Checking for Agent Availability in Zendesk Messaging
Sometimes you want to let your customers know if agents are available before they try to reach out. This article will show you how to do it (on any Zendesk plan!)
Checking for Agent Availability in Zendesk Messaging

On this page
Zendesk Messaging is a so called Conversational channel and is asynchronous by design. This means that the customer sending the messaging and an agent reading the message aren't necessarily things that happen at the same time. A customer can leave a message and close their browser window. When an agent reads the message the customer gets an email and can then choose to resume the conversation within the chat widget, or reply to the email and continue that way.
It's a nice feature but it often doesn't meet a customers' expectations. Some customers see the widget and assume an agent will reply to them immediately. They invested time to start the conversation and letting them know no-one can reply right now is a bad experience if that alert only appears whenever they try to contact an agent.
A while back I posted this link in one of my Roundup articles, showcasing how you can use the Zendesk Chat API to let users in your Zendesk Widget know if an Agent was available or not, which could be used to set expectations from the get go.

.
At the time I didn't notice that this flow was limited to Enterprise users only and used a fairly complex (and old) API flow based on Zopim chat. However, with the new Agent Status feature in Agent Workspace and Omnichannel Routing there's now a different way to set and get Agent availabilities.
Getting agent availability
The new Agent Status and availability feature gives agent a central place to manage with which channels they can or want to interact, and gives colleagues and managers insight in work load and availability of their teams. It allows them to strategically make channels available, and balance the load between ticketing, conversations and voice channels.
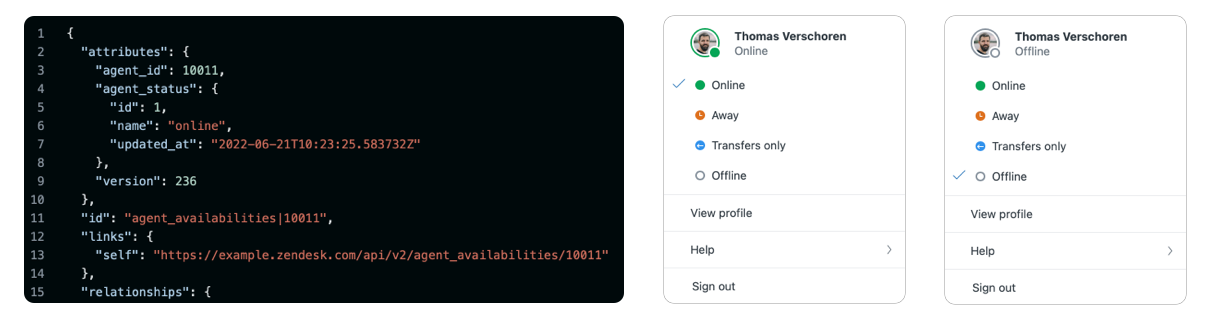
This API call to the Agent Availability endpoint returns the status of all agents across all default and custom statuses. By adding a filter we can narrow this down to all agents that have an online status for Messaging across all agent statuses.
GET 'https://domain.zendesk.com/api/v2/agent_availabilities?filter[channel_status]=messaging%3Aonline'The returned data[] object returns an array of each available agent.
{
    "links": {},
    "data": [
        {
            "type": "agent_availabilities",
            "id": "agent_availabilities|362397585840",
            ...
        }
    ],
    "included": [
        ...
    ],
    "meta": {
        "has_more": false
    }
}
And when no one is online it returns an empty array:
{
    "links": {},
    "data": [],
    "included": [],
    "meta": {
        "has_more": false
    }
}
Since we are only interested if someone is online, we can just check on the availability of elements within the data array. If no items are available, we are offline, when e.g. data[0].id exists, we know there is at least one person online.
&filter[work_items_count]=messaging:3 parameter to only return agents who are online and have less than three active conversations going on.However you decide to filter, if the array ends up empty, you know no agents are. available.
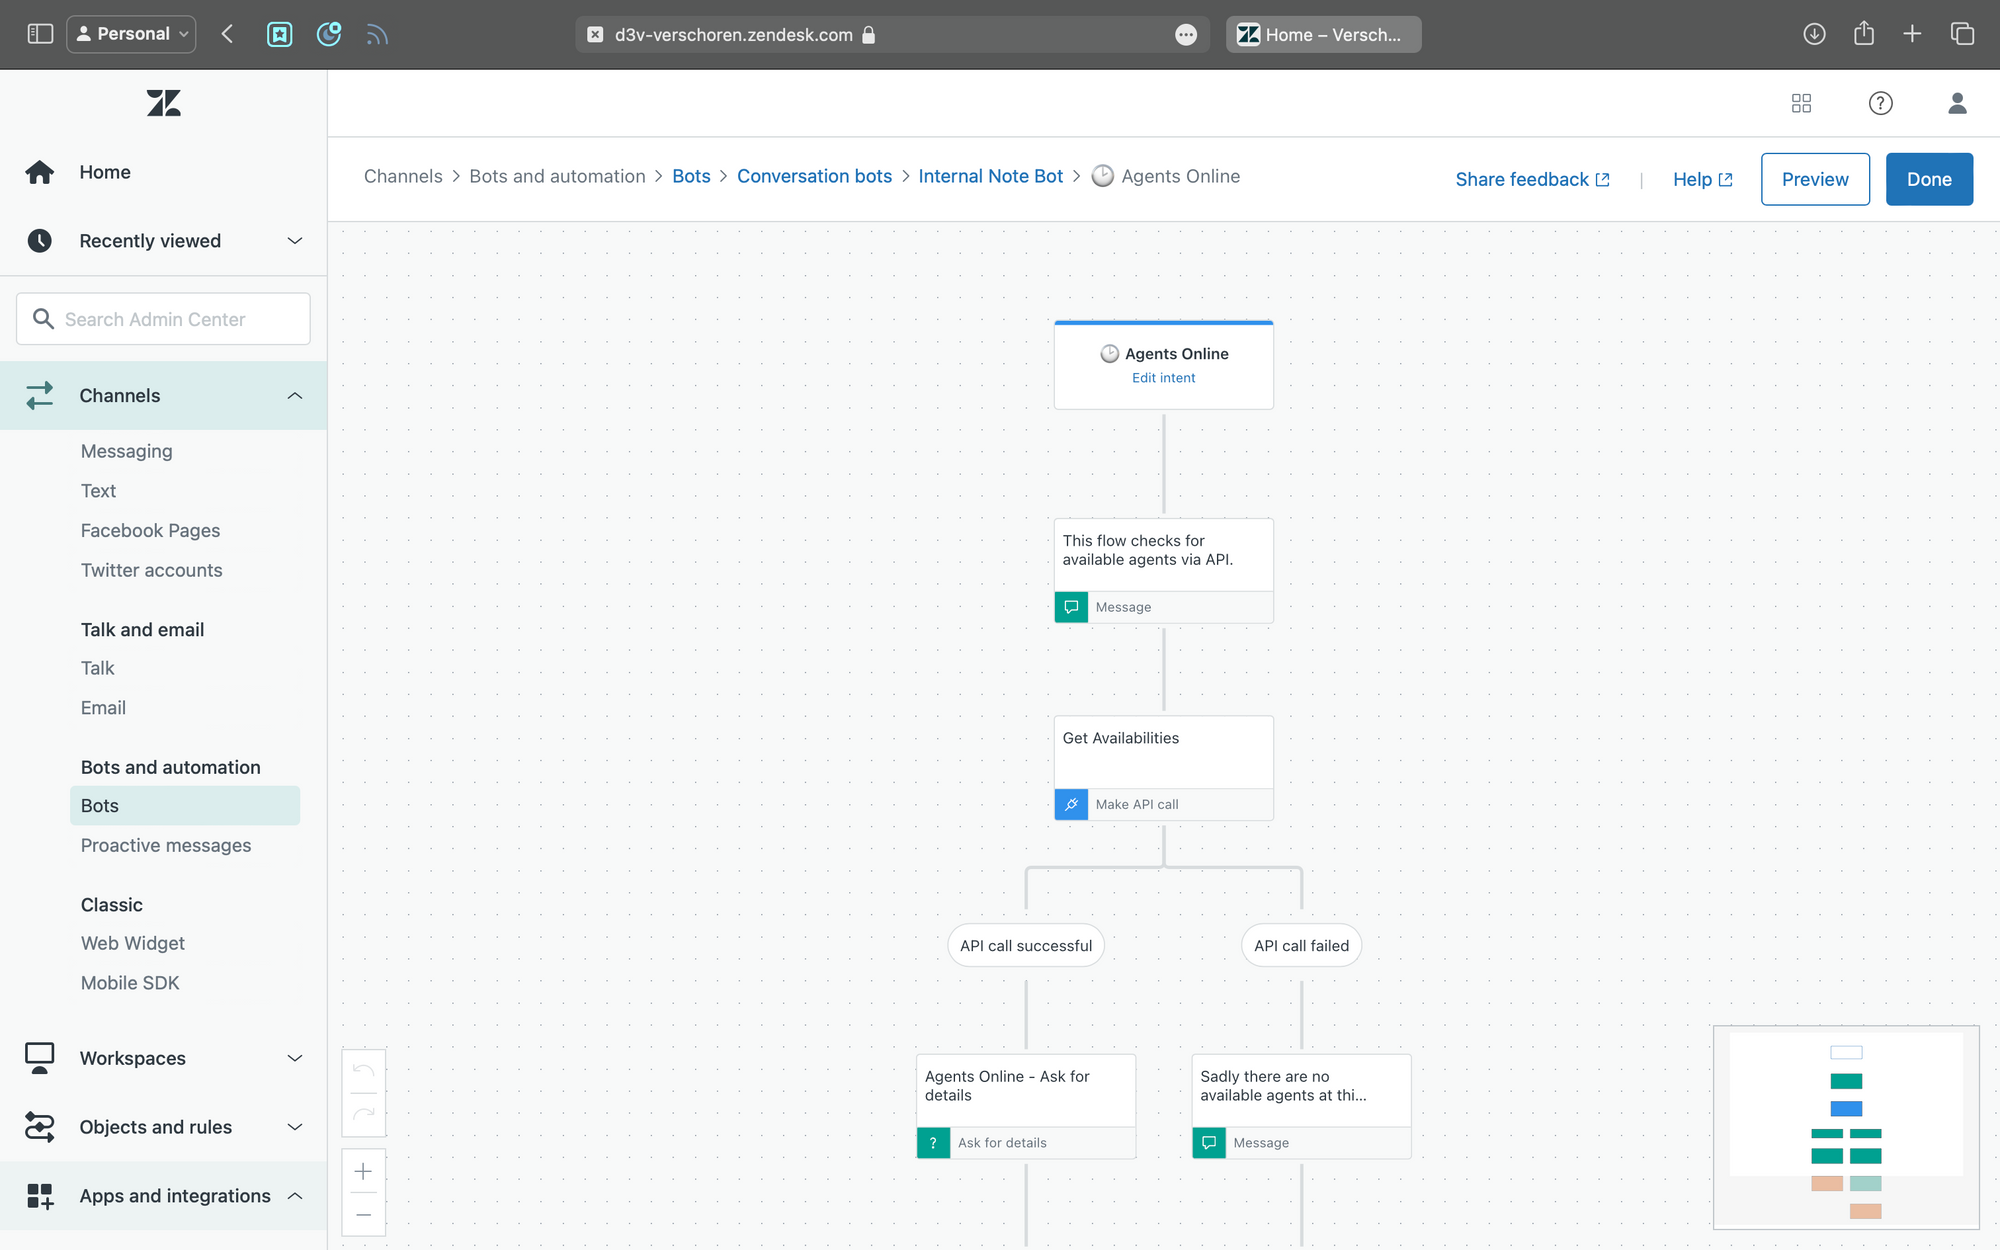
Setting up the Zendesk Bot
Now that we know how we can retrieve agent availability, we can use this in a Zendesk Bot to let customers know if someone is available to assist, or if they can leave a message.
You can combine this check with the Business Hours step to handle all three cases:
- During business hours and agents are available
- During business hours an no agent are available
- Outside of business hours.
For more information on building complex flows, take a look at the tutorial I build earlier this year:
 Thomas Verschoren
Connecting to the API
The first step in this flow is connecting to the API from within your Zendesk Bot.
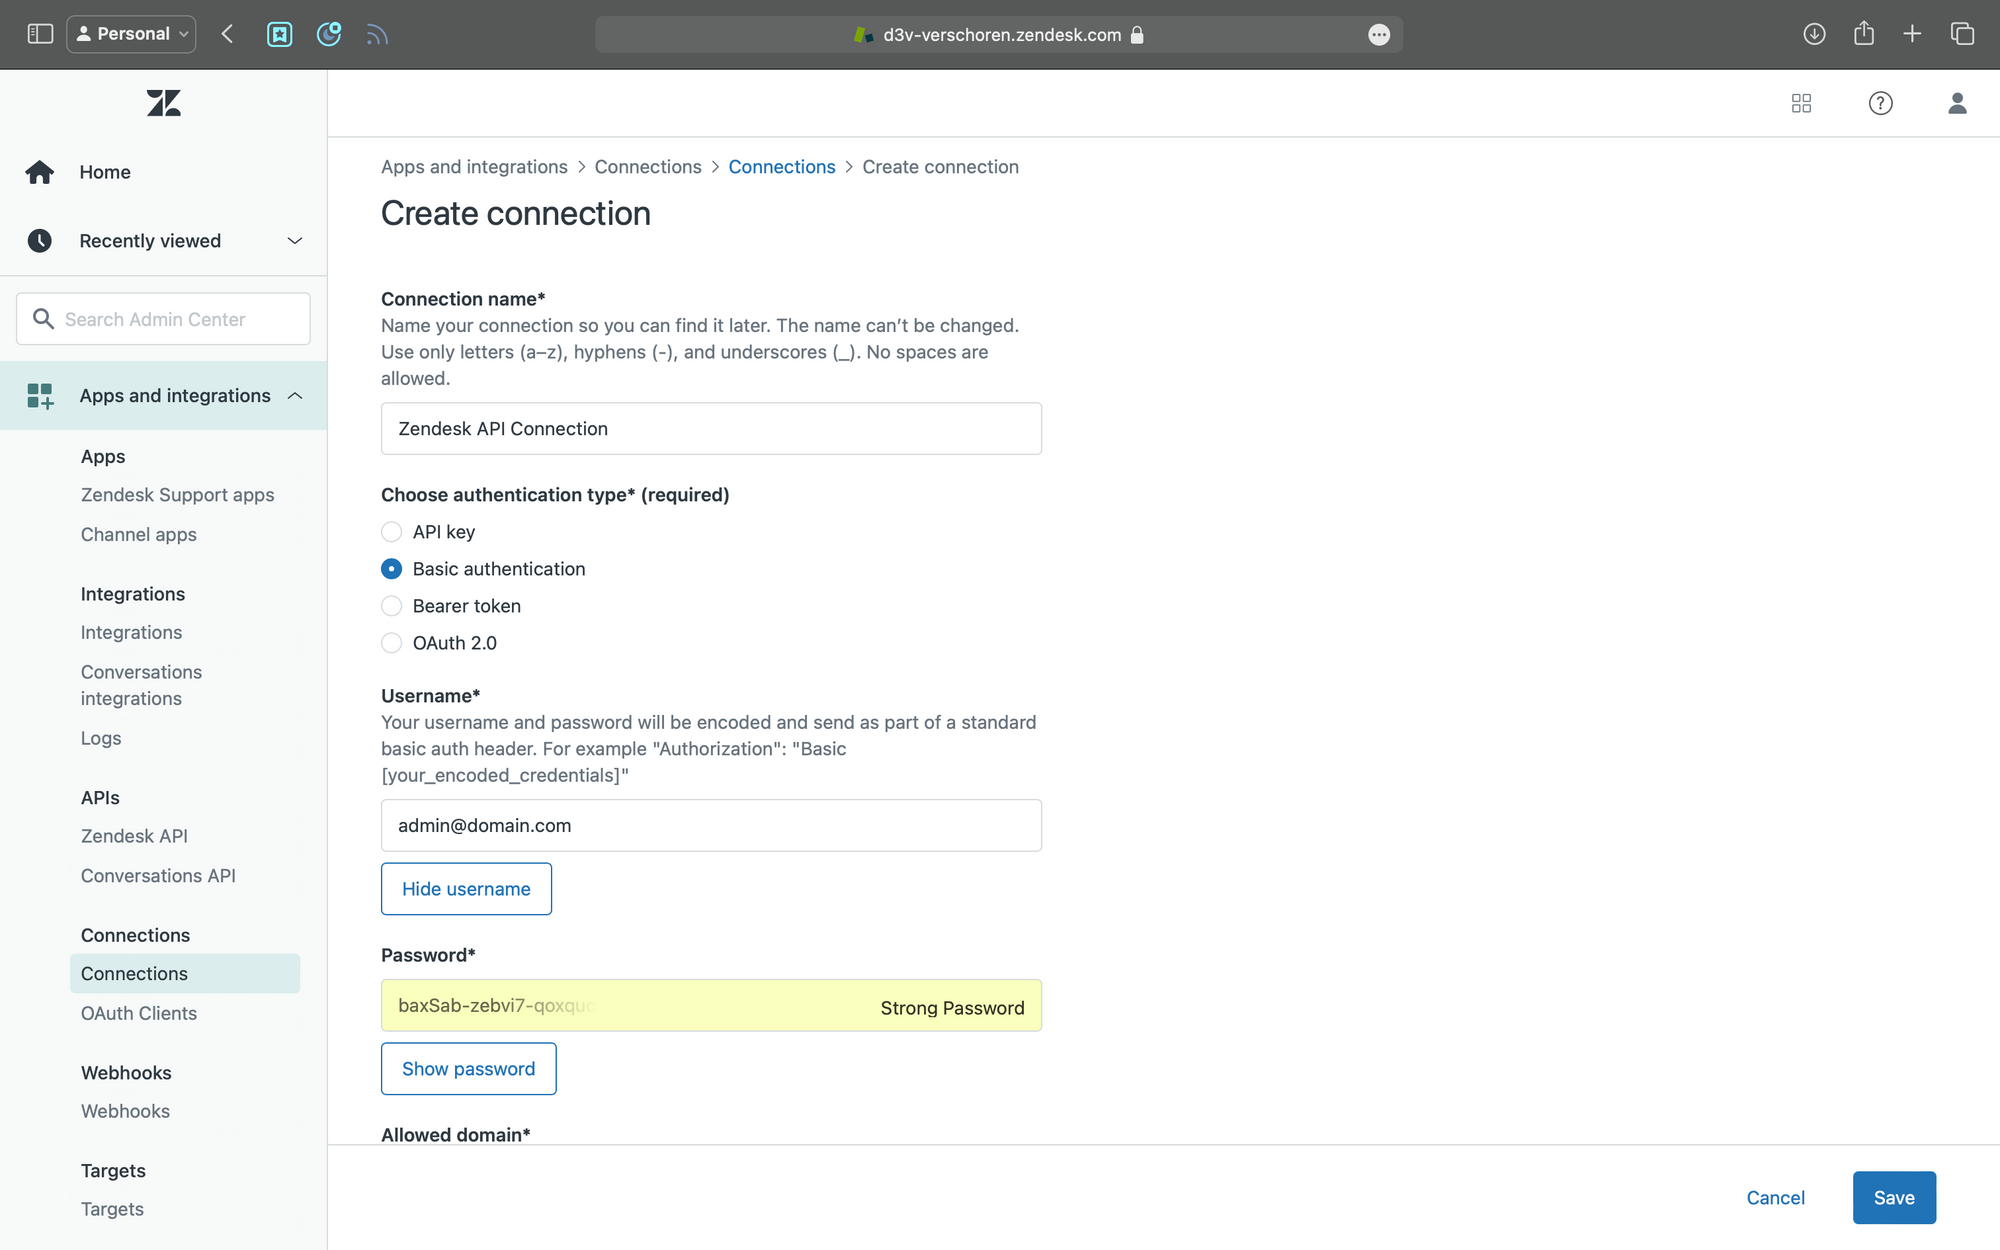
Go to the Admin Center > Apps and Integrations > Connections and add a new connection.
- Choose Basic Authentication
- The credentials are [email protected]/token and a Zendesk API token.
- Allows Domains:
https://*.zendesk.com(Since the call is made from a Zendesk proxy it has to be a wildcard)

Making the API call
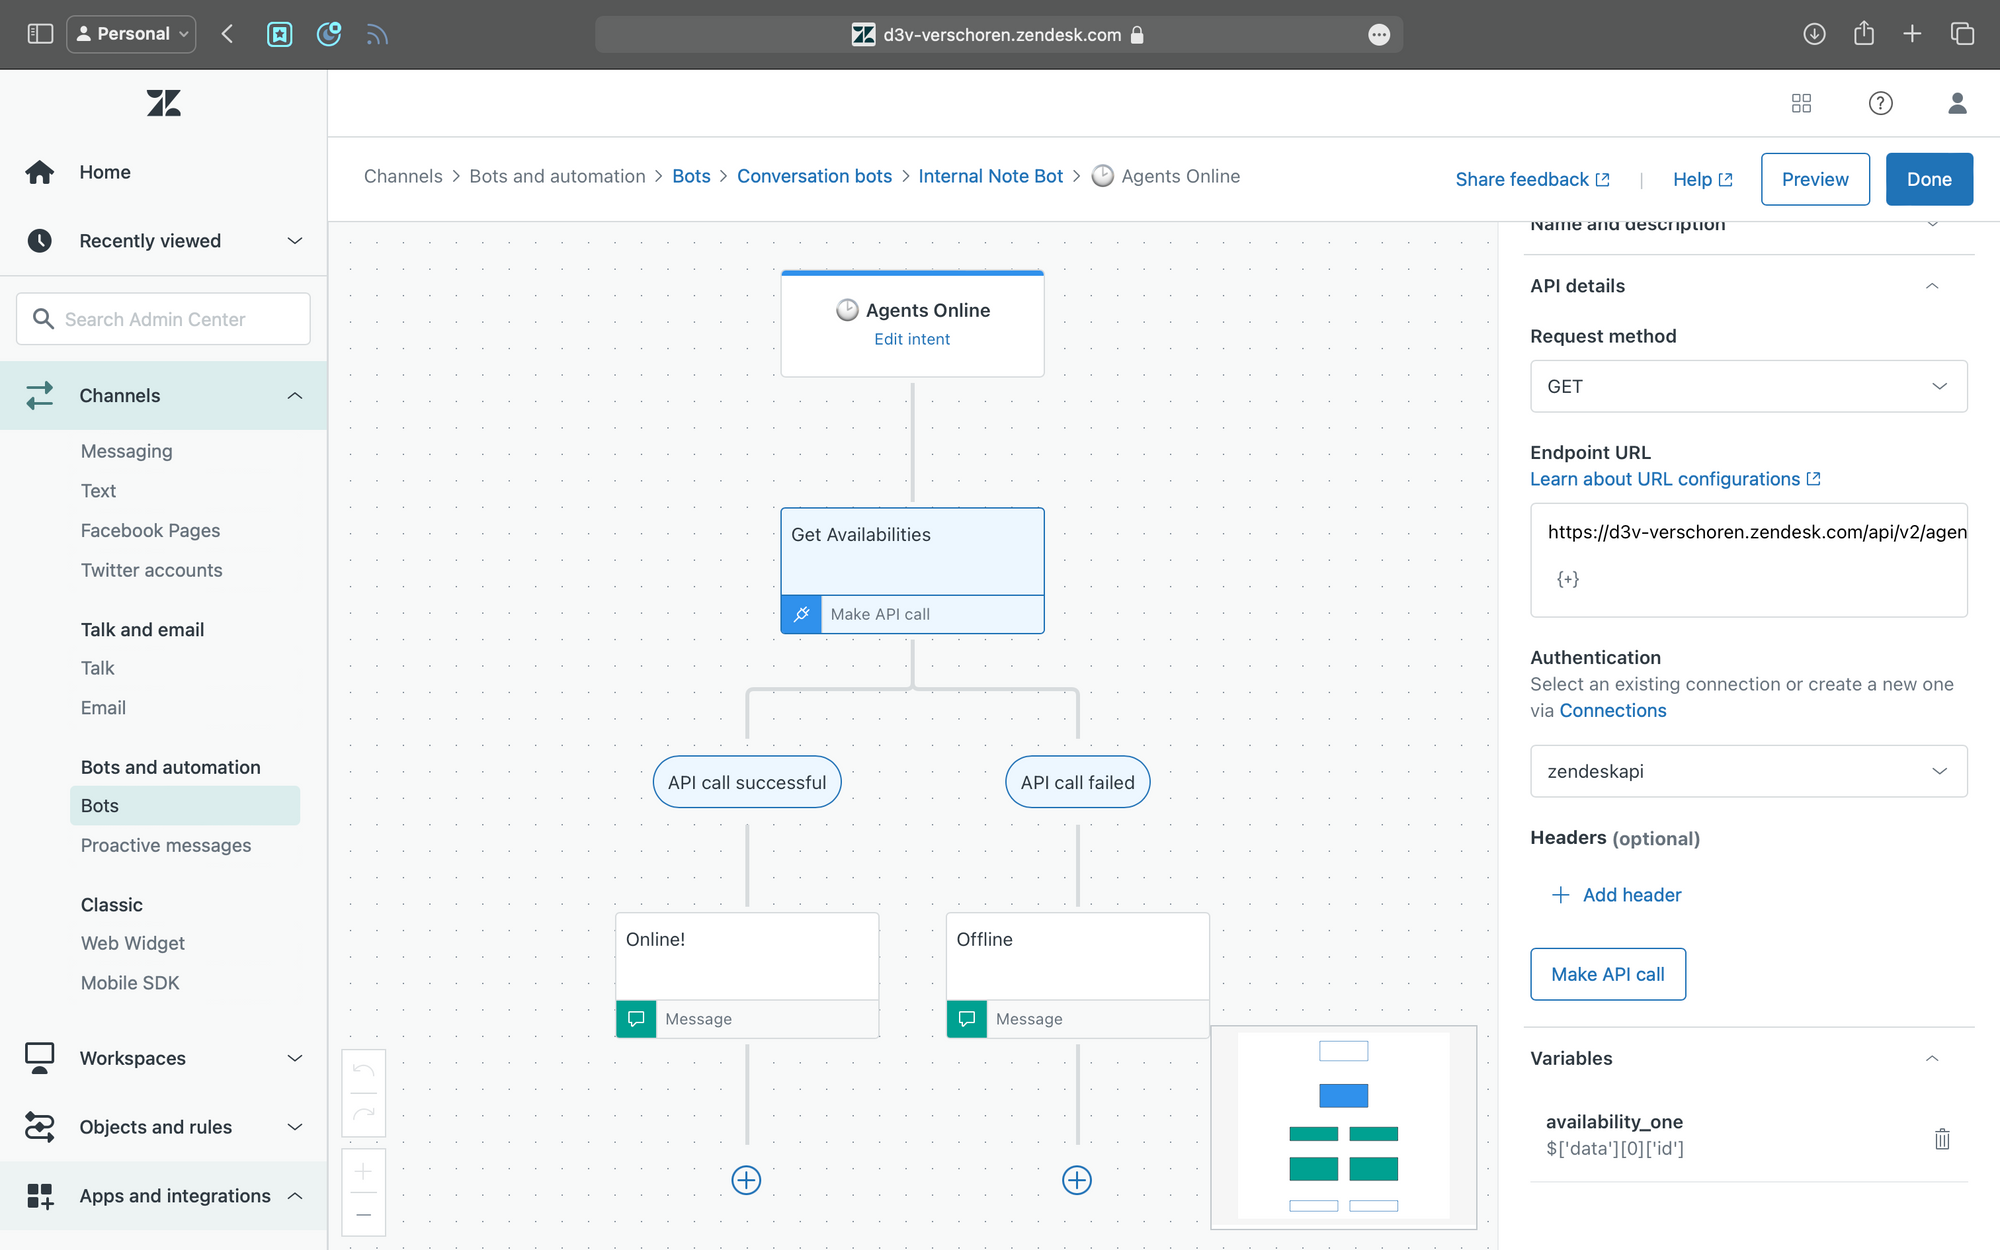
In this example we are creating a new Answer in the Zendesk Bot.
- Go to Admin Center > Channels > Bots > Zendesk Bot
- Select the Answer tab and add a new Answer
- Add an Make API Call step
- Request Method: GET
- URL:
https://yourdomain.zendesk.com/api/v2/agent_availabilities?filter%5Bchannel_status%5D=messaging:online - Authentication: [the connection you just made]
- Click Made API Call to get the returned data
- If successful you'll get a list of variables similar to the example JSON object earlier in this article.
- Expand the sections until you find the
data > Item 1 > attributes > idelement and click on Save - Give the variable a name like Availability ID.
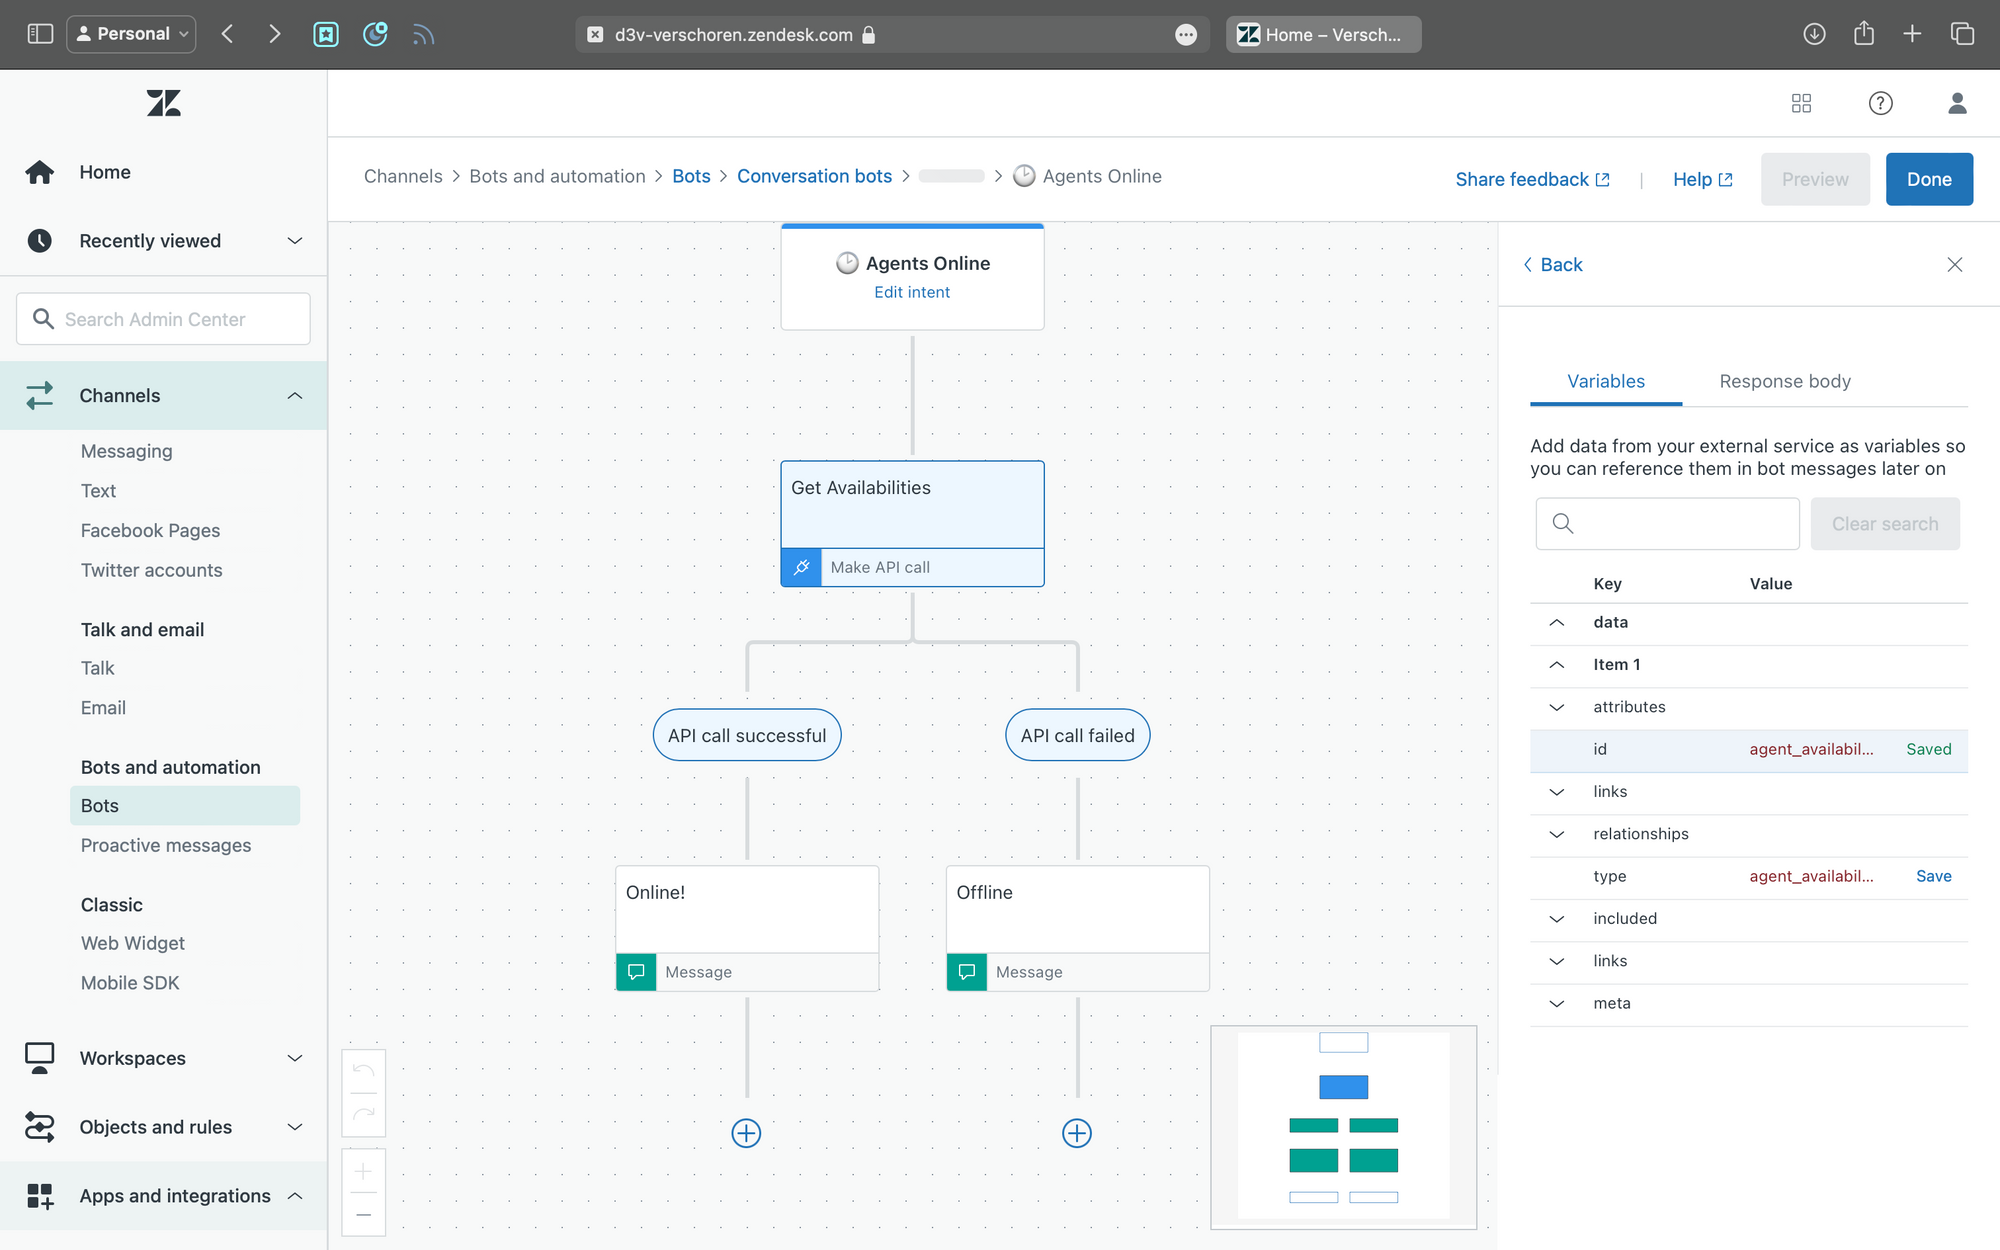
Now that we have successfully added the API call you'll notice that our Bot has t2o branches: a API Call successful and failed branch.
Since we tested the API call we know it will always success unless there are no agents online. Cause if there are no agents the data object is empty and we can't get any Availability ID. So we now know that
- API call successful means we have at least one online agent
- API call failed means no agents are available.
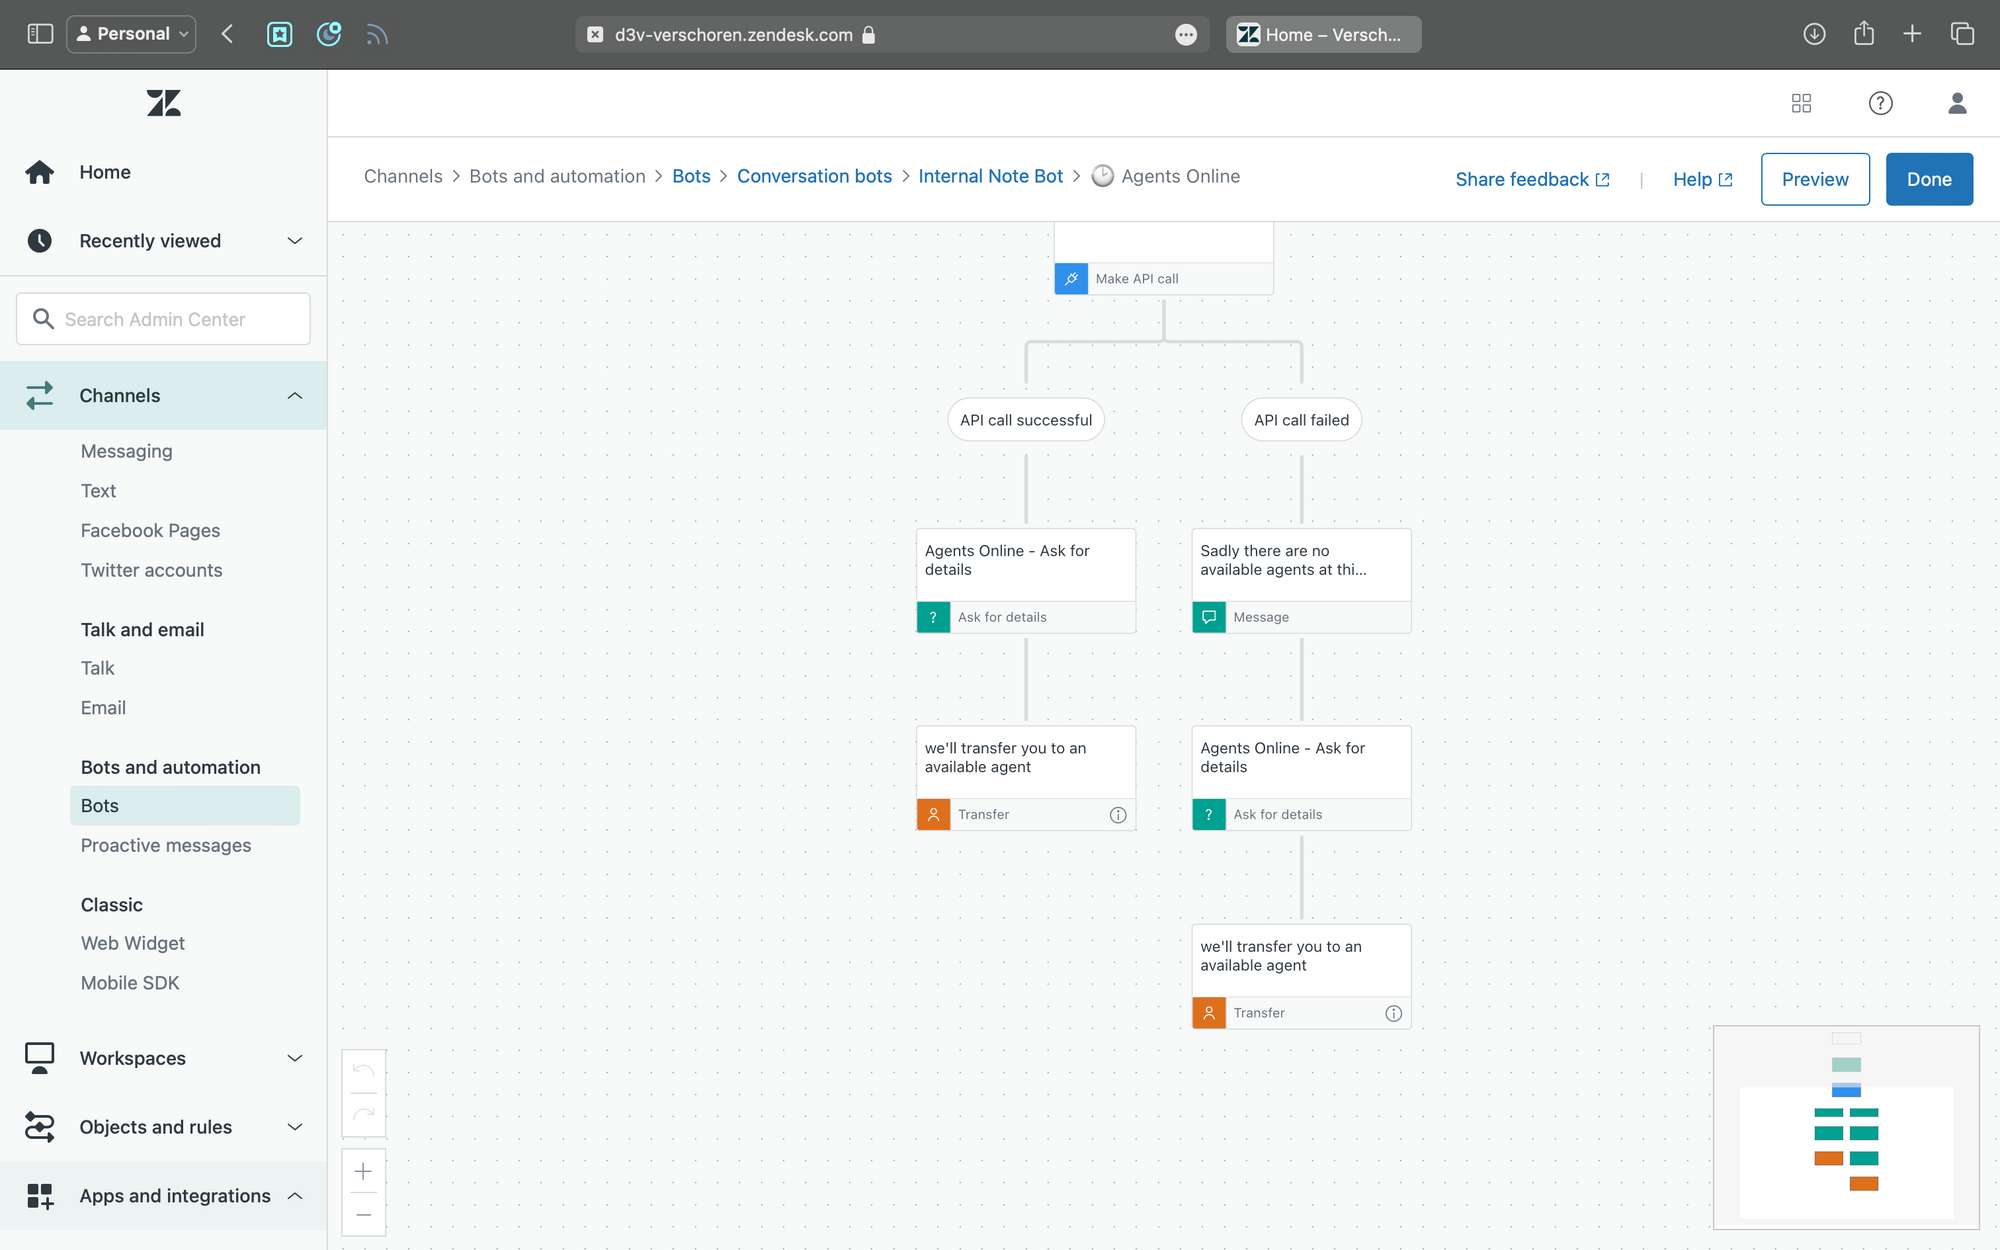
Wrapping it up
You can now wrap up the bot by adding a different experience to each branch.
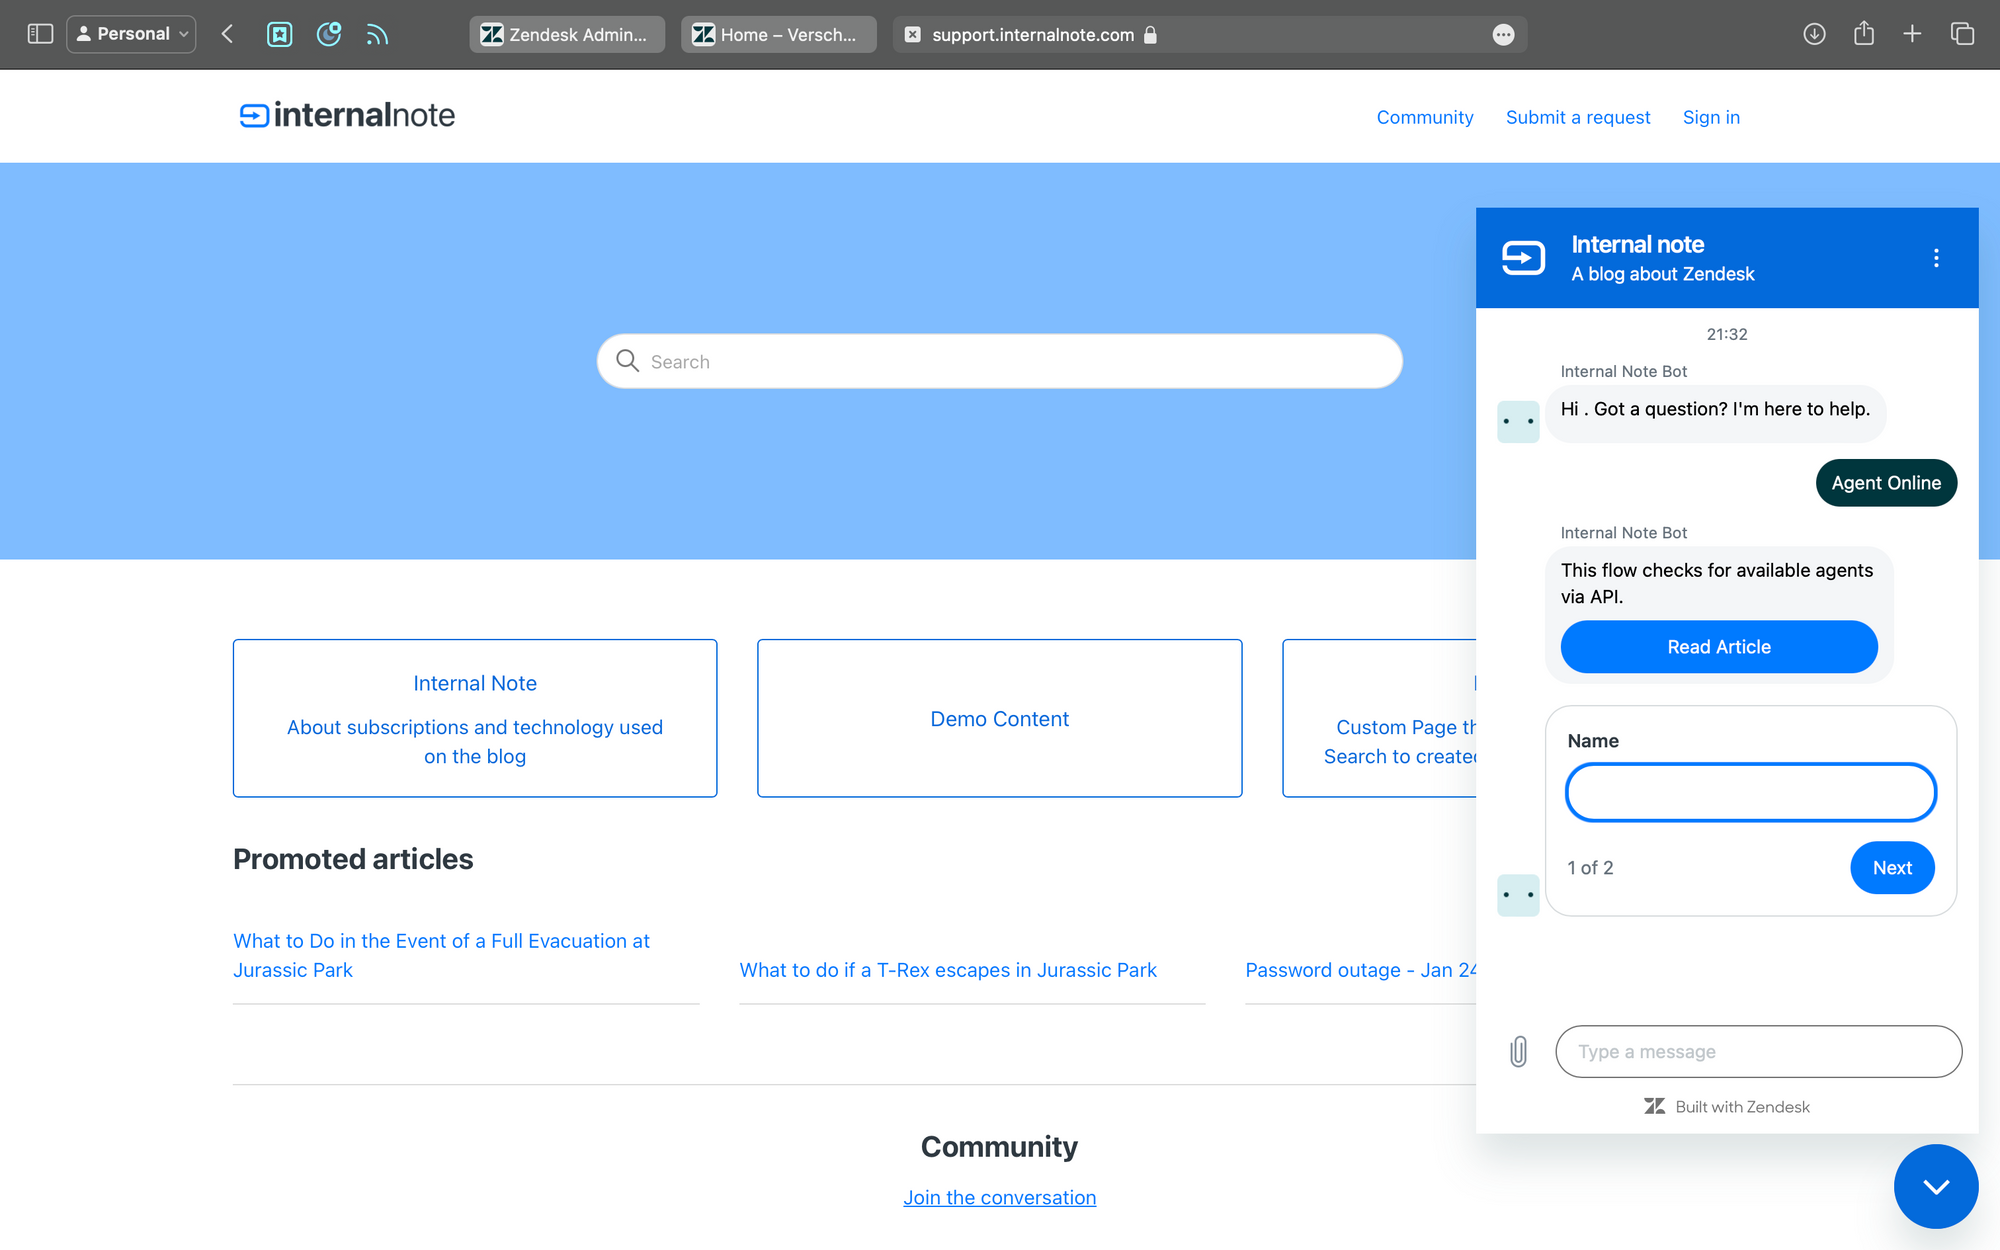
Feel free to test the flow via the widget on this page!