Escalating a customer request to a Zendesk Help Center form for more information.
This article shows you how to escalate an existing ticket to a new ticket form submission and merge the result.

Escalating a customer request to a Zendesk Help Center form for more information.
This article shows you how to escalate an existing ticket to a new ticket form submission and merge the result.

On this page
We all know the following scenario: a customer contacts your support team over email with a minimal set of details. Your first reaction might be to reply to the customer asking for those details. However, you also have a nice form on your Help Center that already asks for those elements, and in a perfect world, the customer would have used that form for their inquiry.
This article will show you a simple setup that allows you to fix this flow. It runs as follows:
When a customer contacts you over email, you can use a macro to reply to them. The macro contains a link to your Help Center where you have a form that ask for more details. If they fill in the form your Zendesk will detect it comes from the same user, and will merge the two requests into one ticket with all information nicely combined.
When to use this
Let's say we have a scenario where your customer emails you about a returning a product. To handle this inquiry the agent needs an order number, the product serial, a return reason and the customer needs to choose between a refund, voucher or a different sized product.
The agent could ask for this information in reply to the email, and then input the response into custom fields to make sure the Shopify sidebar app picks up the order, and that reporting in Explore correctly reflects this ticket. But that takes effort, the customer might not provide all the info, and there's a chance some information is not correct.
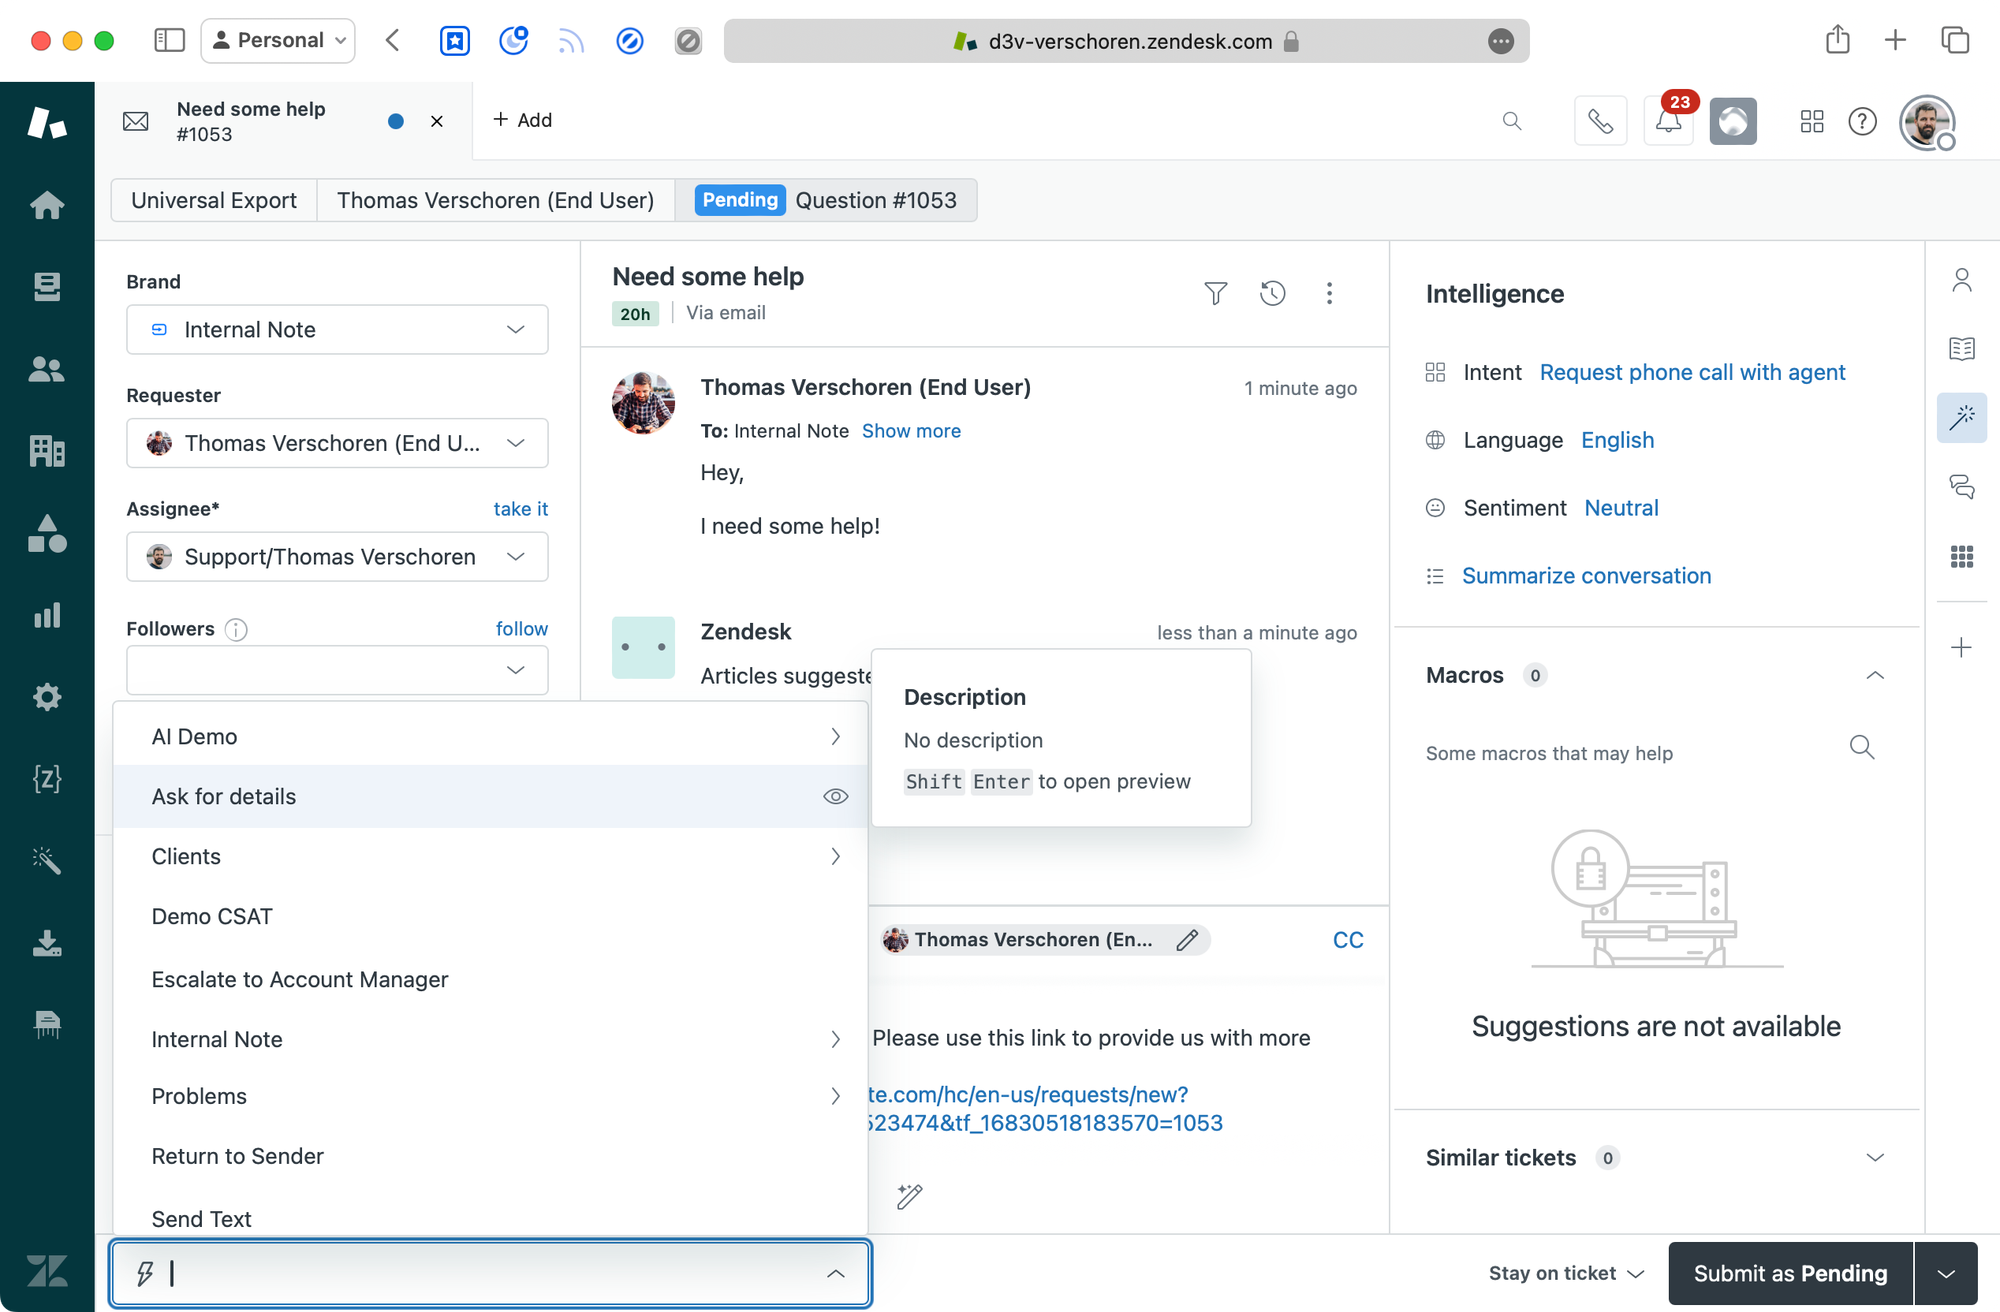
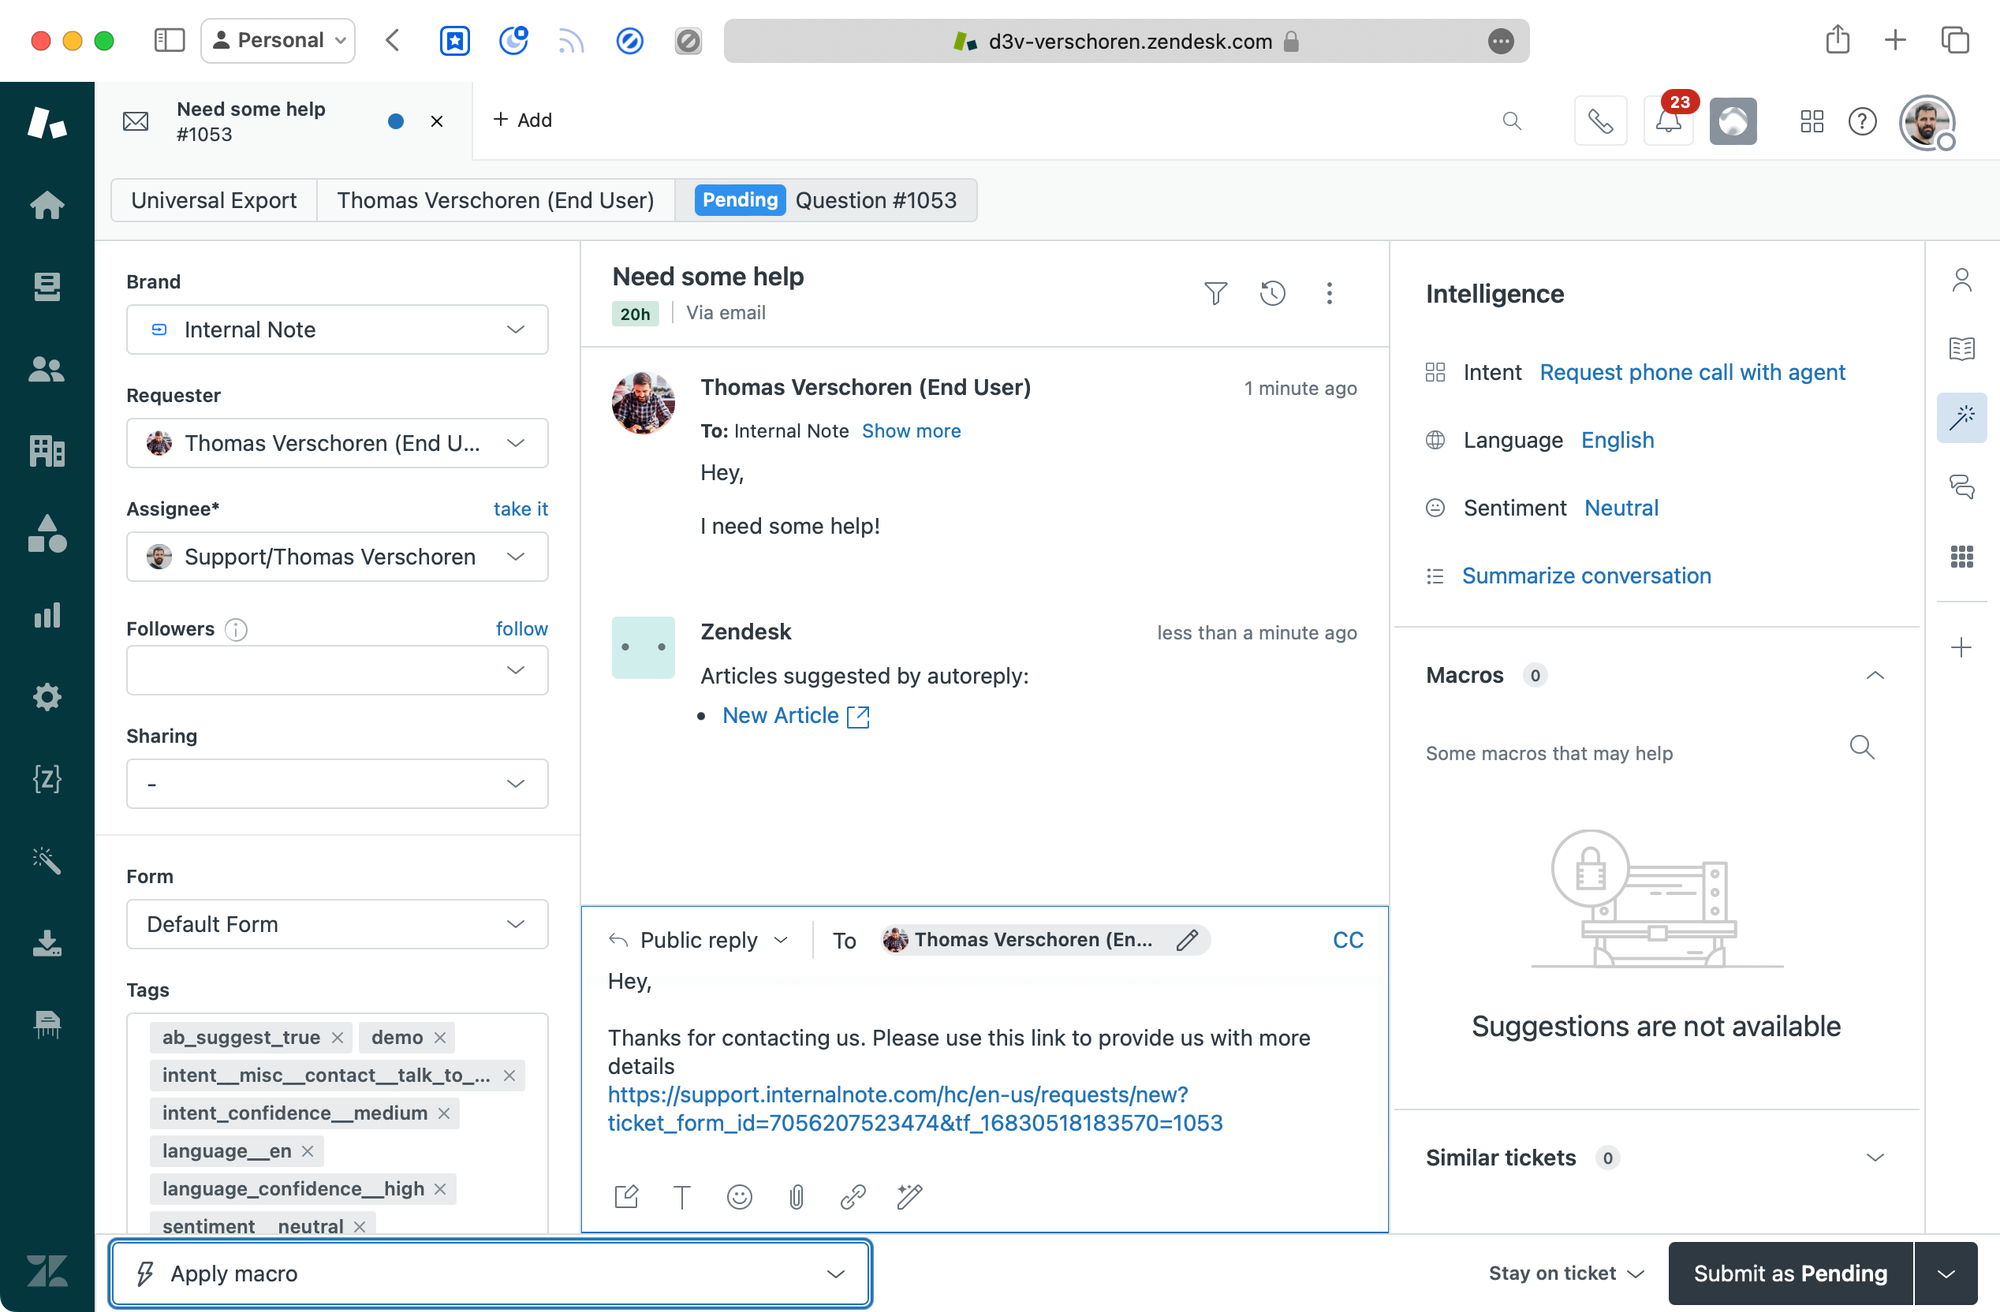
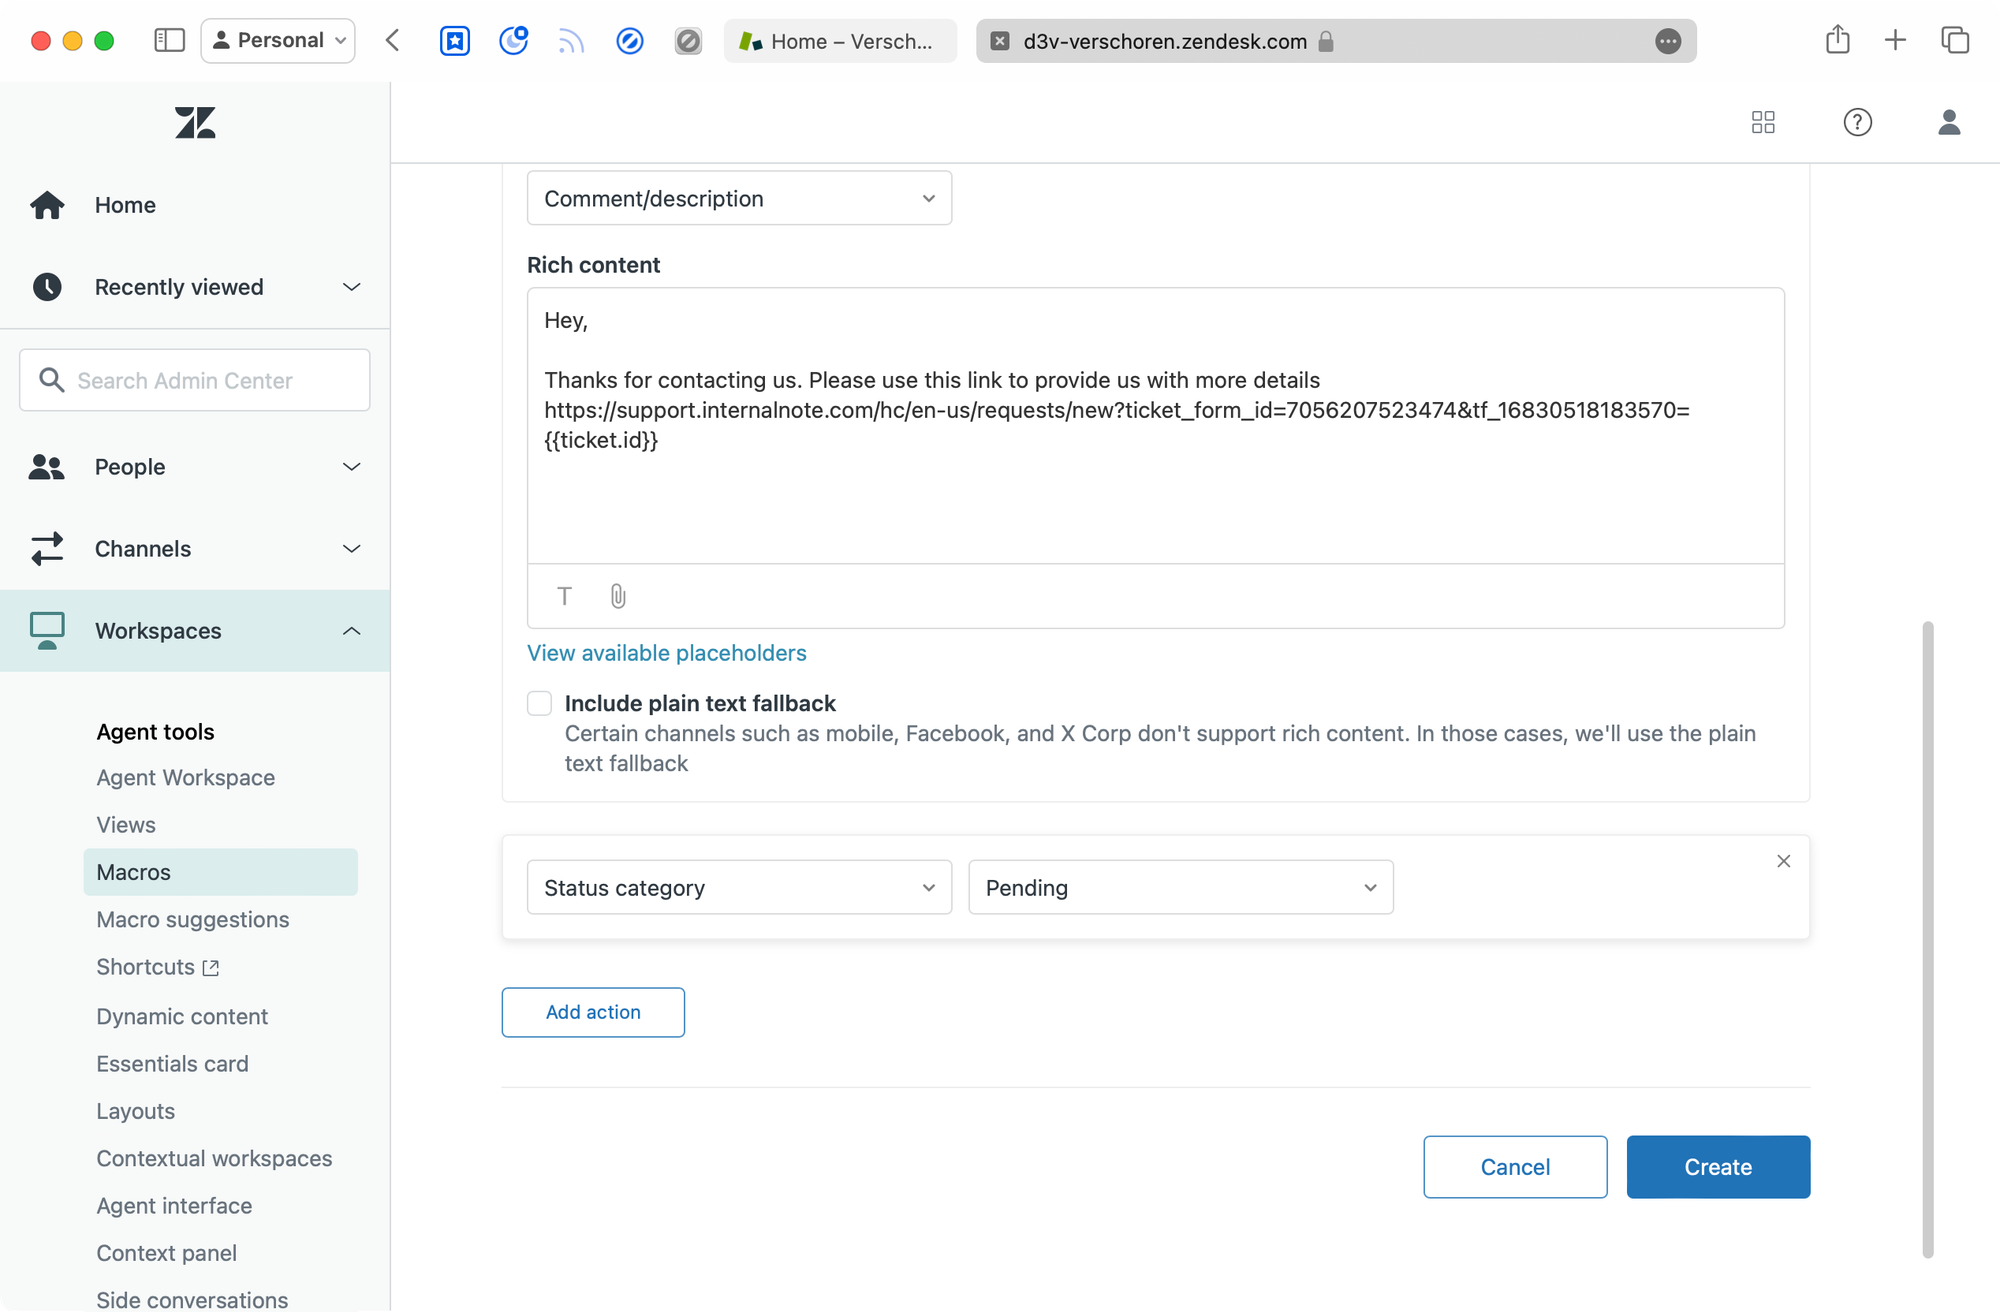
Imagine if we can instead reply to the customer with a link to the right "return product" form. The agent replies with a macro and puts the ticket on Pending.
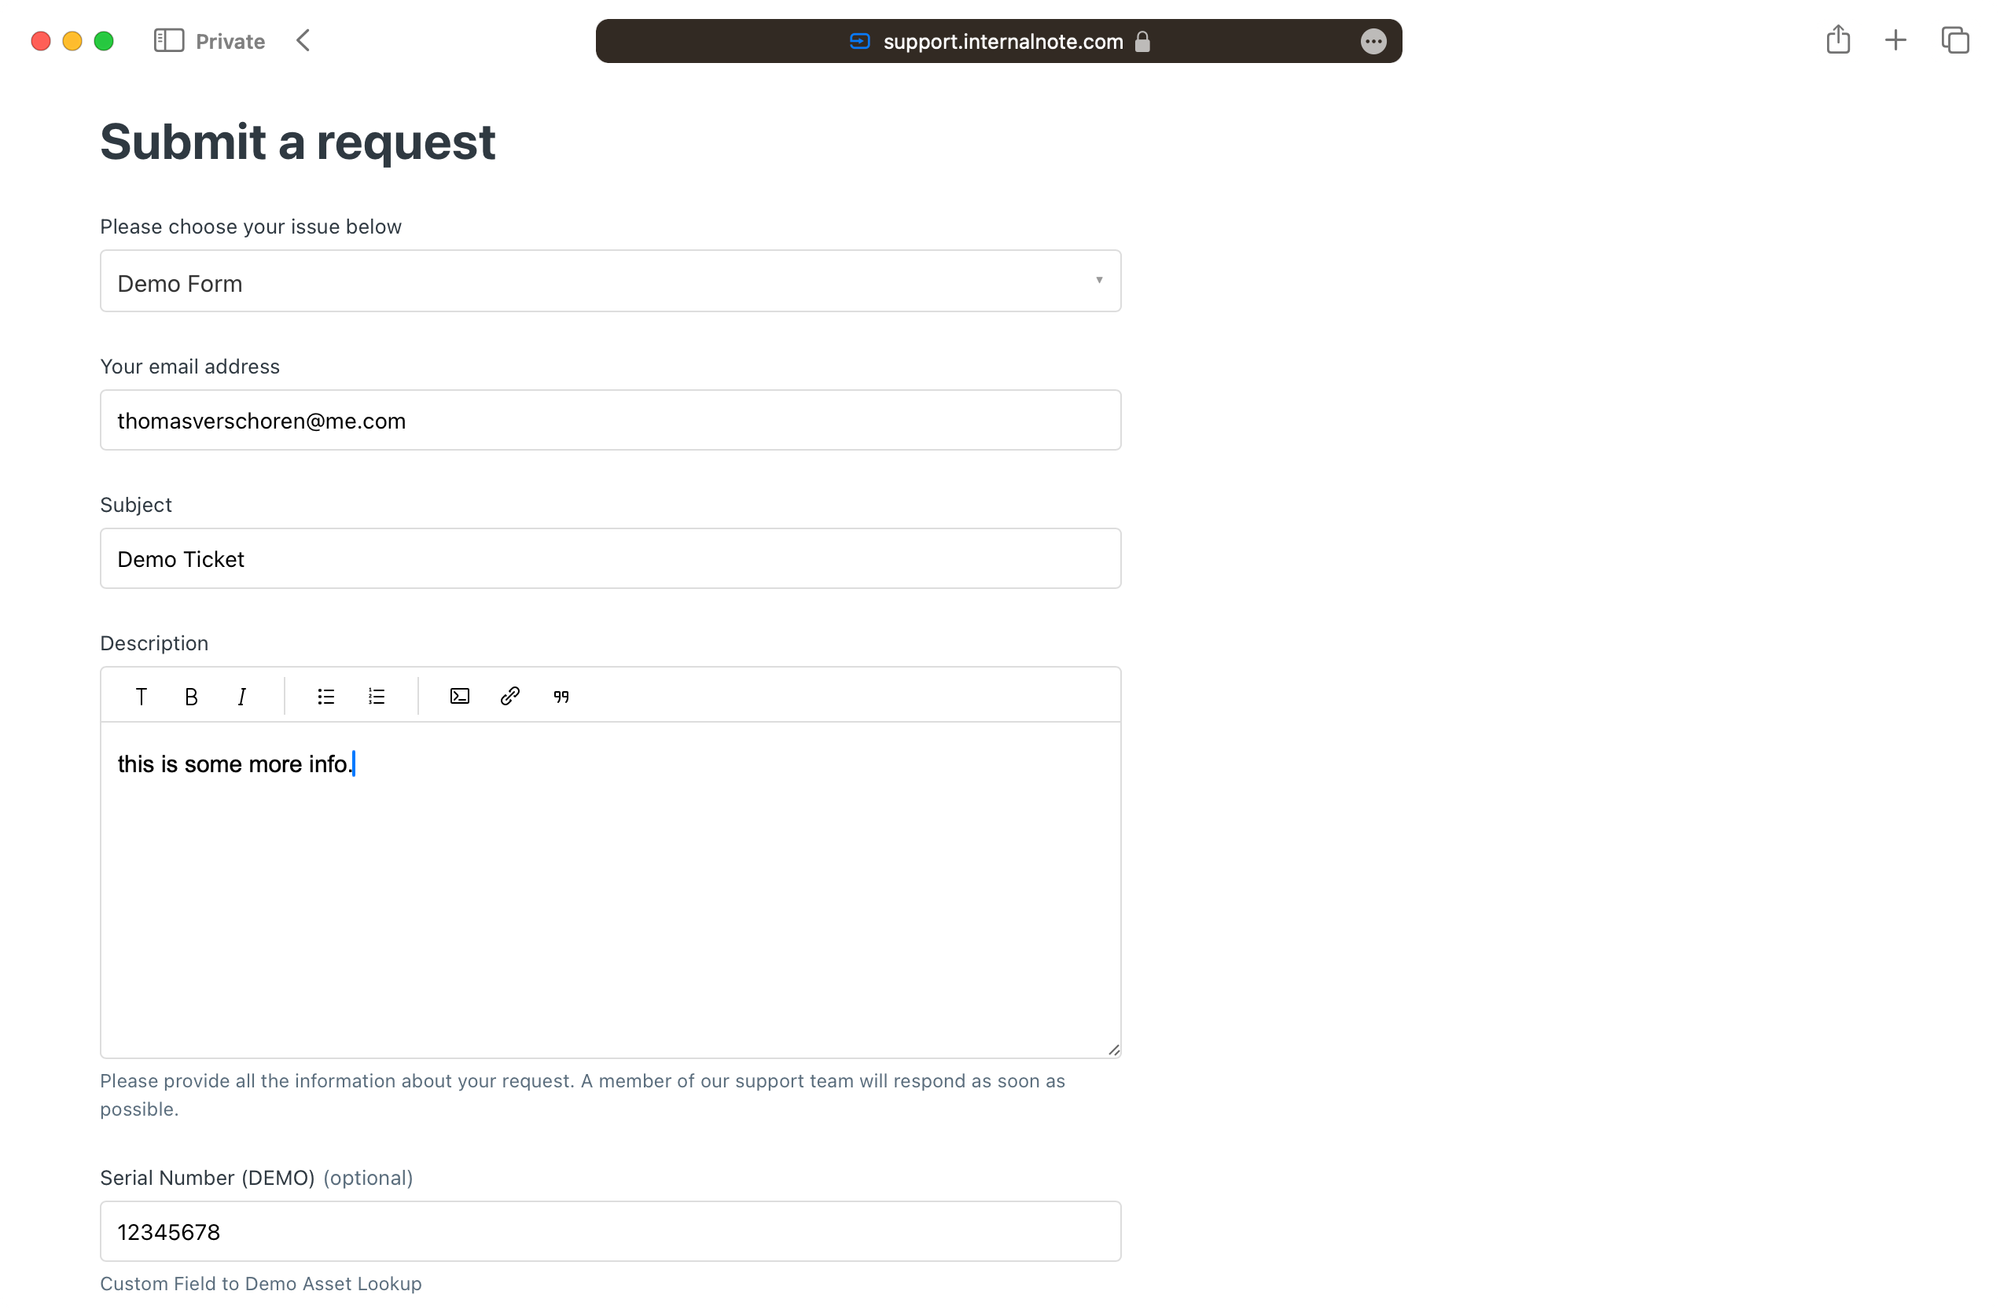
The customer then clicks the link and sees a form pre-filled with their existing comment. They can fill in the required info and the form validates all items before submission.
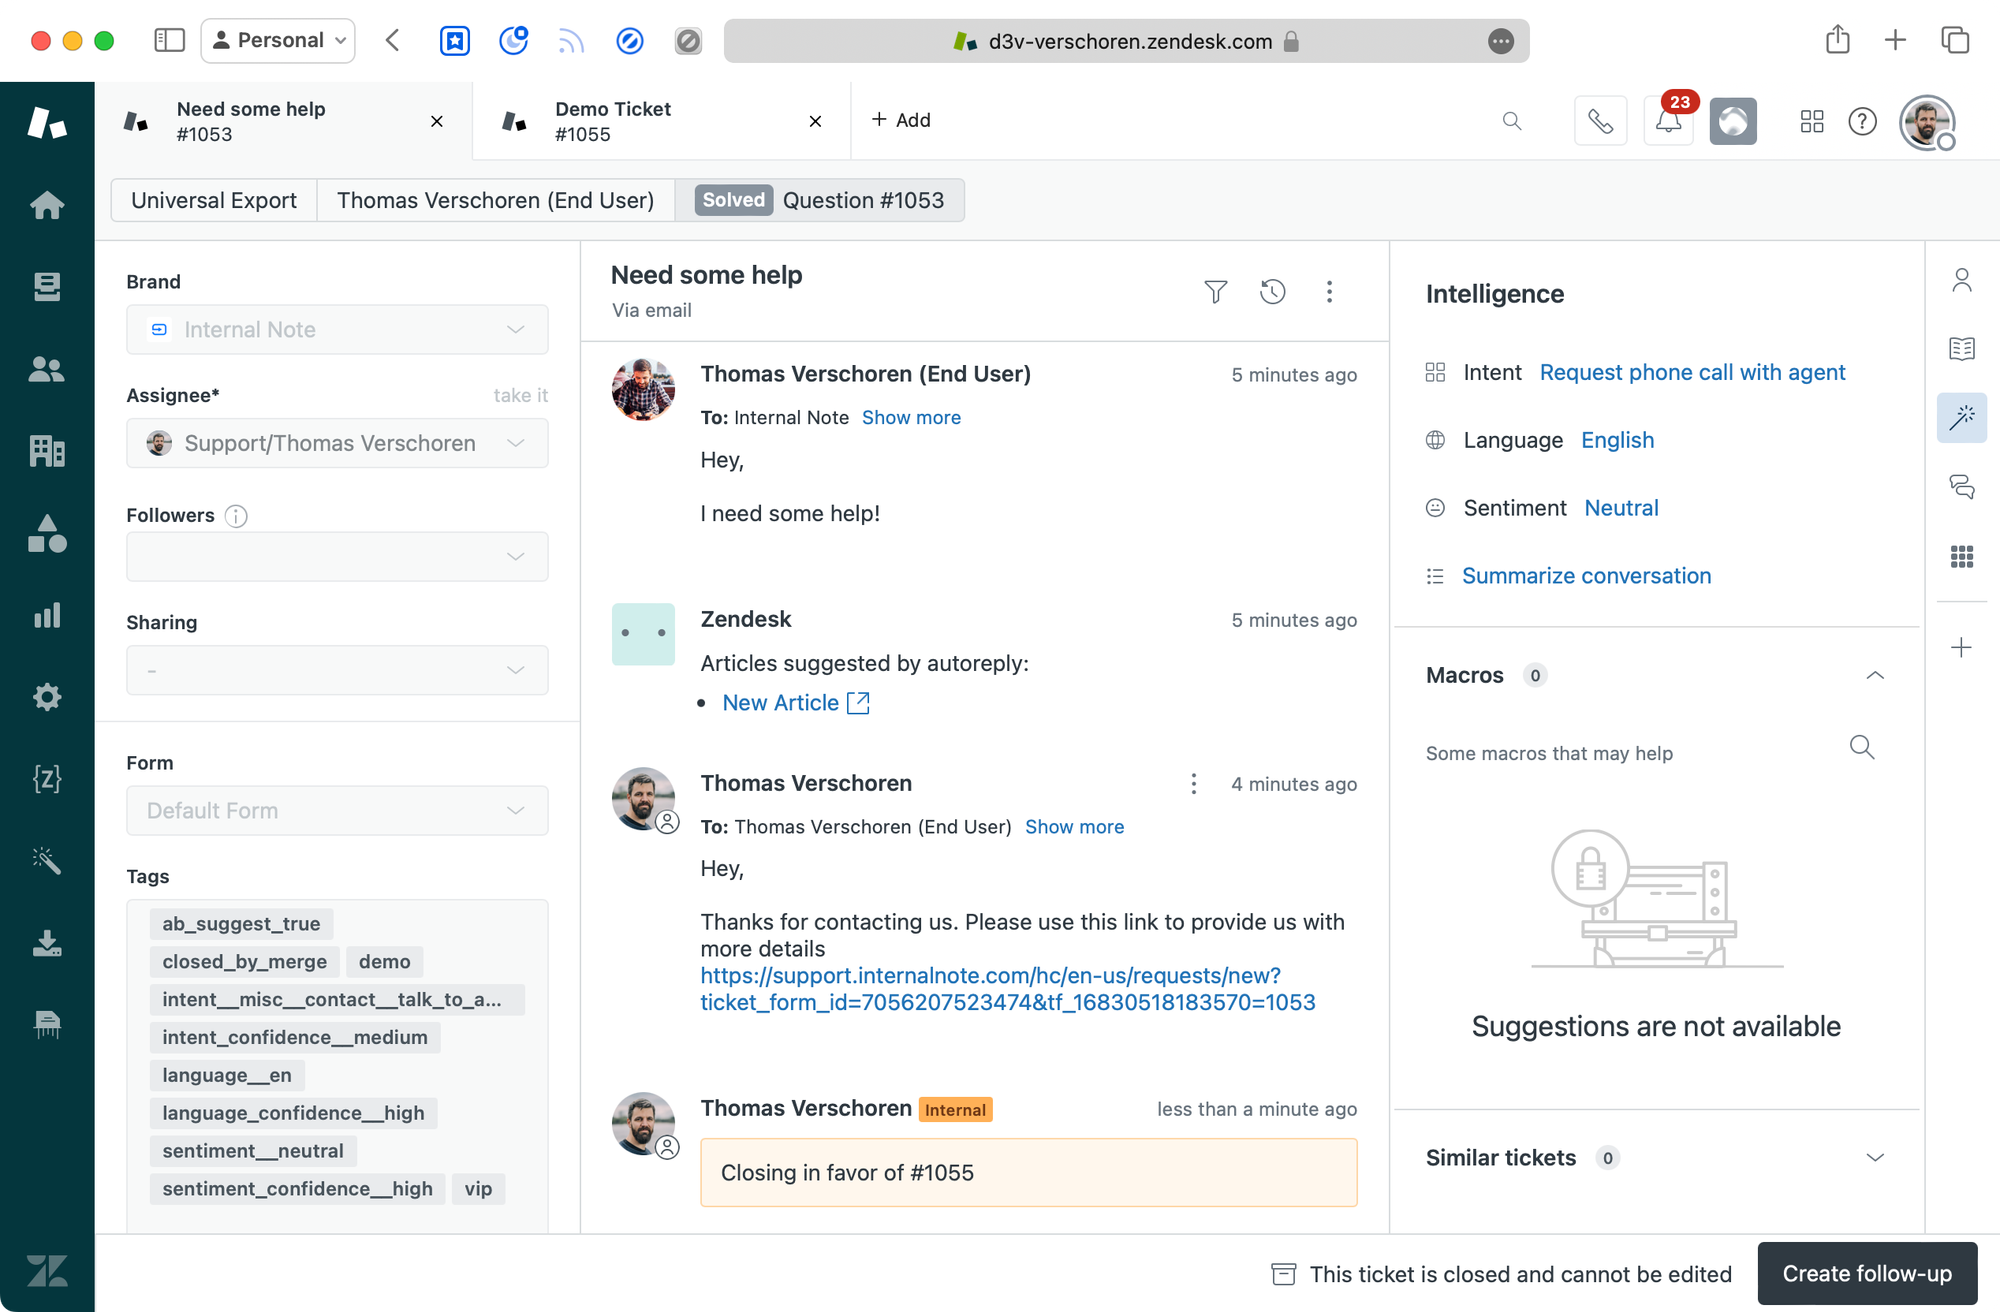
After submit Zendesk will merge the two tickets, and show the agent an open ticket, with all fields correctly filled in, and the original ticket solved and linked to this inquiry. They can immediately get to work with the right information, and no loose tickets are left pending (pun intended).
The setup
The way this setup works is by leveraging an intermediate ticket field that stores the original ticket id. That field – hidden on the enduser form – can then be picked up in a webhook that merges the existing ticket into this new, more complete ticket.
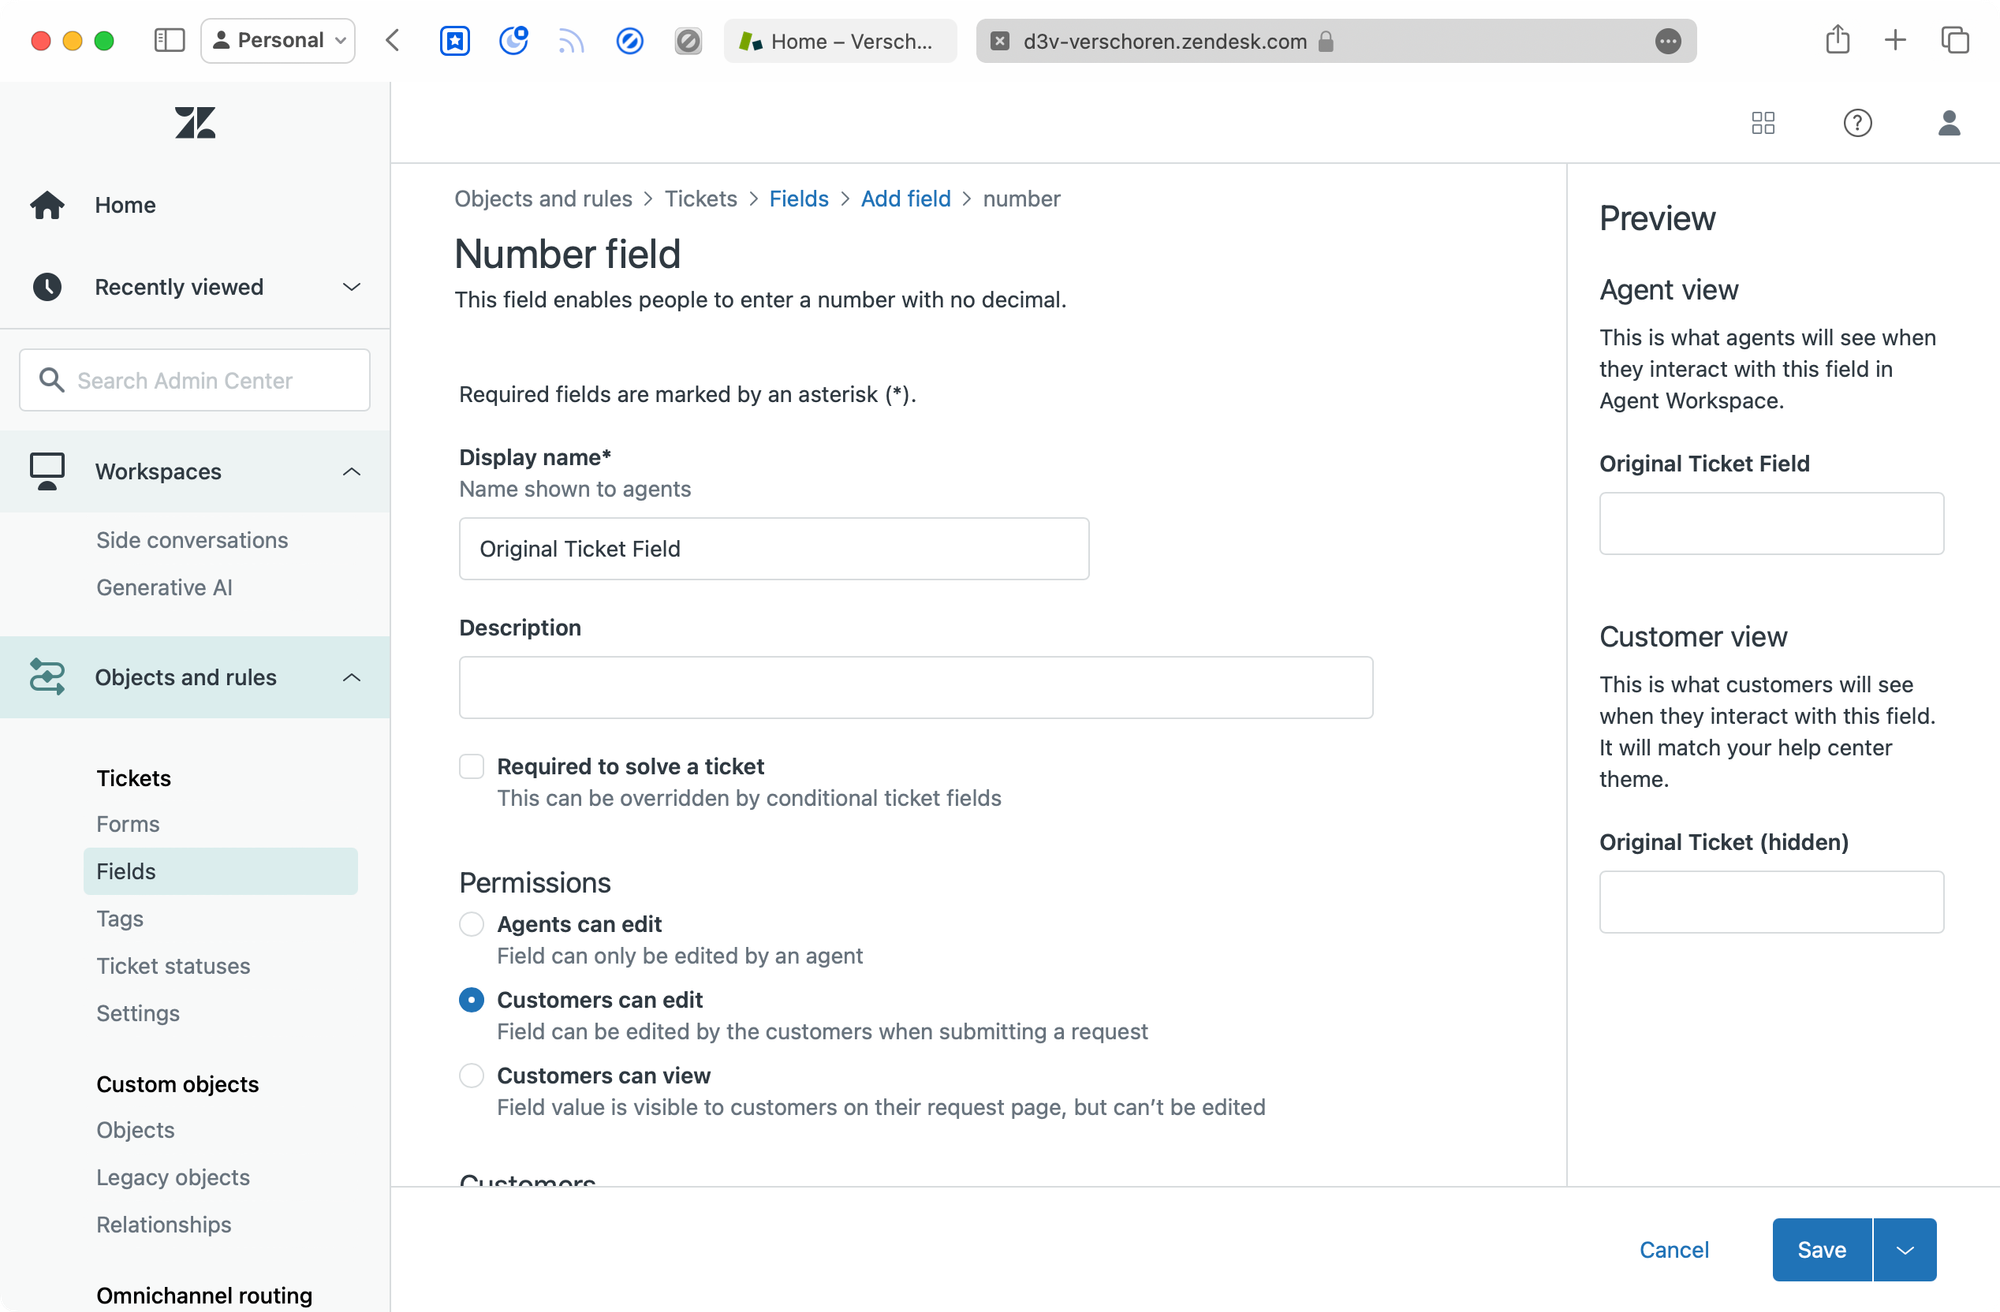
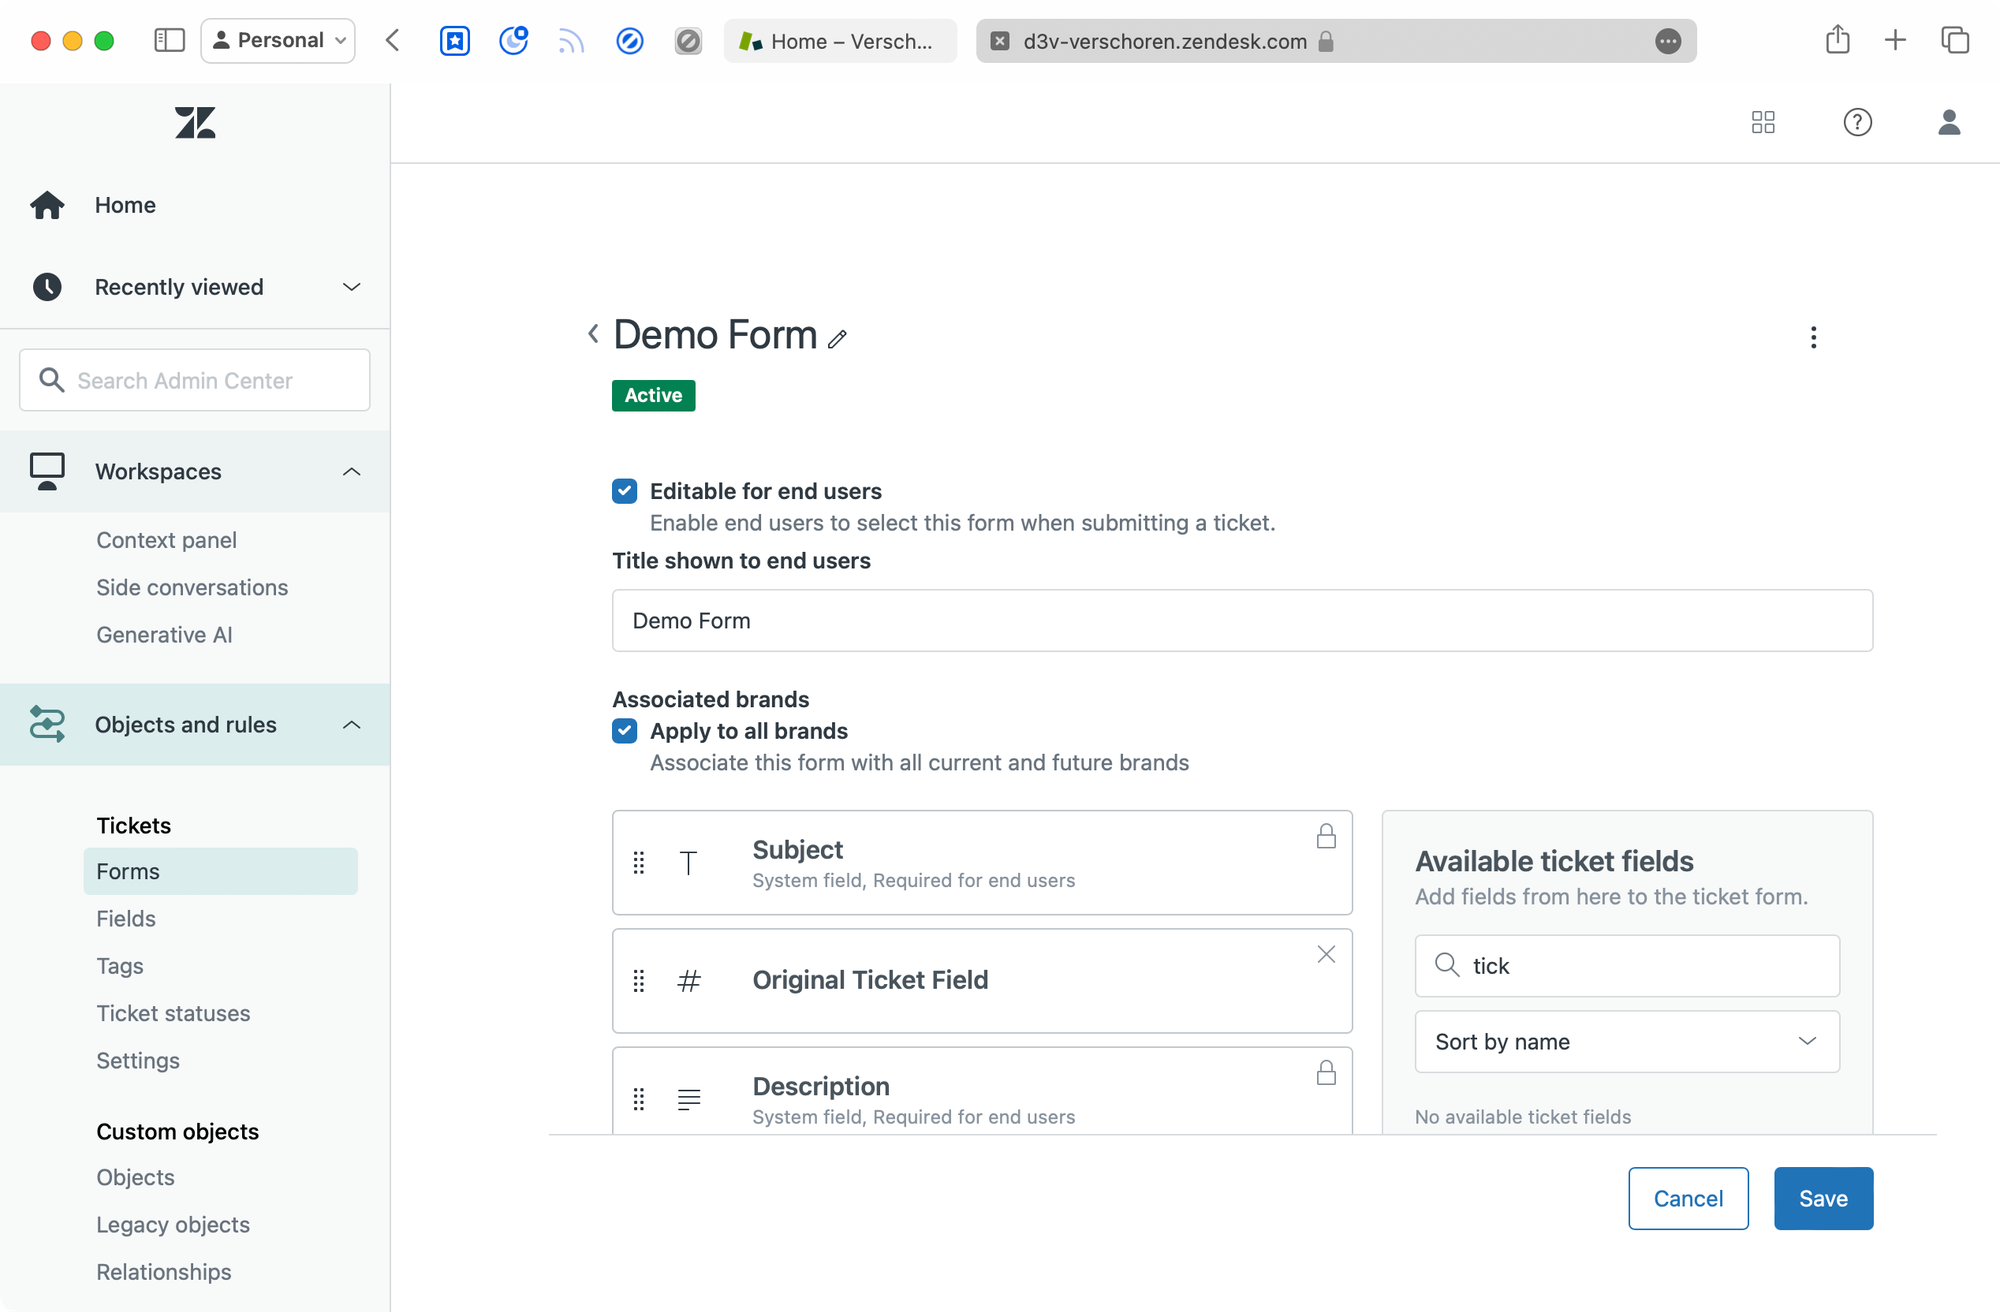
To start, we need to create a new custom field called Original Ticket ID. It's easiest to use a Numeric Field for this one, and make sure it's end-user editable. Add the field to your webform(s), and note down both the Ticket Field ID as well as the ID of the form(s) you want to use it for.
In my case it's Ticket Field 16830518183570 and Ticket Form: 7056207523474
Macro
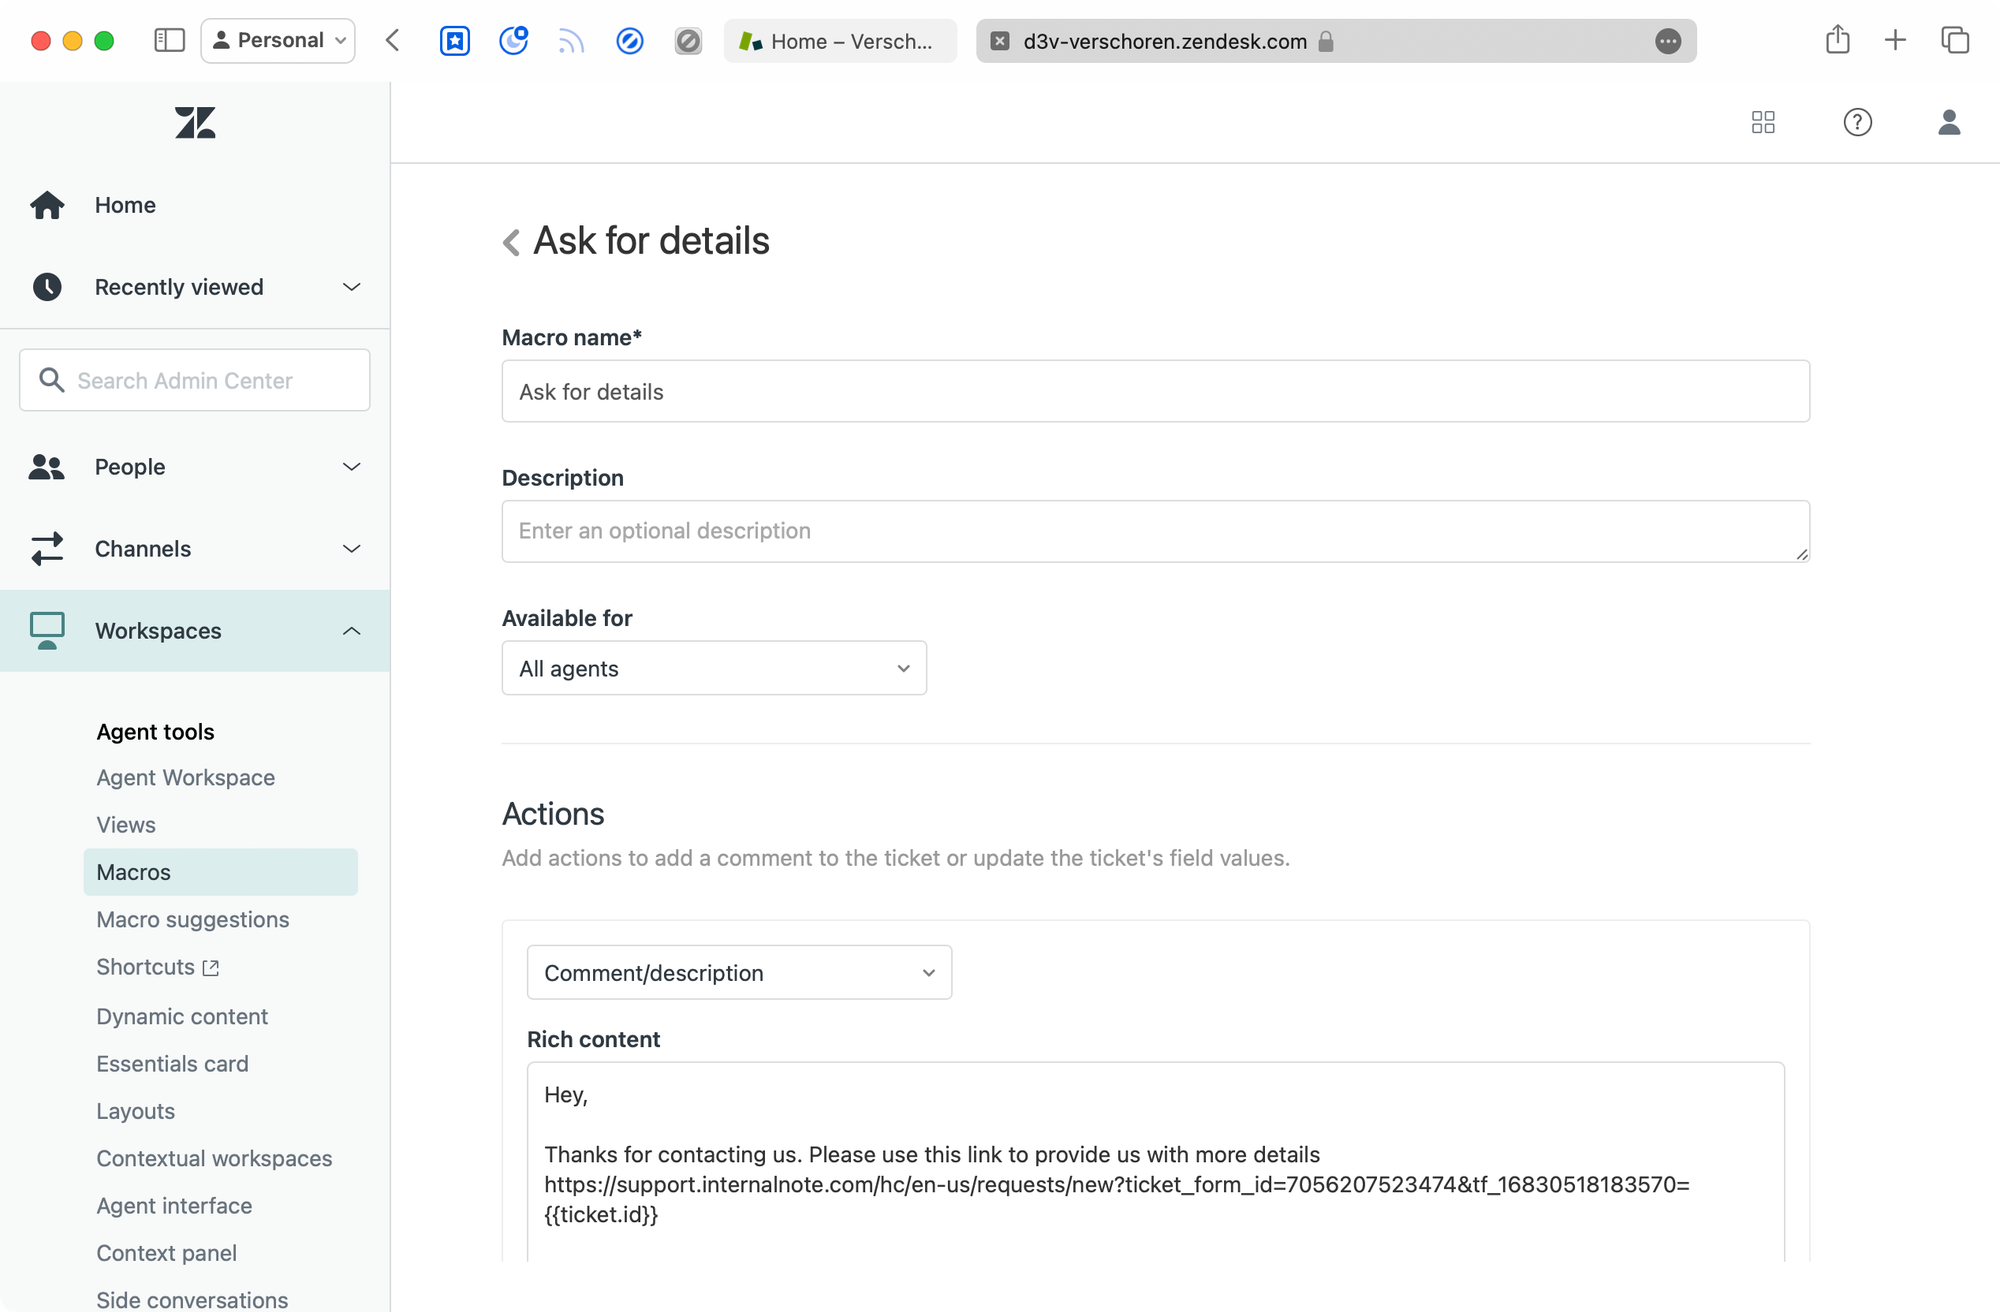
Next up, we need a macro that agents can use to ask for more details. This macro will contain a link to your Help Center Form which makes use of the pre-filled ticket forms feature in Zendesk Guide.

This features leverages URL parameters to prefill fields in your guide form. In our scenario we need to select the right form and prefill the Original Ticket ID field. Optionally we can also add parameters to copy over the requester email, and their original ticket subject and description. This gives the end-user additional context, and profiles more fields for them, making their job a bit easier too.
The URL we need has the following structure. (Make sure to replace the IDs to match your field and form id
https://support.internalnote.com/hc/en-us/requests/new?ticket_form_id=7056207523474&tf_16830518183570={{ticket.id}And if you want to add the additional fields it turns into:
https://support.internalnote.com/hc/en-us/requests/new?ticket_form_id=7056207523474&tf_16830518183570={{ticket.id}&tf_subject={{ticket.title}}&tf_description={{ticket.description}}&tf_anonymous_requester_email={{ticket.requester.email}}Once you've created your URL, you can test it by pasting it into a new browser tab. Next, go to the Admin Panel > Macros and create a new macro for your agents. You can create multiple macros for each form you have, and you can add some additional text to give your customer some context.
Help Center (optional)
The intermediate ticket field we created is editable for end-users and will appear on the Help Center form(s). If you want too you can hide the field by adding the following code to the new_request.hbs file of your team. But you can leave it visible too, as long as the customer doesn't remove or edit the ID, it does no harm.
$( document ).ready(async function() {
  const urlParams = new URLSearchParams(window.location.search);
  const ticket_form_id = urlParams.get('ticket_form_id')

  if (ticket_form_id == '7056207523474'){
    $('.request_custom_fields_16830518183570').hide();
  }
});
Webhook
Once the form has been filled in by the end-user, we will leverage a trigger and webhook to merge the two tickets.
To create a new webhook, navigate to Admin Panel > Apps and Integrations > Webhooks and create a new Trigger Based webhook.
Give it the following target URL.
https://yourdomain.zendesk.com/api/v2/tickets/{{ticket.id}}/mergeYou'll need to authenticate with either an email + password or email + token combination. Leave the rest of the settings as is.
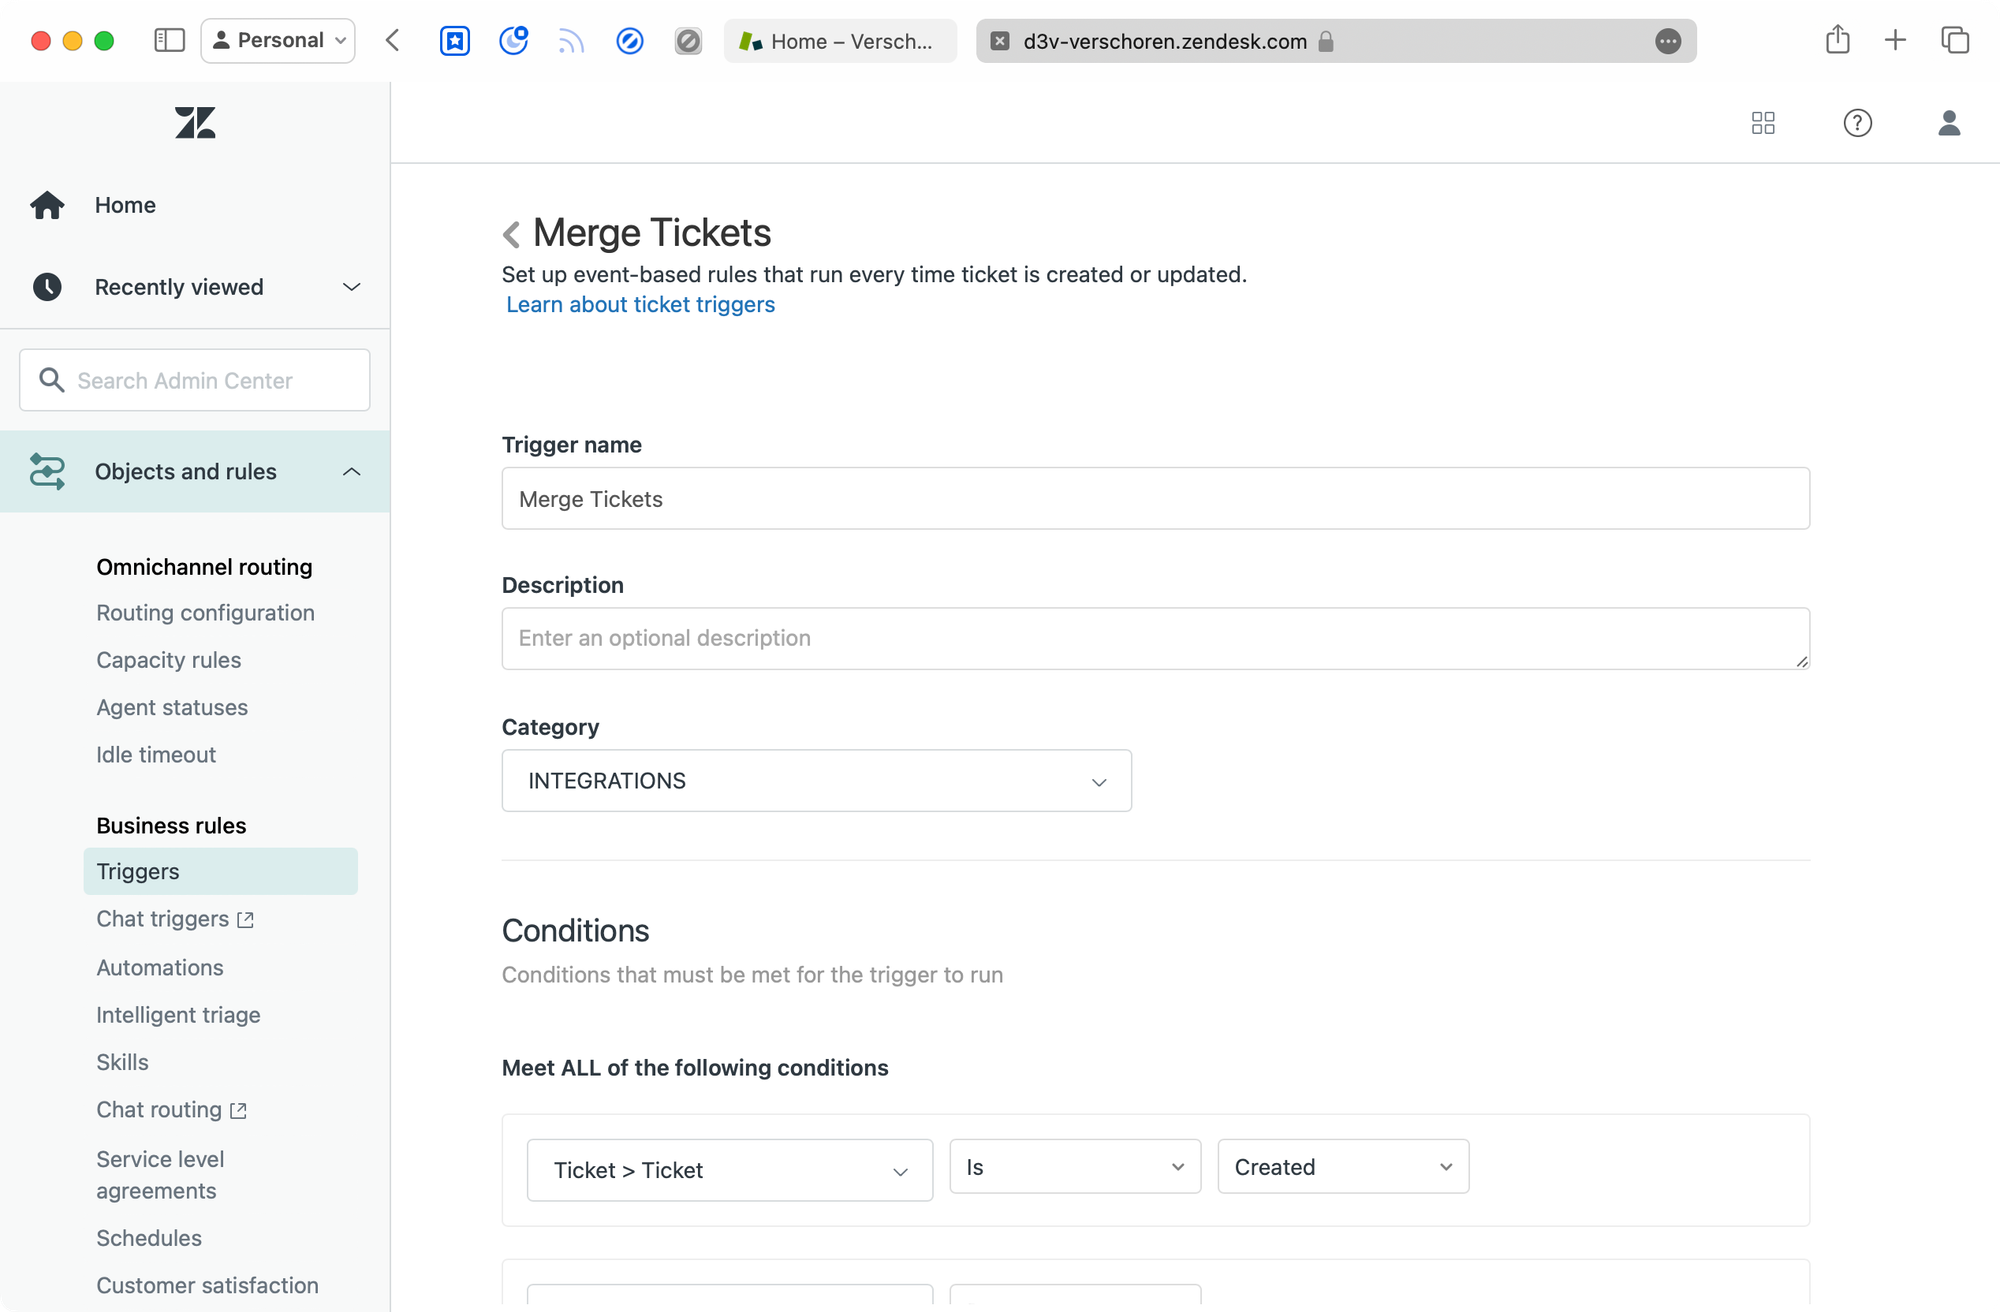
Trigger
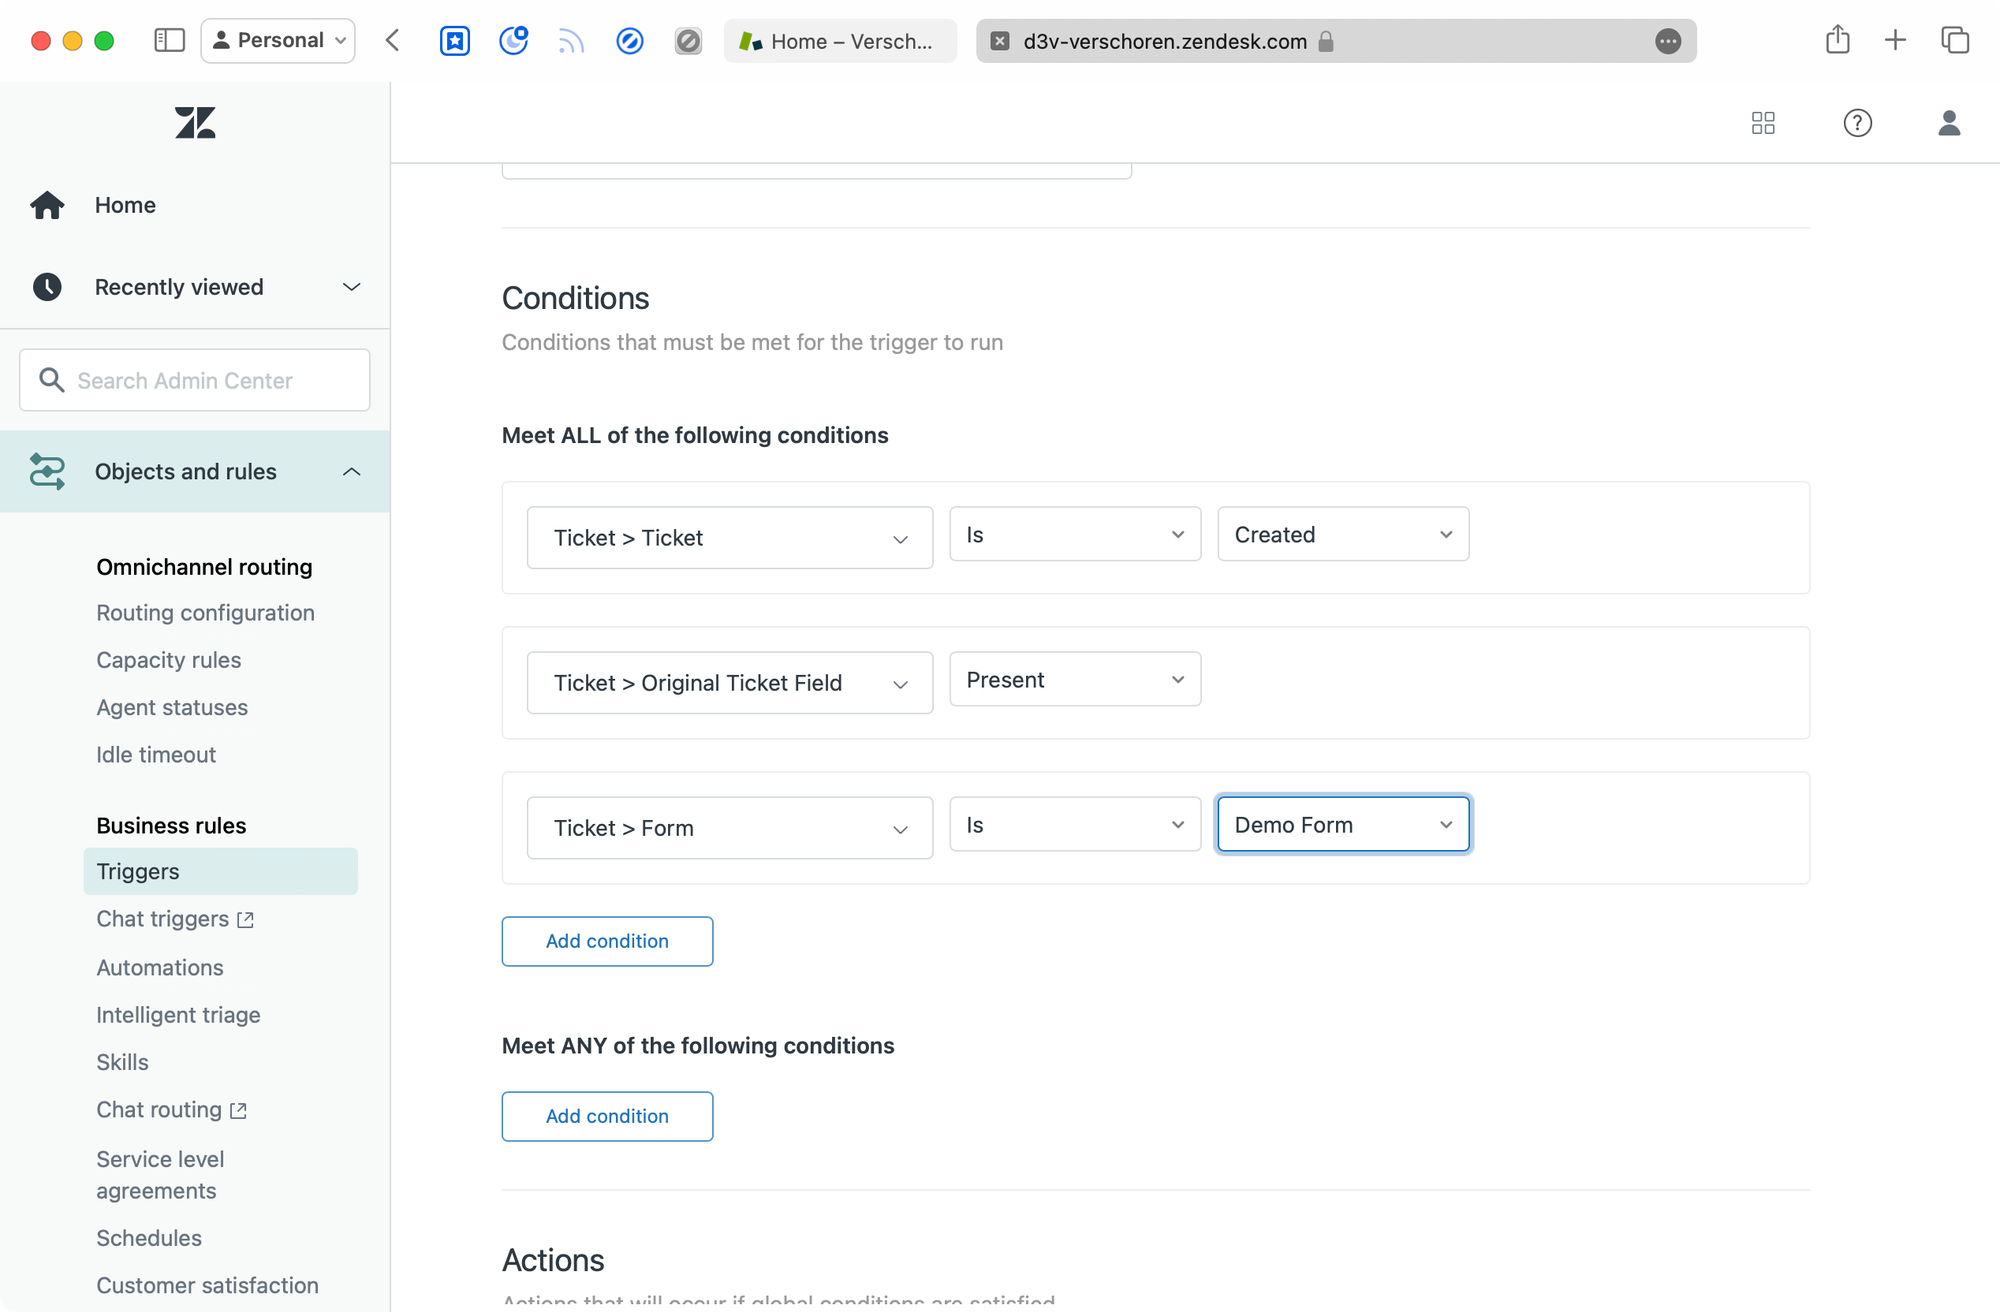
And to conclude the setup, we need to create a trigger that fires whenever a new ticket is created. Our condition relies on the presence of an Original Ticket ID.
Conditions
- Ticket is created
- Original Ticket ID is present
- Form is 'choose a form' (optional)
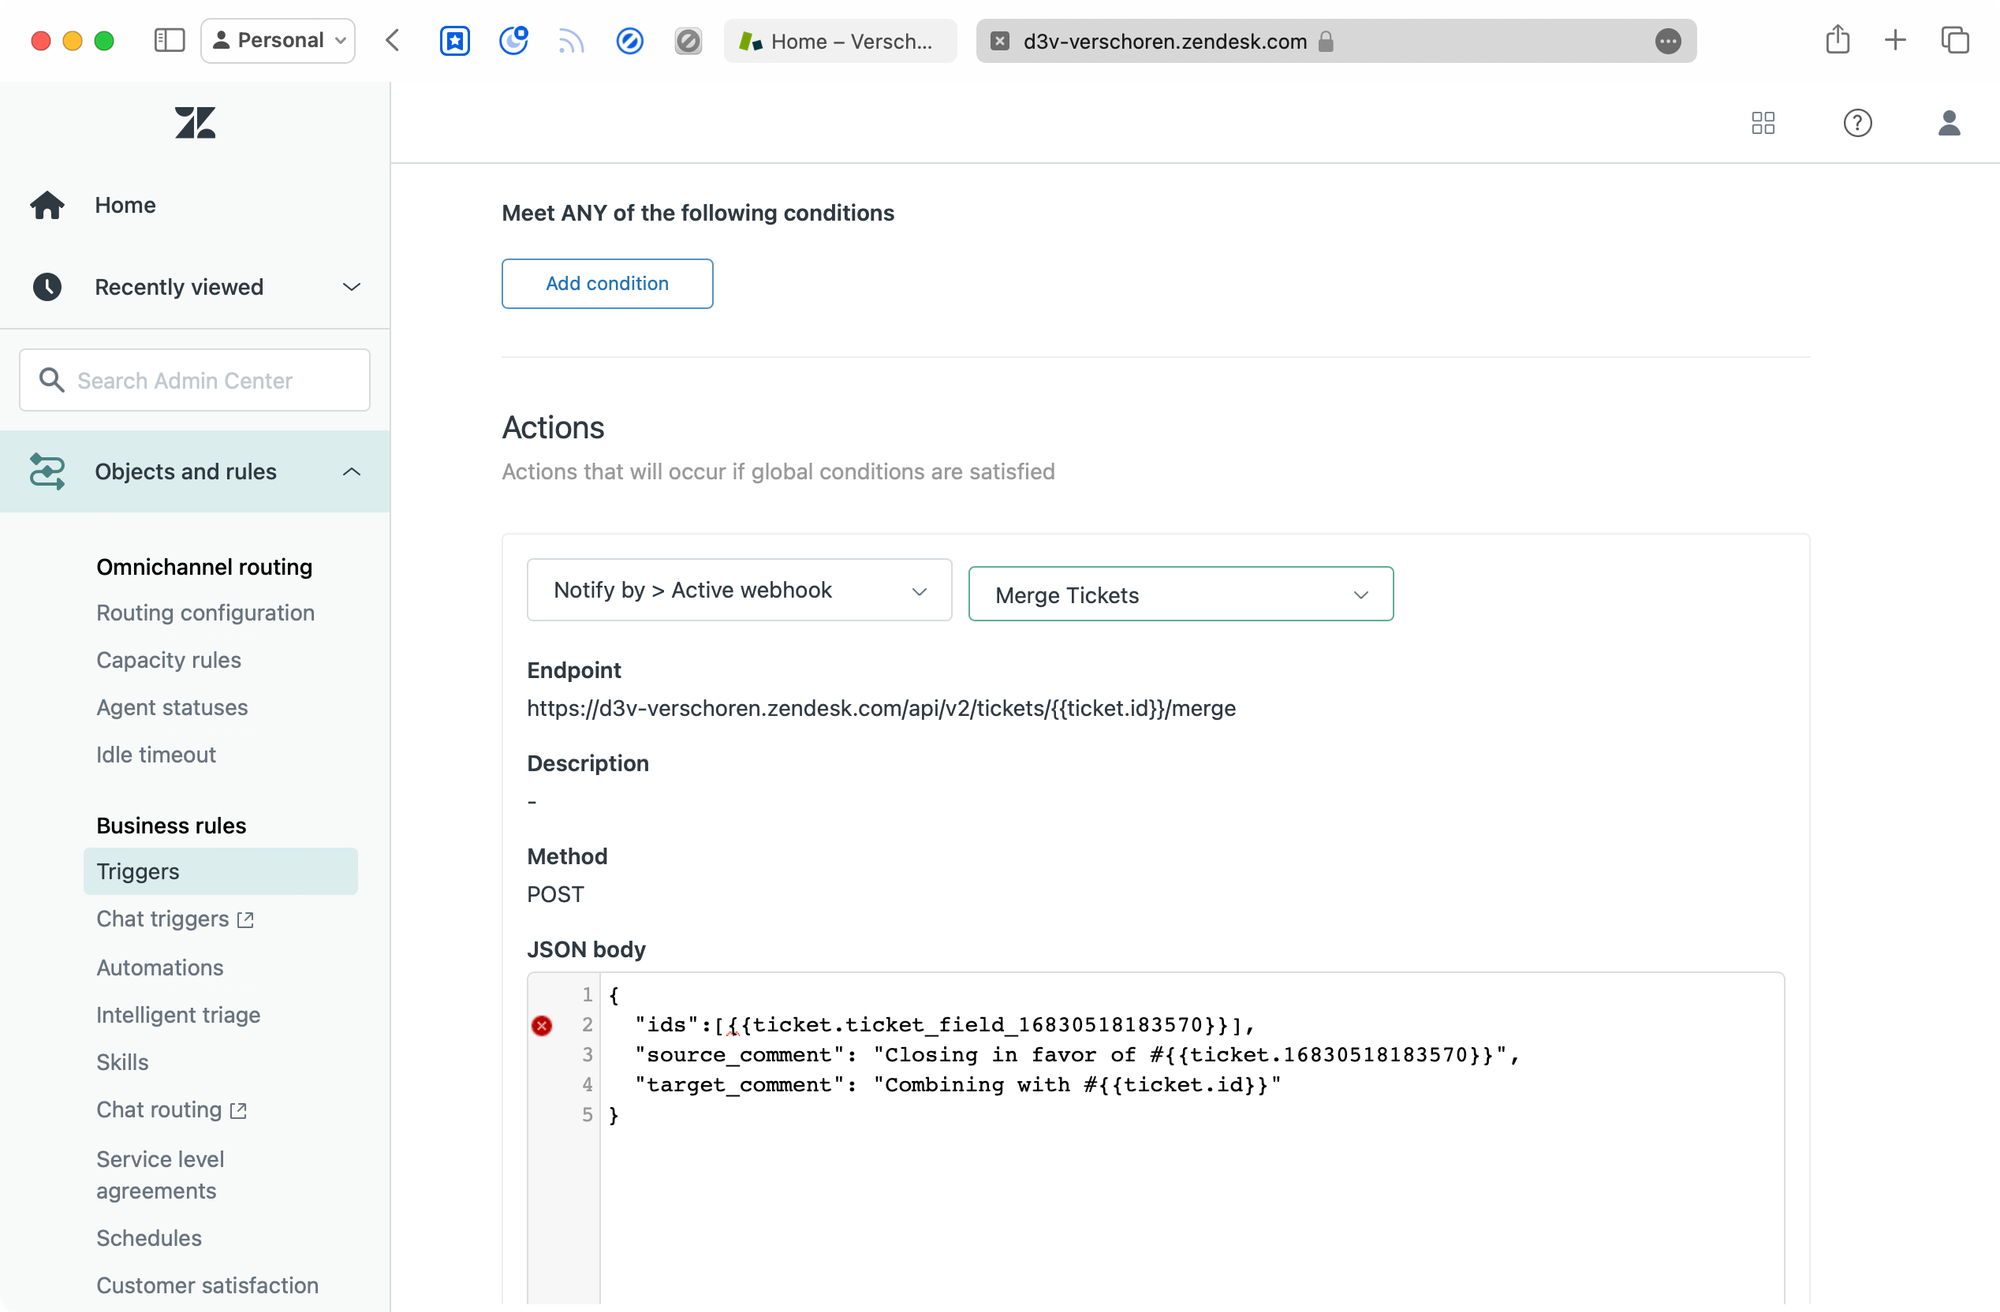
Actions
- Notify By > Active Webhook > 'The webhook created earlier'
JSON Body
{
  "ids":[{{ticket.ticket_field_16830518183570}}],
  "source_comment": "Closing in favor of #{{ticket.id}}",
  "target_comment": "Combining with #{{ticket.ticket_field_16830518183570}}"
}The result
Once we've setup the entire flow, we can test our flow:
- Create a test ticket by emailing to your Zendesk instance
- Use the macro to ask for more details
- You'll receive an email with a link to the Help Center
- Open the link and fill in the form
- The submitted ticket is picked up by the trigger and the original and new tickets will be merged, closing the original ticket in the process.
- Each ticket will contain a link to each other for easy reference.