Automating article attachments with the Guide Media API and Zapier
This article explains Zendesk’s new Media Gallery for Help Center articles, allowing you to manage images across multiple articles. We show off the Media Library API, which enables automated uploads from external tools like Google Drive using Zapier, improving workflow efficiency for teams.

On this page
Over the last year Zendesk has been upgrading their attachments experience for Help Center articles in a major way.
When adding attachments, files or images, to articles it used to be that each attachment was linked to a single article. You could only see attachments when looking at an article, and if you wanted to add the same image to multiple articles you had them upload them again and again for each article.
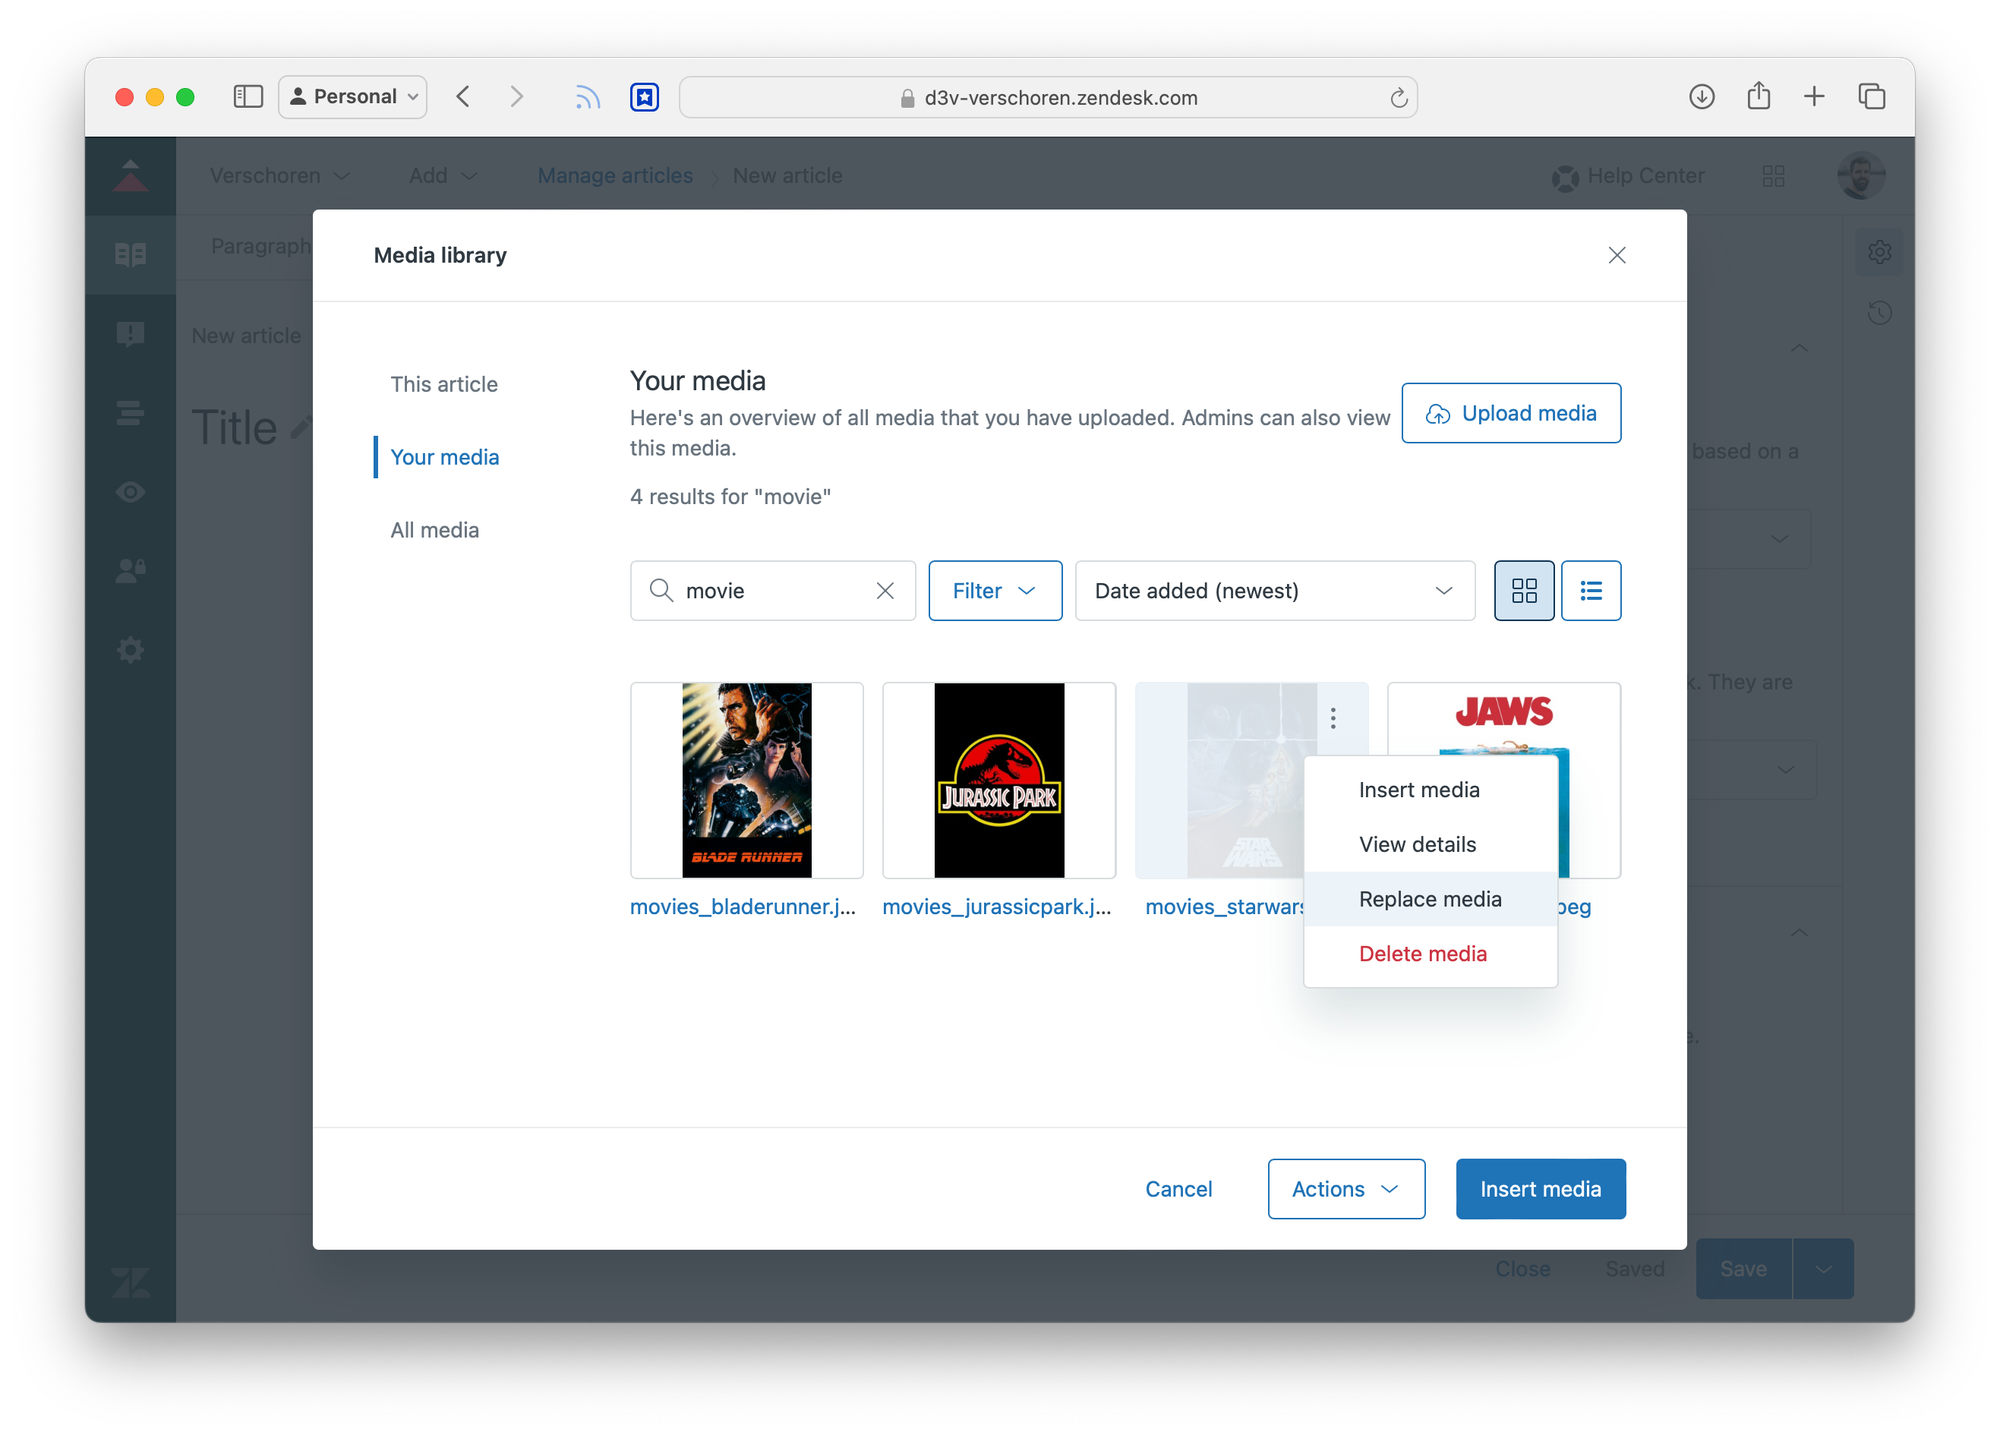
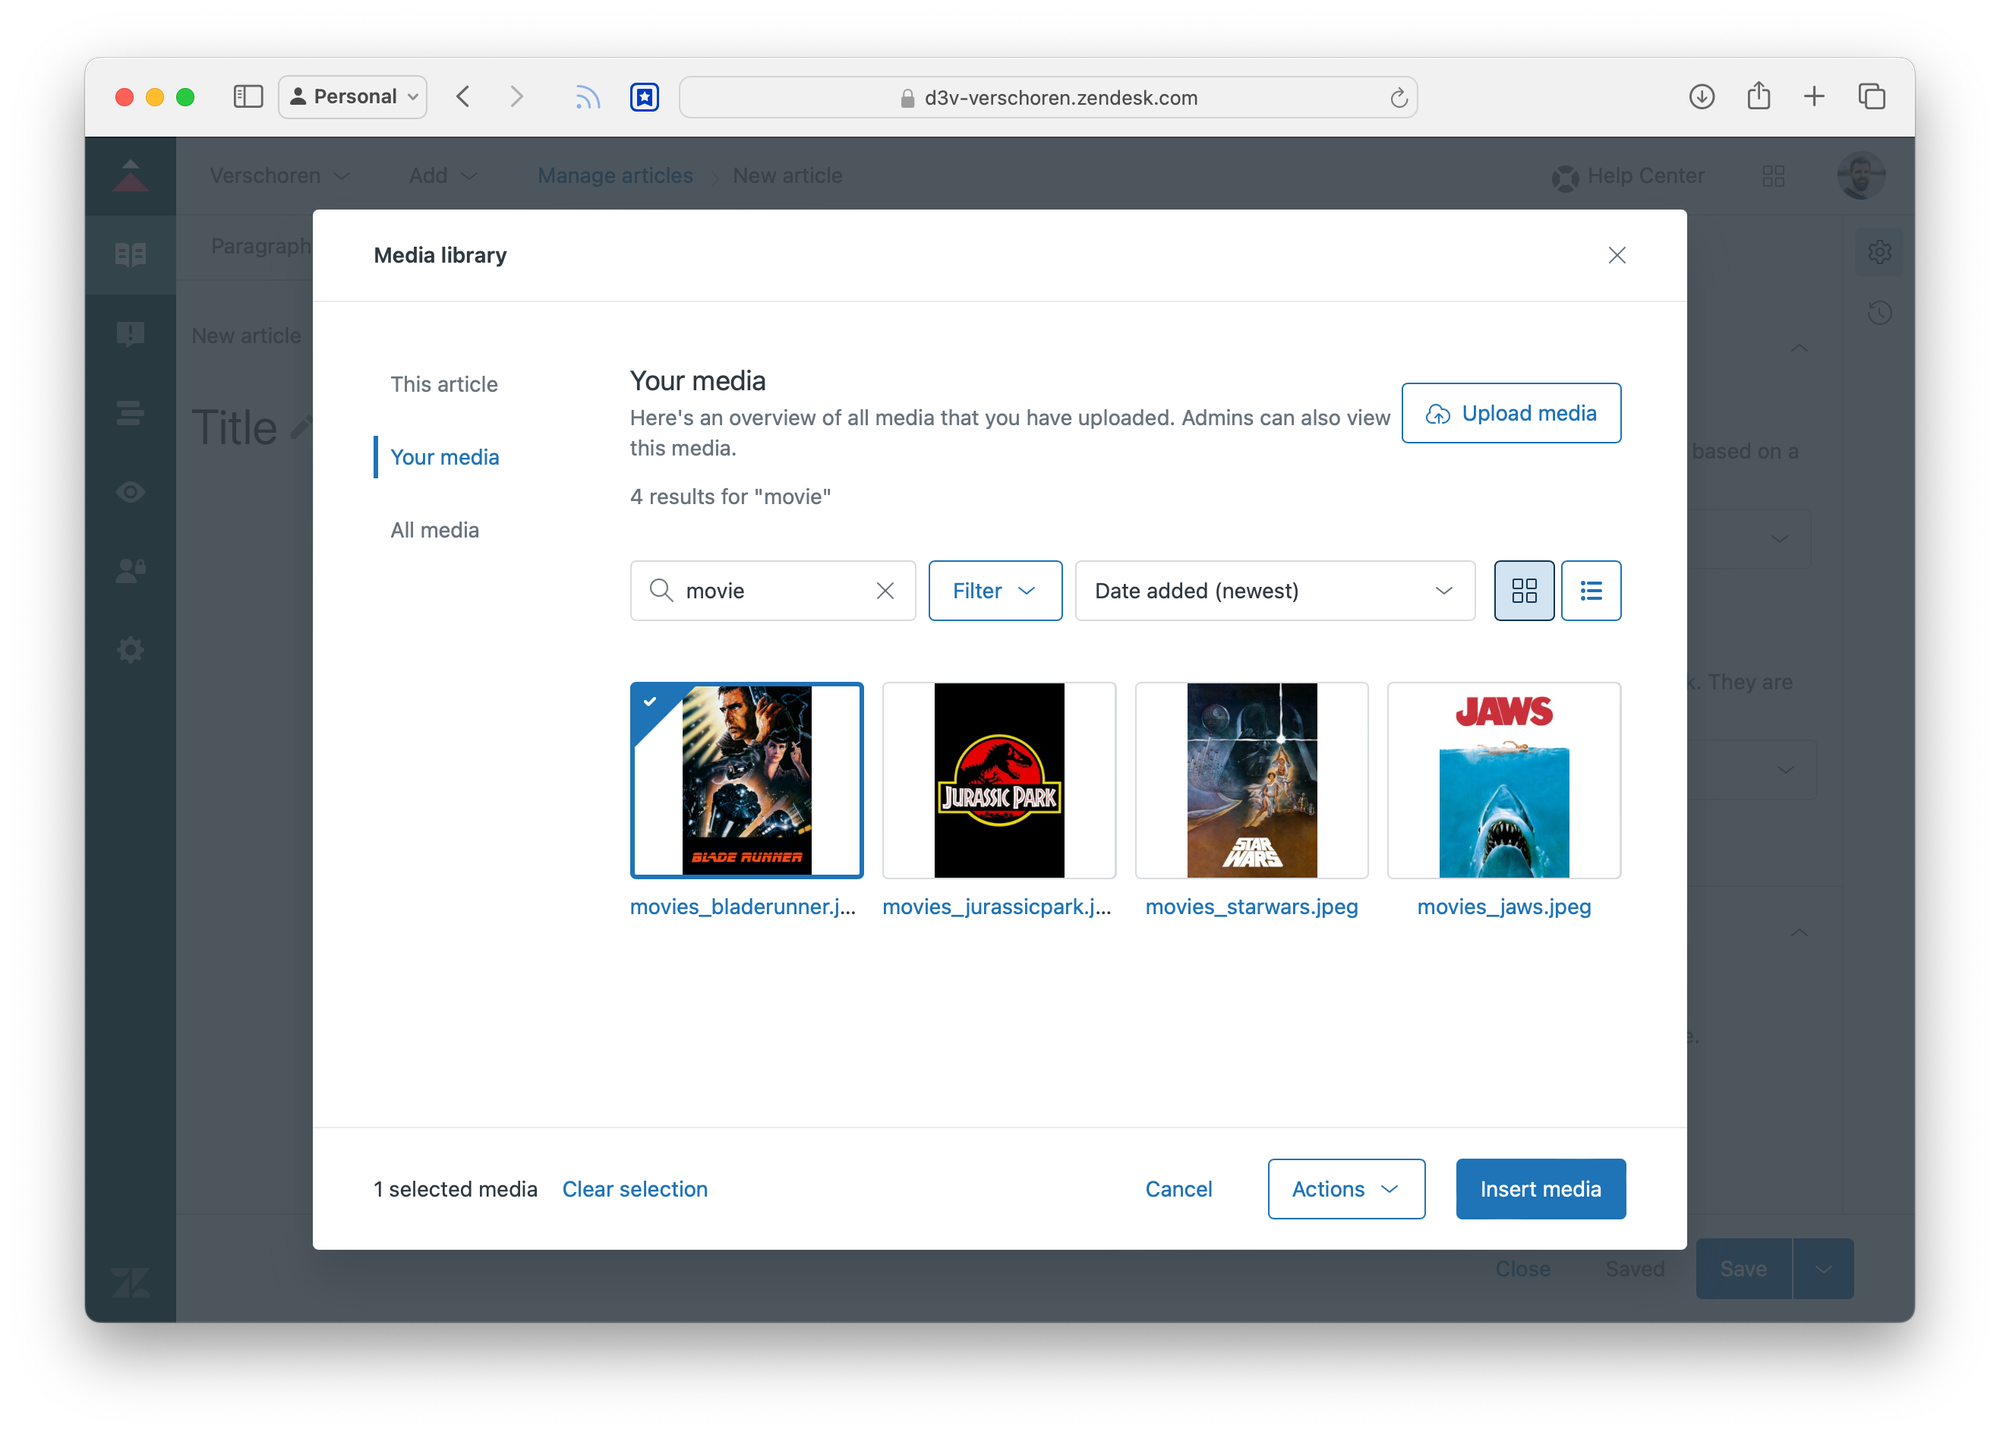
Last year saw the release of the Media Gallery for the article editor. This central repository of files makes it possible to upload an image once, and reuse it other articles by selecting it from the gallery. Similarly you can replace an image, and every article where that specific image lives, will now show the newer version of that screenshot or photo.
Media Library API
This new Media library is great, but there are scenarios where going into Zendesk and uploading your attachments is not very handy. In bigger companies it's often the marketing team that creates the perfect screenshots that can be used by the writers team in their articles.
You could give your marketing team access to the your Help Center, but thanks to the new Media Library API, we can allow uploads from external tools.
Leveraging external sources.
Let's say your Marketing team creates your assets in a tool like Figma, and then uploads them all to a central Google Drive folder everyone can reference. You could go into the drive each time you need an image and upload it into the Media Gallery. But by combining the new API and a tool like Zapier or Make, we can automate this and automatically upload any new image on Google Drive right into Zendesk.
How does the API work?
The Media API has a few endpoints that need to be called in the right order to upload attachments into Zendesk.
- We first create an Upload URL that allows us to upload an image or file to Zendesk's storage.
- We then upload the actual file to that endpoint
- We then create a Guide media object which adds the upload file to the media gallery.
Upload URL
To create an Upload URL we need to let Zendesk know what file type and file size we want to upload.
We do this by doing a POST to https://{{domain}}.zendesk.com/api/v2/guide/medias/upload_url with the following payload
{
  "content_type": "image/png",
  "file_size": 12345
}
This returns the following data
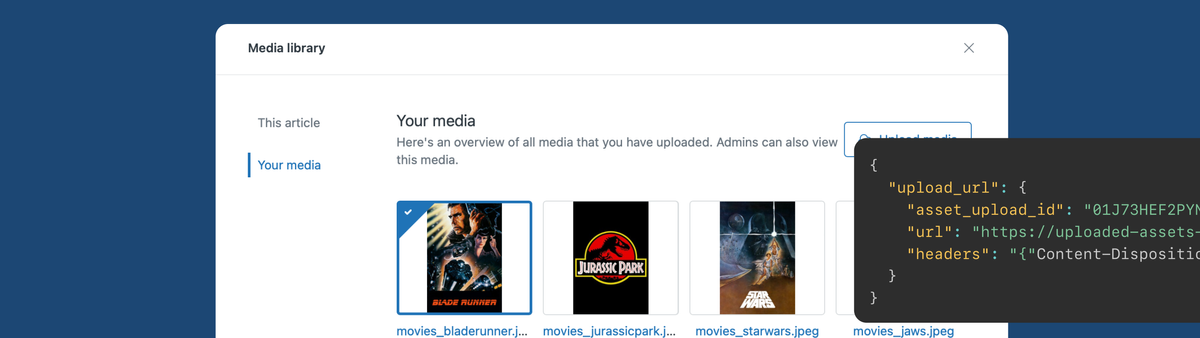
{
  "upload_url": {
    "asset_upload_id": "01J73HEF2PYN50PB9ZXYA1EBPF",
    "url": "https://uploaded-assets-pod17.s3.eu-west-1.amazonaws.com/17/12154371/01J73HEF2PYN50PB9ZXYA1EBPF?X-Amz-Algorithm=AWS4-HMAC-SHA256&X-Amz-Content-Sha256=UNSIGNED-PAYLOAD&X-Amz-Credential=AKIARVNLH63KCBTH4T3L%2F20240906%2Feu-west-1%2Fs3%2Faws4_request&X-Amz-Date=20240906T112754Z&X-Amz-Expires=3600&X-Amz-Signature=8b4a372bf96148be65e8a27f9574f130c72ab2b14759eab828731cfc6c113355&X-Amz-SignedHeaders=content-disposition%3Bhost%3Bx-amz-server-side-encryption&x-id=PutObject",
    "headers": "{"Content-Disposition":"attachment; filename=\"01J73HEF2PYN50PB9ZXYA1EBPF.png\"","Content-Type":"image/png","X-Amz-Server-Side-Encryption":"AES256"}"
  }
}
We'll need these 3 elements in our next steps.
Uploading our file
The previous step gave us a url to upload our file too. Since Zendesk uses AWS for its hosting and data storage we need to upload our file directly into one of their S3 buckets.
We do this by doing a PUT to the https://uploaded-assets-pod17.s3.eu-west-1.amazonaws.com/17/12154371/01J73HEF2PYN50PB9ZXYA1EBPF?X-Amz-Algorithm=AWS4-HMAC-SHA256&X-Amz-Content-Sha256=UNSIGNED-PAYLOAD&X-Amz-Credential=AKIARVNLH63... URL we retrieved in the previous step while adding our file as a --data element in our request.
Do note that we should include the headers that were provided in that first step too. Done correctly we get a status 200 back.
Content-Disposition:attachment; filename="01J73HEF2PYN50PB9ZXYA1EBPF.png"
Content-Type:image/png
X-Amz-Server-Side-Encryption:AES256
Creating the Media Object
And finally we need to add the Media Object to our Media Library.
This is done by a third and final POST API call to https://{{domain}}.zendesk.com/api/v2/guide/media with the following payload:
{
  "asset_upload_id": "01J73HEF2PYN50PB9ZXYA1EBPF",
  "filename": "screeenshot2.png"
}
Note that the asset_upload_id is again taken from the first step. The filename can be the same as our file we uploaded, or we can give a custom name here. This name will appear in the media gallery.
Let's use Zapier
By using a tool like Zapier we can leverage this new API to automate the flow I talked about earlier in this article.
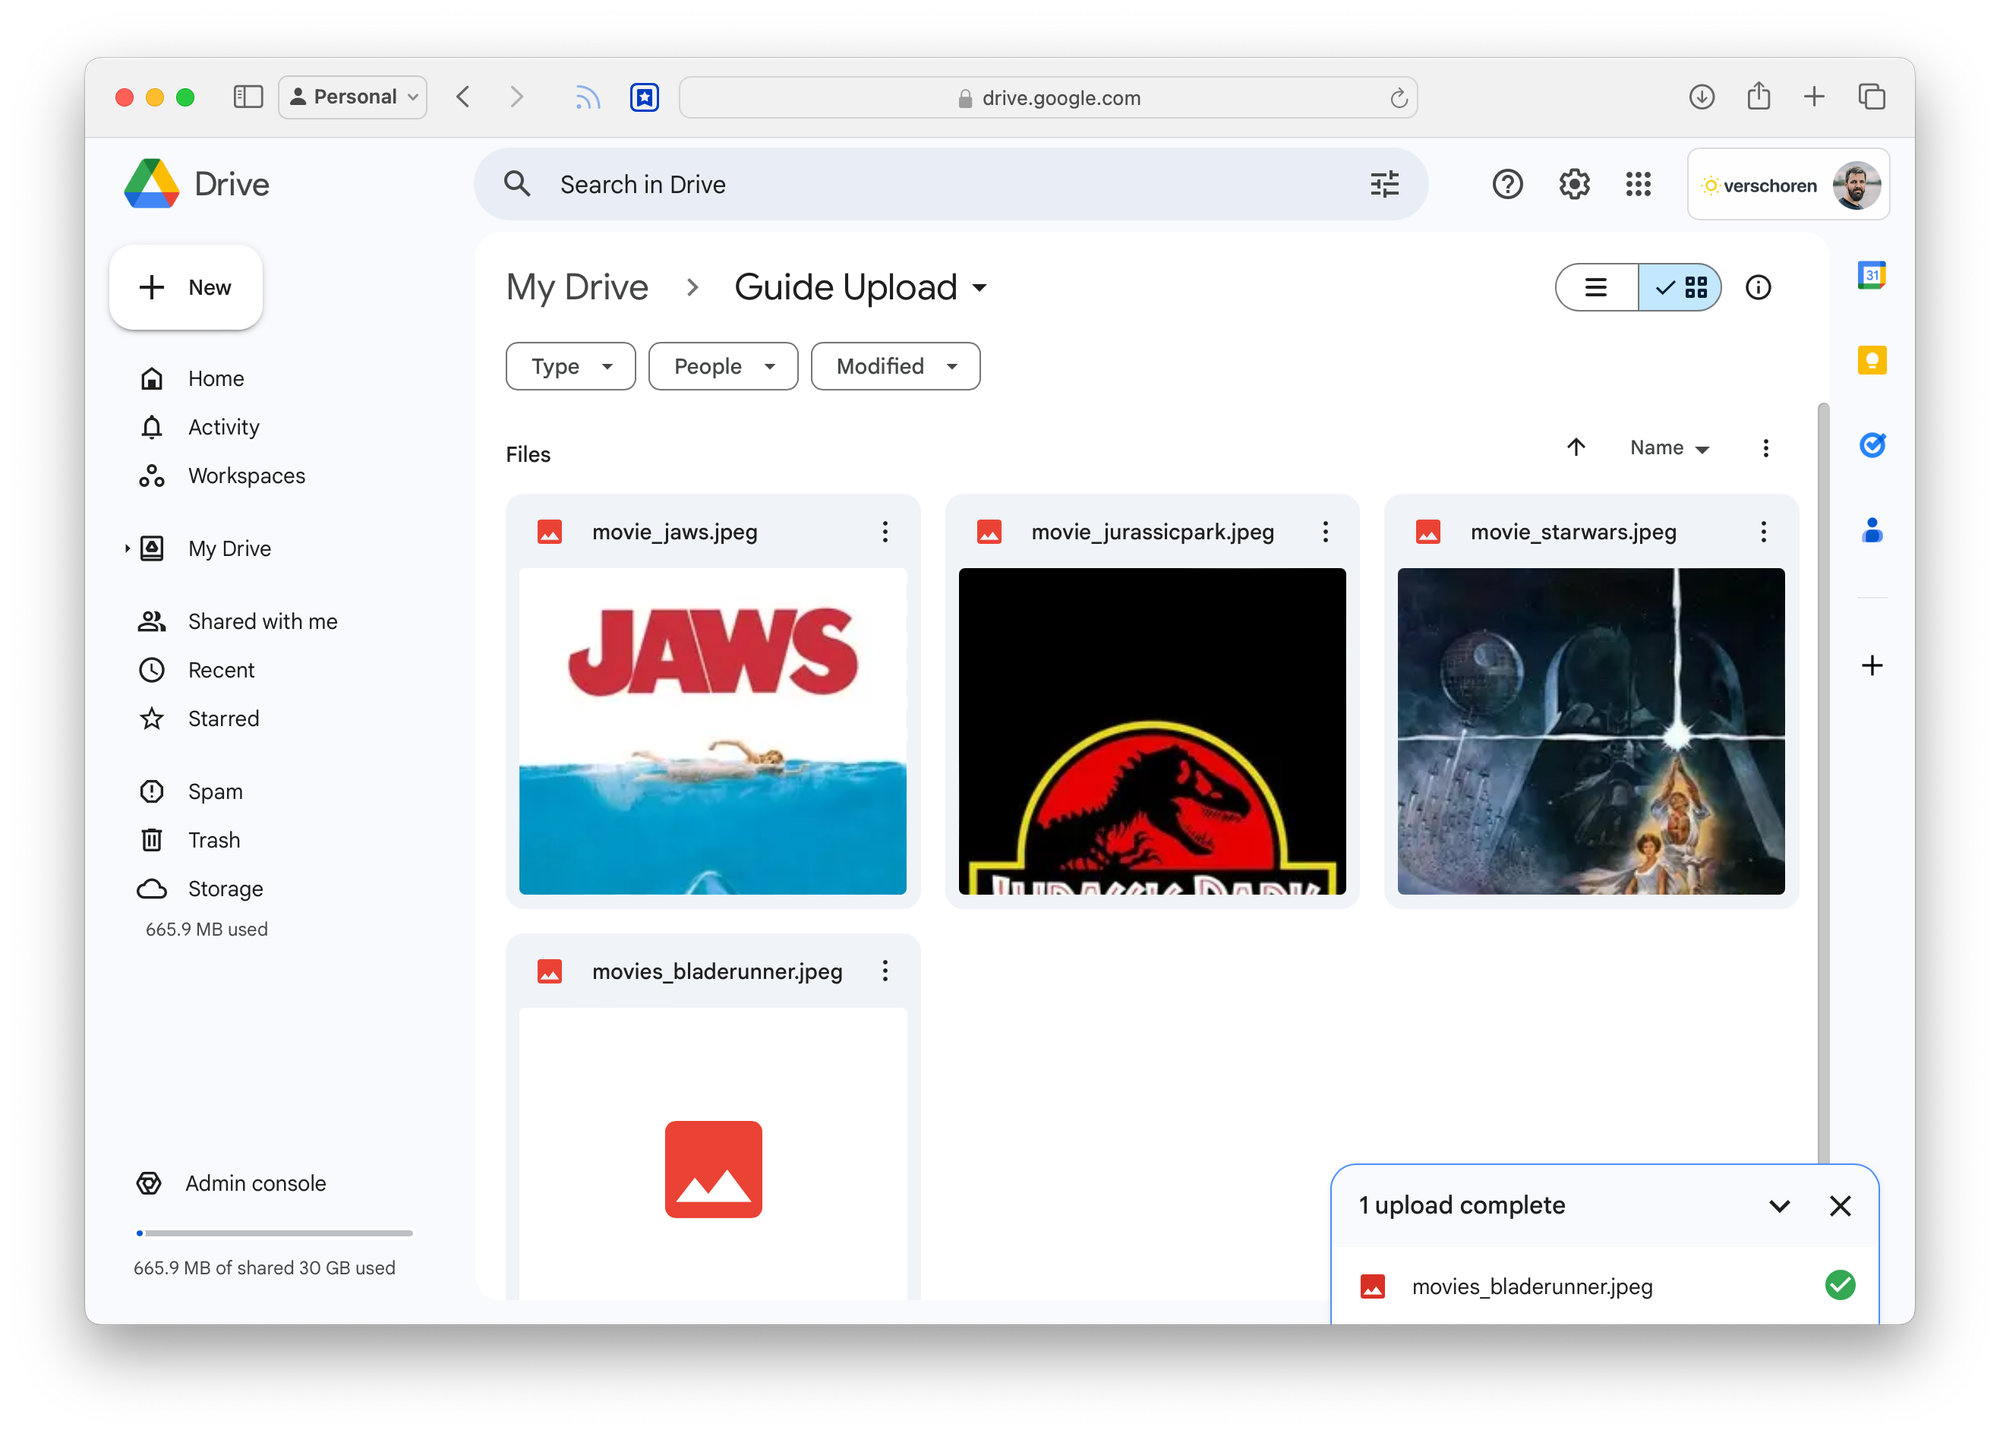
Here's the Upload folder our Marketing team uses to add assets for our Help Center.
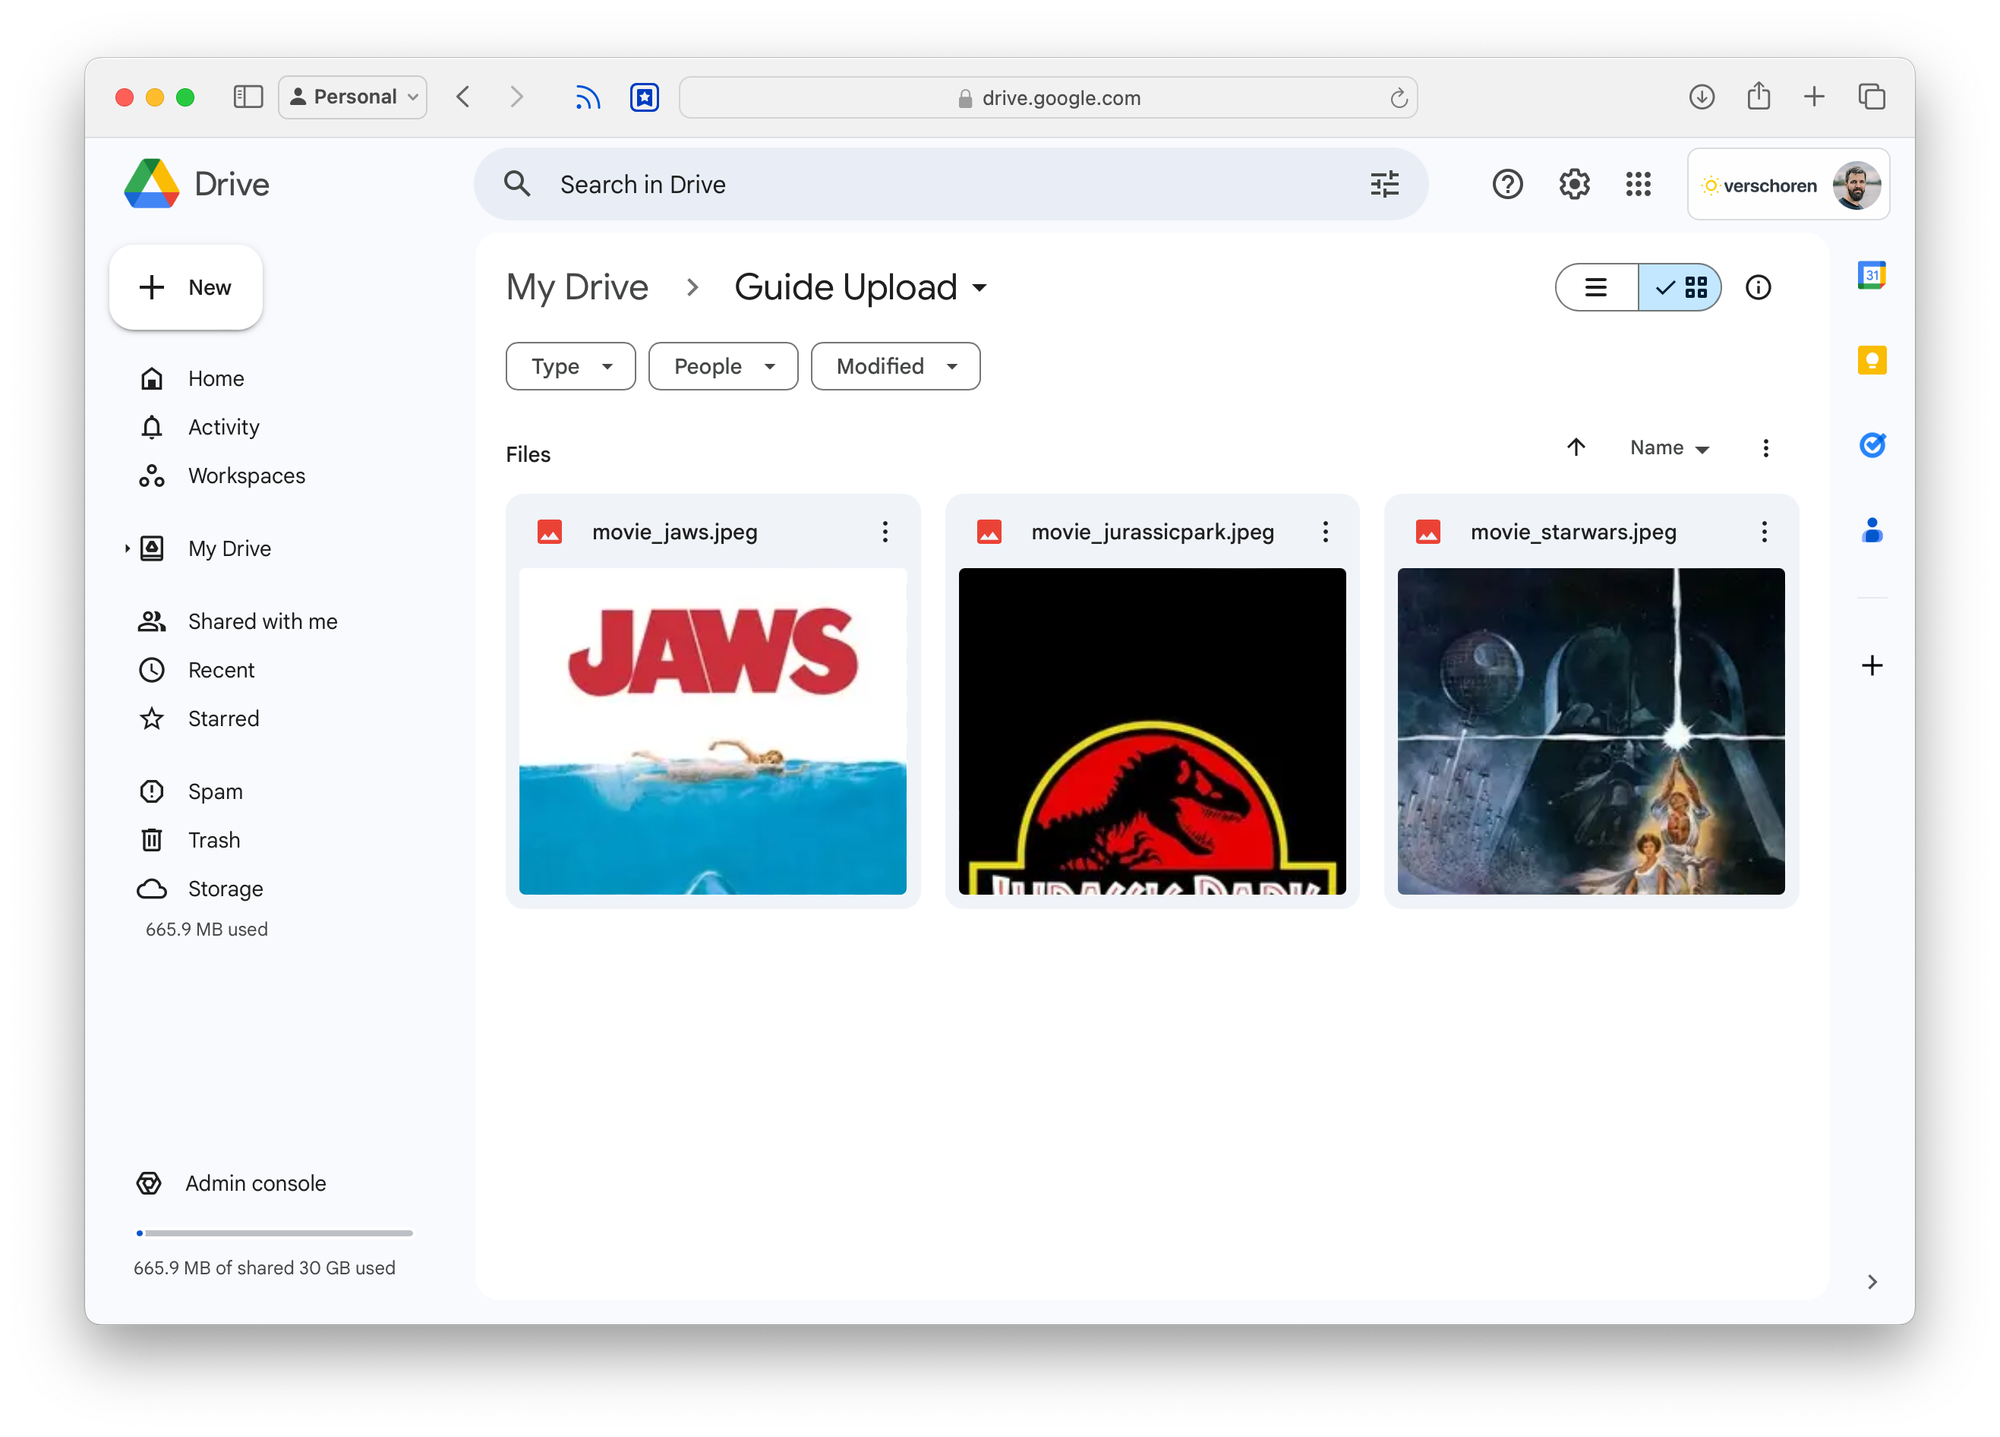
Now let's take this folder into Zapier and automate uploading these images into the Zendesk Media Gallery.
Step 1: Getting new images
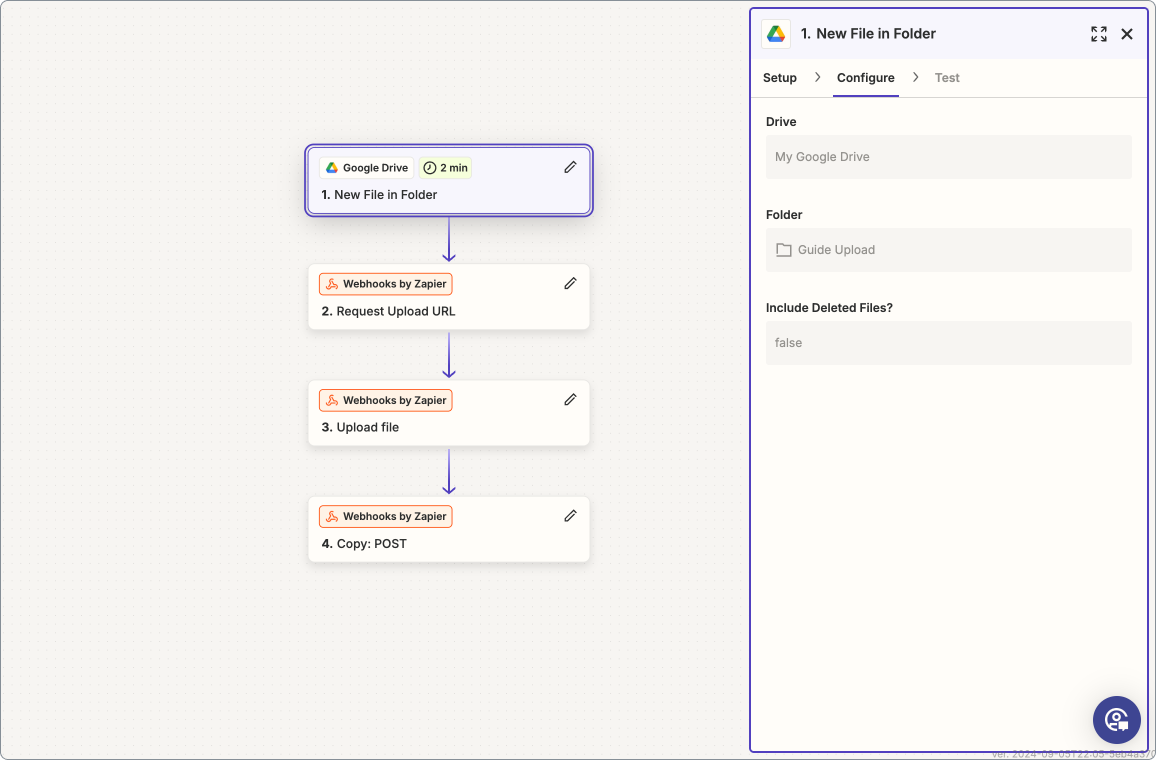
The first step we need in our flow is the New File in Folder action. Select the folder you want to monitor and make sure to exclude the deleted files.
Step 2: Request Upload URL
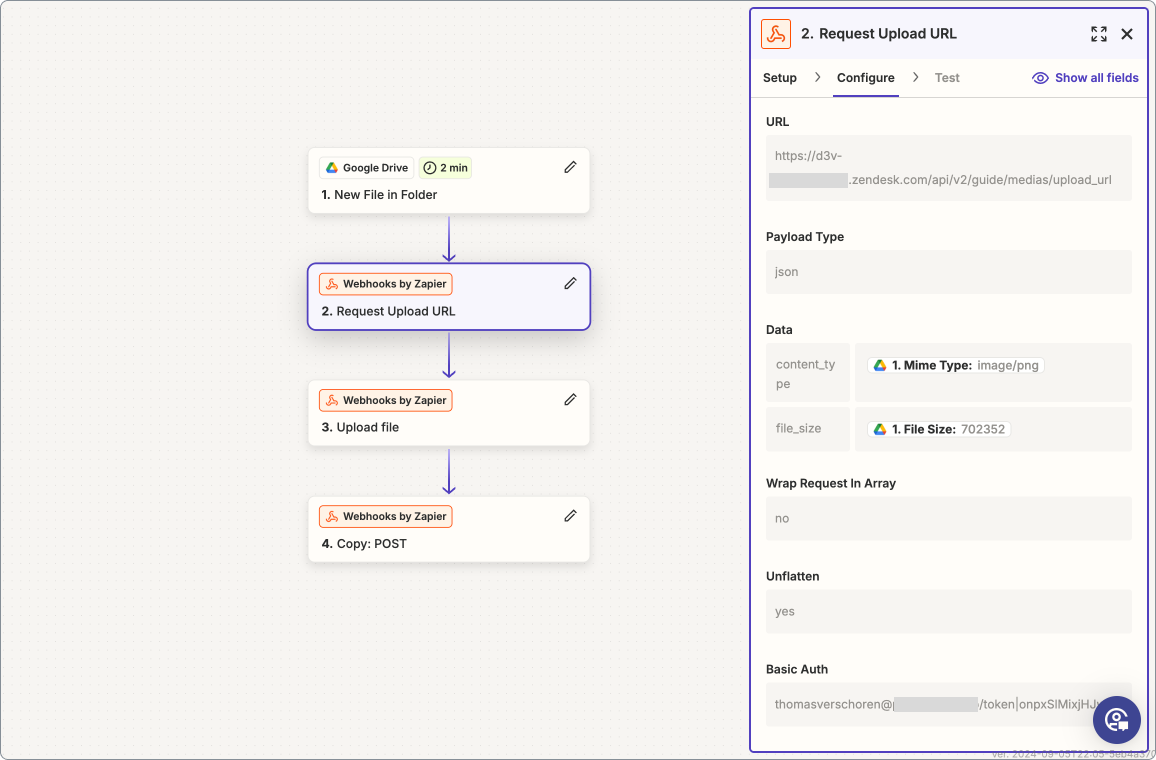
In the second step we use a Webhooks by Zapier step as a POST type to get an Upload URL.
For the URL, use https://{{domain}}.zendesk.com/api/v2/guide/medias/upload_url
We can use the variables from the first step to populate the data flow:
content_type: 1. Mime Type (e.g. image/png)file_size: 1. File Size (e.g.123456)
For the authentication part we can use [email protected]/token then a | and then a zendesk_api_token. E.g. [email protected]/token|abc123def456
Step 3: Uploading the file
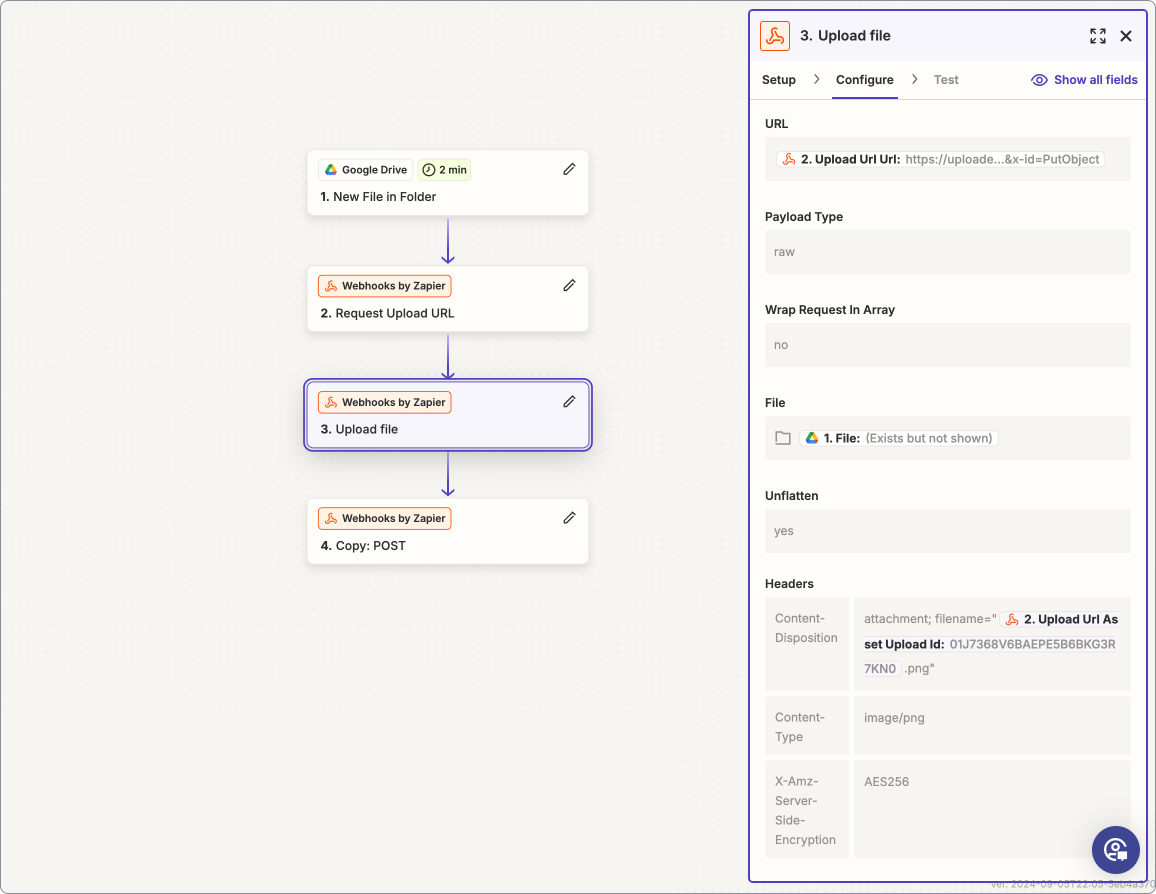
Here things become a bit tricky since there's a lot of variables to set. We once again use a Webhooks by Zapier steps but choose PUT as the type.
- For the URL we choose the 2. Upload Url Url.
- For the File, select 1. File (exist but not shown)
For the headers:
Content-Disposition: attachment; filename="2. Upload Url As set Upload Id.png"Content-Type: image/pngX-Amz-Server-Side-Encryption: AES256
Step 4: Add to the Media Library
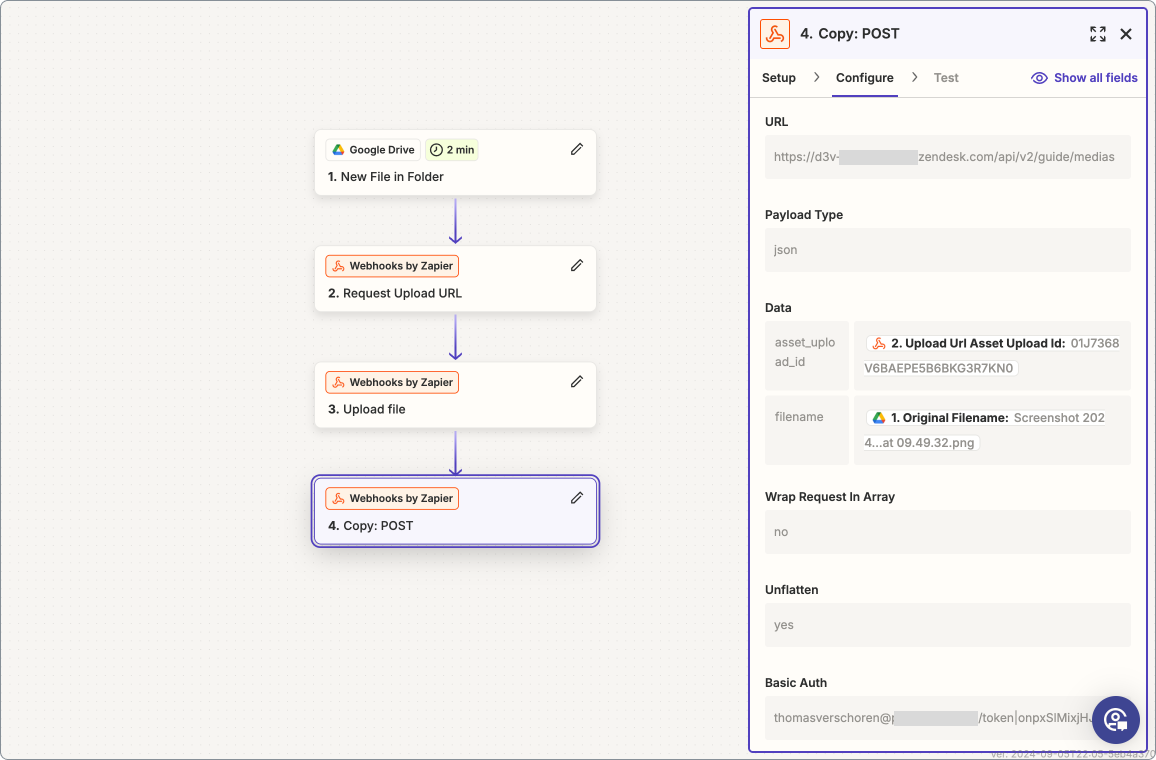
And at last, the final step.
We can use a final Webhooks by Zapier step to POST to the Add to Media Library endpoint.
For the URL use https://{{domain}}.zendesk.com/api/v2/guide/medias
For the data part:
asset_upload_iduse 2.Upload Url Asset Upload Id.filenameuse either a custom name or 1. Original Filename
For the authentication part we can use [email protected]/token then a | and then a zendesk_api_token. E.g. [email protected]/token|abc123def456
Putting it all together
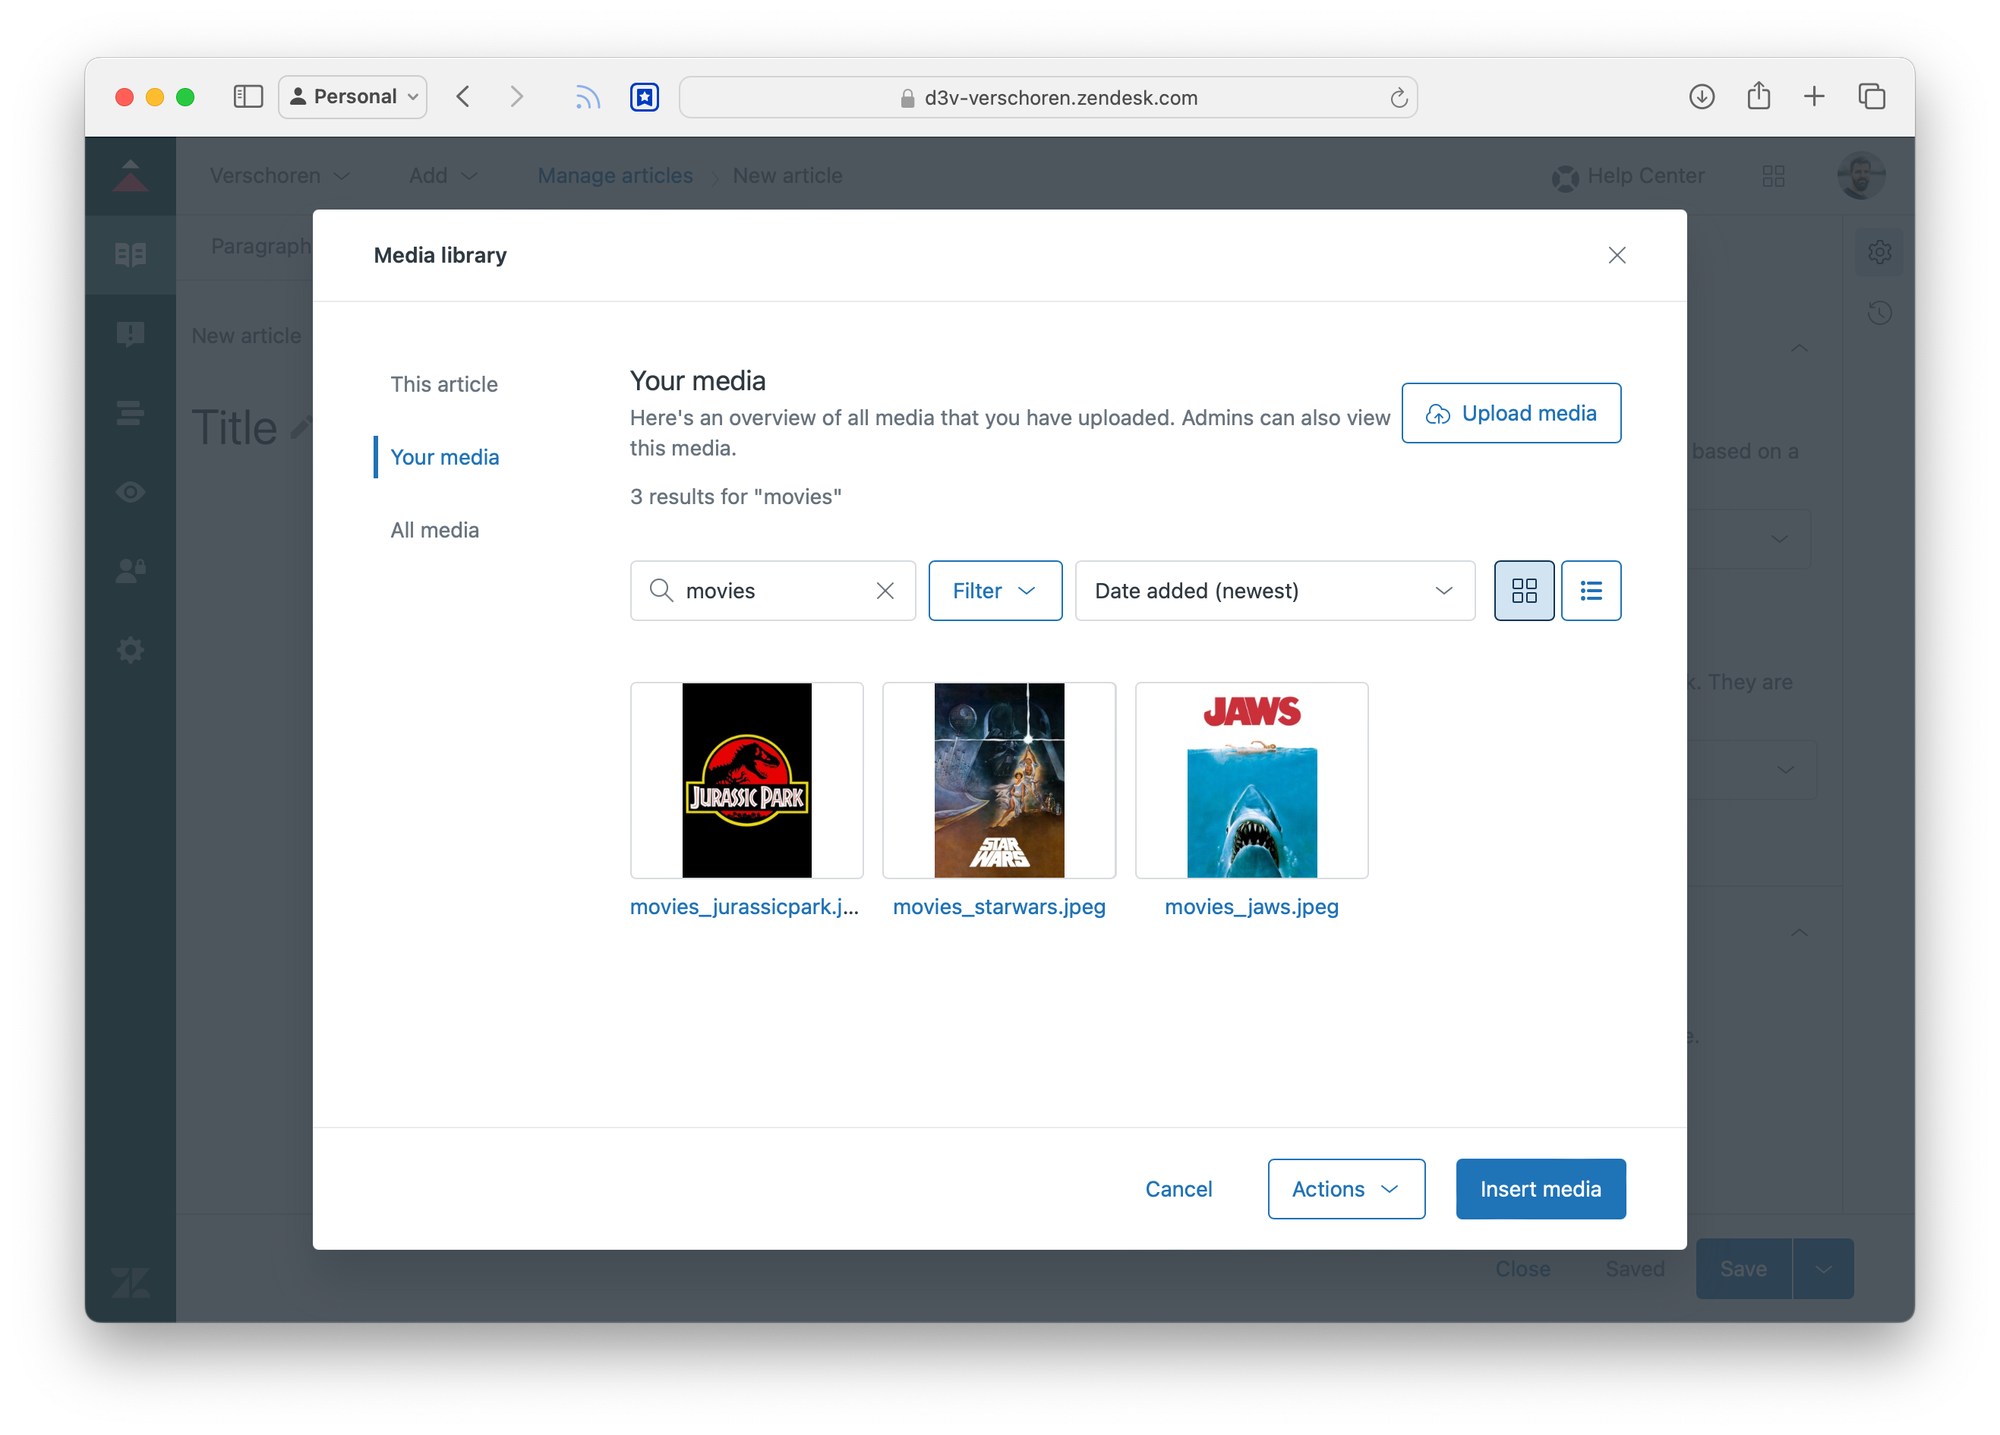
Our marketing team just added a new movie poster to the Google Drive folder.
The Zapier flow picks up the newly added file and starts its run:
- It detects the file
- It creates an upload url for the file by using its file type and size
- It uploads the actual file
- And adds it to the media library
Conclusion
It's nice to see how Zendesk is expanding on their Knowledge Base Content Management. They made changes to the editor allowing for more types of text, they restructured the way we add articles to sections and manage permissions and added a few powerful API tools to rewrite, simplify or tone shift your articles.
This Media Library is another example on how the Help Center is moving more towards the likes of Wordpress or other strong CRM systems.
Are there things missing? Sure! I'd love a way to get access to the Media Library from within the main Admin Panel, maybe as a new button in the left navbar.
Tagging images, seeing in what articles an asset is used, or uploading multiple locales of the same images in an asset bundle are just a few of the things I'd love to see.
But aside from those, this new API allows for some cool workflows as the one I showed above.