
Automatic Ticket Categorisation and Sentiment Analysis via ChatGPT
This article will show you how to automatically categorise any incoming ticket and assign a customer sentiment by using ChatGPT, Cloudflare Workers and Zendesk APIs.

Automatic Ticket Categorisation and Sentiment Analysis via ChatGPT
This article will show you how to automatically categorise any incoming ticket and assign a customer sentiment by using ChatGPT, Cloudflare Workers and Zendesk APIs.

On this page
These last few months ChatGPT and Generative AI have been all the hype and new use cases for this fun API have been popping up left and right.
Zendesk itself has also picked up these new capabilities and has been actively blogging about its possibilities here and here.
And last week they also promised some major announcements in this space on their Relate Event in May.
Even though there is a lot of noise and hype around this tool, in the end it is an API, and like any technology, it's more important thinking about how it can fit in your processes and improve them than to think about the technology itself.
“The question you have to ask yourself is, what is your application designed to do? What problem are you looking for the LLM to solve? Different applications have different requirements and different risks."
Jaakko Pasanen, Chief Science Officer, Ultimate
According to Ultimate, a leading ChatBot and Automation provider, there's four ways Generative AI like ChatGPT can assist in Customer Care, as highlighted in a recent article they posted on their website.
 Gesche Loft
The four main impact points
- 📝 Summarise support tickets
- 🔀 Sort and categorise customer data into intents
- 💬 Craft example replies for conversation designers to use as is or as inspiration to brainstorm dialogue
- 🧙♀️ Transform factual replies to customer requests into a specific tone of voice
In this article we'll do a deep-dive into two flows that build on top of the Summarise and Sorting powers of ChatGPT and Zendesk.
📝 Summarise
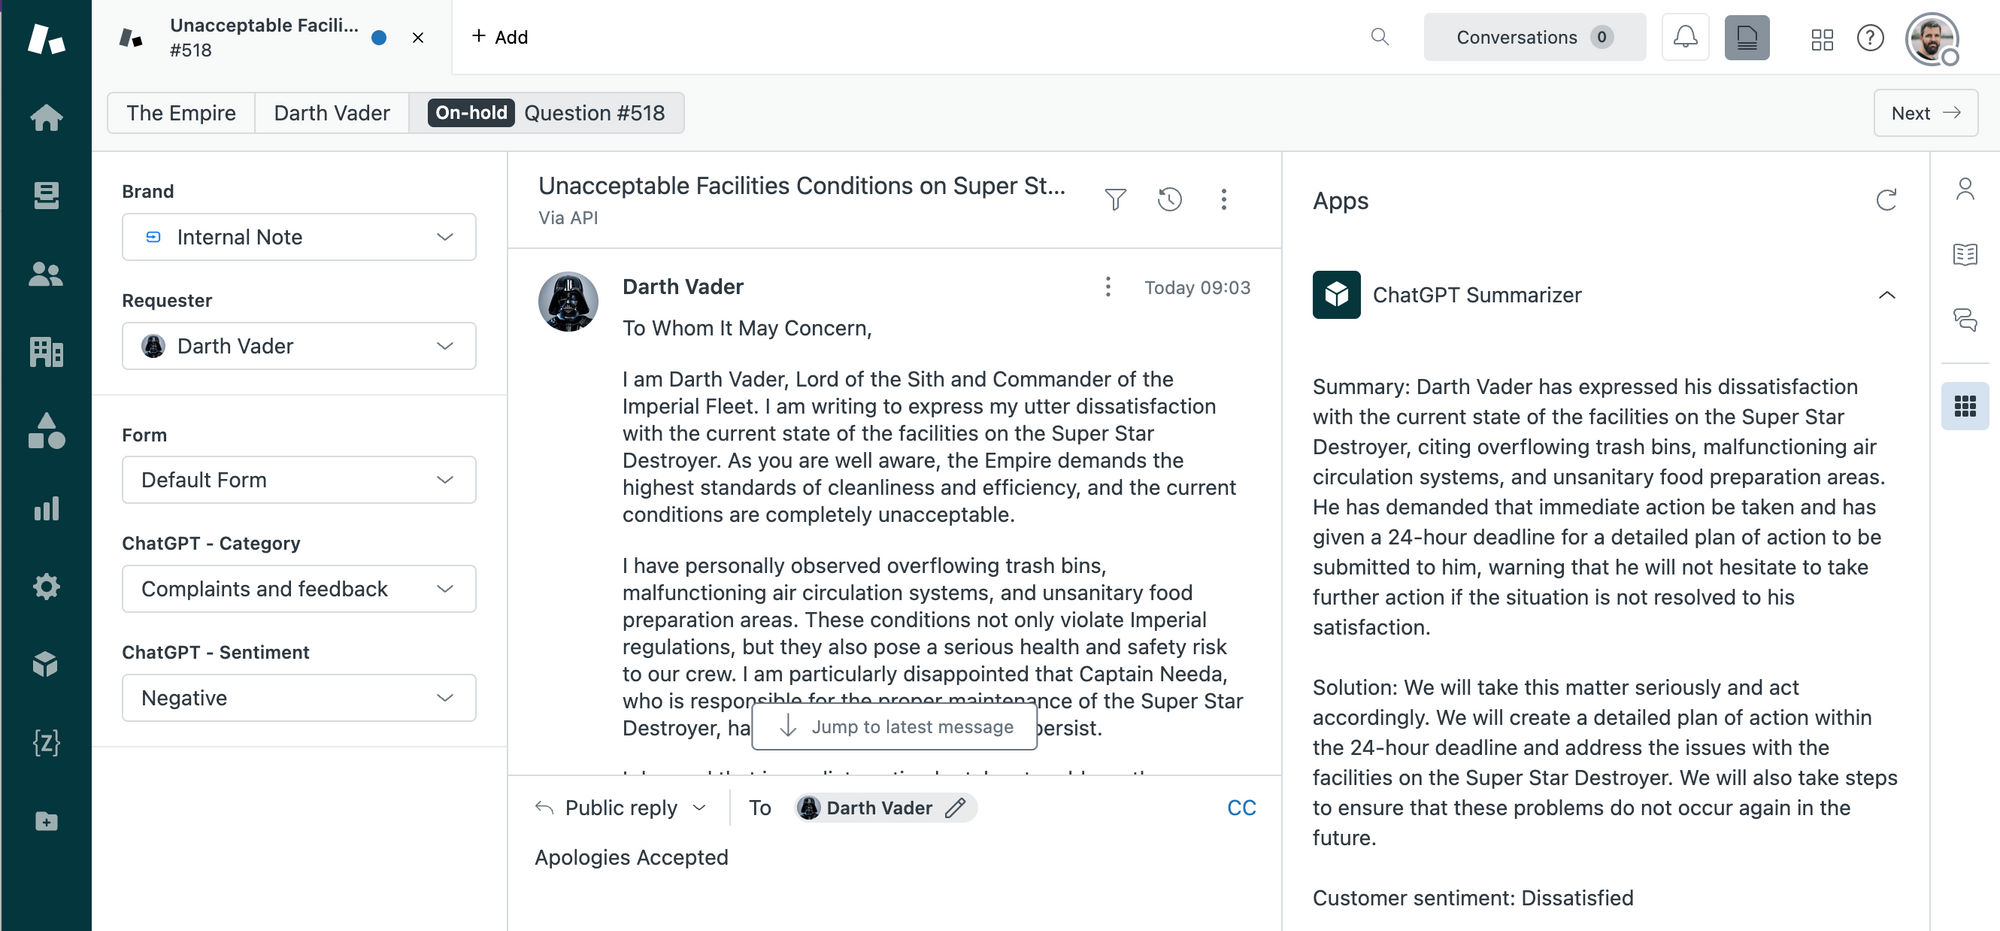
The first impact point has been nicely explained by Zendesk itself in a tutorial on the Zendesk Developer website. They published a full how-to on how to create a sidebar app that summarises a conversation each time a ticket is updated.
This makes it easy for anyone looking at a ticket to get the conversation at a glance.
🔀 Set Ticket Category and Sentiment
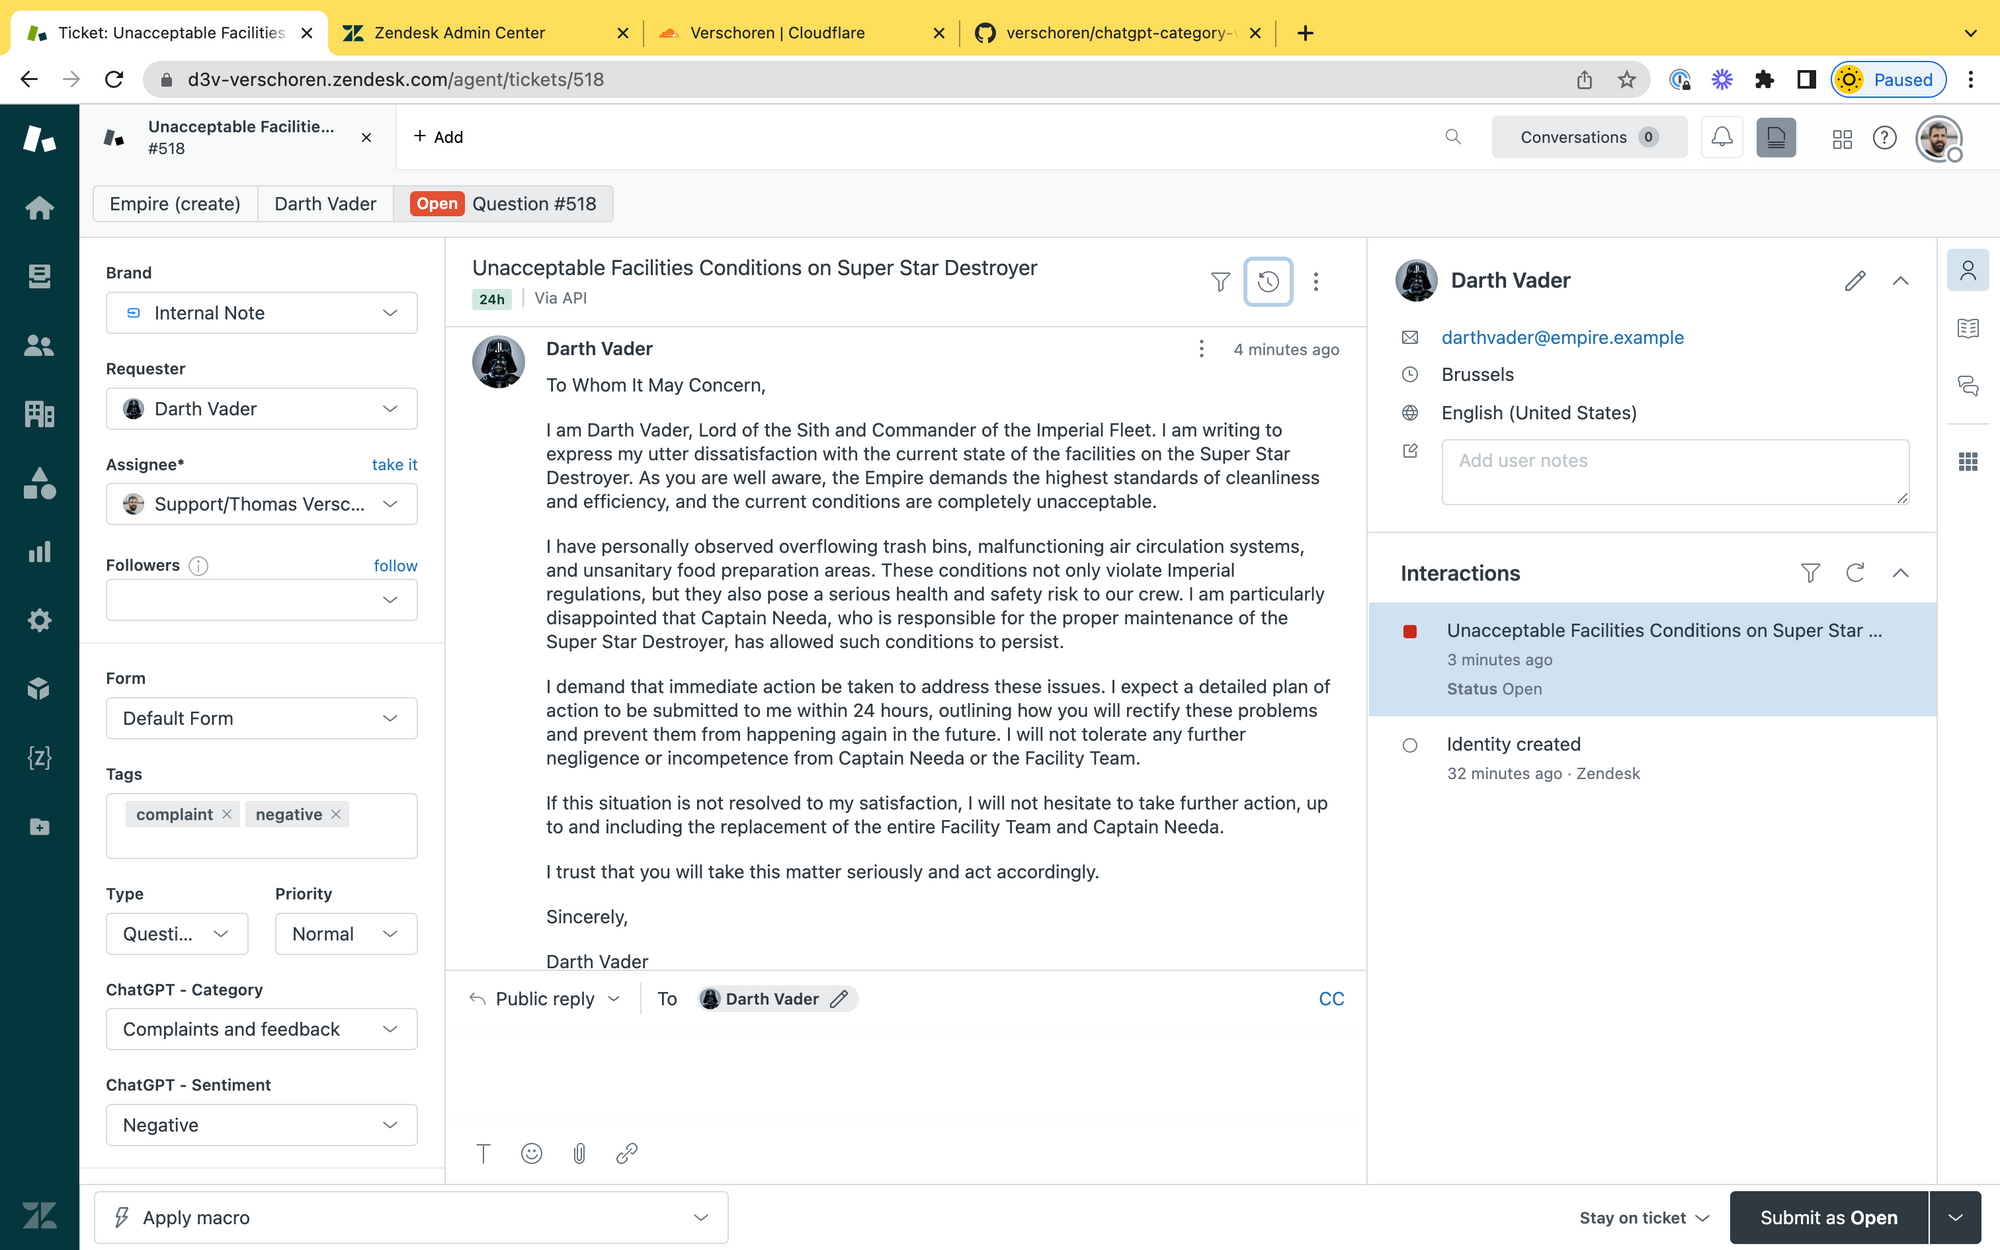
The focus of this article lies on the second impact point: Sorting tickets.
The tutorial below will show you how to build a flow that takes any incoming ticket and assigns a category and sentiment to the ticket, which can then be used to set SLA, priority e.a. in your environment.
Concept
This flow uses a Cloudflare Worker to set the sentiment and category of any created ticket upon ticket creation.
It runs as follows:
- We have a trigger that notifies a webhook whenever a ticket is created
- The webhook submits the ID of the created ticket to a Cloudflare Worker
- The worker uses OpenAI to define a category and sentiment for the ticket and maps it to existing custom field values in your instance.
- We update the ticket with the sentiment and category value.
Read on for the full tutorial.
How to build this flow
Custom Fields
We need two custom fields for this. They can be new Fields, or your existing Category field already in use in your instance.
- Category, a dropdown list of categories you want to map your tickets to.
- Sentiment, a dropdown with Positive, Neutral and Negative sentiments. Or whichever you prefer for your use case.
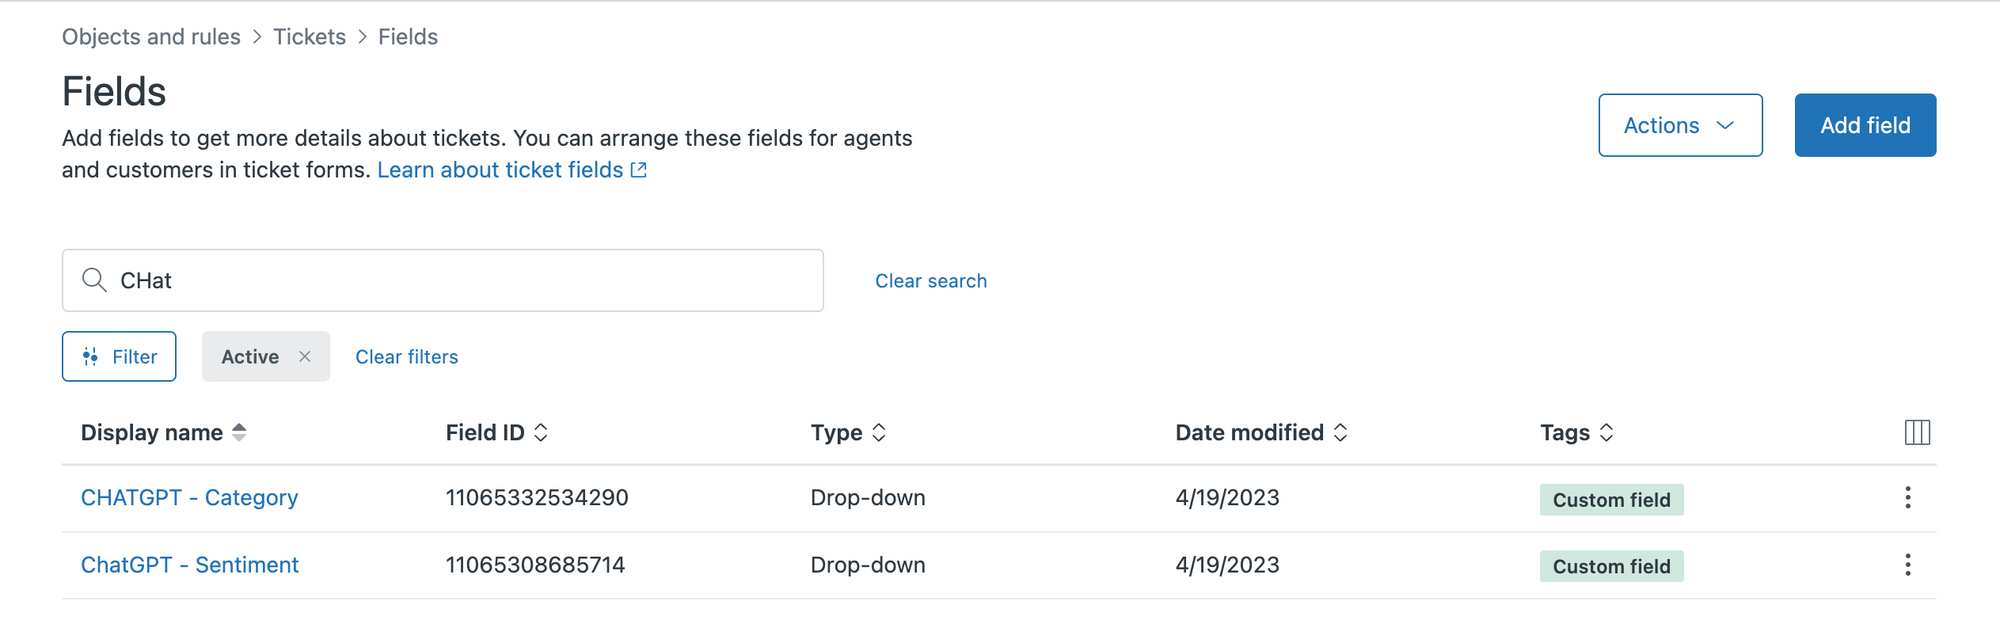
You can tweak these drop-downs to your liking or use case, the important thing is that they have a few values.
Note down the Ticket Field ID for both of these Custom Fields
Worker
The major work of this flow will be done by the Cloudflare Worker. To set it up you can use the repository and copy the worker.js code to a new worker via https://workers.new.
Mine runs at https://chatgpt-category.internalnote.com
 verschoren
Once you've initialised your worker, go to the Deployment Settings and add the following five Environment variables:
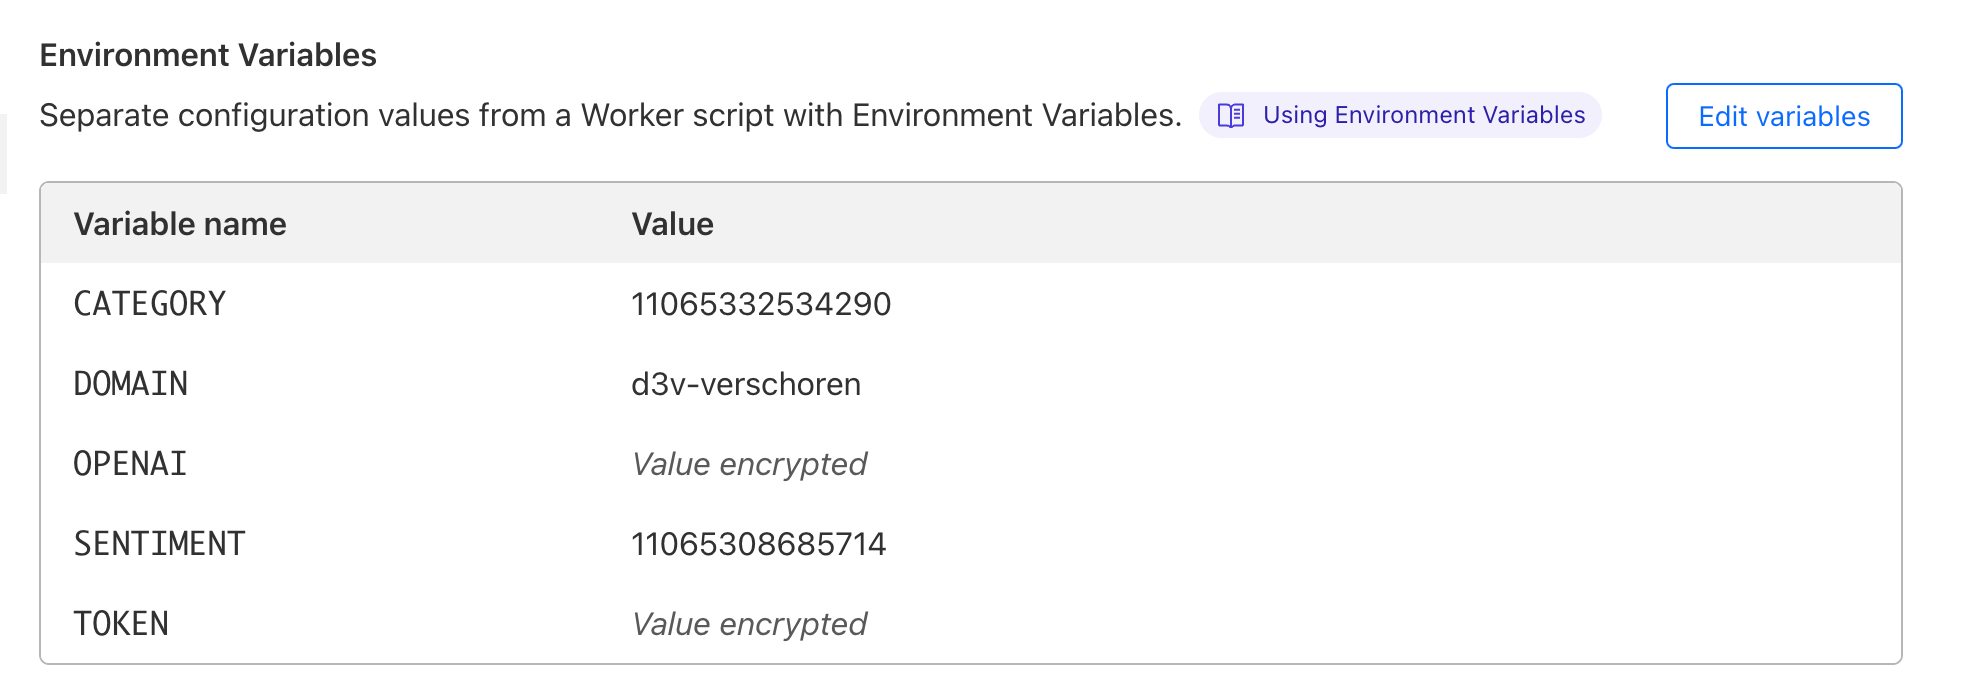
CATEGORYandSENTIMENTare the Custom Fields IDs from the previous step.DOMAINis the subdomain of your Zendesk instanceOPENAIis your OpenAI API Key (This requires a subscription)TOKENis the Base64 Encoded[email protected]:token/zendesk_tokenof your Zendesk instance with[email protected]any admin in your instance, andzendesk_tokena Zendesk API Token.
Get Info
The script starts by extracting the ticket_id from the URL the worker is triggered from.
We then load the category and sentiment values from your custom fields, as well as the ticket description.
export default {
  async fetch(request, env) {
    const path = new URL(request.url).pathname;
    var ticket_id = path.split('/')[1];

    var categories = await getCustomField(env,env.CATEGORY);
    var sentiments = await getCustomField(env,env.SENTIMENT);

    var conversation = await getTicketDescription(env,ticket_id);

    // ...
  }
}
Since the API has a limit of ~4K tokens, we use a bit of code to cleanup the description first:
var description = results.ticket.description;
 var description = results.ticket.description;

  //Remove HTML Code to trim description
  const regex = /<[^>]*>/g;
  const cleaned = description.replace(regex, " ");

  //The limit is 4097 tokens for the API with ~4 characters per token.
  //So let's trim the description to 10k characters to be safe.
  const trimmed = cleaned.substr(0, 10000);

  return trimmed;
Prompt
Once we've got the basic information, we generate two prompts we'll send to OpenAI. These prompts include the ticket field values and ticket description.
Map the conversation below to this JSON list of categories and return only the value (but not the name or raw_name) of the best matching category.
You can tweak this prompt to your liking but for me this one worked the most stable.
var category_prompt = categoryPrompt(categories,conversation);
var sentiment_prompt = sentimentPrompt(sentiments,conversation);

function categoryPrompt(categories,conversation){
  return `
    Map the conversation below to this JSON list of categories and return only the value (but not the name or raw_name) of the best matching category.

    ${conversation}

    Categories:
    ${JSON.stringify(categories)}
  `
}

function sentimentPrompt(sentiments,conversation){
  return `
    Map the conversation below to this JSON list of sentiments and return only the value (but not the name or raw_name) of the best matching sentiment.

    ${conversation}

    Sentiments:
    ${JSON.stringify(sentiments)}
  `
}
Get OpenAI Response
Once we have two good prompts to get the sentiment and category for a ticket, we'll forward those to OpenAI to get the AI to return the best match for the categories and sentiments for the given description.
Note we're using the text-davinci-003 model here since we only need a single text prompt to be returned and don't require a conversation with ChatGPT and require deeper understanding of long text.
var category = await openAIRequest(env,category_prompt);
var sentiment = await openAIRequest(env,sentiment_prompt);

async function openAIRequest(env,prompt){
  const request = {
    model: "text-davinci-003",
    prompt: prompt,
    temperature: 0.6,
    max_tokens: 200,
  }
  const url = "https://api.openai.com/v1/completions";

  const init = {
      body: JSON.stringify(request),
      method: "POST",
      headers: {
        "content-type": "application/json;charset=UTF-8",
        "authorization": "Bearer " + env.OPENAI
      },
    };
  const response = await fetch(url, init);
  const results = await response.json();
  return results.choices[0].text.trim();
}
Update Ticket
And finally, once we got a category and sentiment we can update the Zendesk Ticket with the new values of the Category and Sentiment dropdown fields.
if (category && sentiment){
  await updateTicket(env,category,sentiment,ticket_id);
  return new Response("Ticket updated: " + category+' '+sentiment)
} else {
  return new Response('Nothing could be mapped');
}

async function updateTicket(env,category,sentiment,ticket_id){
  const url = `https://${env.DOMAIN}.zendesk.com/api/v2/tickets/${ticket_id}.json`;
  const ticket = {
    "ticket": {
      "custom_fields": [
        {"id": env.CATEGORY, value: category},
        {"id": env.SENTIMENT, value: sentiment},
      ]
    }
  }

  const init = {
      body: JSON.stringify(ticket),
      method: "PUT",
      headers: {
        "content-type": "application/json;charset=UTF-8",
        "authorization": "Basic " + env.TOKEN
      },
    };
  const response = await fetch(url,init);
  const results = await response.json();
  return results;
}You can finetune the script to handle those scenario's, or, ignore it like it did. In the case the AI can't figure out a category or sentiment we'll let the agent handle those tickets when they update the ticket.
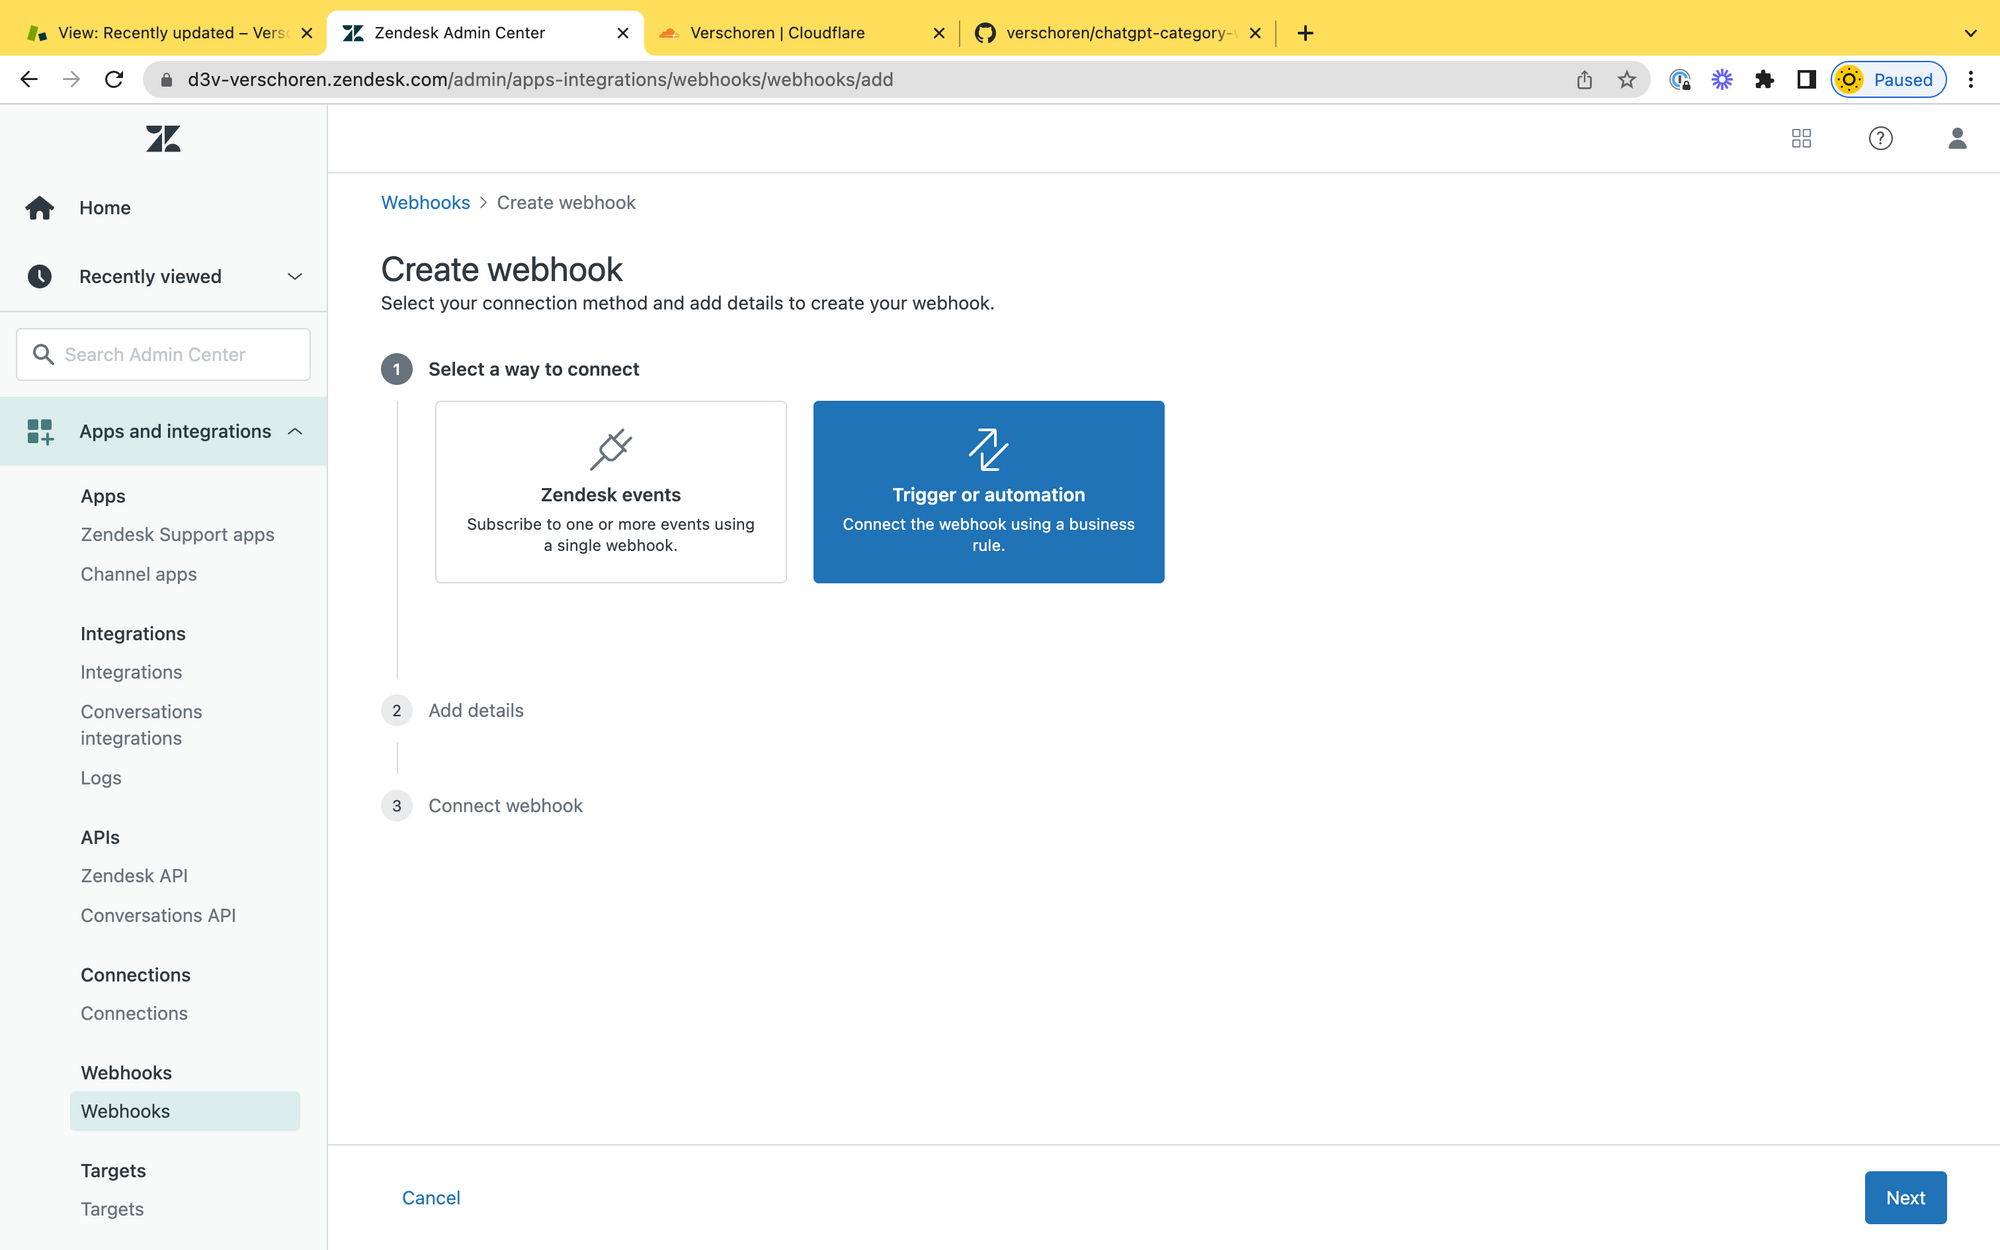
Webhook
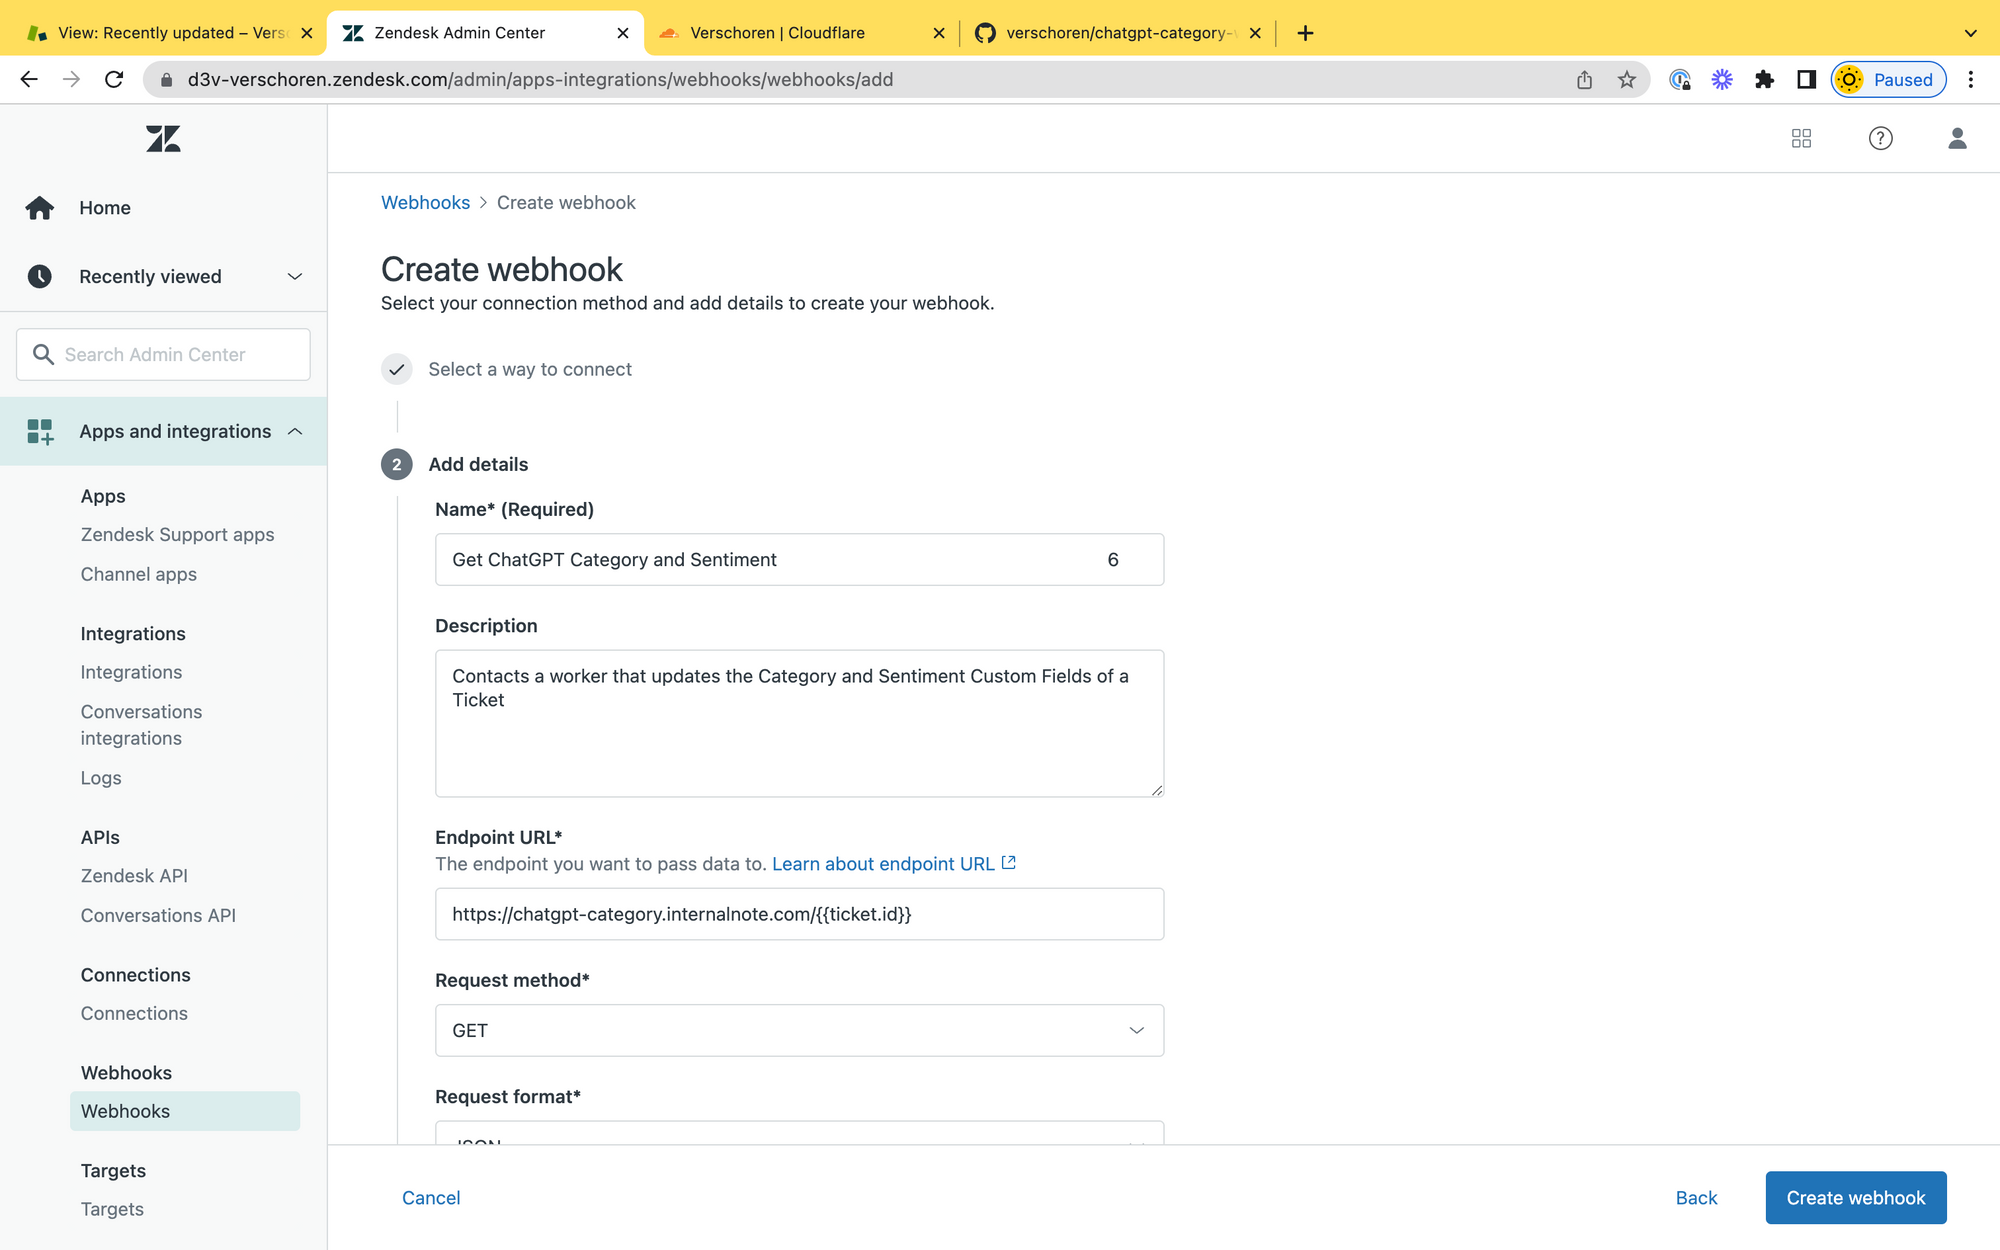
Create a new Webhook that reacts to a Trigger.
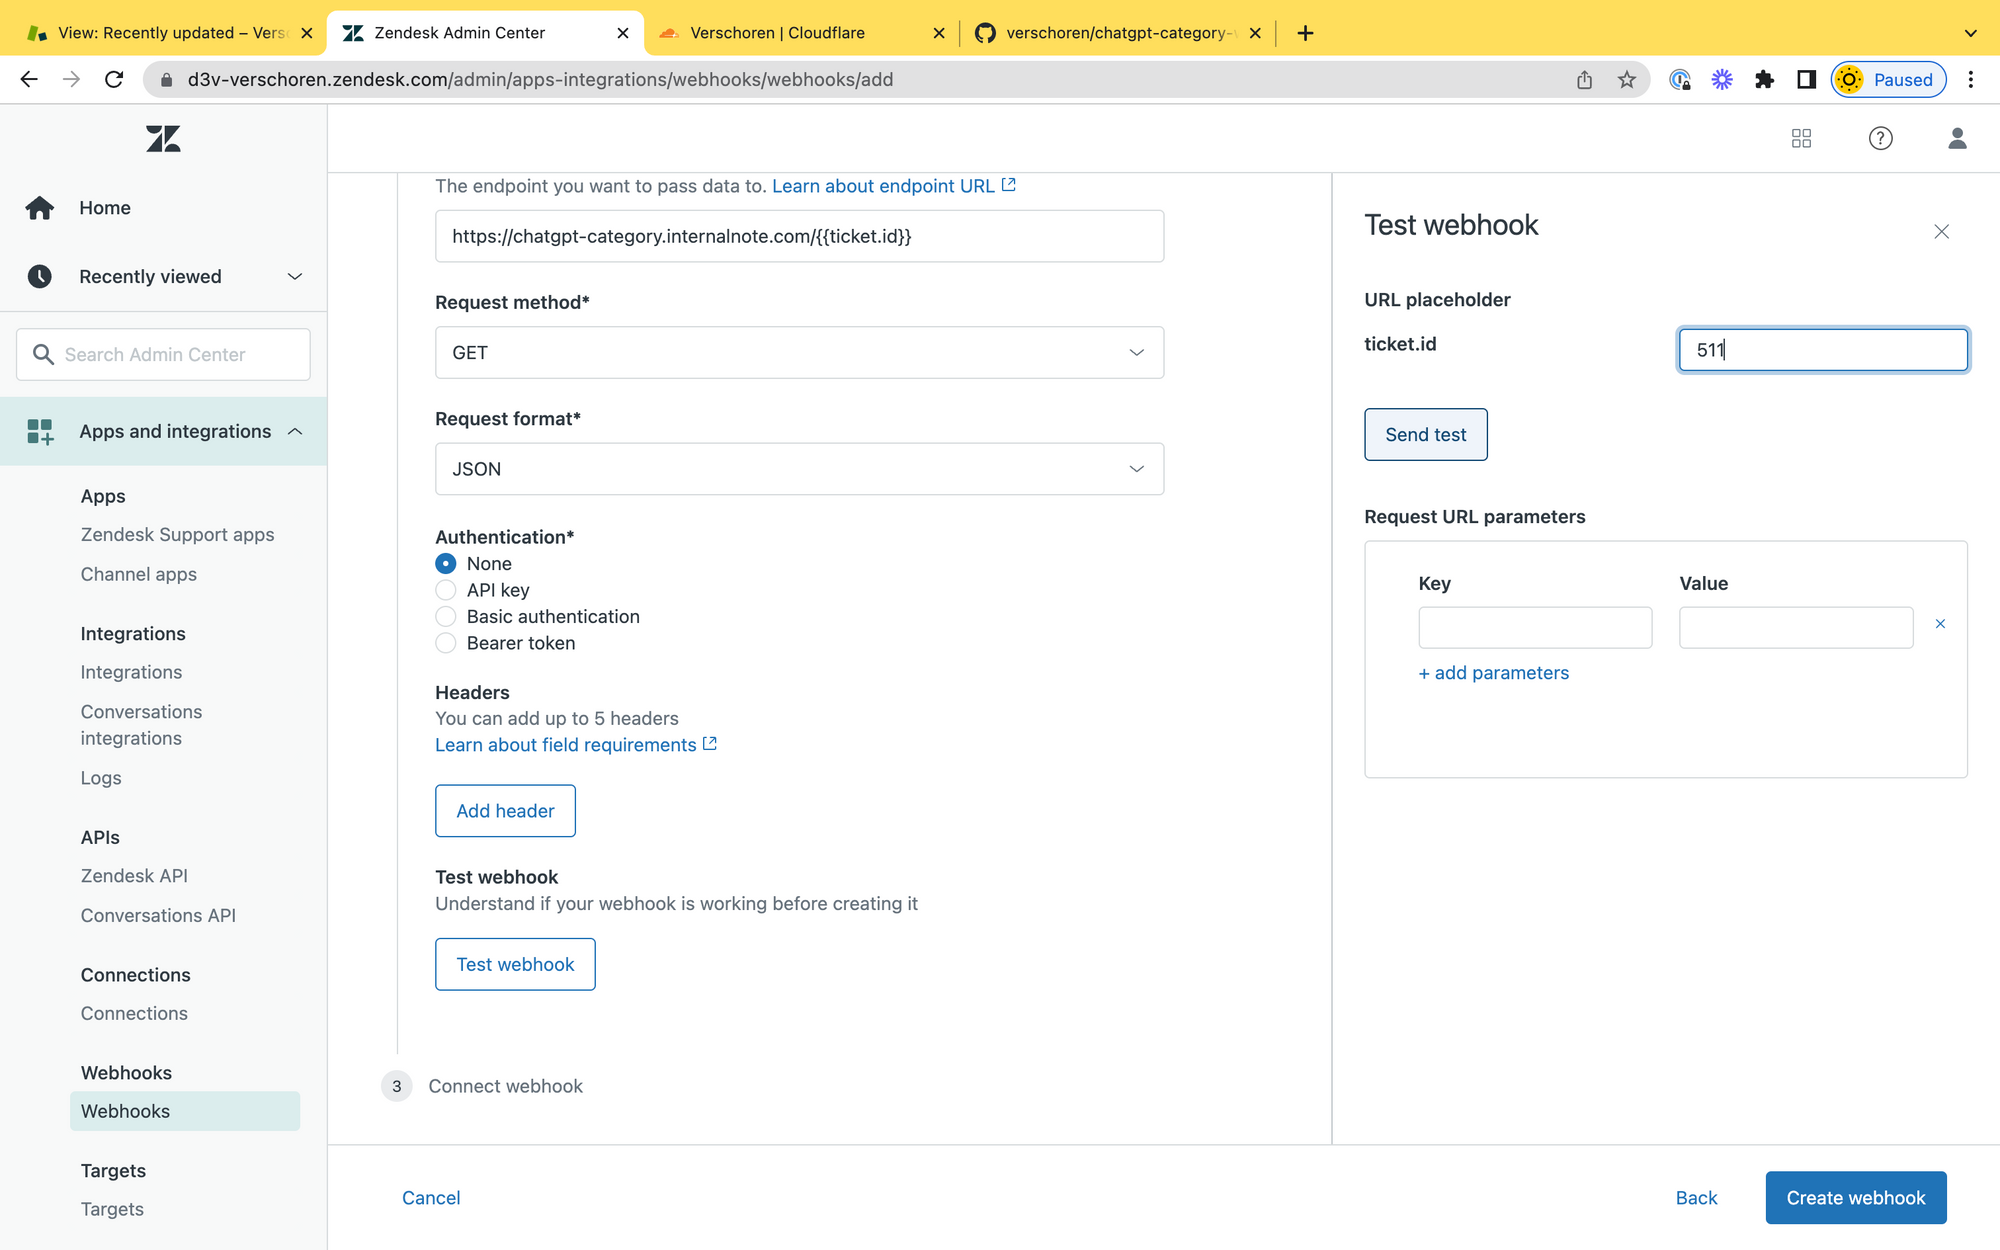
Set the Endpoint URL to the url of your worker, followed by the Ticket ID: https://chatgpt-category.internalnote.com/{{ticket.id}}
Leave the other Authentication and Headers options as is. If you've setup the worker correctly you'll get a 200 OK status and a Ticket Updated message after testing the Webhook.

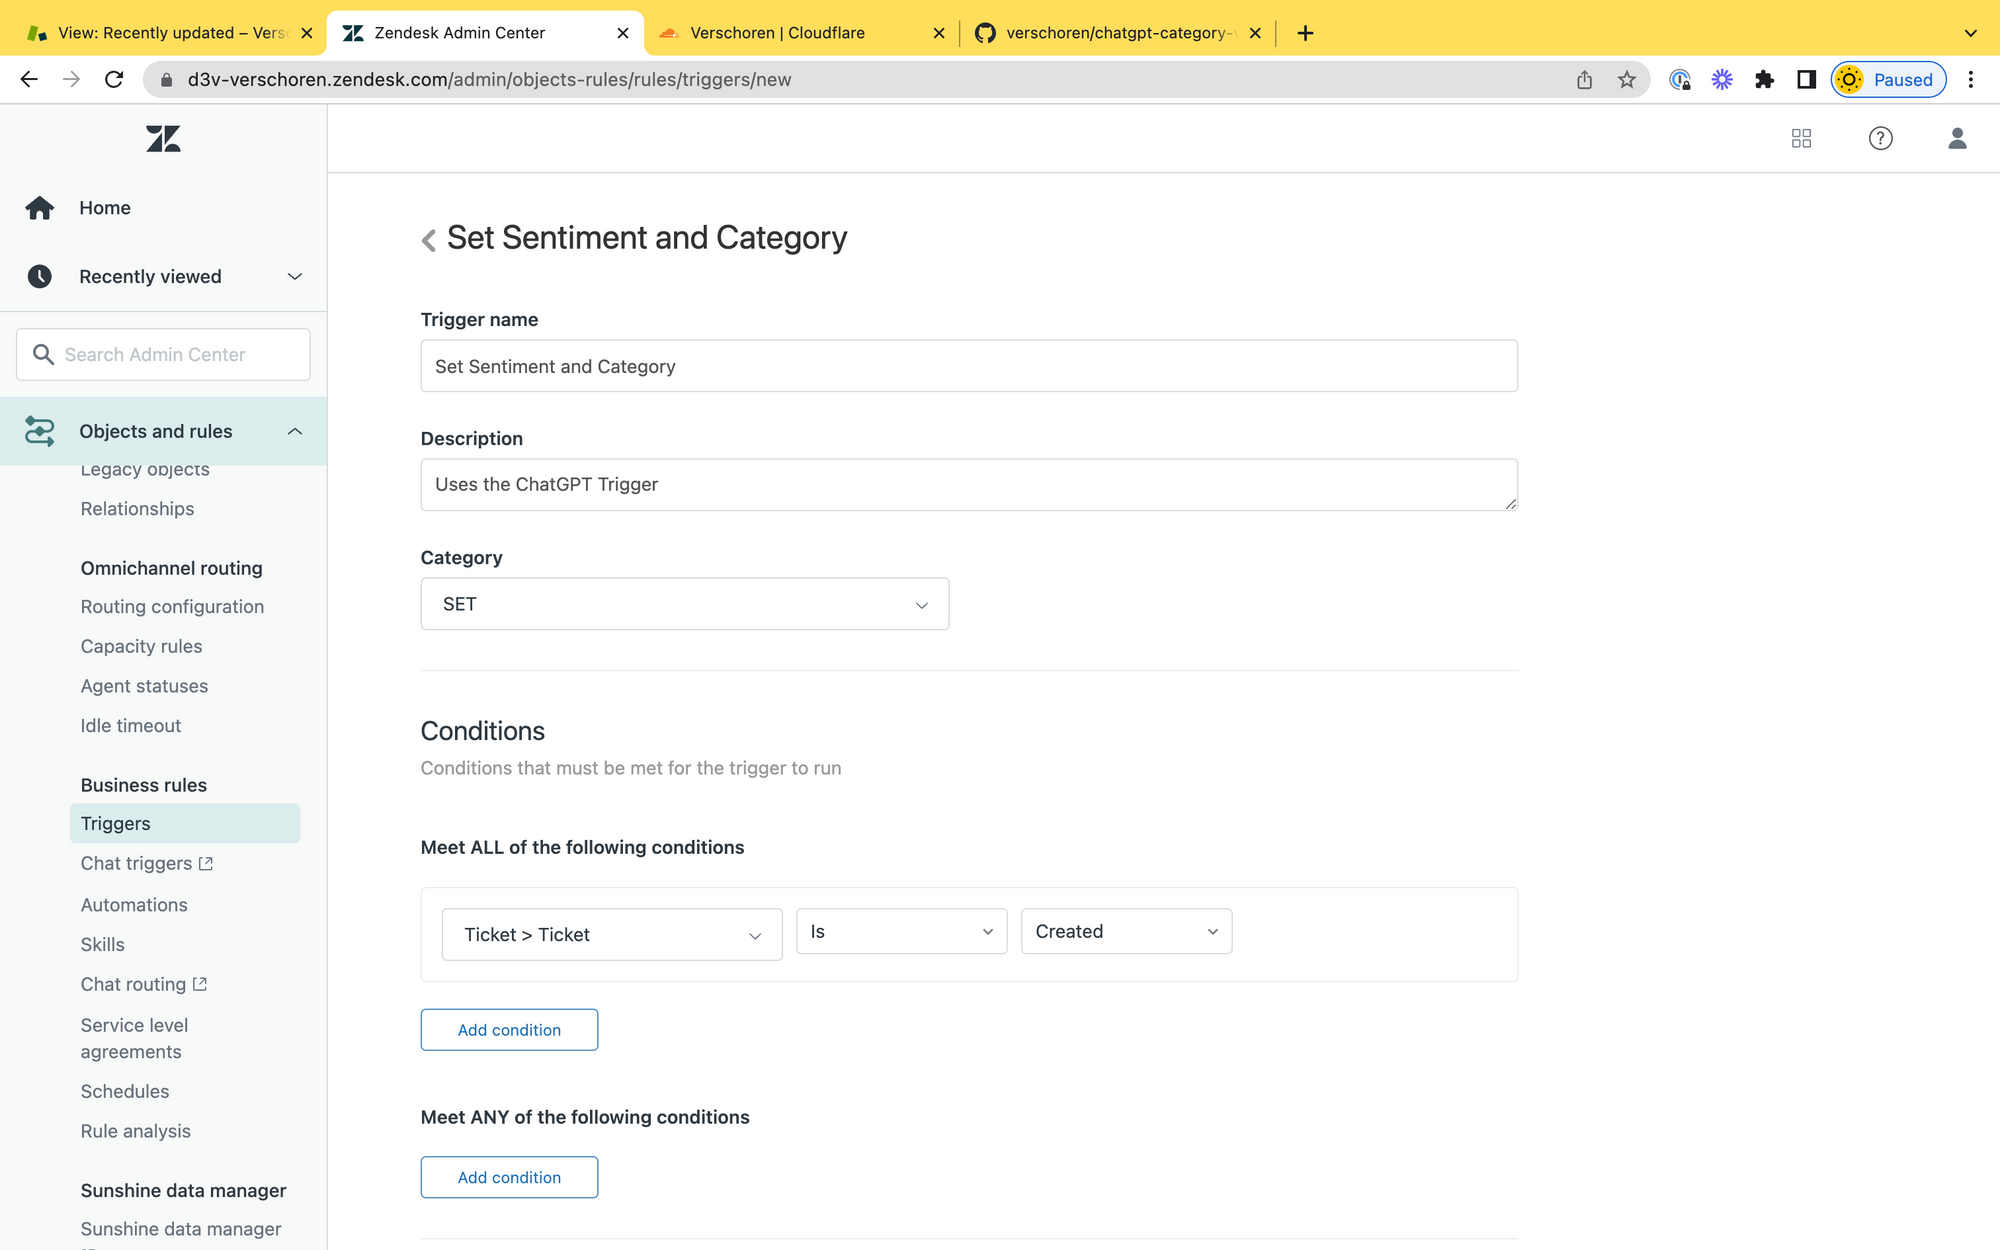
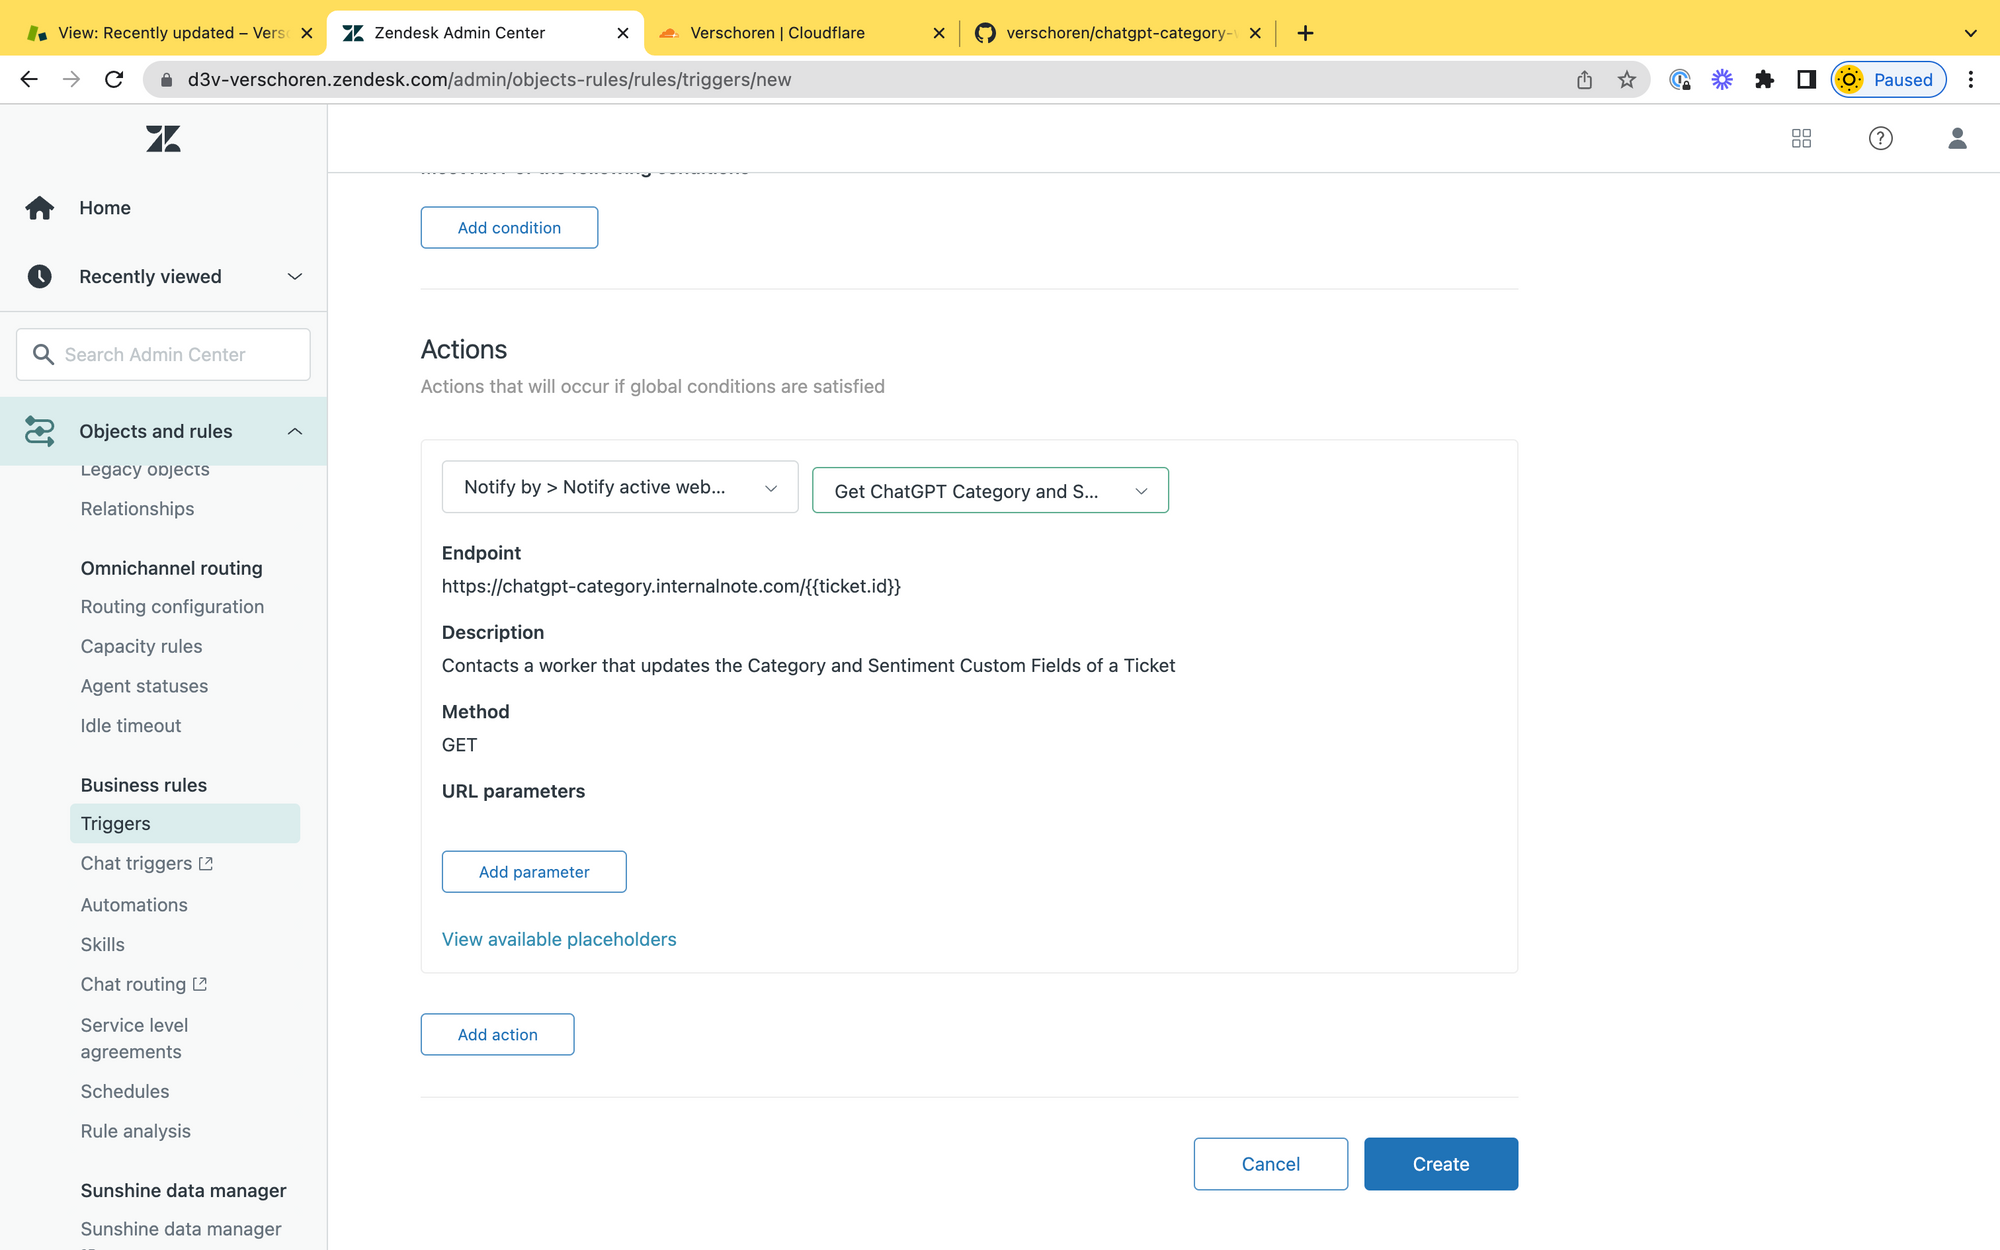
Trigger
To finalise the setup we need to notify the webhook each time a ticket is created. You can do this by adding a new Trigger that fires when a ticket is created.
Set the Actions to Notify Active Webhook and select your Webhook. Remote any URL parameters and leave the rest of the options as is.
Next Steps
Now that every incoming ticket gets automatically assigned to the right category and sentiment you could use this data to:
- Create triggers that respond to changes in Category and assign the right priority or group to a ticket
- Update ticket priority based on the sentiment
- Have a trigger that calls the webhook each time the customer replies to keep the sentiment updated to the right one
- Create a report that maps sentiment and SLA
Conclusion
This article showed one (or thanks to Zendesk, two) use cases for ChatGPT to automate and improve your Zendesk Workflows.
This are, on purpose, two flows where we only have an internal impact without any text going to the customer.
When using ChatGPT to generate replies and comments I'm still hesitant. Making sure the facts, tone of voice and quality of the replies aligns with your company values and processes is complex, and I feel it's still early days for fully automated customer interactions.
However, for a future article I'm exploring a flow on summarising Guide Articles in Agent replies.
Also keep an eye on the YouTube channel from Premium Plus. My team there has been building some pretty cool apps with ChatGPT too!