Connecting AI Agents Essentials and Advanced to channels
Zendesk improved AI Agent management by introducing a new channel manager UI for AI Agents Advanced, removing the need for Switchboard API use. It simplifies linking bots to channels, especially in mixed or transitional setups, but key inconsistencies between Essentials and Advanced remain.

On this page
Zendesk support setups have evolved. Most teams now rely on some form of automation—whether it’s the classic Flow Builder, AI Agent Essentials with generative replies, or the moreAI Agent Advanced (powered by Ultimate). Each approach offers different levels of control and capability, but the goal is the same: resolve more tickets, faster.
As support environments grow, so does the need for flexibility. You might route one AI Agent to social media channels, another to logged-in users on your website. Zendesk lets you mix and match bots across brands, audiences, and channels—but only if you know where to configure them.
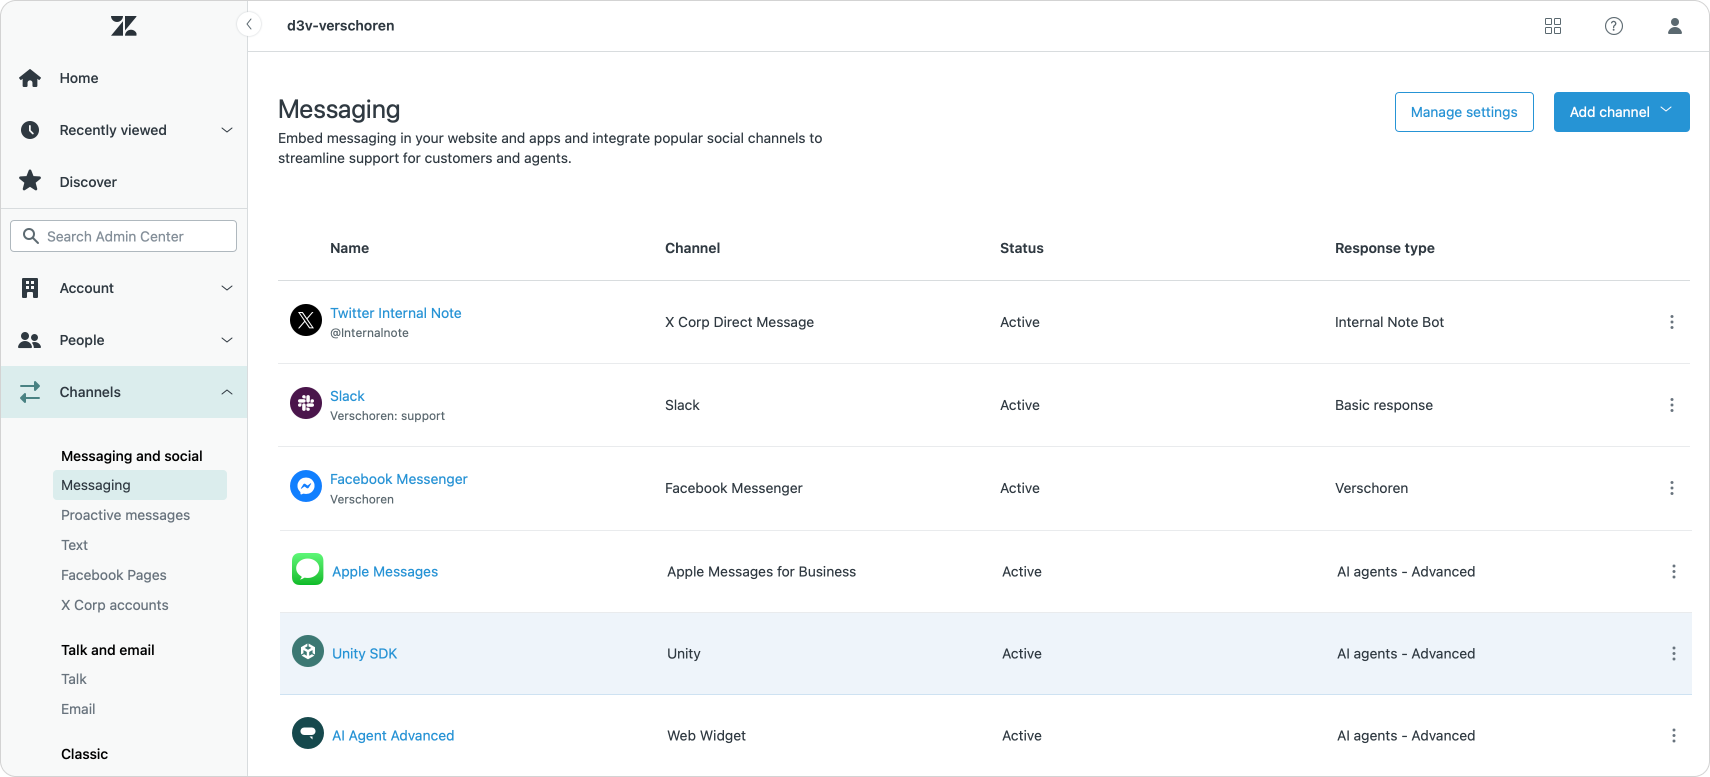
Zendesk now displays a “Response type” for each messaging channel in Admin Center, making it easier to see what kind of automation is in place. Here’s how to read the labels:
- Basic – No AI Agent is linked. The system asks for name, email, or other input before escalating to an agent. This is configured in the channel’s settings.
- AI Agent Advanced – The channel is linked to an Ultimate-powered bot. Responses are managed entirely outside Zendesk, through the AI Agent’s own dashboard.
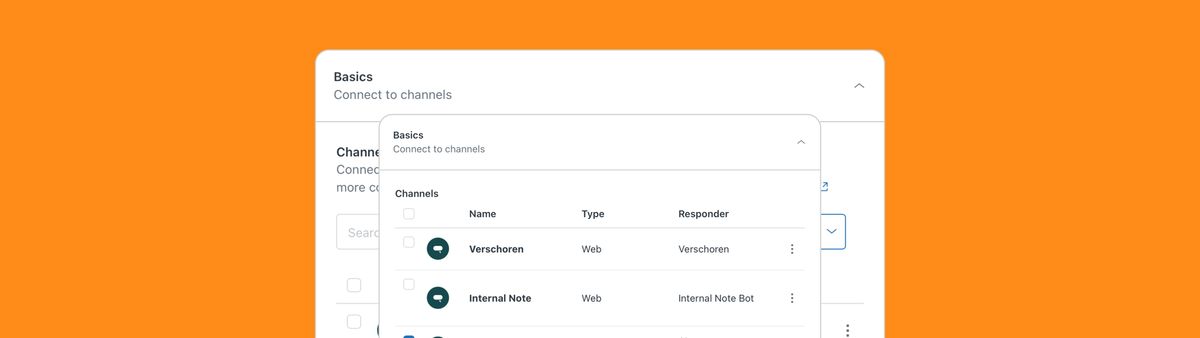
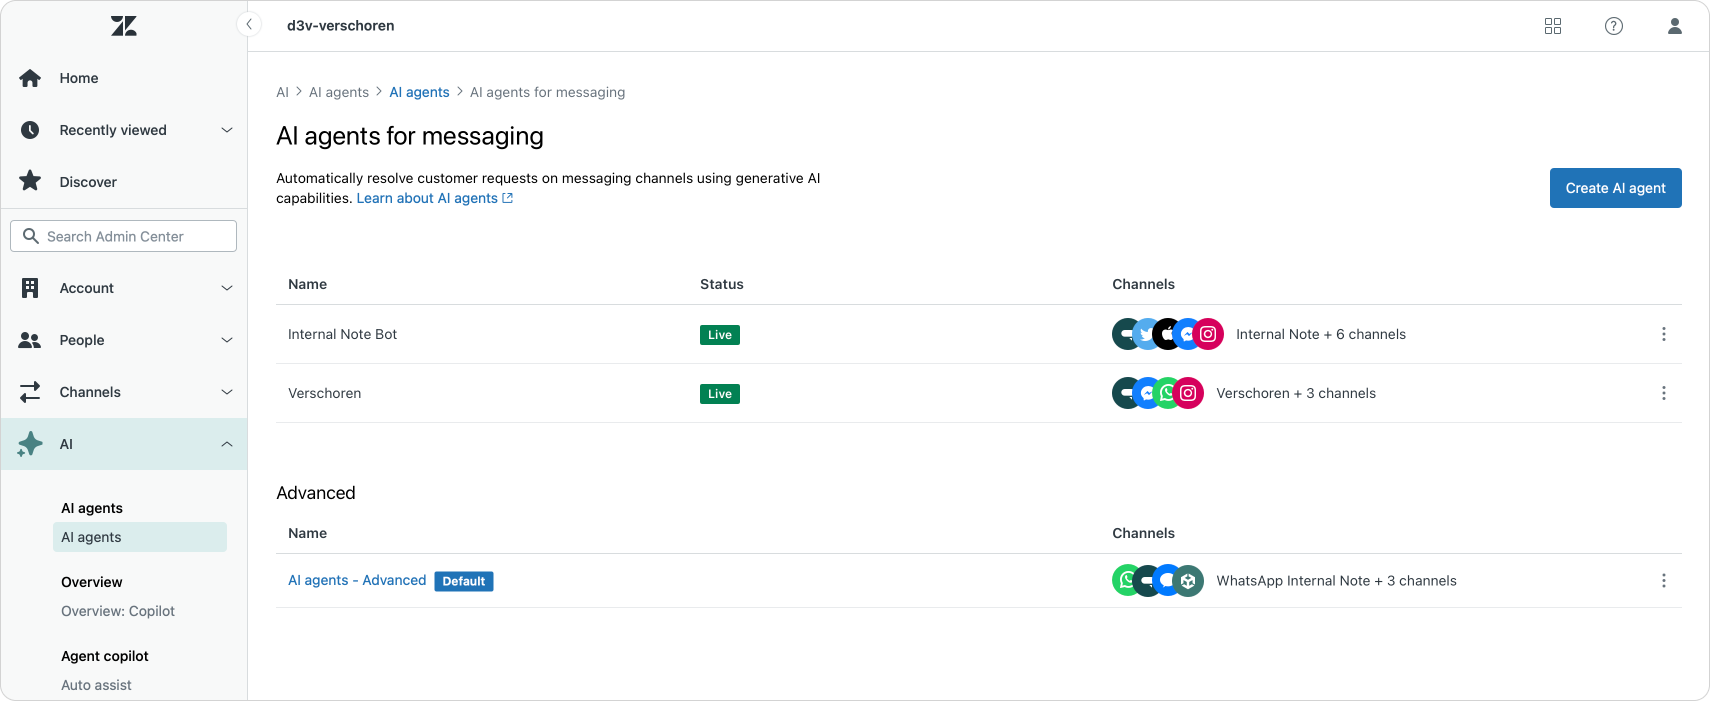
- AI Agent Essentials – Essentials bots appear under their custom names in the list. You manage them from within Zendesk, including assigning which channels they handle.
The linking process differs depending on whether you’re using Essentials or Advanced bots. Let’s break it down.
Linking AI Agents Essentials to channels
Essentials bots—whether powered by generative replies or classic Flow Builder—are managed entirely from within Zendesk. To assign channels to a specific bot:
- Go to Admin Center | AI | AI Agents
- Select the bot you want to configure
- Open the Settings tab
- Choose which channels should use this bot
Changes apply instantly, and you can return to this panel at any time to adjust which channels are connected.
Linking AI Agents Advanced to channels
AI Agent Advanced (powered by Ultimate) connects to Zendesk through the Sunshine Conversations platform. Sunshine acts as the middleware between your customer-facing channels, your AI Agent, and Zendesk’s ticketing system.
Unlike Essentials bots, Advanced bots are managed outside Zendesk. The actual conversation routing is configured through Sunshine Conversations—and until recently, that required direct API configuration using the Switchboard.
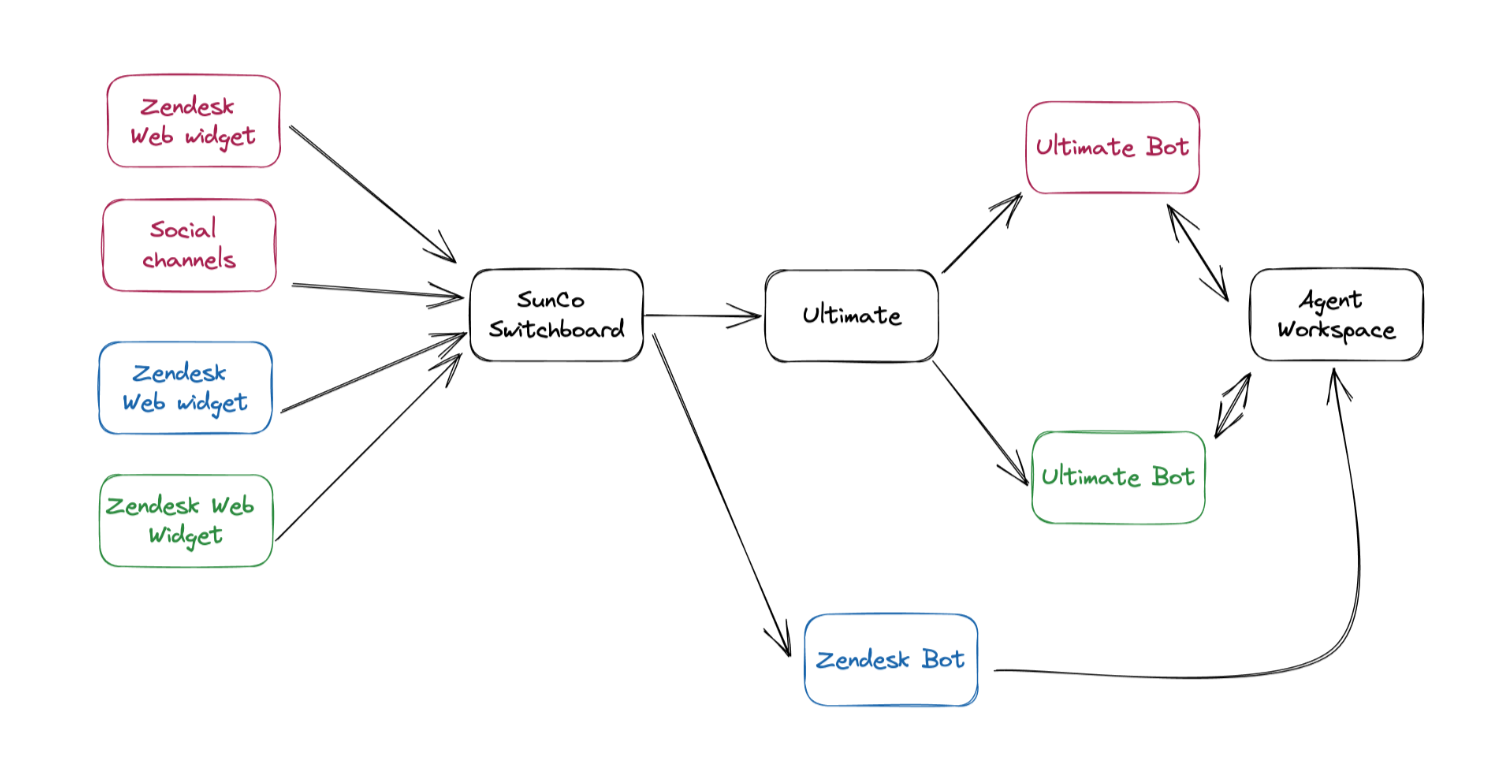
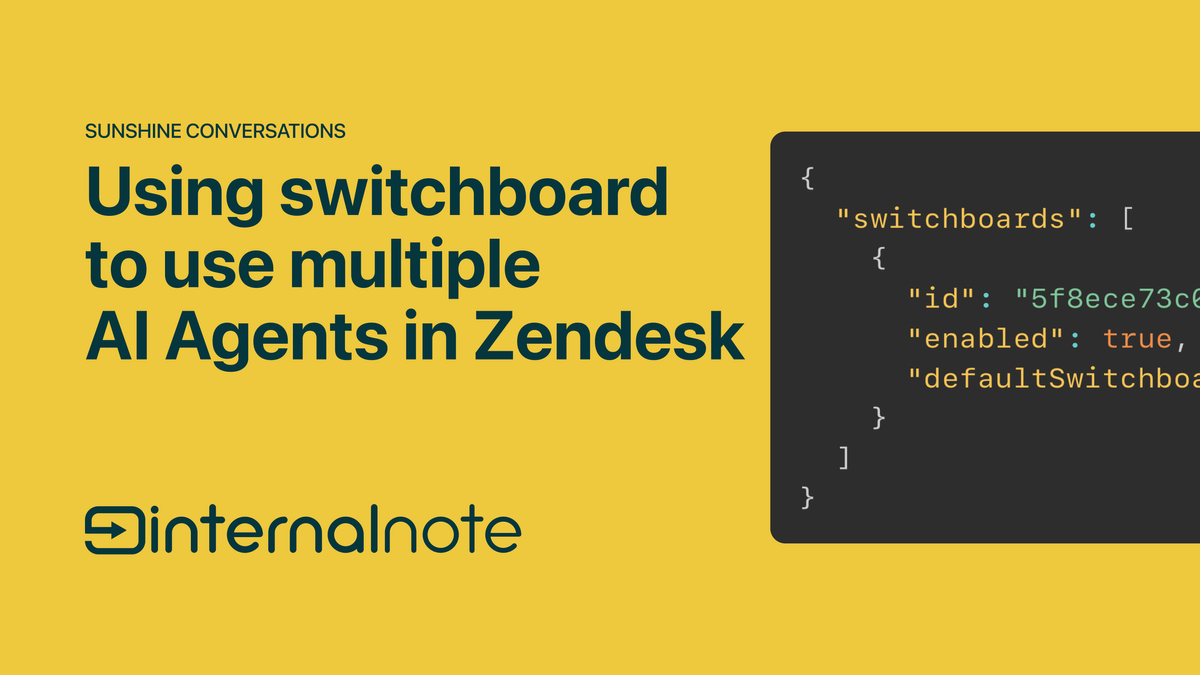
Using the Switchboard API to assign bots
Before Zendesk introduced UI-based linking, assigning Essentials and Advanced bots to channels required manual configuration via the Sunshine Conversations API. This setup relies on the Switchboard, which acts as a traffic controller for incoming messages.
Each Switchboard contains two key elements:
switchboardIntegrations– These define the bots or systems that can respond to a conversation (e.g. Essentials, Advanced, Agent Workspace).integrations– These are your actual messaging channels (like web widgets or social accounts), each with a defaultResponder assigned.
Here’s a simplified example:
{
    "switchboardIntegrations": [
        {
            "name": "zd-agentWorkspace",
            "integrationId": "5f8ecbf2e2059d2c993eab02",
            "integrationType": "zd:agentWorkspace"
        },
        {
            "name": "answerBot",
            "integrationId": "5f8ece75e2059d2c9995186b",
            "integrationType": "zd:answerBot"
        },
        {
            "name": "ultimateaibot",
            "integrationId": "670646eeec1612bbbc225995",
            "integrationType": "ultimate"
        }
    ]
}
{
"integrations": [
{
"id": "61ea8723f4aa6100eb8a69e5",
"type": "web",
"displayName": "Internal Note",
"defaultResponder": {
"integrationId": "5f8ece75e2059d2c9995186b",
"integrationType": "zd:answerBot"
}
},
{
"id": "6706411852c663af3215a44f",
"type": "web",
"displayName": "AI Agent Advanced",
"defaultResponder": {
"integrationId": "670646eeec1612bbbc225995",
"integrationType": "ultimate"
}
}
]
}In this example:
- The Internal Note web widget is routed to an Essentials bot (
zd:answerBot). - A second widget is assigned to an Advanced bot (ultimate).
By editing these responder assignments, you can fine-tune which bot answers on which channel—ideal for migrations, brand separation, or gradual rollouts.
If you want a deeper dive, I’ve written a full tutorial here:
Why You Might Mix Essentials and Advanced Bots
Using the Switchboard API to assign different bots per channel isn’t just a technical trick—it enables flexible rollout strategies. For example:
- Staged migration – Roll out AI Agent Advanced gradually, starting with a low-risk channel while maintaining Essentials on others.
- Brand-specific logic – Assign different bots to different brands, tailoring tone, features, or escalation logic by audience.
- Feature testing – Run new flows on specific channels before expanding.
This flexibility makes Switchboard a key tool for evolving your Zendesk setup without disruption.
As more and more customers migrate from legacy bots towards more powerful solutions like AI Agents Advanced, it becomes imperative that doing those updates to channels is easy to handle. Hiding this functionality behind an API creates a barrier for regular Zendesk Admins to make those changes themselves.
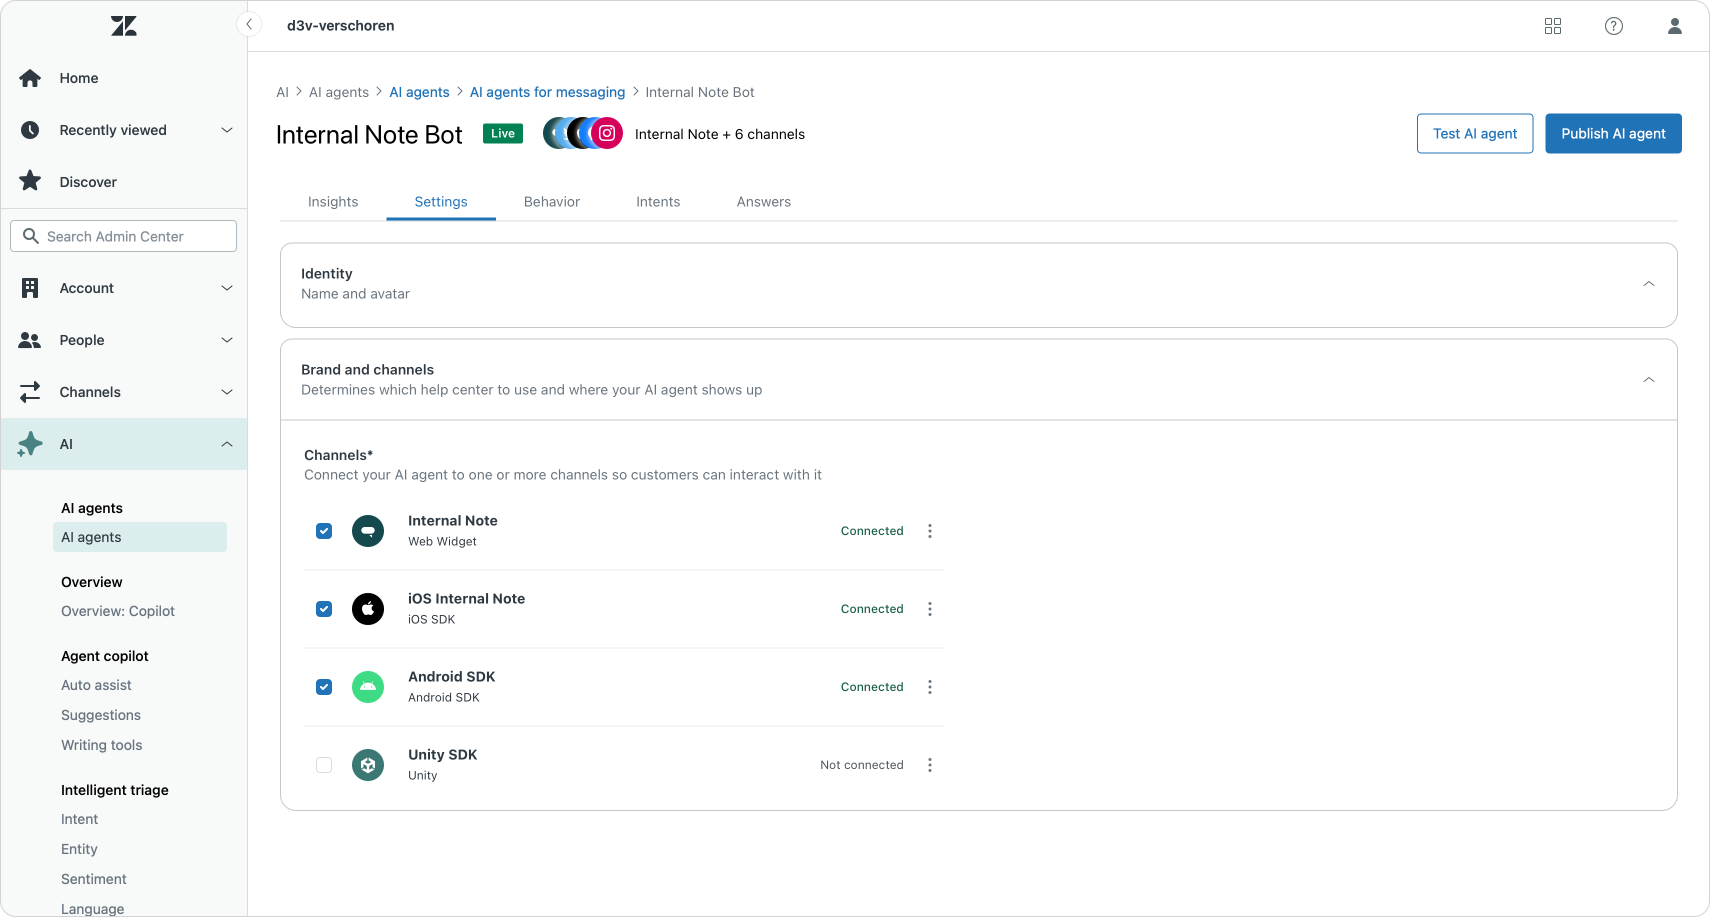
The new channel manager
Zendesk recently overhauled Admin Center, introducing a unified AI section that consolidates bot configuration in one place. One of the most helpful additions is the Channel Manager for AI Agent Advanced.
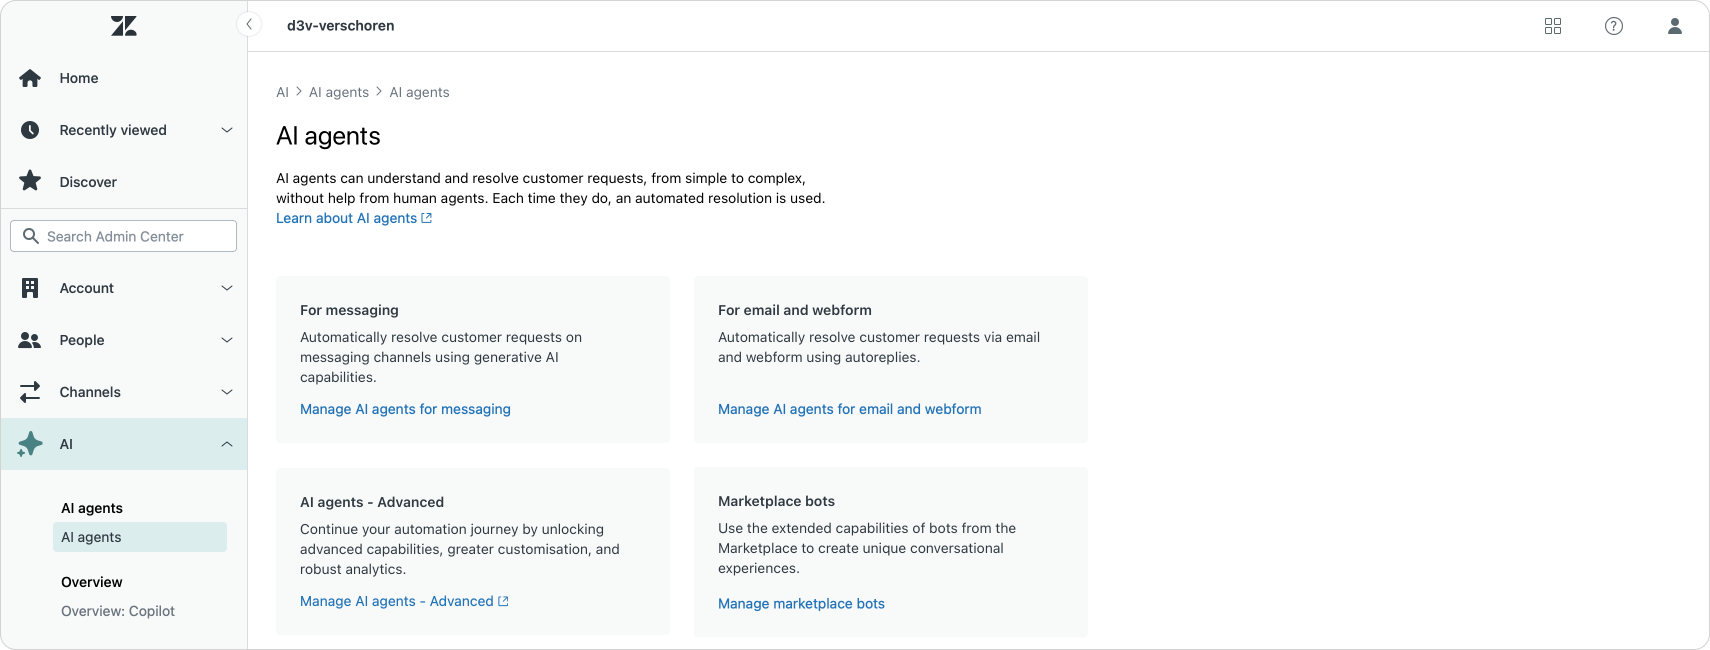
Here’s what’s new:
- You can now select which channels are linked to an Advanced bot directly from the Zendesk UI.
- Previously, the only option was to disconnect a bot entirely—anything more required manual API changes via Switchboard.
- Behind the scenes, the Channel Manager updates the same defaultResponder fields as the Switchboard API.
This turns a once-complex API process into a simple point-and-click workflow, giving admins instant visibility into which channels are connected to which bots.
Essentials bots remain unchanged: you still assign channels through their individual settings panels, as described earlier.

What about multiple AI Agents Advanced?
Linking a channel to AI Agent Advanced via the new interface sends all incoming messages through the Ultimate platform. But what if you’ve got more than one Advanced bot?
To handle this, you’ll use Sunshine Conversations routing rules within the Ultimate dashboard.
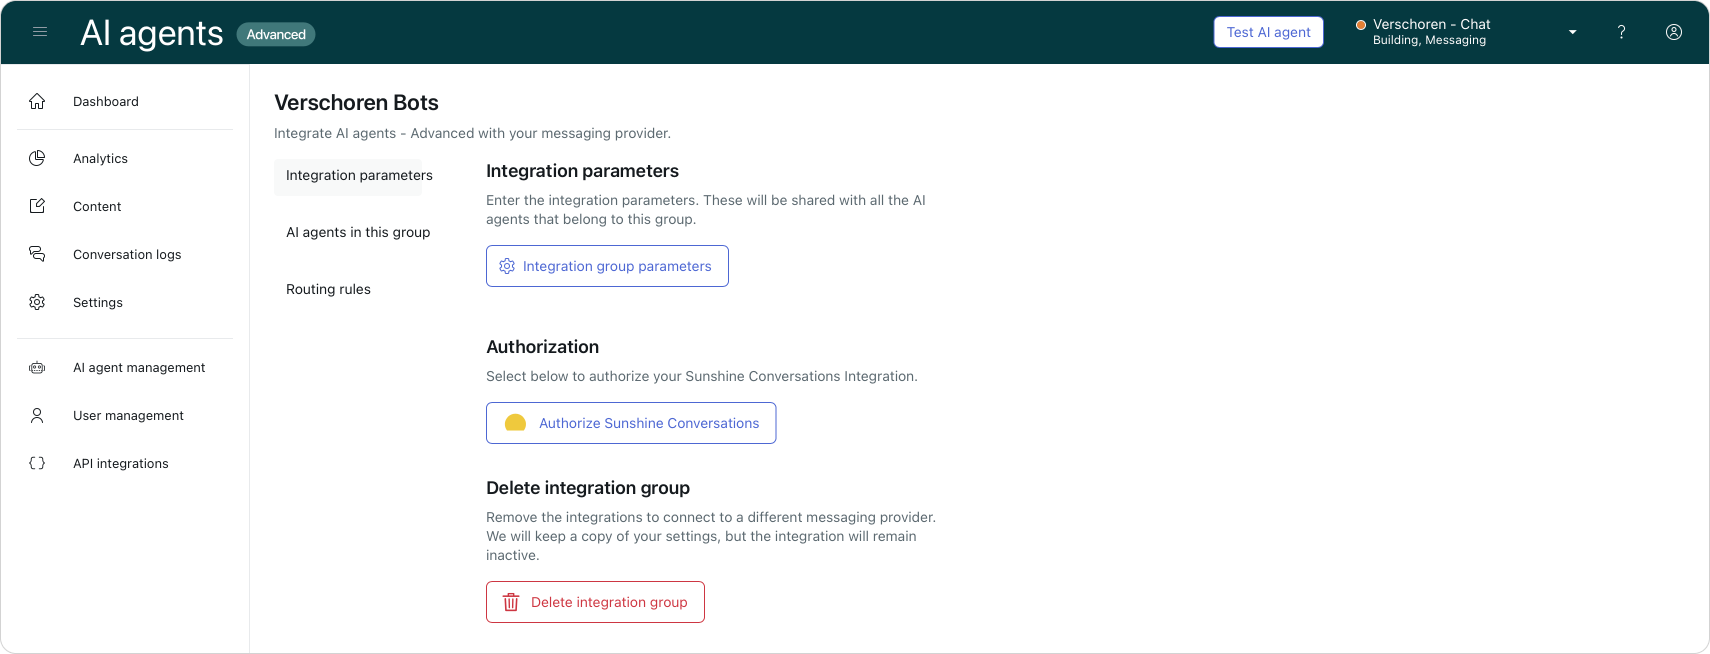
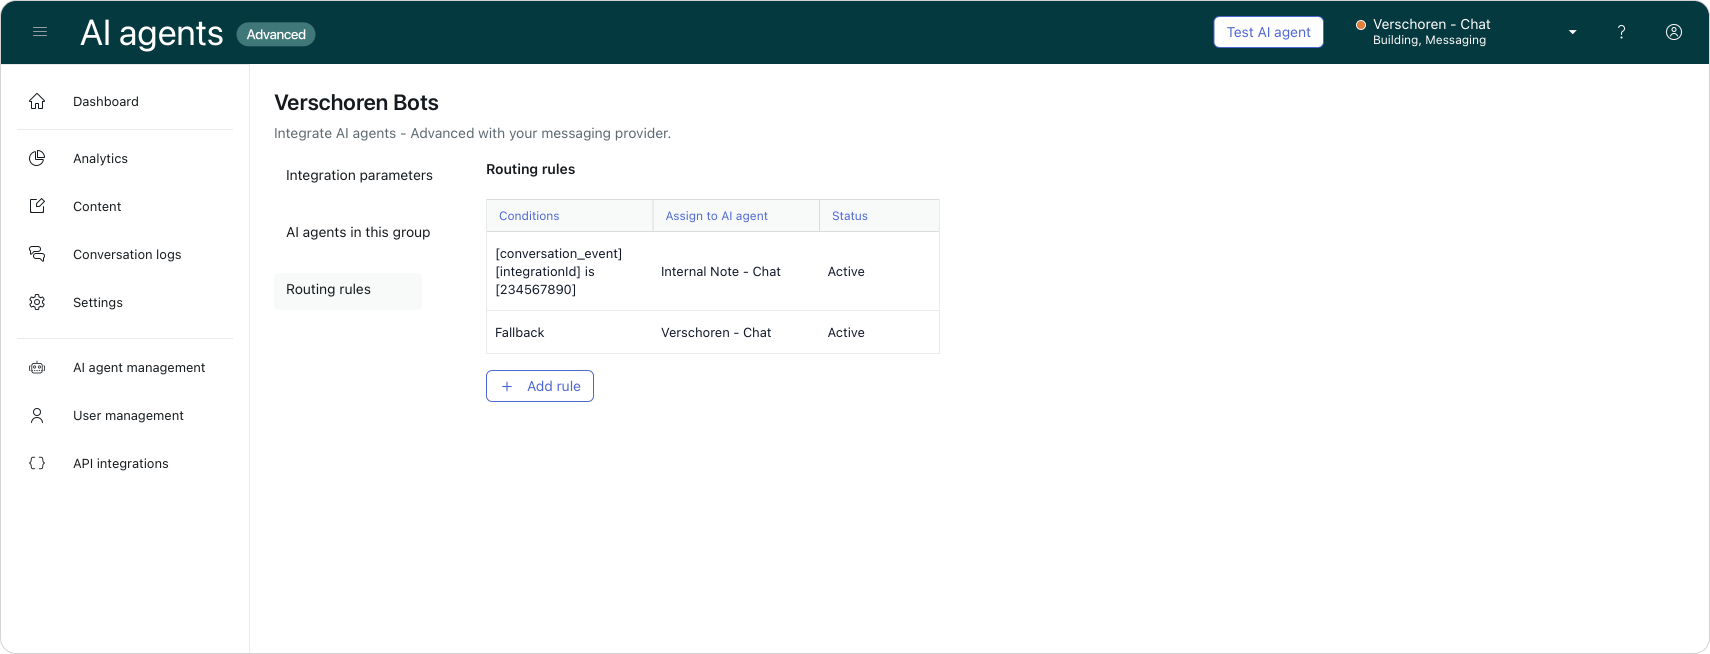
Within the Advanced bot’s dashboard, you can define:
- Which customer segments go to which bot
- How conversations are split across regions, brands, or use cases
- Fallbacks when no condition is met
In this setup, Zendesk handles the initial handoff. The logic for selecting the right bot happens entirely within Ultimate.
This gives you plenty of flexibility—but also means that once messages are routed to AI Agent Advanced. At that point, Zendesk hands off control, and the logic is handled entirely in Ultimate.
Conclusion: A Step Forward, But Not the Final Destination
The new Channel Manager for AI Agent Advanced is a welcome step forward. It brings long-overdue visibility and control to what was previously a developer-only task.
But managing AI Agents in Zendesk is still fragmented. Today, you need to:
- Use the AI Agent settings to assign channels to Essentials bots
- Use the Channel Manager for Advanced bots
- Use Ultimate’s dashboard to configure routing between multiple Advanced bots
That’s still three disconnected places to manage the same outcome.
Ideally, Zendesk would offer a unified interface—one where each channel clearly shows which bot (or no bot) is assigned, and where changes update across both the AI and Messaging views.