Improve ticket deflection by enabling Federated Search
Federated search is a feature that allows customers to search for information across multiple platforms and websites simultaneously, creating a seamless search experience. This article shows how how to setup automatic or manual indexing of records.
Improve ticket deflection by enabling Federated Search

On this page
Federated Search lets your customers seamlessly search across multiple platforms and websites simultaneously.
In a Zendesk context, federated search enables customers to search for the information they need across the website, blog, and FAQ. This means that customers can easily find the answers they need without having to submit a ticket. One key advantage of federated search is that it allows customers to search for blog articles and website sales content within the same search experience as regular FAQ articles.
This can greatly benefit customers as they can access a wider range of information in one go, without having to switch between different search interfaces or platforms. By including blog articles and website content in the search results, customers can also benefit from a more holistic understanding of the company's products and services. Furthermore, by providing customers with more relevant information, they are more likely to find the answers they need and reduce the likelihood of submitting a ticket and improve CSAT.
Federated search can also help to reduce the workload of customer support teams. By enabling customers to find the information they need on their own, support teams can focus on more complex tickets that require their expertise. This can improve the efficiency of the support team, as they can allocate their time and resources more effectively and reduce their workload.

Federated Search in Zendesk
There's a two ways you can enable Federated Search in Zendesk:
Search crawler
This is the easiest way to setup Federated Search. Zendesk looks at your website's sitemap and indexes all publicly available content on a nightly basis.
It has the benefit of being an almost no-code integration with the exception of one verification tag to be added to your websites <head>
Federated Search API
This API endpoint lets you manually add records to the search database of your Zendesk instance. You can do this one article at a time, or you can use a tool like Zapier or a custom script to update the database whenever a new page/article/item is added to your website.
Demo
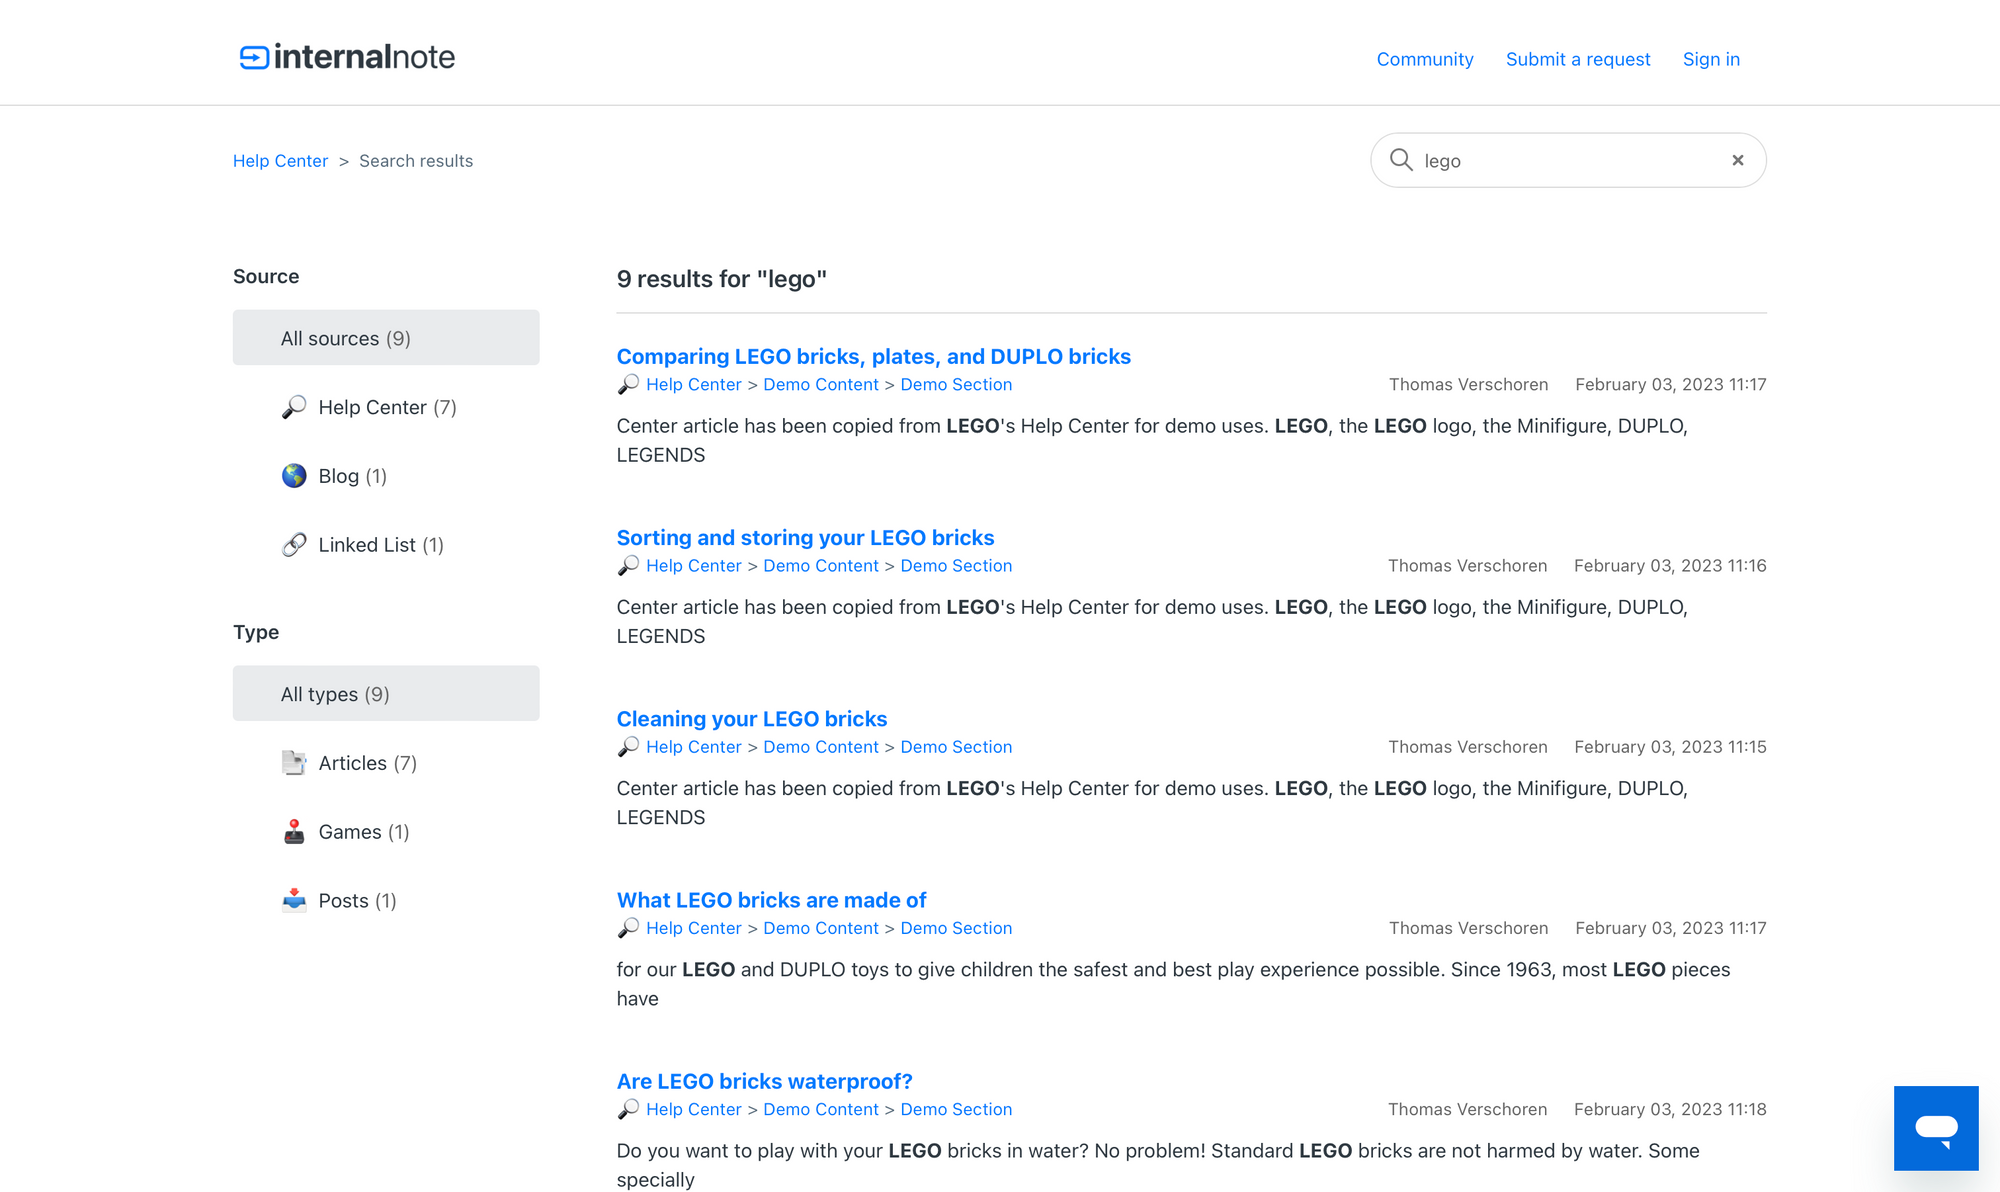
The Demo Help Center on support.internalnote.com has Federated Search enabled. It indexes this website and also has a bunch of loose websites added to its index.
If you search for e.g. LEGO it'll show support articles from the FAQ, an article from this Blog, and a few external links in its results.
Automatic Search Crawler
Most customers I've seen have a lot of duplicate content on both their website and Help Center. The website explains the what/how of their offerings from a commercial standpoint, and the help center has almost identical article so that customers contacting them via web/email/social can find that same content via search or Answer Bot. For this reason I recommend to index at least your website inside your Help Center so you can remove a lot of this semi-duplicate content.
Setup
Setting up an automatic Search Crawler is five easy steps:
- Add Website Sitemap to Crawler (e.g.
https://internalnote.com/sitemap.xml) - Validate ownership by adding
<meta name='zd-site-verification' ...>to<head> - Add a Content Source Name (e.g. Website) and Type (e.g. Article) for the indexed items. These show up in the search sidebar.
- Wait for the first indexation (up to 24h)
- Enable the new Source and Type on your Help Center.
Setup the Federated Search API
Sometimes you don't want to index your entire website but make a specific landing page for a product or issue available for search within your Help Center.
Or, if the website has no sitemap, you might want to add all useful pages manually to your Help Center for indexing. This is where the API comes in.
In this Example we'll add lego.com as a record available for searches.
Source and Type
Similar to how the Crawler needs a Source and Type, manually added records also need to have this associated metadata. You can do this via the Admin Panel, or via API. Note that you can associate multiple type with one source, and that you can reuse existing ones you already created earlier.
// Creating a source
// POST /api/v2/guide/external_content/sources
{
  "source": {
    "name": "Useful Links"
  }
}

// Status 201 Created
{
    "source": {
        "id": "01GSWVD7FMC6QQ4YPVS4K2BFHF",
        "name": "Useful Links",
        "created_at": "2023-02-22T15:20:56Z",
        "updated_at": "2023-02-22T15:20:56Z"
    }
}
// Creating a type
// POST /api/v2/guide/external_content/types
{
"type": {
"name": "Link"
}
}
// Status 201 Created
{
"type": {
"id": "01GSWVEFWB9ERZYPSA1SCC0ETV",
"name": "Link",
"created_at": "2023-02-22T15:21:37Z",
"updated_at": "2023-02-22T15:21:37Z"
}
}Adding a record
Once we've created the source and type objects, we can start adding Records to our Help Center.
There's a few items of note:
- External ID: this has to be an unique 12-characters or longer string. Can be related to a record ID in your existing CMS, or something you randomly generate.
- The
source_idcan be found in the results from the API call to create a Source. Or do aGET /api/v2/guide/external_content/sourcesto find the right ID. - The
type_idcan be found in the results from the API call to create a Type. Or do aGET /api/v2/guide/external_content/typesto find the right ID.
// POST /api/v2/guide/external_content/records

{
  "record": {
    "body": "The LEGO website is a hub for all things LEGO, offering a wide variety of resources and content...",
    "external_id": "360046759835",
    "locale": "en-us",
    "source_id": "01GSWVD7FMC6QQ4YPVS4K2BFHF",
    "title": "LEGO Website",
    "type_id": "01GSWVEFWB9ERZYPSA1SCC0ETV",
    "url": "https://lego.com"
   }
}segment object. If you specify a segment, e.g. Agents and Admins, you can add internal resources and only make them available to Agents. These articles show up for logged in Agents on the Help Center, or in the Knowledge Panel in Agent WorkspaceUpdating Records
You can update an existing record by doing a PUT with the new data to /api/v2/guide/external_content/records/{id} . Note that the Automatic Search Crawler updates records regularly if it detects a change in the sitemap. For manually added items you can update e.g. the Body to improve searchability.
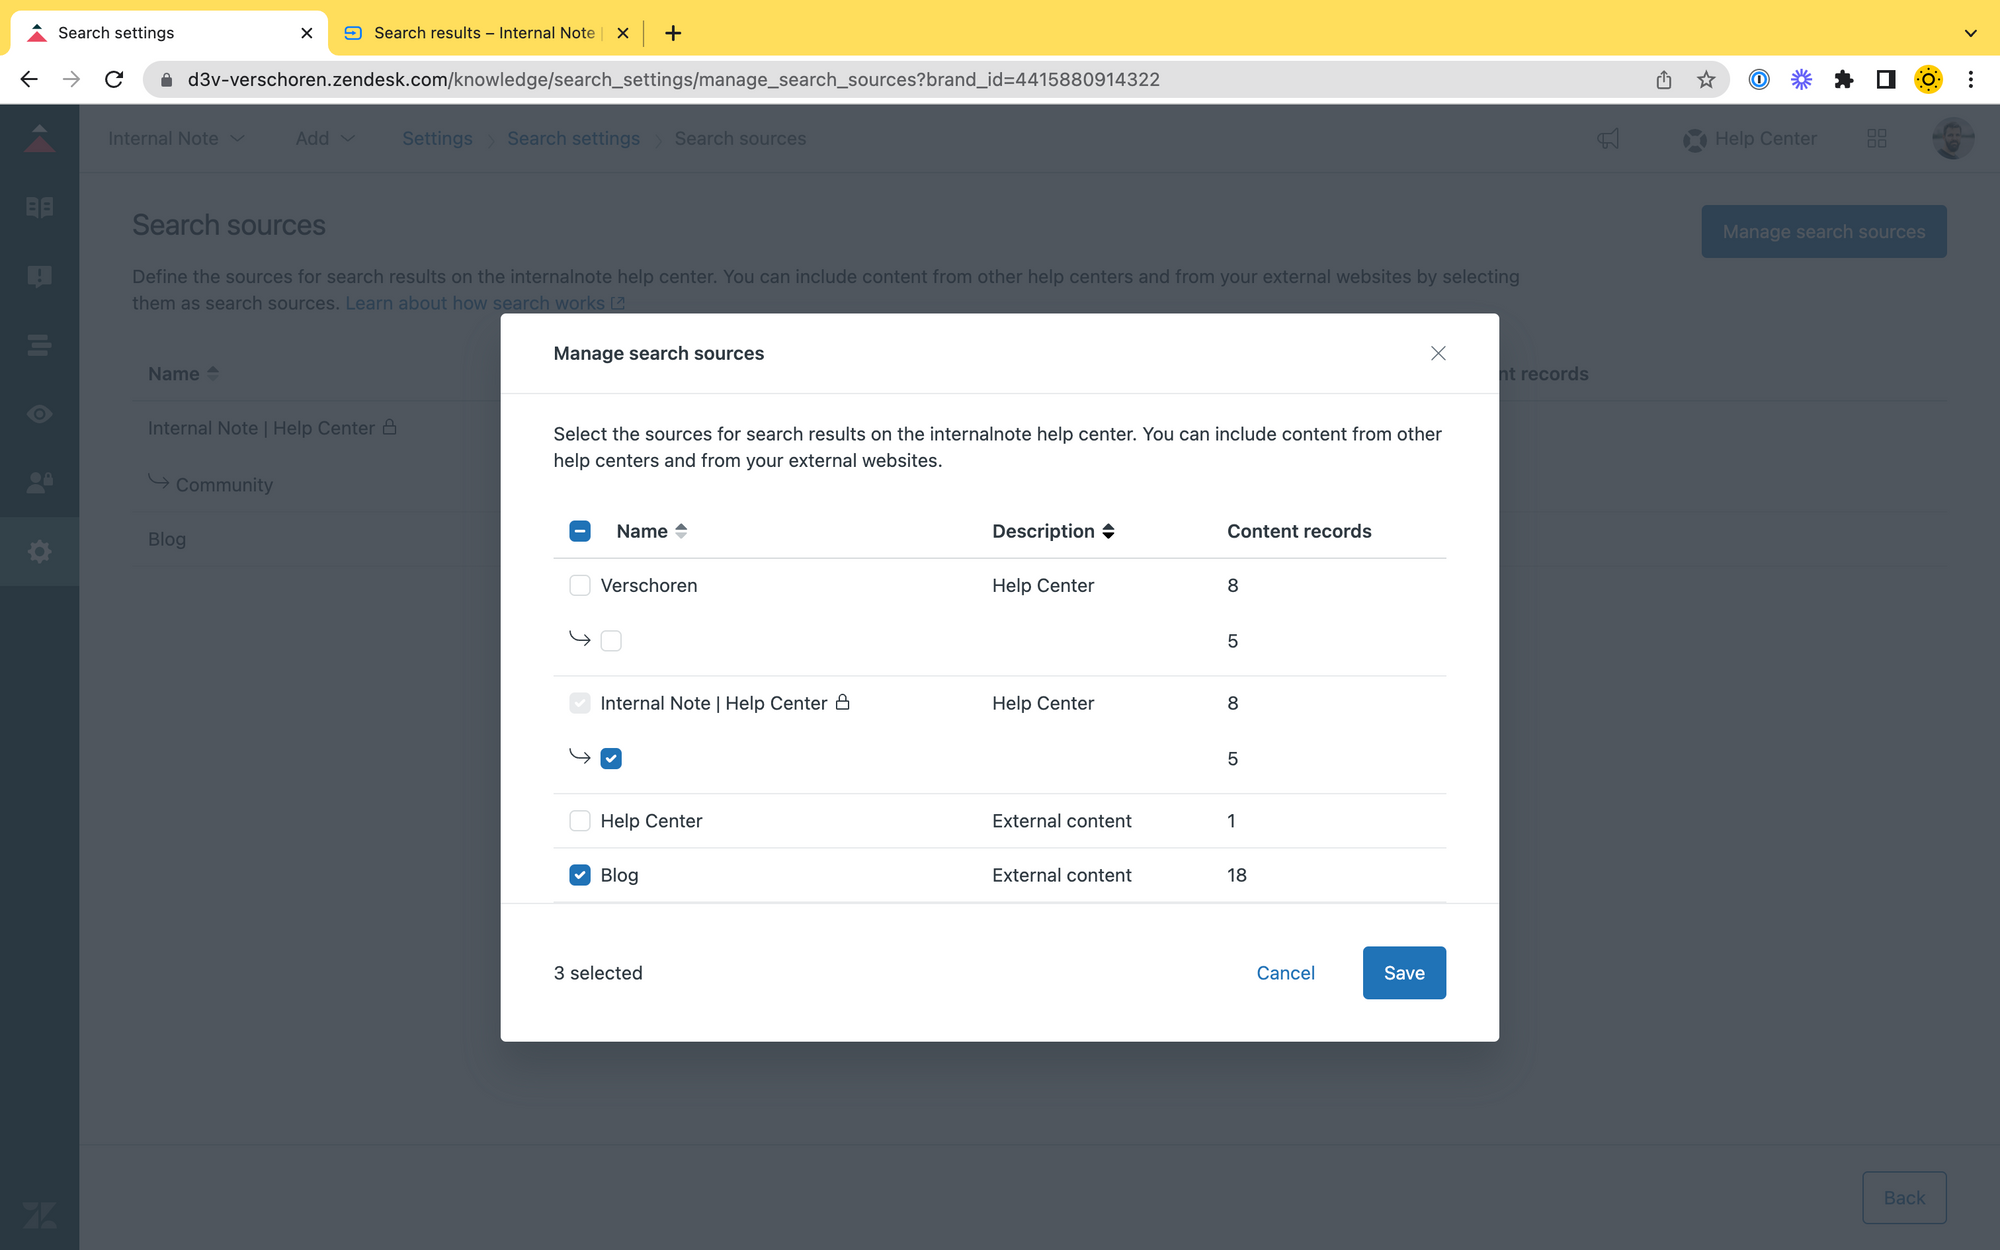
Enabling Sources
Once you added sources via either the Crawler or API, you can make them available in the Search Results. Note that this also makes them available for Agents.
Customise Help Center
Once you enable the different new Sources and Types in Federated Search your Help Center Search results will display some new options in its sidebar to allow users to filter based on type.
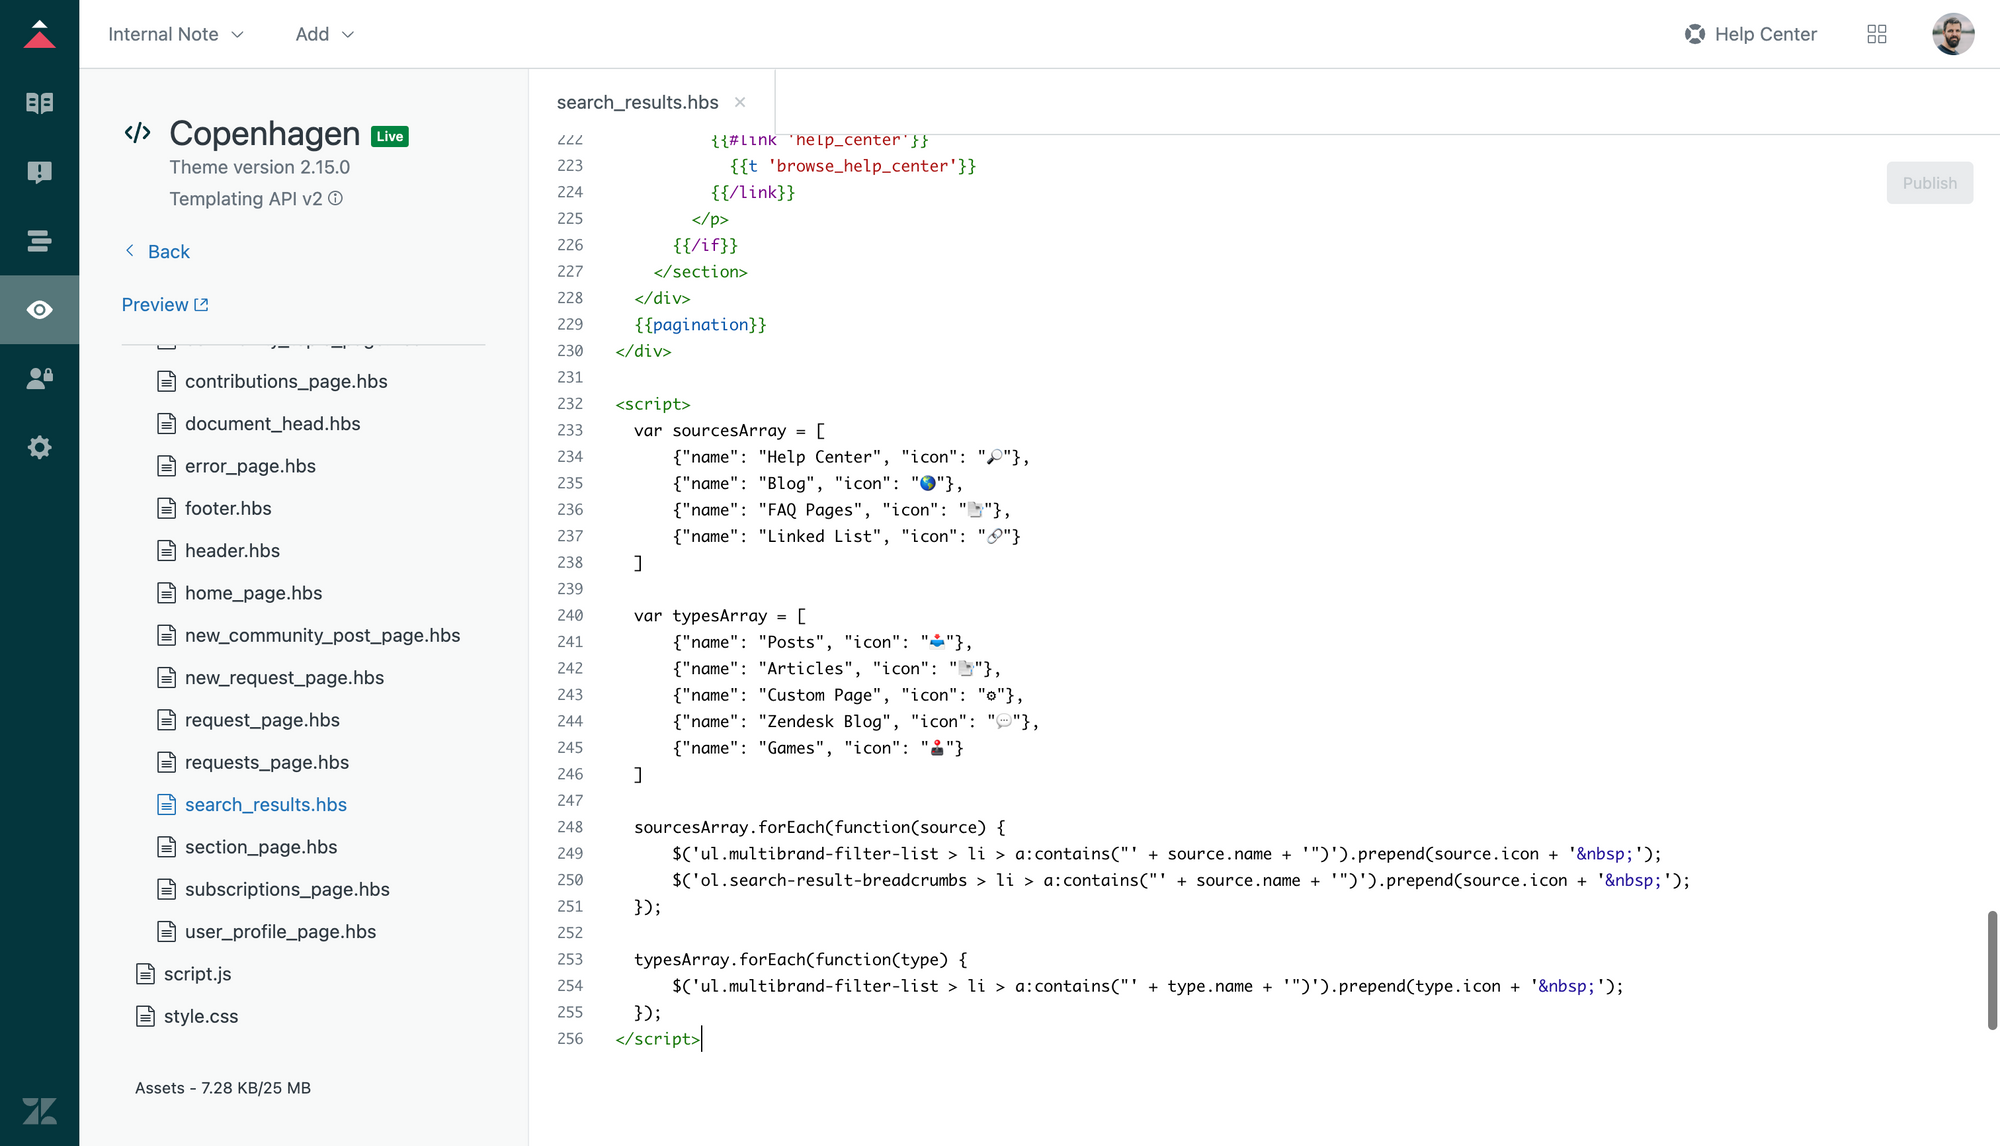
Personally, I find this list a bit to plain for my taste, so below is a bit of code you can add at the bottom of search_results.hbs in your Guide Theme Editor that adds a custom emoji before each filter. You can replace this with a favicon, icons,..
var sourcesArray = [
    {"name": "Help Center", "icon": "🔎"},
    {"name": "Blog", "icon": "🌎"},
    {"name": "FAQ Pages", "icon": "📑"},
    {"name": "Linked List", "icon": "🔗"}
]

var typesArray = [
    {"name": "Posts", "icon": "📥"},
    {"name": "Articles", "icon": "📑"},
    {"name": "Custom Page", "icon": "⚙️"},
    {"name": "Zendesk Blog", "icon": "💬"},
    {"name": "Games", "icon": "🕹️"}
]

sourcesArray.forEach(function(source) {
    $('ul.multibrand-filter-list > li > a:contains("' + source.name + '")').prepend(source.icon + ' ');
    $('ol.search-result-breadcrumbs > li > a:contains("' + source.name + '")').prepend(source.icon + ' ');
});

typesArray.forEach(function(type) {
    $('ul.multibrand-filter-list > li > a:contains("' + type.name + '")').prepend(type.icon + ' ');
});


Conclusion
The above steps should give you the information you need to get started to enable Federated Search yourself, and see results in increased efficiency, reduced ticket and higher CSAT scores.