Return to Sender - Reassign Zendesk Tickets back to the original agent
Use triggers and webhooks in Zendesk to automatically reassign tickets back to the original assignee.
Return to Sender - Reassign Zendesk Tickets back to the original agent

On this page
As a Zendesk agent, or administrator you might have run into the following scenario's:
- You have set agents to only view tickets in their own groups, but for some license types this means they can only assign to their own group and not to other groups
- You use private groups or light agents and this means some tickets can not be shared back to other groups via the UI
In either of these scenario's the process is the same: you have a ticket belonging to group A. They assign it to group B to take action. At some moment you want to reassign the ticket to group A. This might not be possible due to the above restrictions, or your agents might have the permissions to do so, but looking at a tickets' event log to find the original assignee is time consuming.
This is where the Return to sender flow comes in. It uses a combination of macro's, triggers and webhooks to store the original assignee, and uses that data to return the ticket to sender.
Overview
Setup
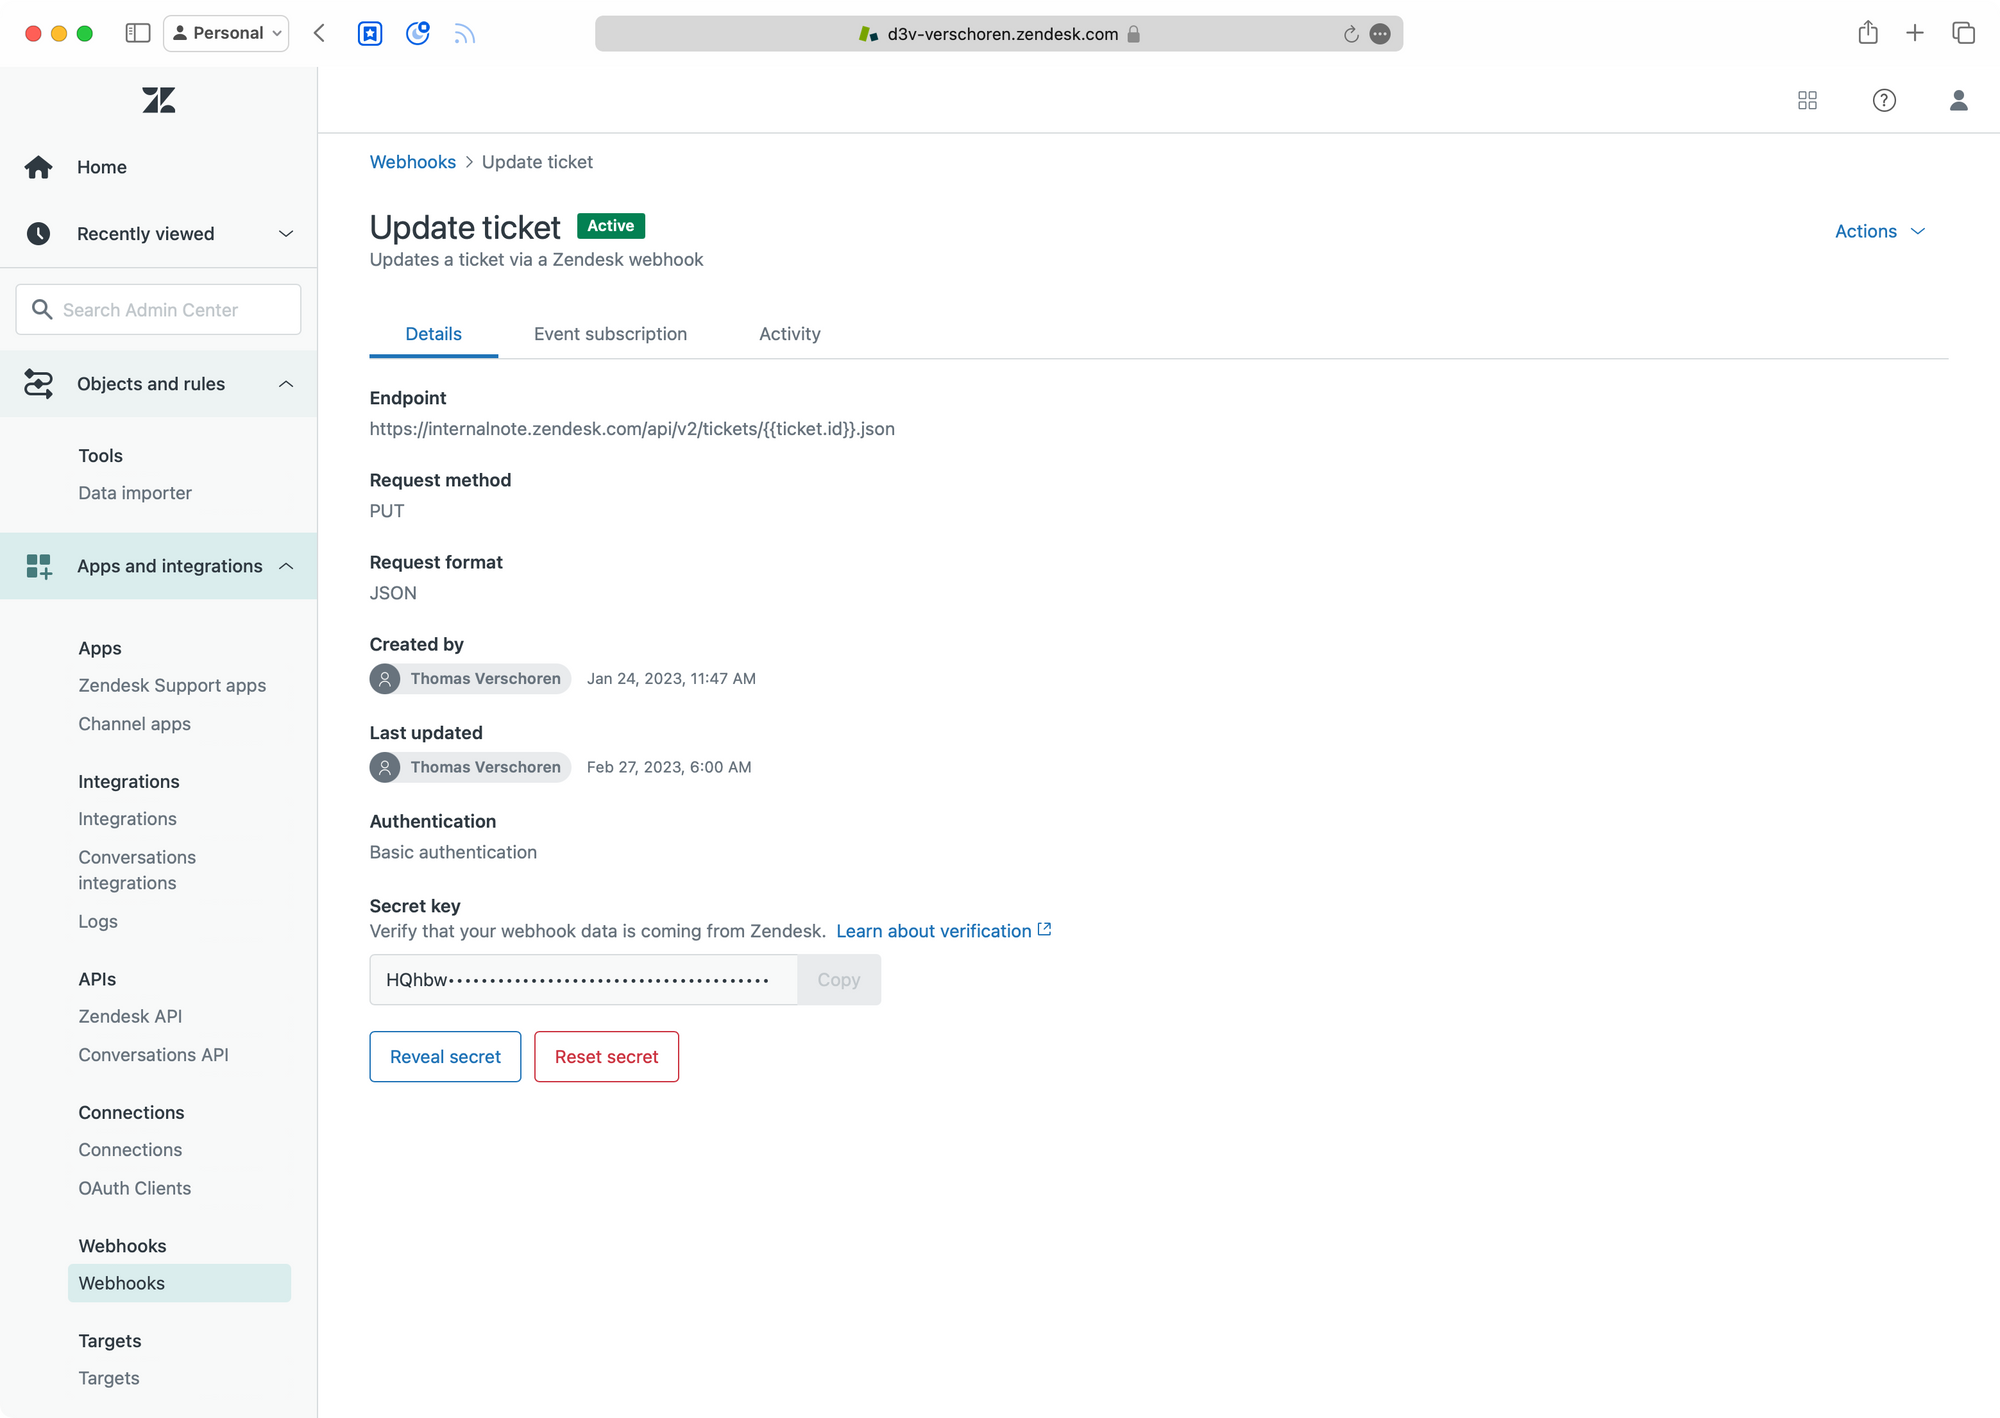
Webhook
If you've already build an update ticket webhook you can re-use that one.
 Thomas Verschoren
If not, you can build one as follows:
- Name: Update Ticket
- Endpoint:
https://subdomain.zendesk.com/api/v2/tickets/{{ticket.id}}.json - Request Method: PUT
- Request Format: JSON
- Authentication: Basic Authentication
- Username:
[email protected]/token - Password: a Zendesk API token
- Username:
Custom Fields
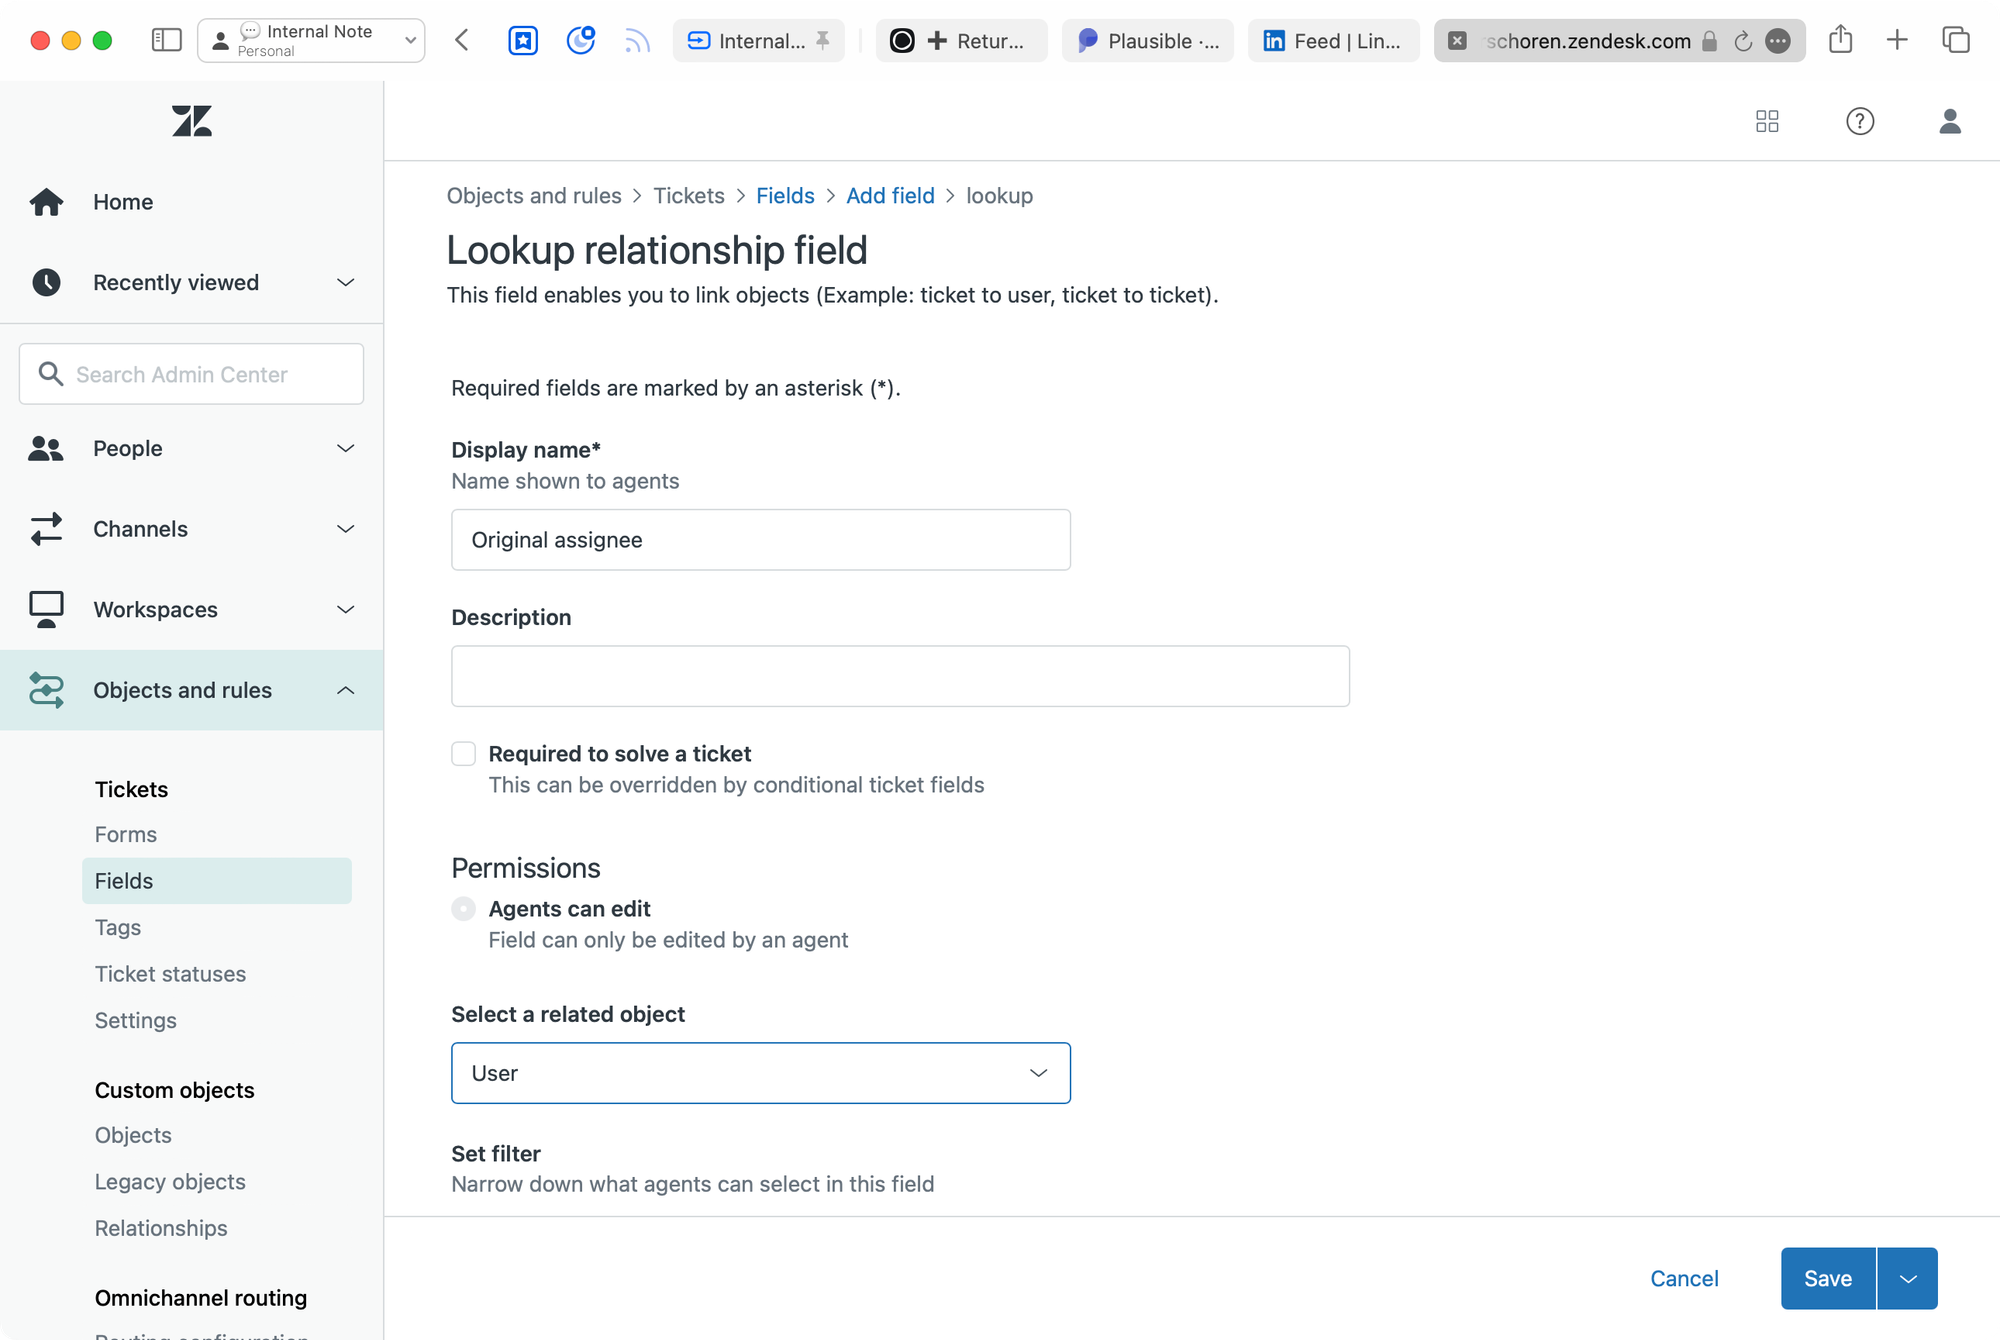
Create two custom fields to store the original assignee and group.

{{ticket.ticket_field_123.id}} this can be solved more elegantly.Original Assignee
This field can be a Lookup Field that creates a relationship with Users. Make sure to setup filter to only allow for agents and admins, by excluding end-users.
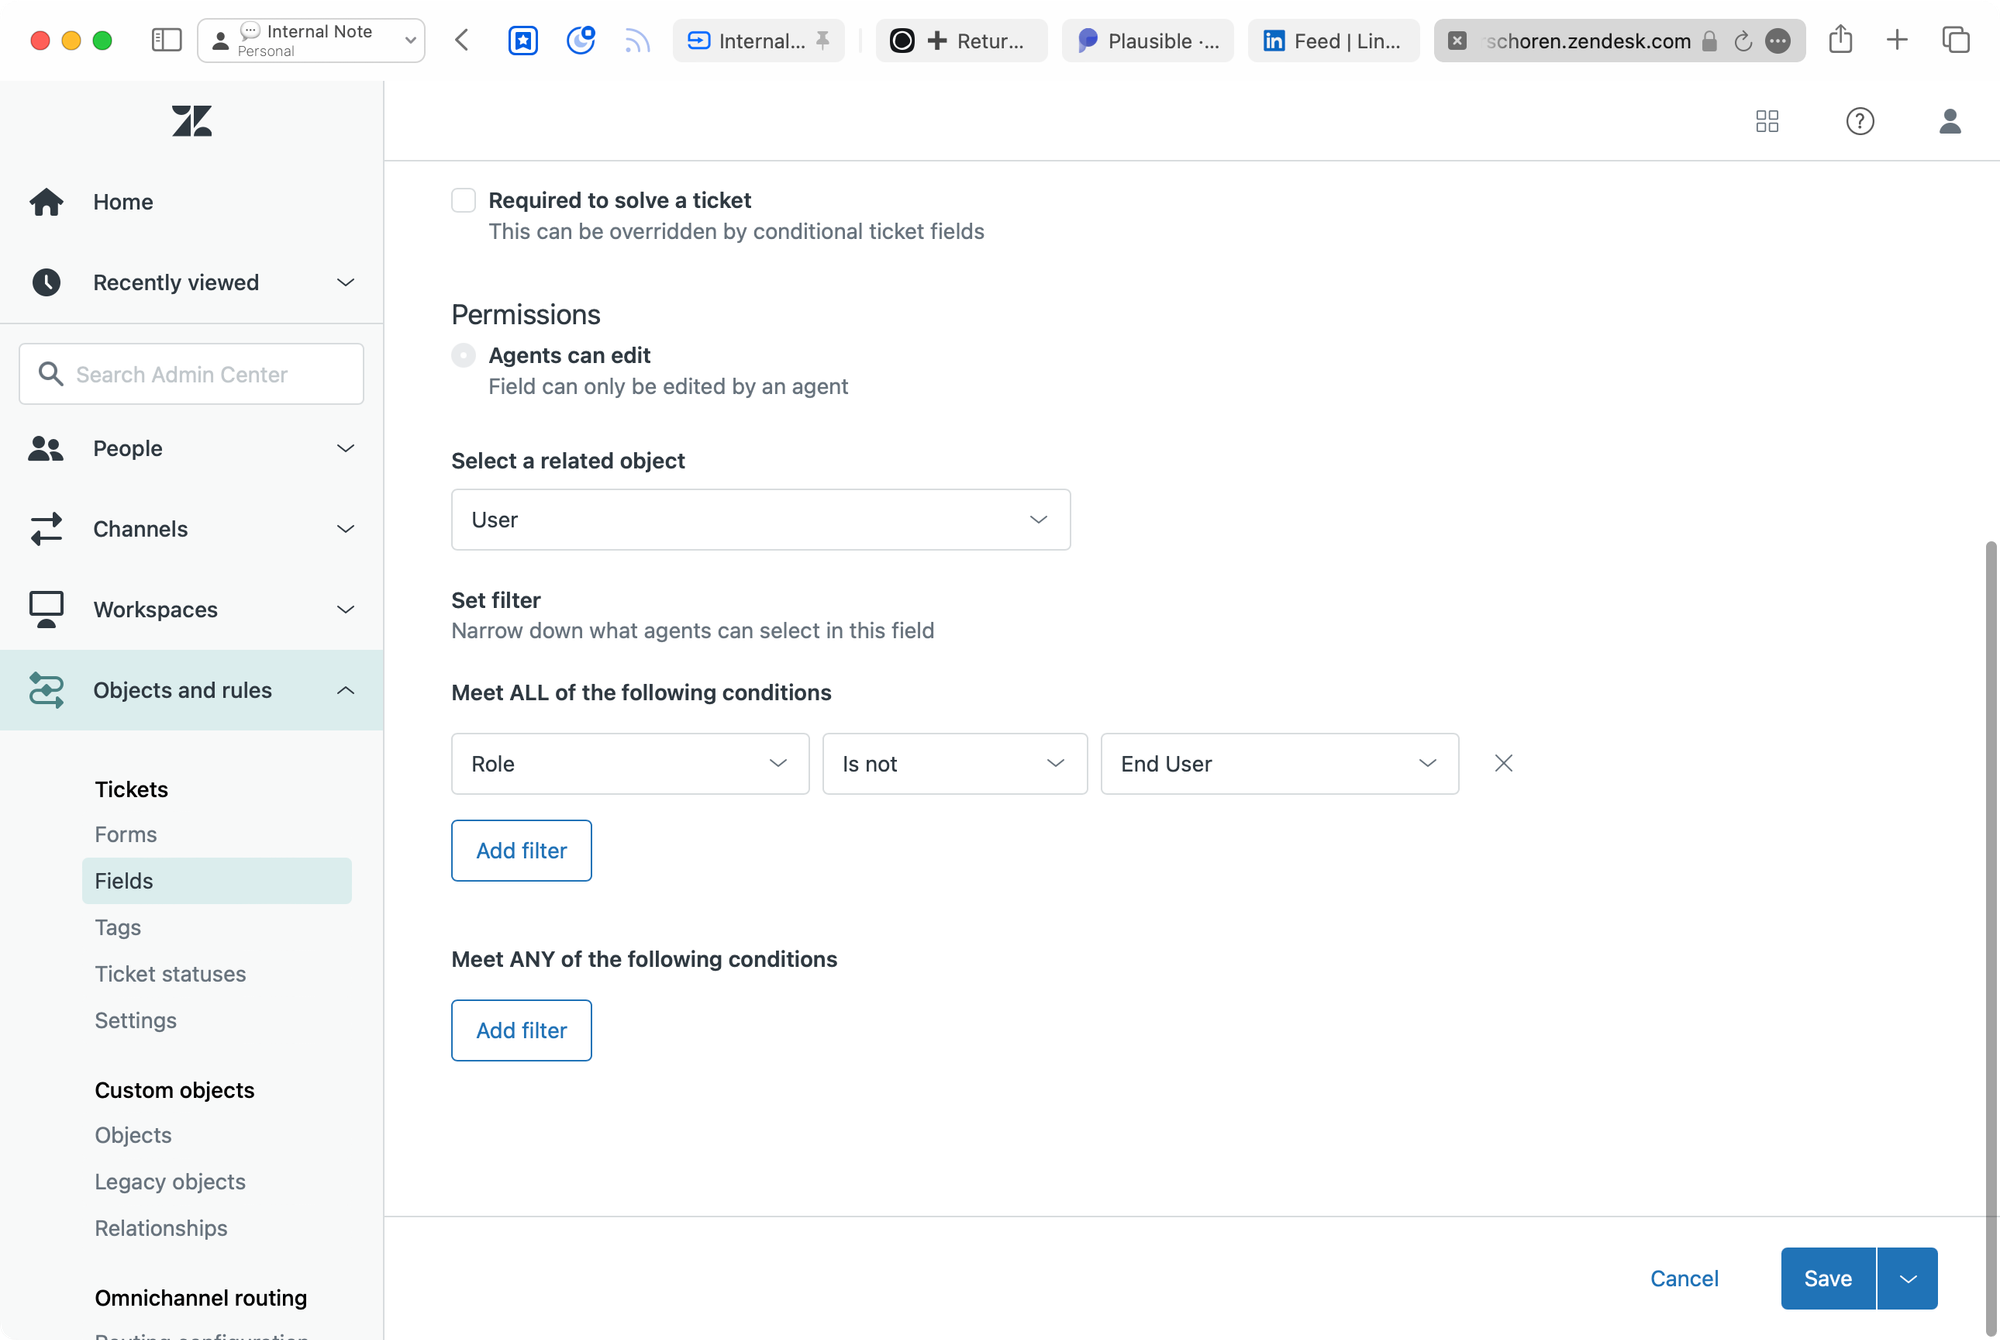
Original Group
The original group field has to be a numeric field.
Triggers
Trigger #1: Log the original assignee
This first trigger sets references to the original assignee and group in the custom fields.
- Meet ALL of the following conditions:
- Ticket is updated
- Assignee is changed from (-)
- Actions
- Notify By > Active Webhook > Update Ticket
and set the following payload (update the IDs to match your assignee and group custom fields)
- Notify By > Active Webhook > Update Ticket
{
  "ticket": {
    "custom_fields": [
      {
        "id": 123456789,
        "value": {{current_user.id}}
      },
      {
        "id": 987654321,
        "value": {{ticket.group.id}}
      }
    ]
  }
}
Trigger #2: Return to sender
This trigger reacts to tickets where the tag return_to_sender has been added too.
- Meet ALL of the following conditions:
- Ticket is updated
- Ticket Tags > Contains
return_to_sender
- Actions
- Notify By > Active Webhook > Update Ticket
- Ticket > Remove Tags
return_to_sender
and set the following payload- update the IDs to match your assignee and group custom fields
- note the
{{ticket.ticket_field_123.id}}syntax to access the ID of the linked user.
{
  "ticket": {
    "assignee_id": {{ticket.ticket_field_123456789.id}},
    "group_id": {{ticket.ticket_field_987654321}}
  }
}
Macro
Final step is adding a macro that adds the return_to_sender tag.
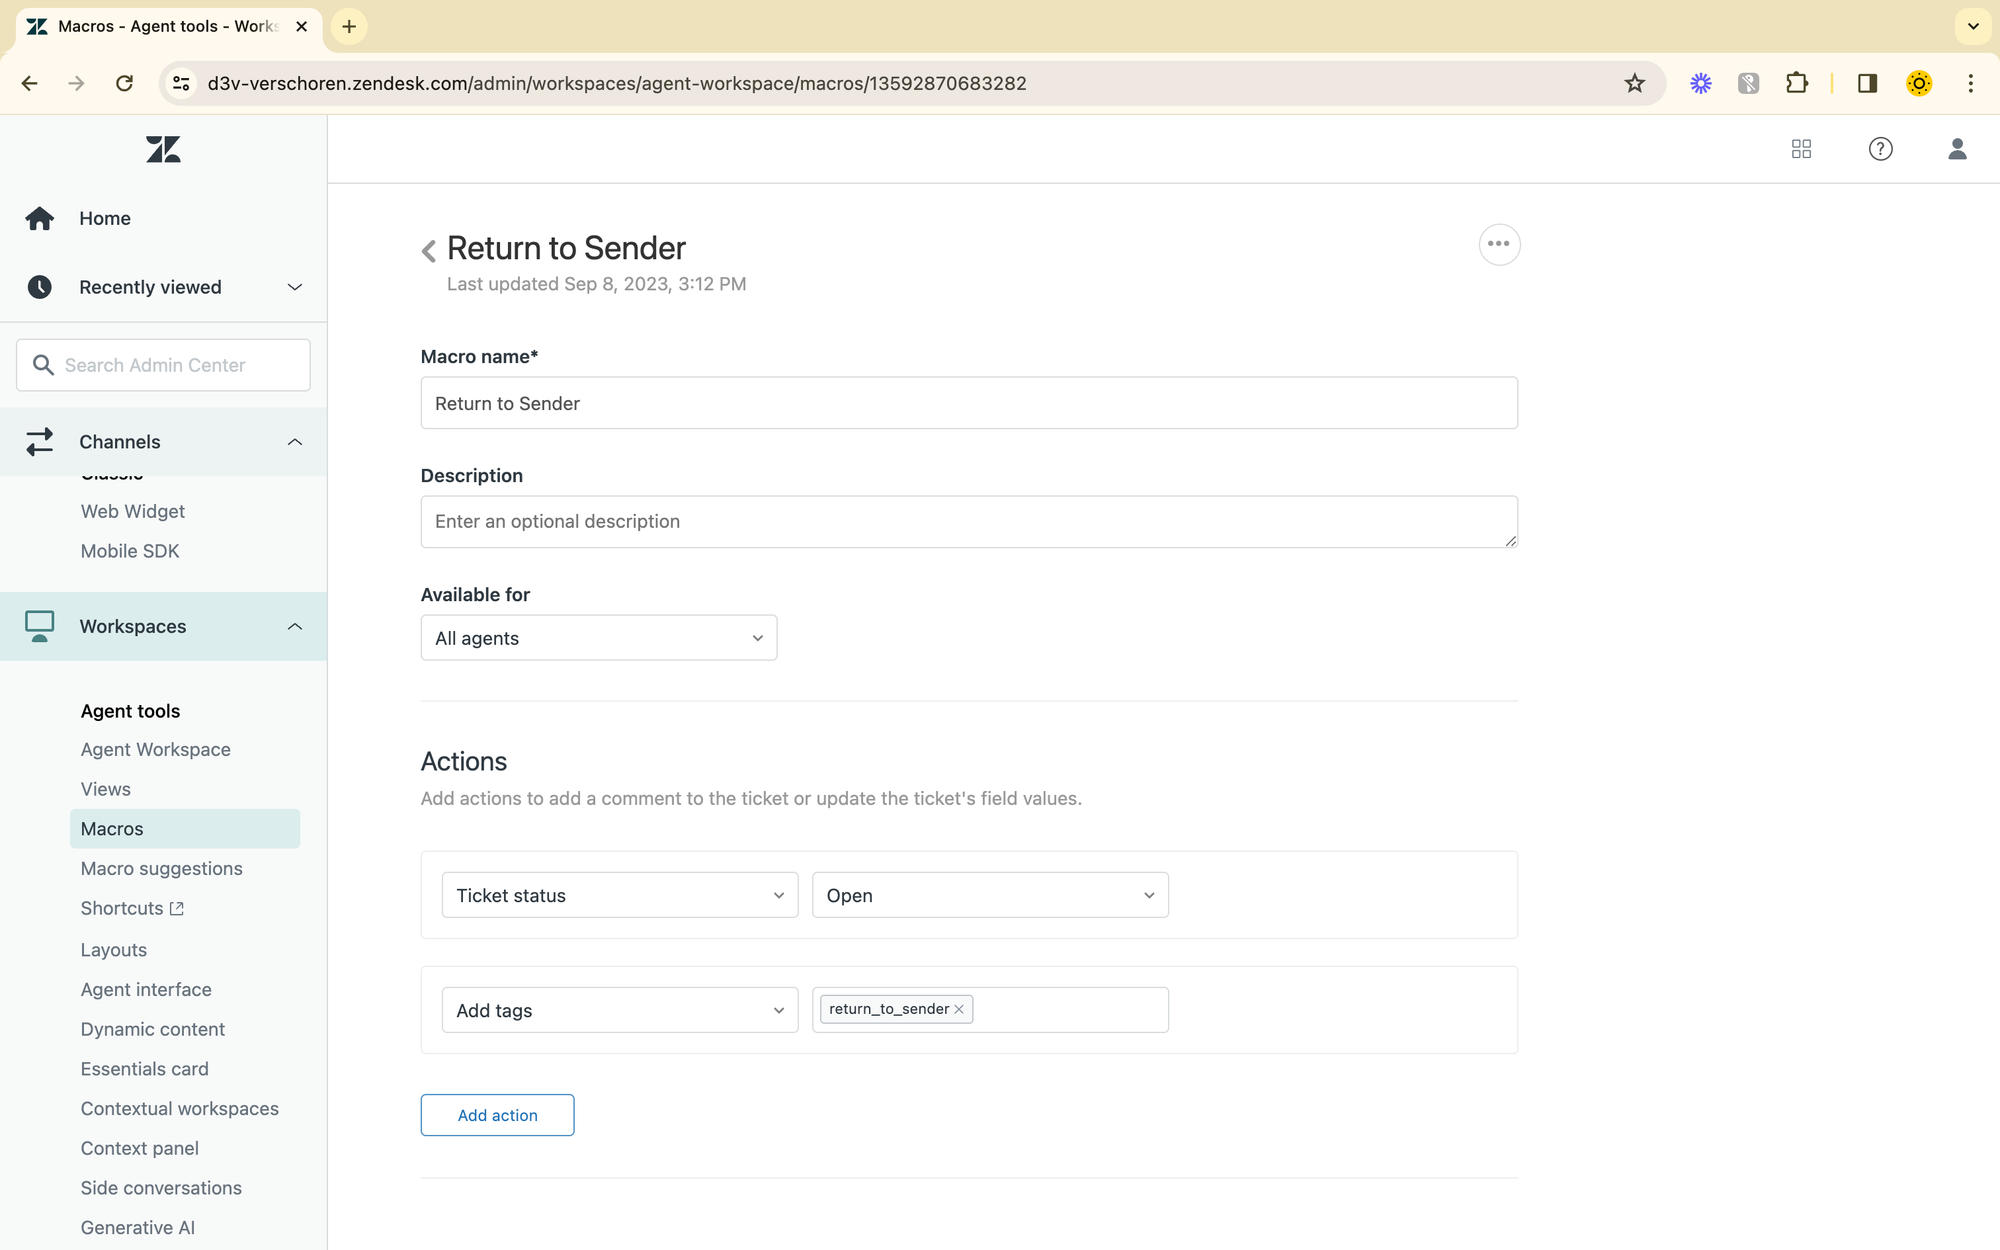
Set tags step. A Reader noted that Add tags is better since it does not remove all other tags on the ticket. Thanks!Bringing it all together
Now that we have all the steps your agents can experience the following automated flow:
- A ticket arrives to the First Line Team and is assigned to John
- They reassign the ticket to HR and it gets picked up by Linda
- Once she wraps up her work she uses the return to sender macro to effortlessly reassigns the ticket back to John
- John wraps up the ticket and confirms everything is ok for the customer.
Variations
You can also use parts of this flow in different flows.
You could use the field to log the original assignee so you can report on both first line and second line actions in Explore for scenario's where the person solving the ticket (second line) might not be the one who did the triage (first line).