
Enabling forms on the Zendesk Messaging widget without using a bot
This article explains how you can use the Messaging Widget without a chatbot and still collect information from your customers

Enabling forms on the Zendesk Messaging widget without using a bot
This article explains how you can use the Messaging Widget without a chatbot and still collect information from your customers

On this page
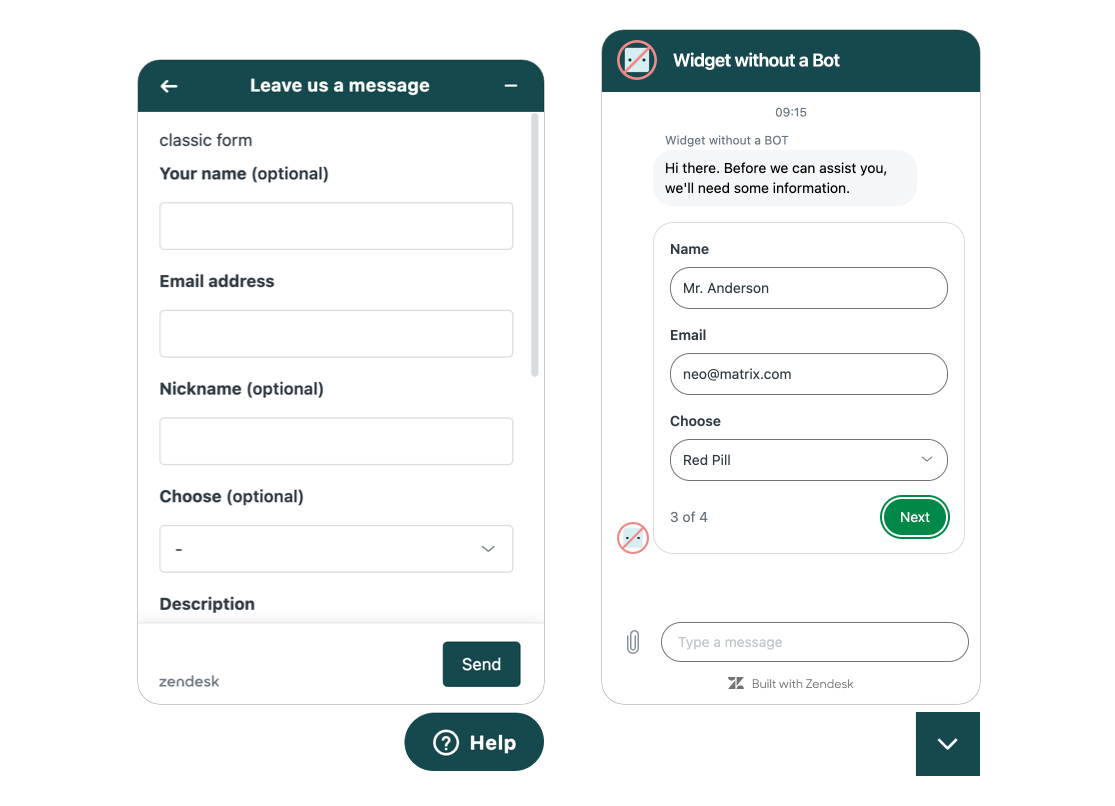
Before Messaging and the new Zendesk Bot and Flow Builder everyone used the Classic Widget. This widget offered a modal view which searched your Help Center first, and then offered your users a web form to submit a ticket if they still needed help.
Optionally you could expand this widget with Chat or Talk integrations to offer more direct and immediate support to your customers.
With the arrival of Messaging and conversations the old widget made room for the new experience we know (and love) today. However with the new we also lost some of the old. If you don't offer a self service solution via your Help Center, or your customers or support scenario's don't really fit a chatbot-first approach, the new widget gave a subpar experience. Without enabling a bot you can only ask for a name and email, and there's no other metadata to be captured.
Many of my own customers that didn't find a fit in Zendesk Bot resisted moving to the new Messaging experience and kept the Classic Widget and its webforms active all this time.
Custom ticket fields the Messaging Web Widget
Since last week it's now possible to add custom fields to a basic Messaging Widget. So instead of just asking for a name and email when a user launches your widget, you can now ask for additional details without the requirement of adding a full Zendesk Bot (and paying for its usage via MAU).
Text and drop-down custom field types are supported in this first release. We are considering expanding support for other types such as numeric and date in the future.
Who wants to use this?
The best customer care setup is one where you allow customers to find answers themselves without waiting for or needed your support team. This leads to faster resolutions for the end-user, and gives your care agents the room to spend time on the more complex or unique scenario's.
However, there are a few scenario's where having a Help Center and Bot first approach isn't a good fit.
- You use your web widget and Zendesk instance as a way to capture sales leads and inquiries instead of a real customer care platform
- Your Help Center is not yet ready for deployment, you're still working on its contents or your information doesn't live on Zendesk Guide (although Federated Search can assist here).
- Your support use cases are verify specific and don't lent them to self service.
- You only just started using Zendesk and you want a basic support flow via Messaging. You can then use the data captured to learn what flows are ideal for ticket deflection, and start working on a real bot for future deployment.
In these kind of scenario's it might be useful to offer direct support via a webform, instead of having a chatbot that deflects, which makes this new feature launch ideal!
How does it work?
So, how does it work? In this article we'll explore three scenario's:
- Default setup where we ask for a name and email
- A nicer setup where we ask for additional information
- A full setup where we pre-fill fields based on website context
As always, you can test out the feature on a demo page:
 Internal Note
Let's dive in!
Default Setup
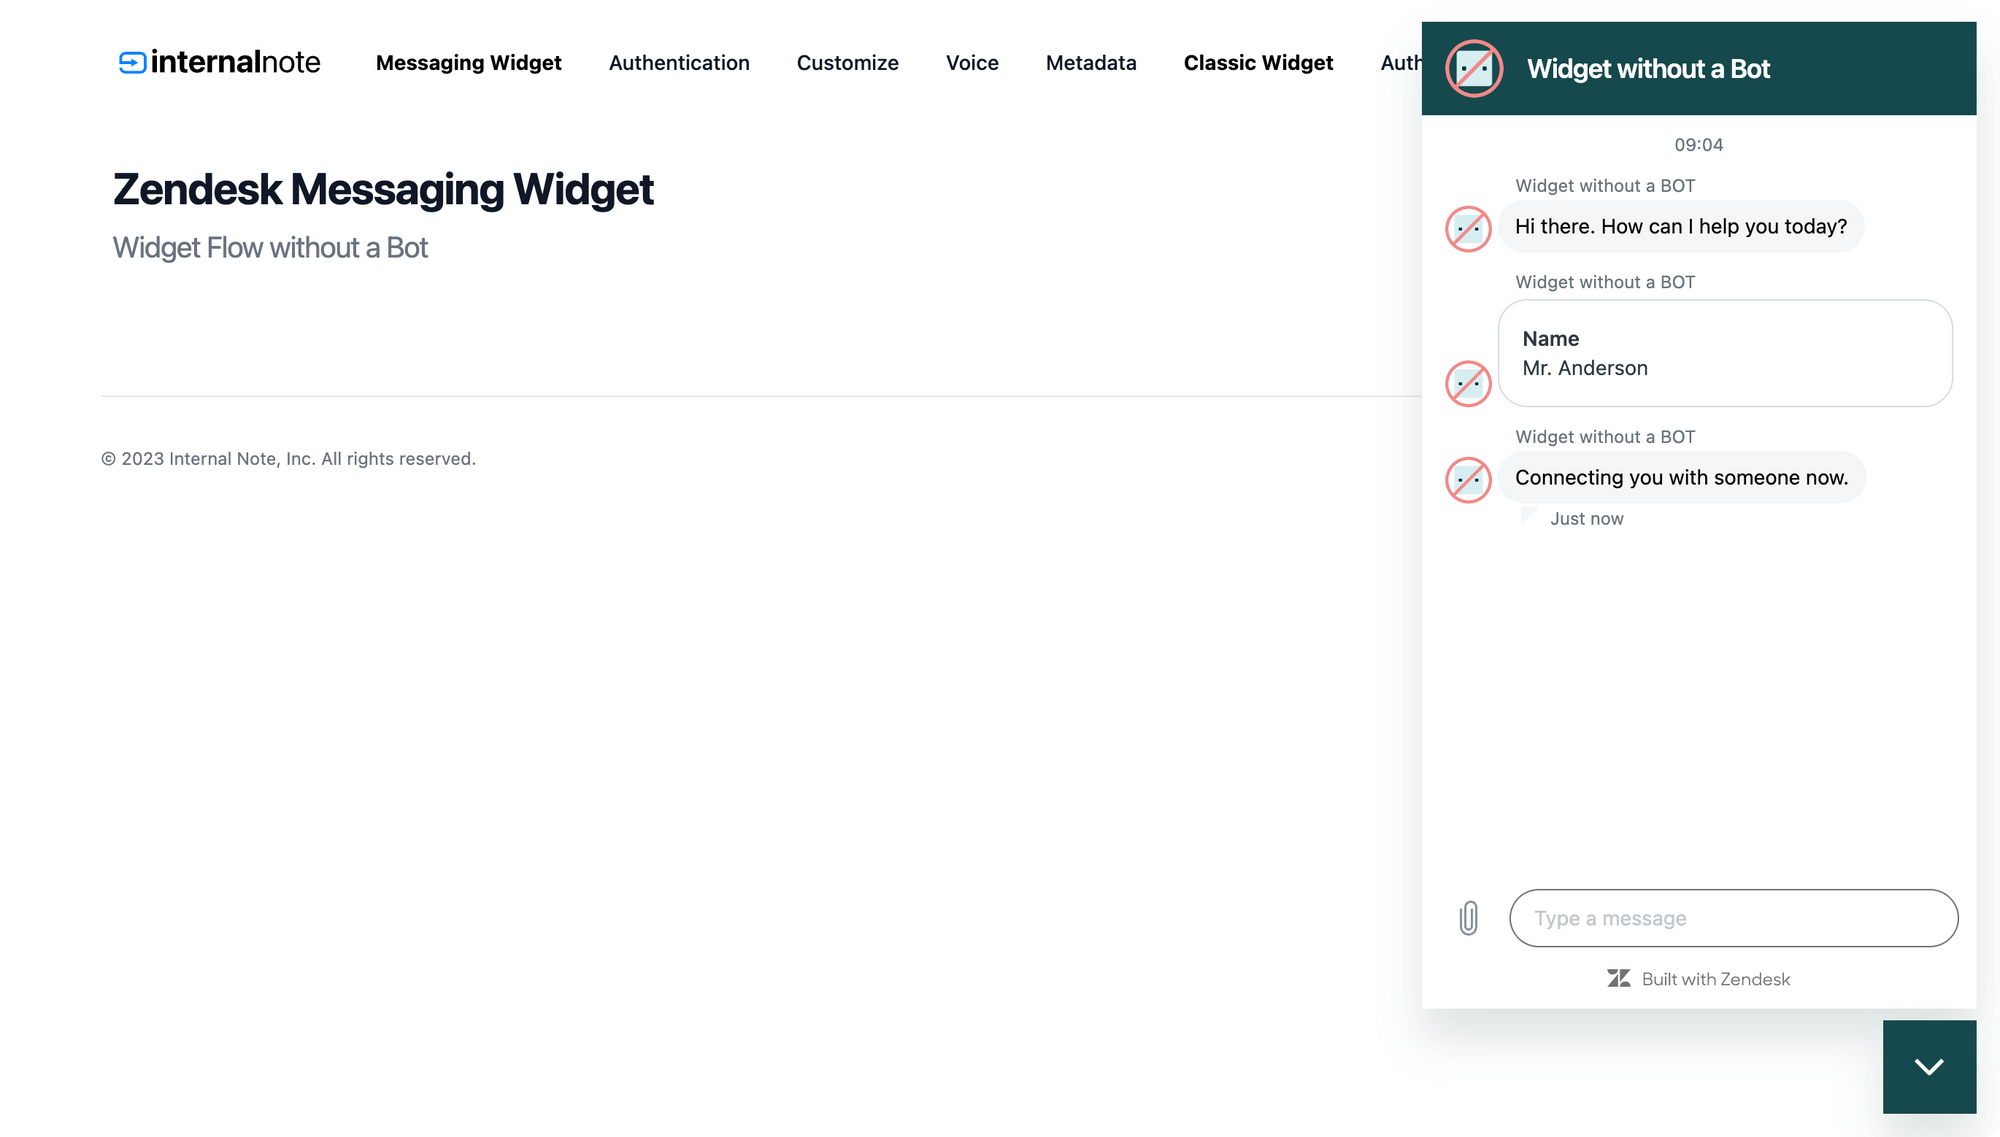
The initial setup of any new Messaging widget contains this default setup. The system welcomes the user, and then asks for their name before moving to an available agent. If no one is available, it asks for an email and then lets the customer know they'll receive a notification once an agent replies.
It's basic, bare bones and does the job.
Asking for information
The default setup is nice, but this article wouldn't exist if there weren't some configurations and improvements we can do.
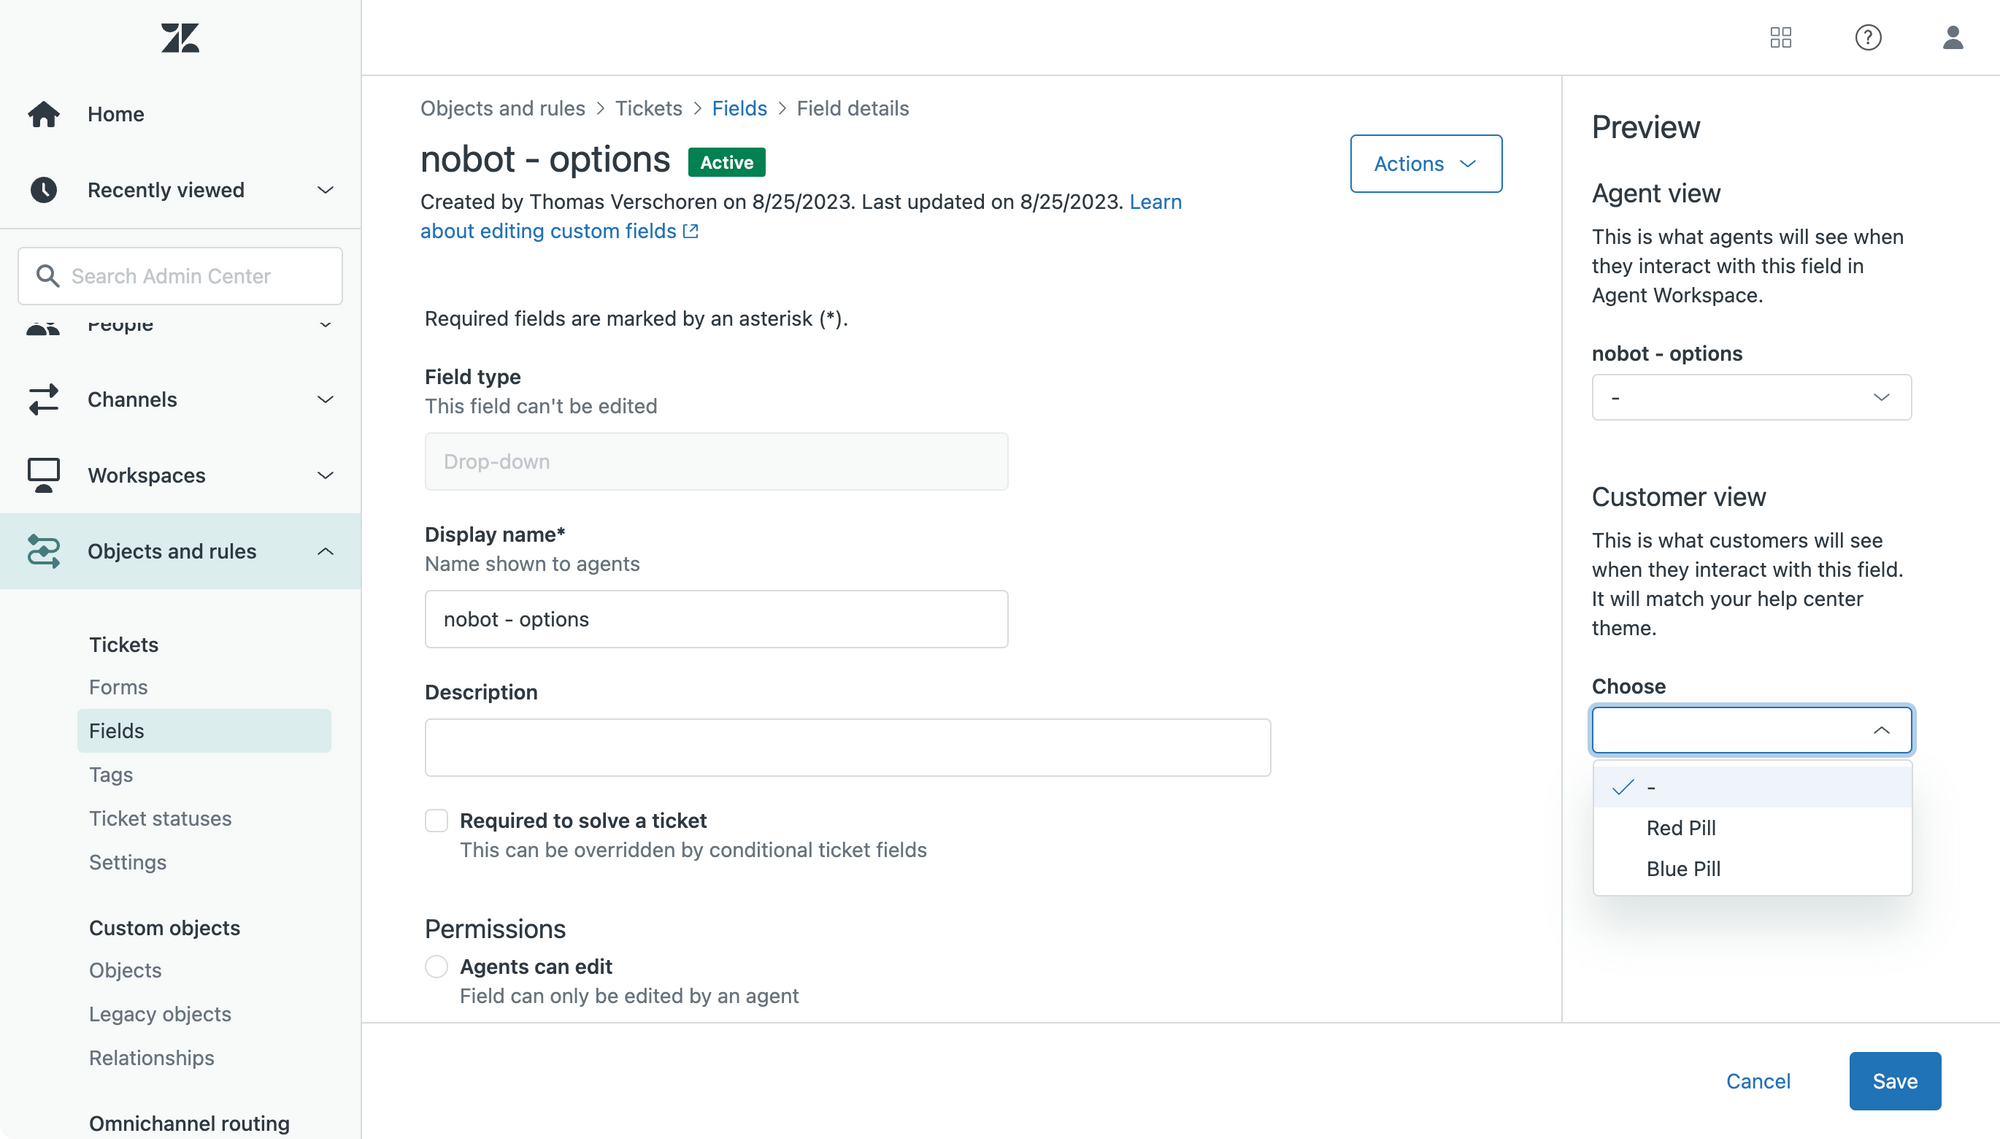
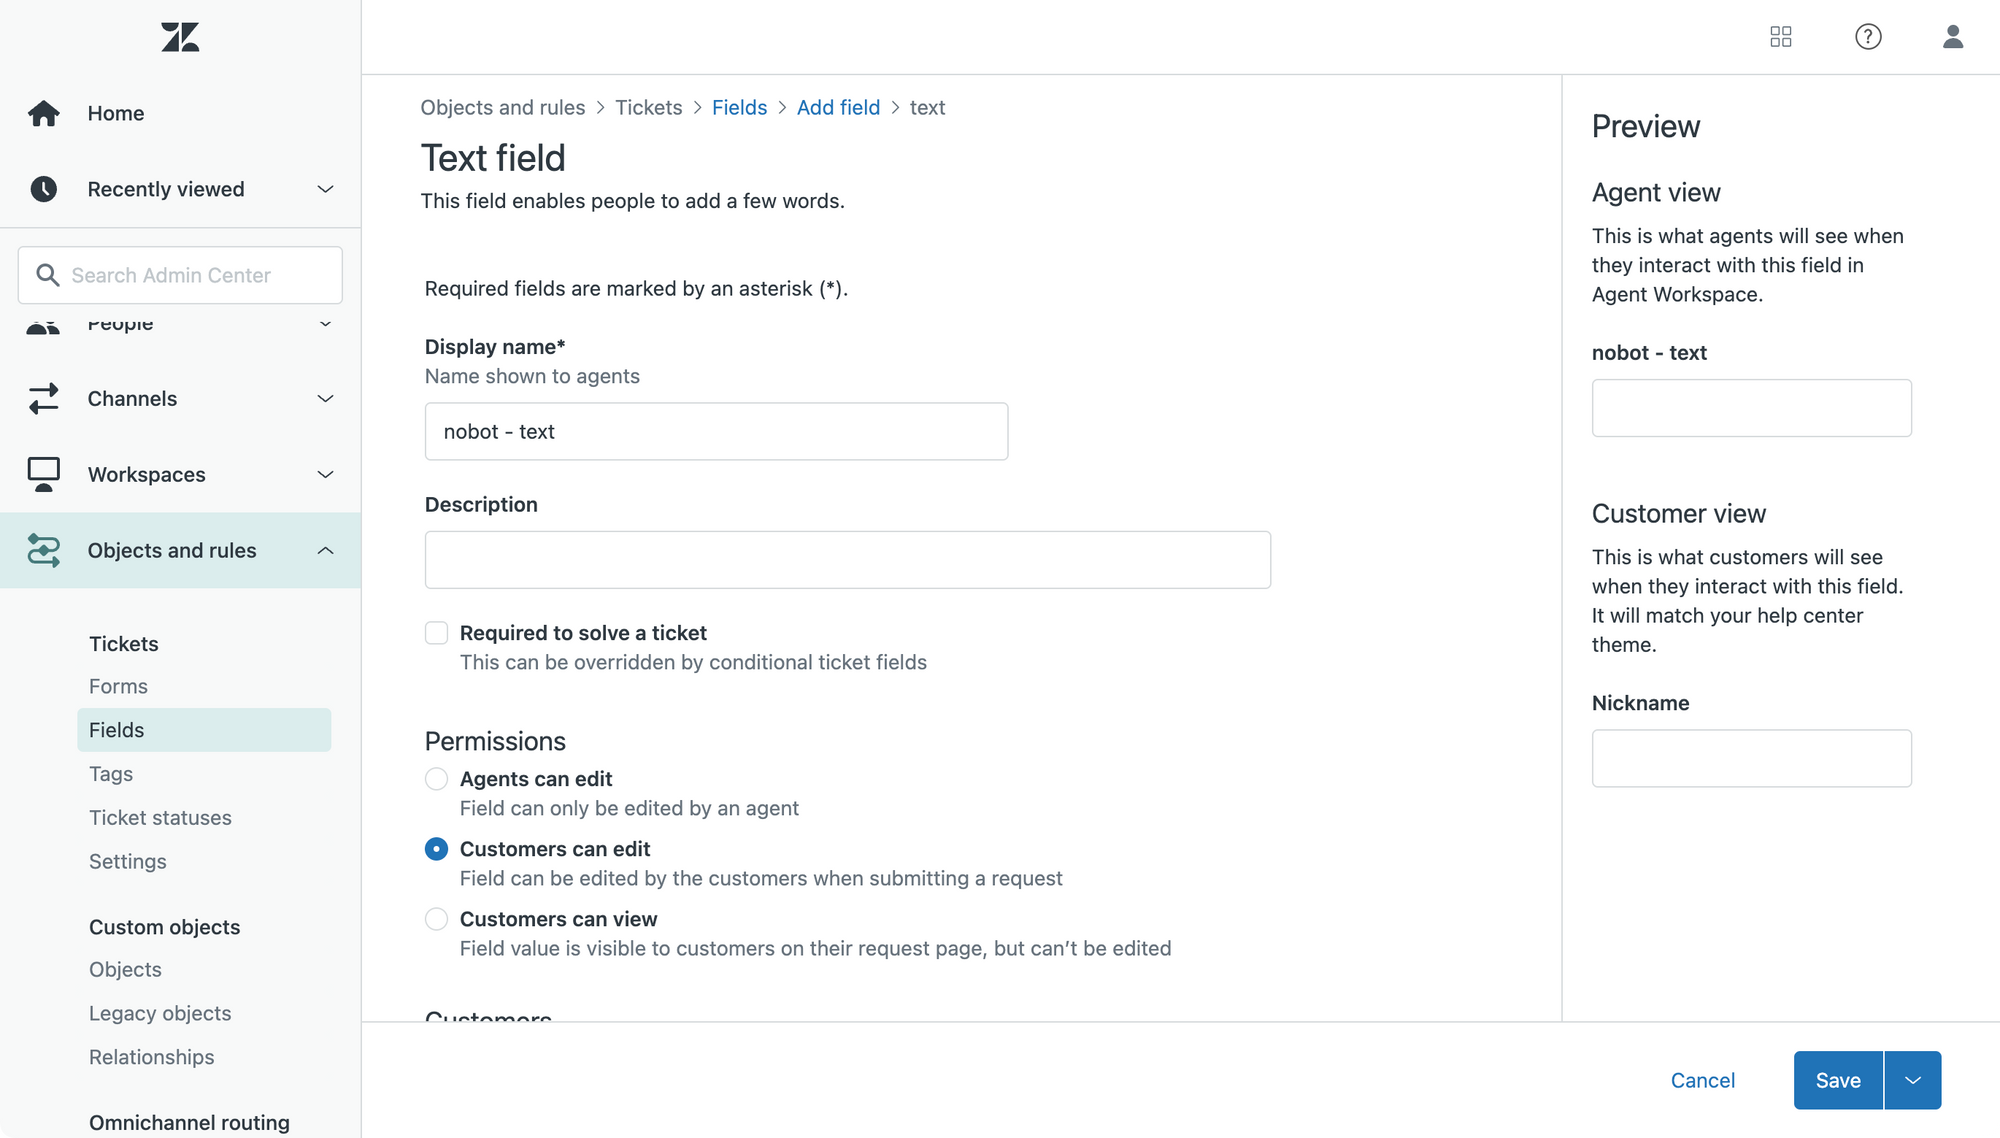
First, let's set the context. Our Zendesk setup has two custom fields.
- A dropdown where we ask the customer to make a choice
- A text field where the customer can enter some information.
As noted above, no other field types are currently supported.
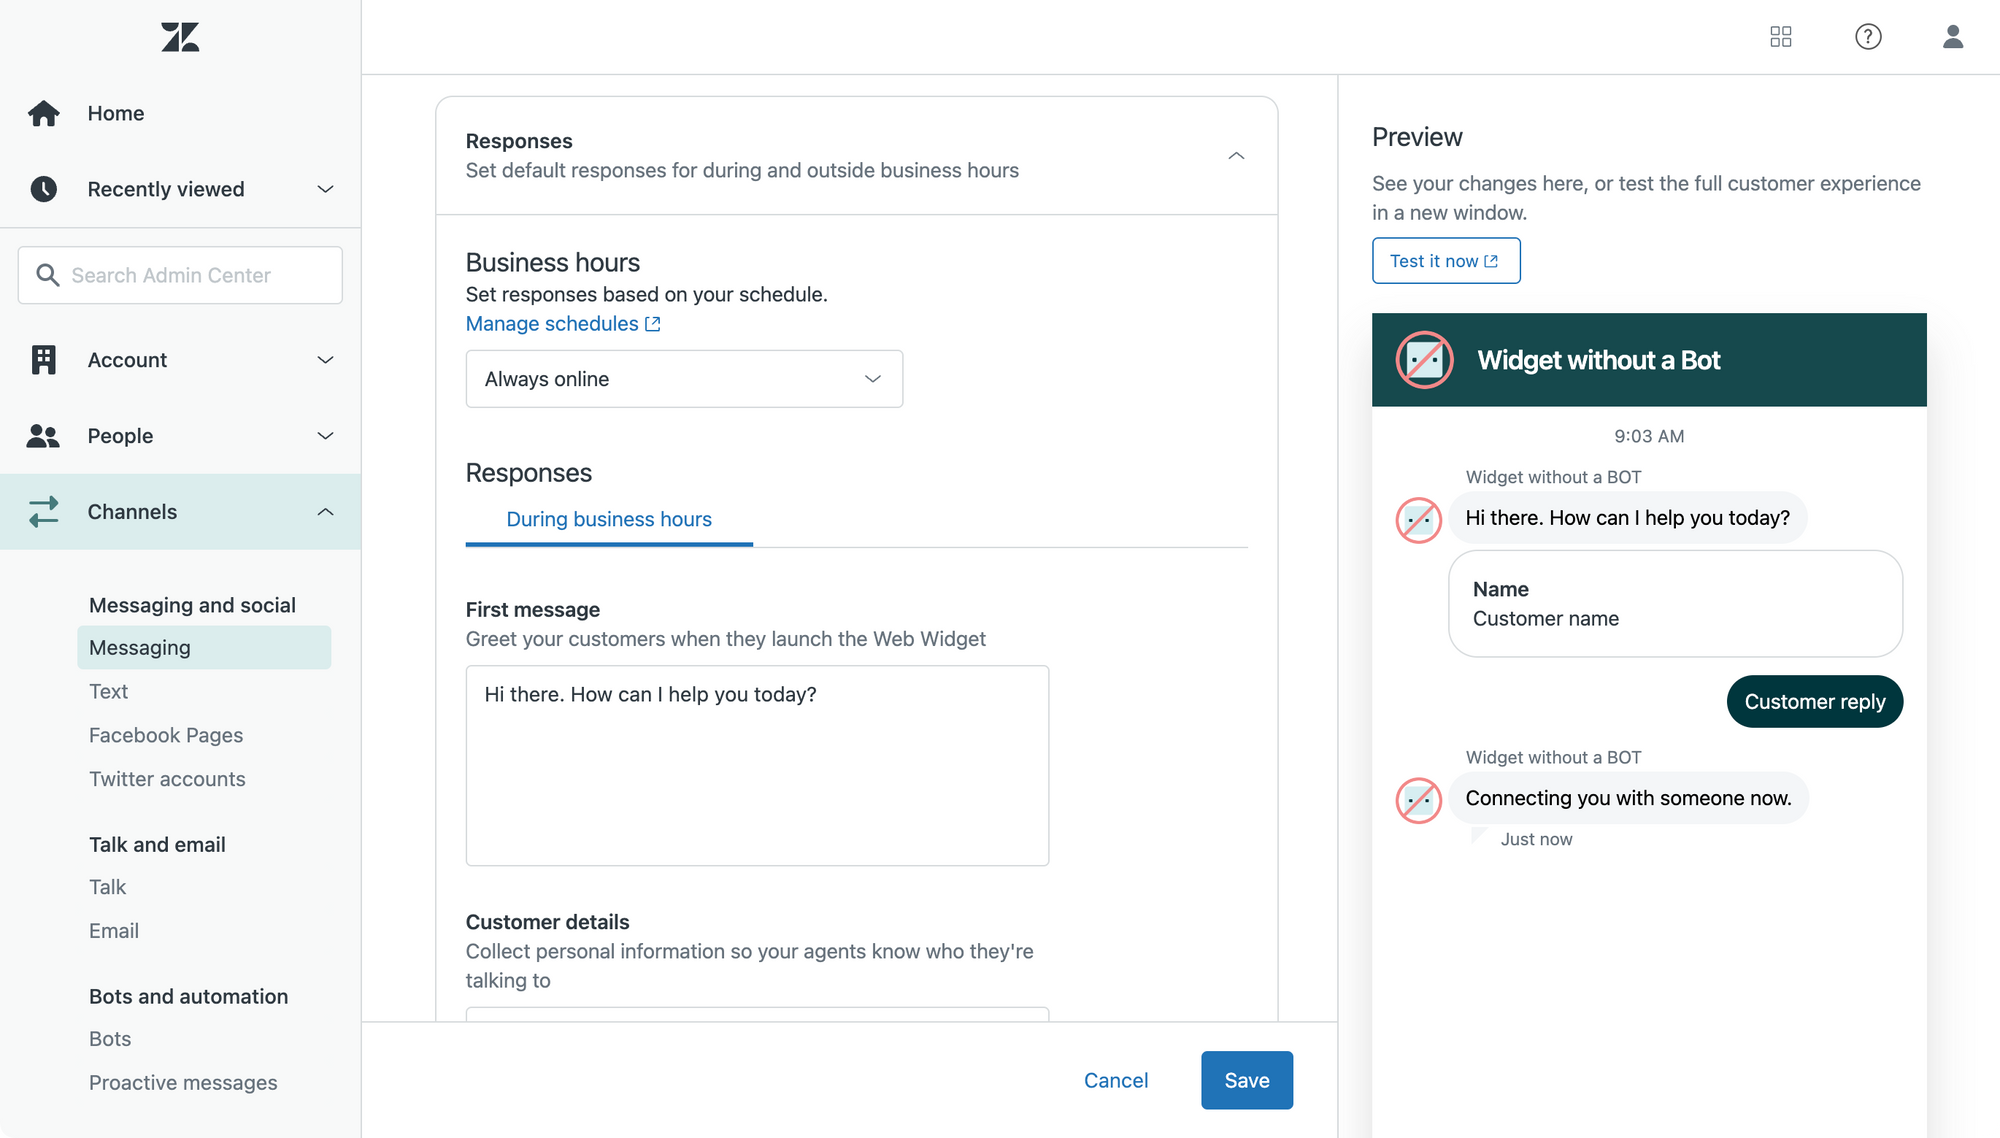
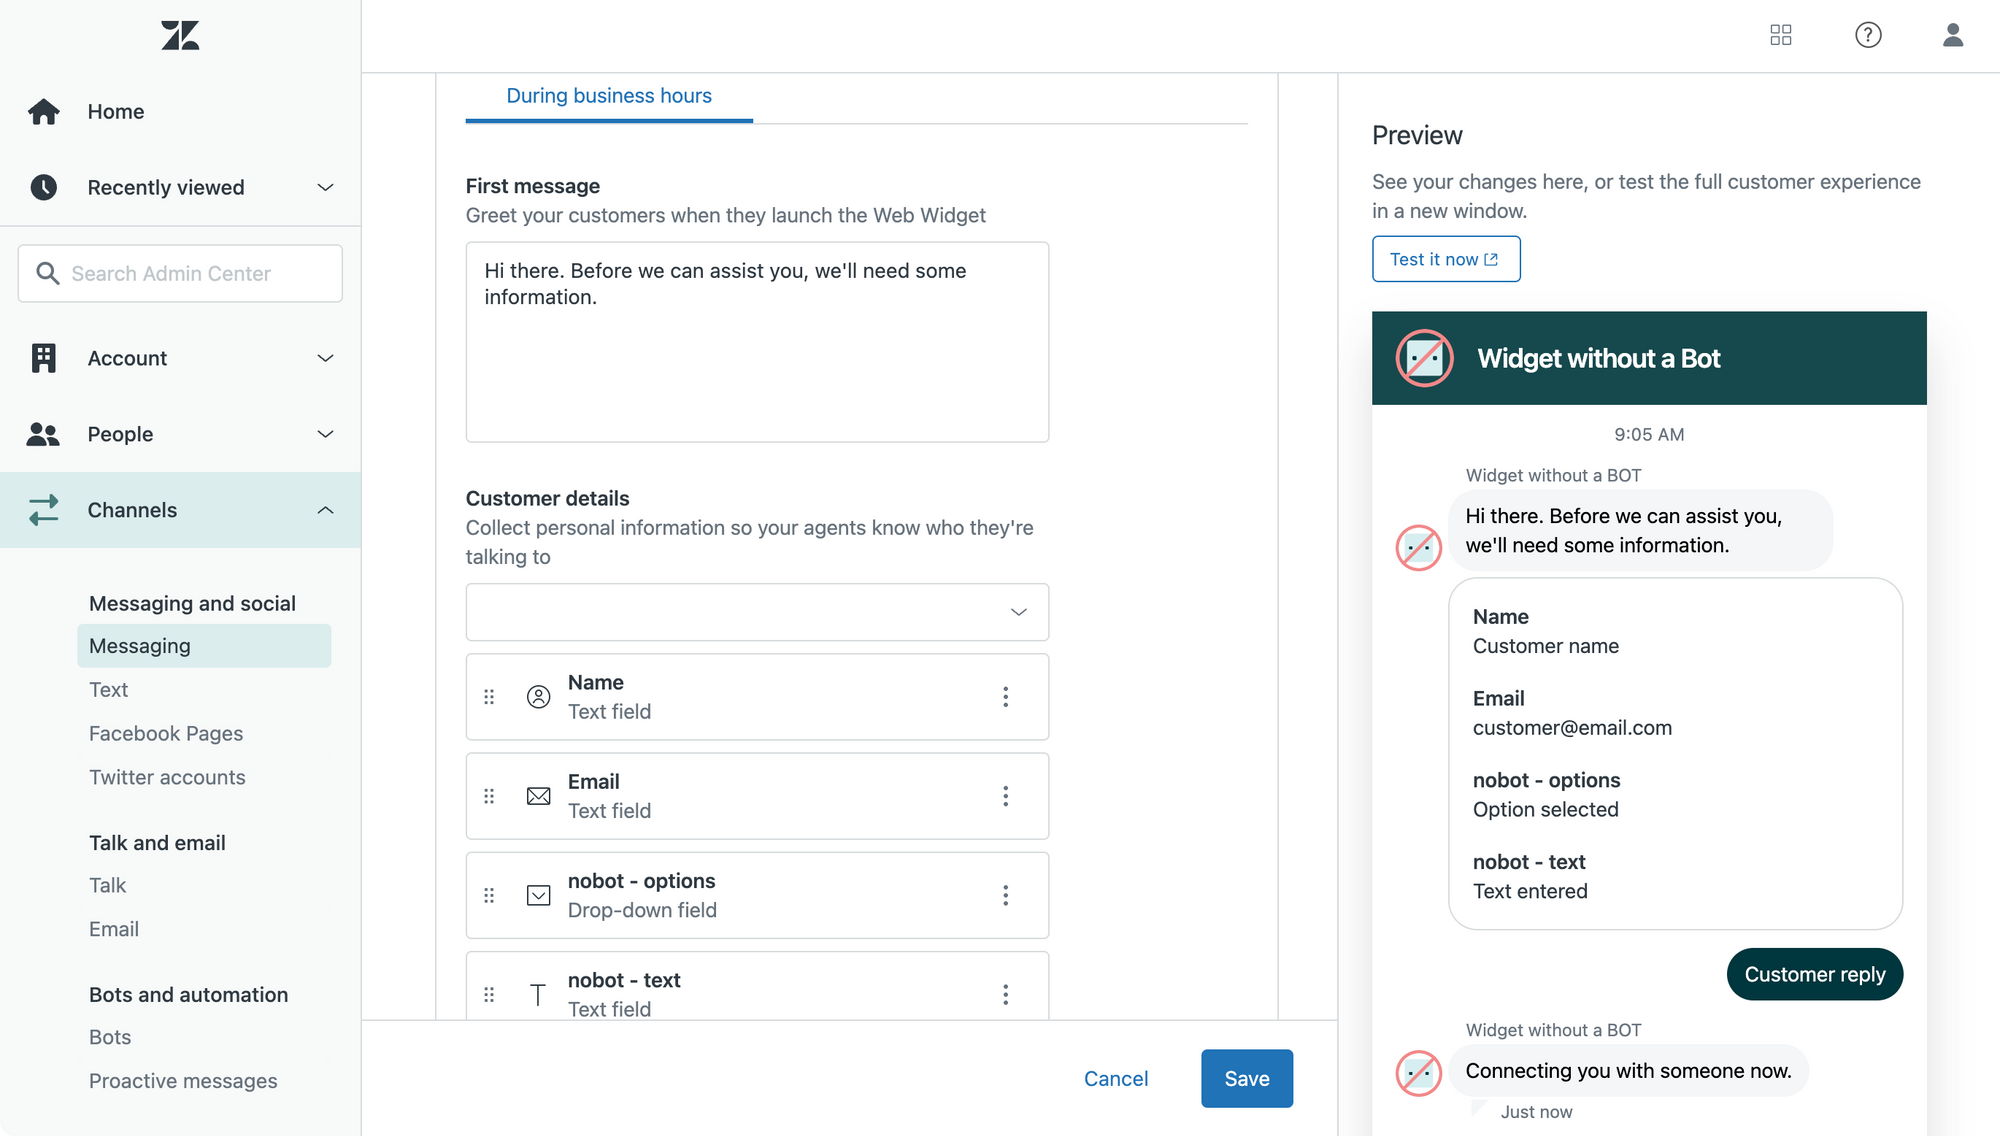
Now that we have our two fields we can jump into Messaging > Widget and go to the Responses section. We can tweak the welcome message, and use the Customer Details section to add, remove or reorder custom fields. Any field you add to this list is mandatory.
In this example I've added the email field from the get go, but note that if no agents are available and you've got Continuous Conversation enabled, the system will asks for the email anyhow. I just find this a nicer flow for the customer.
Once the customer fills in the form they get a final Follow-up message, before we move to an Agent. If you plan to offer only async offline ticketing, it's best to change this follow up message to something akin to "We'll reach out via email".
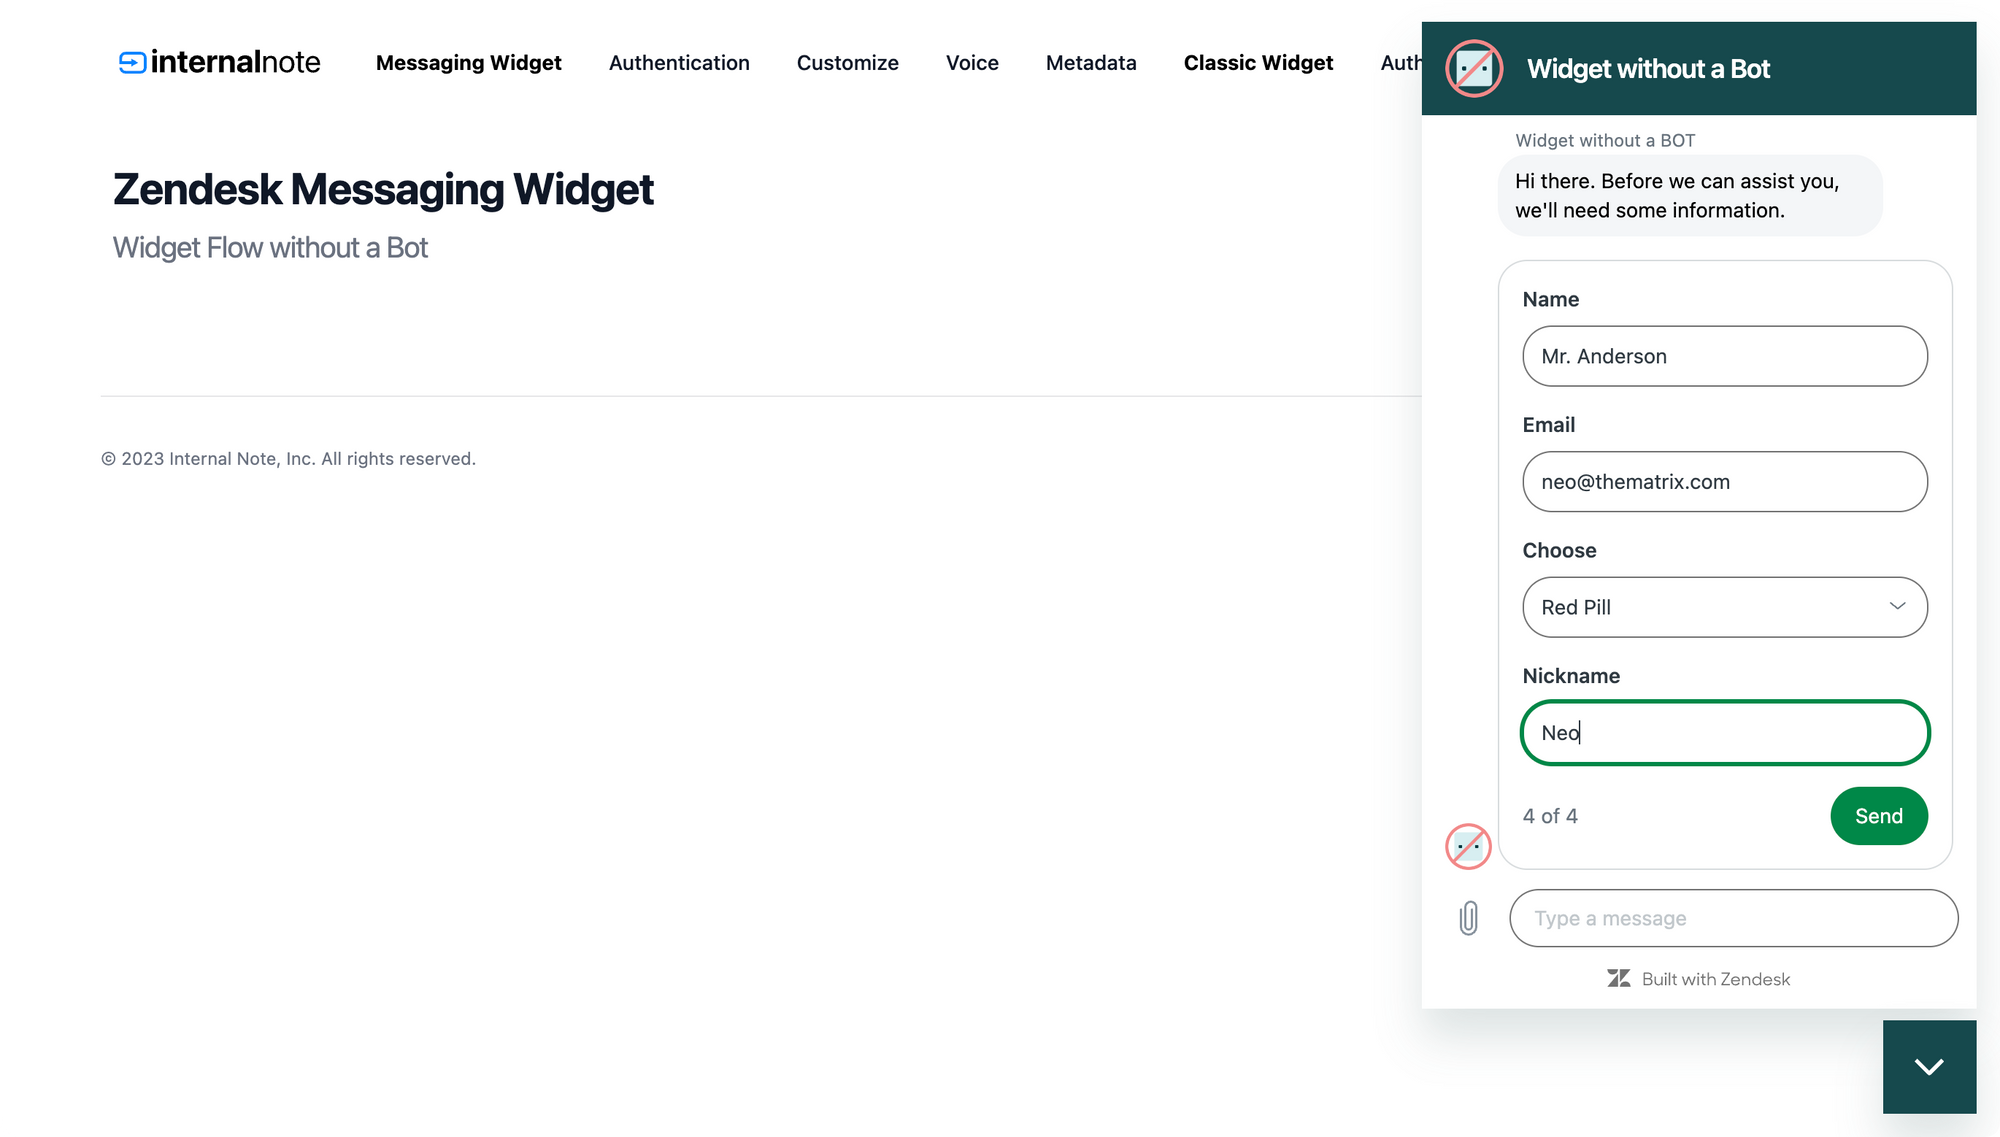
As you can see in the screenshots above, the experience of the end-user is nearly identical to the form-only experience the Classic Widget offered, with the added benefit that you can move to a Zendesk Bot once you're ready.
Pre-fill data
So far, everything we did was a no-code UI only setup. This means it can be done by anyone and requires minimal effort from an IT or Marketing team to enable the widget on your website.
We can however improve this flow a bit with some code.
Imagine a scenario where you have three distinct departments or product categories on your website: mobile, desktop and wearable. Instead of asking the customer to select a product type for their inquiry, it might be nice to preset that option based on the product they're currently looking at.
Or similar, if you have a website that spans multiple countries or multiple properties or hotels, you might want to set the Country, Location or Hotel custom field upon opening the widget based on what the customer is looking at.
 Thomas Verschoren
I wrote an entire article on this topic, and the cool new is that all of those API endpoints also work with this no-chatbot setup.
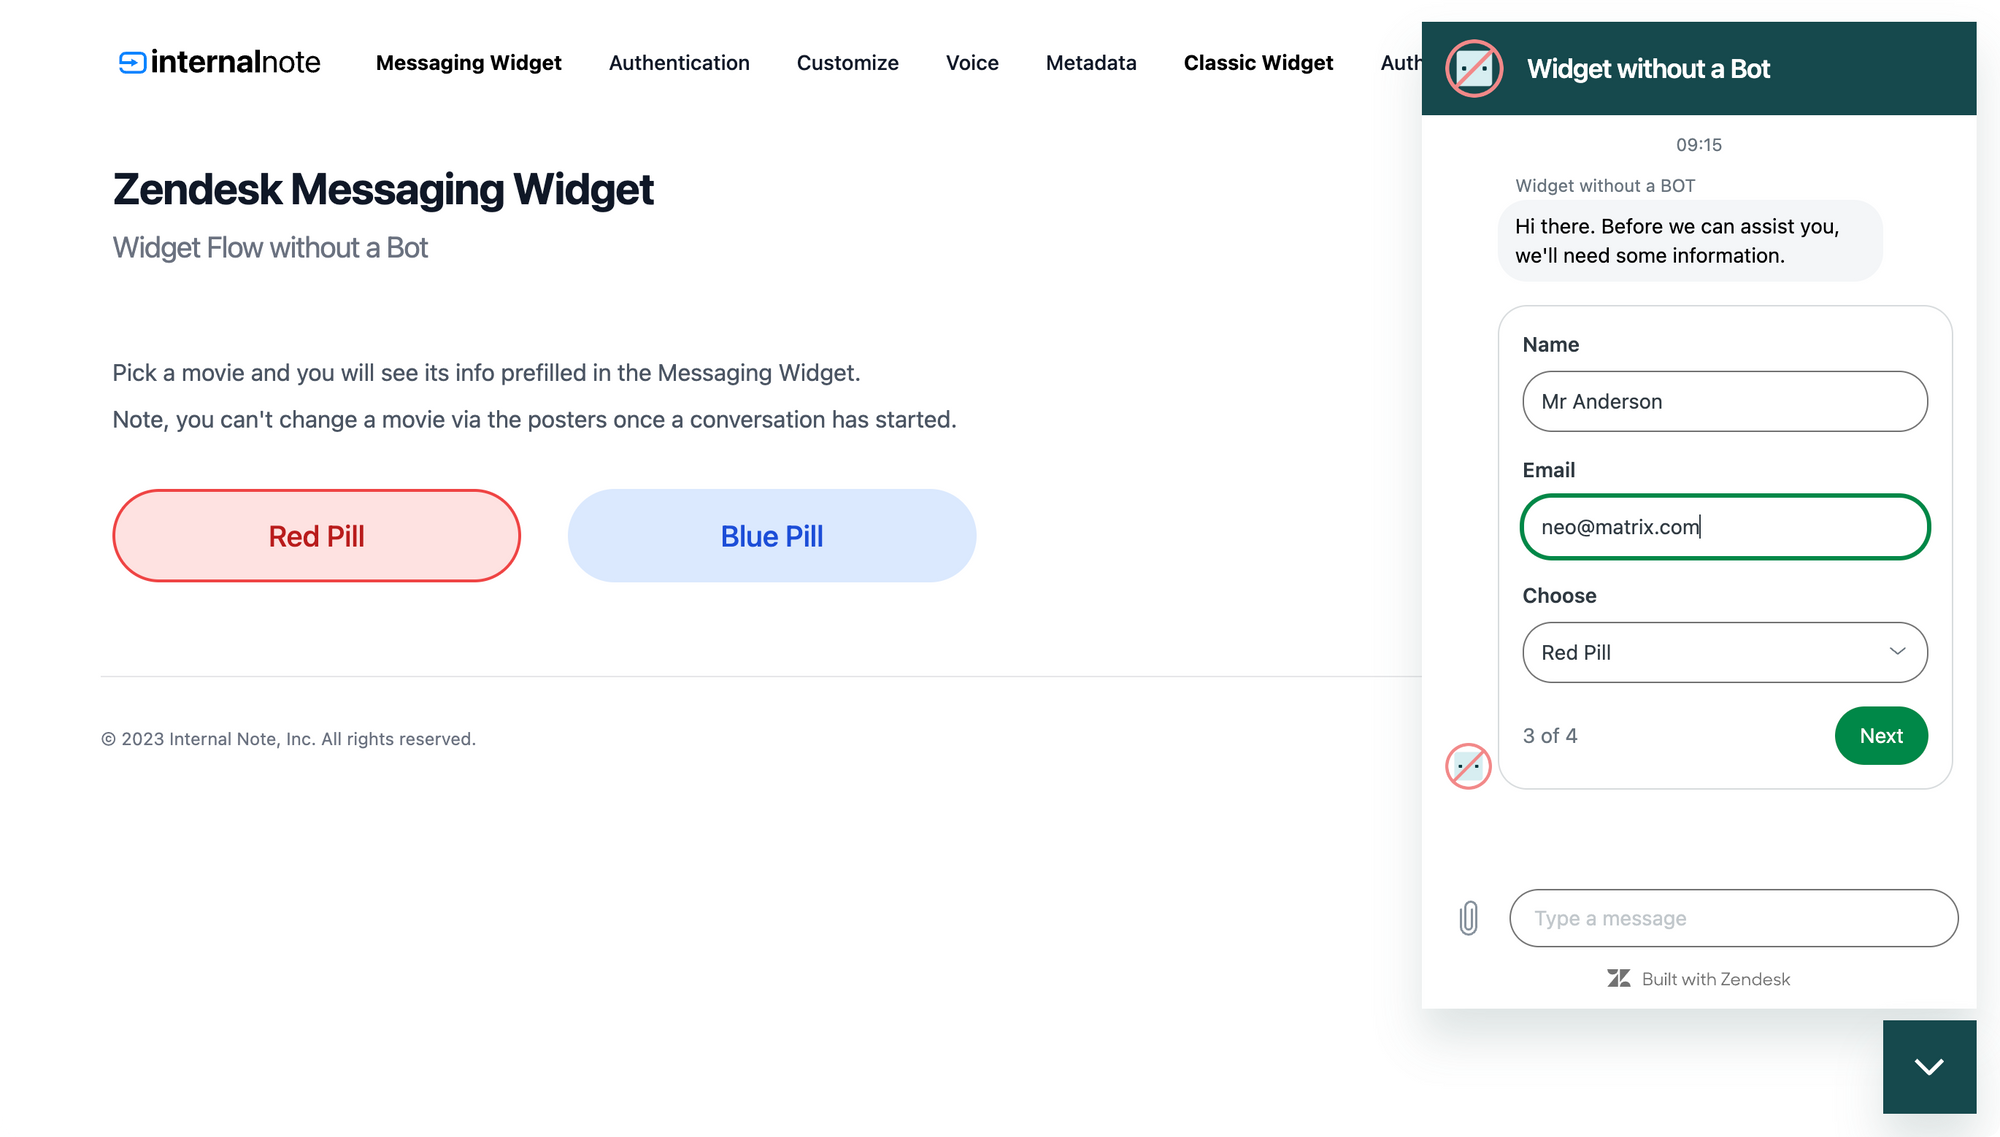
You take the blue pill, the story ends, you wake up in your bed and believe whatever you want to believe. You take the red pill, you stay in wonderland, and I show you how deep the rabbit hole goes.
On the demo page you'll find a sample where clicking a button will make your choice and set the field.
$('.pill').click(function(){
var pill = $(this).data('target');
zE('messenger:set', 'conversationFields', [{ id: '13281147569042', value: pill}]);
zE('messenger', 'open');
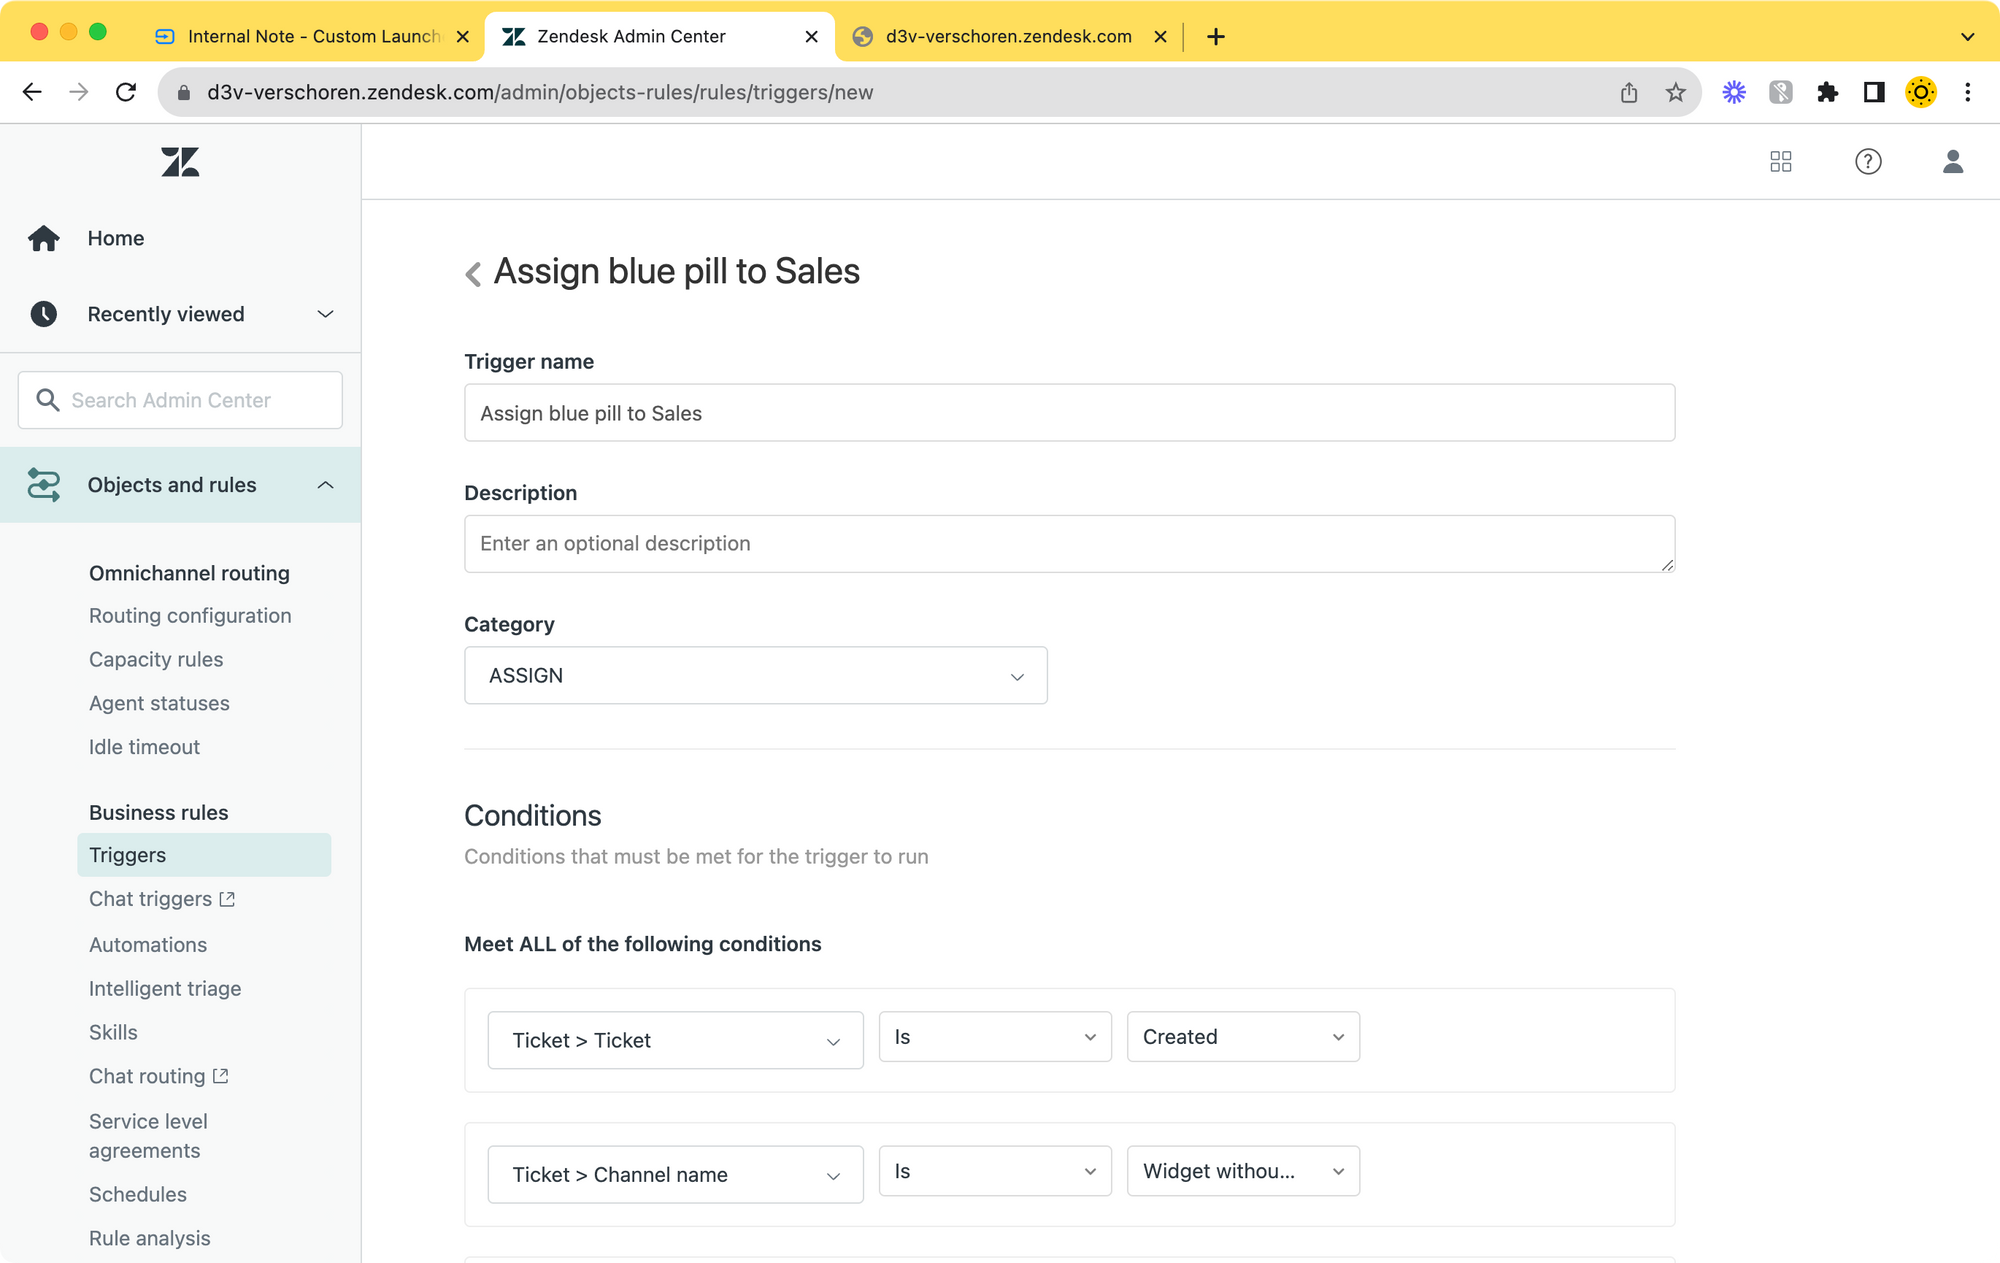
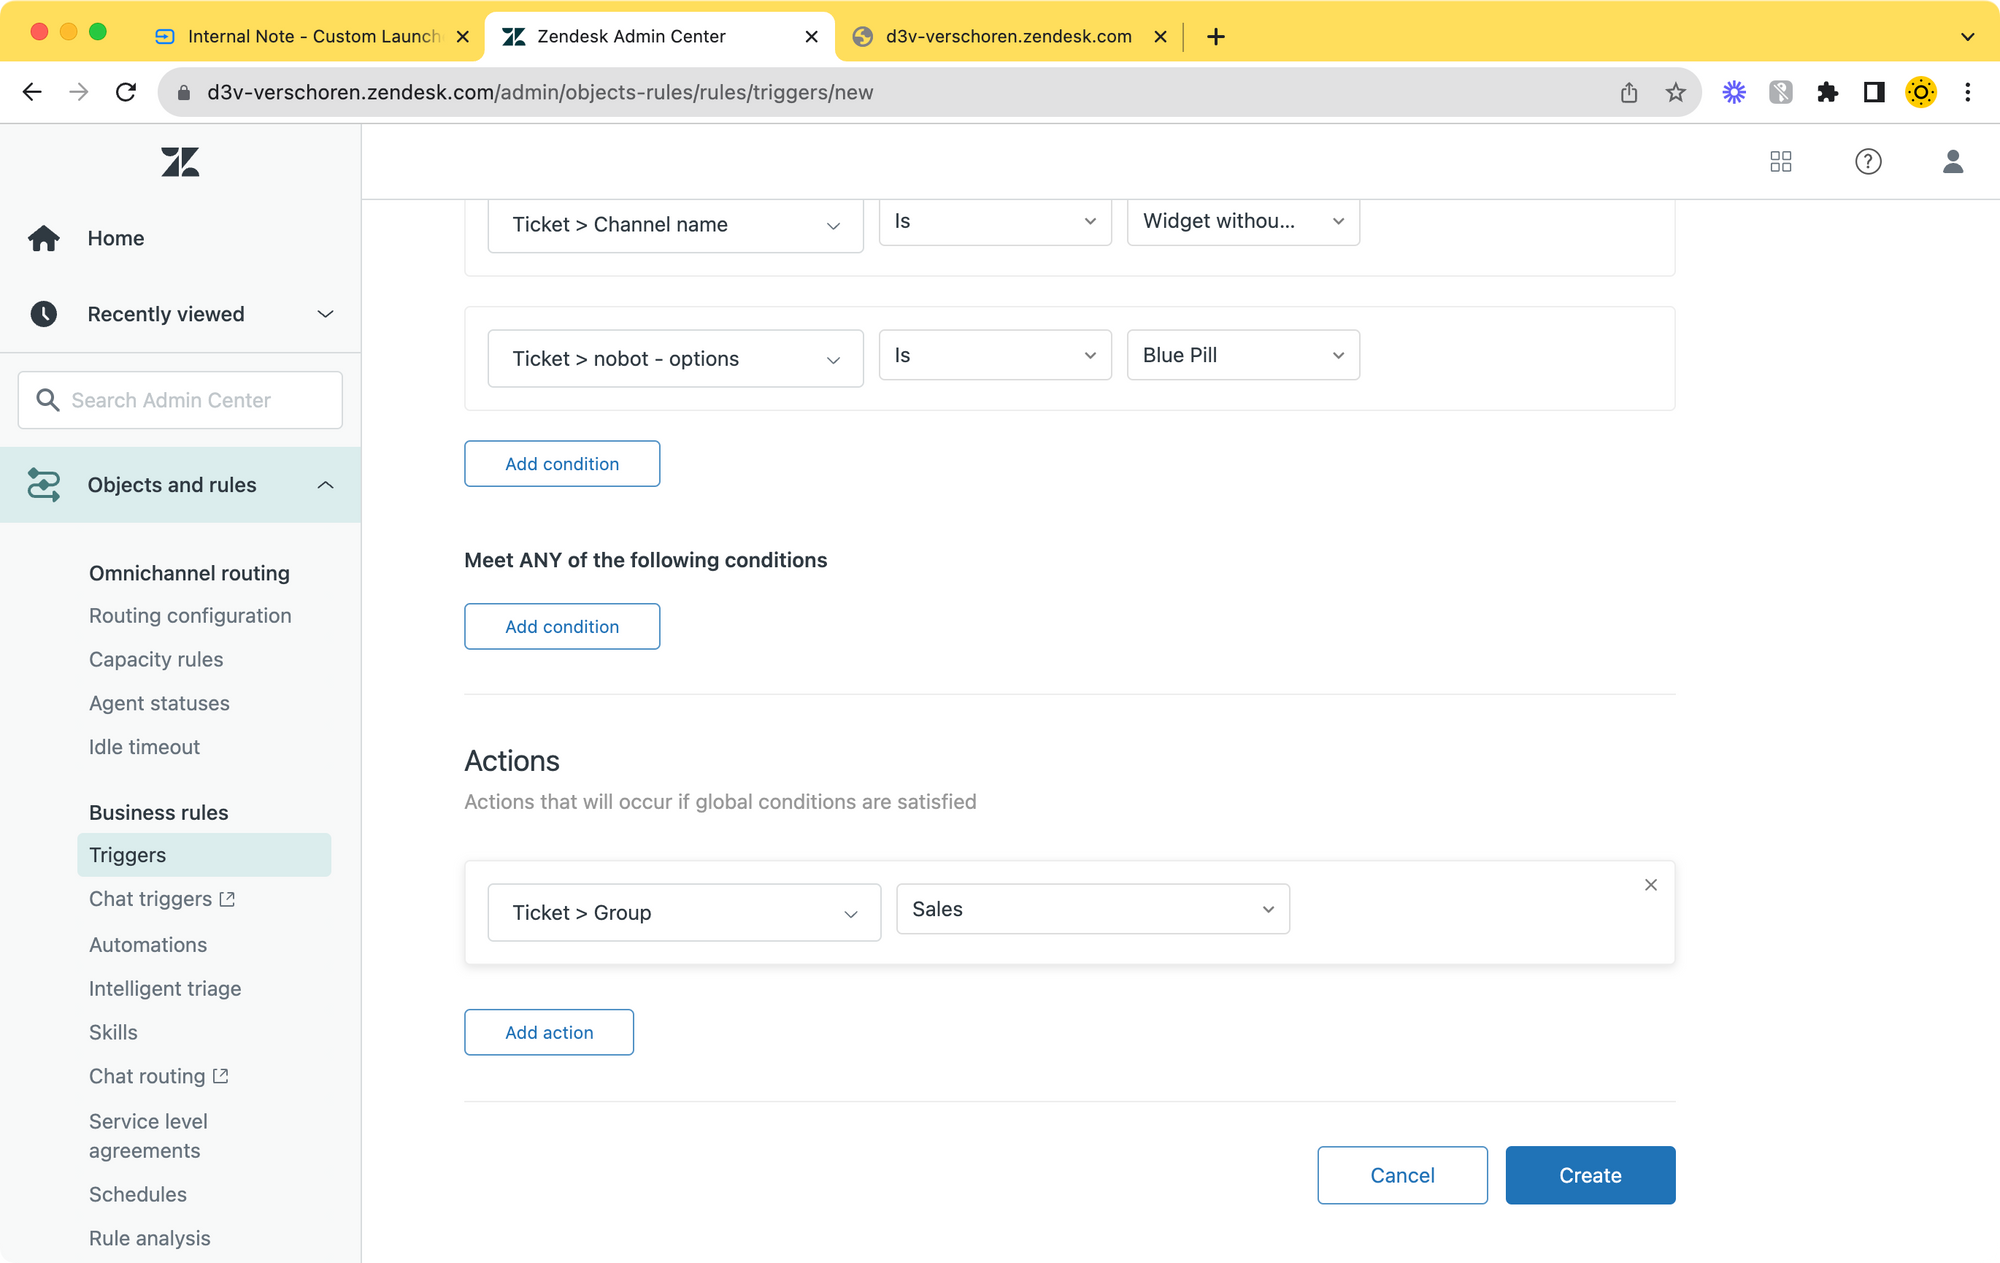
}); And making a choice is one thing, we also want to assign this ticket to someone. Luckily this works identical to how any trigger works. Since we use and set custom ticket fields, we can use those field values to assign tickets to the right department upon ticket creation.
Wrap Up
This new release takes Messaging yet one step closer to the Classic Widget experience while still keeping the spirit of Messaging there. I can really see a flow where companies start with this setup and then gradually migrate to a bot and expand the flow without exposing their customers to big UI changes when they move from forms to bots.
I heard from some people that they would like to see Help Center search, context aware forms, multiple forms,... in this feature too. I agree that these are useful features to have, but I think that those were already covered by the real Zendesk Bot feature.
But either way, this features lowers the threshold of getting on board with Messaging while retaining feature parity with your existing Classic Widget, so it's a real win-win.