Classic Web Widget Authentication
You can authenticate your Zendesk Web Widget to identify your users, and to make restricted Help Center content available to users.
Classic Web Widget Authentication

On this page
You can authenticate your Zendesk Web Widget to identify your users, and to make restricted Help Center content available to users.
By default Zendesk' Web Widget has no idea who's looking at the website. Similarly, when searching the Help Center via the widget, it will only show publicly available articles, and no articles assigned to a specific segment of users or your agents.
To fix this you can pre-fill or authenticate the Web Widget.
Setting it up is easy, as long as you have a working JWT endpoint. If you haven't got one, this guide will show you how to set one up using Cloudflare Workers.
 verschoren
How it works
Let's start at the end of the flow and show a working scenario.
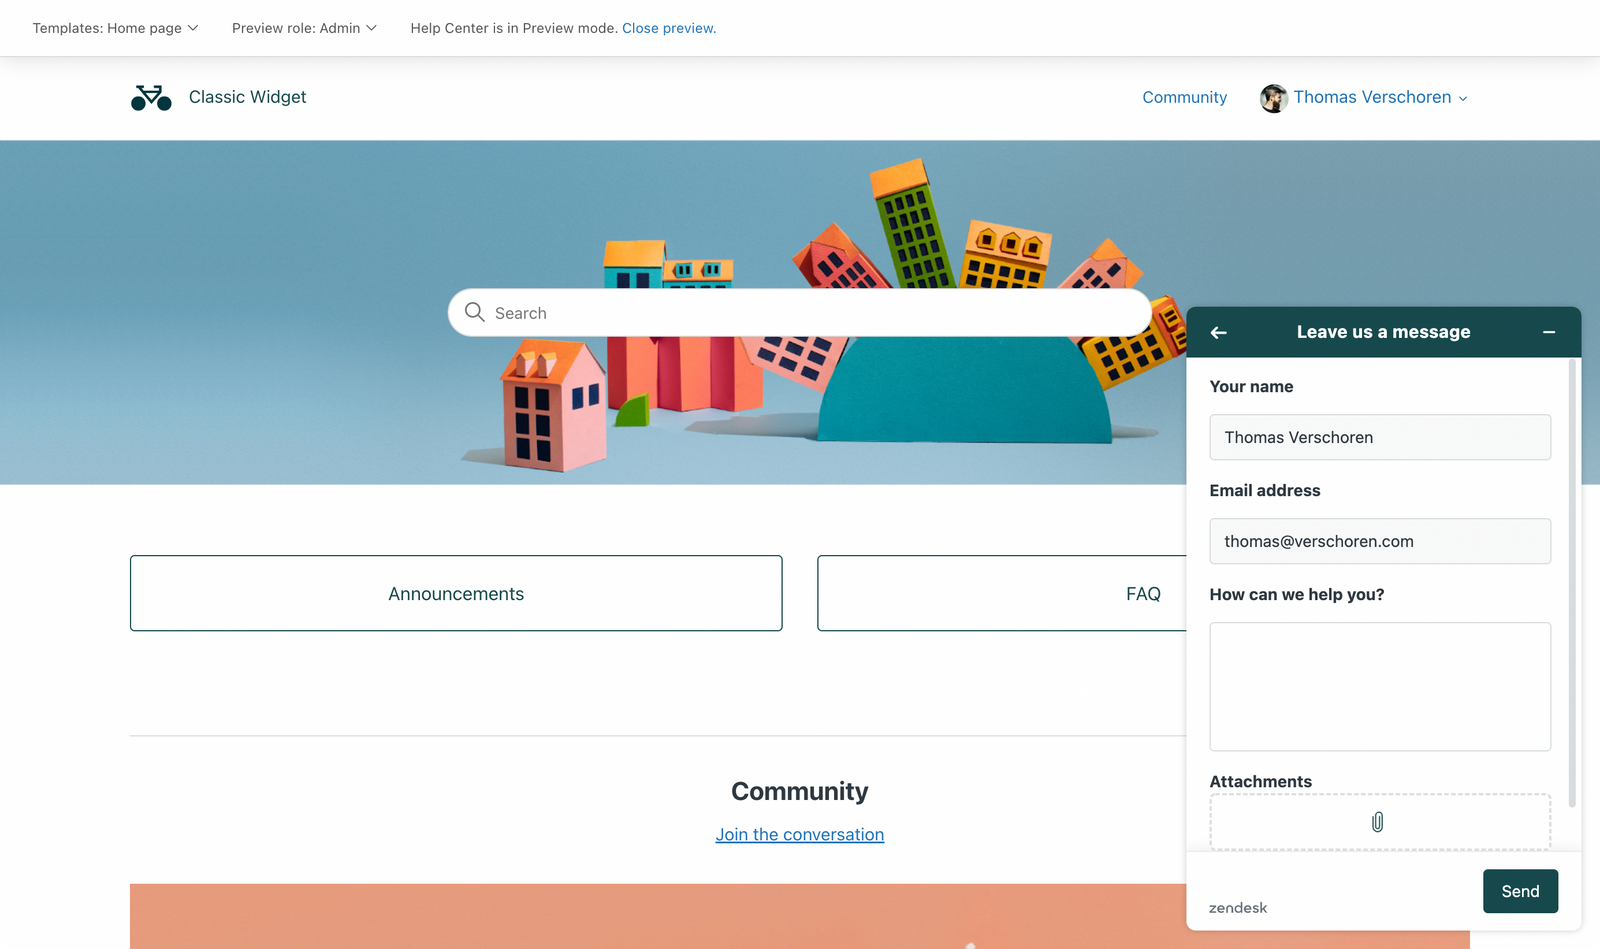
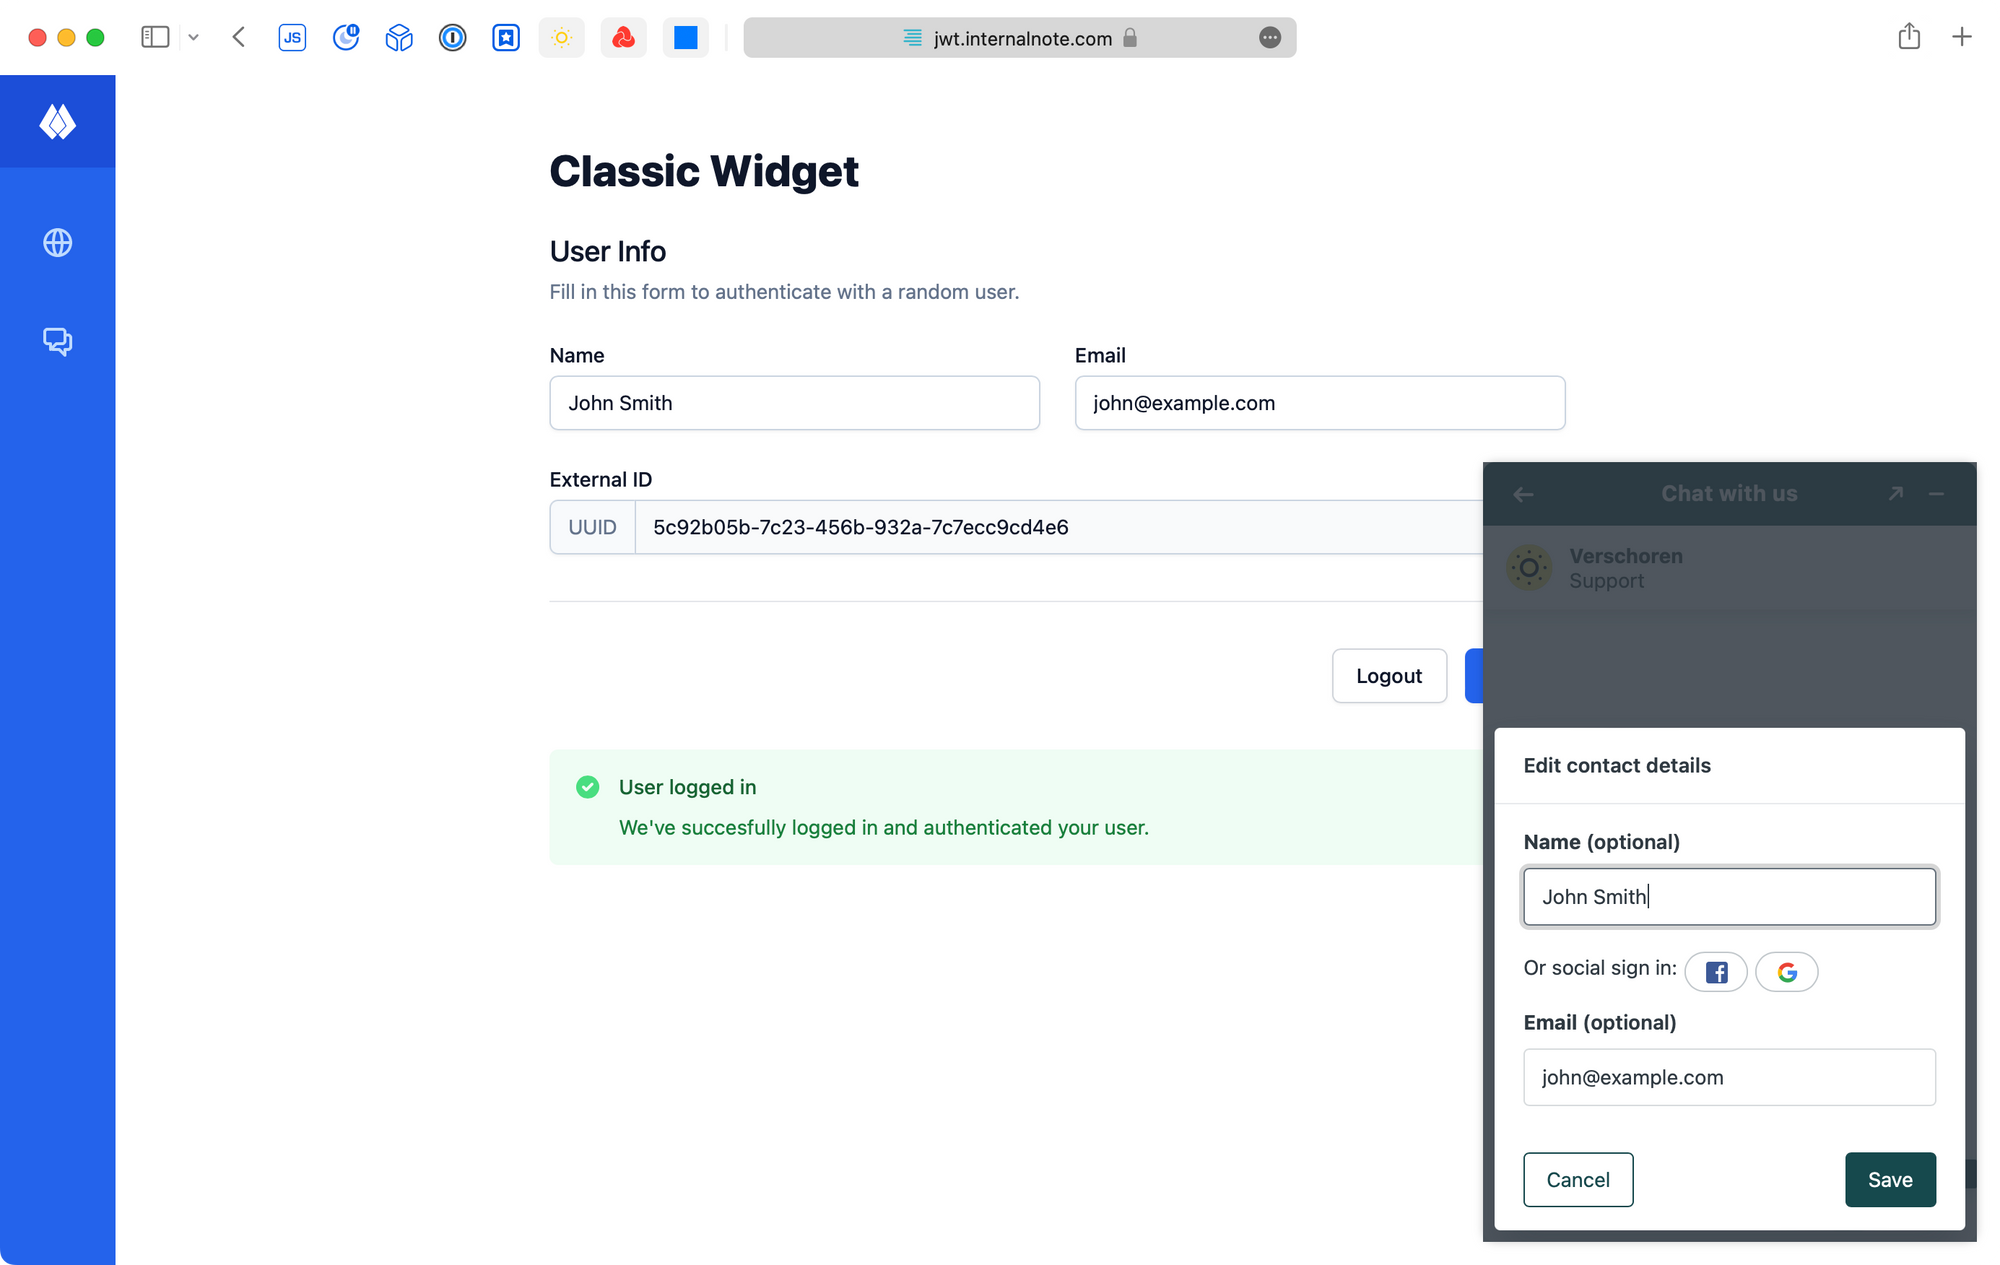
- A user visits https://jwt.internalnote.com
- They enter their name/email and press login
- The website logs in the user and the widget authenticates
- Zendesk recognises the user and fills in their name and email in the prechat form and form fields.
- When the user searches the Help Center, restricted content becomes available.


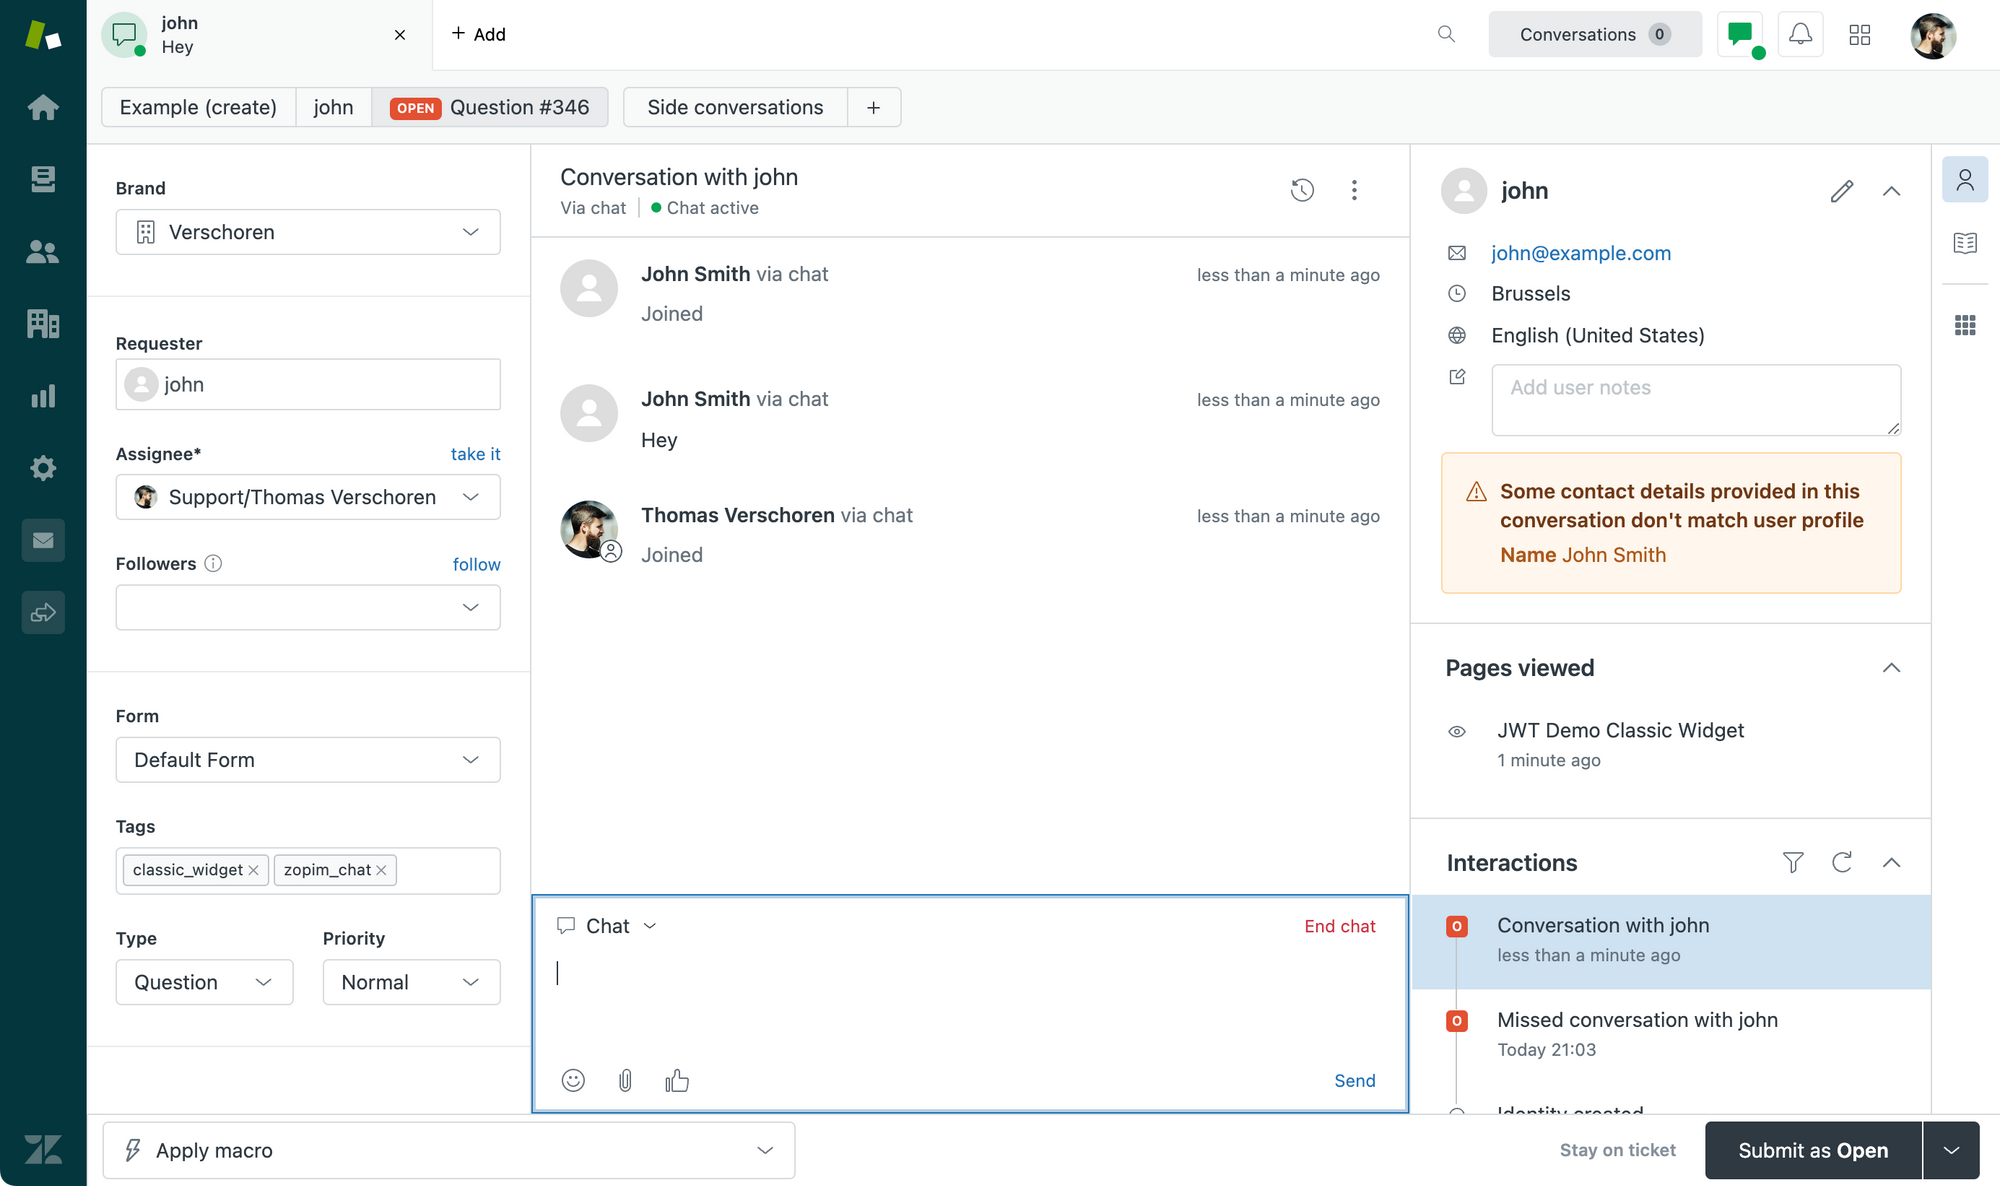
The agent doesn't really see that the user was logged in during the Chat, but he will see the correct name, email and page view history.
Setting up Authentication
Authenticating a user requires the following steps:
- Get the necessary secrets from Zendesk for Chat and Guide
- Create a web service (e.g. via Cloudflare Workers) to generate a valid Valid JWT
- Have a function on your website that calls the web service when a user logs in and generates a JWT based on their email, name and ID
- Push that JWT Tokens to the Widget
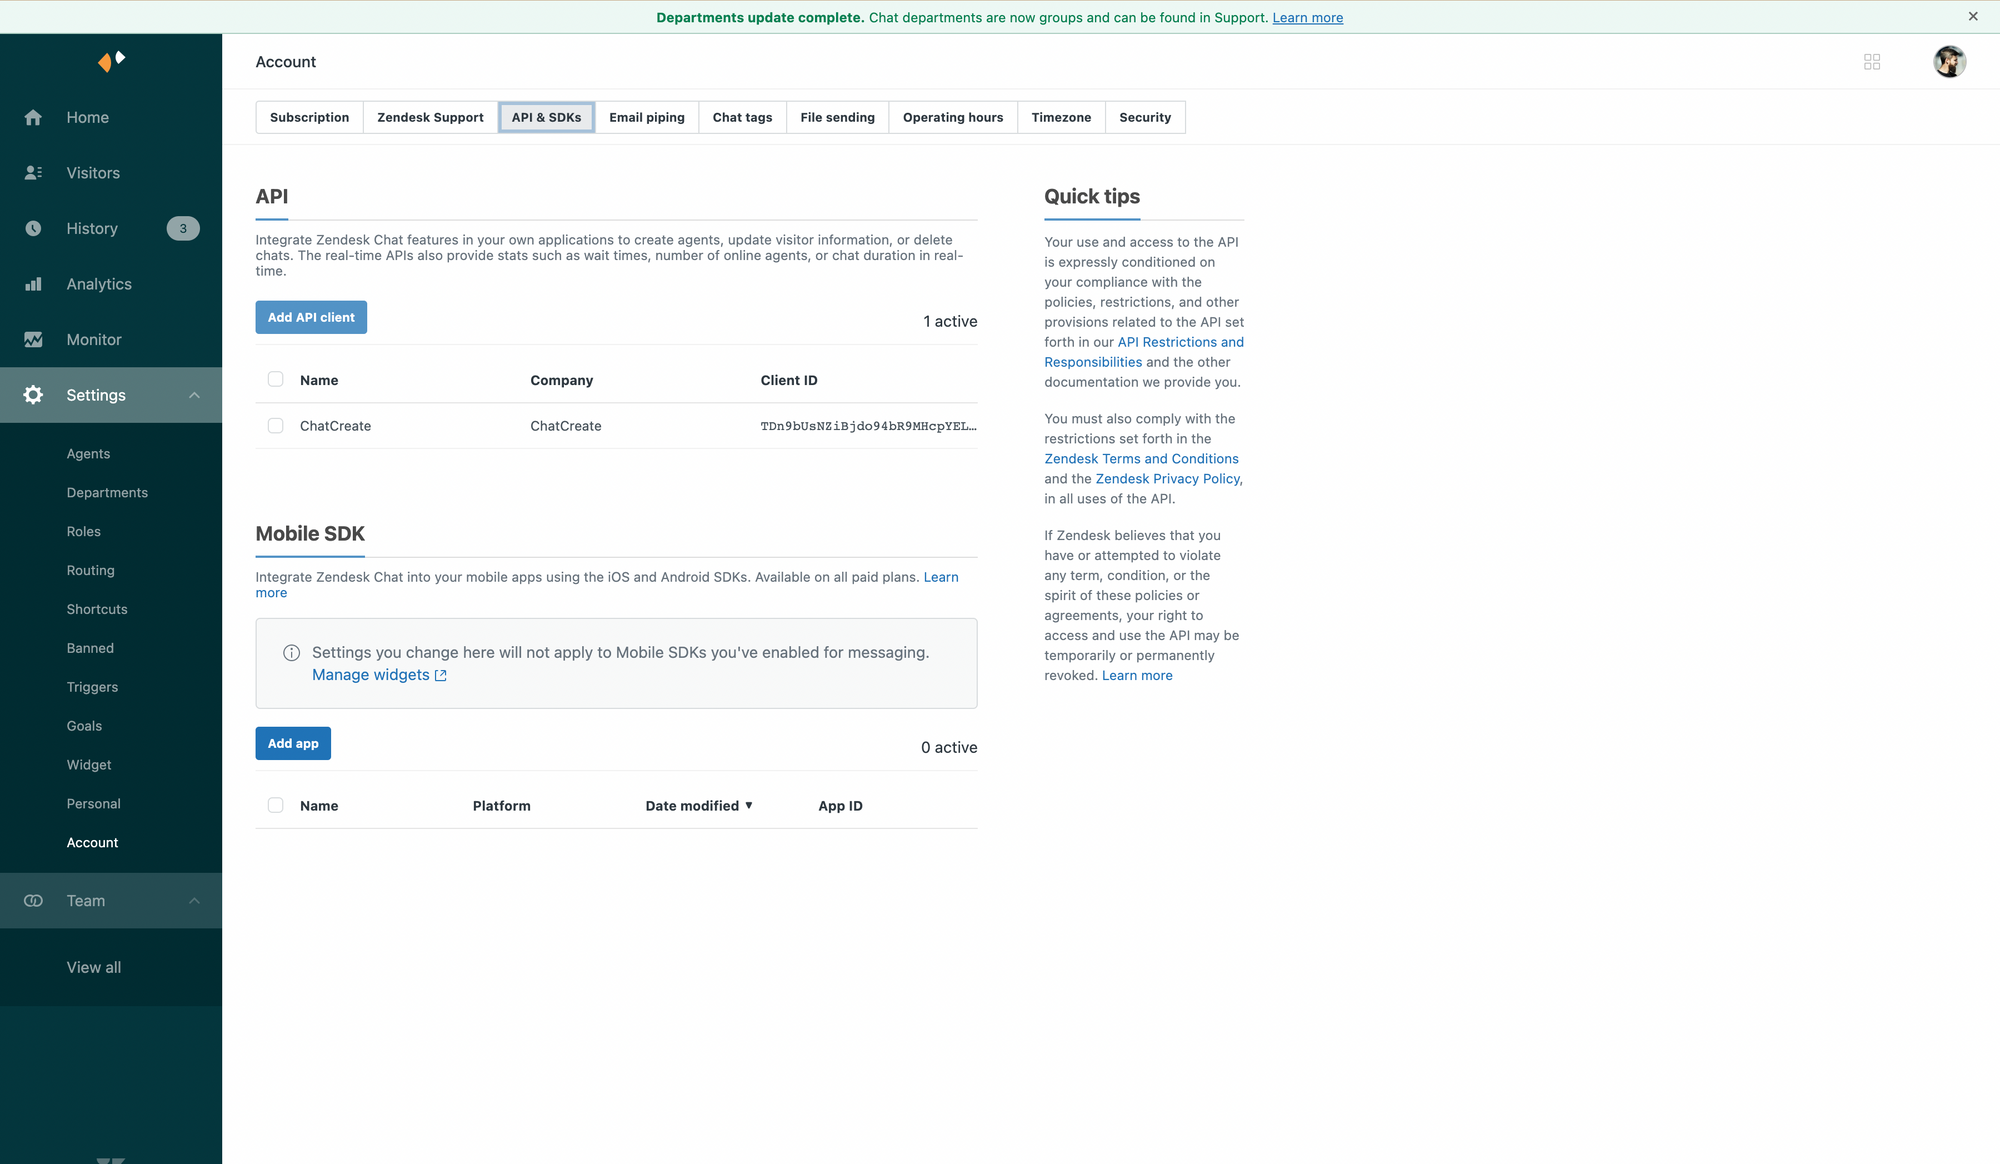
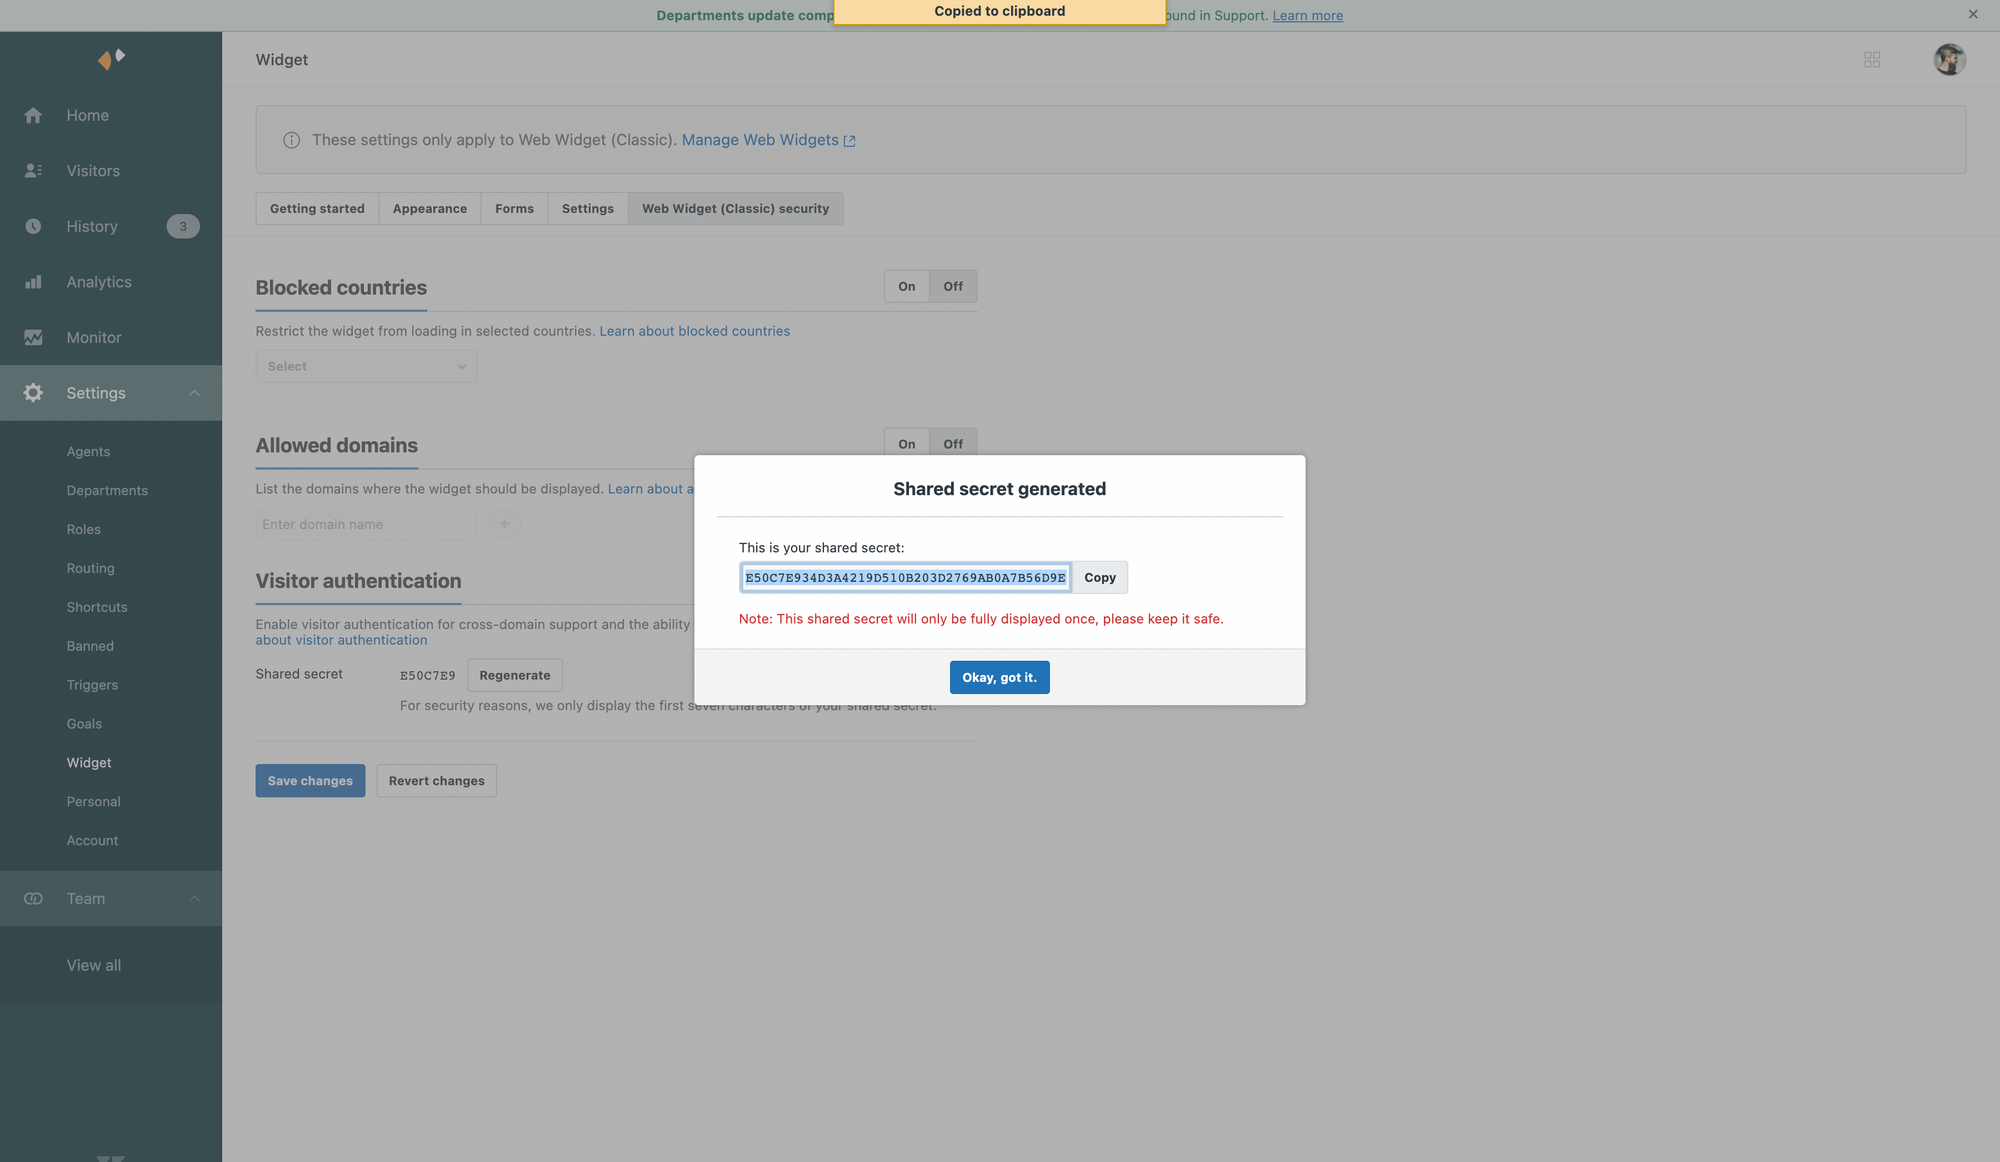
Credentials - Chat
Setting up authentication for Chat first requires generating a Secret.
That's done via https://subdomain.zendesk.com/chat/agent#widget/widget_security
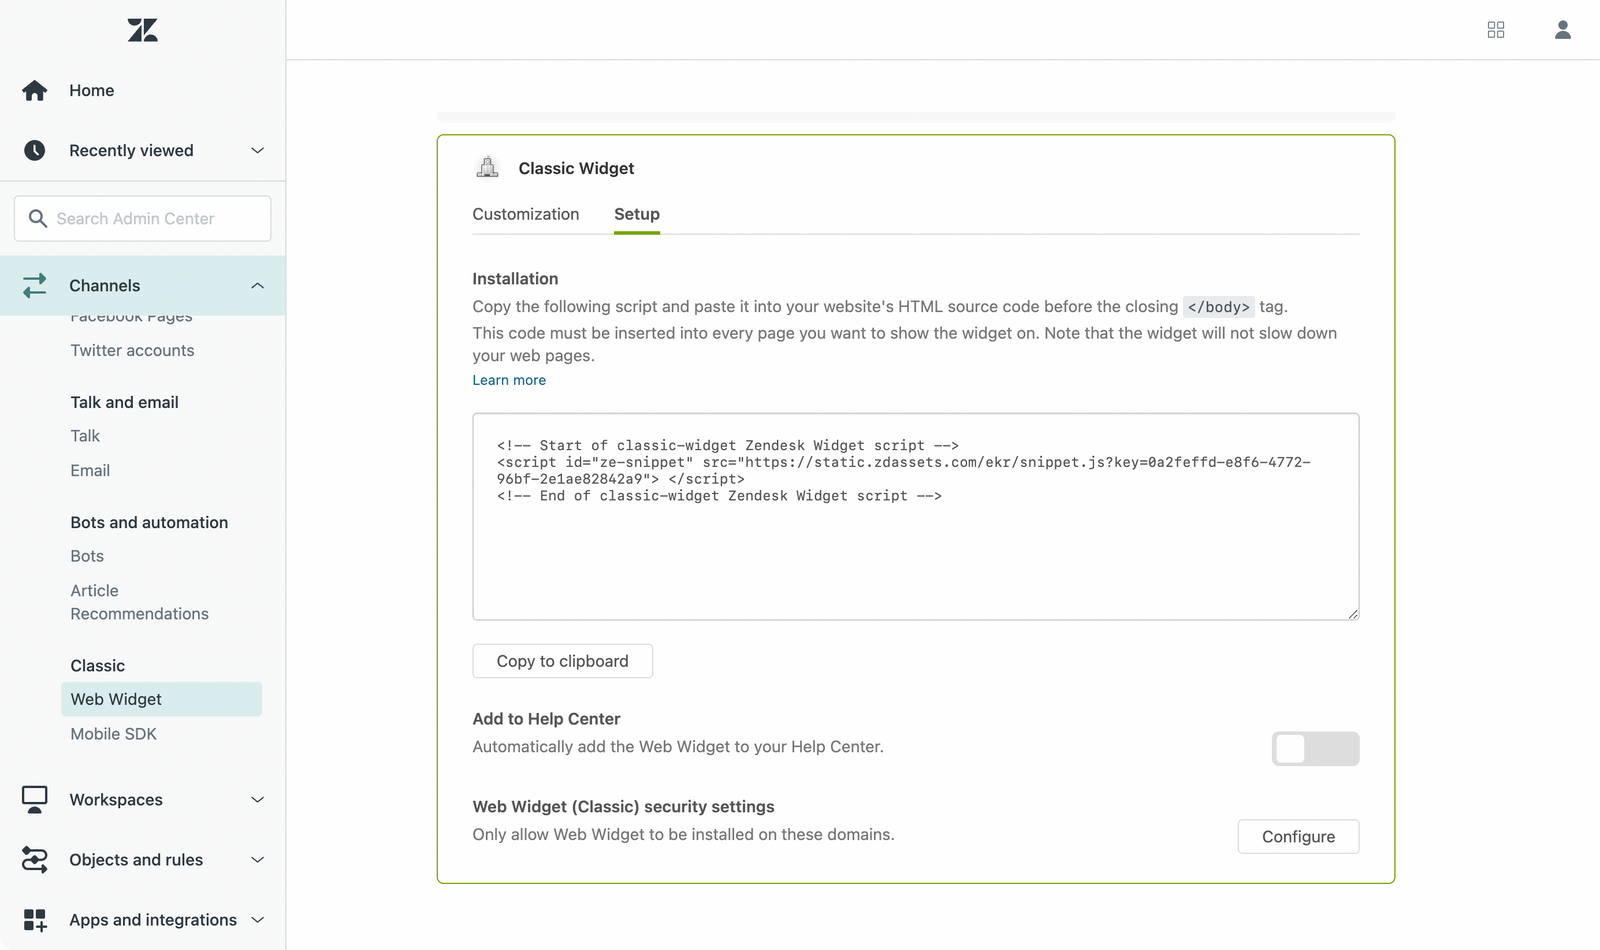
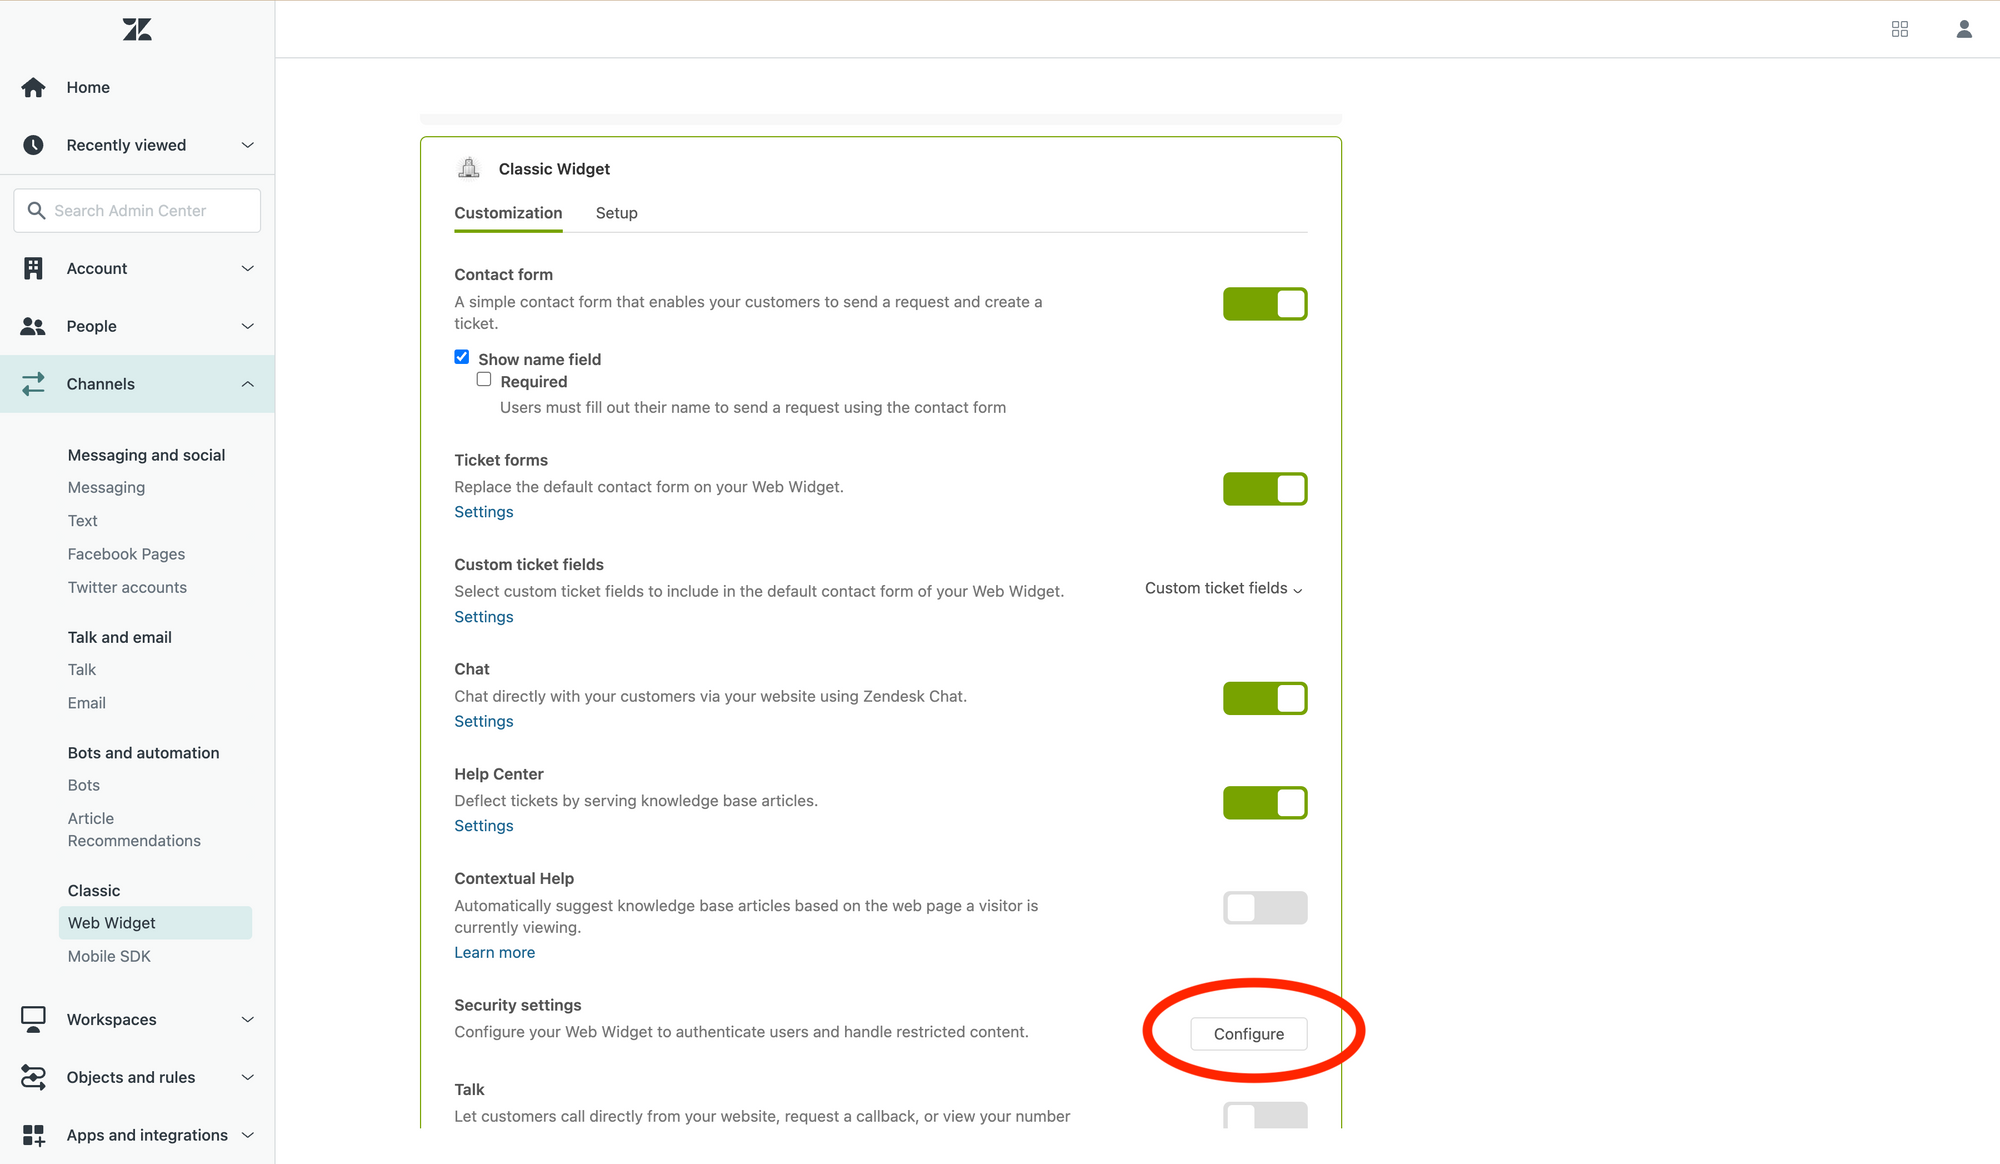
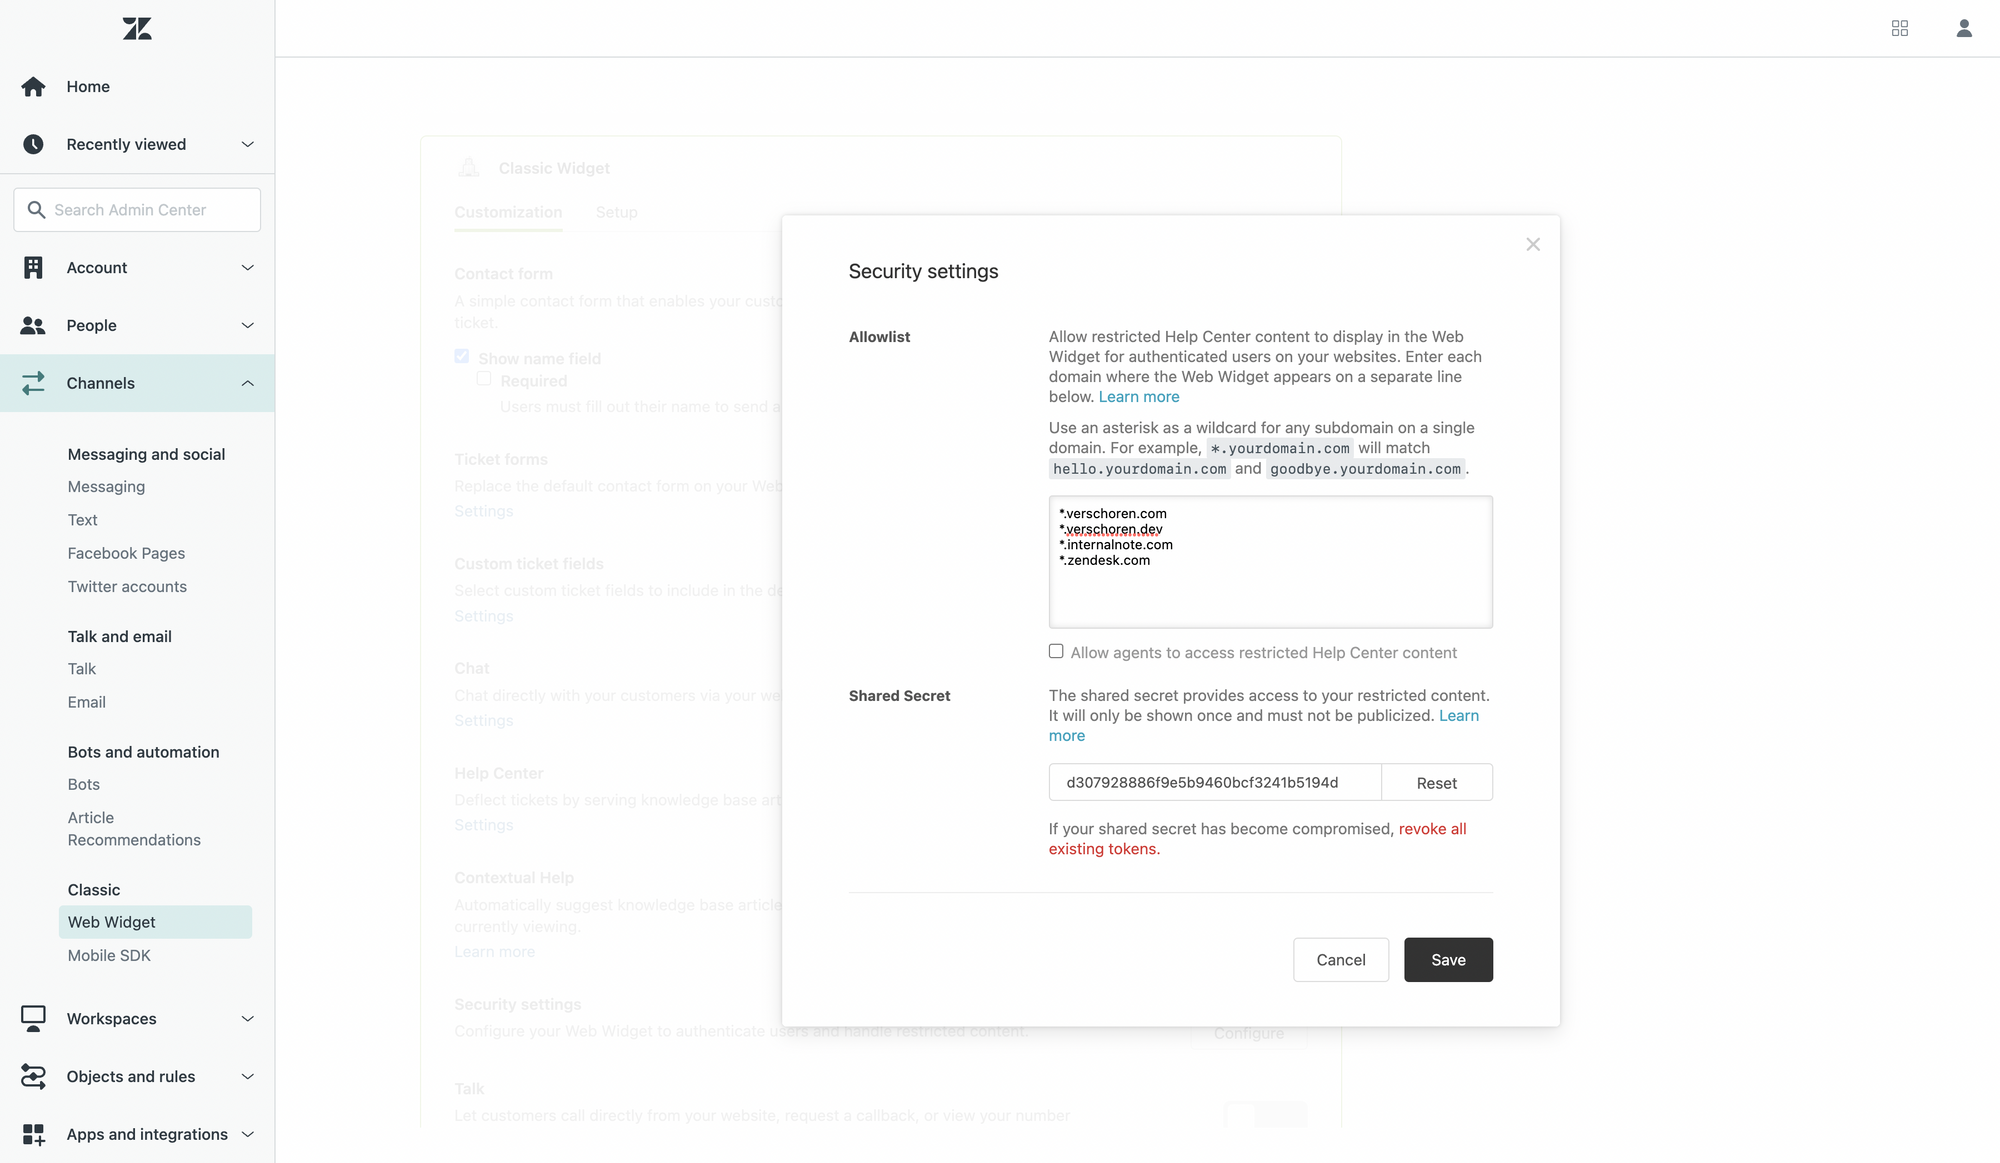
Credentials - Guide
Setting up authentication for Guide requires generating a Secret and filling in a list of allowed d0mains:
This can be done via https://subdomain.zendesk.com/admin/channels/classic/web-widget
Note that you need to enter all websites where you want authentication to work. You can do this via *.domain.com to capture any subdomain for your website(s).
To generate a login for the web widget you'll also need a name, email and external ID for your user.
Generating the JWT
Based on the above items you can generate a working JWT. You can find an example below.
There's a few important caveats:
- External ID has to be unique for each user, so use a GUID, UUID, or database ID
- Our code does not validate if the user exists, it just accept whatever input is there.
Chat
var input = {
    "name":"Thomas Verschoren",
    "email":"[email protected]",
    "external_id":"123456"
}

const secret = "abc123";

var token_raw = {
   iat: Math.floor(Date.now() / 1000),
   name: json.name,
   external_id: json.external_id,
   email: json.email,
};

var token = jwt.encode(token_raw, secret);
Guide
var input = {
    "external_id":1906365876753,
    "user_email":"[email protected]",
    "user_name":"Thomas Verschoren"
}

var secret = "abc123";

var token_raw = {
    jti: Math.floor(Math.random() * 10000000),
    iat: Math.floor(Date.now() / 1000),
    name: json.user_name,
    email: json.user_email,
};

var token = jwt.encode(token_raw, secret);
For the example website above I created a Cloudflare Worker that handles the JWT scenario for both Messaging and the Classic Widget.
You can find a working code example via the link below.
verschorenLogging In
The end result is a JWT token that you pass to the widget via:
//Prefill Forms and Chat
zE('webWidget', 'identify', {
    name: user.name,
    email: user.email,
});

zE('webWidget', 'prefill', {
    name: {
        value: user.name,
        readOnly: true
    },
    email: {
        value: user.email,
        readOnly: true
    }
});

//Authenticate
window.zESettings = {
    webWidget: {
        authenticate: {
            jwtFn: function (callback) {
                callback(jwttoken);
            }
        }
    }
}
What about your Help Center?
You can also easily use the above example to authenticate the widget for users browsing your Help Center.
- Uncheck "Add Widget to Help Center" on https://subdomain.zendesk.com/admin/channels/classic/web-widget
- Copy the Widget Embed Code on that same page.
- Open your Zendesk Guide Theme and edit its code
- Open
document_head.hdbsand paste the Widget Embed Code at the bottom. - Also paste the following code just below the embed code.
 Internal Note
From now on, whenever a user logs into your Help Center, the widget will authenticate itself.