Expanded API Support via Custom Authentication for Zendesk Webhooks
Zendesk announced Custom Headers and API Key support for its Webhooks. And fixed my previous list of shortcomings a 100%
Expanded API Support via Custom Authentication for Zendesk Webhooks

On this page
Zendesk announced Custom Headers and API Key support for its Webhooks. Where they already supported Username/Password, you can now add up to 5 custom headers to your webhook configuration, expanding its support to way more platforms.

I wrote about Shortcomings of Webhooks last fall, and mentioned three scenarios that weren't possible with webhooks at that time:
- Use webhooks to send data to Zendesk Sell, due to lack of
Accept: application/jsonheader - Access resources behind Cloudflare Zero Trust, due to lack of custom authentication headers
- Accessing the Asana API, due to lack of
bearer: tokensupport.
Let's see how this new release changes things.
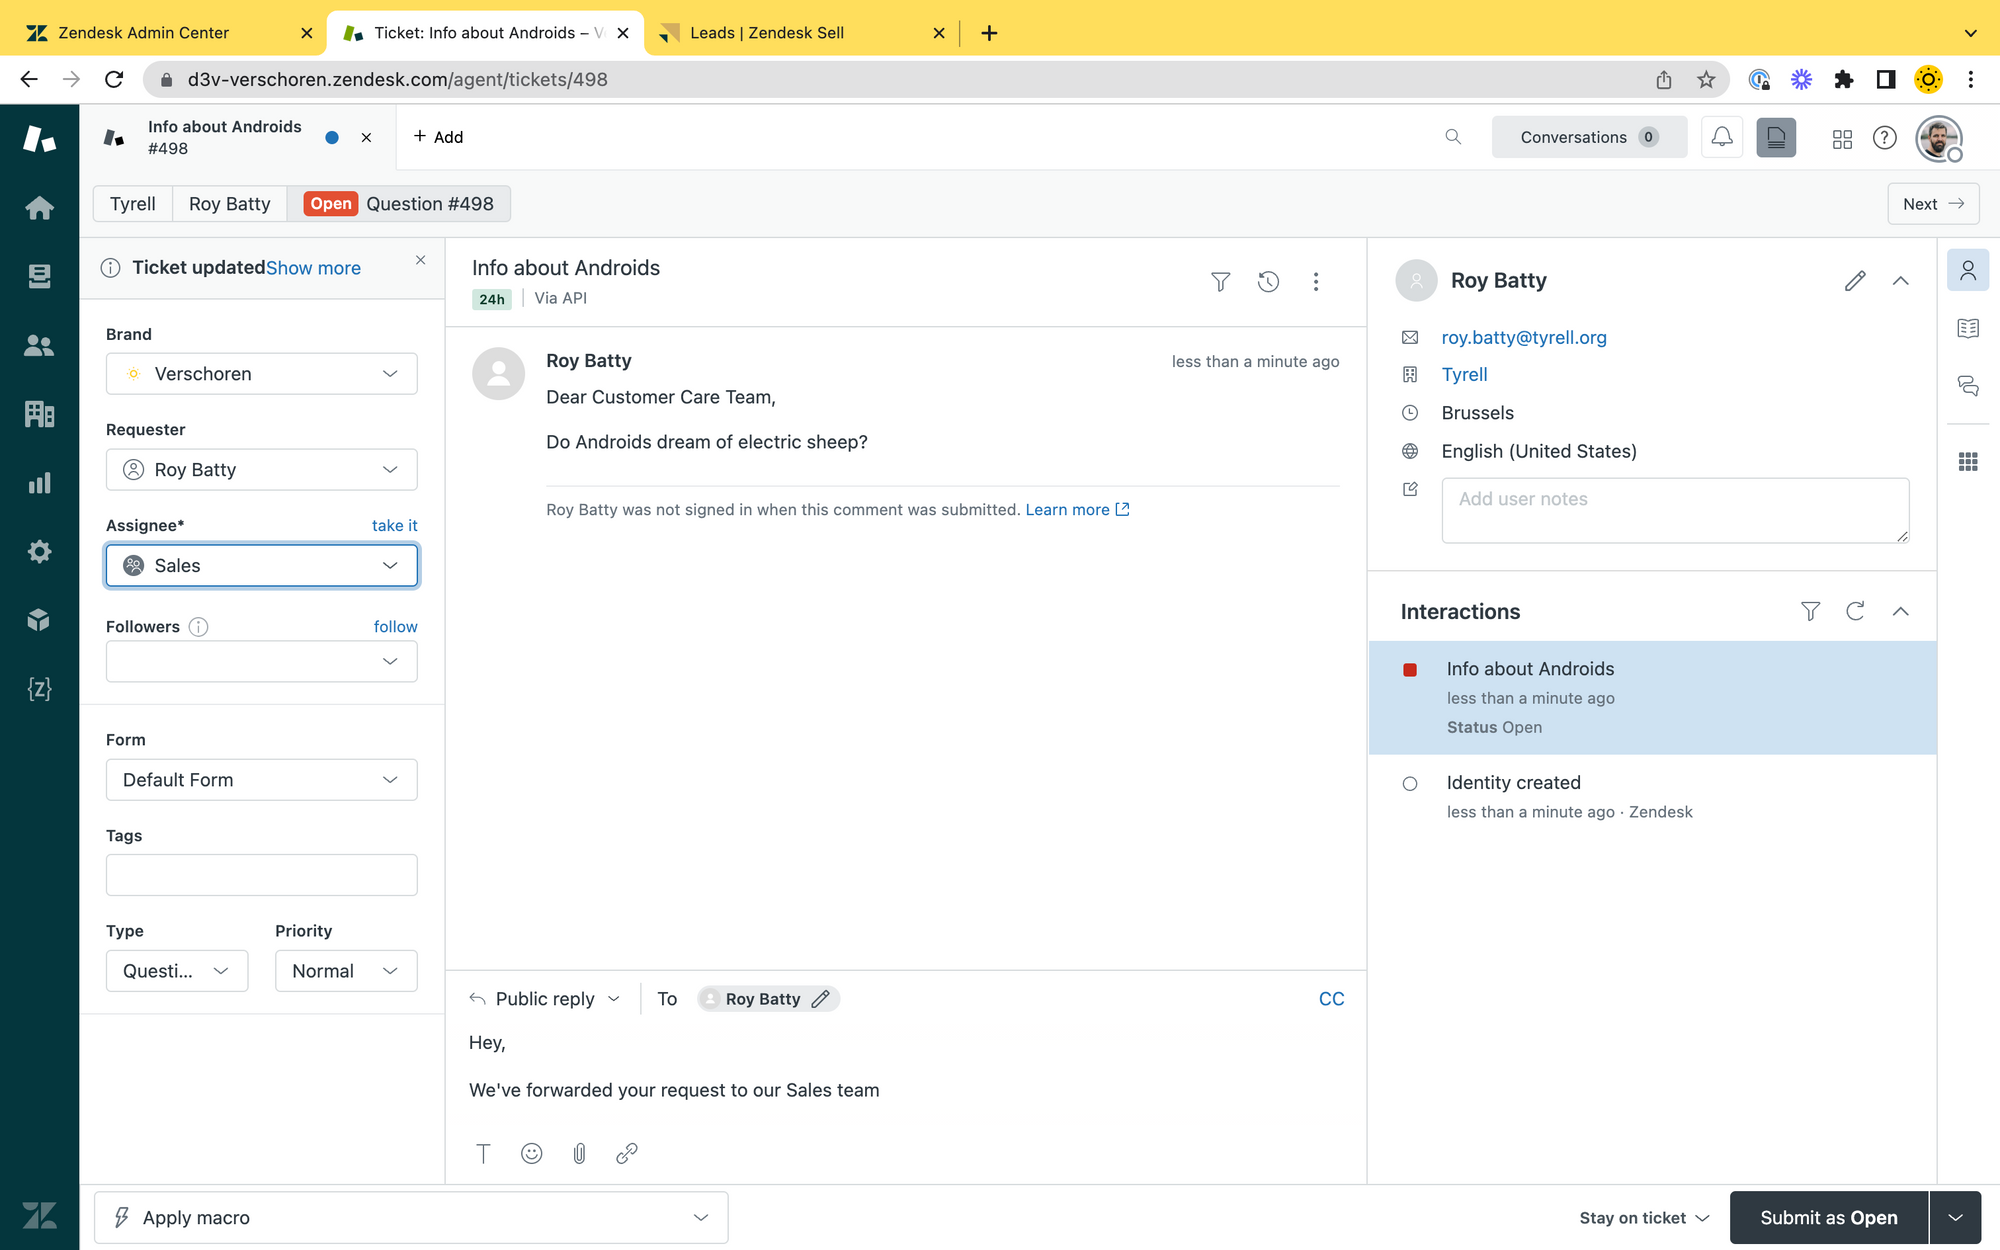
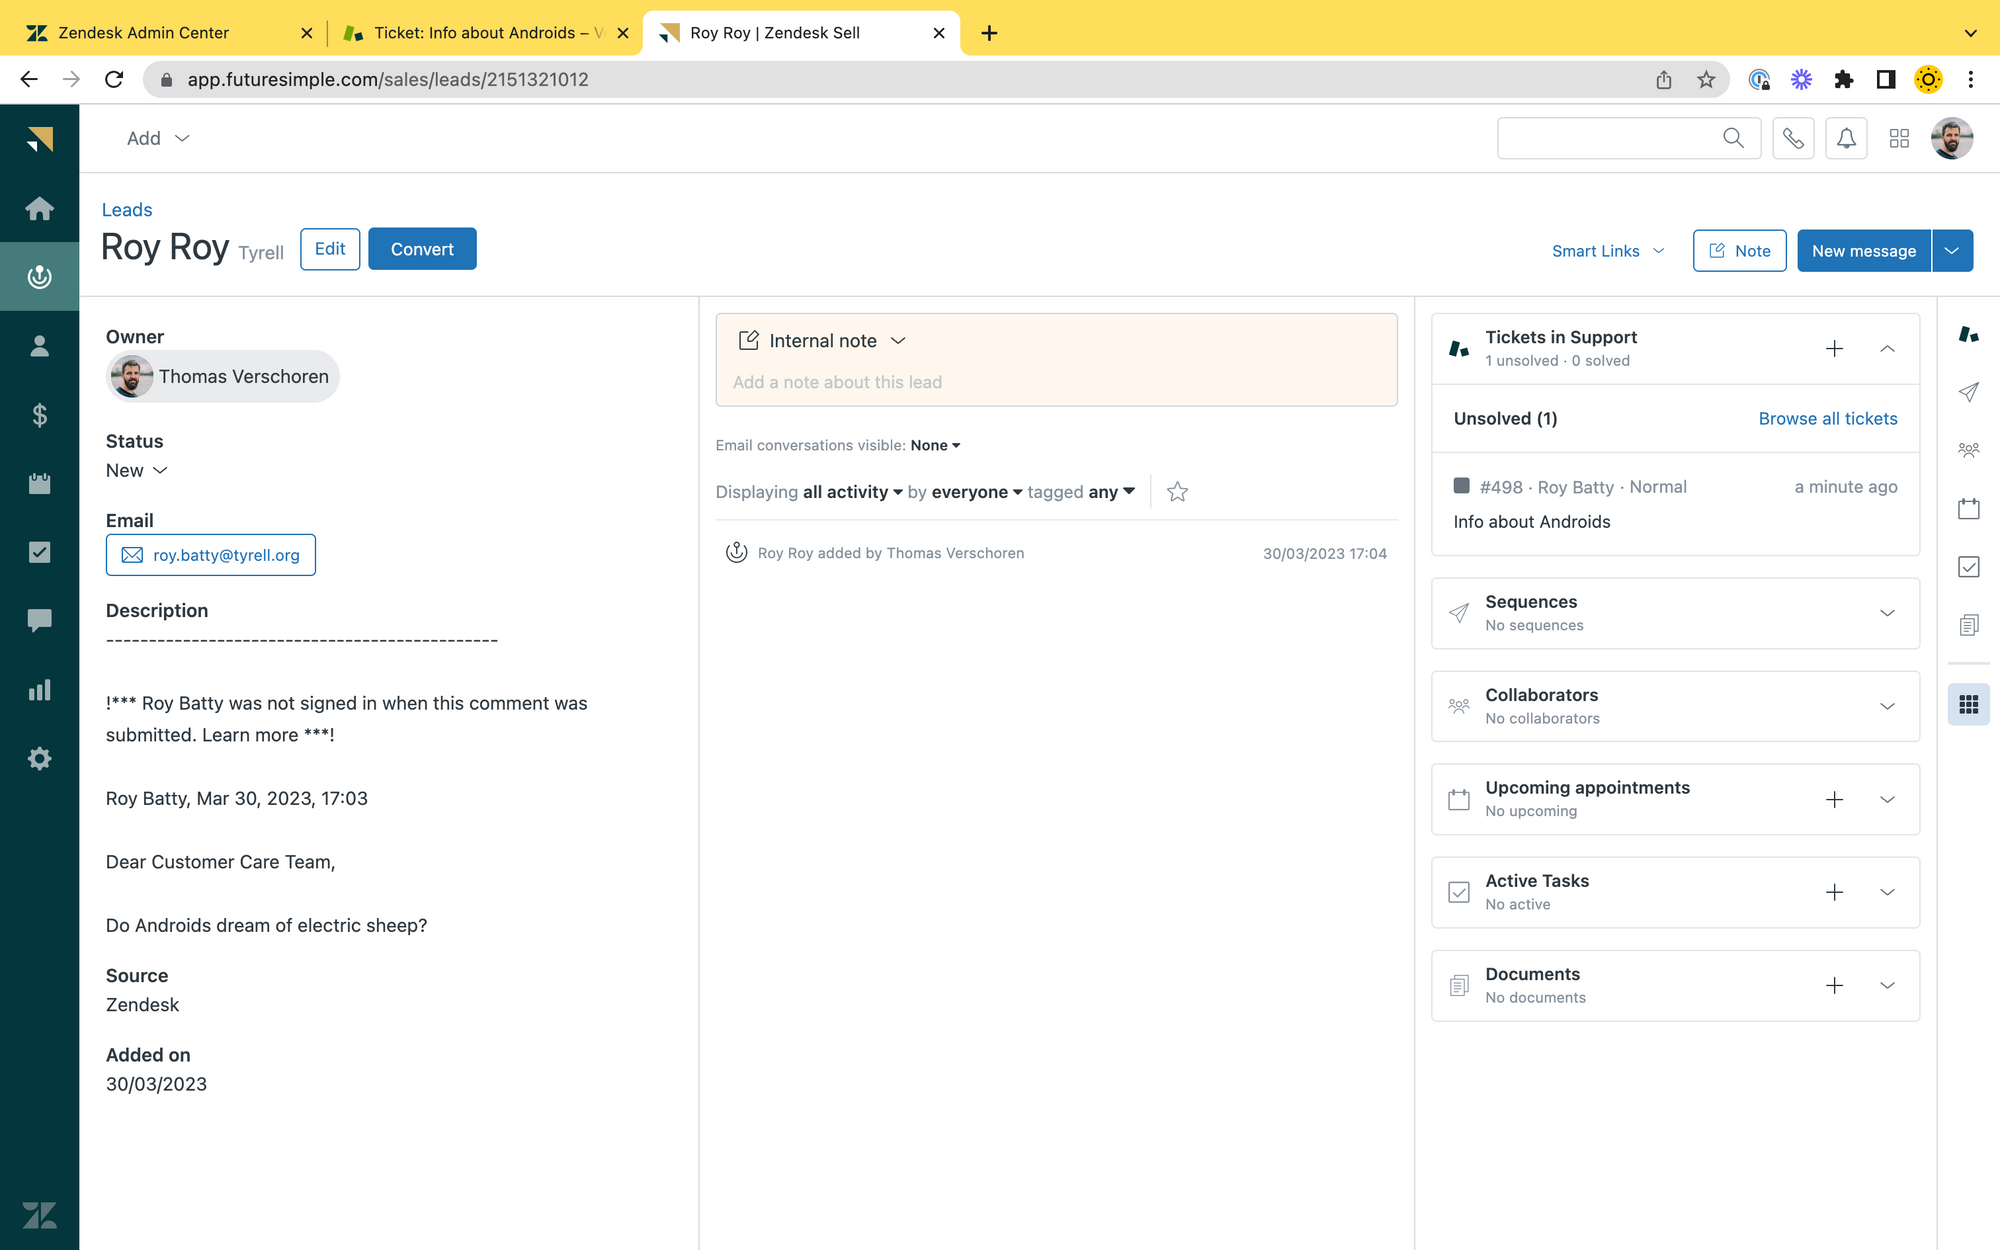
Add Sell Lead from Zendesk Support
My first example was a scenario where I wanted to create a lead in Sell each time a ticket was assigned to Sales. You can use it to add leads for tickets you assign to the Sales group, or create tasks in Sell for your Sales team,..
There obviously is a very nice integration for Sell and Support already, but sometimes doing things automatically via triggers is just a bit easier.
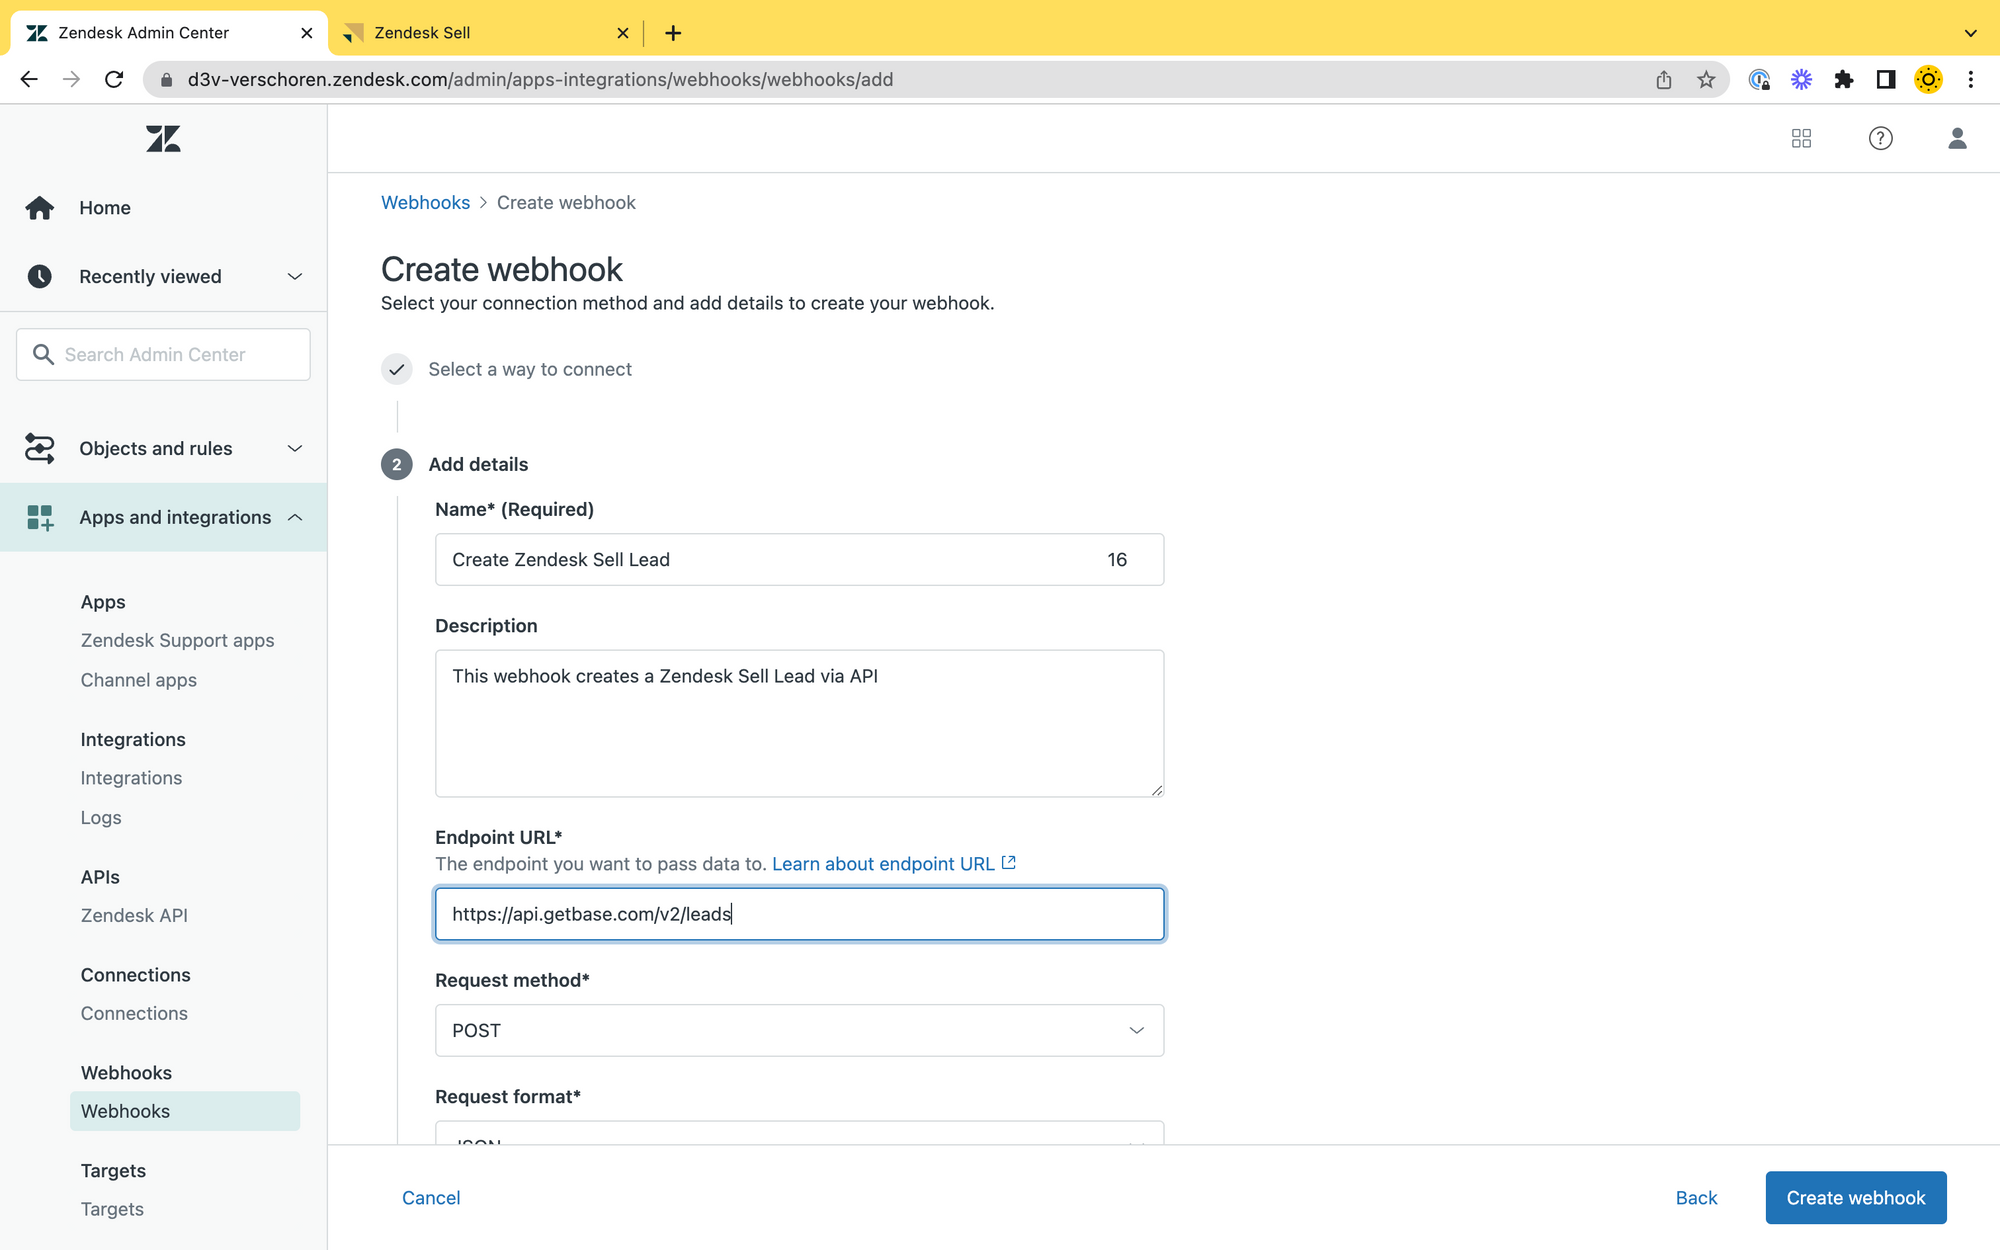
Step 1: Creating a Webhook
Step one in our flow is creating a new webhook.
Use https://api.getbase.com/v2/leads as the Endpoint URL, POST as the method, and JSON as the format.
Next choose Bearer token as the authorisation method and enter your Access Token.
Finally, add a new Header with Accept as the name, and application/json as the value.
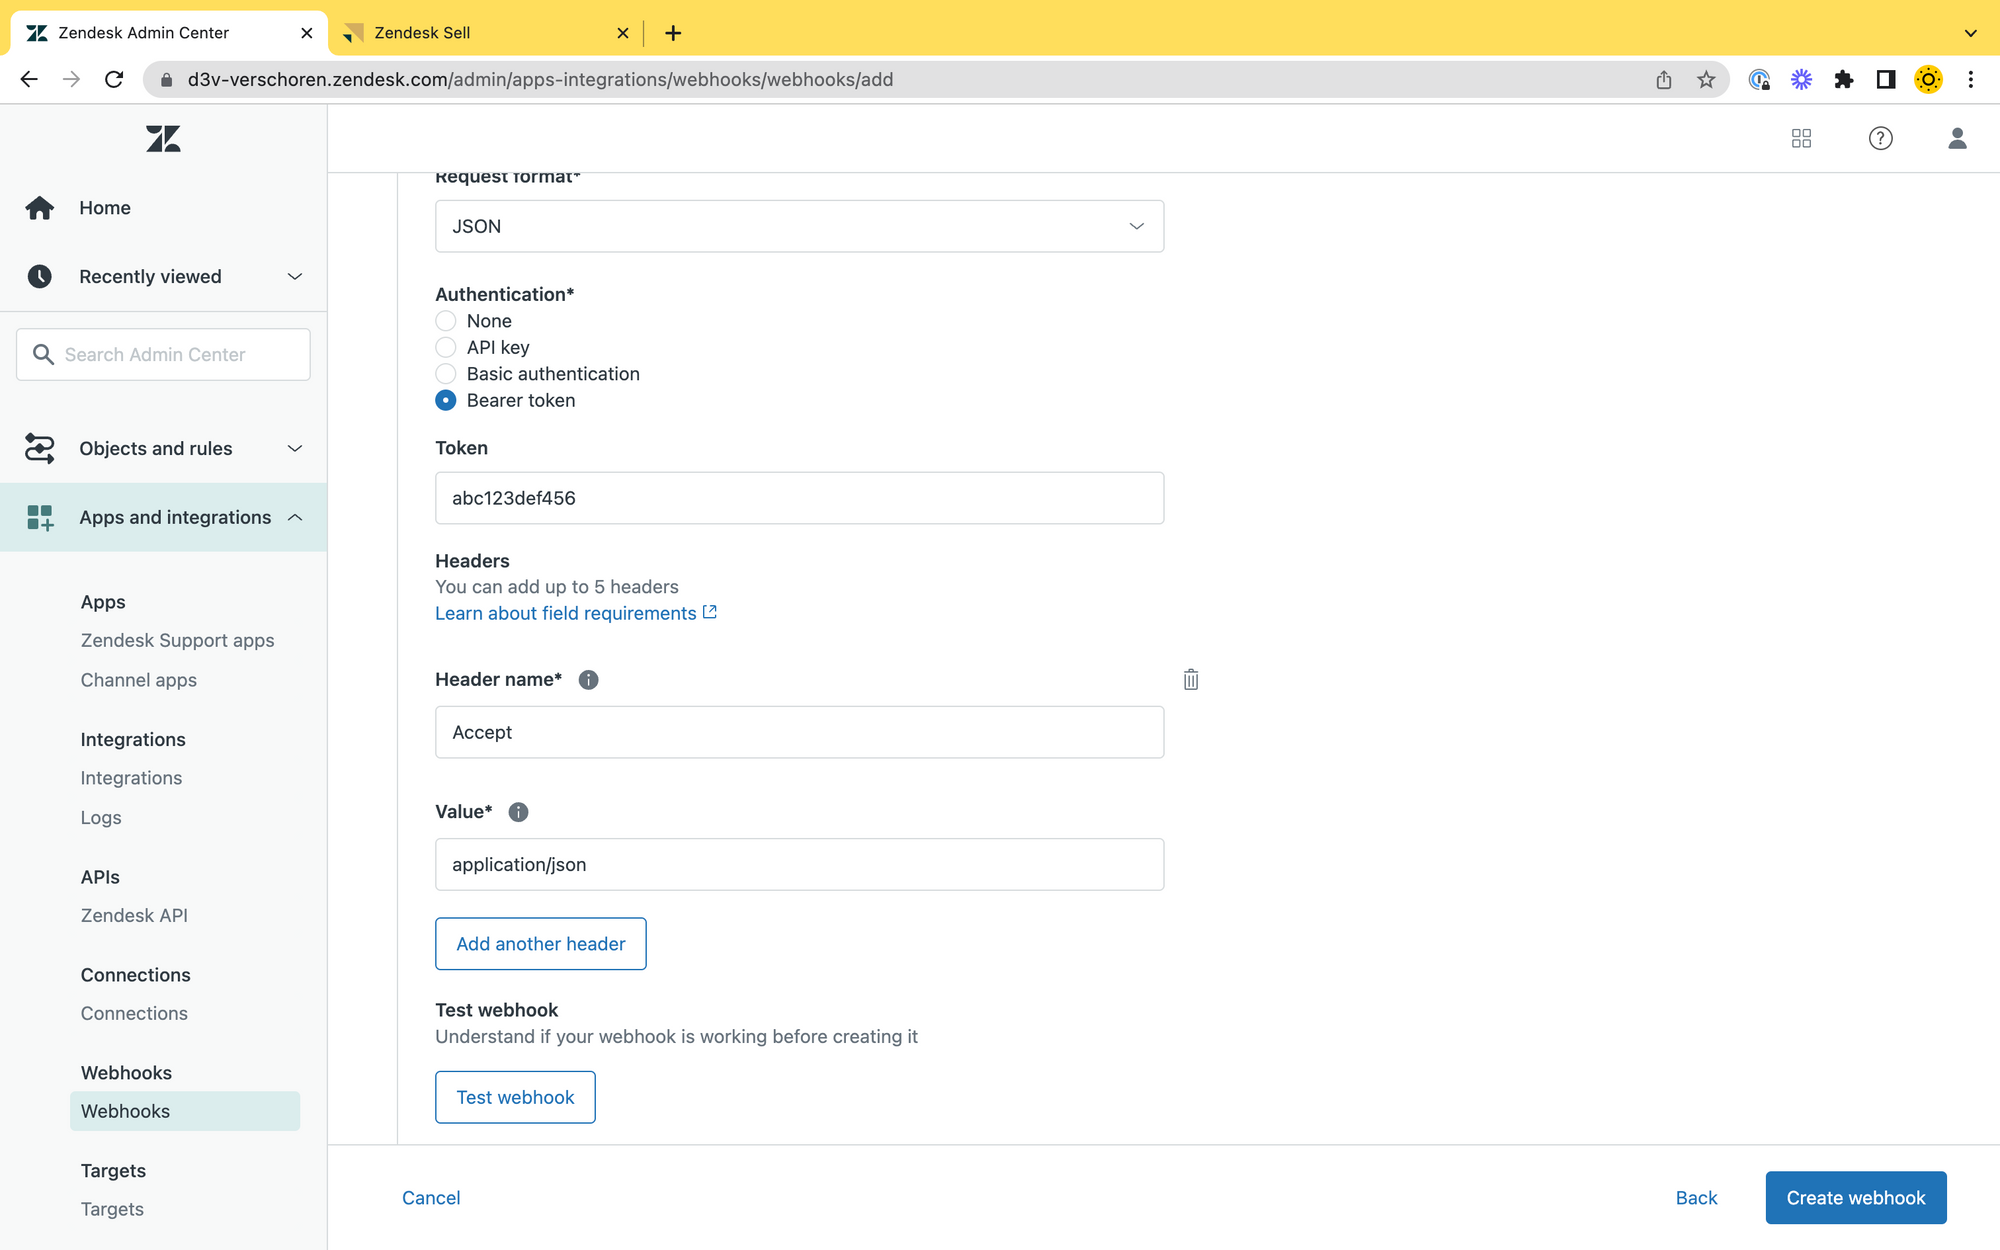
Step 2: Adding a Trigger
Next up, calling our Webhook. For this we'll use a trigger which, each time a ticket is assigned to Sales, will create a new Lead in Sell with the relevant information, and solve the ticket.
The ticket will dissappear from the Inbox of your Support Team, and a new Lead will appear in Sales' Pipeline.
Create a new trigger that looks for:
- group is changed to Sales
And add the following conditions:
- Status is solved
- Notify Webhook (the one you just created) and add the following JSON payload.
{
    "data": {
        "first_name": "{{ticket.requester.first_name}}",
        "last_name": "{{ticket.requester.last_name}}",
        "organization_name": "{{ticket.organization.name}}",
        "description": "{{ticket.description}}",
        "email": "{{ticket.requester.email}}"
    }
}
Result
And, if all goes well, each time we now assign a ticket to sales, the ticket will be resolved, and a new lead will show up in Zendesk Sell.
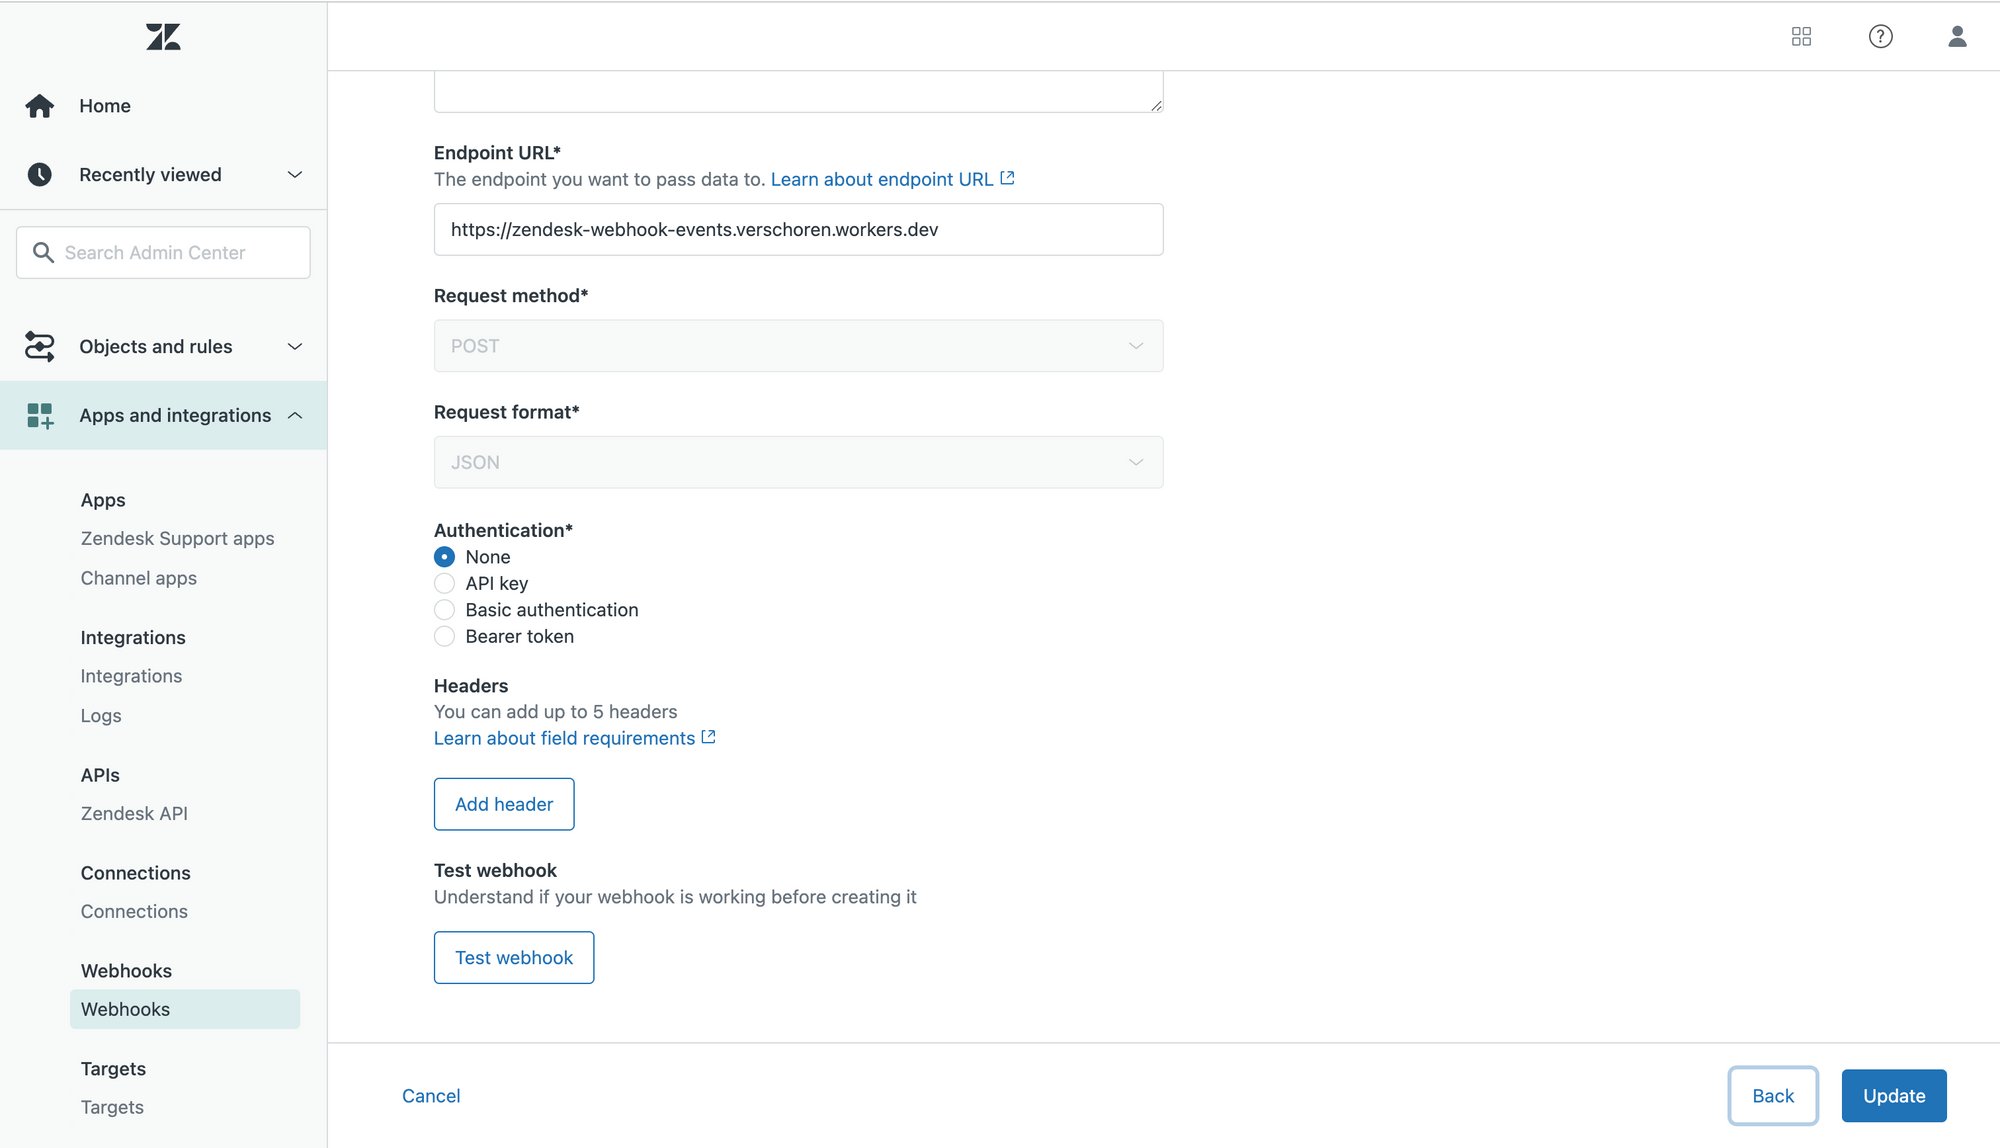
Protect Cloudflare Worker
As you've probably already noticed on this blog, I'm a big fan of using Cloudflare Workers to handle complex API actions outside of Zendesk.
For example, in the flow below, I use a Worker combined with Zendesk Webhooks to update a newly user with a proper signature, alias and profile picture.
 Thomas Verschoren
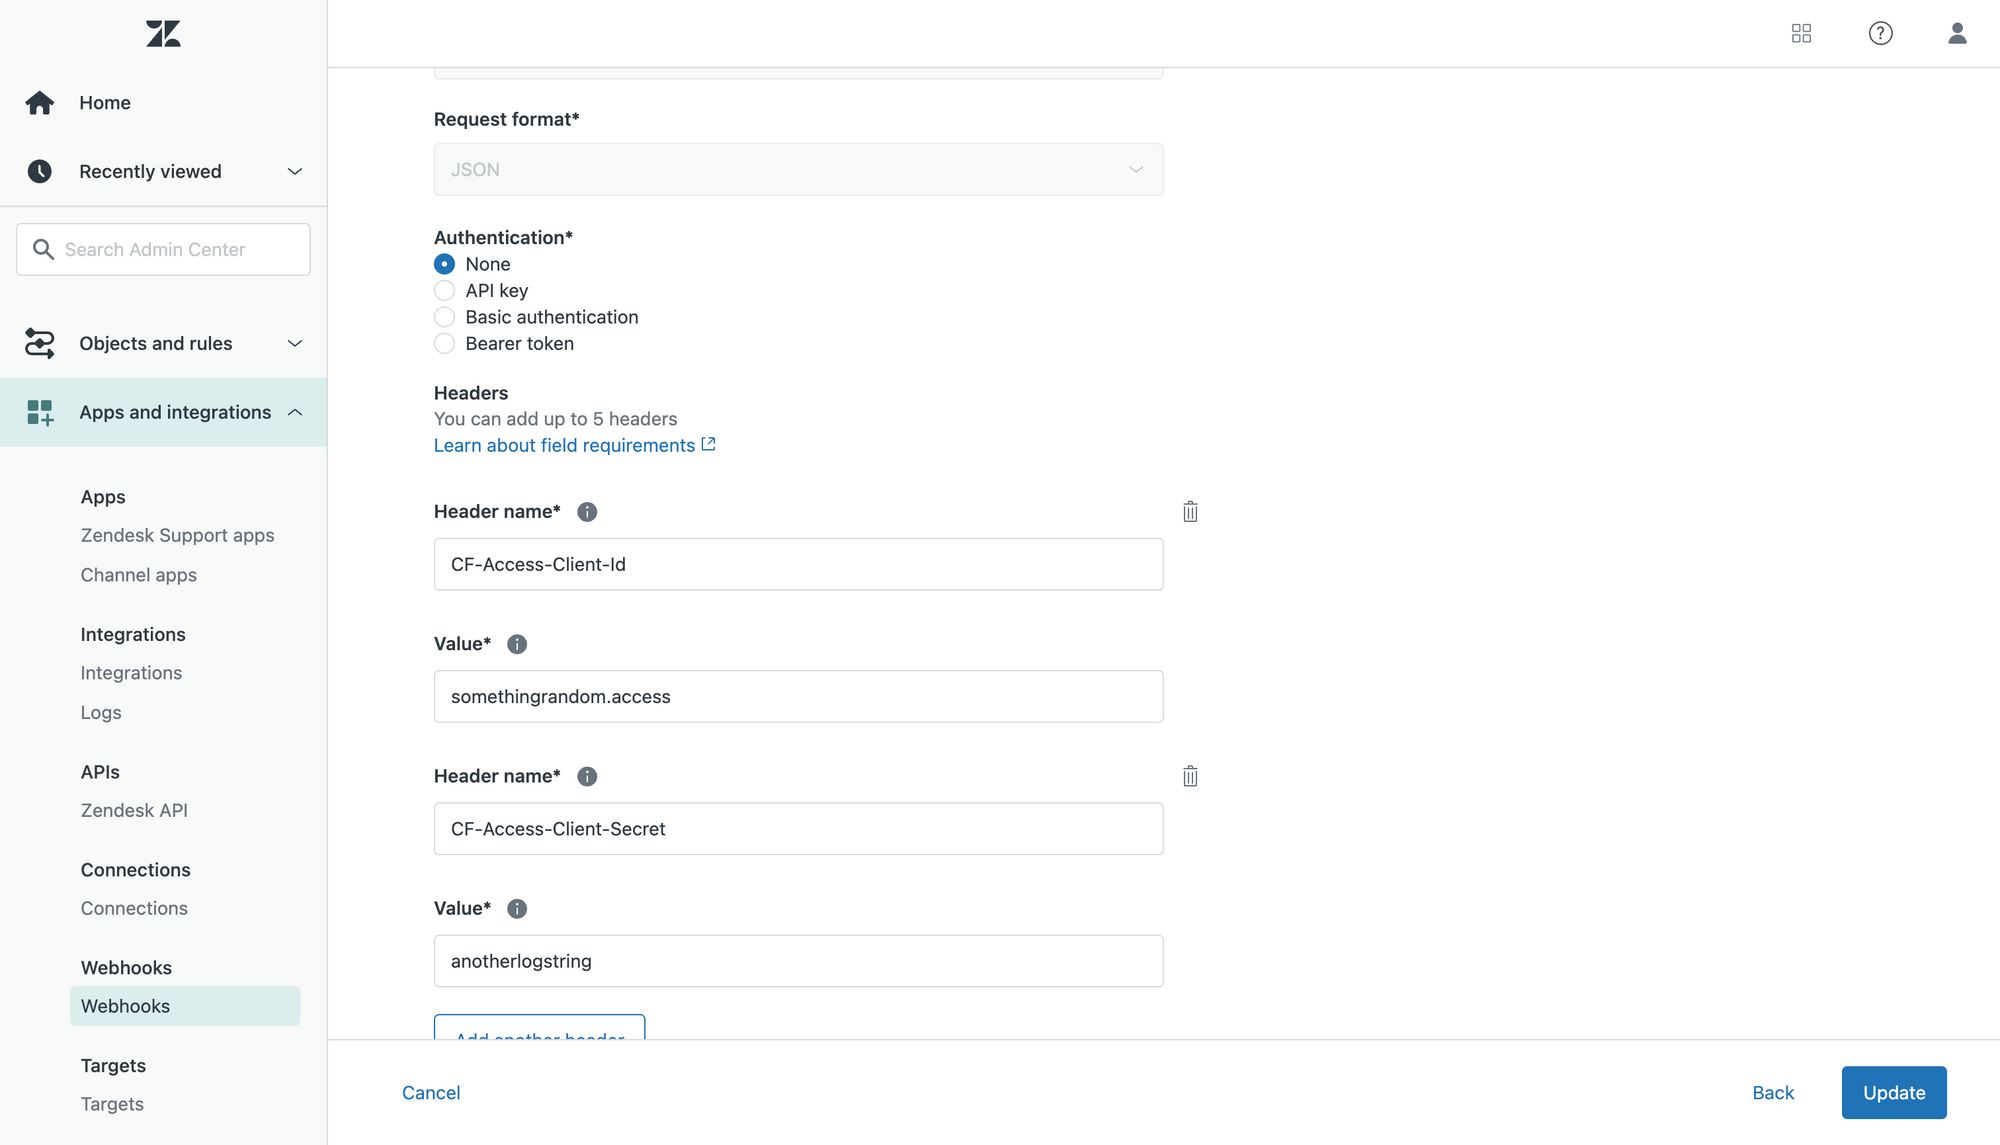
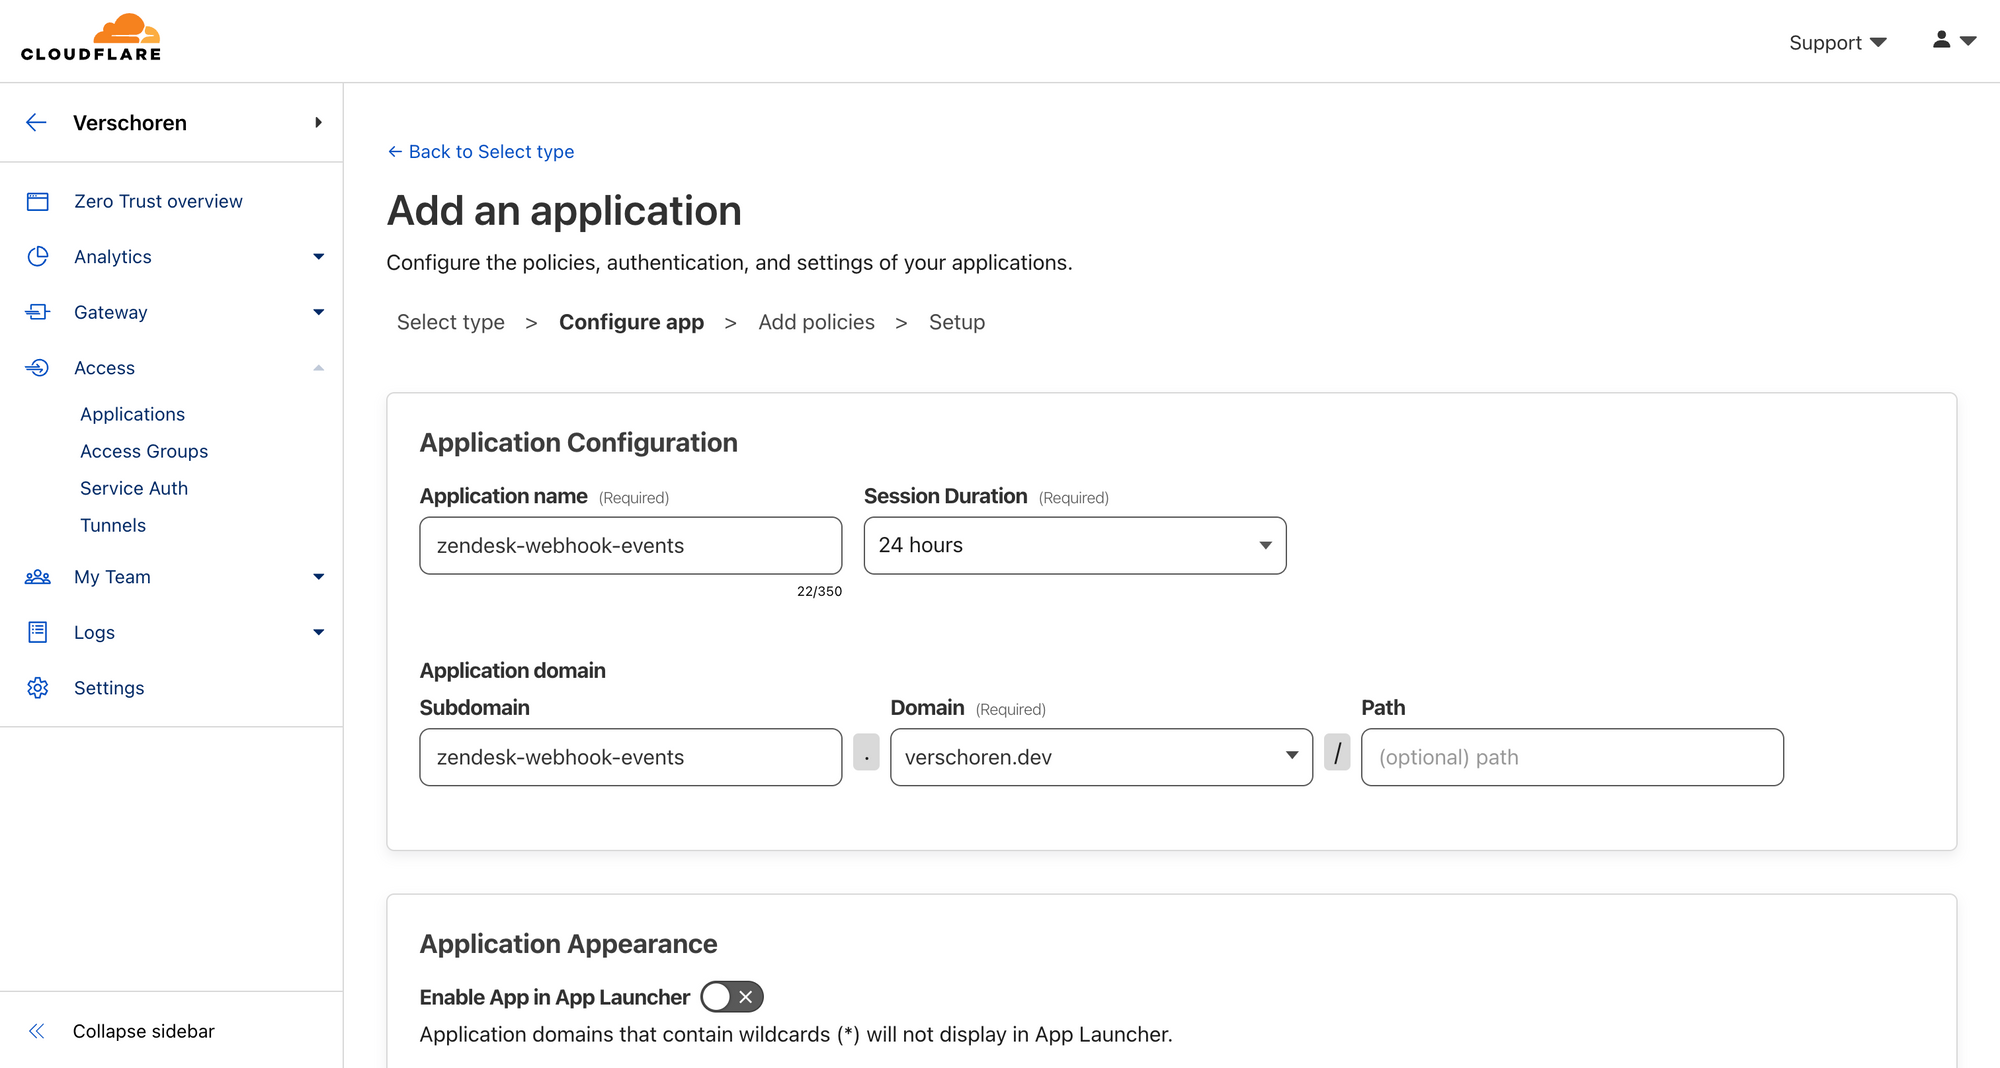
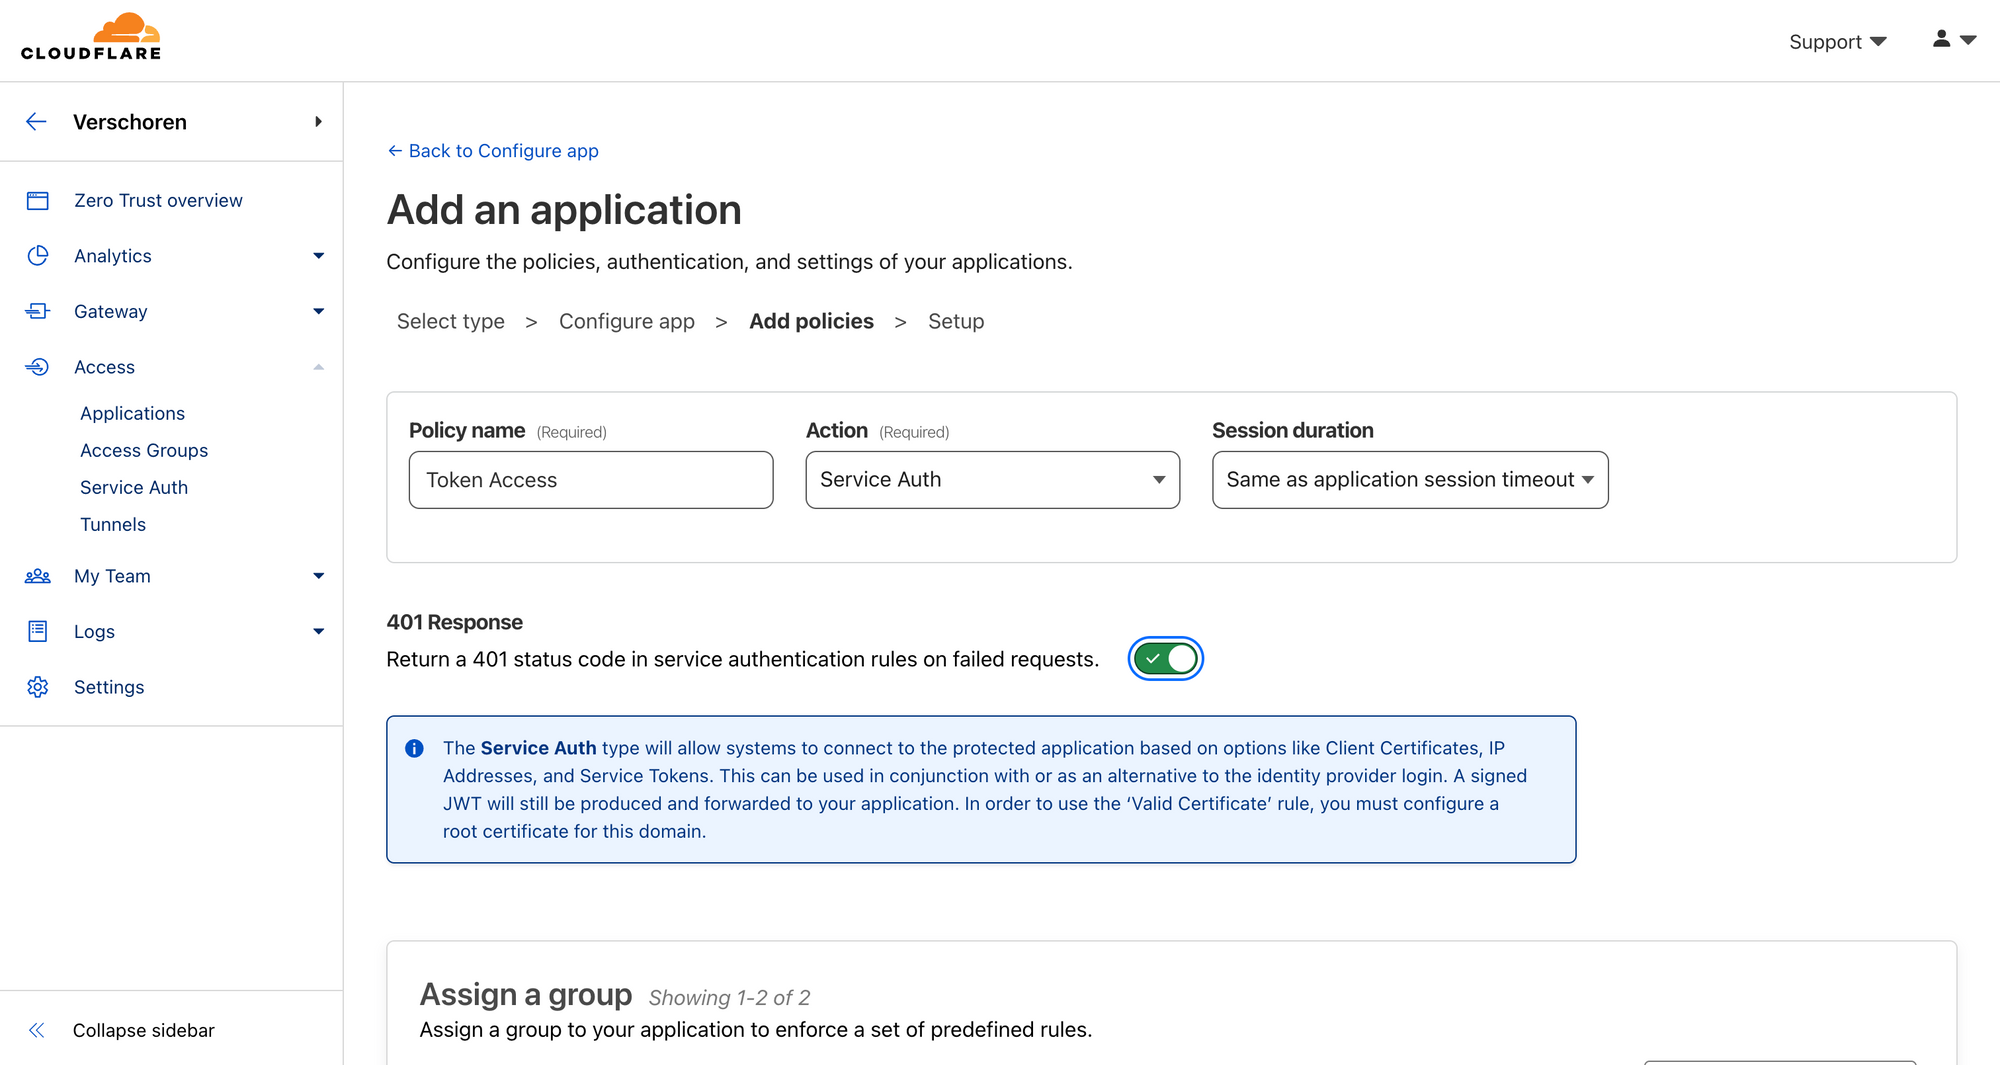
Up till now, these workers had to run "unprotected" since Zendesk was not compatible with the way Cloudflare Access works. Now, with this release, I can finally protect these workers by adding these two custom headers to my webhooks.
CF-Access-Client-Id: <Client ID>
CF-Access-Client-Secret: <Client Secret>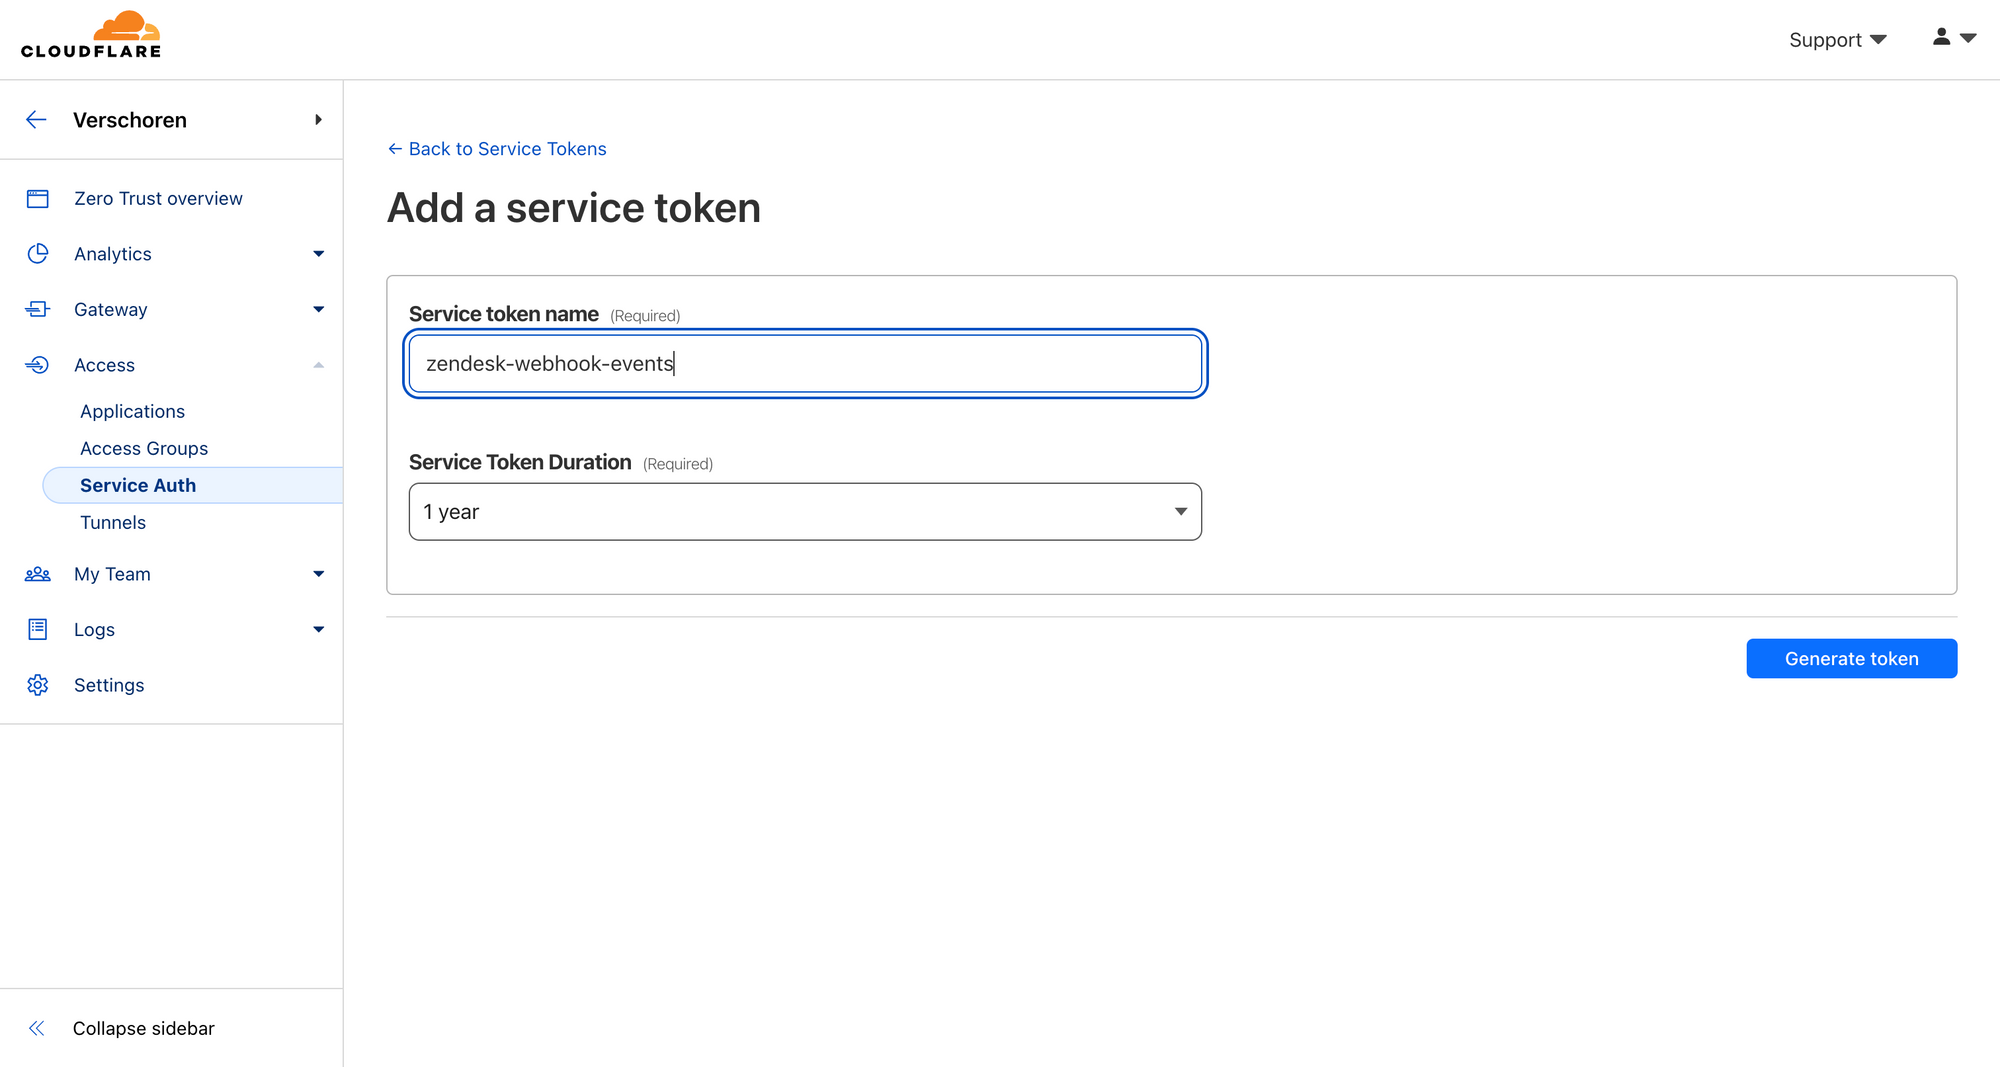
For more information on creating Access Tokens for Workers, take a look at the article below.

Adding a task to Asana
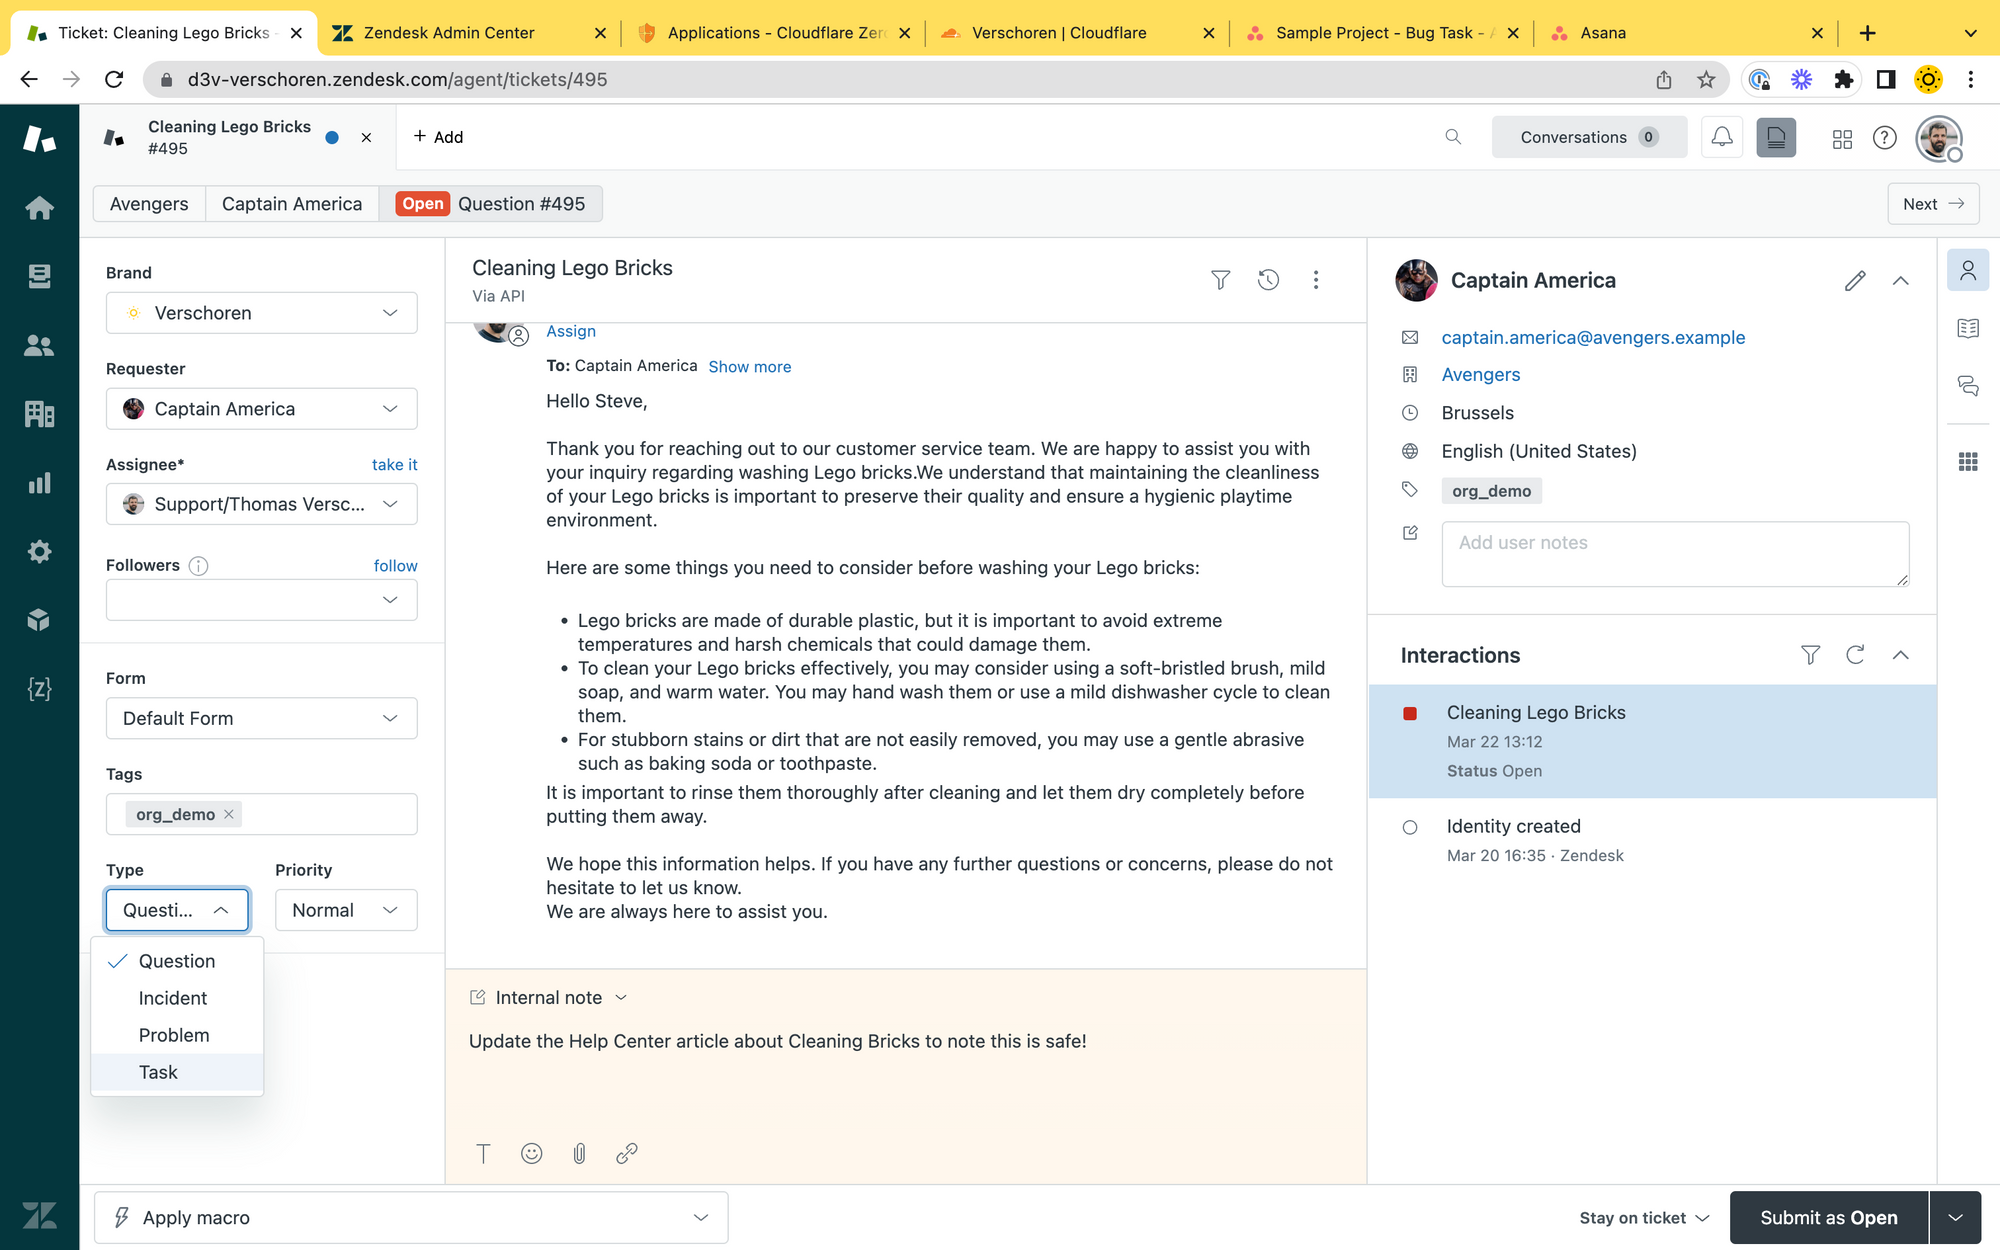
So far, that's two out of three issues resolved. Let's check the final one, Asana. In this example we're going to create a new task in Asana whenever a ticket is updated and the ticket type is changed to, you guessed it, Task.
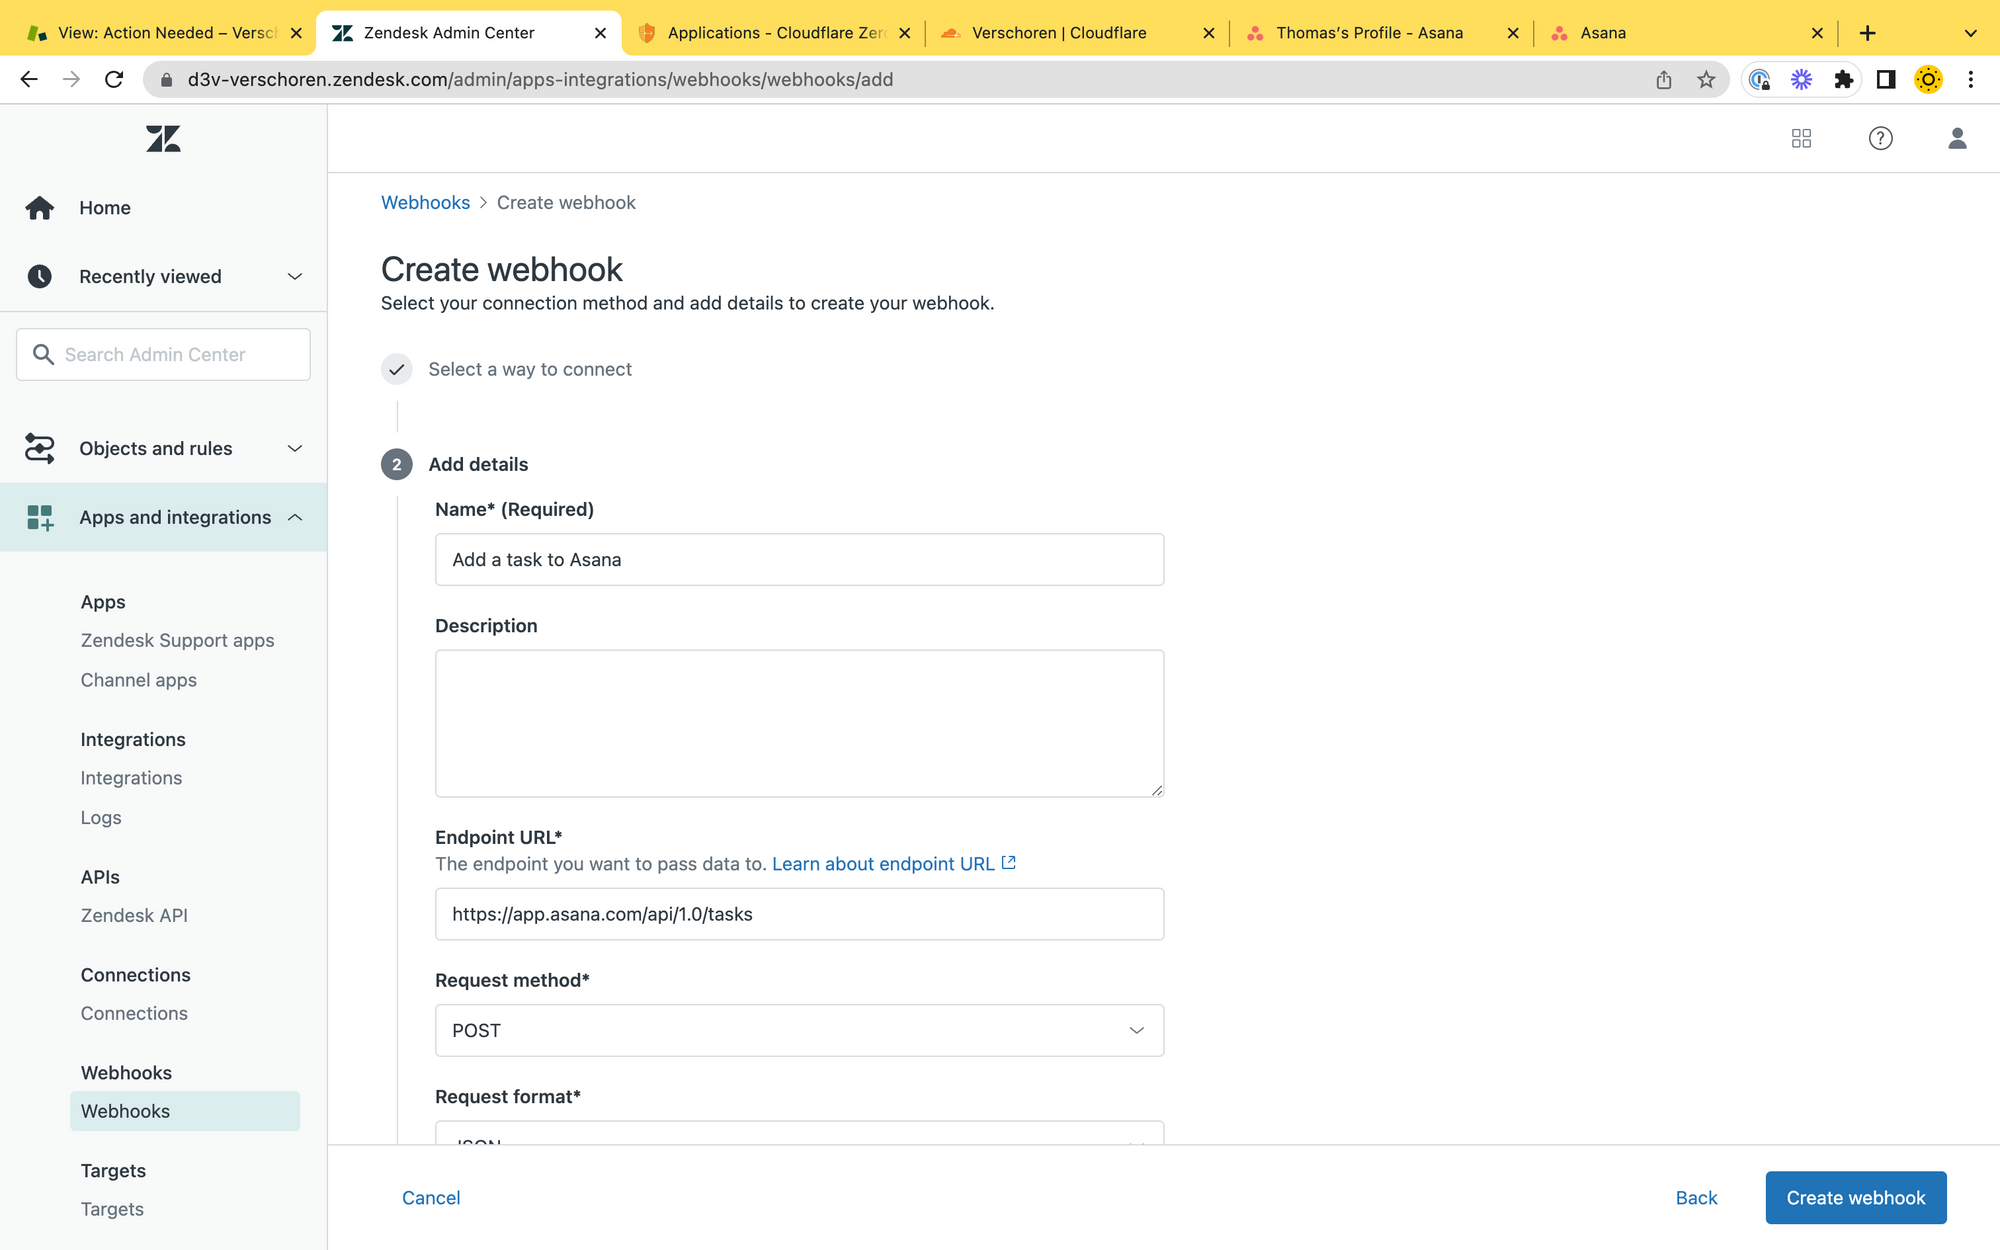
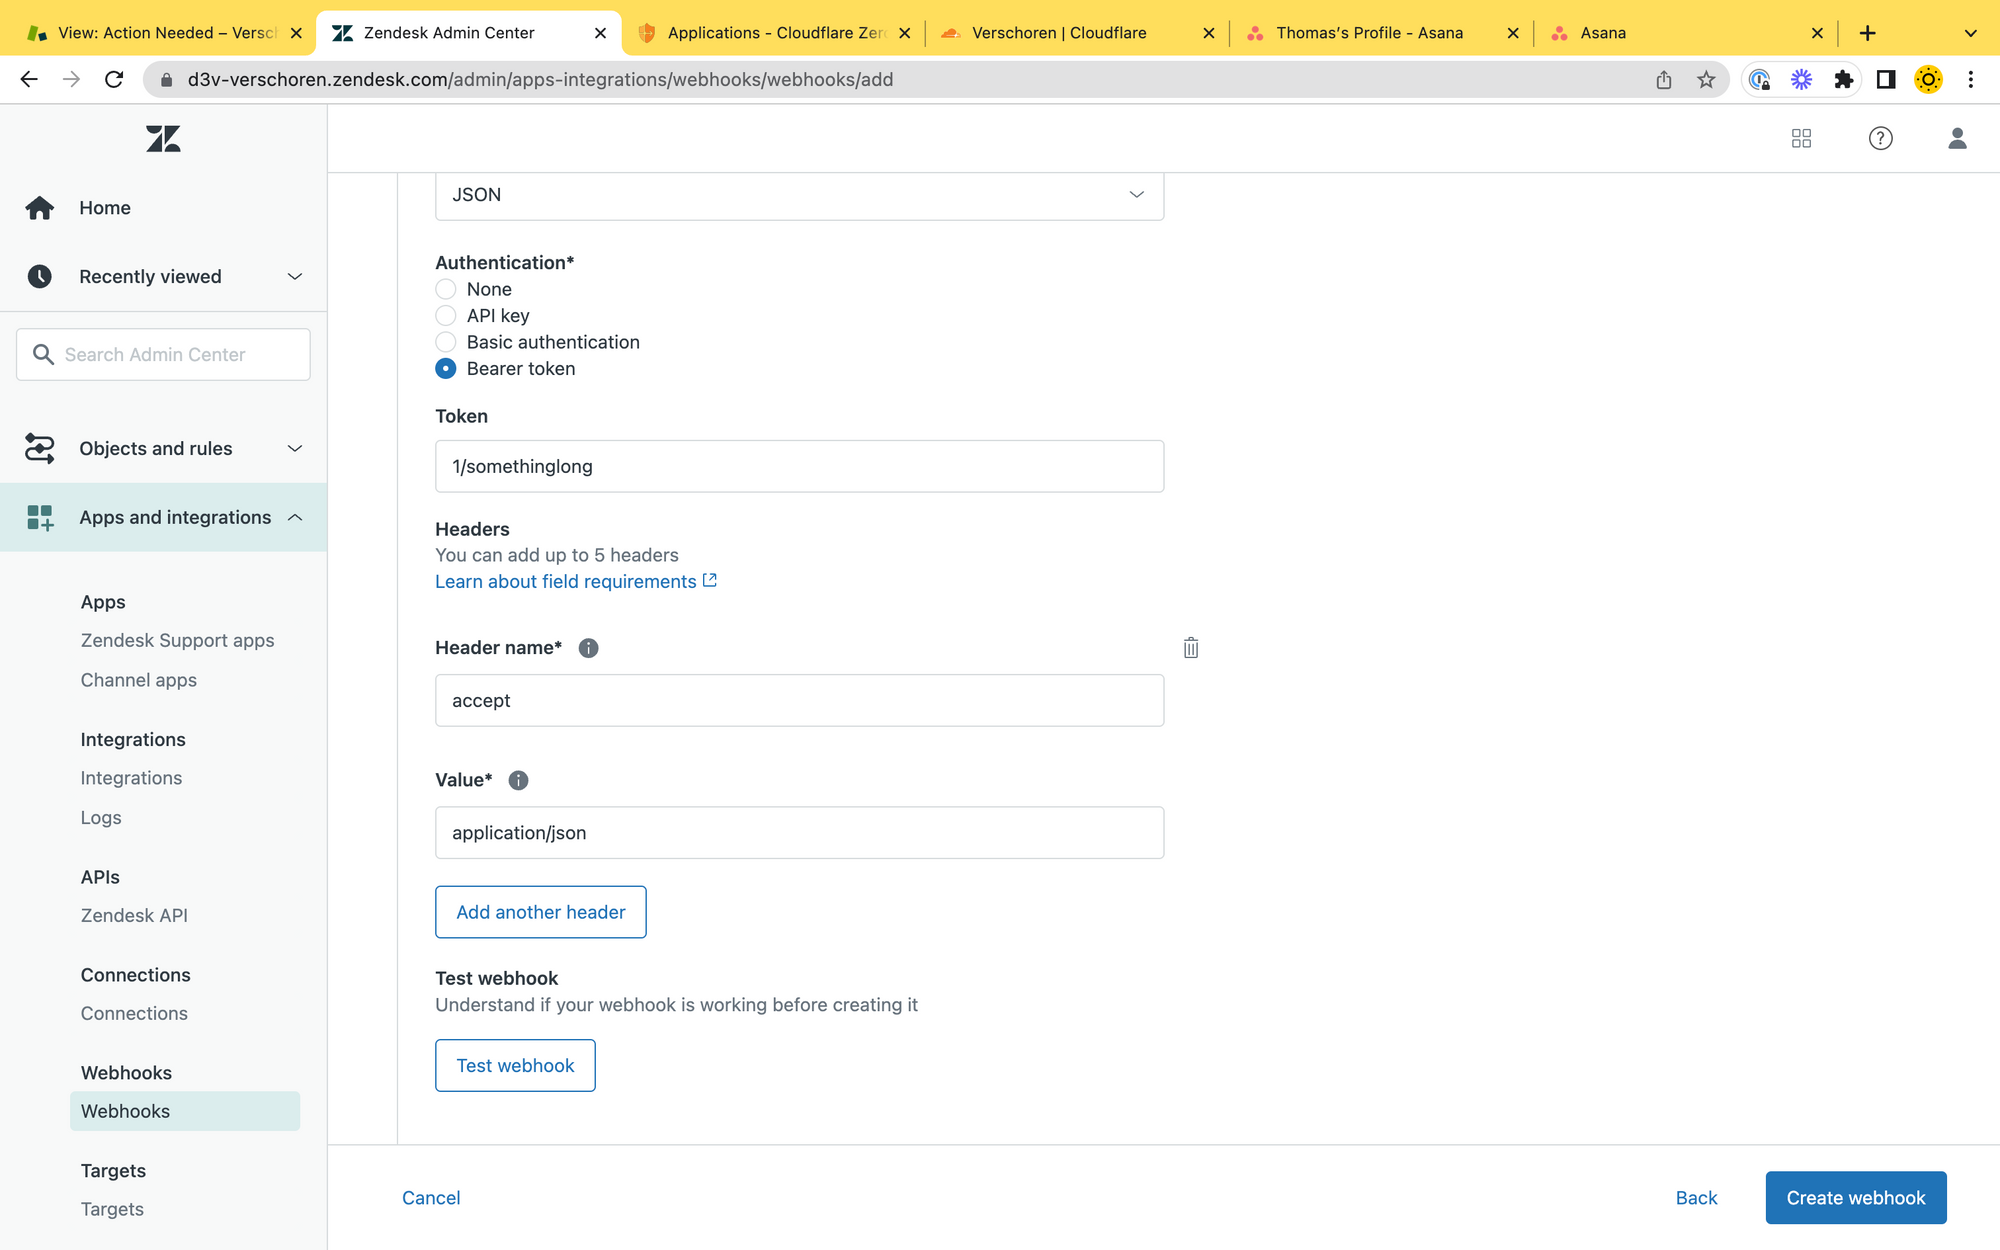
Step 1: Create a Webhook
First off we create a new webhook that calls the ttps://app.asana.com/api/1.0/tasks endpoint.
We use type JSON and action POST as the option and select Bearer Token as our authentication type. See this article on how to get a token.
To complete the setup, add a custom header with name: accept and value: application/json and save your webhook.
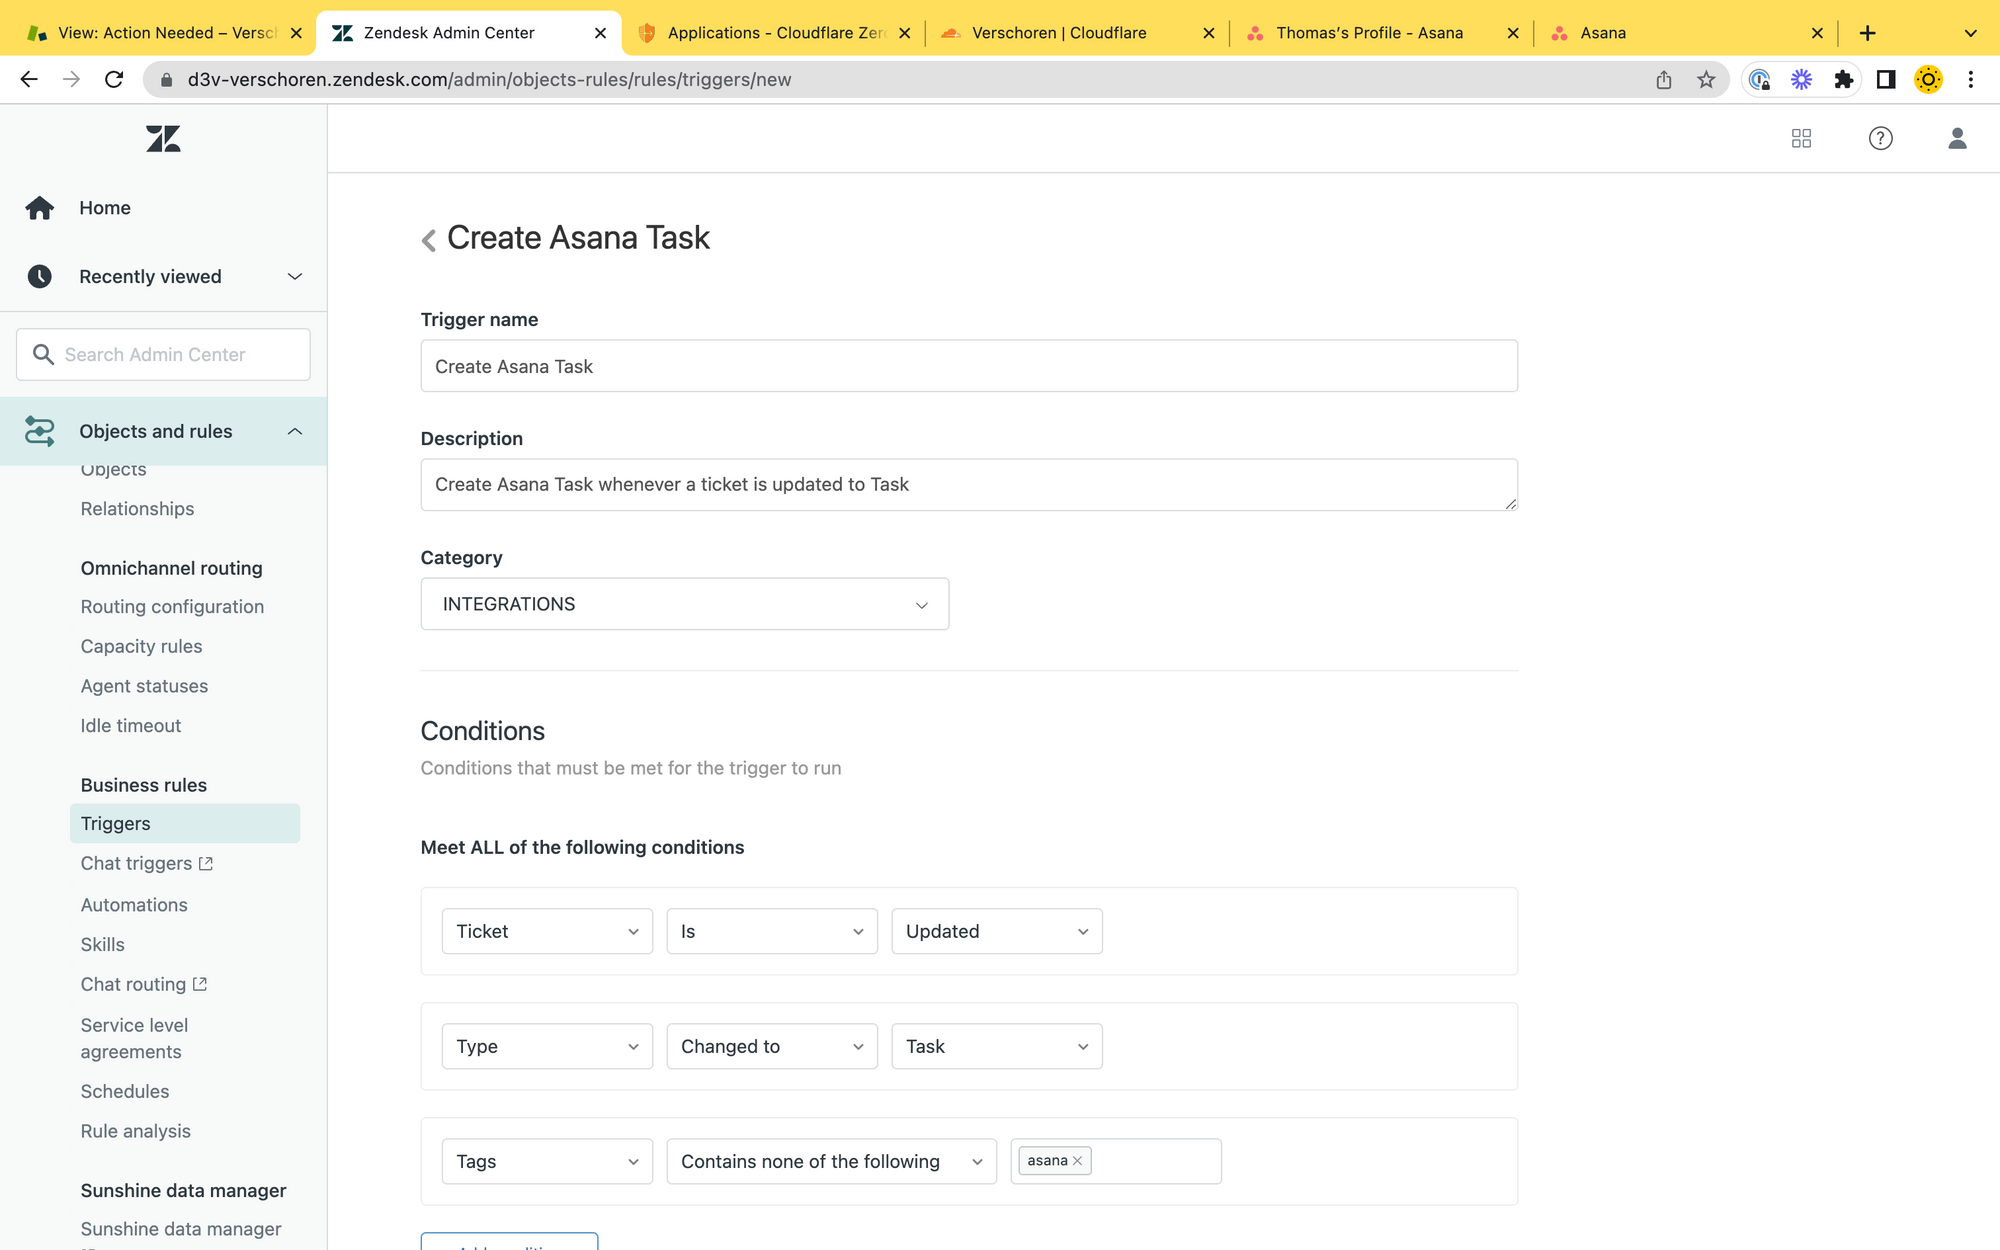
Step 2: Create a trigger Trigger
Create a new trigger that runs when a :
- Ticket is updated
- Type is changed to Task
- Tags does not contain
asana(this prevents multiple tickets being created)
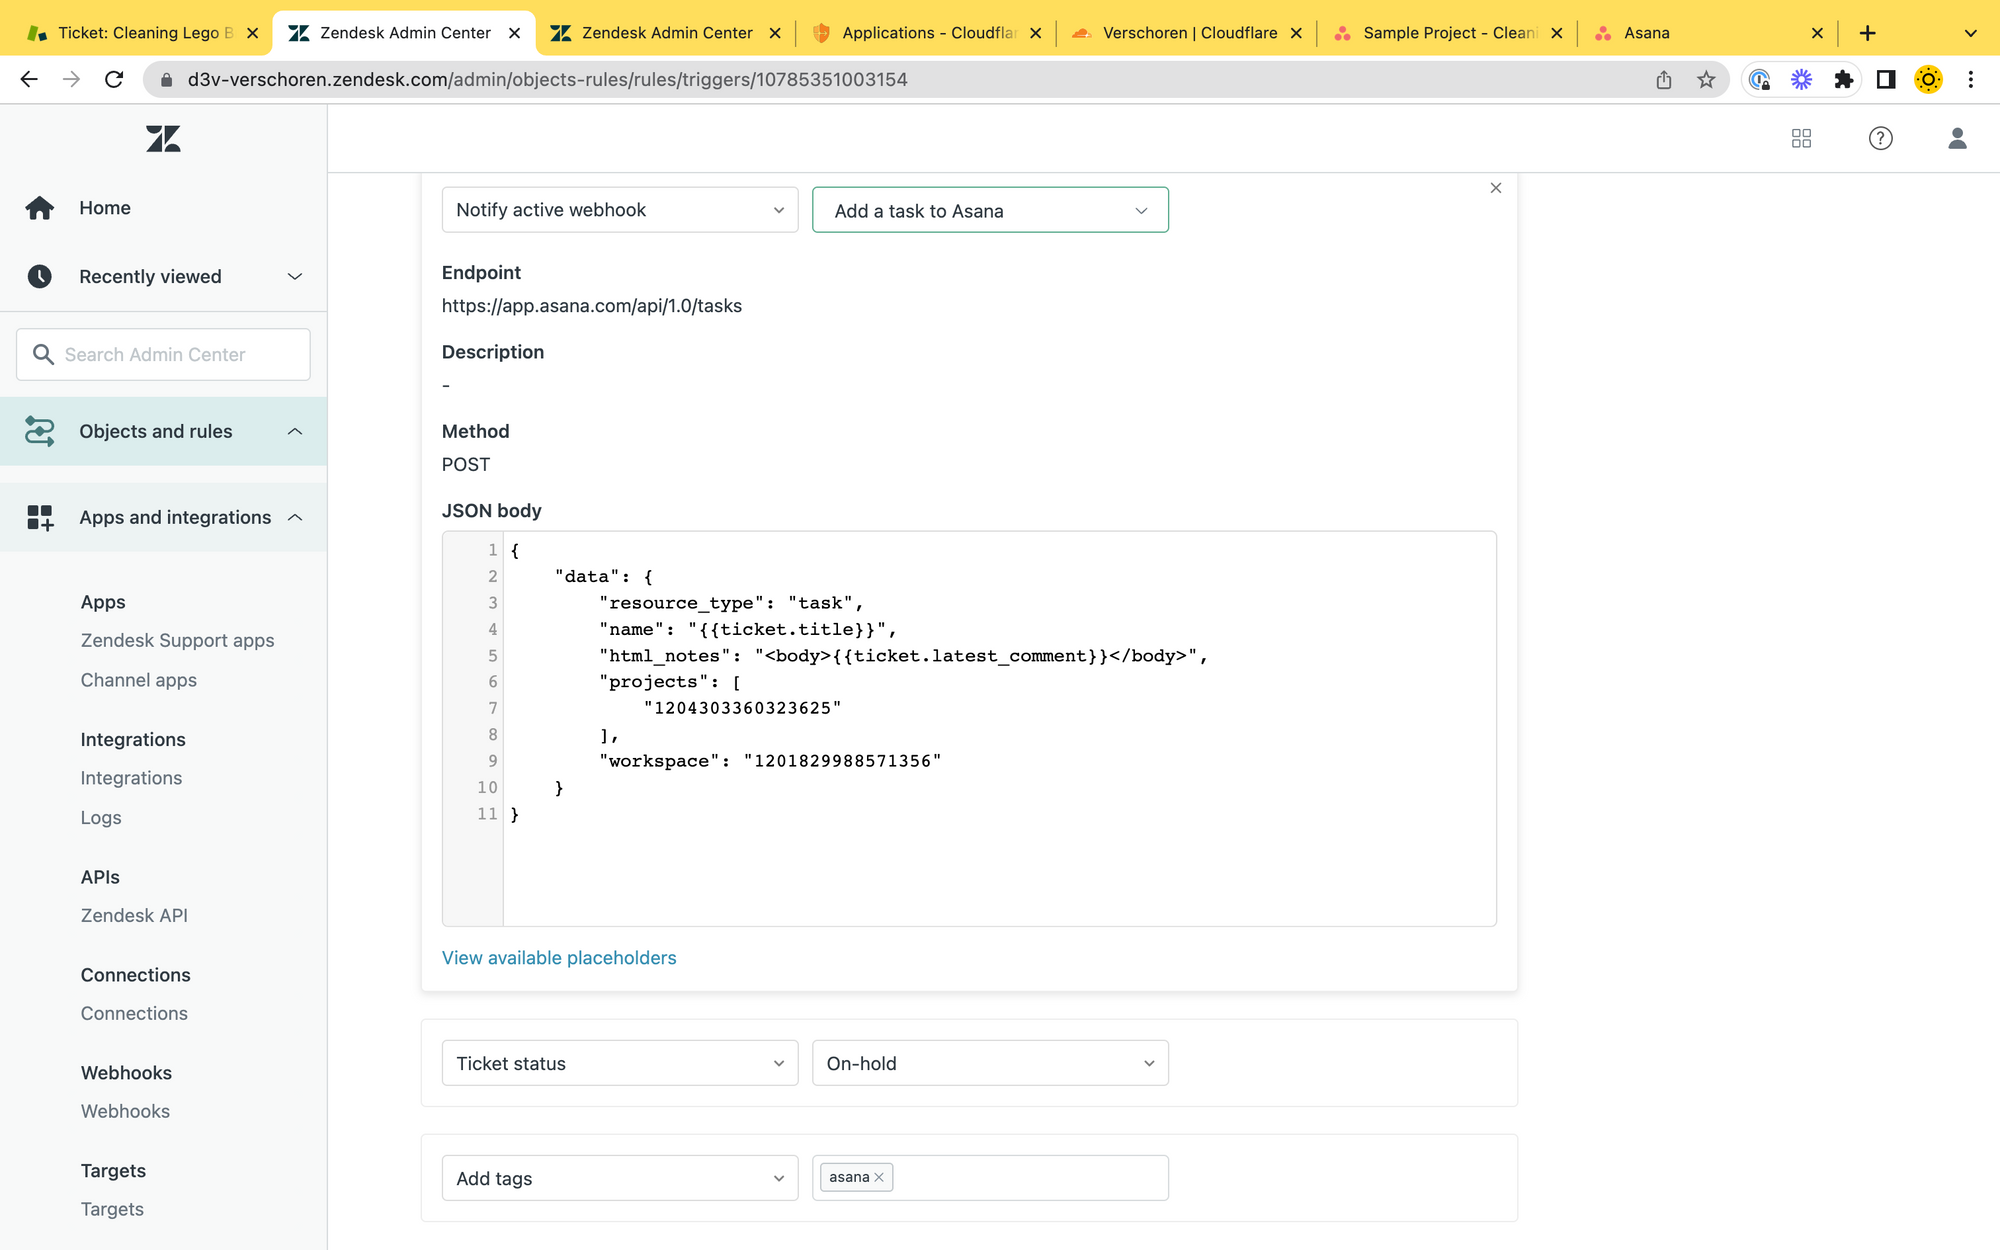
Set the actions to:
- Alert Webhook (the one you just created)
- Add tag
asana
In the Alert Webhook action, add the following JSON payload. Don't forget to replace the project and workspace IDs with your own. The result will be an Asana task with the latest comment as the description and the ticket subject as the title.
{
    "data": {
        "resource_type": "task",
        "name": "{{ticket.title}}",
        "html_notes": "<body>Zendesk Ticket #{{ticket.id}}: {{ticket.latest_comment}}</body>",
        "projects": [
            "1204303360323625"
        ],
        "workspace": "1201829988571356"
    }
}
Result
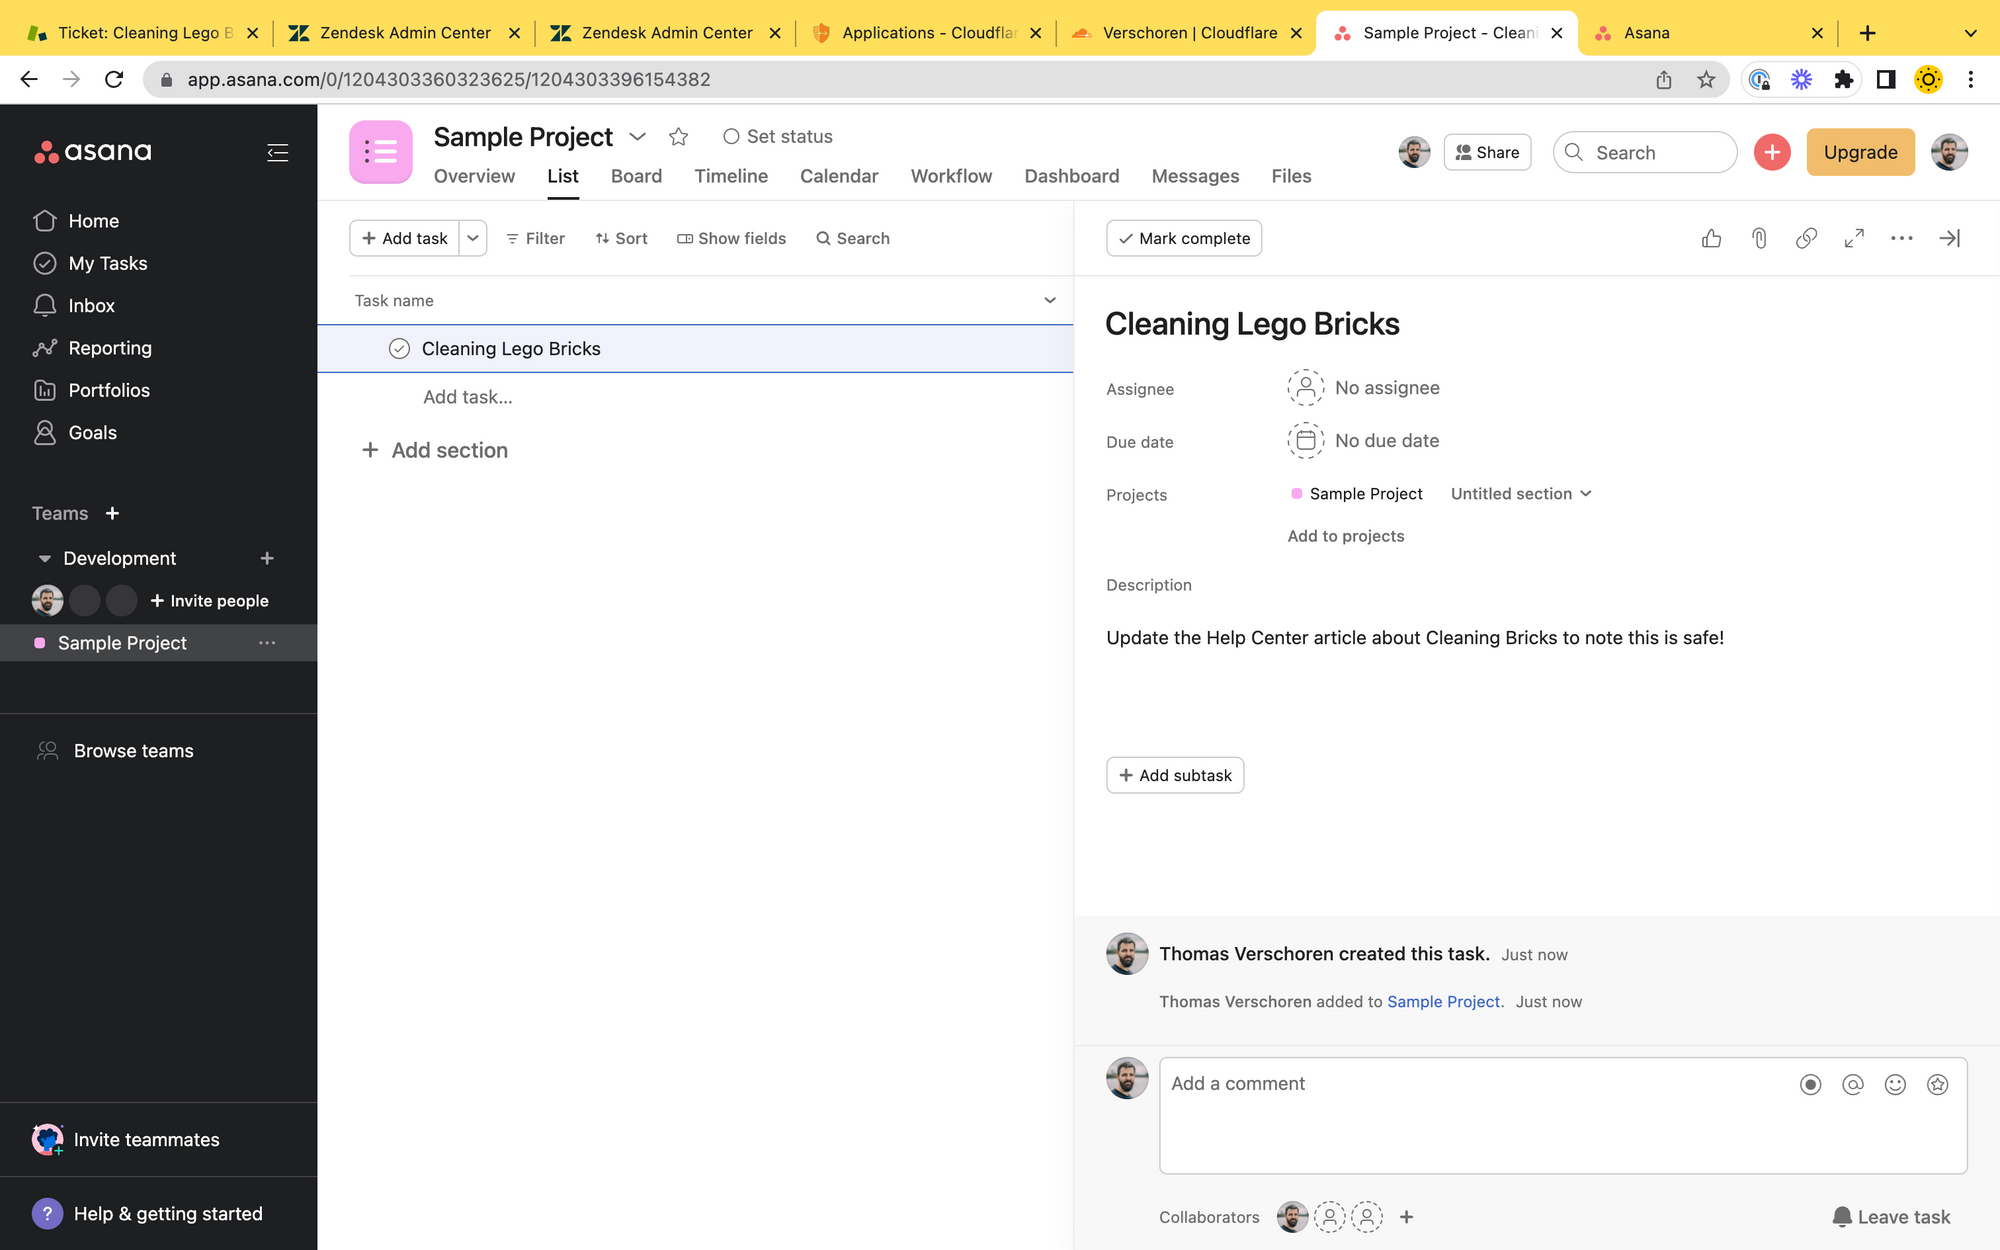
And if all goes well, each time we now change a ticket to type 'Task" a new task in Asana is created!
Naturally the native Asana for Zendesk integration is way more useful, but this example shows that the Webhook authentication updates allow for a lot more API integrations now!
Conclusion
3 out of 3. I think one of my wishes came true.
A seemingly small update to the Webhooks feature, makes three otherwise impossible scenarios now possible.
What kind of webhooks will you build next?