Learn how to build a full-featured Flow Builder Bot for Zendesk.
In this article we will build a full-featured Flow Builder Bot for Zendesk. We'll use every step type, use API calls and variables and show you how to create a bot yourself in a full length video tutorial.
Learn how to build a full-featured Flow Builder Bot for Zendesk.

On this page
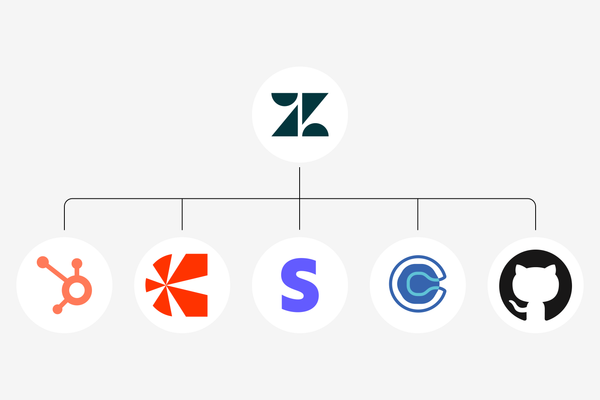
Zendesk Flow Builder has been available for over two years now, and since that time it evolved from a basic flow builder (pun intended) to a complex tool that allows for advanced logic, API calls, authentication and a lot more.
I've written about how to work with Flow Builder in the past, but since the latest set of releases during the What's New in March most of the last remaining big ticket items are now available, which means it's time for a deep-dive into Flow Builder.
This article will show you how to build a complete bot and will touch upon every available feature available in Flow Builder. You can find an overview video below, and then you can choose to either watch the full 45min tutorial later in this article, and/or read the article to learn more about the specifics steps used.
🦖 Jurassic Park Flow Builder Bot
Tutorials are only as fun as the subject it teaches, so for this how-to will build a bot for Jurassic Park.
We'll start with setting up a few intents and show Help Center articles, before we dive into the really fun stuff with API calls to check on Dinosaur escapes, and use the new authentication metadata to check upon bookings for the park.
Welcome to Jurassic Park. 😎
How to build a complex Flow Builder Bot
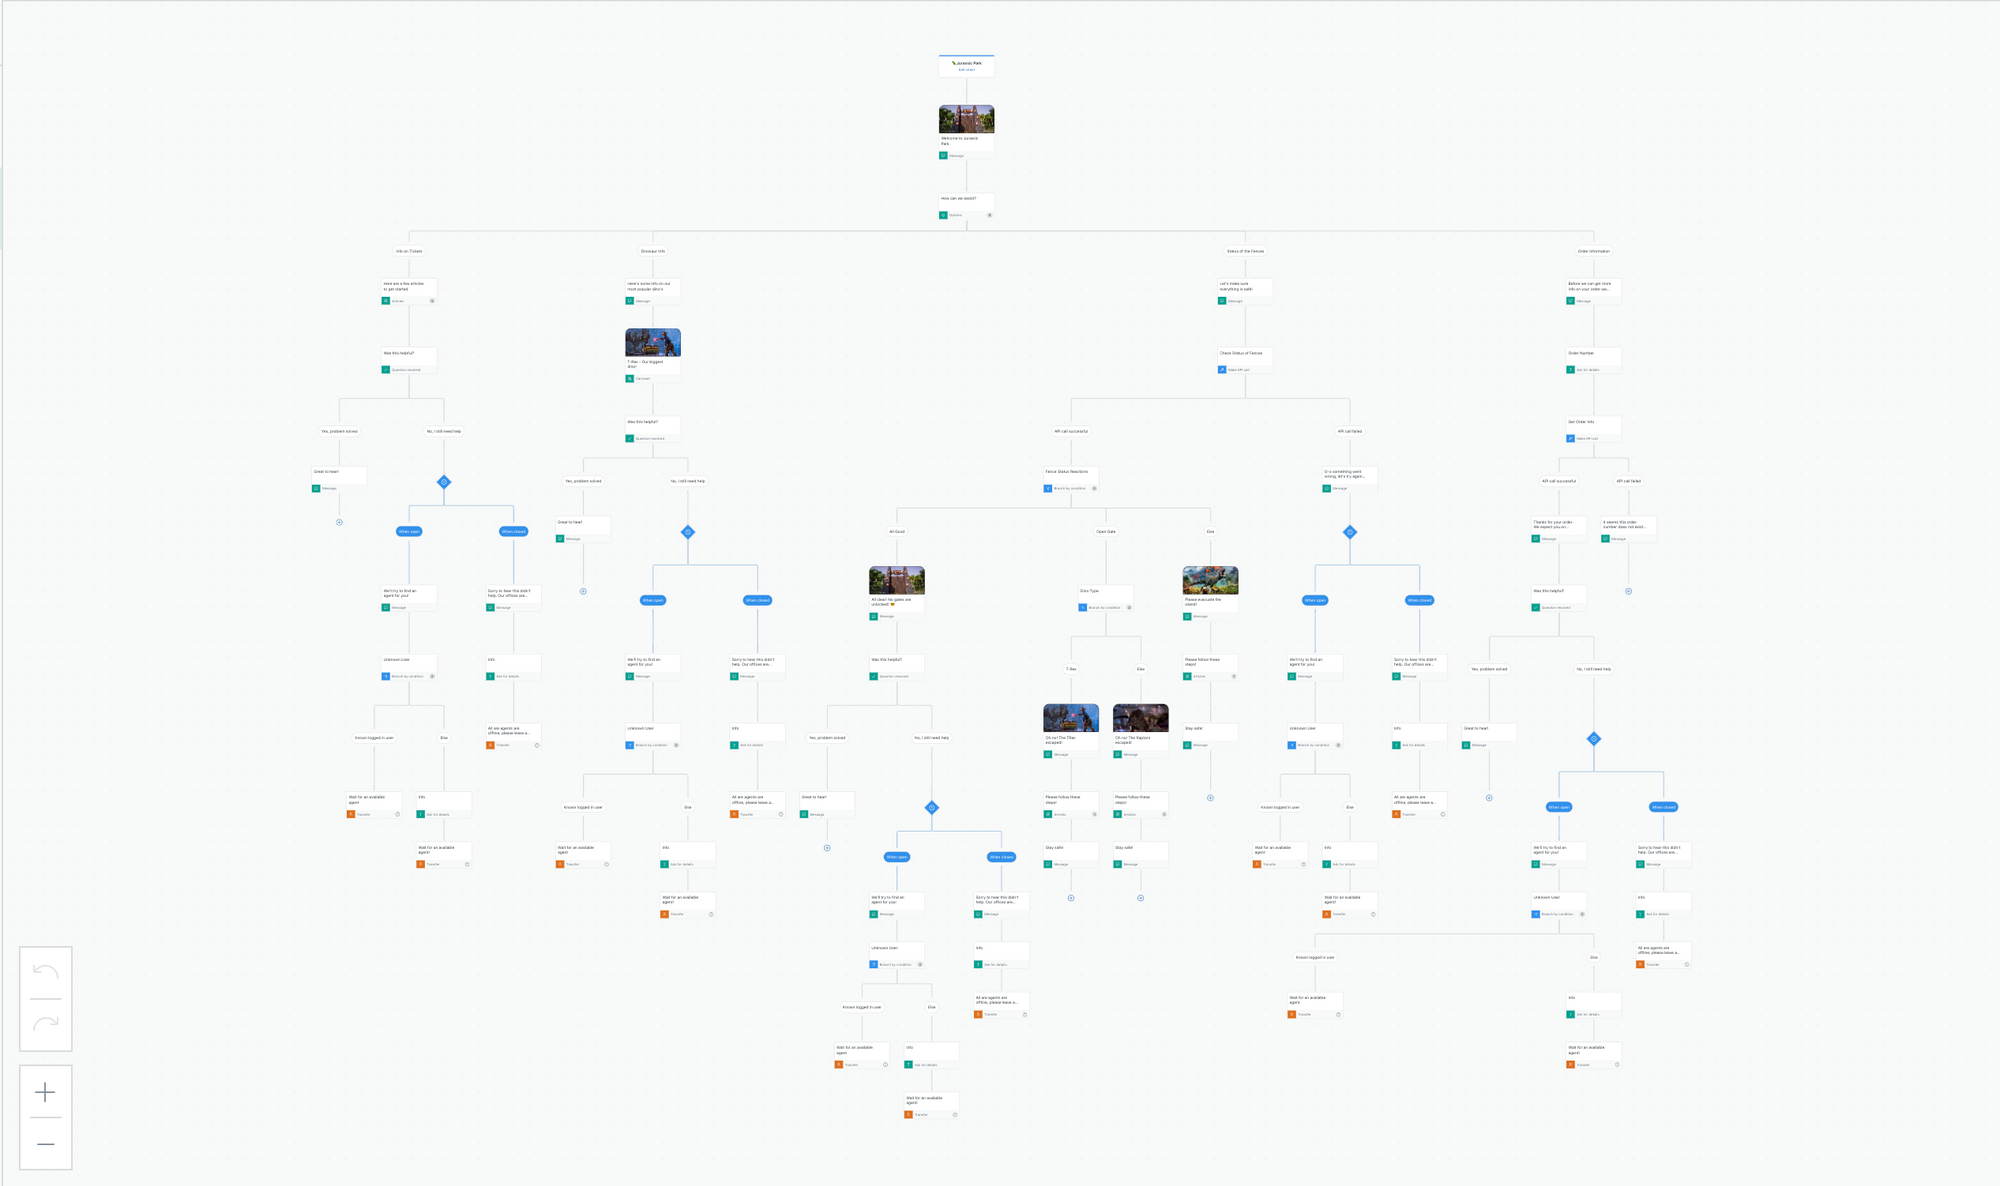
Customer Intents
As I'll also mention in the tutorial video below, the first step to build a good Chatbot is to define the issues the bot should help the customer with.
In my scenario here, I'm trying to solve four scenarios that will lower agent workload:
- How to buy tickets
Deflect tickets about ticket purchases so that most customers can self-serve and agent only need to handle the complex cases. - Info on Dinosaurs
Although the Customer Care team should be able to give information about the animals in the park, most of these questions are generic and easily satisfied with a good article or video. - Status of the park
When things break, you should inform customers in an automated way so that your agents can handle the real emergencies and focus on one to many communication. - Order Information
Most people that need information on orders either want confirmation or lost their booking emails. Offering that info up front gives agents time to handle real issues with payments or erroneous bookings.
Mapping it all out
I always start with a flow chart that maps out a rough overview of the flows you expect your customers to follow. This will serve as a guideline for building your Flow Builder bot, and allows for quick iteration before you commit on building the bot.
Answer Flow Step Types
Flow Builder has around a dozen different Step Types you can use to build your bot. We'll use all of them to build our different flows and intents.

Intent #1: Ticket Info

Our first Intent is the Buy a Ticket intent. It's a pretty basic flow that offers the customers a set of preselected Guide articles, ask if the issue is resolved and if not, escalates to an Agent.
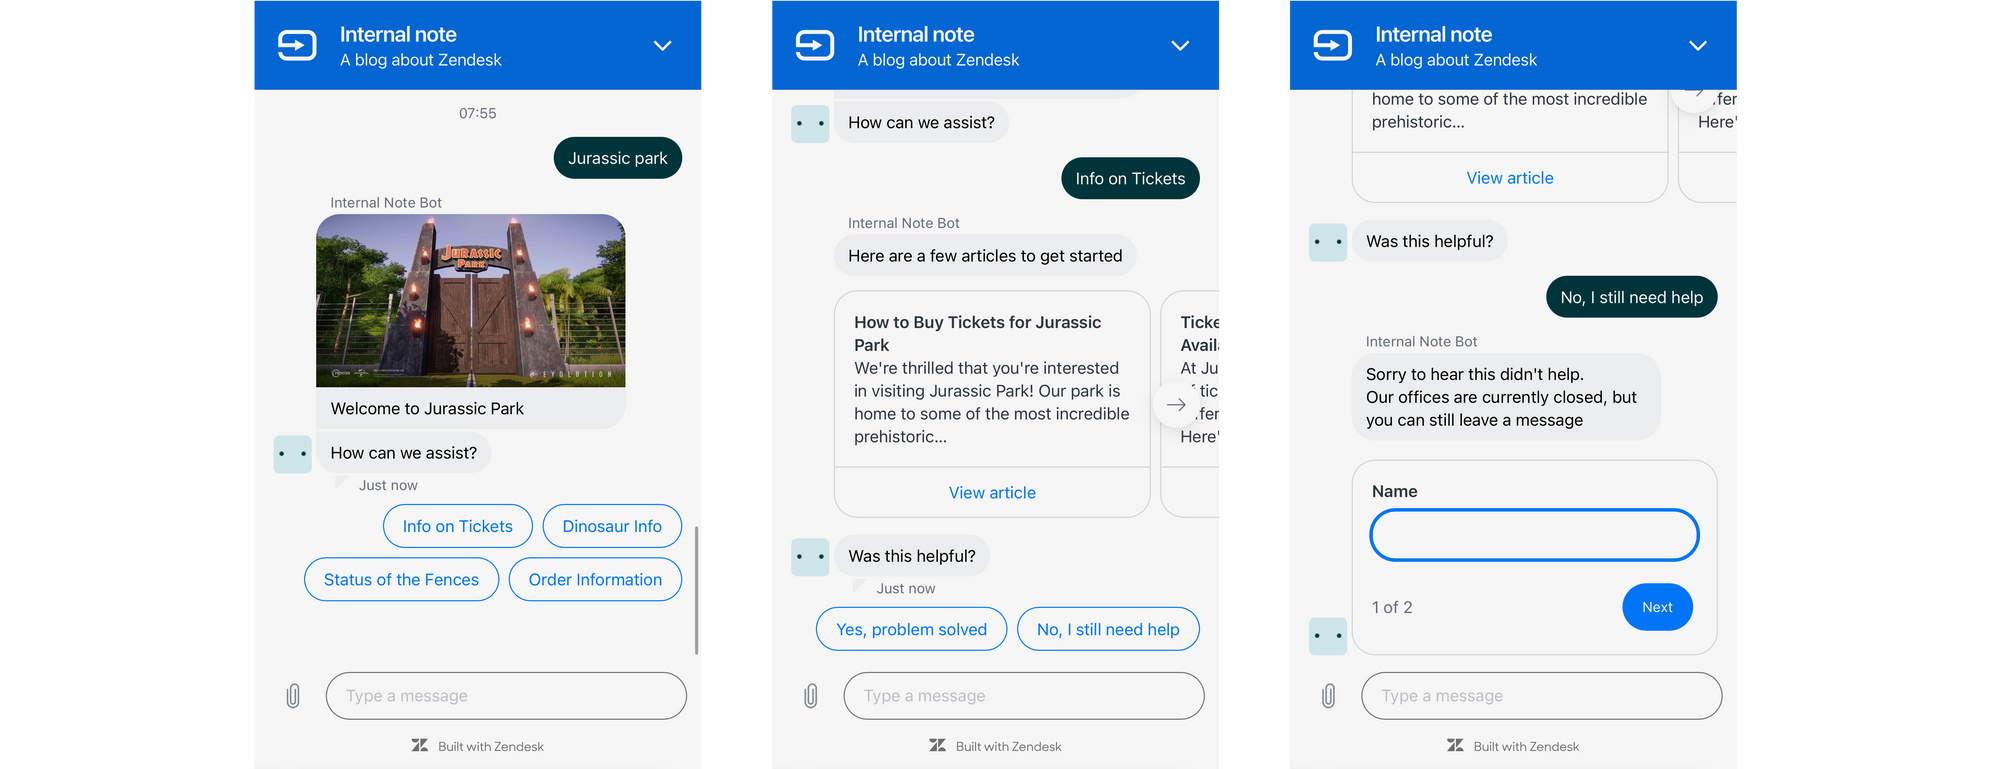
Show Help Center Articles
This step allows you to show up to six public articles to your customers. Articles will be shown in the locale the Widget is loaded in and articles are always shown in a carousel in the same order.
Once a customer clicks an article, they'll be redirected to your Help Center. But no worry, if they open the Widget again it'll remember their actions. Any read article will show up in the Context Panel in Agent Workspace if you've enabled those events.
Ask if question is resolved
Once we've shown the articles we'll ask the customer if the question is now resolved. The answers to this question will be stored in Explore so you can measure your success-rate. If the customers answers negatively, we'll escalate to an Agent.
Business Hours
Zendesk Messaging can take your Support schedule into account and can show a different reply inside or outside of Business Hours.
Authentication Info 🆕
If you allow your users to login to your Messaging Widget you can use that information to pre-fill their name and email and make escalation to an Agent easier. You could even have different experiences for VIP users vs regular users, or assign logged in users to a separate support tier.
Transfer to Agent
Once we've offered a few Self Service solutions in attempt to deflect the question, and got confirmation that, yes, the customer does need help, we can transfer the conversation to an Agent in Support.
For unauthenticated users we can use the Ask for Details step (see below) to ask for their name and email, before we attempt to find an available agent.
Intent #2: Dinosaur Info

Similar to the basic deflect or escalate flow in our first Intent, this second Intent will follow a similar path.
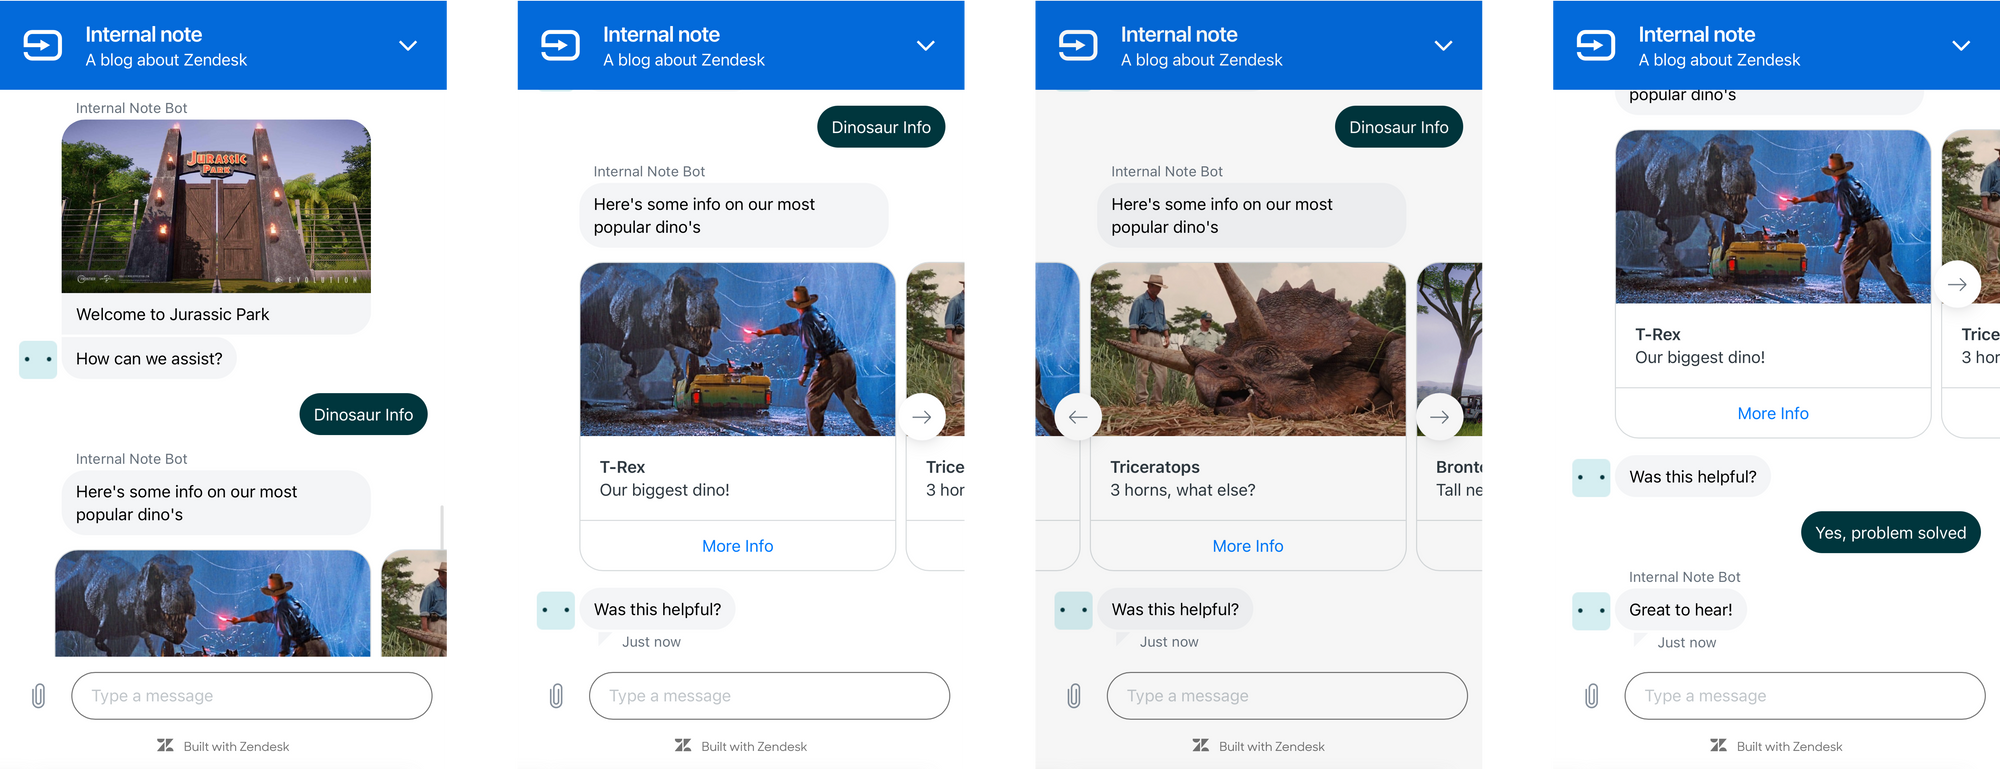
Carousel
When the customer chooses the Dinosaur Info option we'll use the Carousel step to show them information on three Dinosaurs. Each carousel element included an image (loads an externally hosted photo), a short description, and a button that links to a Help Center (or external) article with information about the Dinosaur.
Escalate to Agent
Here also, when the customer lets the bot know that they need more information, we escalate to an Agent.
Intent #3: Fence Status
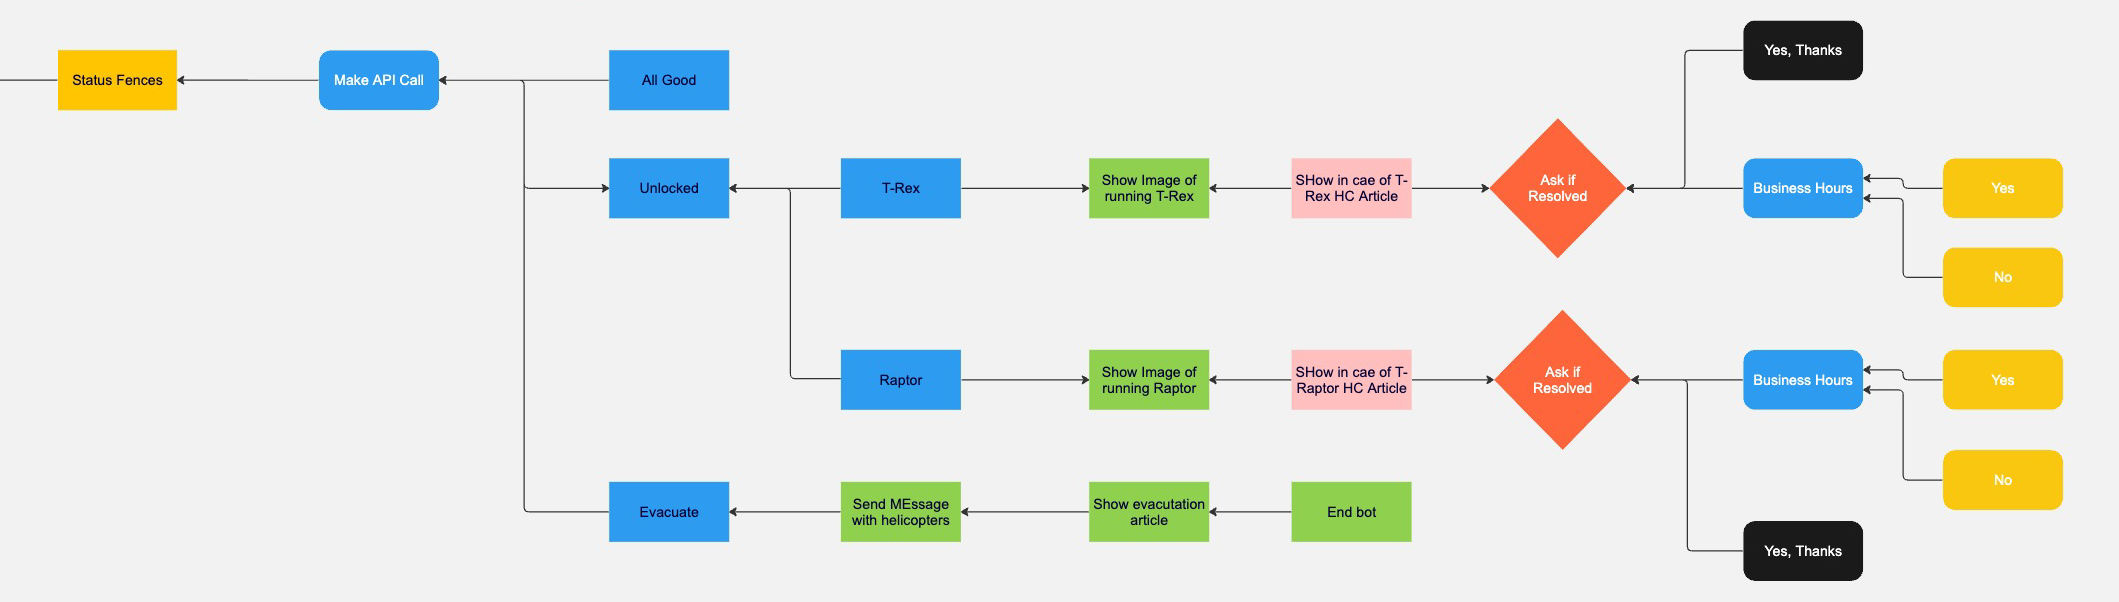
Our third intent introduces some more logic based on API calls and handling the returned data.
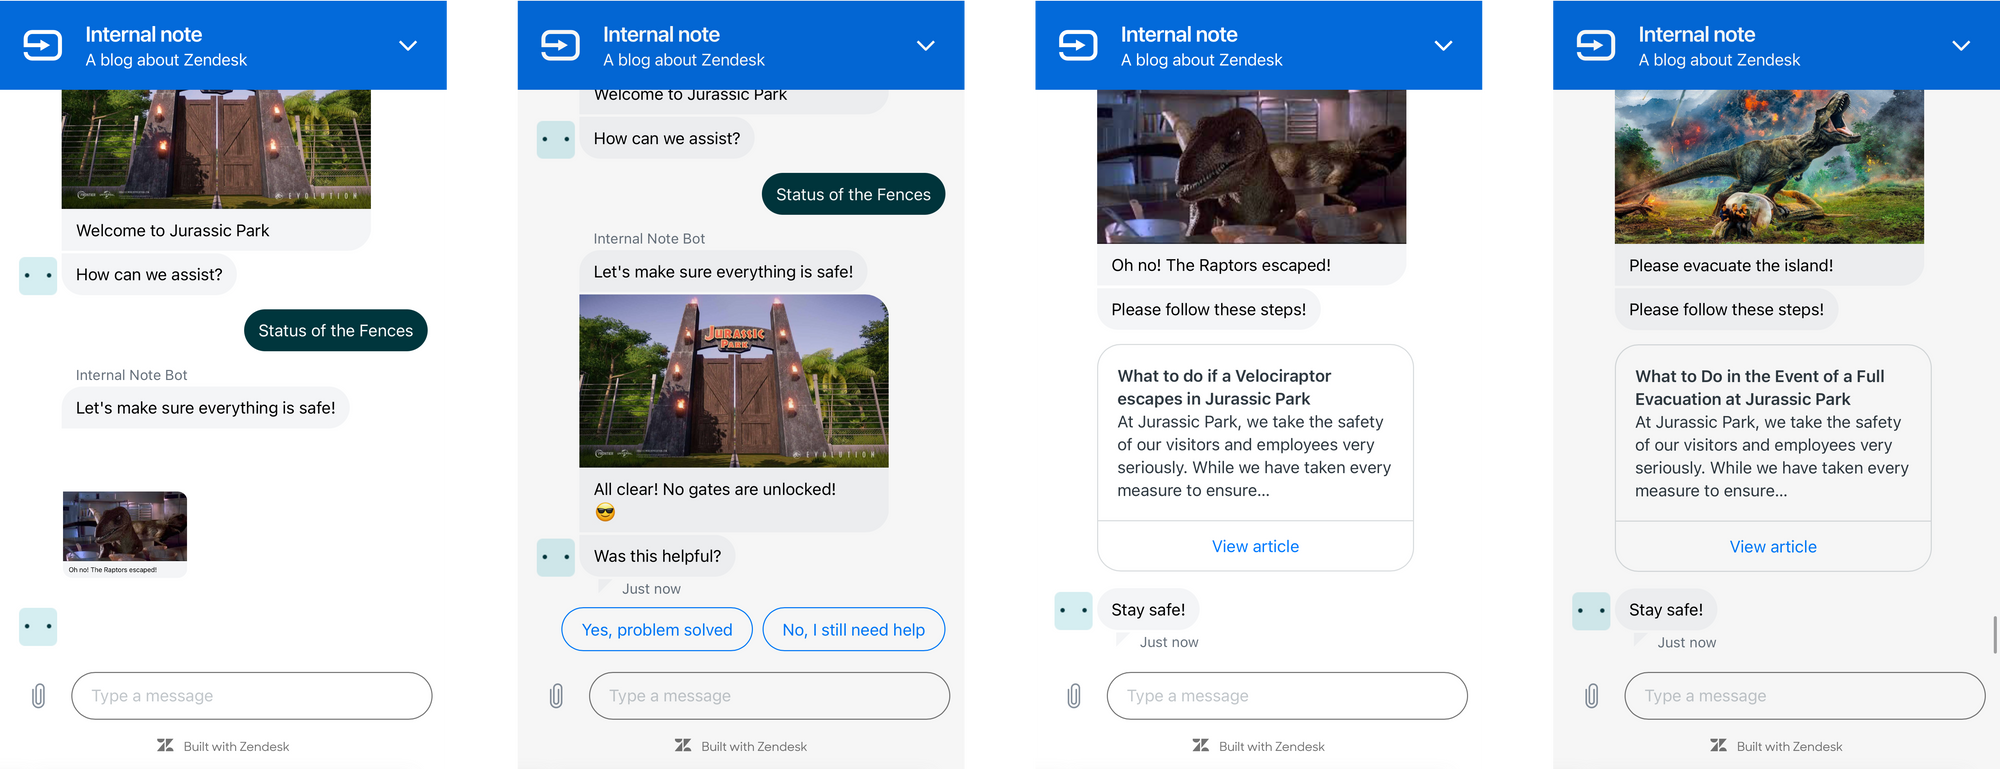
API Call
When a customer chooses the Status of the Fences intent we immediately fire an API call. This API call checks an external API resource https://jurassic-park-bot.internalnote.com/status and gets a payload back.
{
  "status": ["all_good","unlocked_raptor","unlocked_trex","evacuate"]
}
We make use of the recently announced Custom Webhook Headers to reach a protected API resource, and store the returned payload.status in to a variable status
If the API call fails we'll try to reach an agent for the user by once again copying those steps from the previous Intent.
 verschoren
Branch By Condition 🆕
If we do get a valid payload back we use the new Conditional Flows step to show different results based on the status value. For each status we show a Bot Message step that includes an externally linked image and a button that links to a Help Center article. And since this Intent often ends with disasters and escaped Dinosaurs, we do not escalate to an Agent for this flow.
Intent #4: Order Info

Our final intent is a variation on the previous one. We once again make an API call to an external service, but instead of a hardcoded URL with results that are the same for all visitors, we'll make an API call that contains unique information provided by the customer and returns personalised responses.
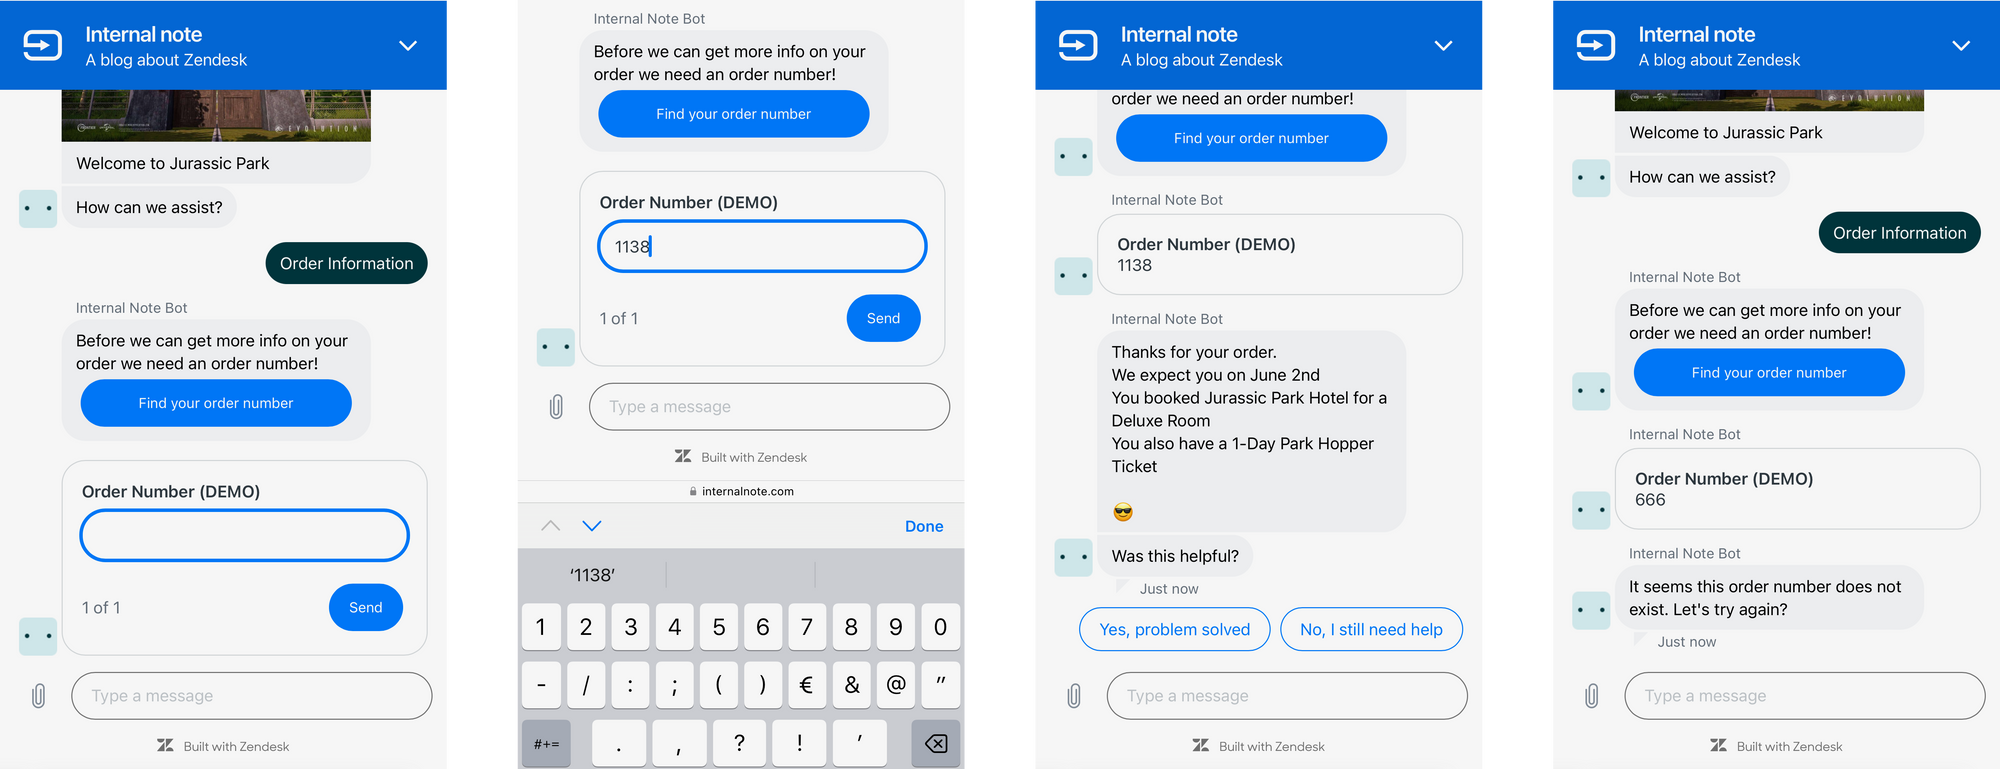
Ask For Details
We use the Ask For Details step to ask for an Order Number. This value is stored in a custom field for easier retrieval by an Agent if escalation is needed, and is also automatically stored in a variable Order Number we can use anywhere in our Bot Logic.
API Call with POST/Details
Where the previous Intent did a GET request, we will now make a POST request to https://jurassic-park-bot.internalnote.com/order with a JSON Payload:
{
  "order_id":"{{Order Number}}"
}
The API call either fails, or successfully returns our order data. We store all returned data in variables, and use the Send a Message step to return the data in a nicely formatted way.
{
  "items": [
    {
      "name": "Jurassic Park Adventure Park",
      "quantity": 2,
      "ticket_price": 150,
      "ticket_type": "1-Day Park Hopper",
      "type": "attraction"
    },
    {
      "name": "Jurassic Park Hotel",
      "nights": 3,
      "room_price": 350,
      "room_type": "Deluxe Room",
      "type": "hotel"
    }
  ],
  "order_date": "June 2nd",
  "order_id": "ORD1002",
  "order_status": "confirmed"
}items[i] as a unique array and the API call will fail if we store e.g. a variable items[3] and the next API call only responds with 1 element.Conclusion
What started as a fairly simple Flow Chart to handle four clearly defined intents, ended up in a complex tree of over a hundred steps, including links to Help Center articles, external APIs and hosted images.
I really hope the video above, and the documentation in this article helps you to build your own Flow Builder Bot.
A small ask
Building this bot and tutorial took a lot of preparation. If this free article was useful to you, share it with a friend or colleague and ask them to subscribe.
If this really offered value, please consider subscribing to a paid tier to make this blog and project viable and allow me to write more of this content in the future.