Sunshine Events via Zapier or Webhooks
Zendesk Sunshine Events allows you to enrich your customer profiles and give context by building a timeline of your customers’ actions by adding events from external systems. This tutorial shows you how.
Sunshine Events via Zapier or Webhooks

On this page
Zendesk Sunshine is a set of Zendesk platform toolkits that allow you to track more data in Zendesk than the standard user/organization/ticket matrix.
It has a few elements:
- Profiles: create additional identities on top of user profiles similar to how a user can have an email, phone, social identity. Useful for e.g. tracking membership IDs or account numbers
- Custom Objects: A database of object records you can store in Zendesk and link against users, ticket, organizations or other profiles and objects. Think of it of a Lookup Field on steroids.
- Custom Events: Interactions that happen outside of a ticket but are important for a customers' journey can be logged in Zendesk on the end-user profile and made visible for agents.
For this article we'll focus on Events.
Zendesk Events
Your Zendesk instance comes with a preset of Event types out of the box for Answer Bot and Guide to show Suggested Articles, Answer Bot, Help Center Search and Article Views. And if you use the Shopify integration you can easily see customer actions on your website too.
This is quite useful for agents cause you can see what the customer was doing before he submitted a ticket.
Similar, any website with the Web Widget enabled (and cookies accepted) will also log page views in the interaction timeline. This way a customer going to your webshop, looking at a product, looking at size information and creating a ticket gives your agents context: they want a product, have already seen the size matrix, but need more help.
Custom Events
Aside from the predefined Zendesk Events, you can easily add your own events to the timeline by leveraging the Zendesk API and webhooks.
Examples you can add as events:
- User added to Mailchimp list - link
- User became a Ghost member - link (Yep, that's live for me!)
- New order in WooCommerce - link
- And a personal favorite of mine: create a trigger in Zendesk that creates an event whenever the user gives good or bad CSAT feedback on a ticket. (I'll leave that one as an exercise for the reader 😎)
Cloudflare Worker
The repository below contains a sample worker that takes an incoming webhook and creates an event for the relevant user.
You can use this worker to receive an incoming webhook from your platform of choice, and convert it to an event in your customers' timeline.
 verschoren
Zapier
We can make it easier by removing custom code and leveraging Zapier for this flow. Benefit is that instead of relying on webhooks you can use any of the hunderds of Zapier actions as input, but you'll need to pay for a Premium subscription.
Whatever option you choose, the steps are almost identical.
Our Setup
This basic demo will capture a webhook from our application, parse the fields, and create an event for the involved user.
Since this is a demo, there's a few caveats:
- We use
emailas the identifier of our user. You can use others like name, external ID or phone, but for convenience sake we'll use email. - Our webhooks' input has nicely formatting data. Your application might send out more complex data and some parsing/reformatting might be required.
Step 1: Catch Webhook
We create a new ZAP of type Catch Hook in Webhooks by Zapier. This will give us an URL to send our payload too: https://hooks.zapier.com/hooks/catch/1237760/3yd0uuw/
We then use Postman to test the webhook by sending an example payload:
{
    "name": "James Sullivan",
    "email": "[email protected]",
    "booking_id": "1345",
    "date": "04/05/2023"
}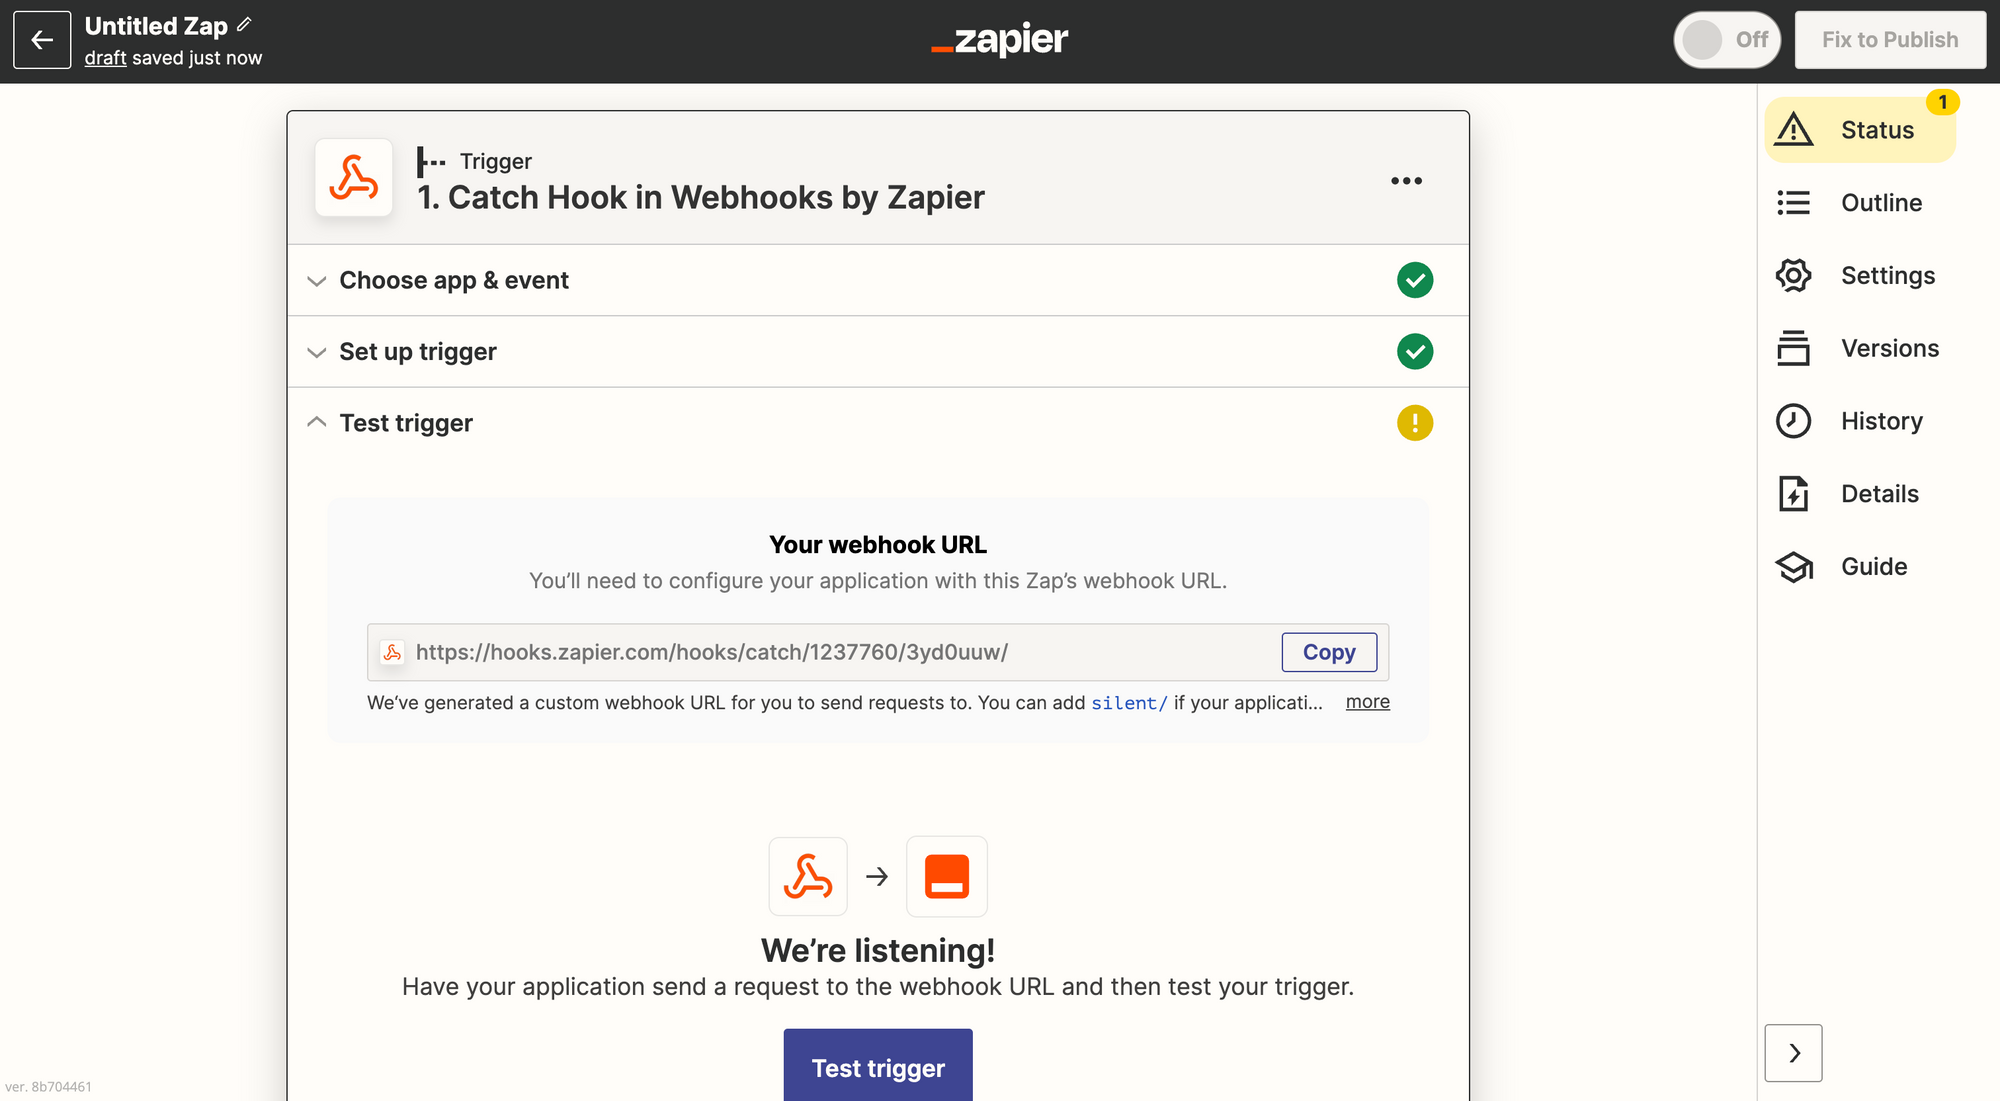
Catch Webhook
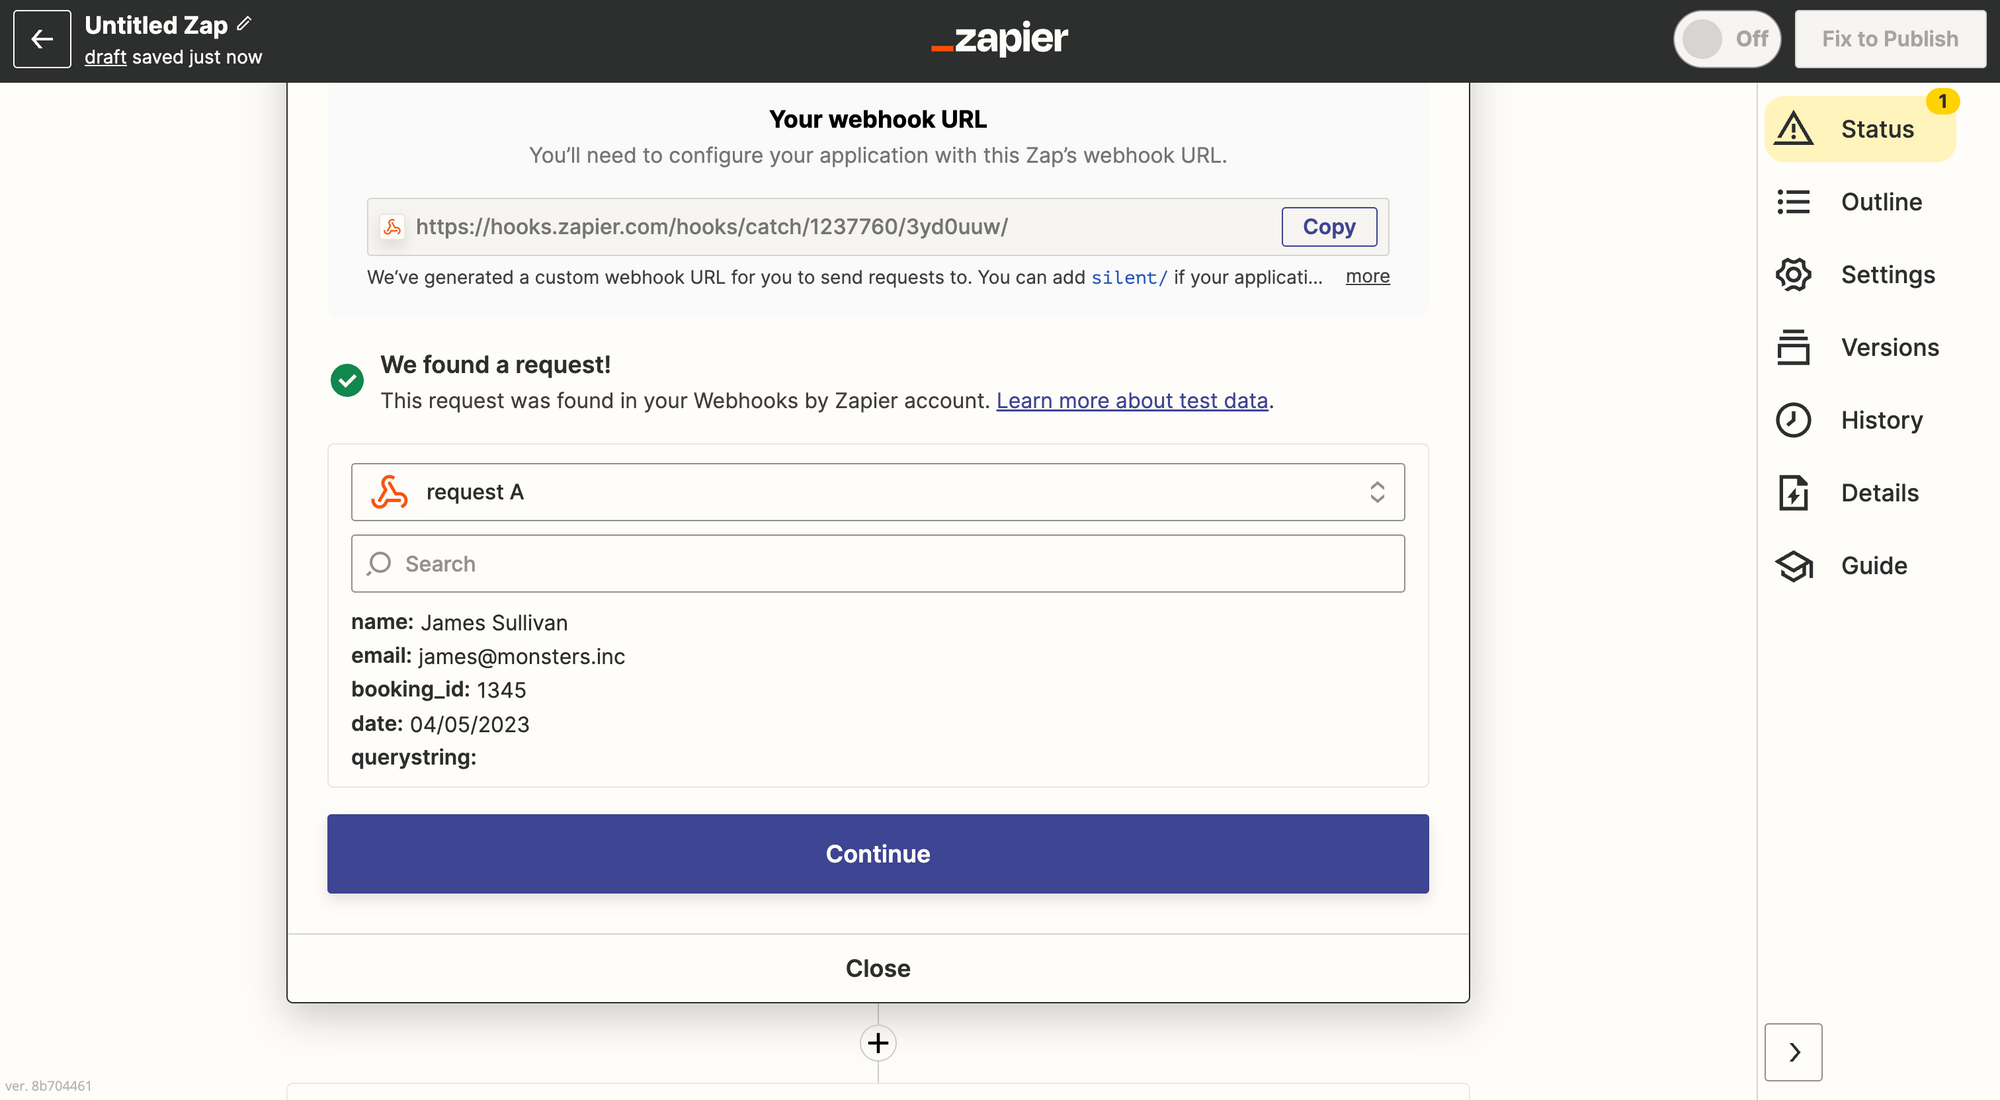
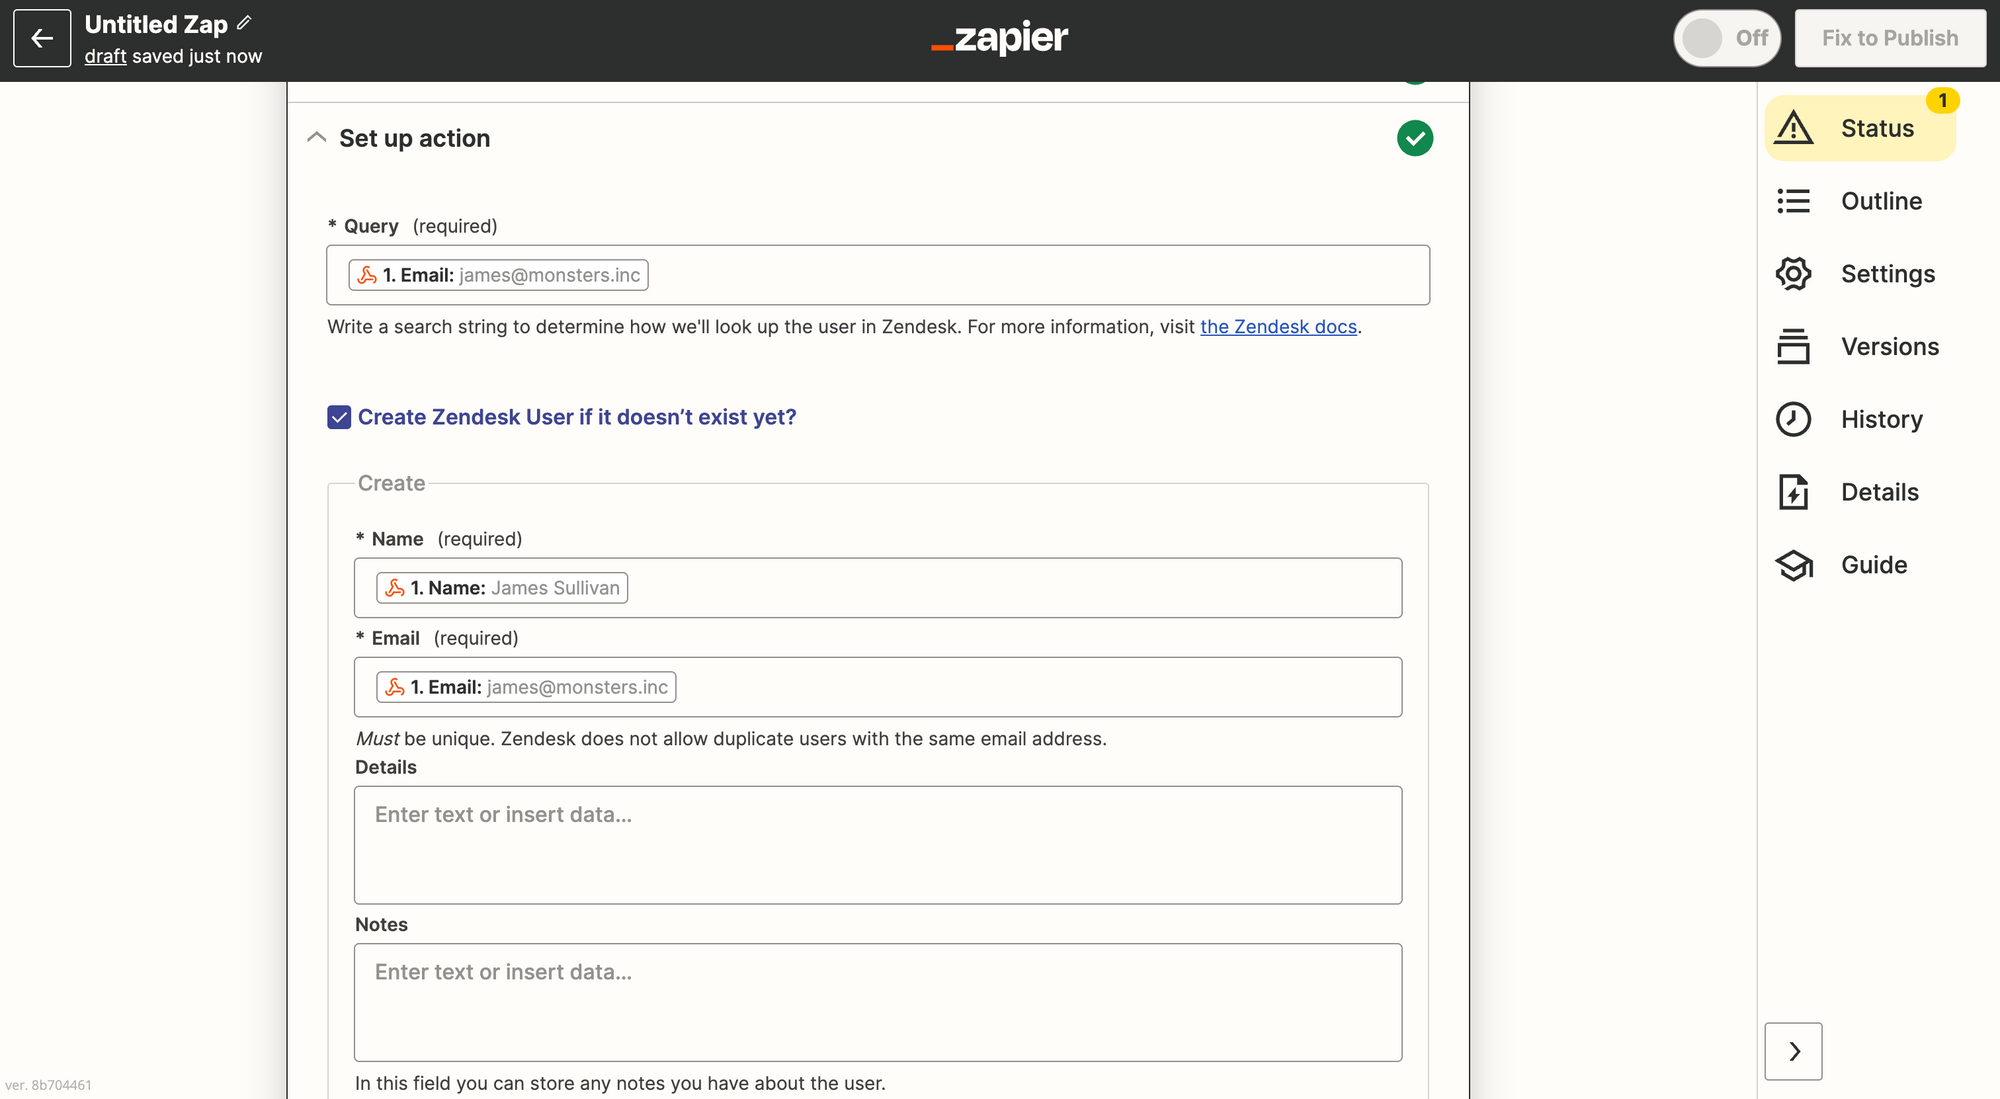
Step 2: Find or Create User
Now that we got an incoming webhook, we need to find our user in Zendesk. Since Events are stored against Users in Zendesk, we need the ID of our end-user.
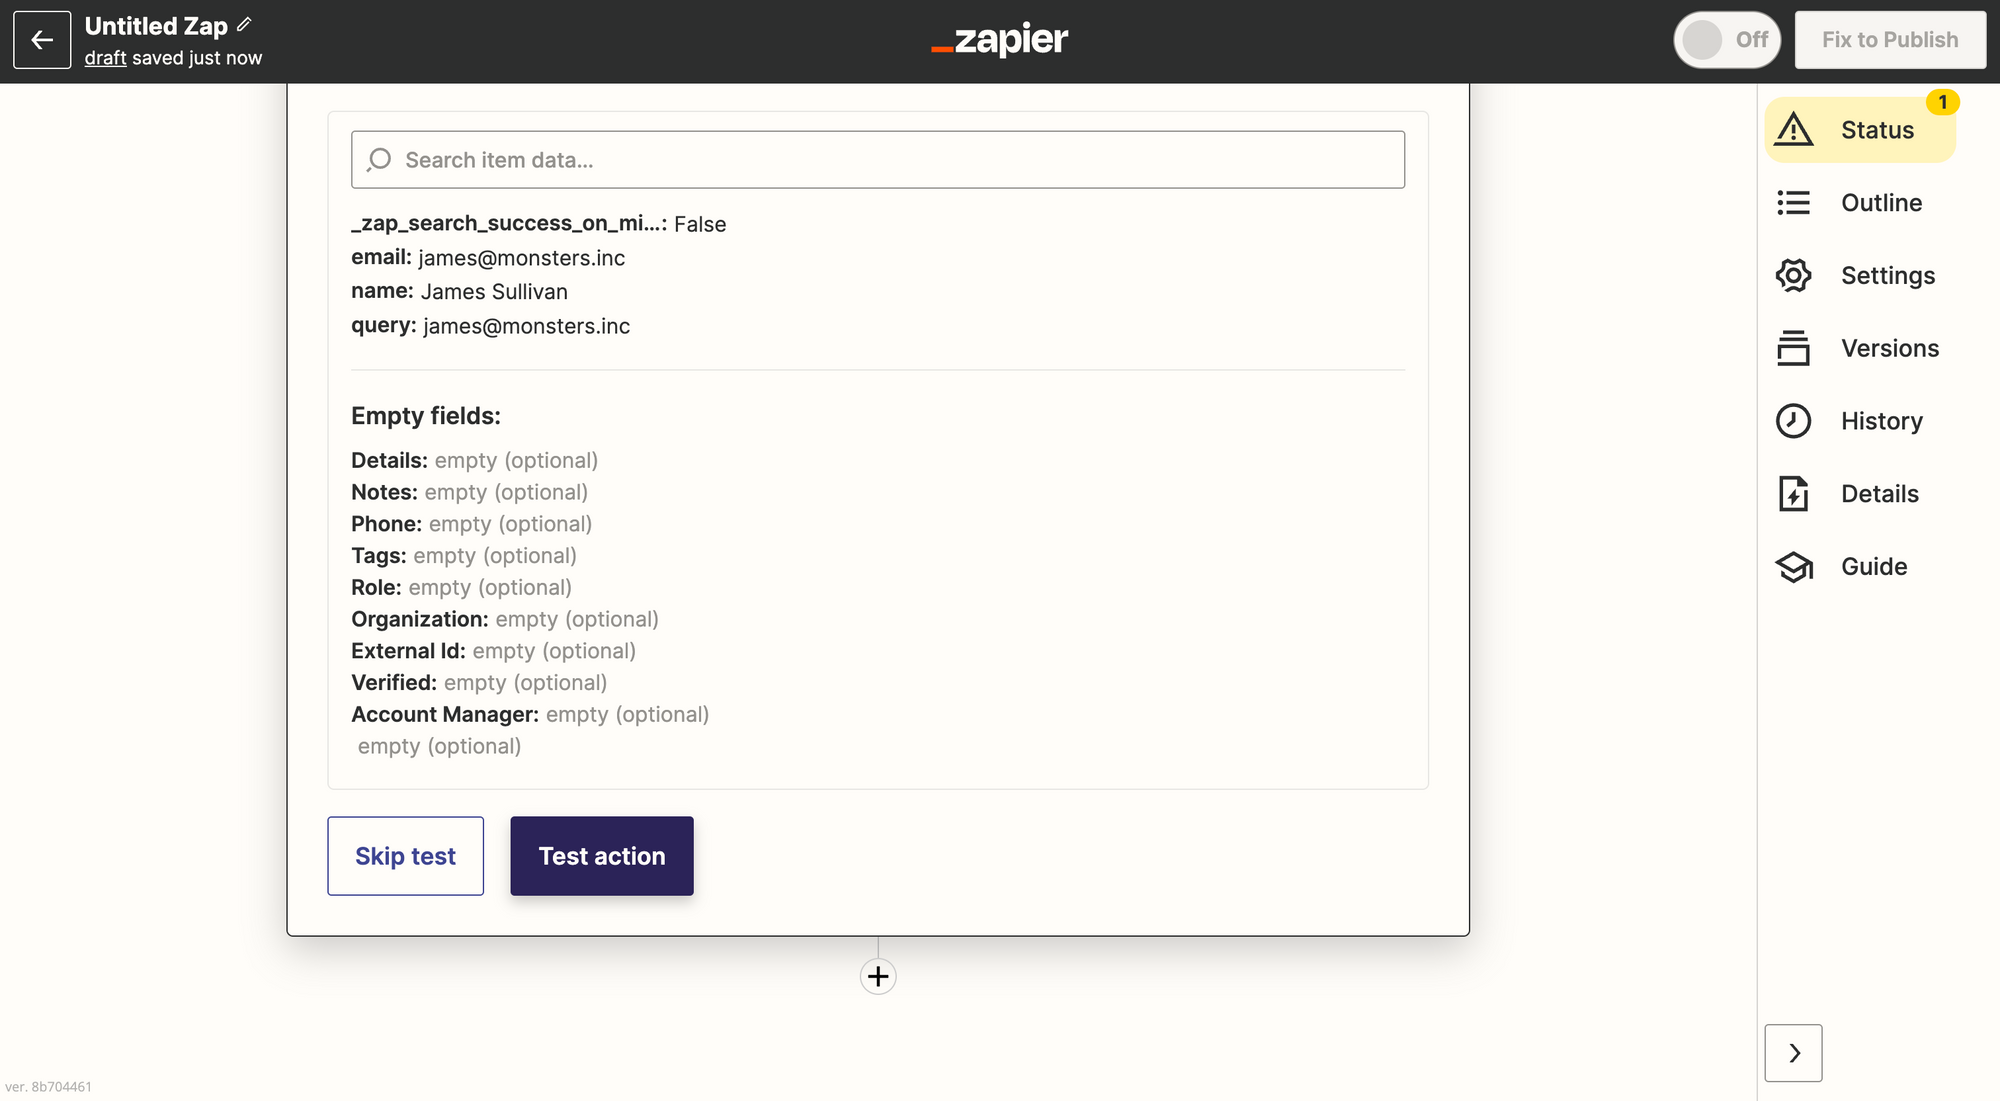
We use the Premium Zendesk step in Zapier to Find a User in Zendesk and choose the email key from our JSON payload from Step 1 to search.
If you want you can enable the Create user if it doesn't exist yet? option so you have a guaranteed event created.
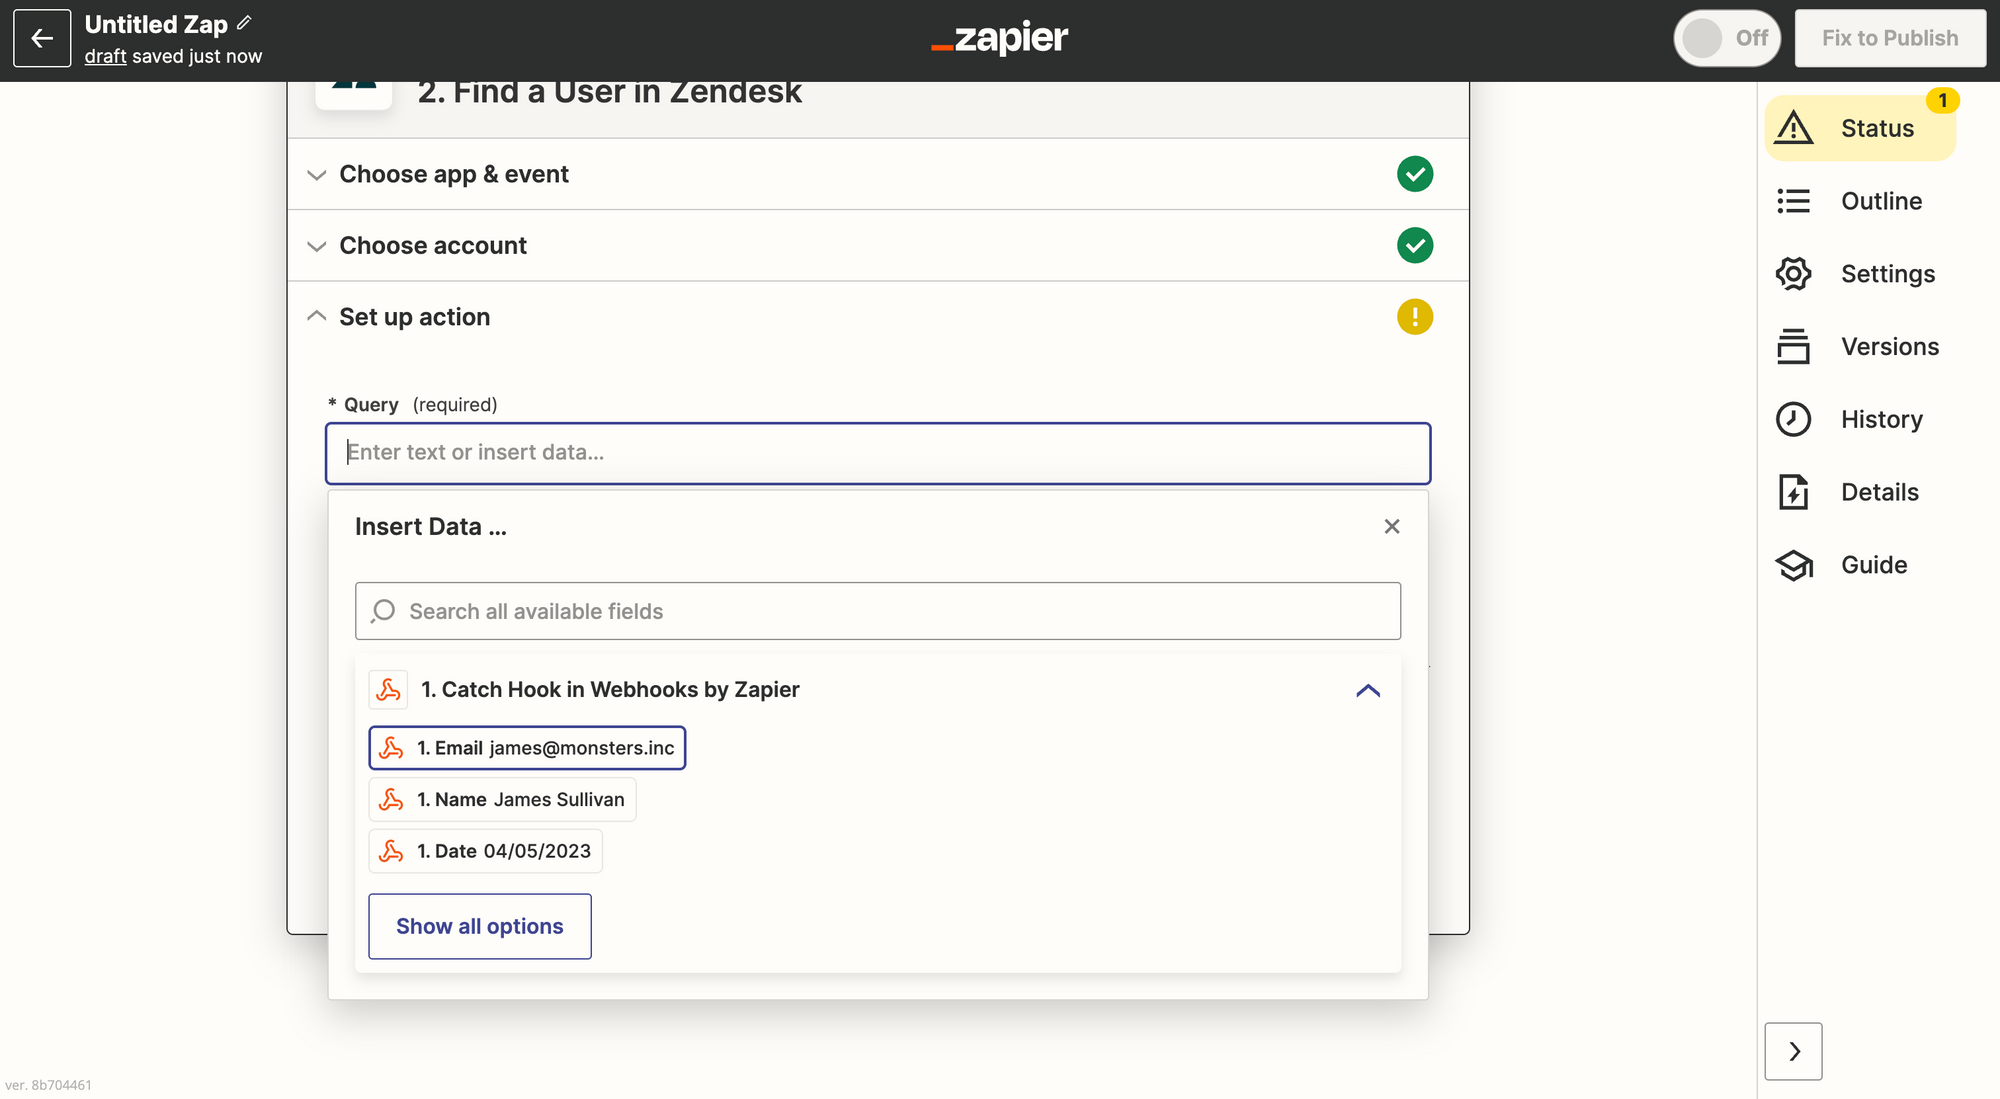
Find User
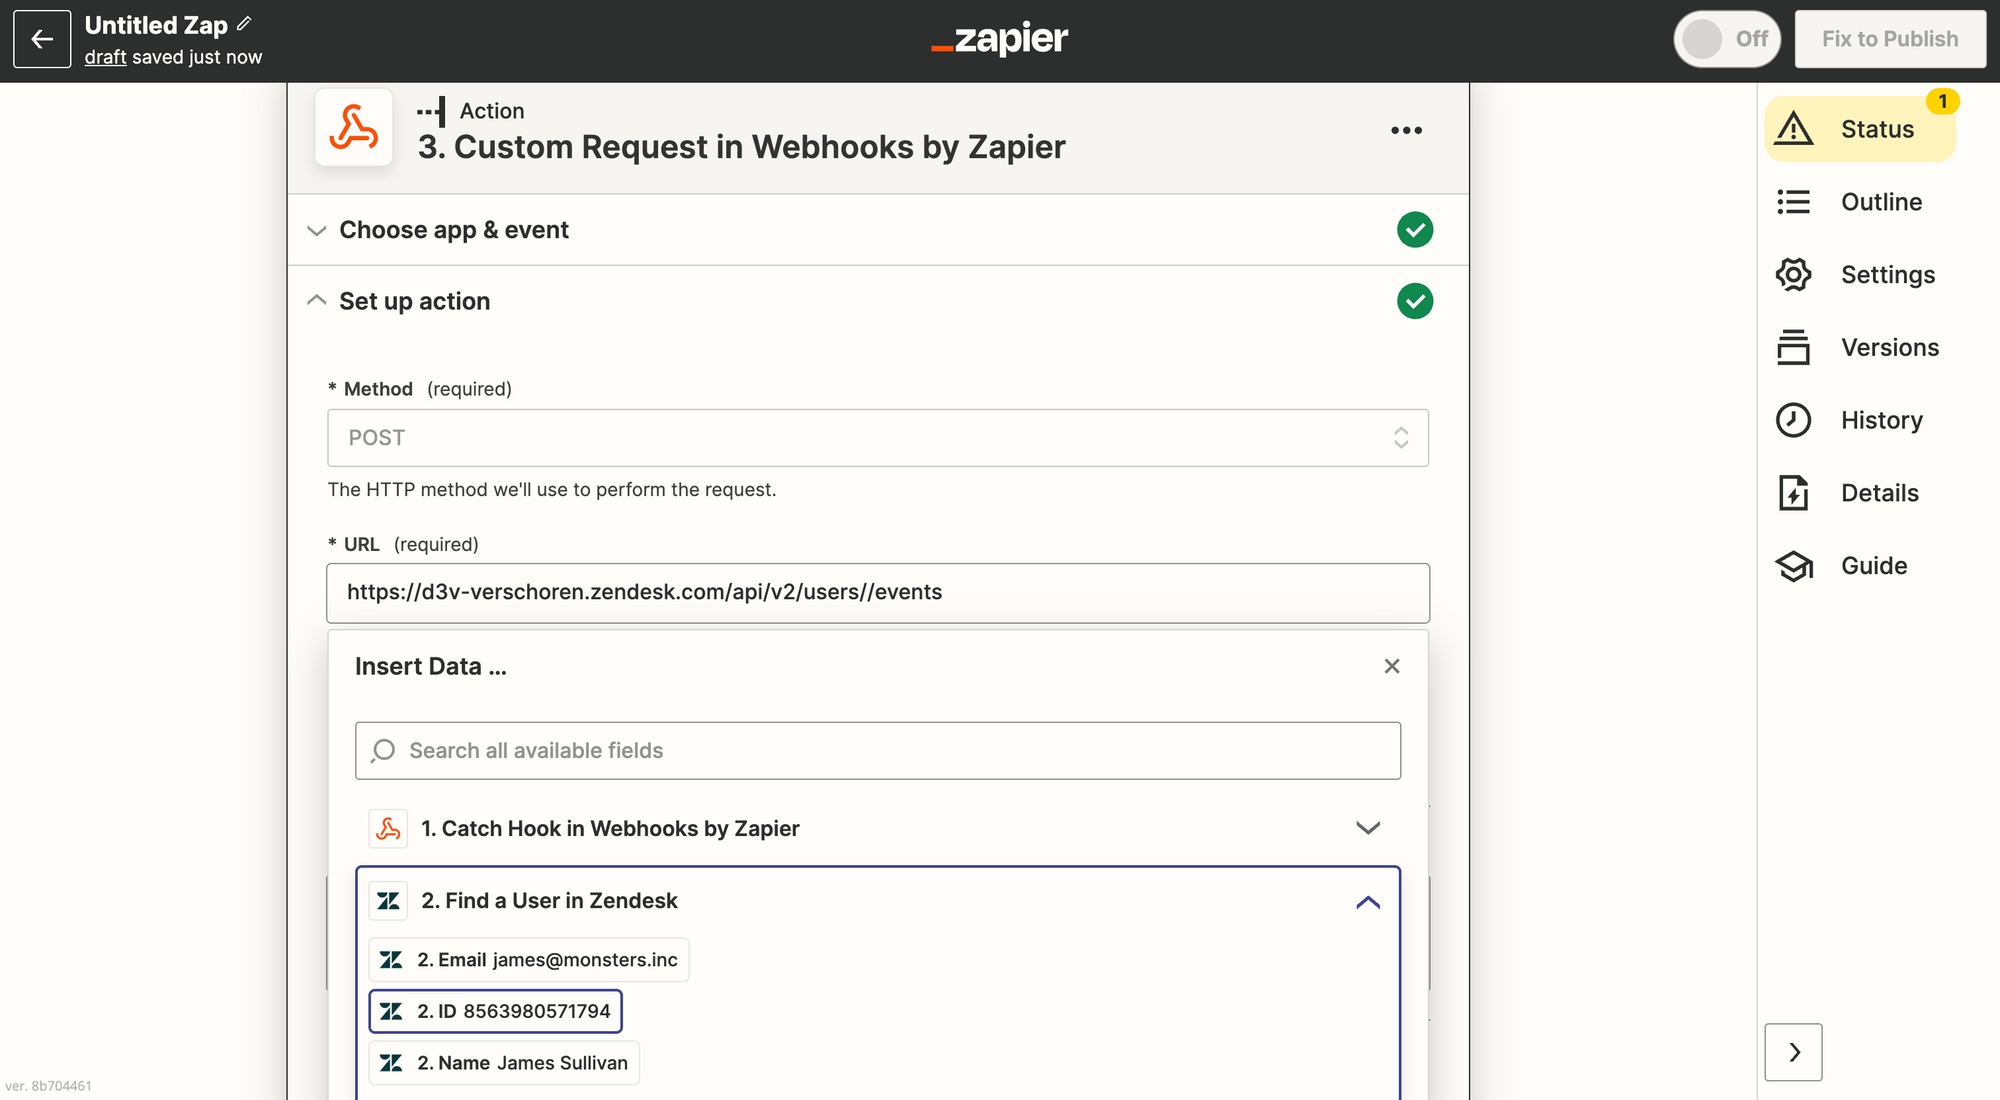
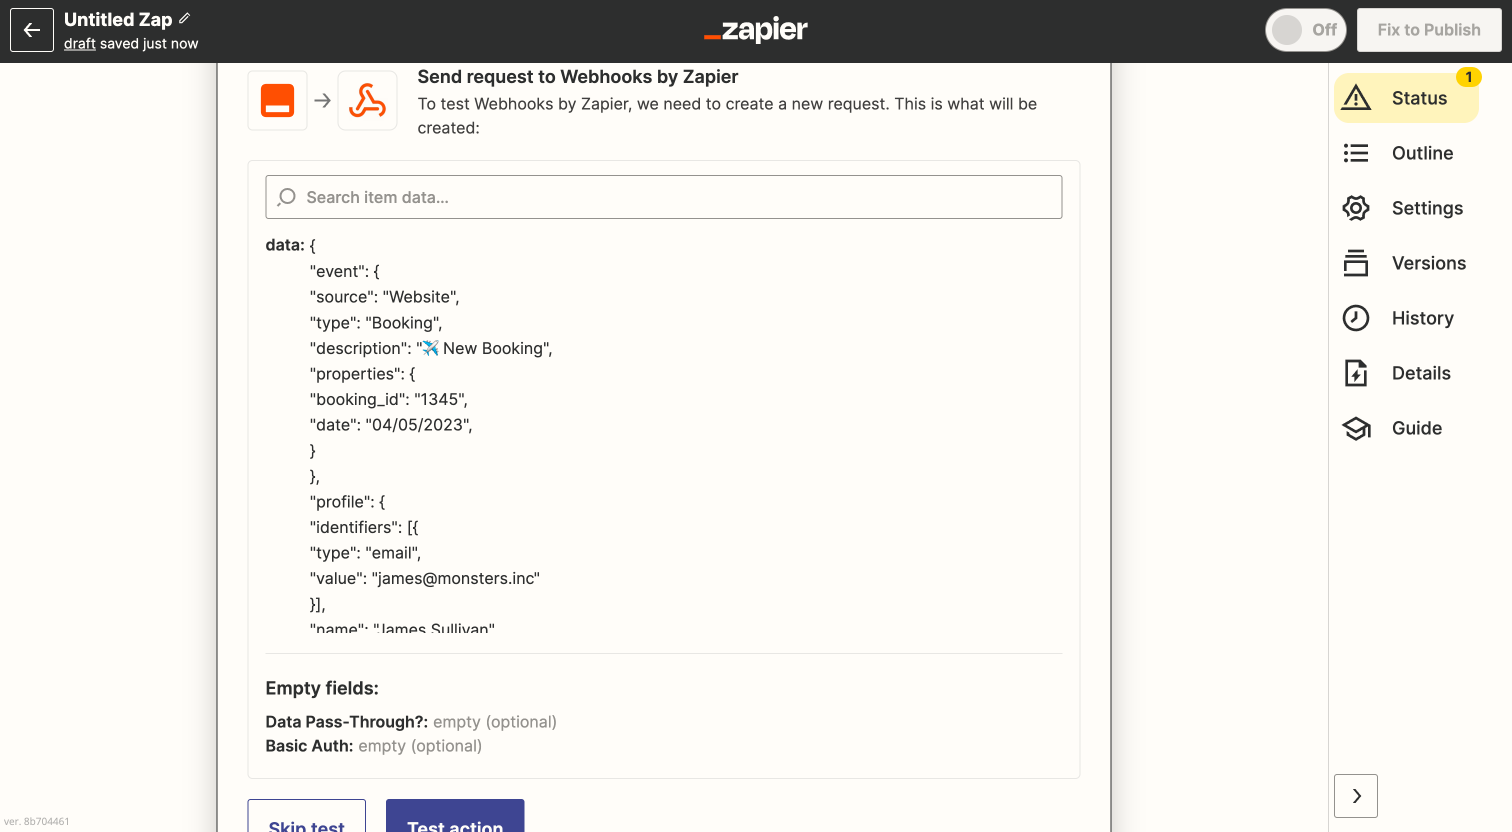
Step 3: Custom Request via POST
Now comes the fun part. By combining the data from the Webhook and Search steps we can create the following payload.
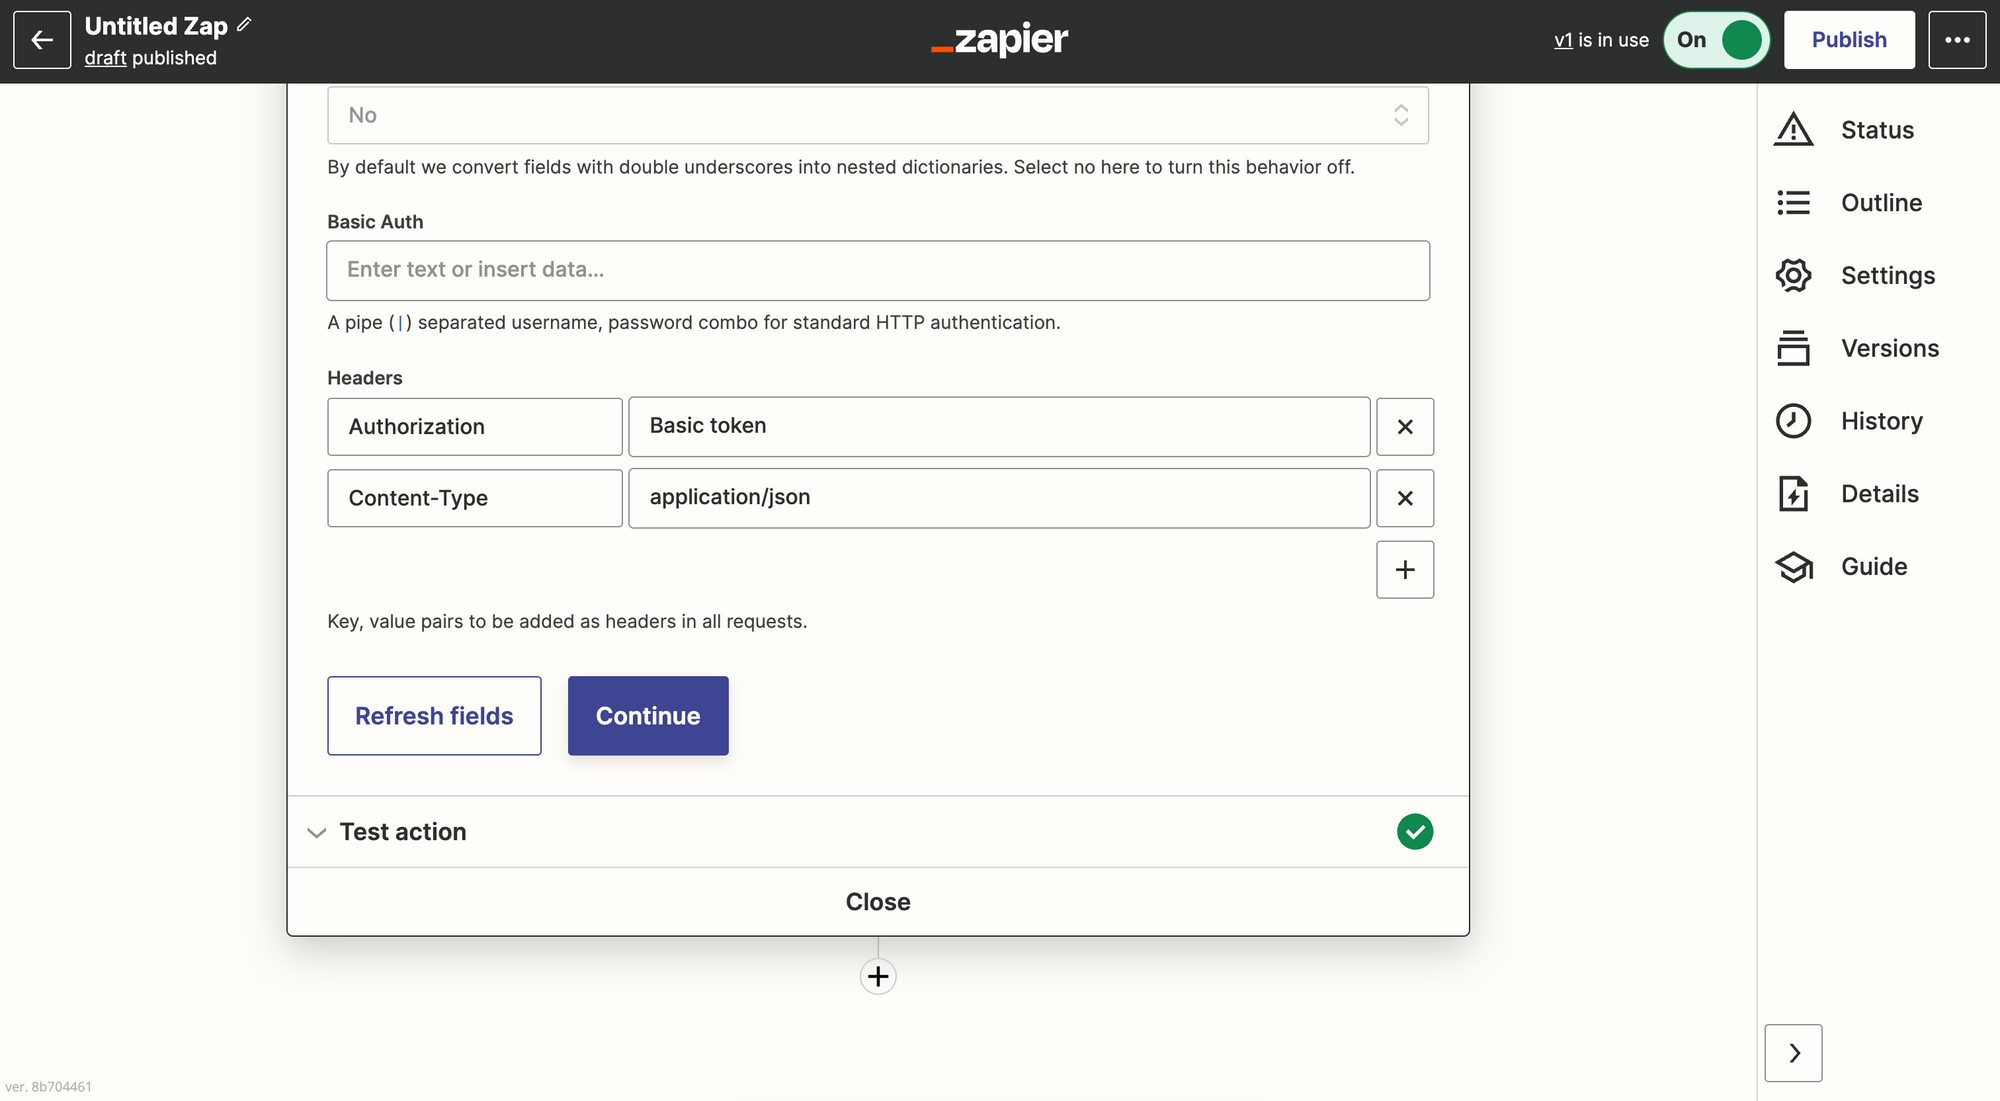
For this we use once again the Webhooks step in Zapier, but pick a Custom Webhook event. Note the values {{in between brackets}}. Those are parameters taken from prior steps in the Zap.
- Choose POST as the type
- Add
https://{{domain}}.zendesk.com/api/v2/users/{{user_id}}/eventsas the URL. Note that{{user_id}}is the ID of the user found in Step 2. - Header:
Authorization: basic base_64_encoded([email protected]/token:zendesk_api_token) - Header:
content-type:application/json
{
	"event": {
		"source": "Website",
		"type": "Booking",
		"description": "✈️ New Booking",
		"properties": {
			"booking_id": "{{181856201__booking_id}}",
			"date": "{{181856201__date}}"
		}
	},
	"profile": {
		"identifiers": [{
			"type": "email",
			"value": "{{181856201__email}}"
		}],
		"name": "{{181856201__name}}",
		"source": "website",
		"type": "customer"
	}
}
The values for source, type in both the event and profile arrays are yours to choose. Source refers to the place the event came from, type is useful if you want to log e.g. returns, refunds, orders, deliveries all from the same source. They will show up in the Timeline filter of your end-user.
Once you've got the payload setup you can test it to create an example event. Since events can not be deleted, be careful which user you test on ;-)

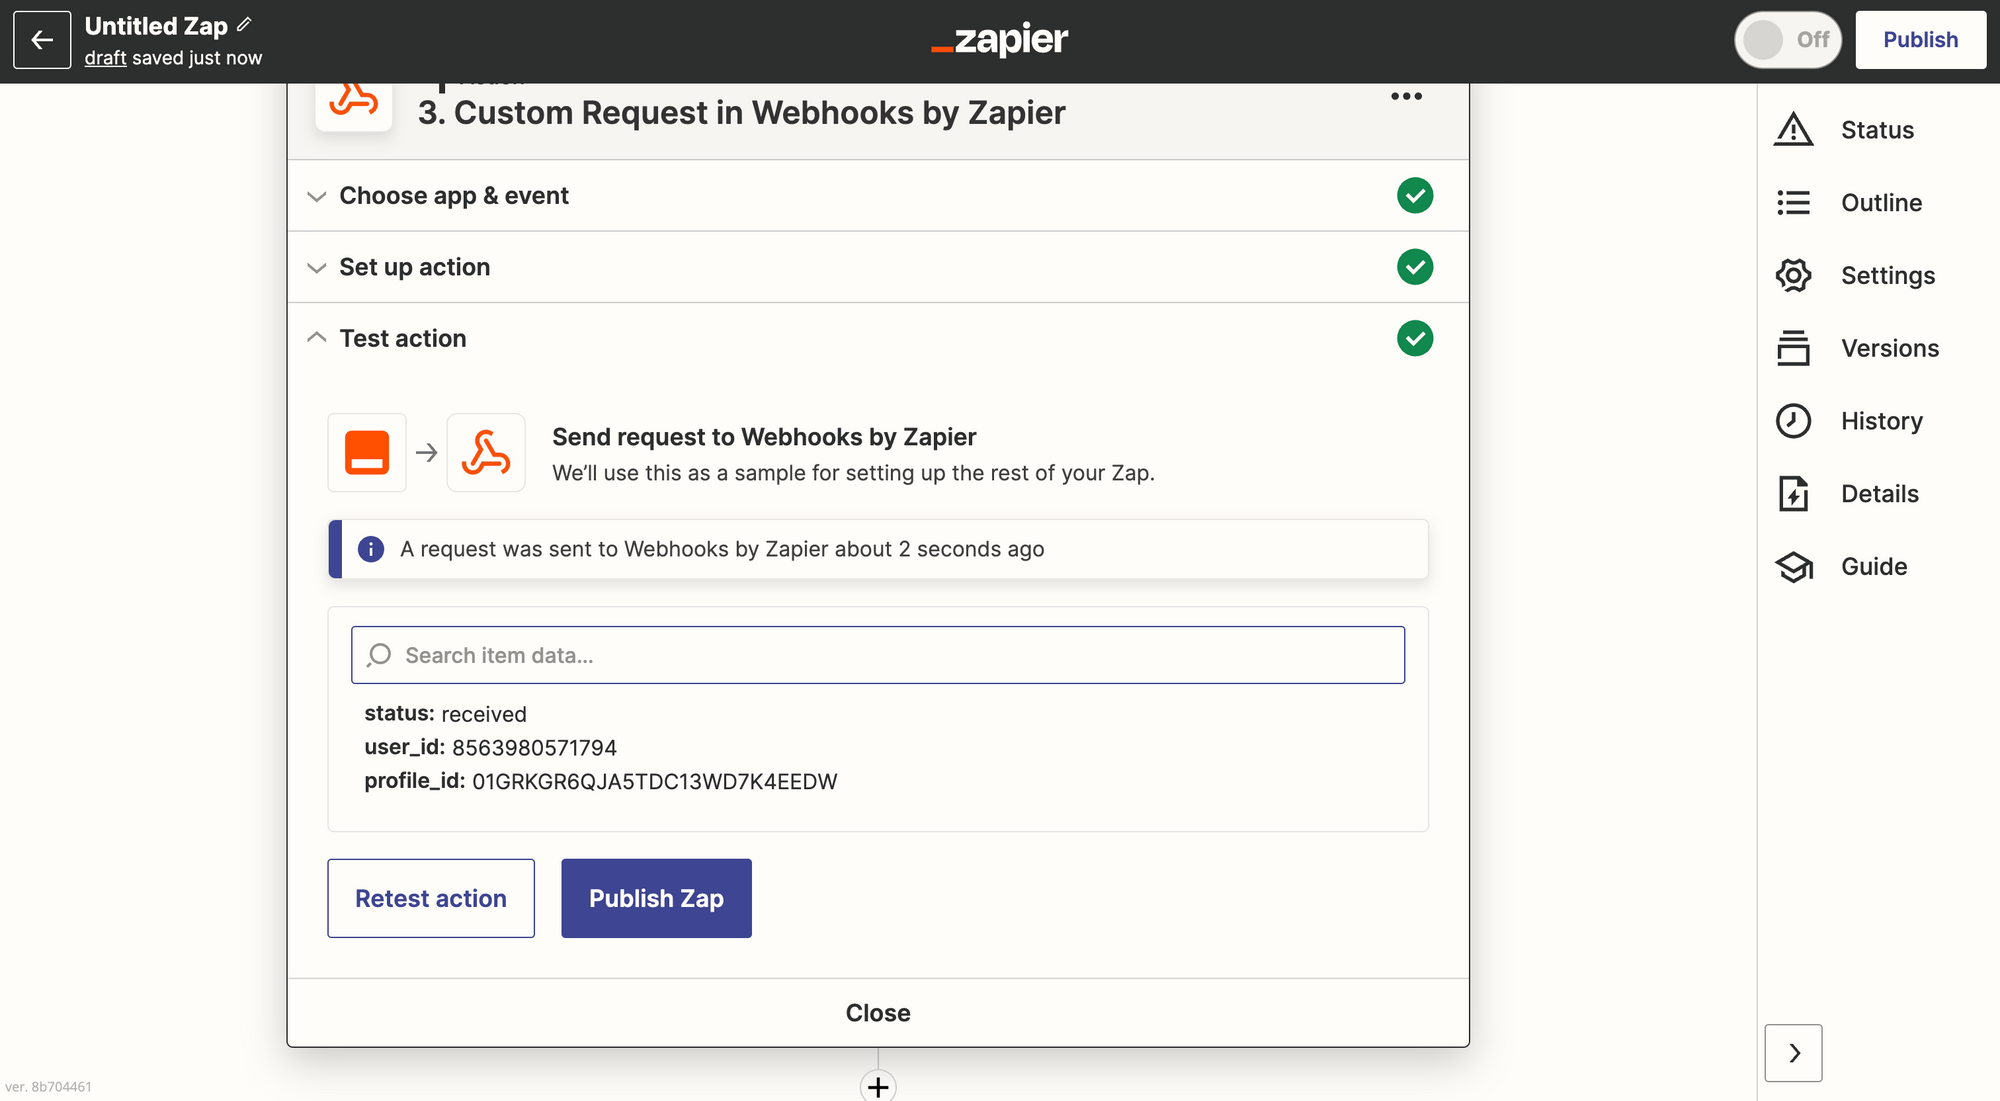
Custom Request via POST
Result
If all goes well, your test-user will see a nice event show up its timeline once you enable them in the Admin Panel.

If you want you can use this private Zendesk API to enable them via API.