Make Protected Zendesk Help Center Articles available in Search
This article shows you how to make articles available to logged in users only, but still make them available in search by showing an excerpt of the article.
Make Protected Zendesk Help Center Articles available in Search

On this page
Zendesk Guide has a built-in feature to make articles visible to everyone, logged in users, agents only or, if you've got an Enterprise license, specific user segments. This is a useful feature for anyone who wants to have one Help Center but make content available based on who's looking at the content.
Traditionally you'd see Zendesk environments with approaches like this:
- All articles are public, but some articles are agent only. (The default)
- Some articles are public, but most are for logged in users only (Software with paid licenses, companies that offer membership perks,...)
- A Help Center that is fully locked down with no public access.
These scenario's work, but they come with some caveats though:
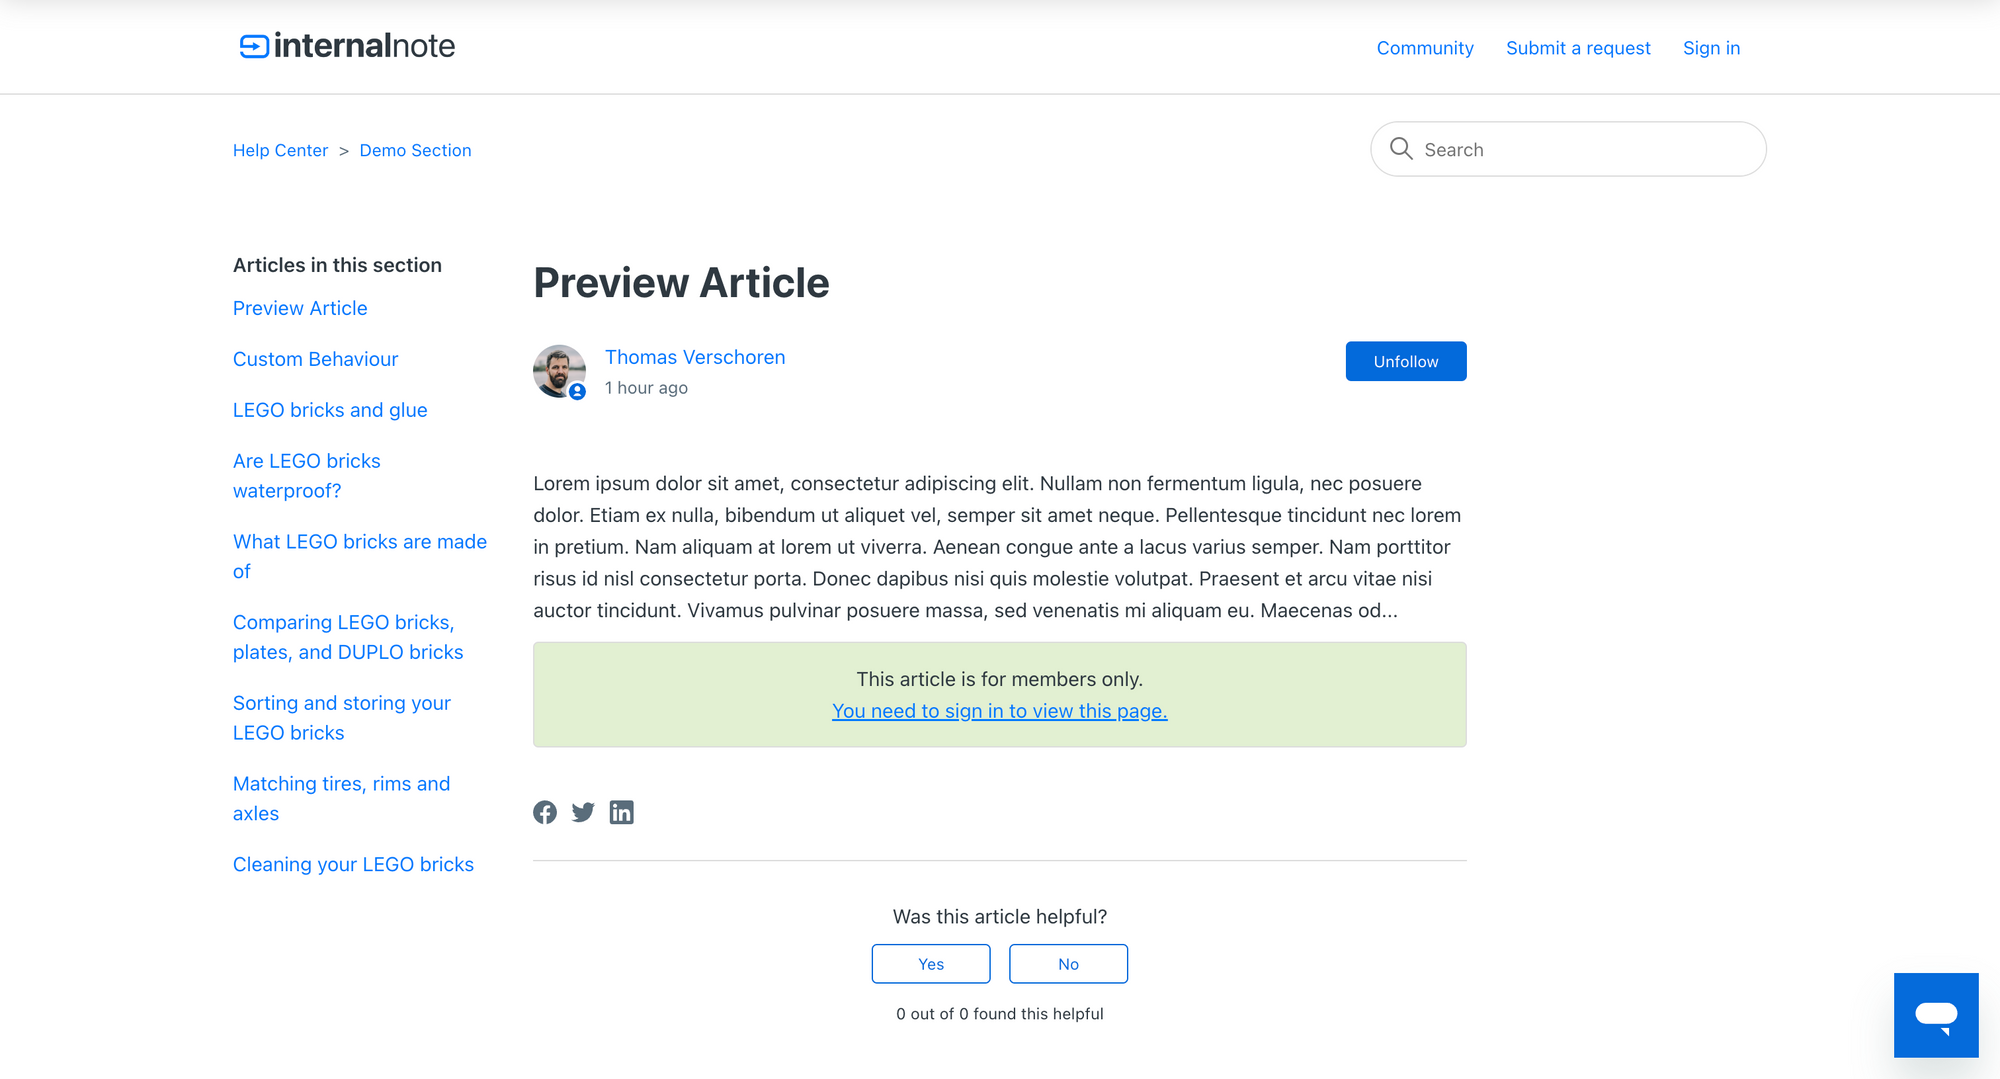
If you make articles available to logged in users only it makes them invisible for e.g. Google Search, but also prohibits discovery for users. They'll only know these articles exist if they login, and until they do that information remains invisible!
Similarly, articles that are available to agents only are nice, but that often results in two articles: one with public information, and another with internal information.
So the question arises: can we solve this somehow?
Show excerpts for segmented articles.
Zendesk's Help Centers are highly customisable of you know a little bit of HTML and CSS. And thanks to their extensive library of helpers most customisations can be done with little to no code at all.
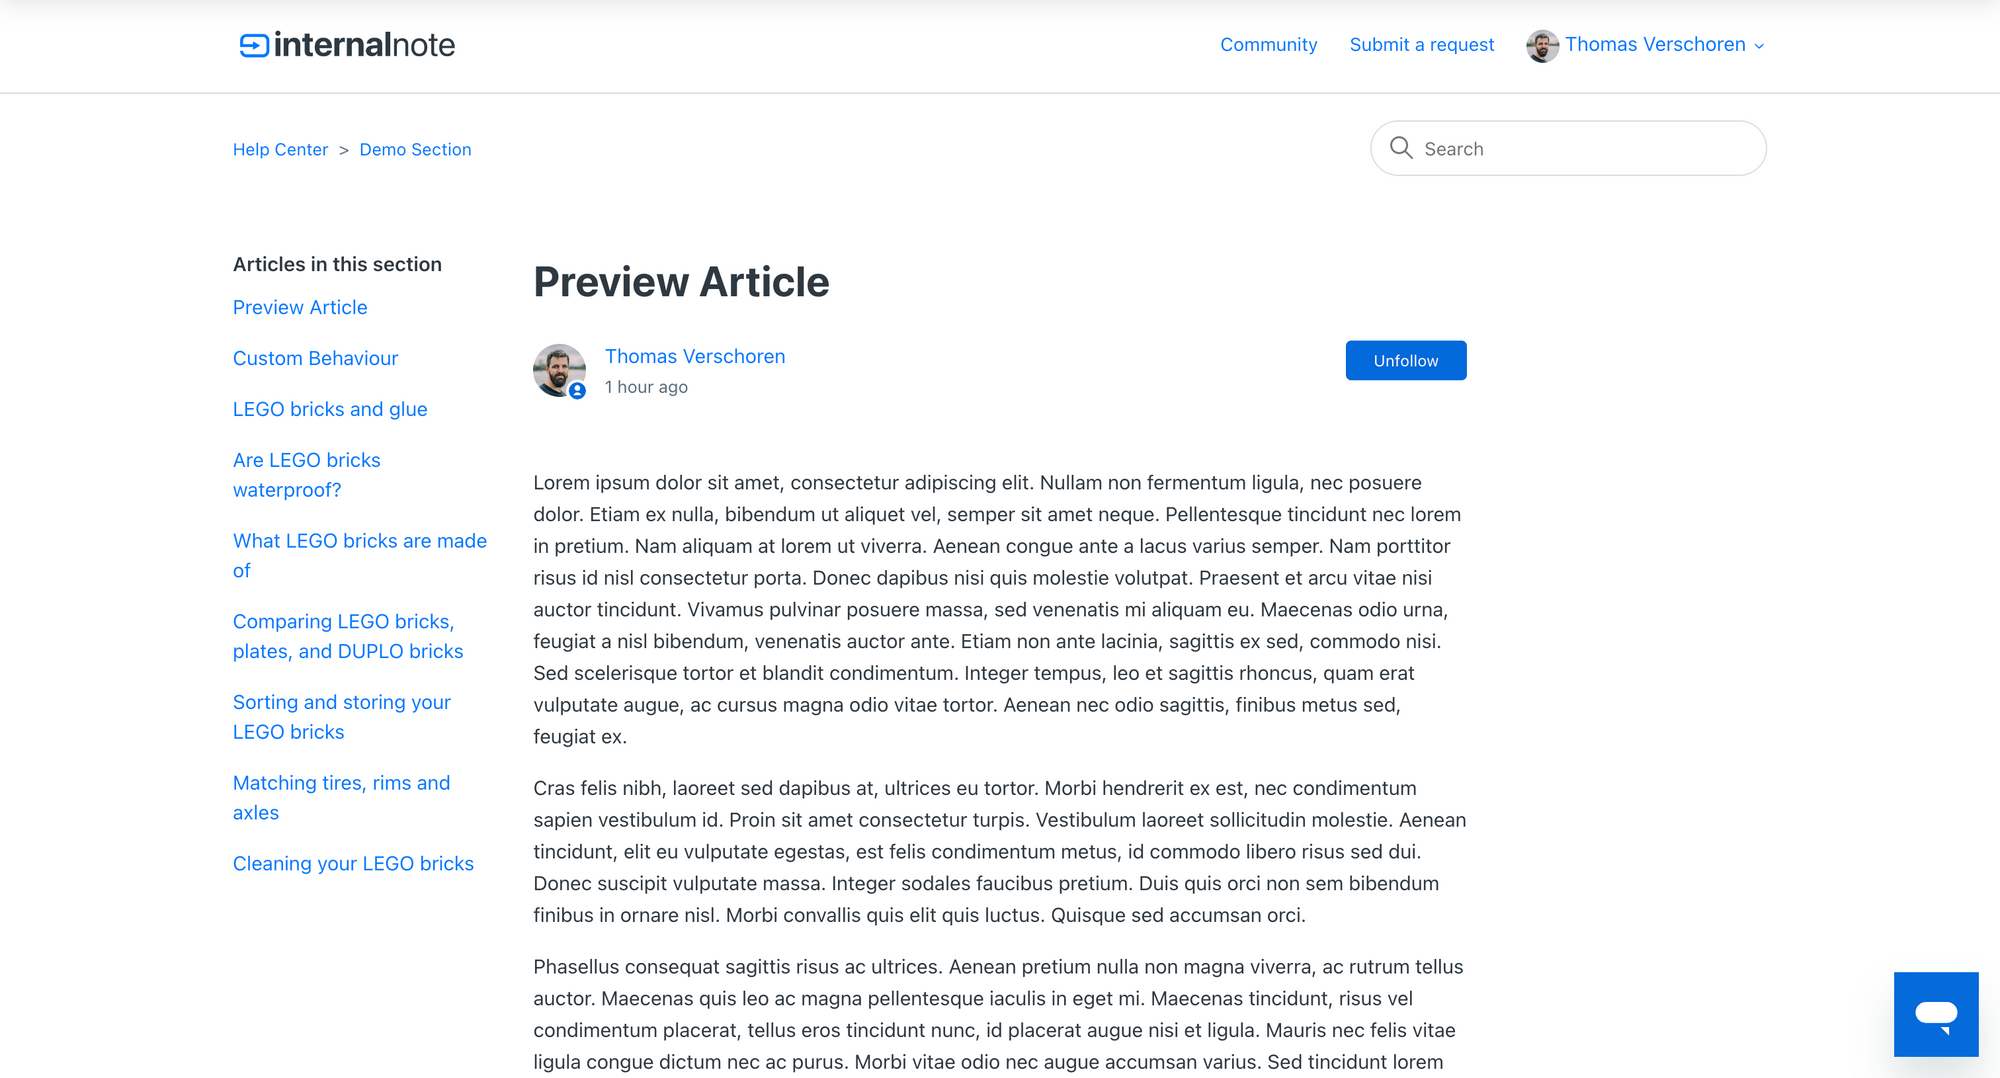
So imagine you can have a Help Center that shows an excerpt of articles for anyone, but the full article body whenever a user is logged in. Cool no?
How to build this
The demo above can be explored via these Help Center articles.
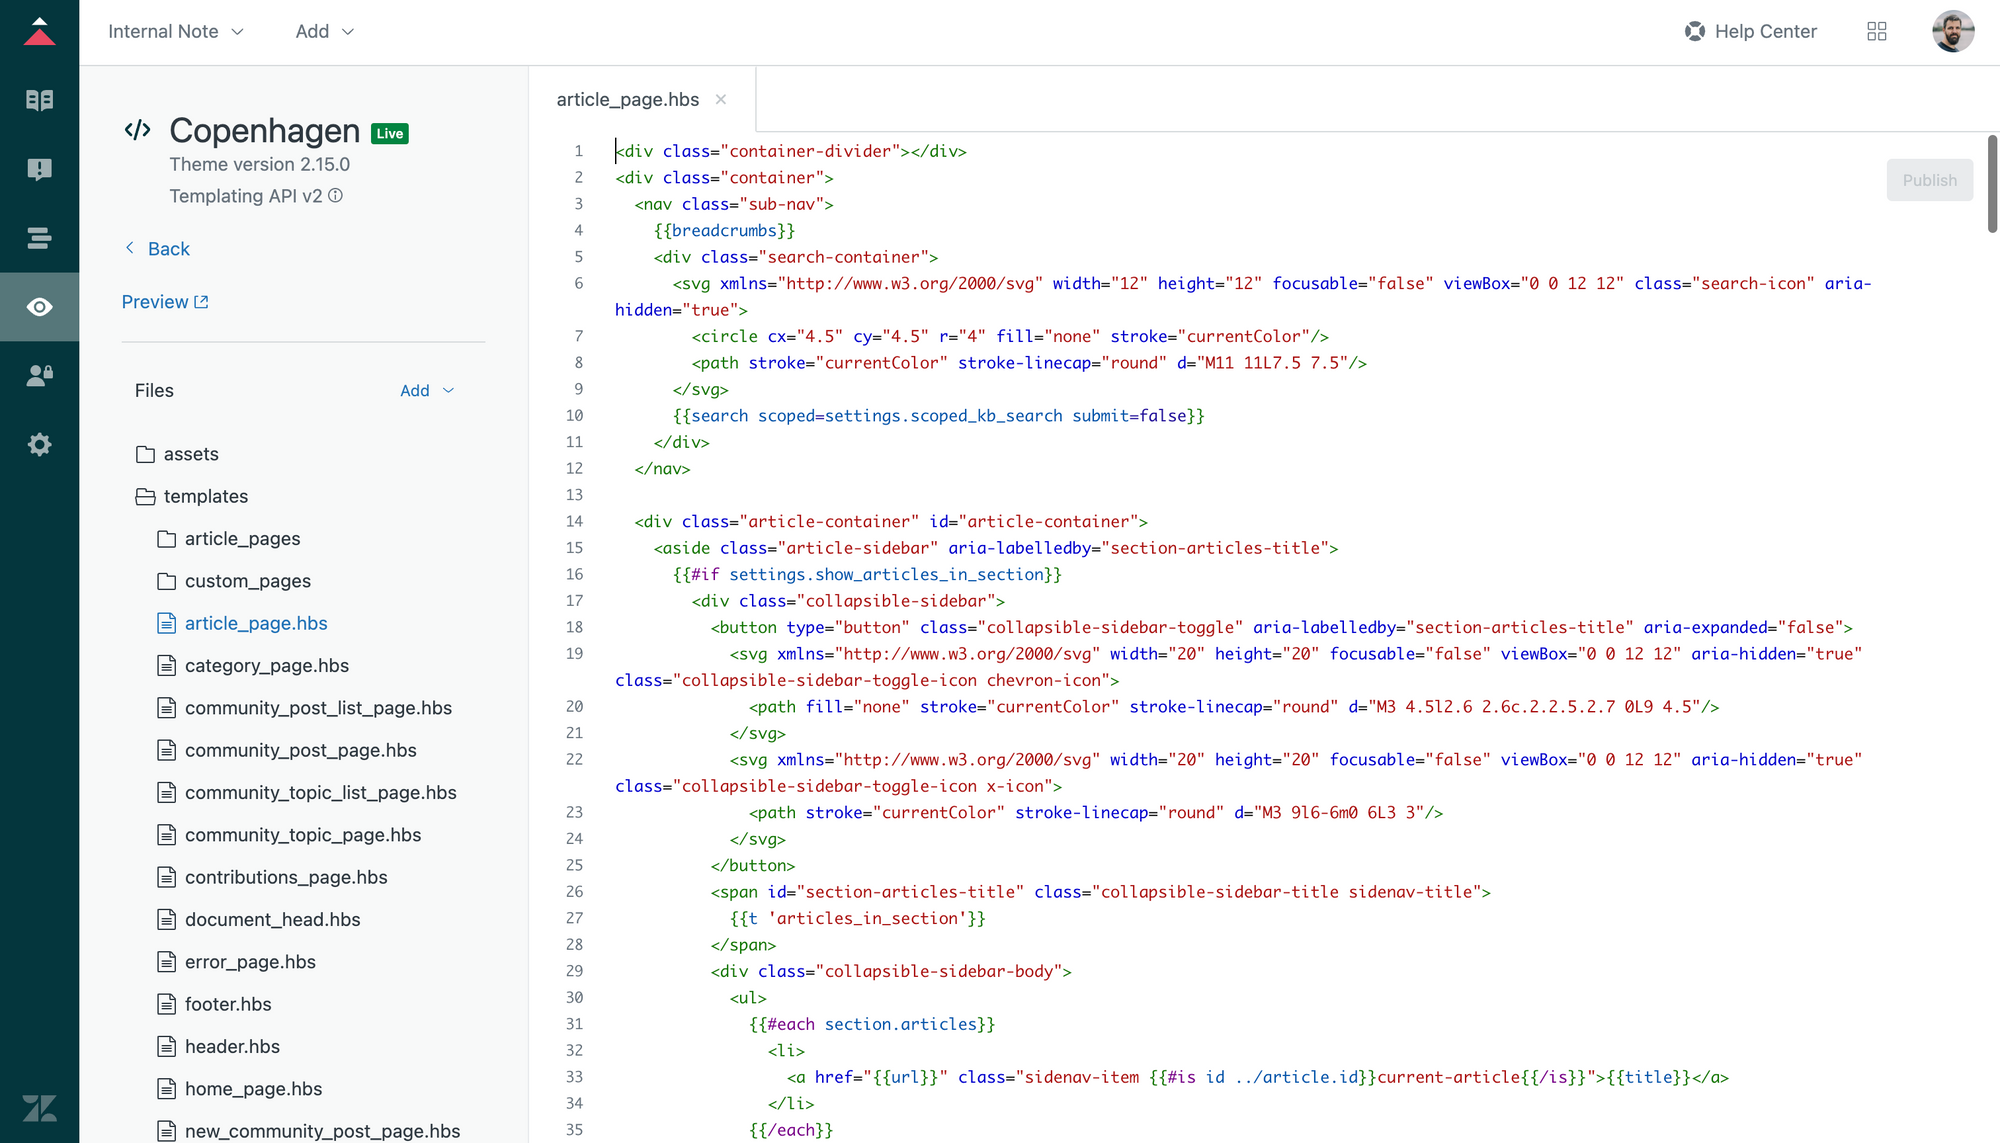
It works by modifying the following snipped in article_page.hbs based on the logged in status of the current user and if the user is not logged in, we show an excerpt of the first 300 characters.
Why 300? Cause this is similar to the length of Answer Bot and Flow Builder snippets.
Code Sample 1: Make use of custom article layouts.
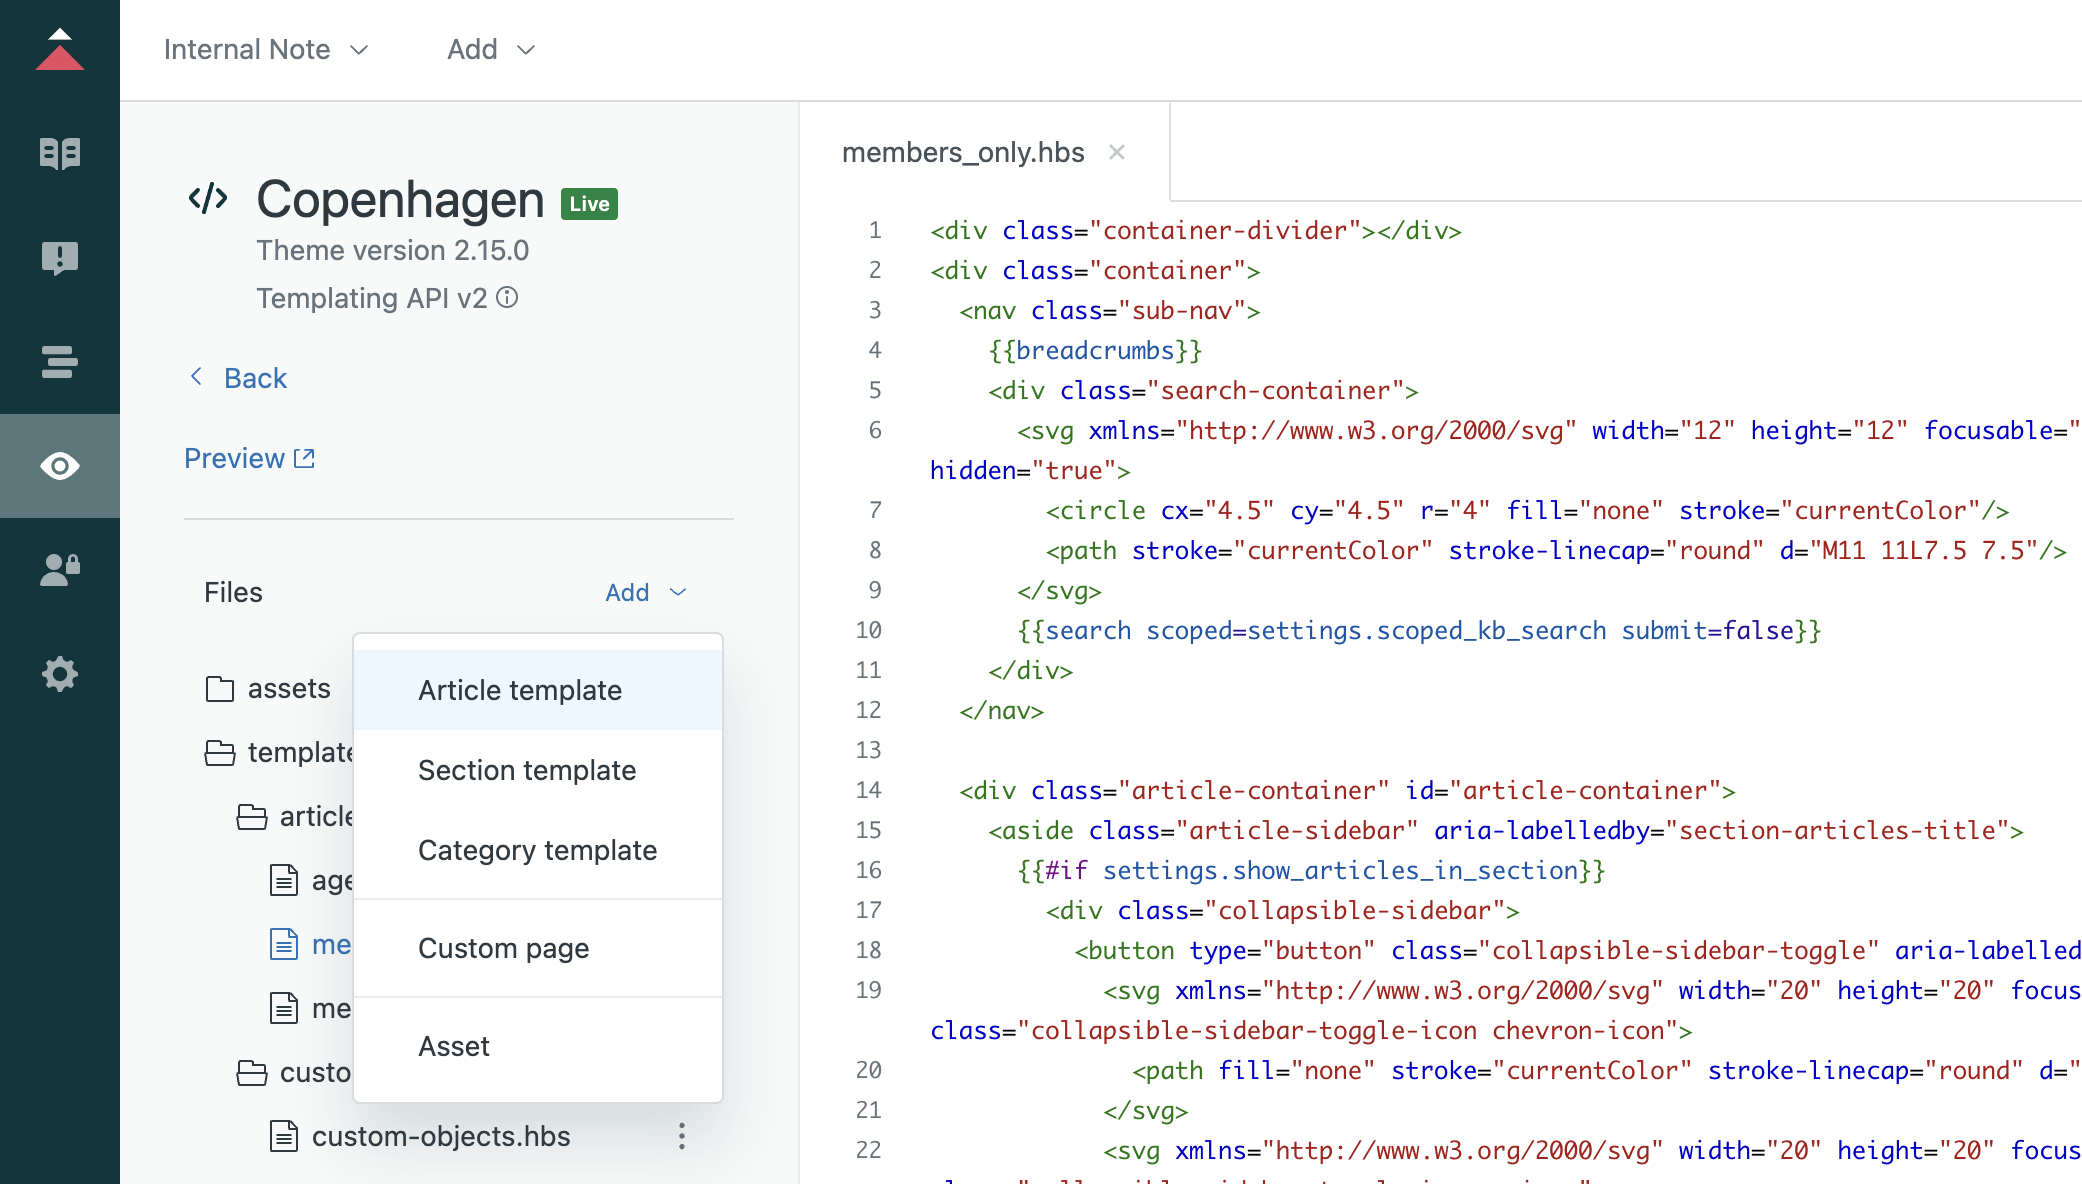
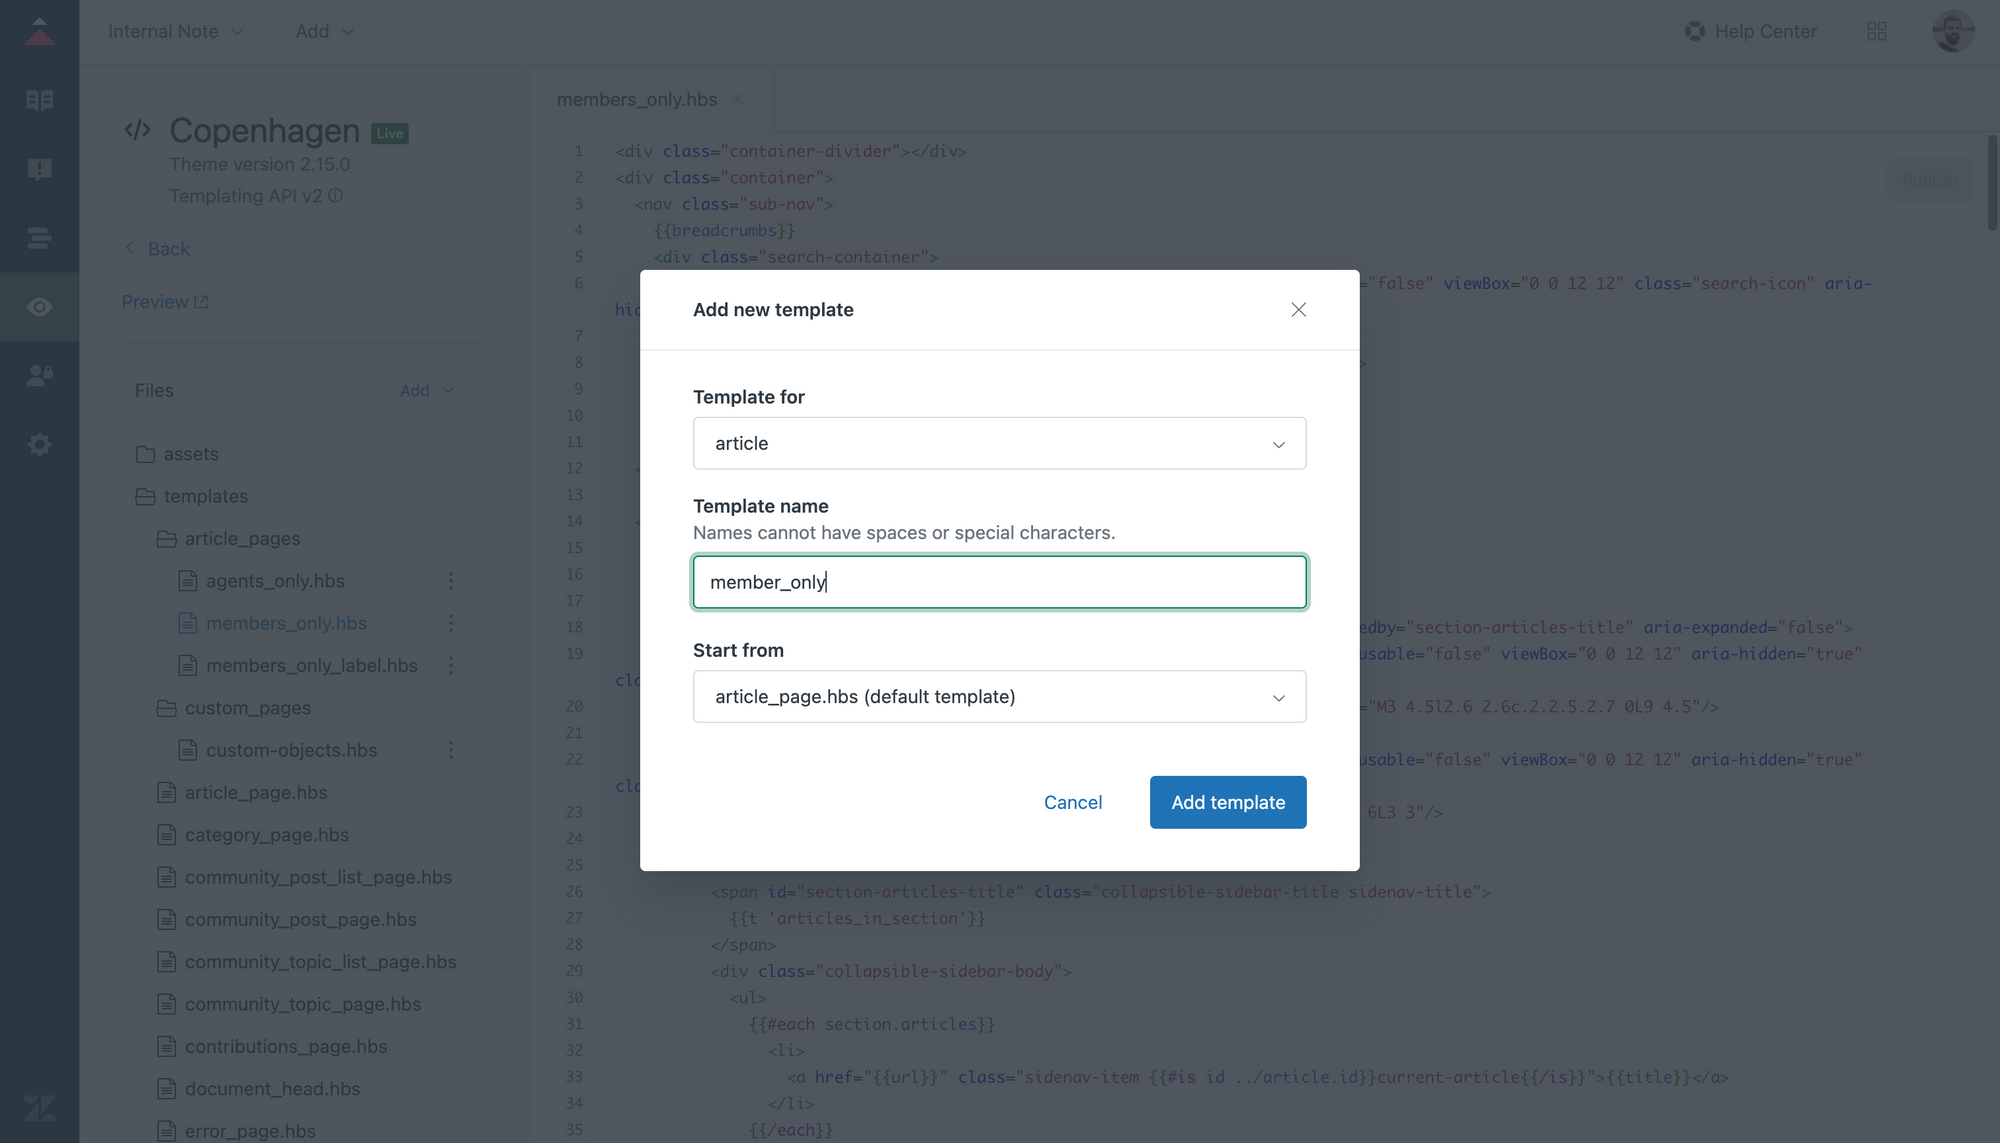
The easiest way to build is, is by leveraging the Article Templates available in Suite Enterprise. (If you don't run Enterprise, no worries, I've got code below for other license types).
- Go to your Zendesk Guide Admin Center, and go to the Code Editor of your current template. (Or make a copy if you want to test).
- Add a new Article Template
members_only - Look for the line
<div class="article-body">{{article.body}}</div> - Replace it with the code below.
<!--Members Only Template-->
<div class="article-body">
  	{{#if signed_in}}
    	{{article.body}}
  	{{else}}
    	{{excerpt article.body characters=300}}
		<div style="
			margin-top:12px;
			padding: 15px;
			border: 1px solid #ddd;
			border-radius:4px;
			background:#E3F0D2;
			text-align:center;
		">
            This article is for members only.<br>
            {{link 'sign_in' class='submit-a-request'}}
    	</div>
	{{/if}}
</div>
This code first checks if a user is logged in. If they are we show the regular article. If they aren't we show an excerpt of the first 500 characters. (modify to suite your needs). And we append a small disclaimer that asks the user to login.
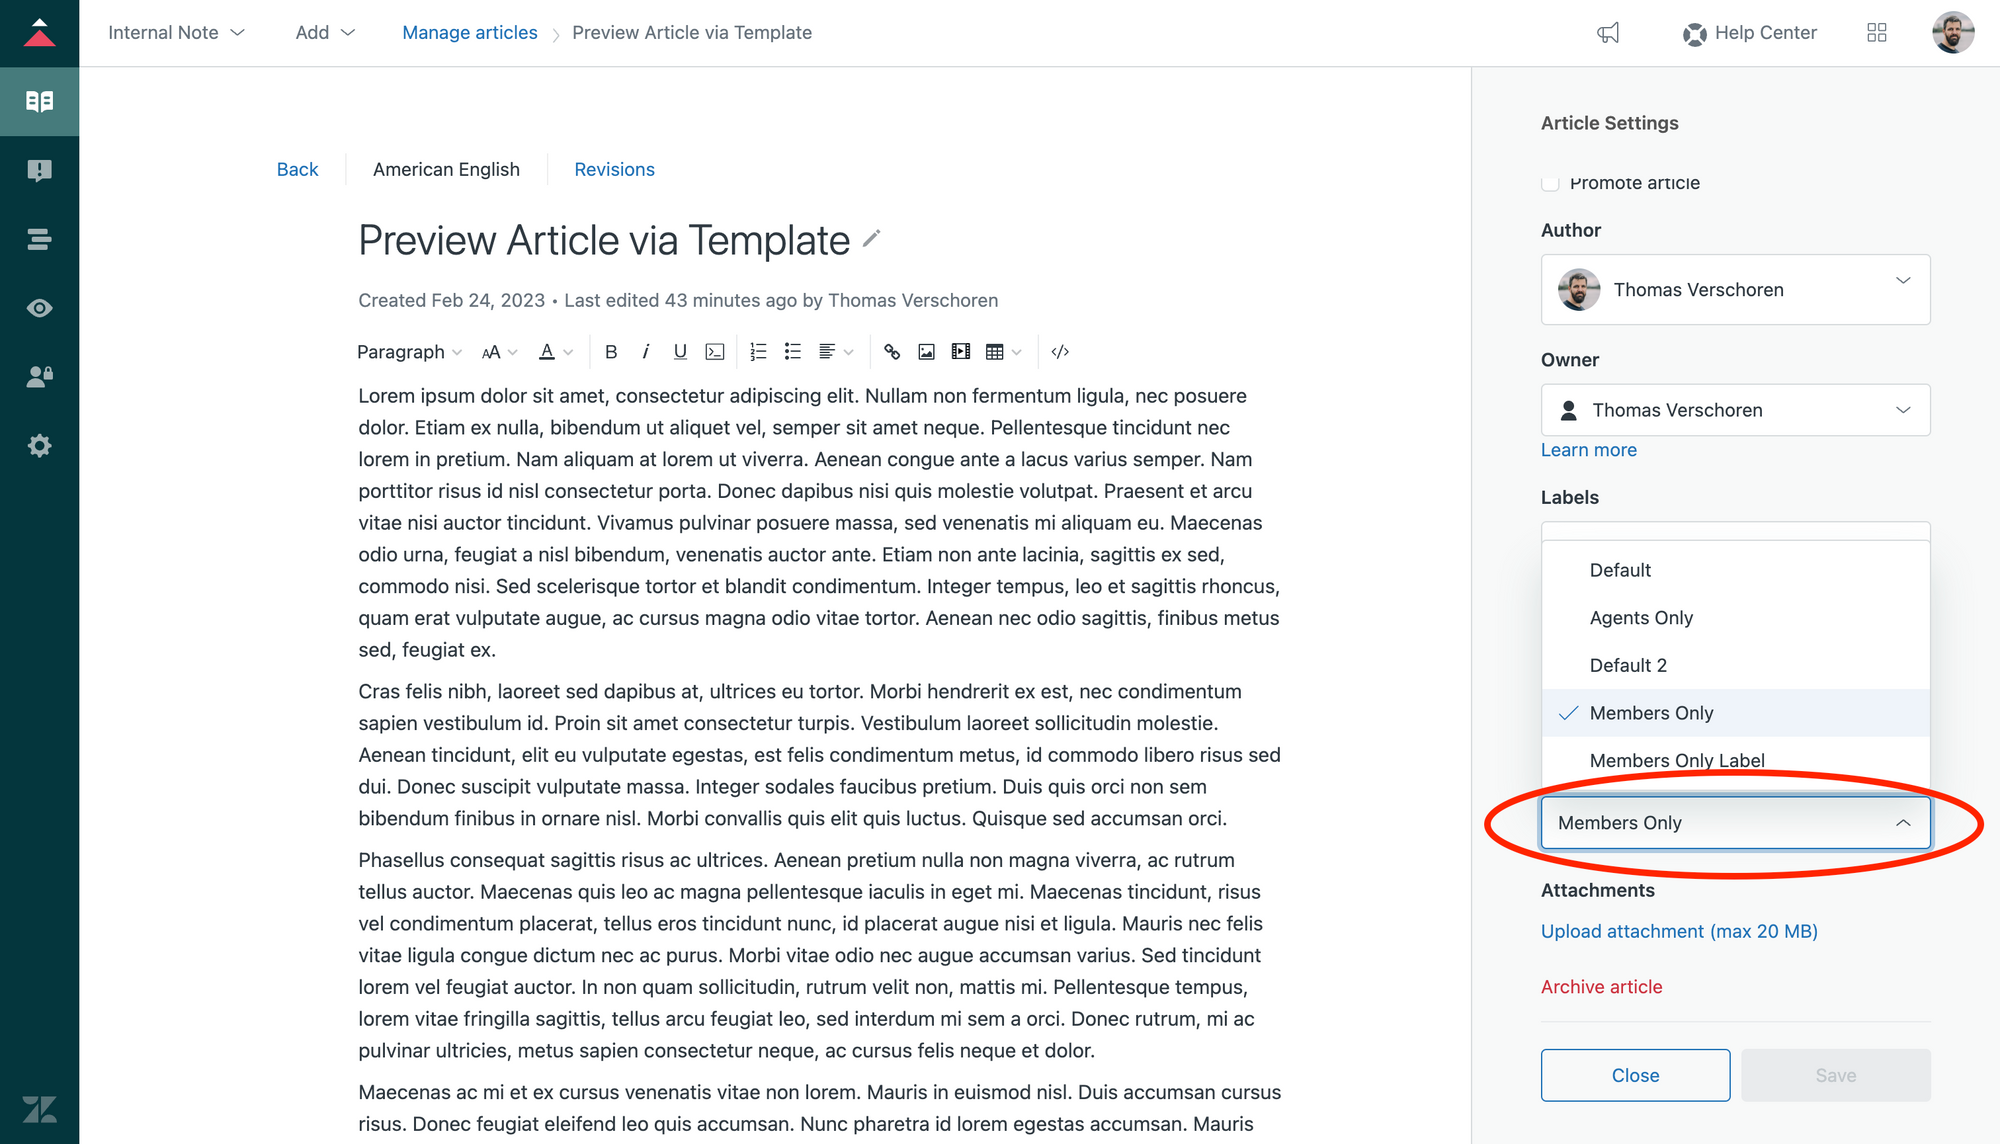
Once saved you can create new articles, or modify existing ones to make use of this new template. Any template where you apply the template will use the filter above to show excerpts or full articles. All other articles use the regular articles without filtering.
Code Sample 2: Make use of article labels.
If you're not running Suite Enterprise, you can approach this idea in a different way. Instead of assigning a custom template that contains the article, we use article labels to differentiate between regular articles, and articles that should show an excerpt.
- Go to your Zendesk Guide Admin Center, and go to the Code Editor of your current template. (Or make a copy if you want to test).
- Open
article_page.hbs - Look for the line
<div class="article-body">{{article.body}}</div> - Replace it with the code below.
<!-- Filter by Label-->
<div class="article-body">
	{{#each article.labels}}
		{{#is identifier 'preview'}}
			{{#if ../signed_in}}
				{{../article.body}}
			{{else}}
				{{excerpt ../article.body characters=300}}
				<div style="
                    margin-top:12px;
                    padding: 15px;
                    border: 1px solid #ddd;
                    border-radius:4px;
					background:#E3F0D2;
                    text-align:center;
                ">
					This article is for members only.<br>
                    {{link 'sign_in' class='submit-a-request'}}
               	</div>
			{{/if}}
		{{else}}
			{{../article.body}}
		{{/is}}
	{{/each}}
</div>
This code first checks all the article labels. If they contain the label preview we run our code. If they aren't we show the full article.
If we do have to show a preview, we check if the user is signed, if they aren't we show an excerpt of the first 500 characters. (modify to suite your needs). And we append a small disclaimer that asks the user to login.
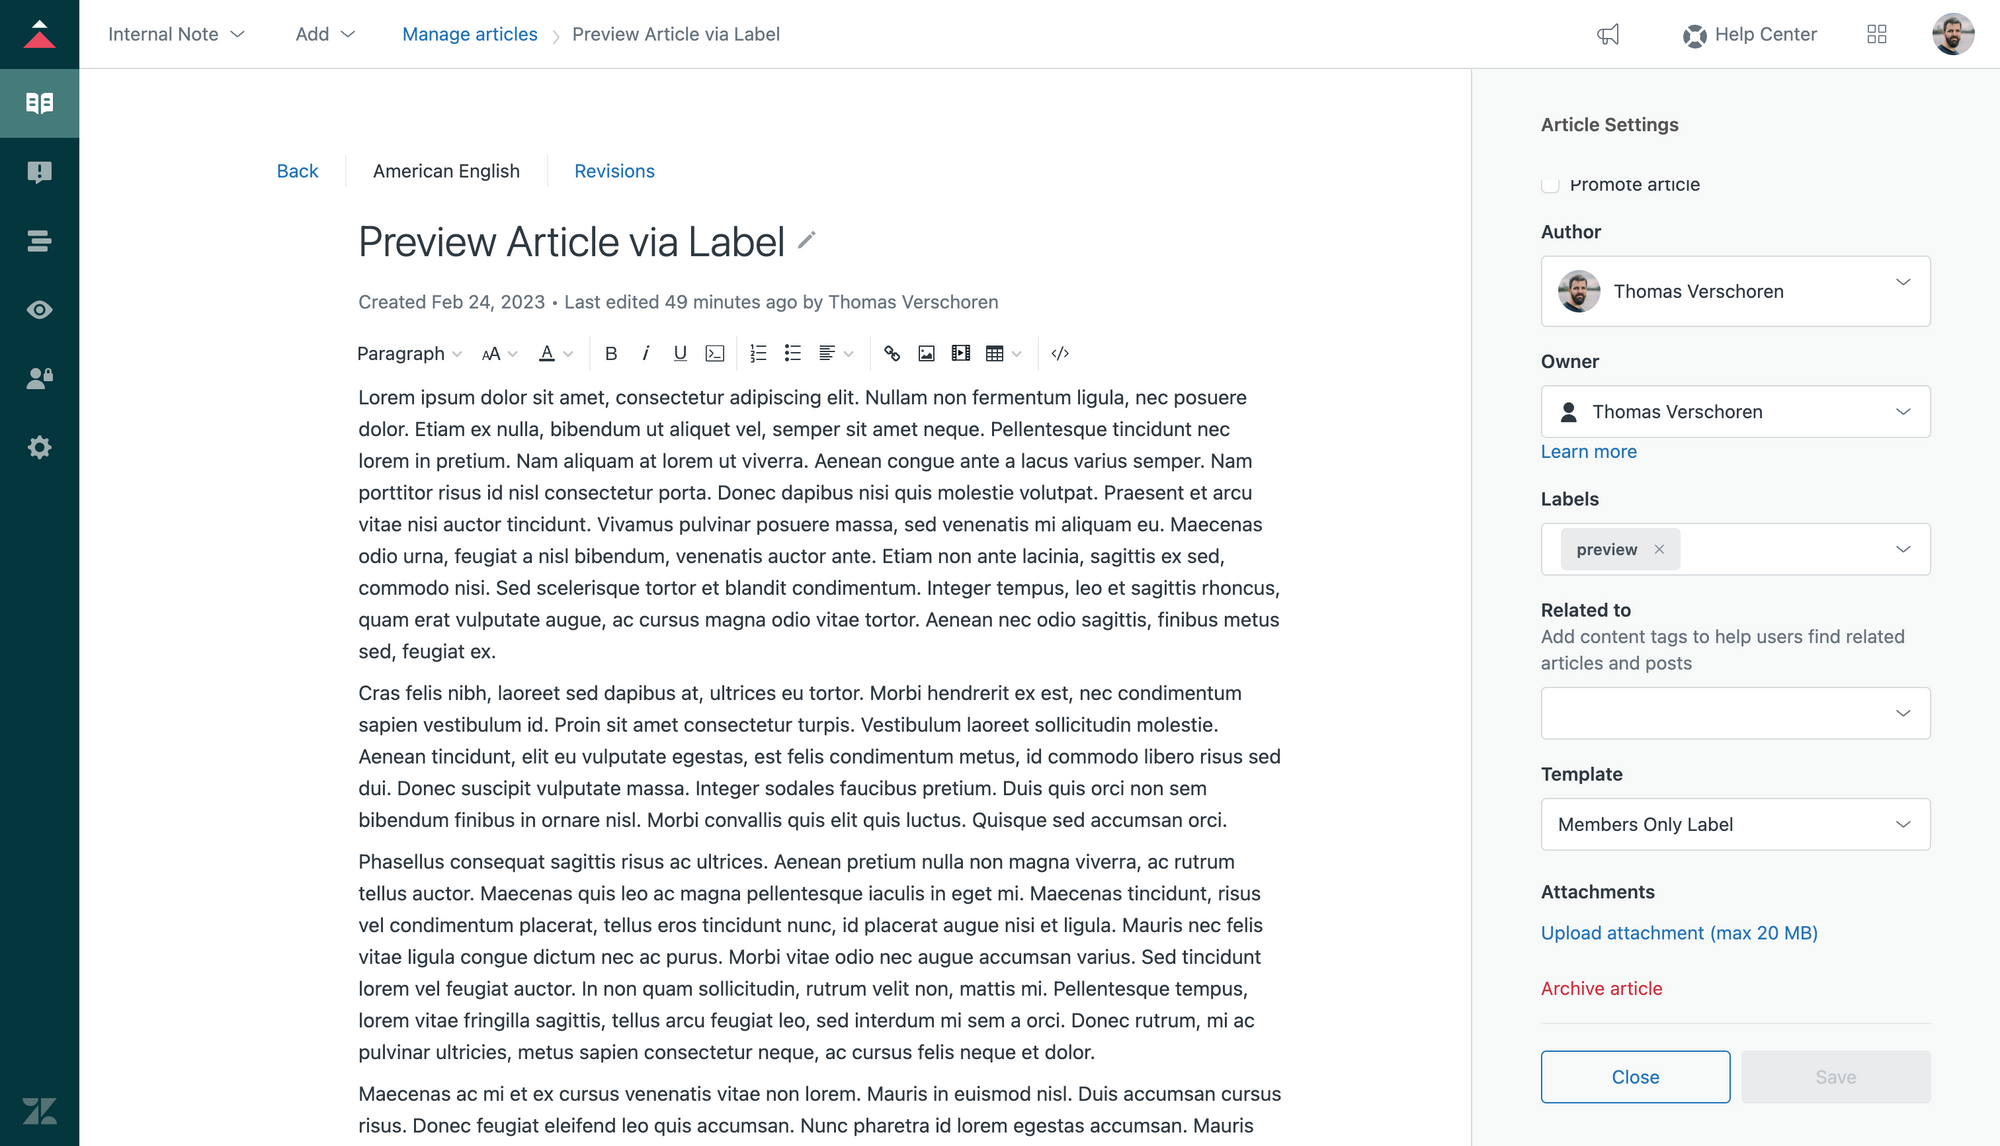
Once saved you can create new articles, or modify existing ones to make use of this filter. Just make sure to add the label preview to each article that you want to show excerpts instead of full articles.
Where to take it from here.
The code above is a very basic example. You can expand the div that shows the login notification to contain more text, or you could expand the code to show different alerts based on different labels or templates.
If you use the Classic Zendesk Widget this will not work. That widget renders full article contents wihout obfuscation.
Bonus: Filter on User Role
The Excerpt example above makes no use of any Javascript or code. This means the code is rendered serverside and there's no real risk of smart customers seeing the article contents. If you want, I've also written code that makes use of Client Side Javascript to filter article contents based on the logged in user-type.
The code below can be added to add the bottom of any article_page.hbs template and will:
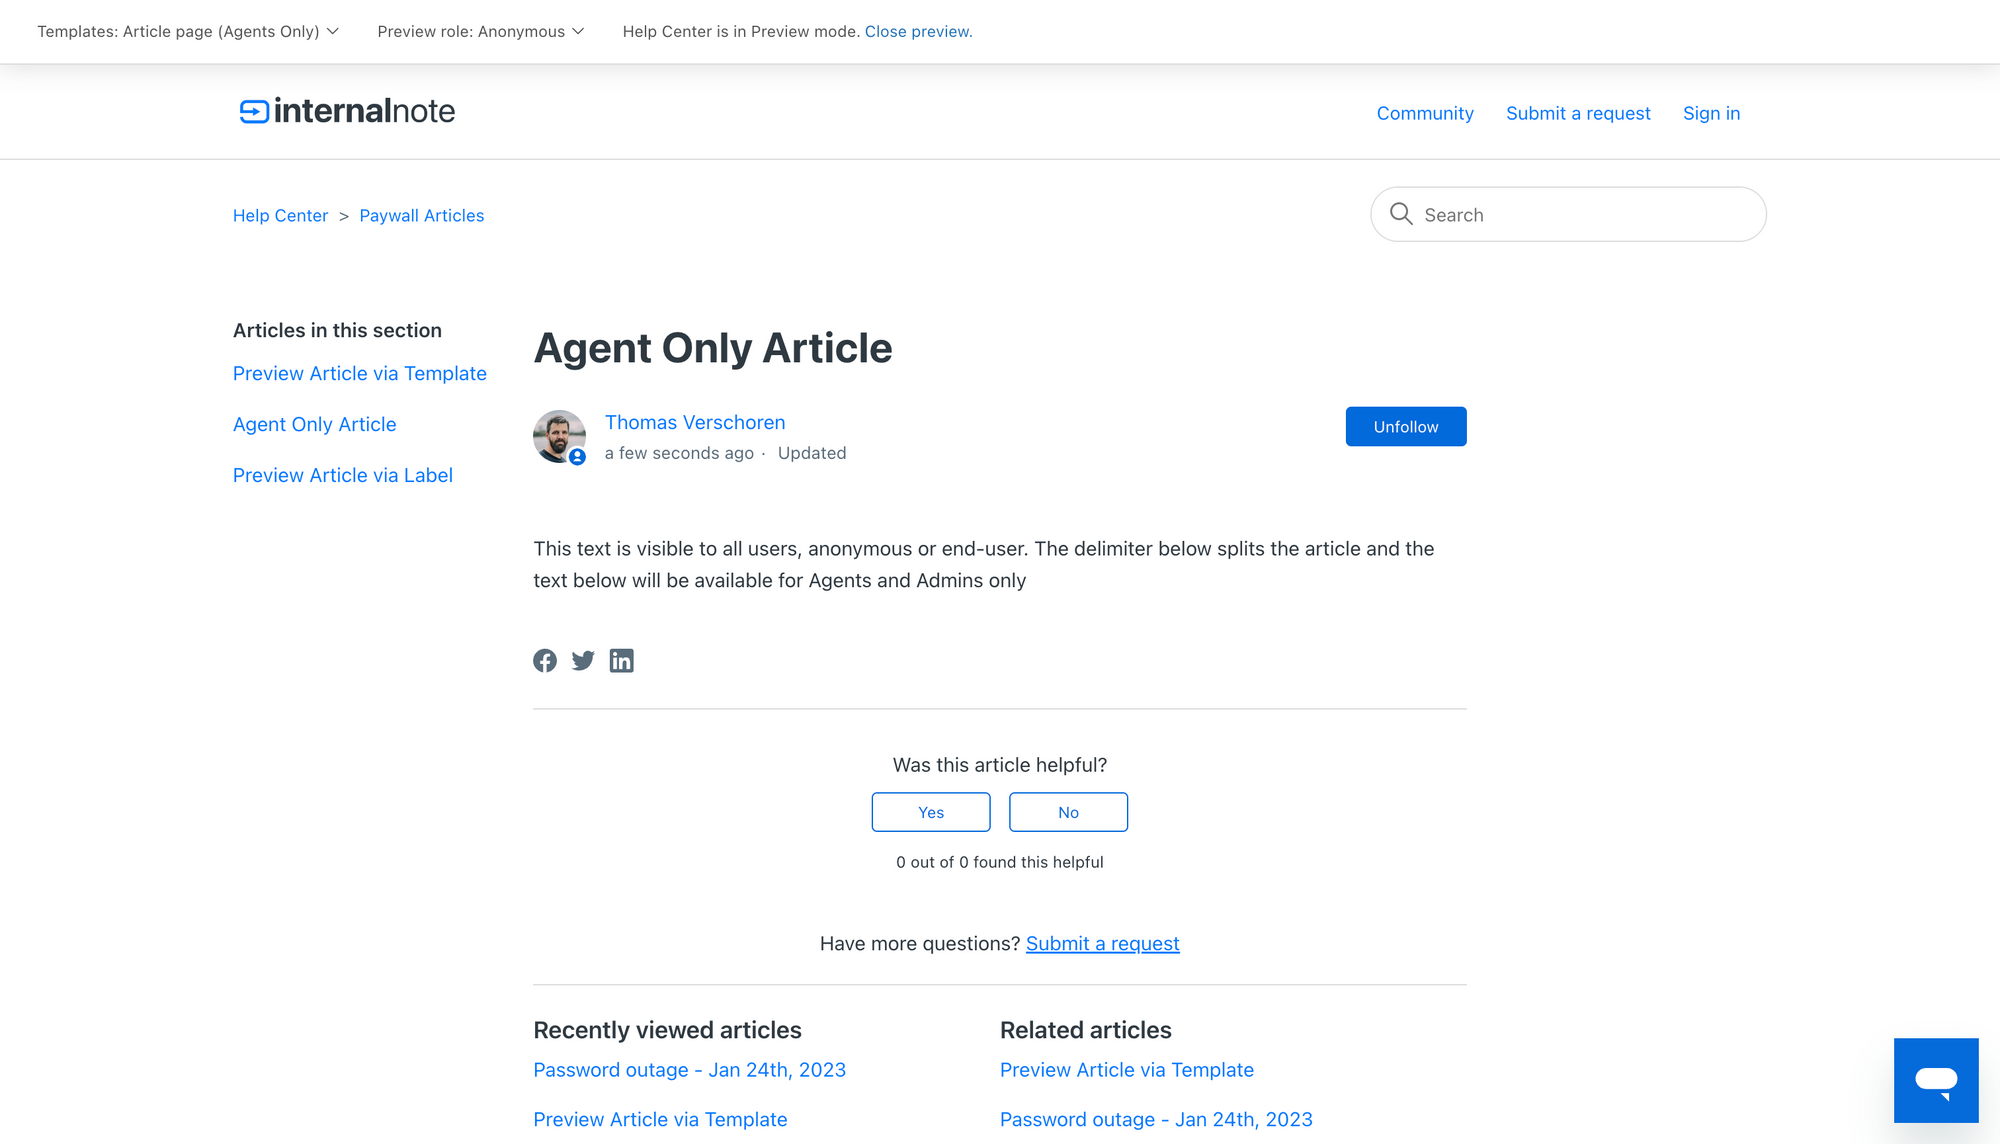
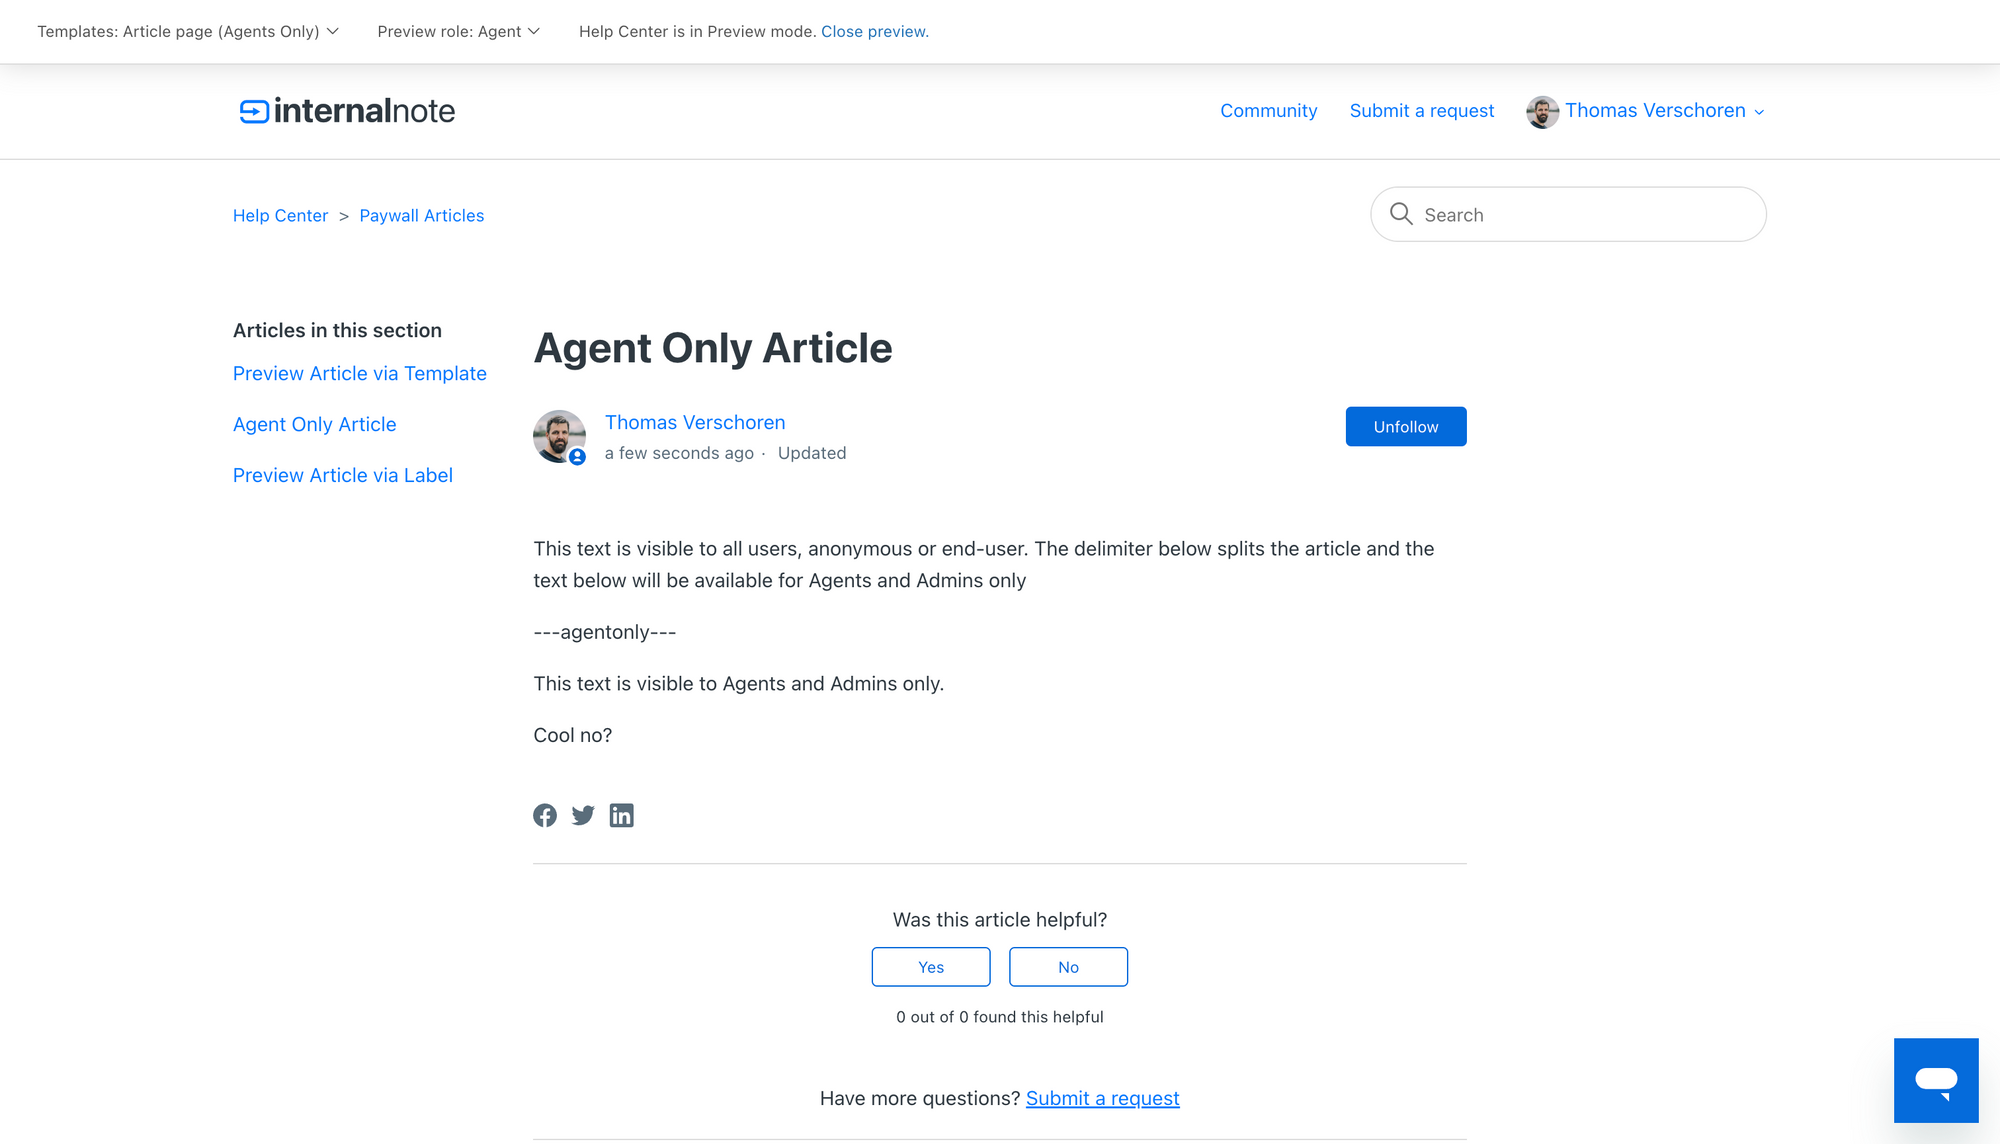
- Show the full article for any agent or admin
- Will show all text up to the first delimiter
---agentonly---.for all other users.
//Filter on User Role
$(document).ready(function(){
	if (
		HelpCenter.user.role=="anonymous" ||
		HelpCenter.user.role=="end_user"
	){
		var article = $(".article-body").html();
		var pre_array = article.split('---agentonly---');
		$(".article-body").html(pre_array[0]);
	}
	if (
		HelpCenter.user.role=="agent" ||
		HelpCenter.user.role=="manager"
	){
		//show article
	}
})