Authenticate Zendesk Messaging
Zendesk recently added the ability to authenticate users in the Zendesk Messaging Web and Mobile SDK. This article shows how to set it up with sample code.
Authenticate Zendesk Messaging

On this page
This means Email matching is still an issue, but External IDs do work!
Zendesk recently added the ability to authenticate users in the Zendesk Messaging Web and Mobile SDK. This article shows how to set it up with sample code.
Zendesk recently added the ability to authenticate users in the Zendesk Messaging Web and Mobile SDK. This allows any website or app that has logged in users to pass that information to Zendesk so that you're sure you're talking to the right person, and removes the need for your customer to enter any credentials.
Setting it up is easy, as long as you have a working JWT endpoint. If you haven't got one, this guide will show you how to set one up using Cloudflare Workers.
Note that this example code does not validate the user against any directory. It trust the input and returns a valid JWT for Zendesk to use.
How it works
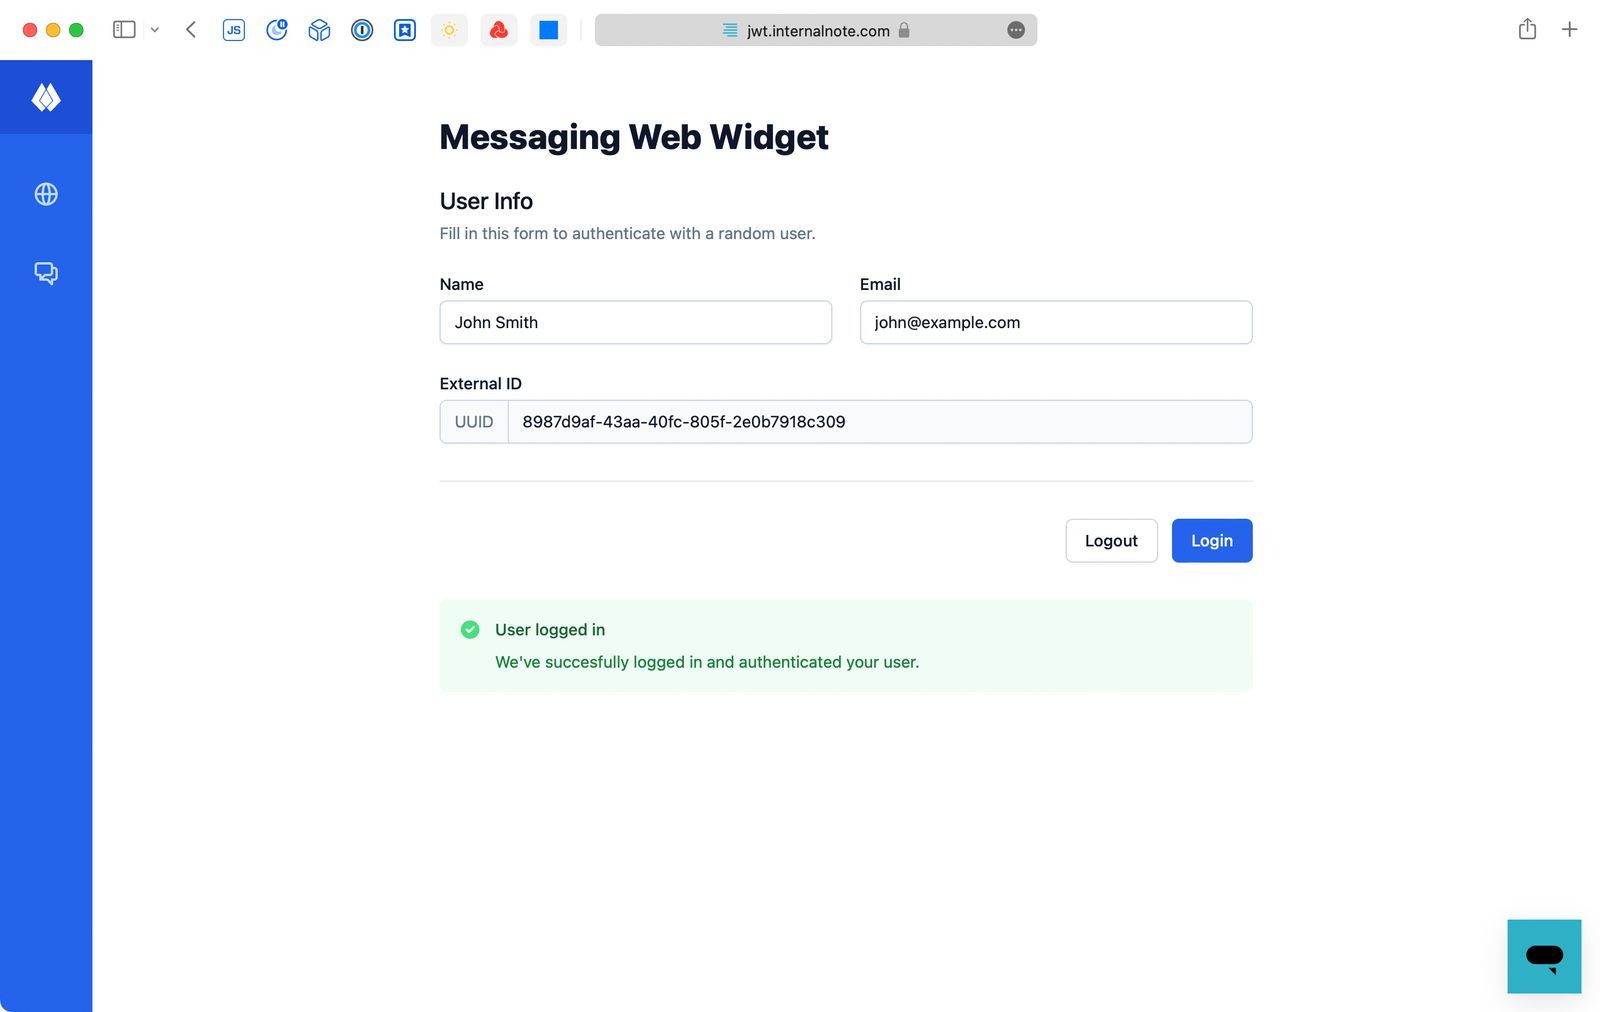
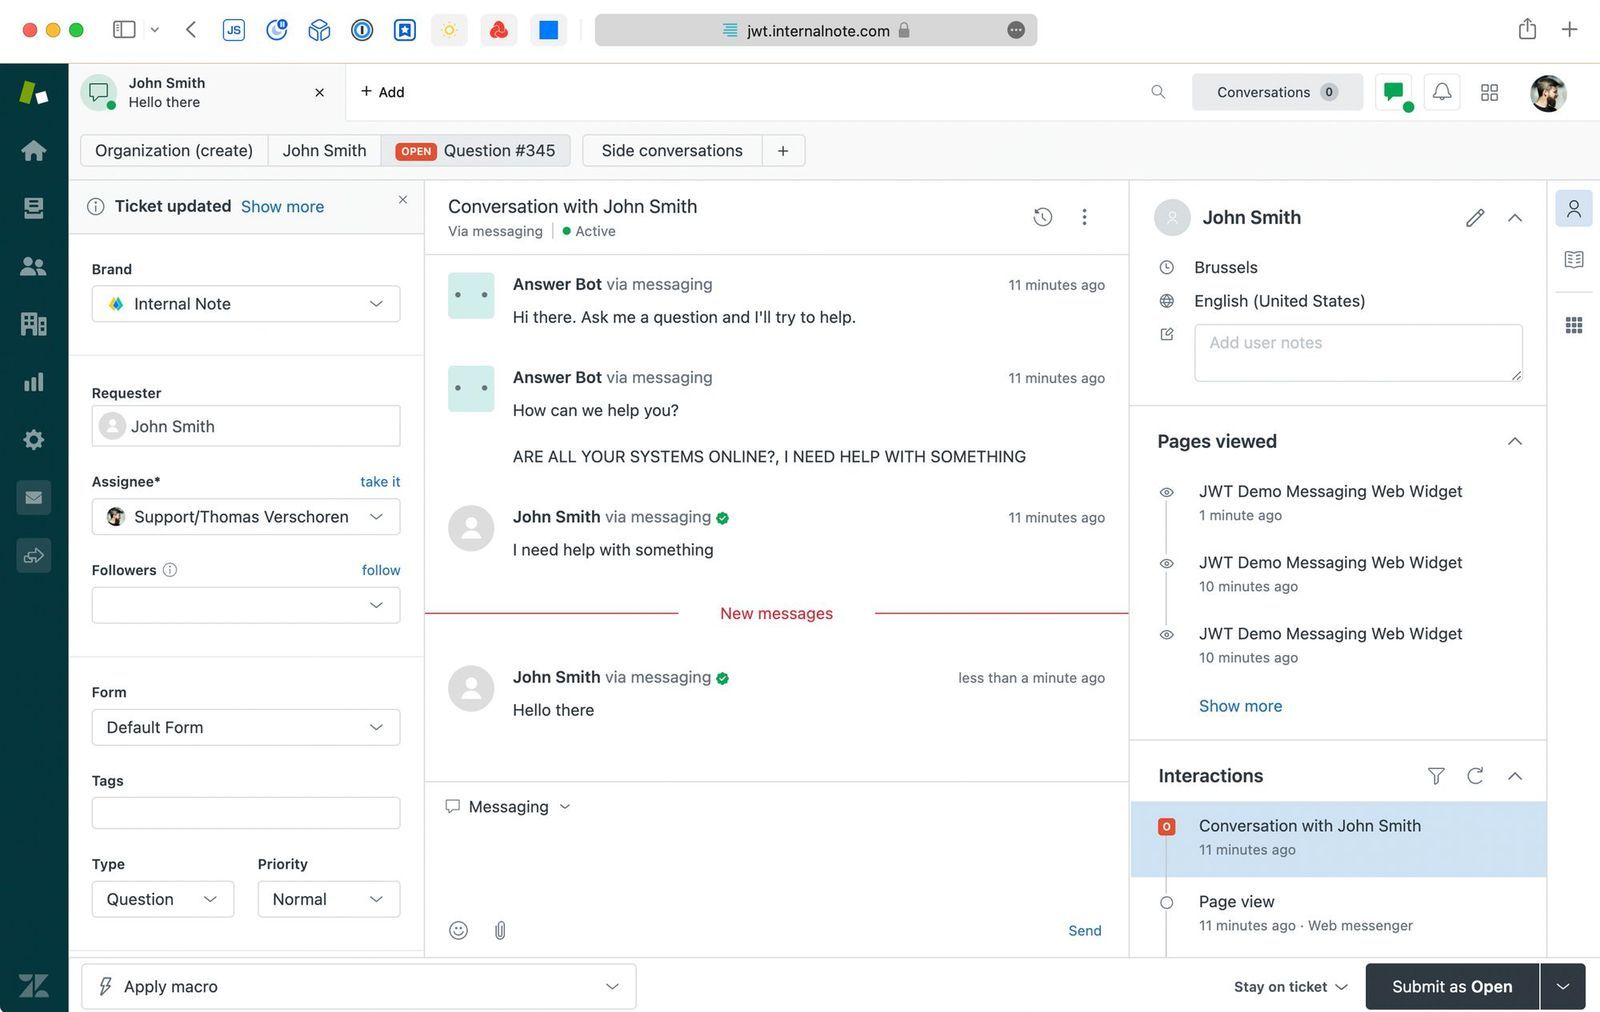
Let's start at the end of the flow and show a working scenario.
- A user visits https://demo.internalnote.com/messaging.html
- They enter their name/email and press login
- The website logs in the user and the widget authenticates
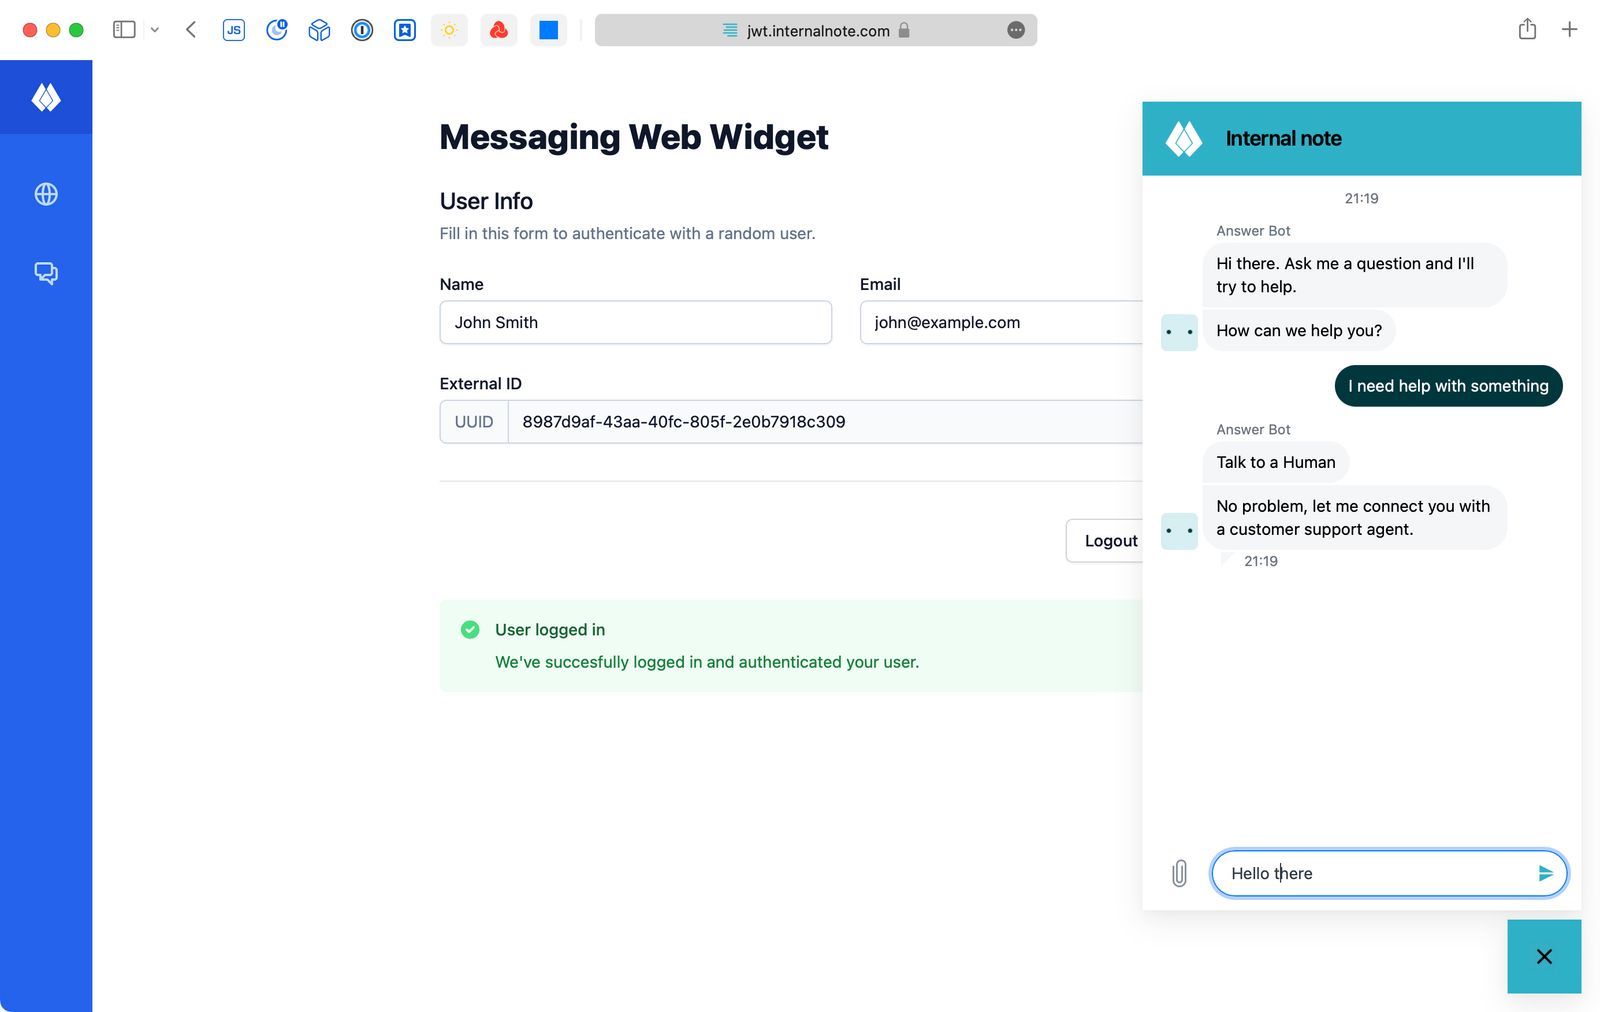
- Zendesk recognises the user, and starts a conversation.
If there's still an ongoing conversation from earlier, the widget will show the conversation regardless of the user having used that browser/device before.
When the agent opens the conversation in the Agent Workspace he notices a green checkbox next to the users' name showing them the user has logged in correctly.
Setting up Authentication
Authenticating a user requires the following steps:
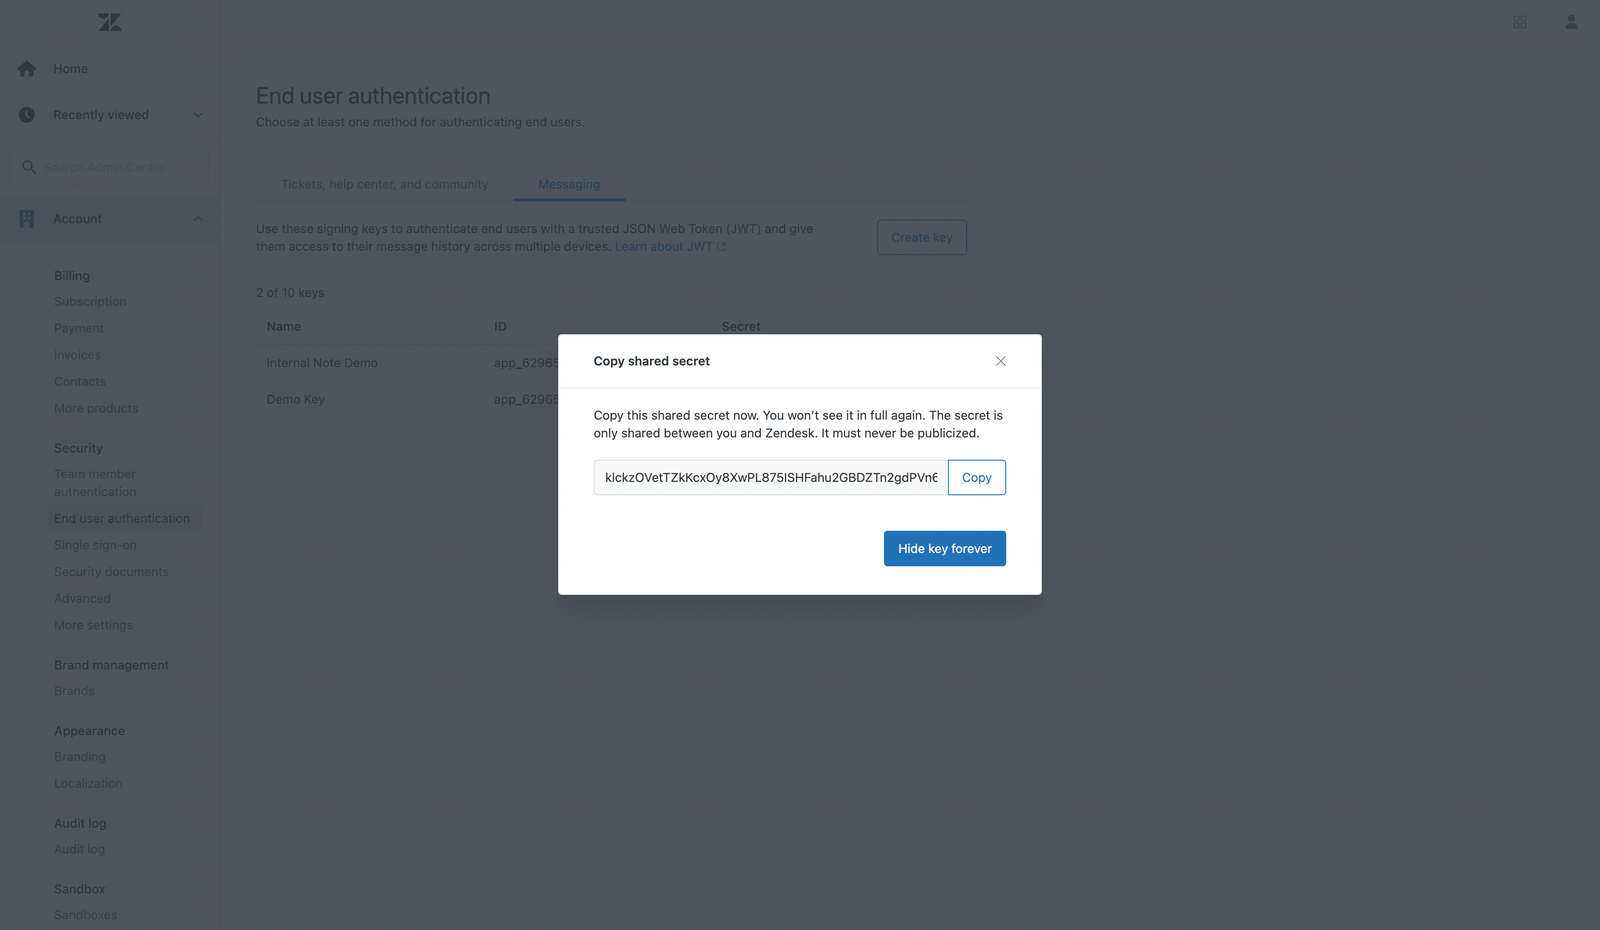
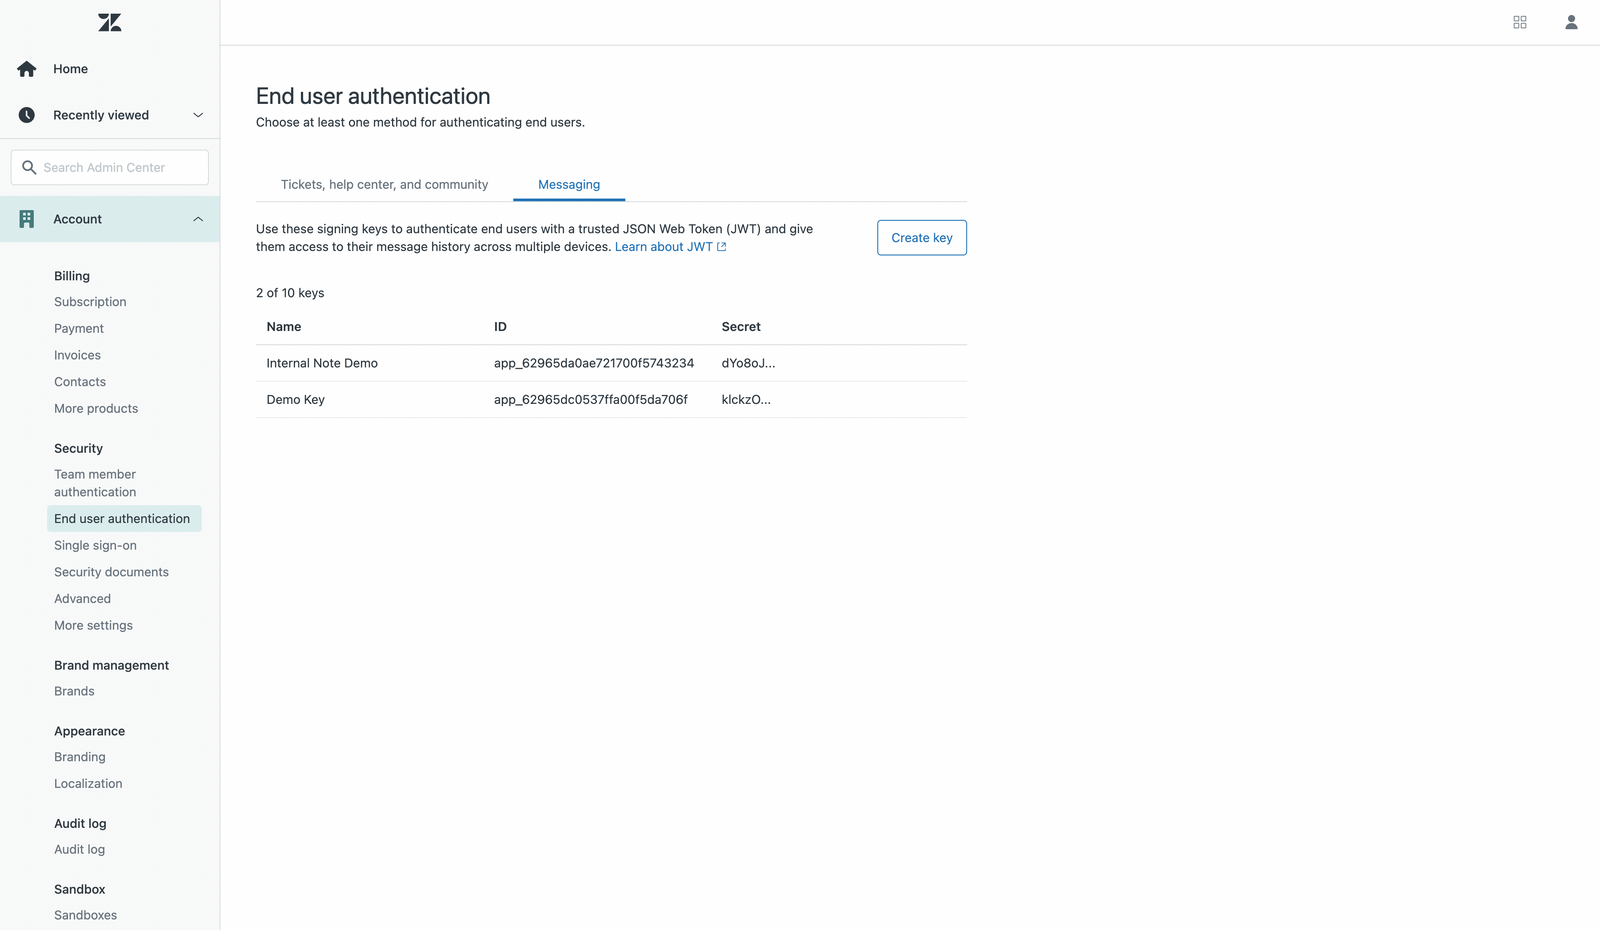
- Get a Secret and App ID from Zendesk
- Create a web service (e.g. via Cloudflare Workers) to generate a valid Valid JWT
- Have a function on your website that calls the web service when a user logs in and generates a JWT based on their email, name and ID
- Push that JWT Token to the Widget
Credentials
Setting up authentication for Messaging first requires generating a Secret and App ID. That's done via https://subdomain.zendesk.com/admin/account/security/end_users#messaging
App ID: app_12345abcde1234567890
Secret: some-very-long-string-with-digits-and-numbers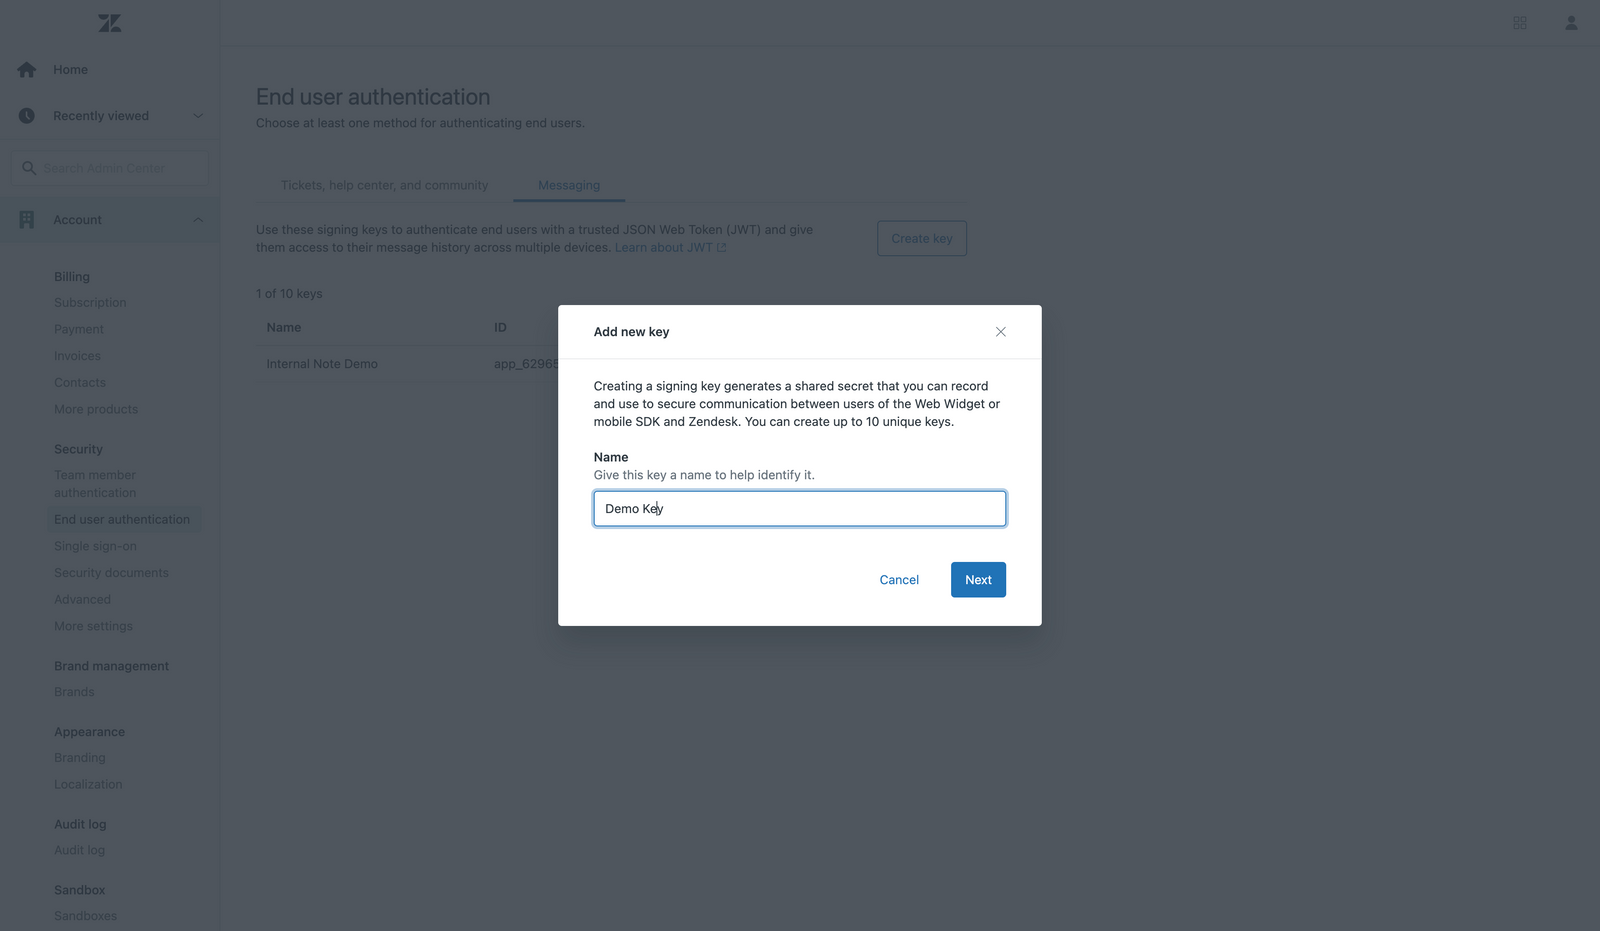
To generate a login for the web widget you'll also need a name, email and external ID for your user.
Generating the JWT
Based on the above items you can generate a working JWT. You can find an example below.
There's a few important caveats:
- External ID has to be unique for each user, so use a GUID, UUID, or database ID
- The credentials do not expire unless you set an expiration date
- We pass
email_verified: trueso that Zendesk will handle the email address as a verified address to work with the new email identity rules.
var input = {
    "external_id":1906365876753,
    "user_email":"[email protected]",
    "user_name":"John Smith"
}

const app_id = "app_123";
const secret ="abc123";

const key = await crypto.subtle.importKey(
   "raw",
   utf8ToUint8Array(secret),
   { name: "HMAC", hash: "SHA-256" },
   false,
   ["sign"]
);

const header = JSON.stringify({ alg:"HS256", typ:"JWT", kid:app_id });

const payload = JSON.stringify({
  exp: Math.floor(new Date().getTime() / 1000.0) + 86400,
  scope: "user",
  name: json.user_name,
  email: json.user_email,
  external_id: external_id,
  email_verified: true
});

const partialToken = `${base64URLStringify(utf8ToUint8Array(header))}.${base64URLStringify(utf8ToUint8Array(payload))}`;

const signature = await crypto.subtle.sign(
	"HMAC",
    key,
    utf8ToUint8Array(partialToken)
);

const jwt = `${partialToken}.${base64URLStringify(new Uint8Array(signature))}`;
For the example website above I created a Cloudflare Worker that handles the JWT scenario for both Messaging and the Classic Widget.
You can find a working code example via the link below.
 verschoren
Logging In
The end result is a JWT token that you pass to the widget via:
zE('messenger', 'loginUser', function (callback) {
    callback(jwttoken);
});
Logging Out
If for any reason you wish to logout your user, you can use the code below.
zE('messenger', 'logoutUser');What about Zendesk Guide?
You can also easily use the above example to authenticate Zendesk Guide.
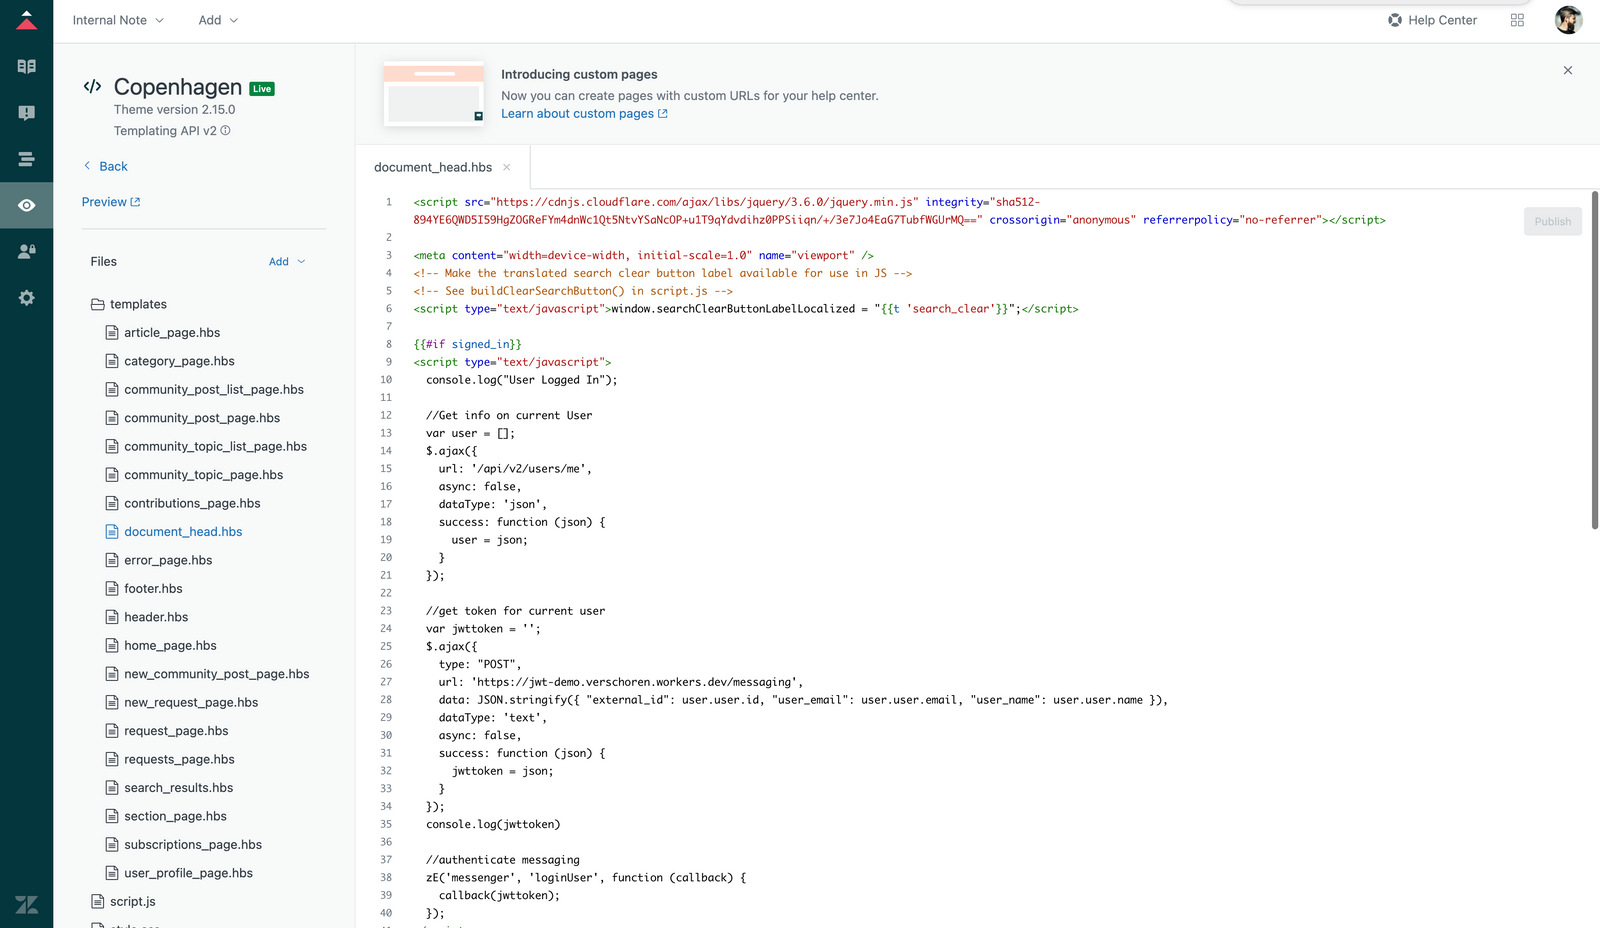
- Open your Zendesk Guide Theme and edit its code
- Open
document_head.hdbsand paste the following code at the bottom - From now on, whenever a user logs into your Help Center, the widget will authenticate itself.