An introduction to Omnichannel Routing in Zendesk
This article will give you an overview of Zendesk's Omnichannel Routing, Agent Availability and the brand new Queues features.
An introduction to Omnichannel Routing in Zendesk

On this page
When users contact your support team they expect their question to be answered quickly and correctly in the most efficient way. No customer wants to wait for their issue to be resolved, and IVRs, "please hold for an available agent", or "let me transfer you to the right team" are the bane of any customers' support experience.
In a modern customer care setup the first line of defence is your Help Center or Bot which offers self service solutions for your customers. When the content of your knowledge base can't assist, we can leverage forms or custom bot answers to collect customer intent and contextual information before we pass the request or conversation to one of the available support agents.
Group Based Routing
Traditionally, this is where Zendesk triggers take over. By looking at a form, custom field values, language, brand or other information, we can use triggers to assign tickets to the right group of agents. The tickets are assigned to a group, and appear in views where agent can work through the list of tickets top to bottom.

This approach has a few downsides though. Tickets appear in a view and chances are that if I look at the top most ticket, it might not be the best ticket for my skills. Similarly, there might be a perfect ticket somewhere in the list that does match the language I speak. Or, since we assign all requests to our Support team first, it might take a while for that one question related to an invoice to be reassigned to Finance.
To tackle these issues Zendesk environments often evolve into complex environments with multiple Support groups per language, and dozens of views to filter tickets about orders, refunds, technical support etc. These "hacks" are all workarounds to give insight in the list of open tickets, and surface the right tickets to the right person or team. But they're not ideal, and scale badly since they're hard to maintain.
Omnichannel Routing
Let's look at this concept of assignment and routing in a different way.
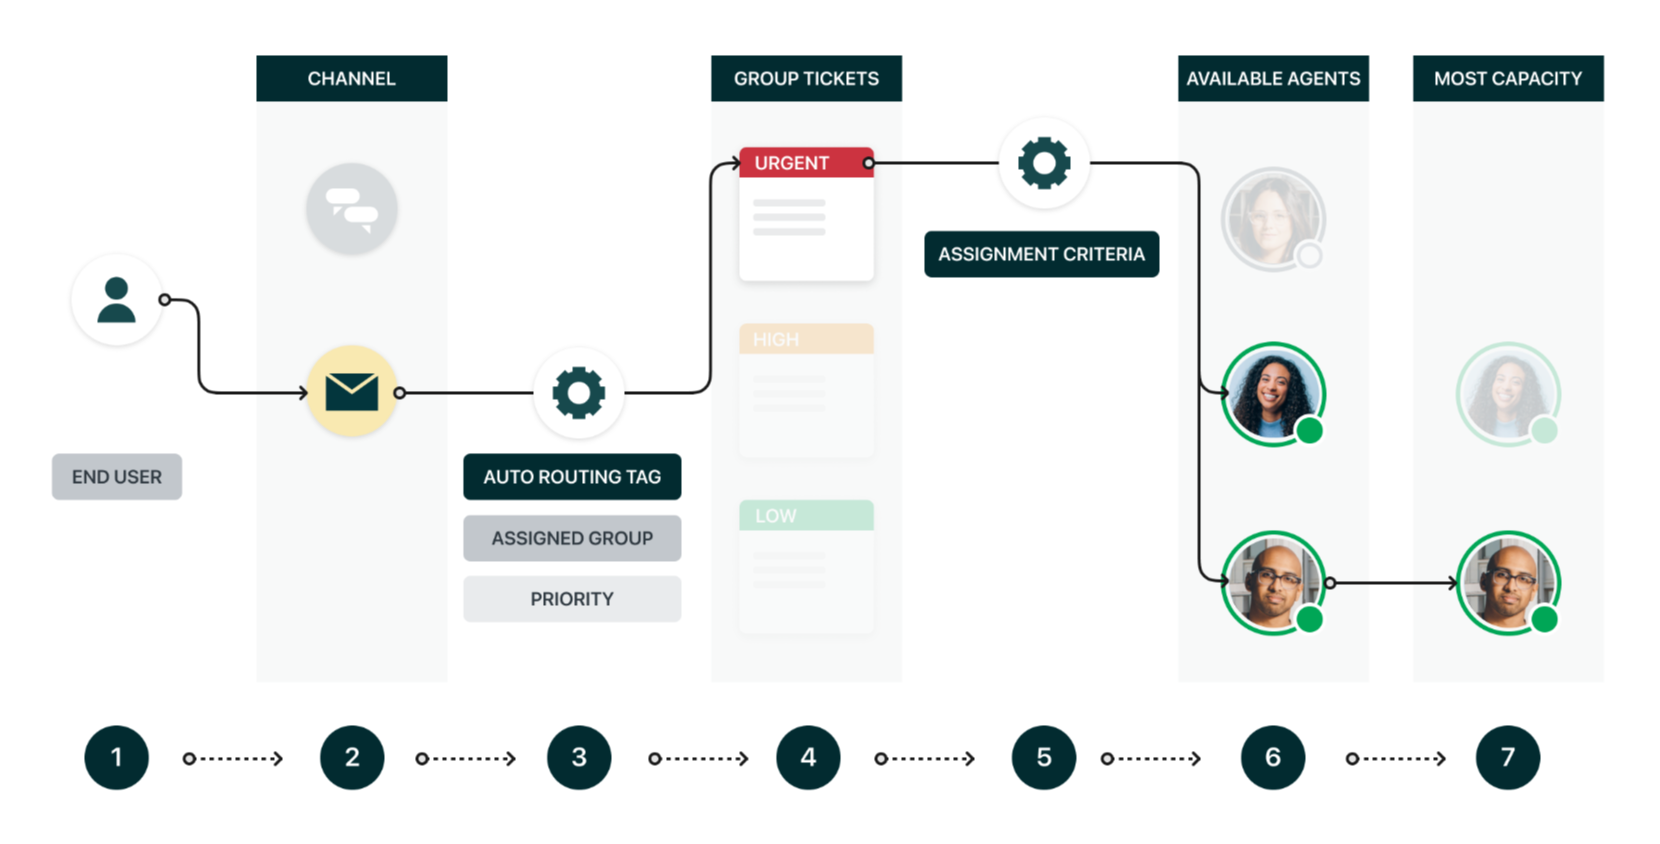
We begin with a customer inquiry that is created in Zendesk. This inquiry can be an email based ticket, a messaging conversation or a phone call.
The inquiry has an intent, or in other words, what's the question about? And it relates to a brand or product
The customer reading the question speaks a specific language and might be a customer, lead or VIP user.
On the other side we have agents, Agents speak specific languages, are knowledgeable in certain topics and are allowed to execute certain tasks within the CRM systems. And, importantly, they are either at work or not at work, and already have a certain workload assigned to them.
Forgetting groups, triggers and views for a moment, what we want is to make sure that if a ticket is raised, that we assign that ticket to the best agent to handle that ticket. Best can mean, the agent that is online, it can mean the agent that knows about the topic, or it can be the agent already working on that ticket.
This concept is what Zendesk calls: Omnichannel Routing. It's a new method to assign tickets to the best agent to handle the inquiry.
How does it work
Before we dive into the setup, let's first give a high level example on how this would work. Let's take three tickets.
- One ticket is a question about an invoice raised by a French speaking customer
- The second ticket is a question about a product from an English speaking customer
- A third ticket is raised by a English VIP user about a product
In our Zendesk instance we have two agents. Jack and Rose, they can both handle all topics, but Jack speaks only English.
With omnichannel routing our tickets arrive in Zendesk. We have triggers that assign both tickets to the support team. Since both agents are online, omnichannel routing can assign those tickets to any of the users.
Since the first ticket is in French, the system decided to assign the ticket to Rose, skipping Jack in the queue. The third ticket is assigned to Jack, since he has no assigned tickets and is available, and the priority of VIP tickets is higher than regular tickets. And the remaining second ticket will be assigned by whoever has capacity first: Jack, or Rose.
When Jack and Rose look at their Agent Home they will see their tickets appear in their inbox, and similarly, when they look at their open tickets view, they see all three tickets, with tickets assigned to either one of them.
Now imagine Jack going away. At that moment any response to a pending ticket will be routed to Rose, who's online. Or, if both of them go offline, the ticket can be reassigned to a fallback group and Molly, a friend of Rose who works in another department, can take over the ticket.
So that's omnichannel routing. We still assign tickets to groups based on topic, but the system dynamically routes to the right person for the job.
Setup up omnichannel routing
There's a few moving parts in order to get omnichannel routing setup.
- We need to tag tickets we want to auto-route
- We need to allow agents to set their online status
- We need to give agents a maximum capacity
And additionally we can enable two optional features: we can assign skills to agents, and we can queues.
Let's take them one by one.
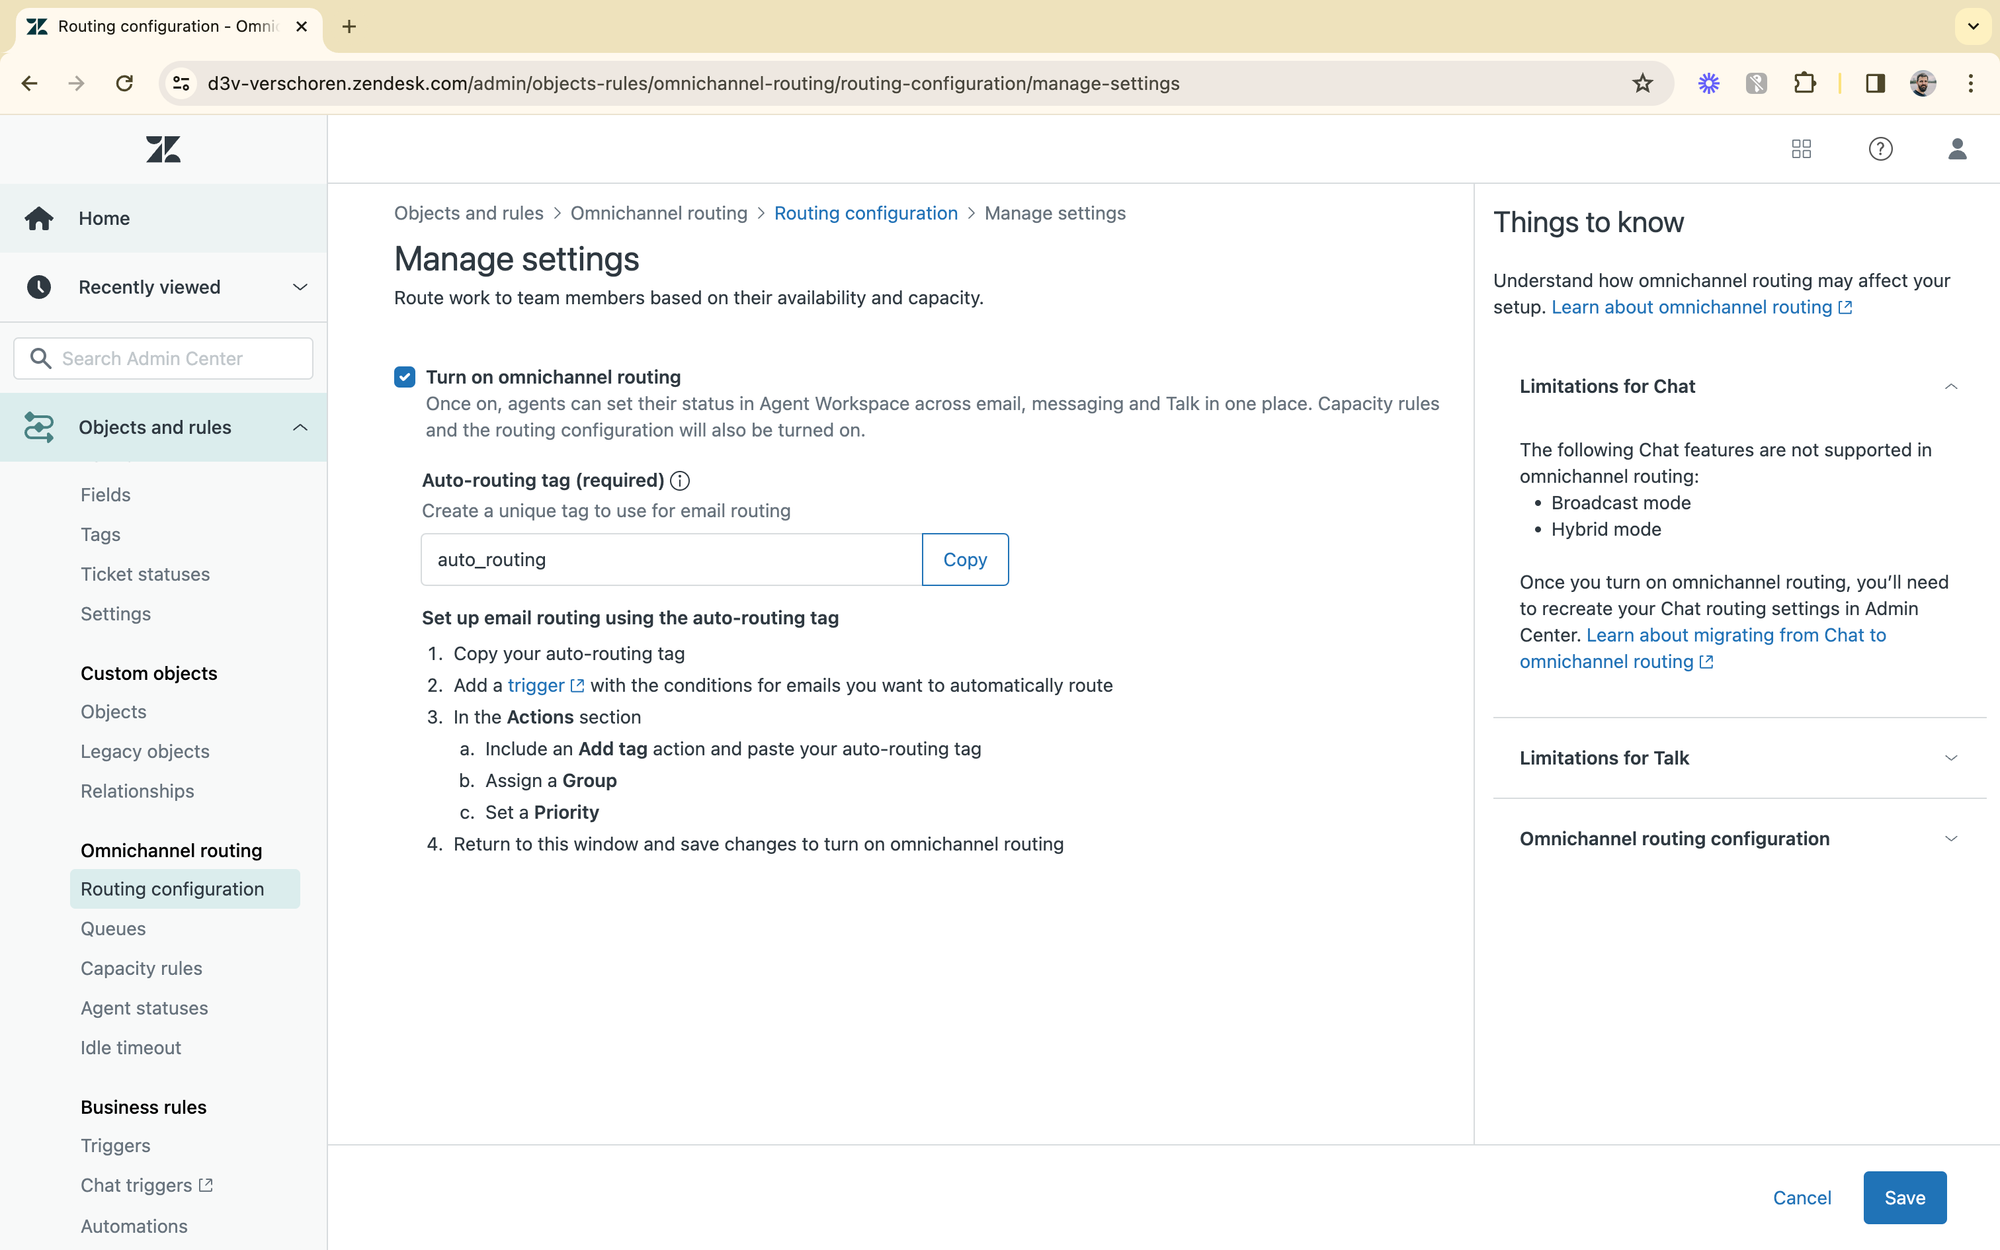
Routing
Omnichannel routing does not route all email based tickets by default. It will only route tickets tagged with a specific tag. This way you can choose to use routing for e.g. your first line support team, but leave the more complex finance tickets as a traditional group assignment in a view.
To start, you can decide which tag you'll use to identify which tickets should be automatically routed to agents. For my setup I picked auto_routing as a tag.
Triggers
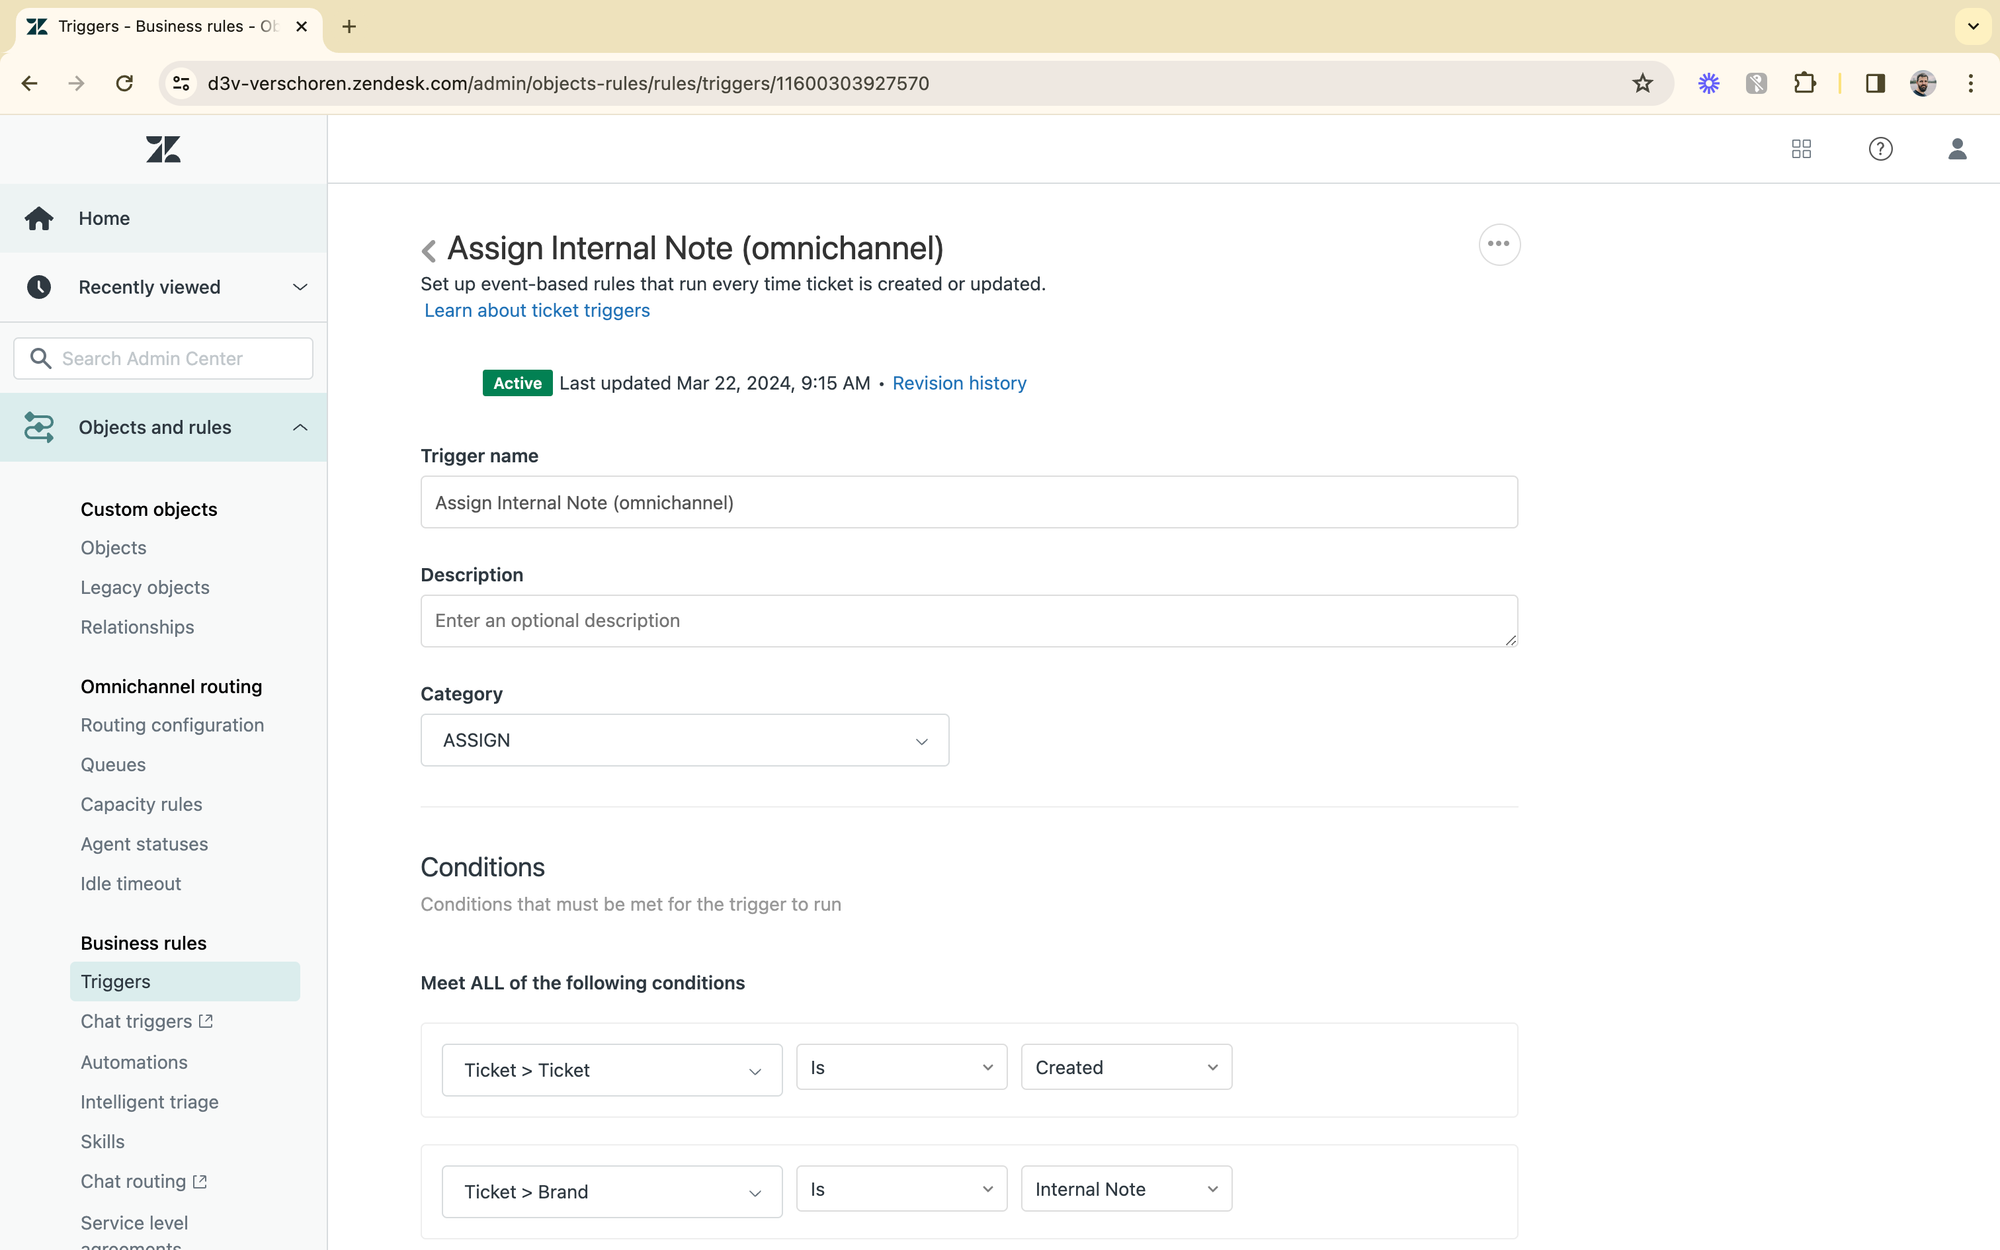
Next, go into your triggers and add the tag to all tickets you want the system to auto-route. In my setup I had four triggers that handle assignment:
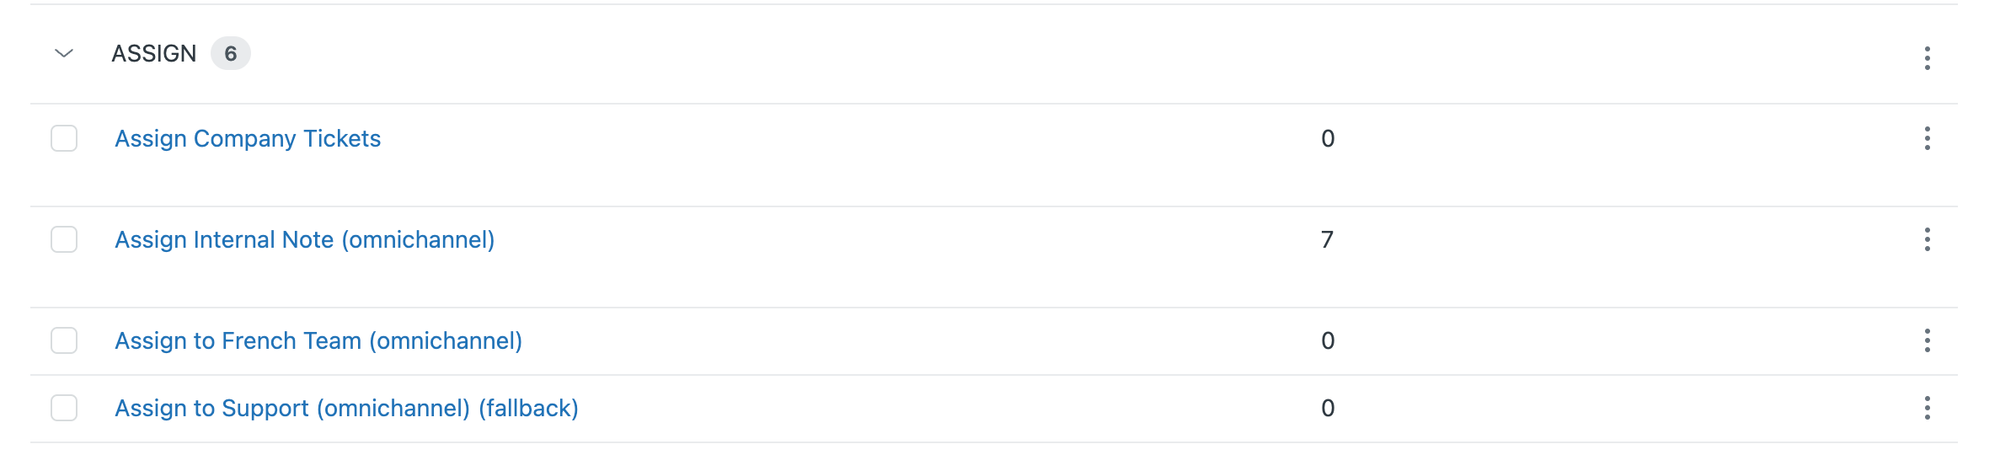
I've decided that Company tickets are going to remain assigned to a specific group, and should not be auto-routed to an agent.
All other tickets are also assigned to their respective groups, but will be automatically routed and assigned to an available agent. Tickets about Internal Note are assigned to the Support group, and get the auto_routing tag. I also have a trigger that assigns French tickets to a Support - French group. For now, I keep that trigger as is, but also add the auto_routing tag so that these tickets to are assigned to available agents.
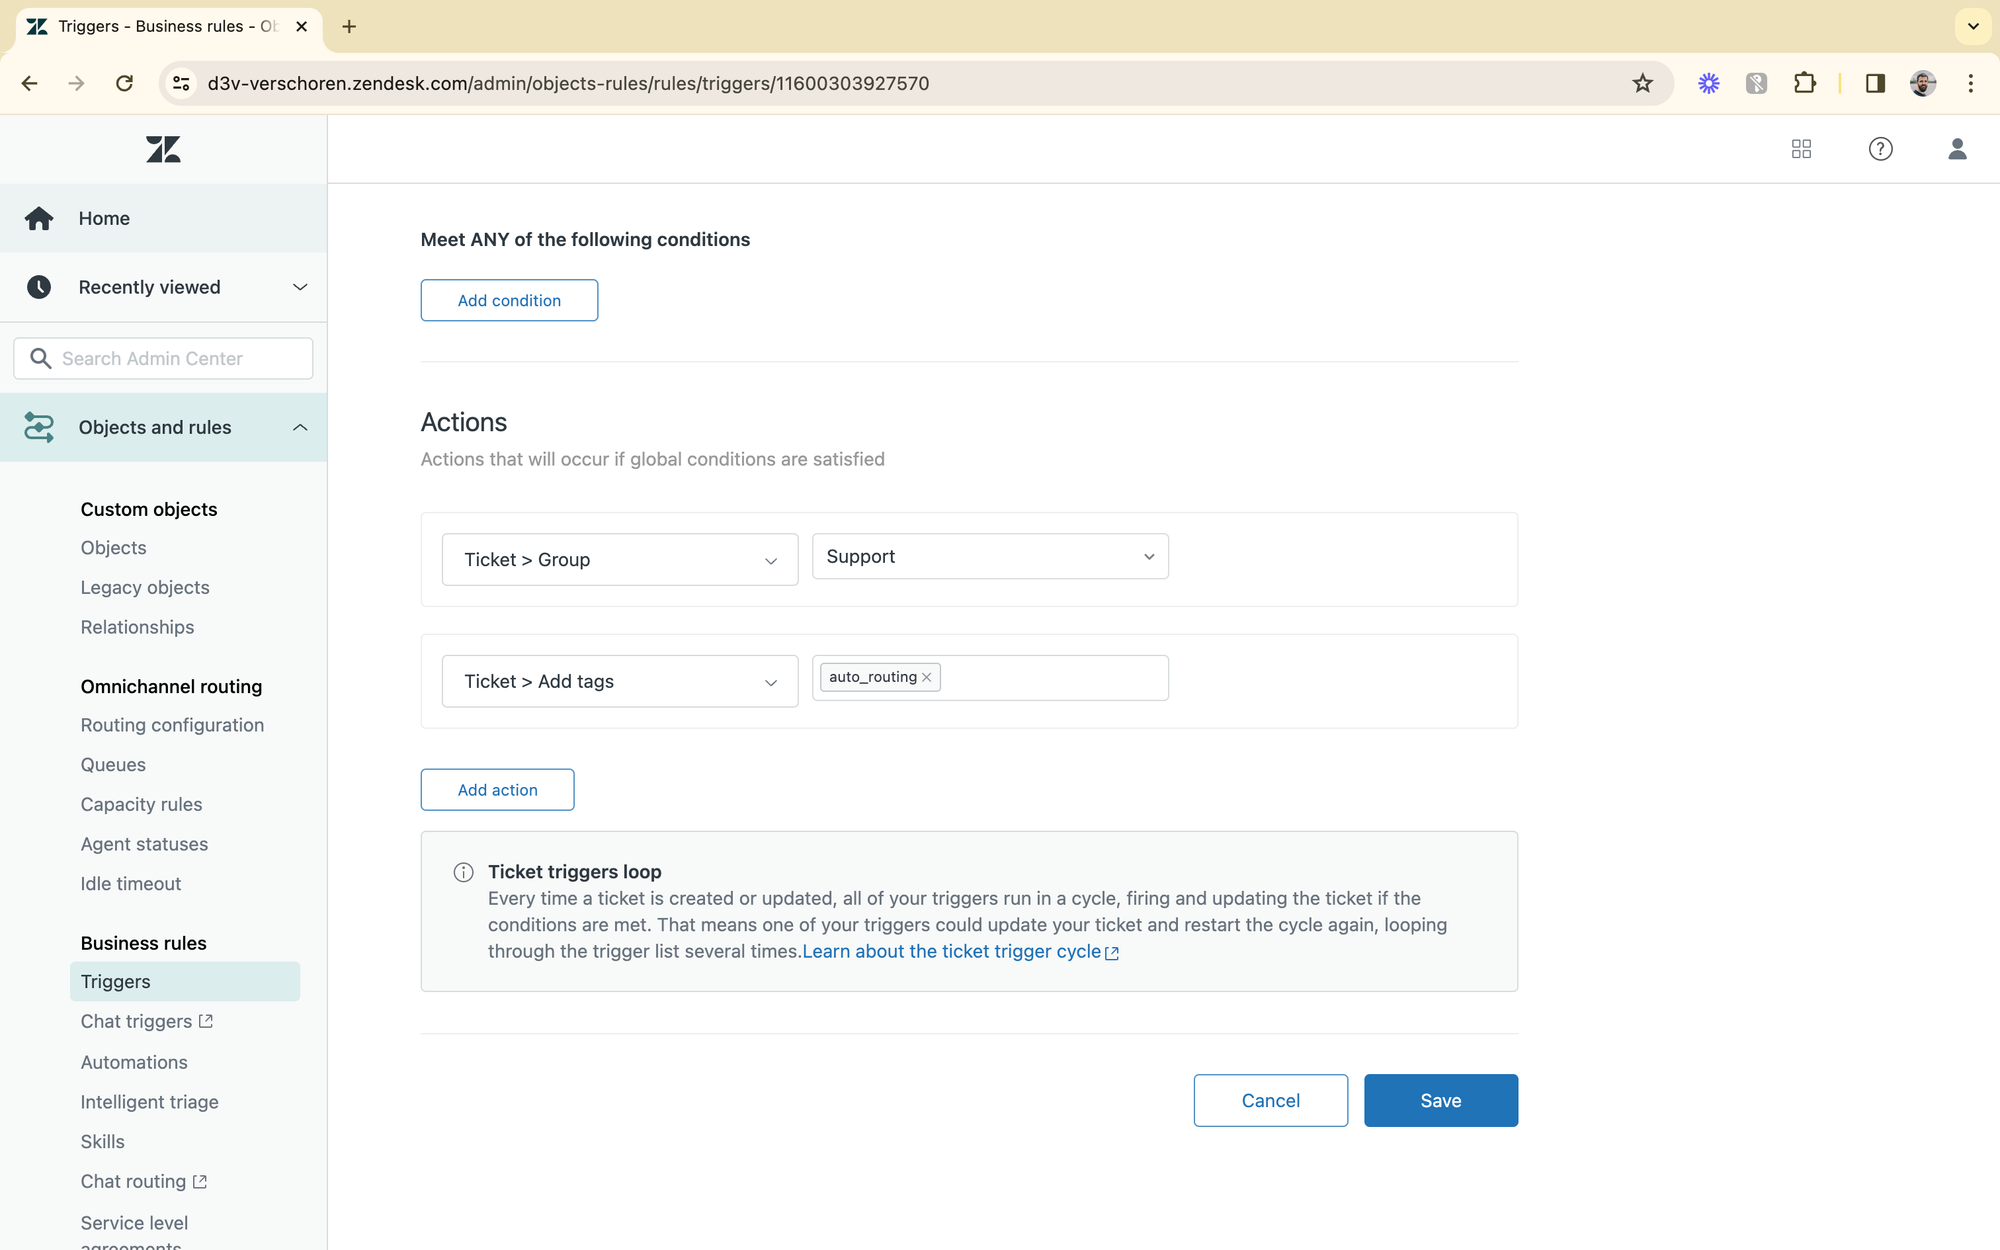
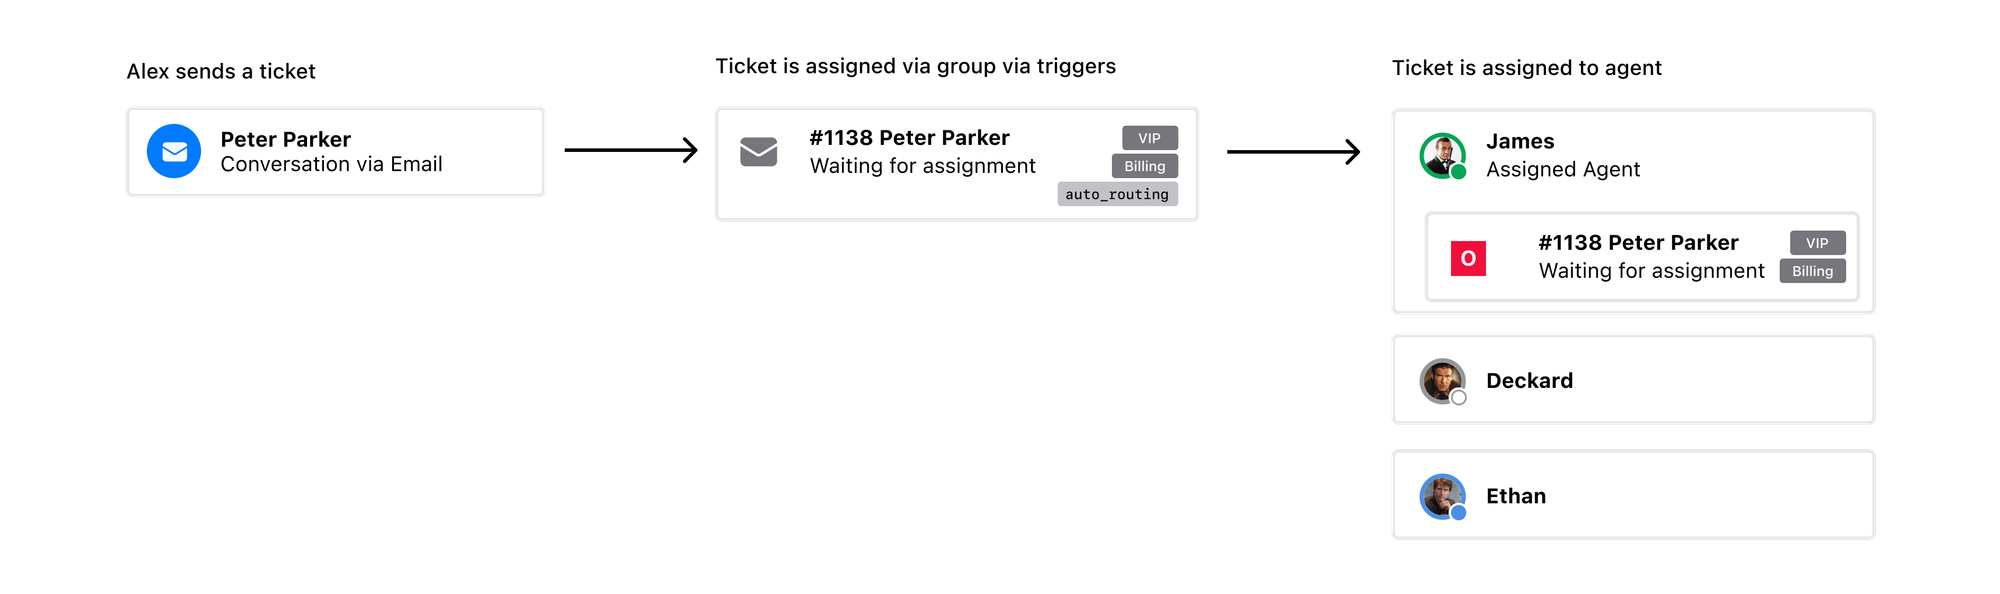
As a result of these changes we'll see some tickets assigned to groups, and other tickets assigned to agents within that group.
E.g. a customer contacting me about a Company related question, will get their ticket assigned to the Company group. But all other Internal Note inquiries will be assigned to the Support group, and assigned to a specific agent in that group.
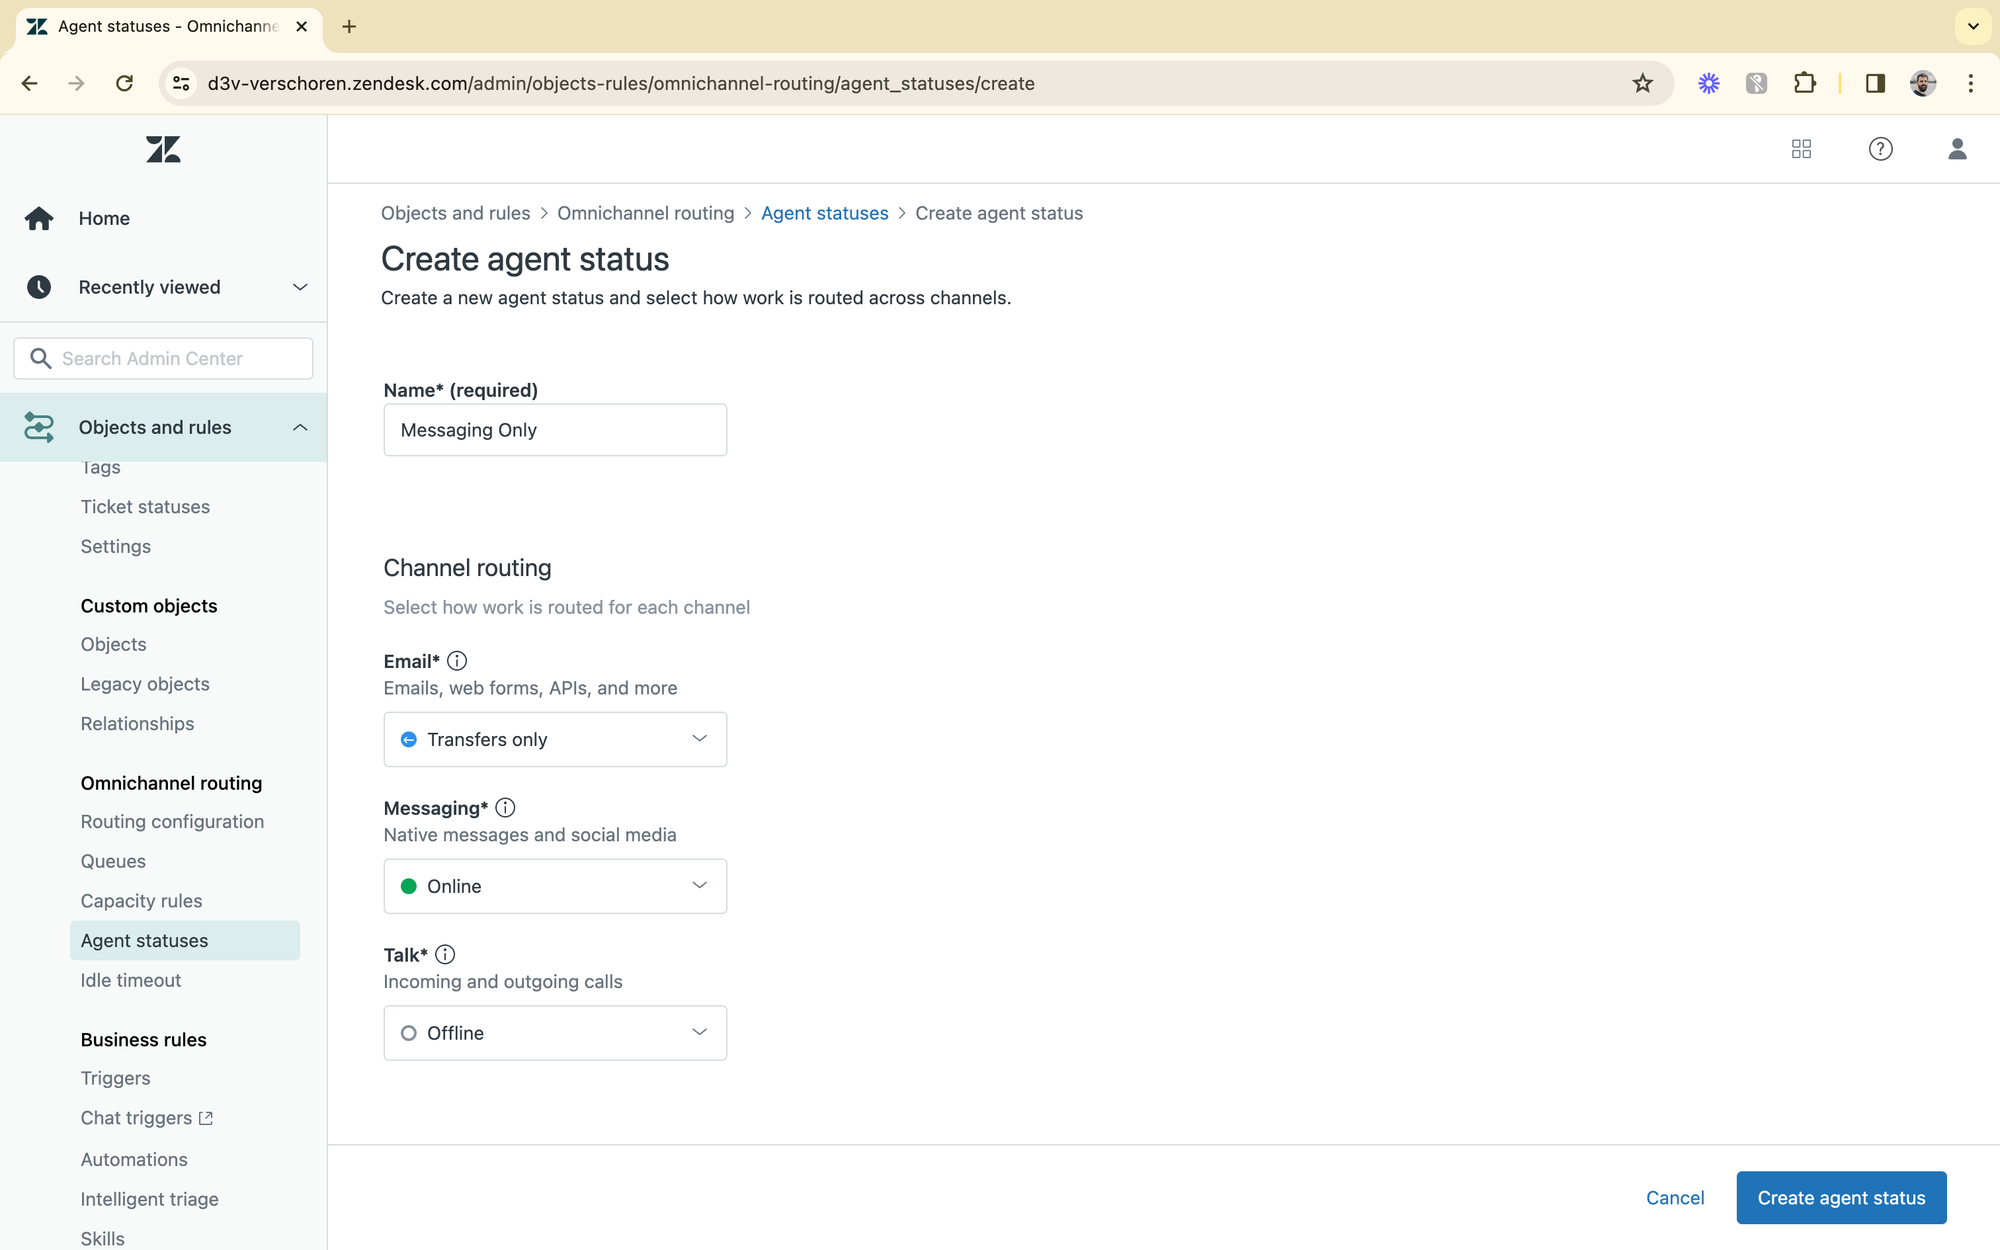
Agent Statuses
Now that tickets are routed to the right group and routing will also attempt to assign tickets, it's important that we can set statuses so that agents can make it clear if they can, or can't receive tickets or conversations at the moment.
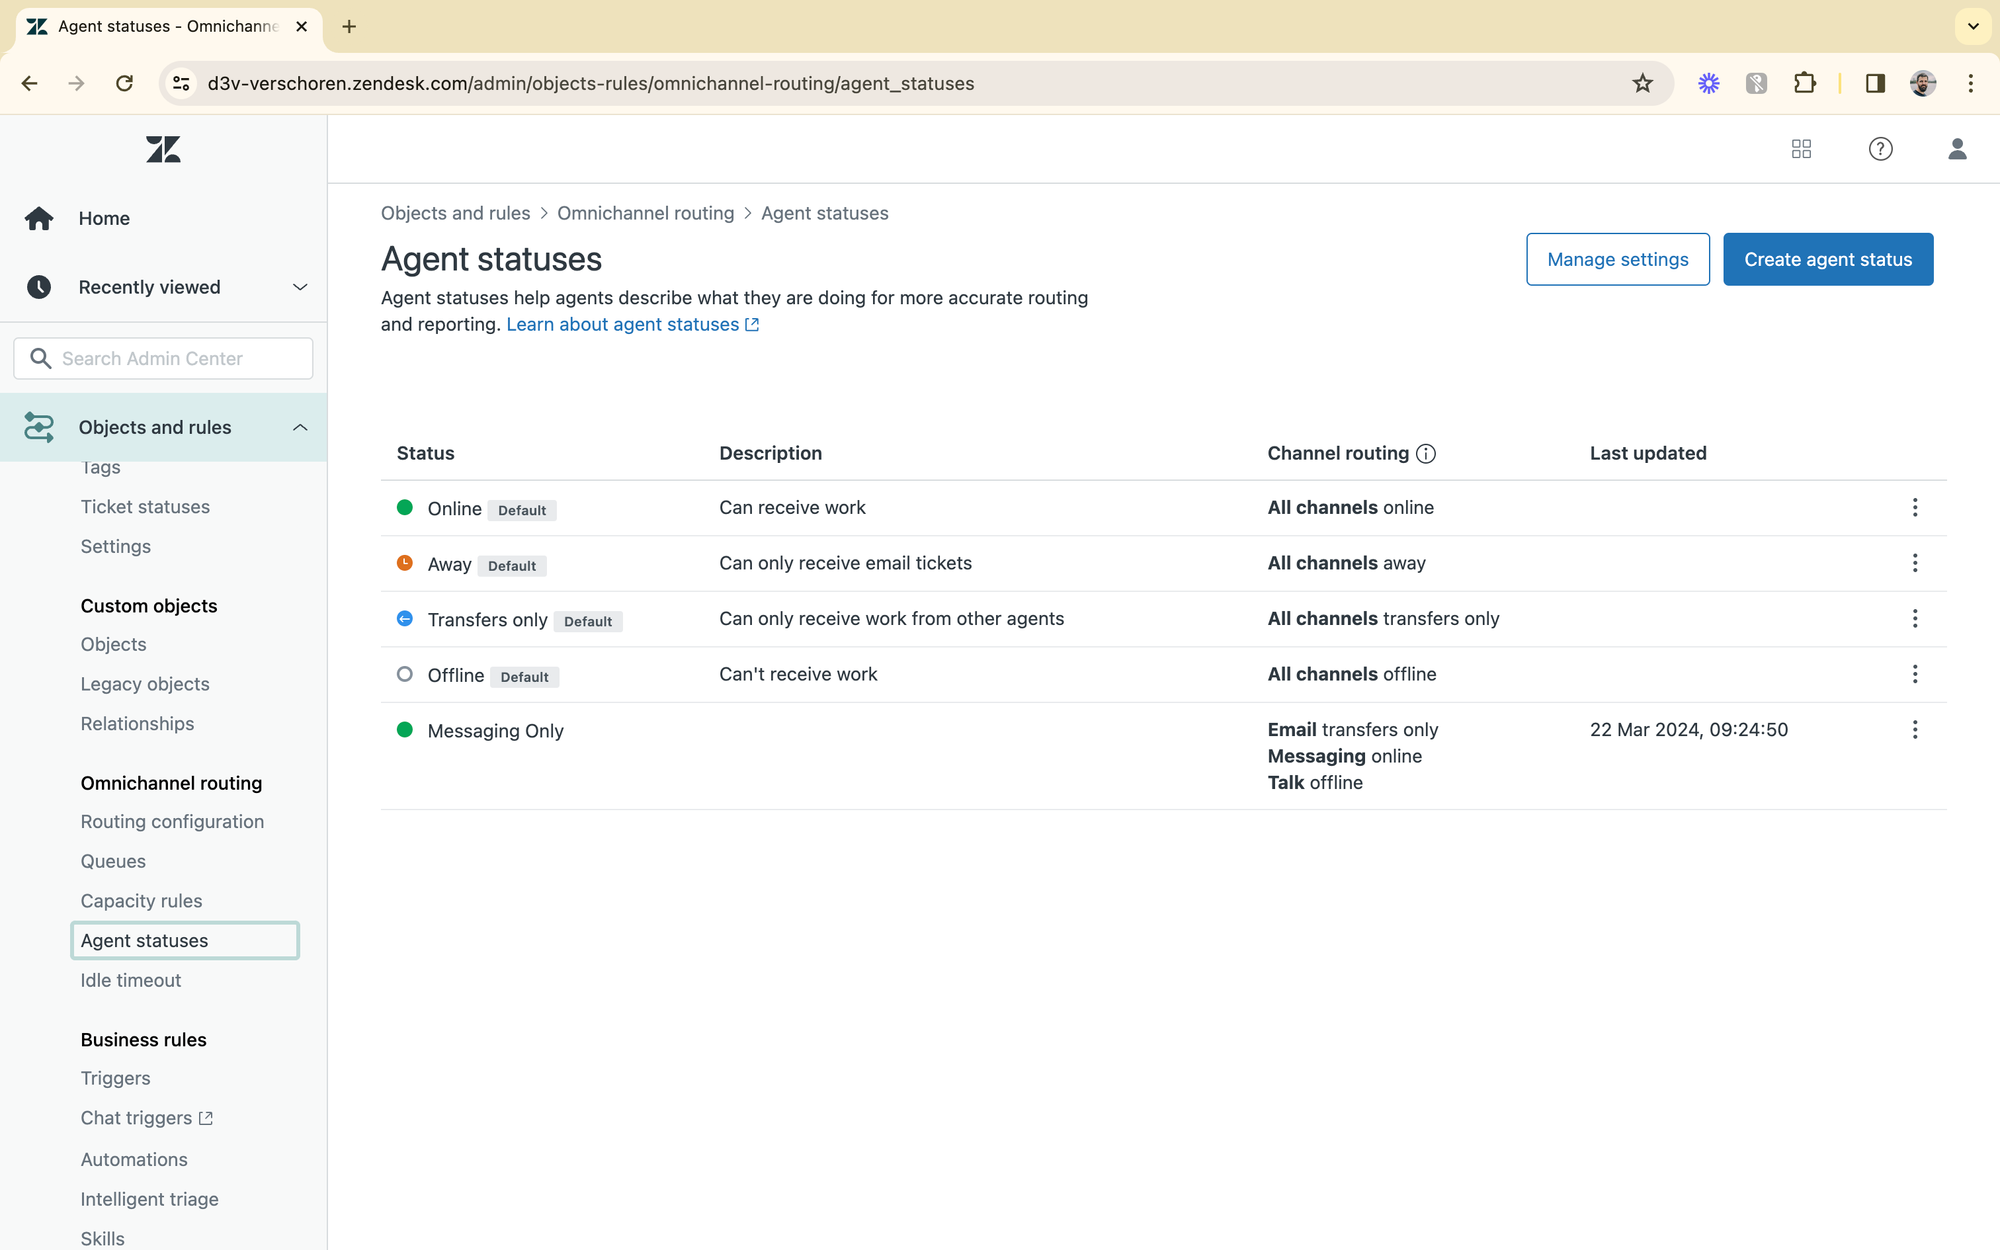
By default Zendesk offers the following four statuses:
- Online: all channels are available
- Away: the agent does not accept messaging conversations or phone calls. Email can be assigned though since it's not a live interaction
- Offline: the agent does not accept any tickets
- Transfers only: no tickets are routed to them, by other agents can assign ticket to them. This is an ideal fit for team leads for example.
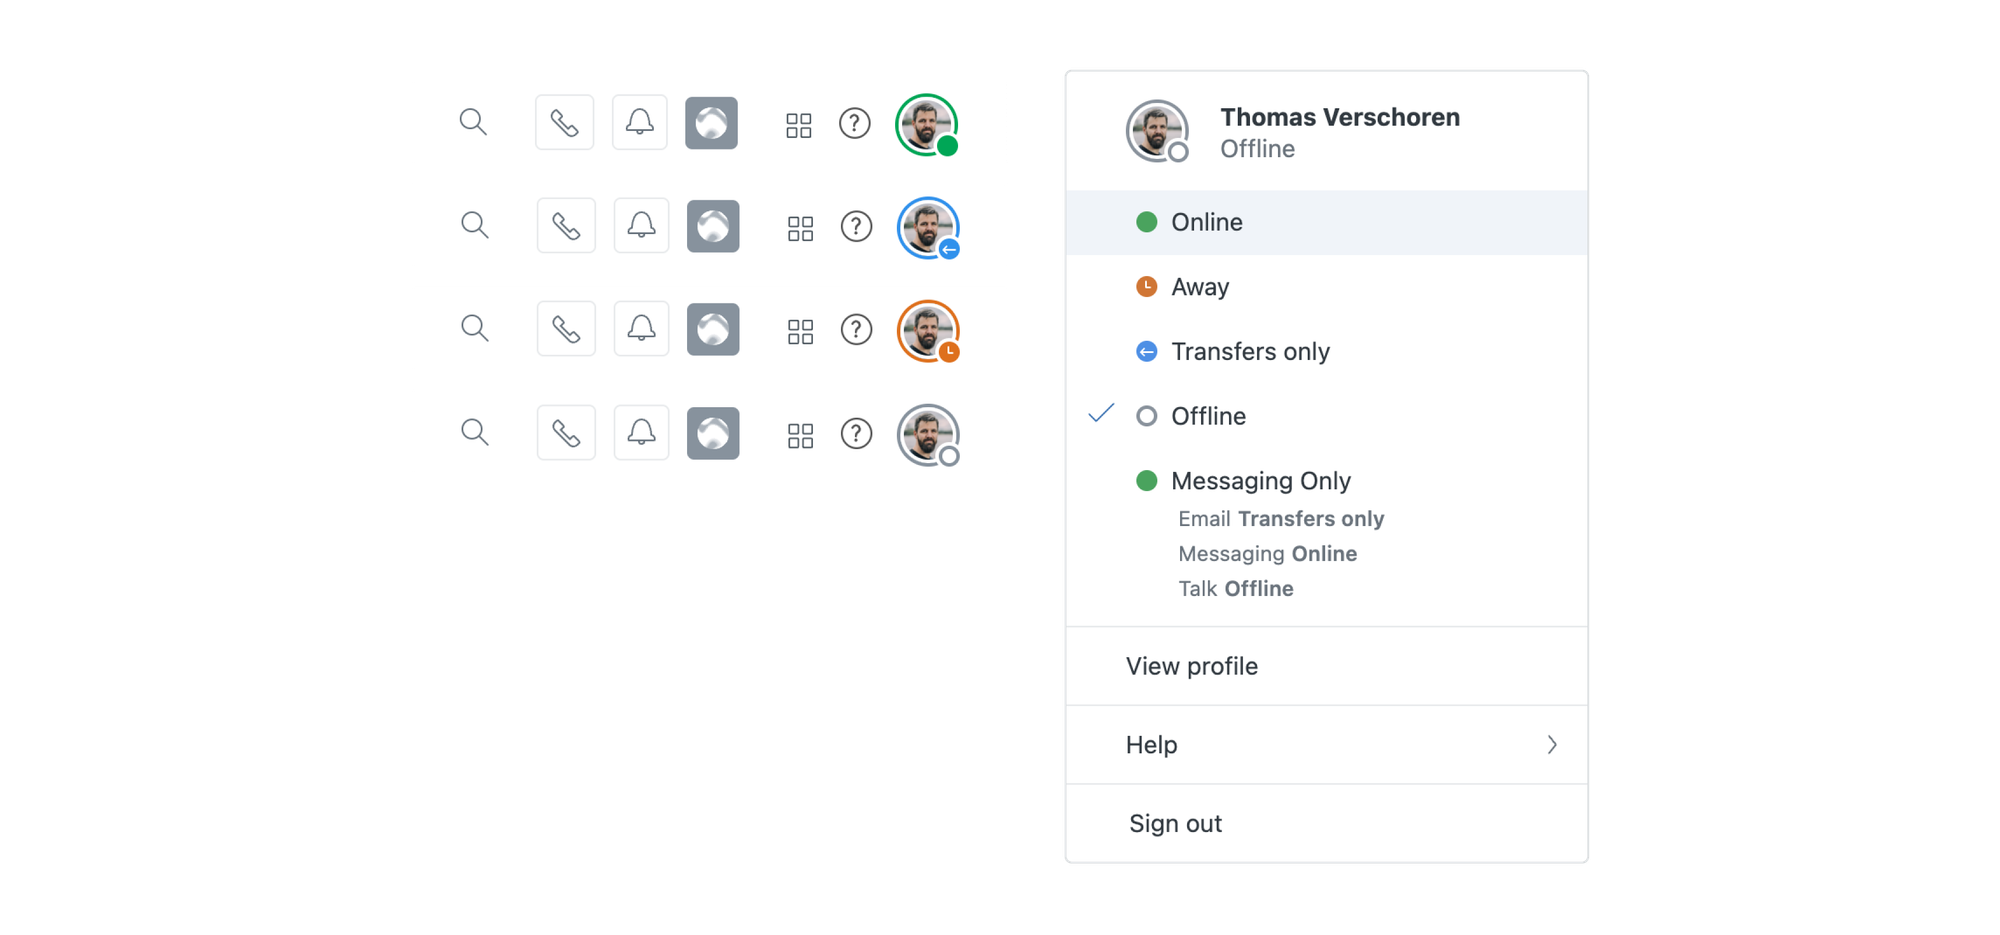
We can add additional statuses. You can for example add a "Messaging only" status, which only allows for conversations. Or a "Phone only" which indicates that this agent will only accept phone calls.
Once activated, agents can use the status dropdown in the Agent Workspace to indicate their status.
Capacity Rules
We now have tickets routed to specific groups, and assigned to available agents. But imagine a scenario where we have 50 incoming messaging conversations, or a dozen phone calls. If our team has 6 agents, we can't expect the agent to each handle 8 tickets at once.
Most agents can maybe manage around 3 active conversations. Obviously we can only handle one phone call at a time, and to keep tickets moving swiftly we maybe want to assign only a few tickets to agents at a time, leaving the rest unassigned until someone has capacity.
This is where capacity rules come in. They allow you to set a limit to the amount of tickets an agent can handle, and this for either messaging, voice, tickets or a combination of the above.
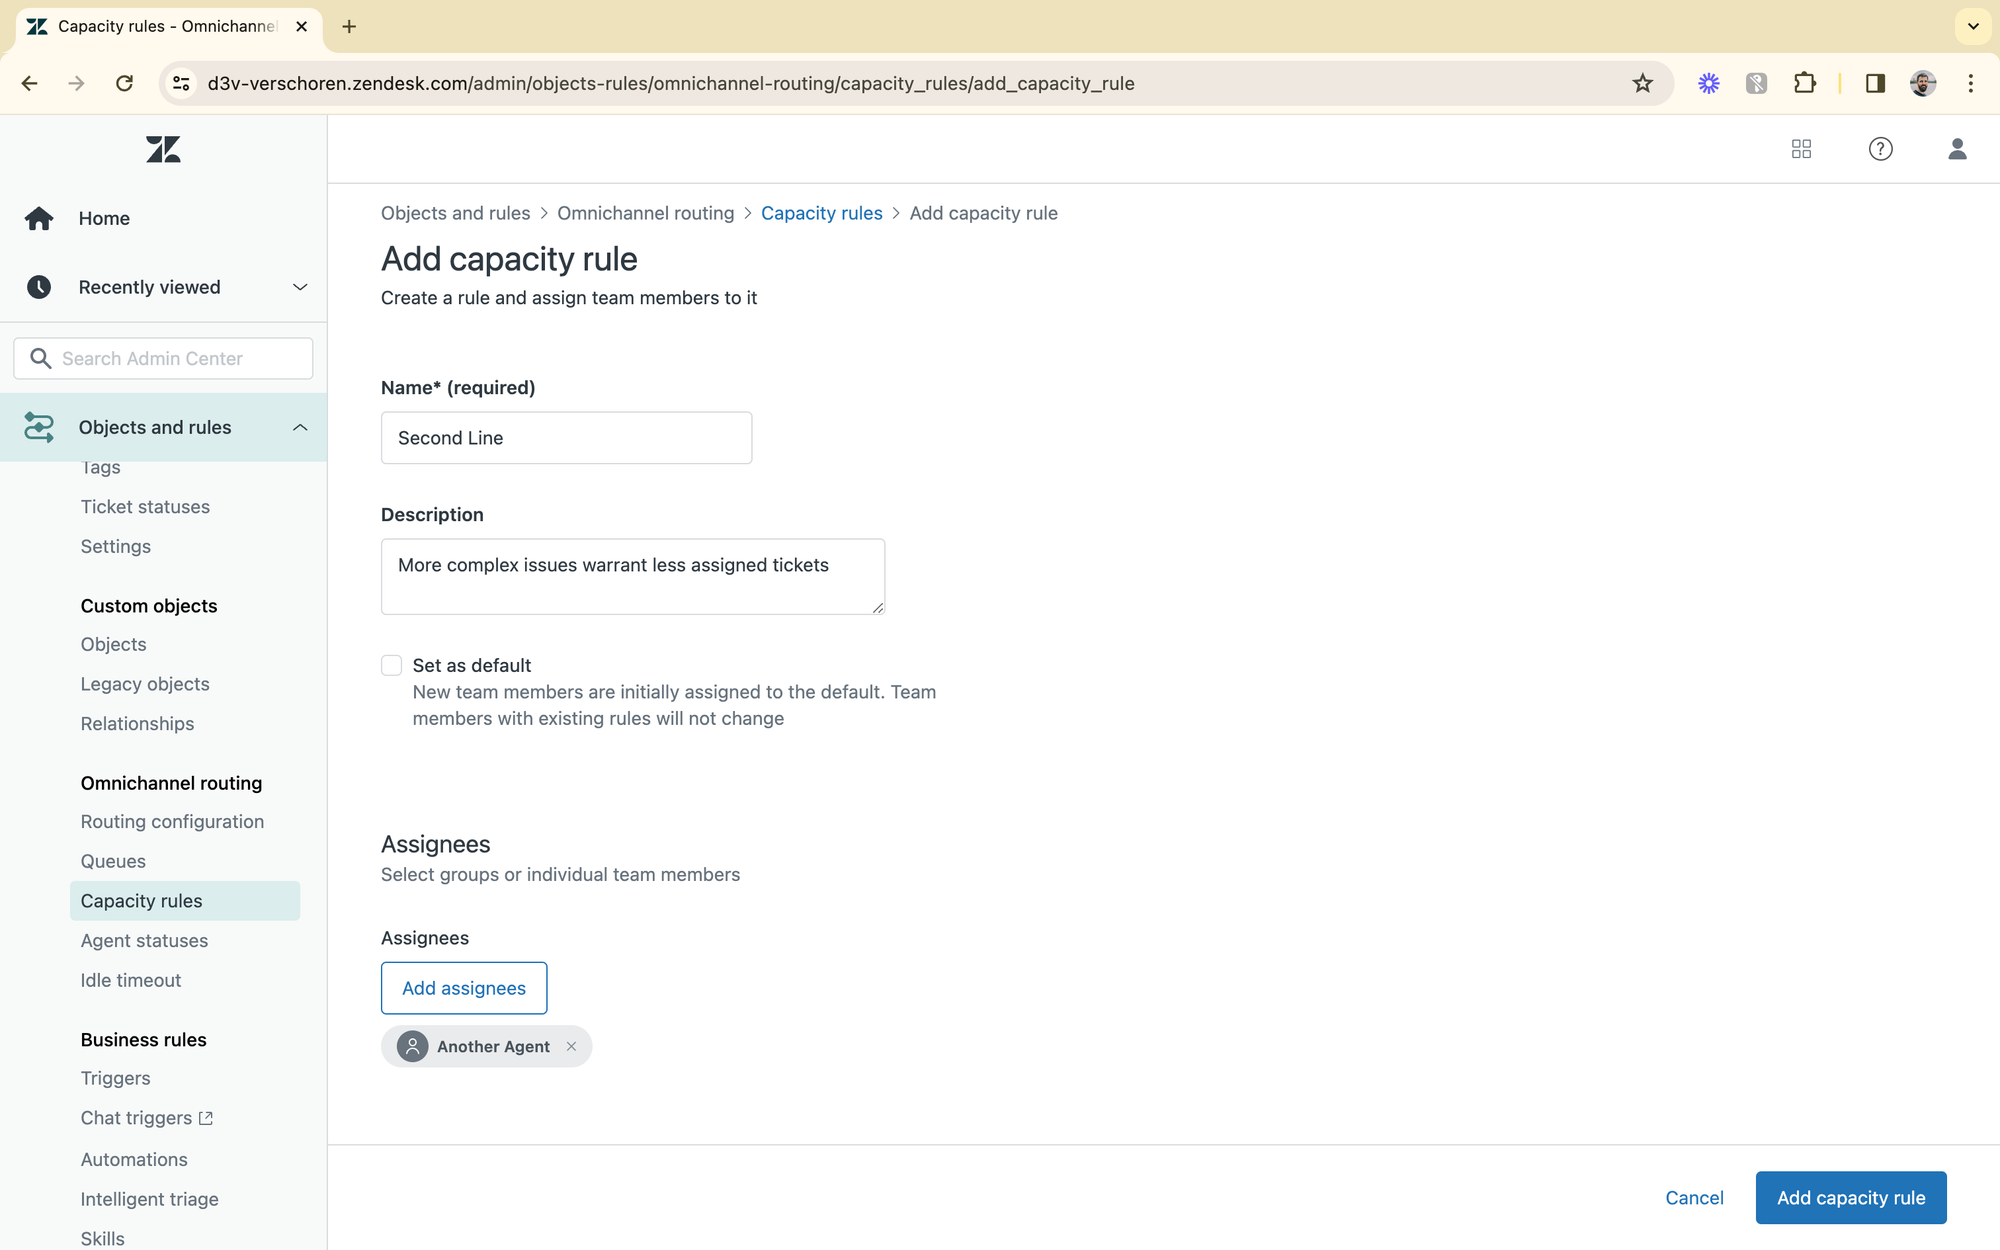
You can create as many capacity rules as you need, and you can assign specific agents (but not groups) to that capacity rule.
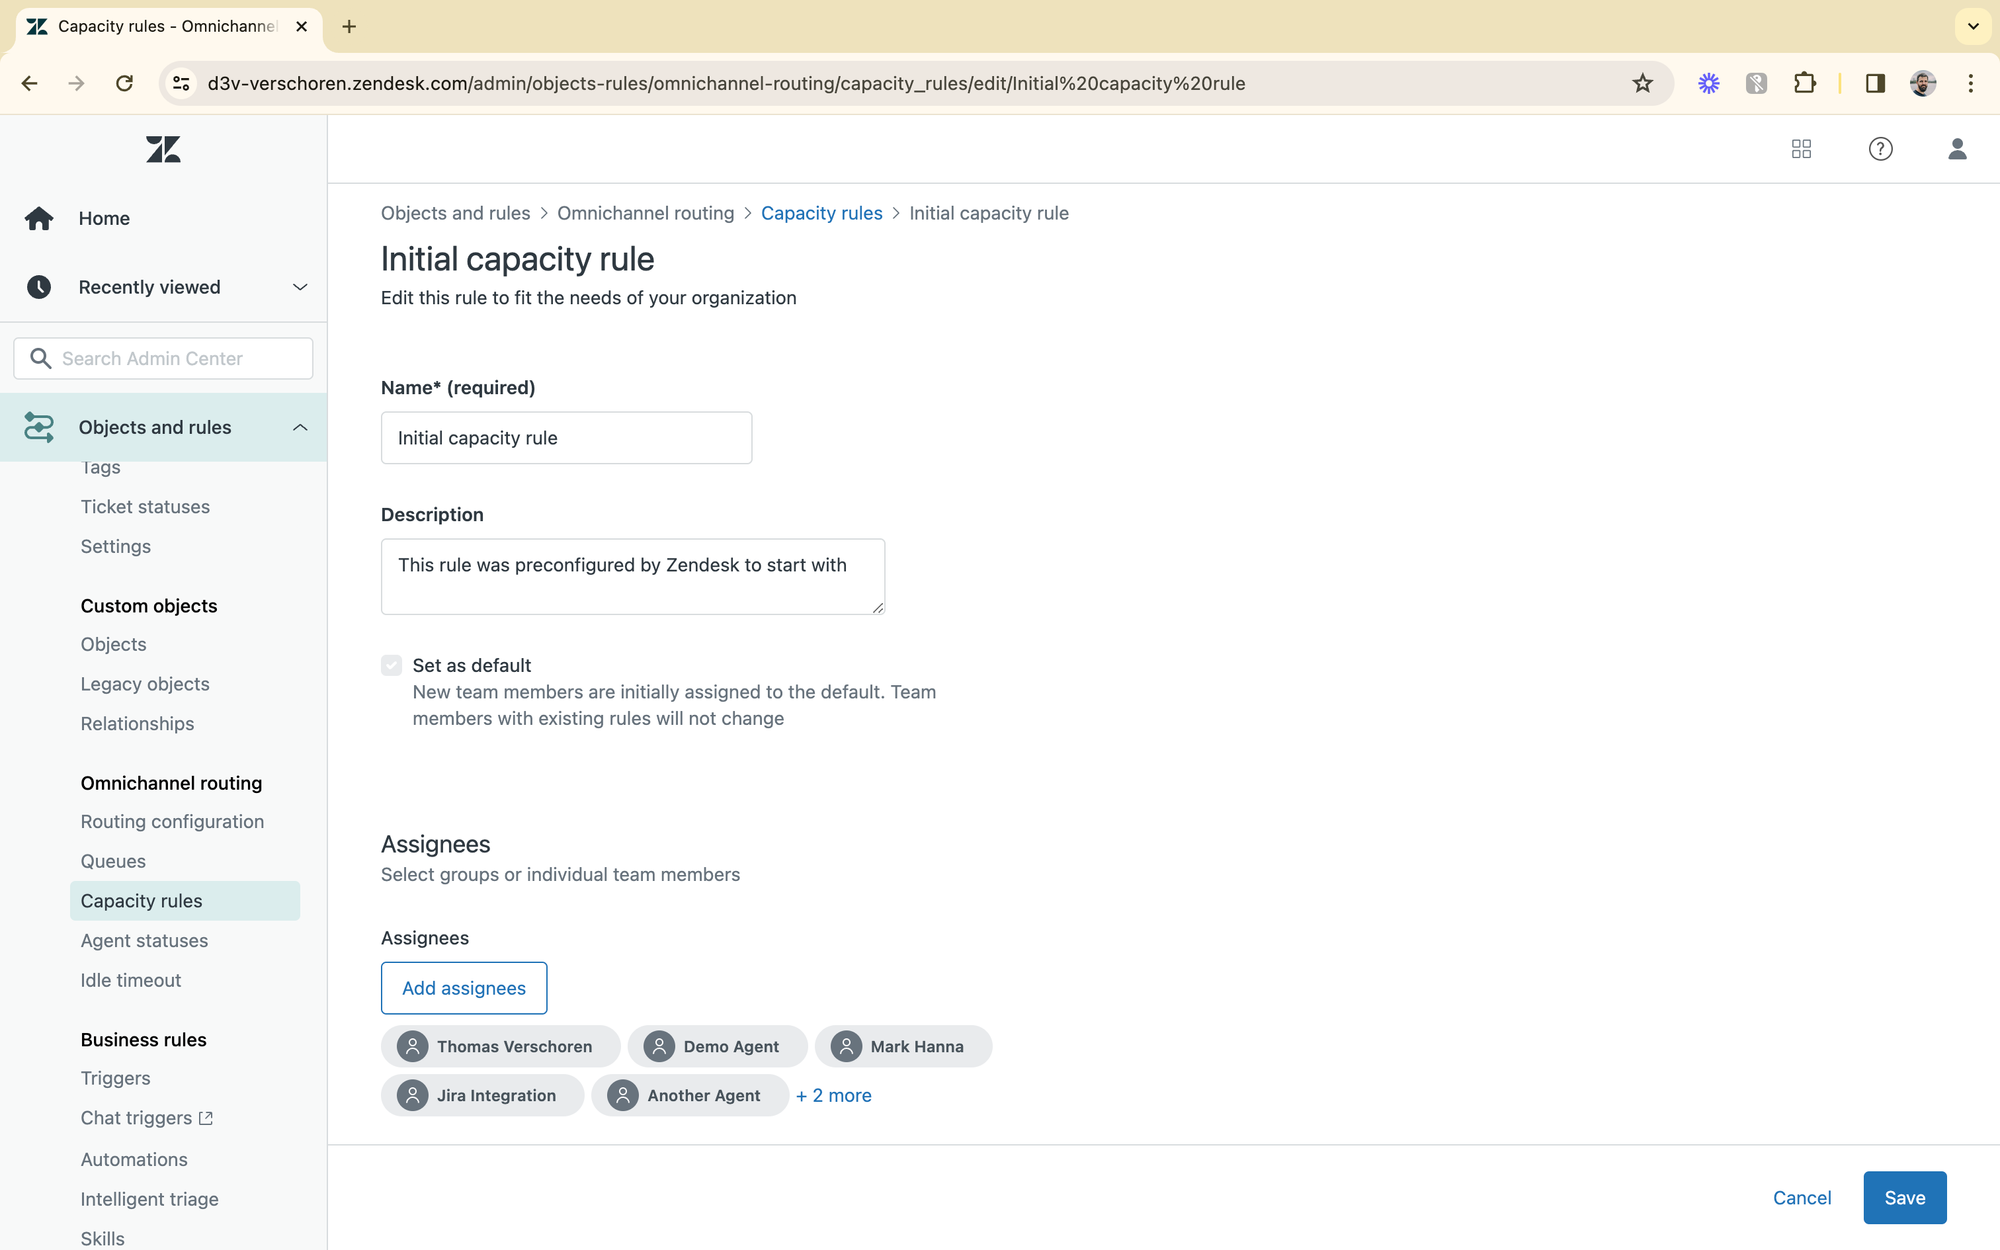
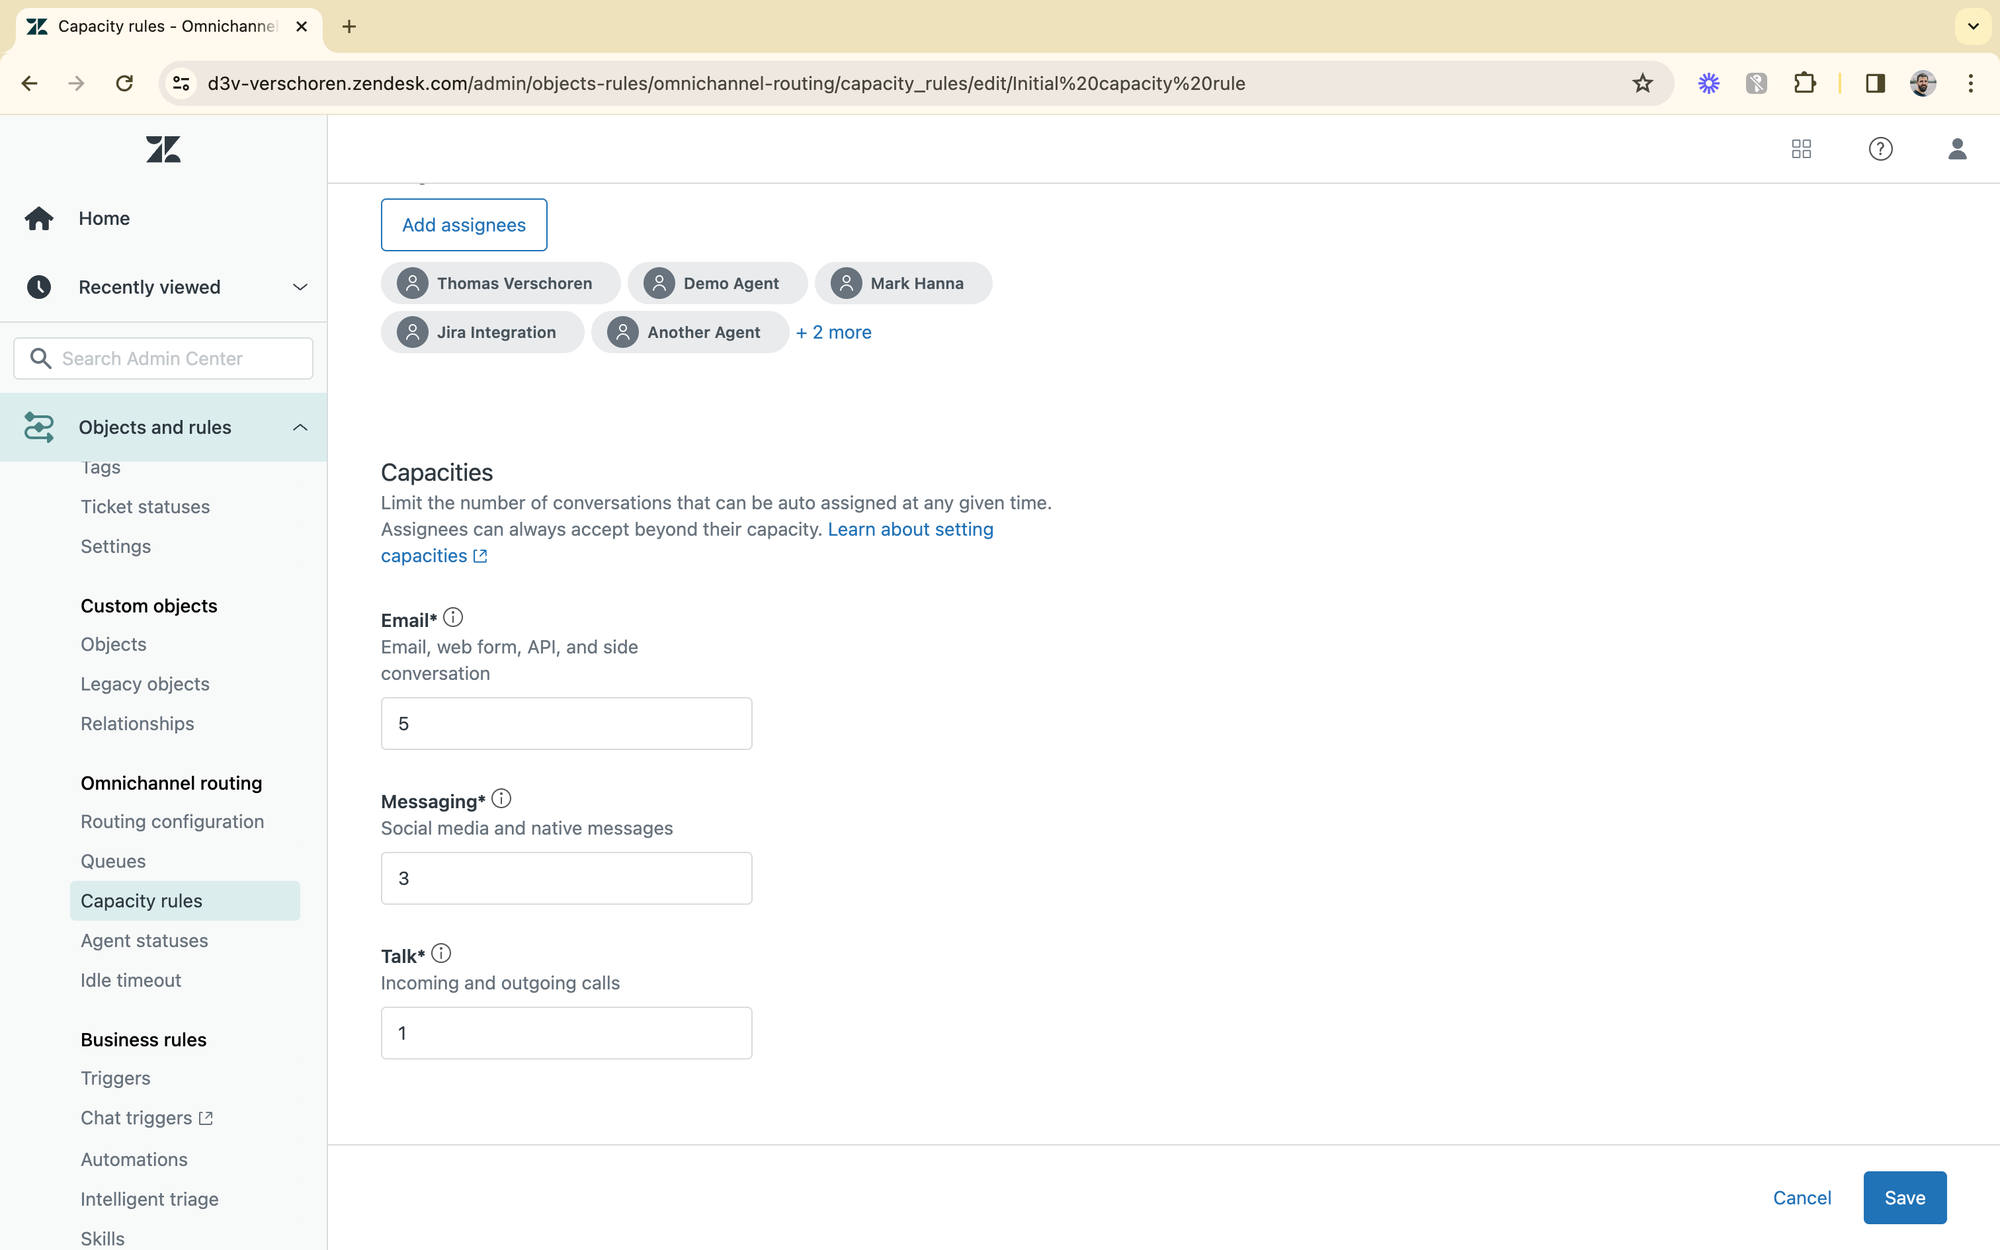
My default rule set allows agents to handle 3 email, 5 messaging and one talk interaction at a given time.
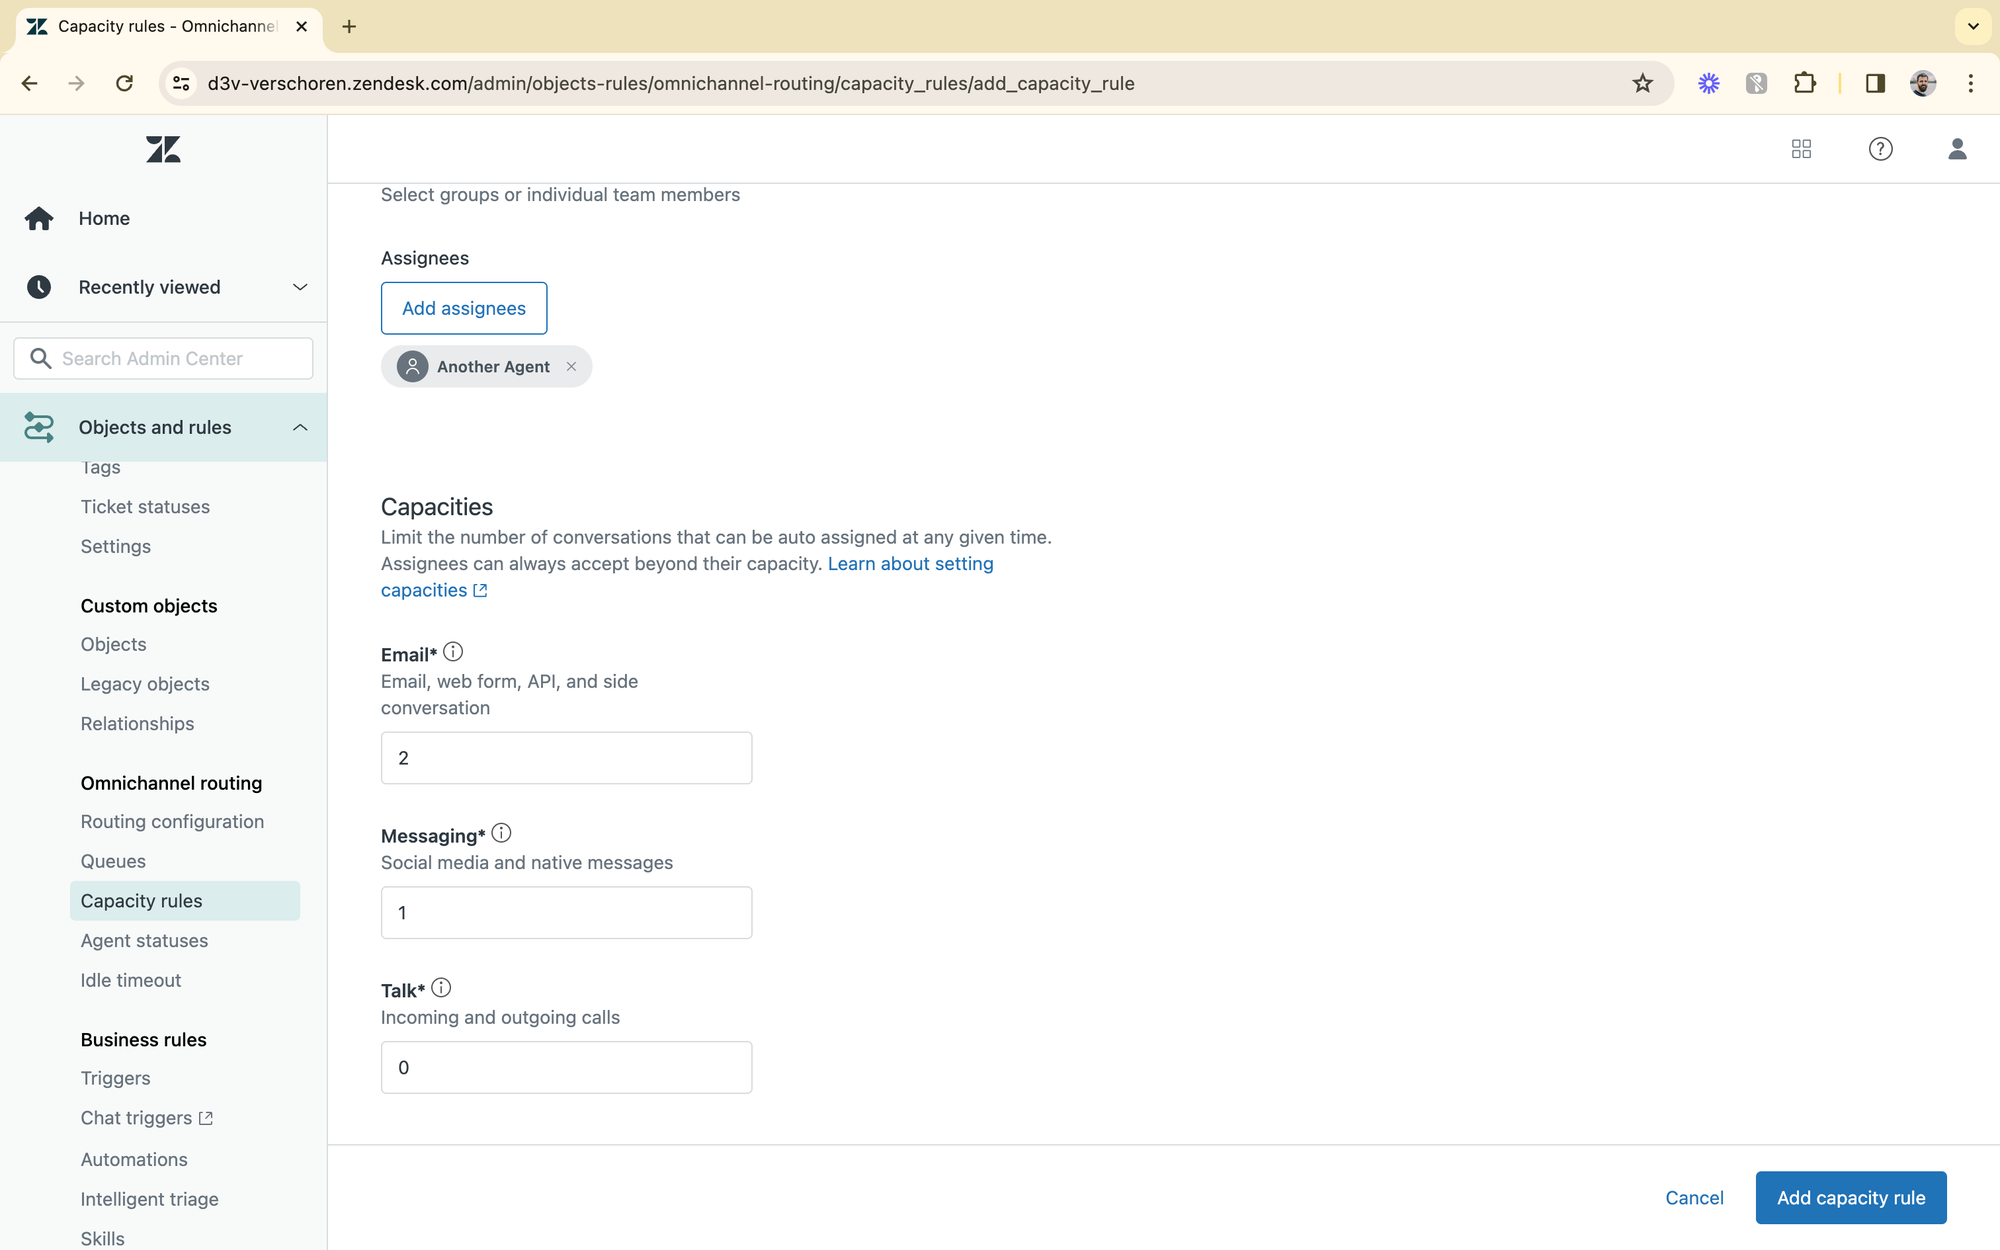
But my rule set for Second line agents, who handle more complex tasks, only allows for 2 email tickets and one 1 messaging conversation due to the longer resolve time and additional focus needed for their tickets.
So in our example above, if we have 50 incoming conversations, and we allow our team of 6 to handle 3 conversations at a time, we'll have 18 assigned tickets, and 32 remaining unassigned tickets.
Once a conversation is handled, the next one will be assigned, or the customers in line will get an "no agents available" message in chat, and the conversation will be turned into a ticket. This last part depends on how you've configured your Zendesk Bot.
Similarly, if one of our agents sets themselves to offline, or voice only, then we've got only 5 agents available to handle those incoming conversations. Once they come back online, they'll get the next ticket in the queue assigned to them.
Advanced features
There's a couple of advanced elements we can setup:
- You can enable auto-acceptance of messages, which will assign tickets to agents and start the conversation immediately.
- Setup an idle-time out which sets passive agents to offline or away after a while.
- You can allow tickets to be reassigned to a new agent if they are reopened.
- By default inactive tickets (e.g. customer doesn't respond anymore, or ticket is pending) are not counted against capacity. By enabling messaging activity routing they are.
Skill based routing
So far our routing only took agent availability into account. If two agents are available and a ticket comes in, it will be assigned to the "least active" agent with capacity.
Referring back to our initial example, if we have two agents, Jack and Rose, and only one of them speaks French, we want to assign French tickets to Rose, and split English tickets across the two of them.
This is where Skill-based routing comes in. It allows you to assign one or more skills to agents, and those will be taken into account when assigning.
Some examples:
- We can use languages as skills. A ticket matching a language will be assigned to an agent with that language as a skill
- We can use intents as skills. E.g. all tickets matching a Refunds intent, will be assigned to agents with the skill "Invoicing and Payment" which includes Refunds.
- We can use custom fields as skills. E.g. tickets with the category "Book a journey" will be assigned to agents with the skill "Travel"
Assigning skills to agents
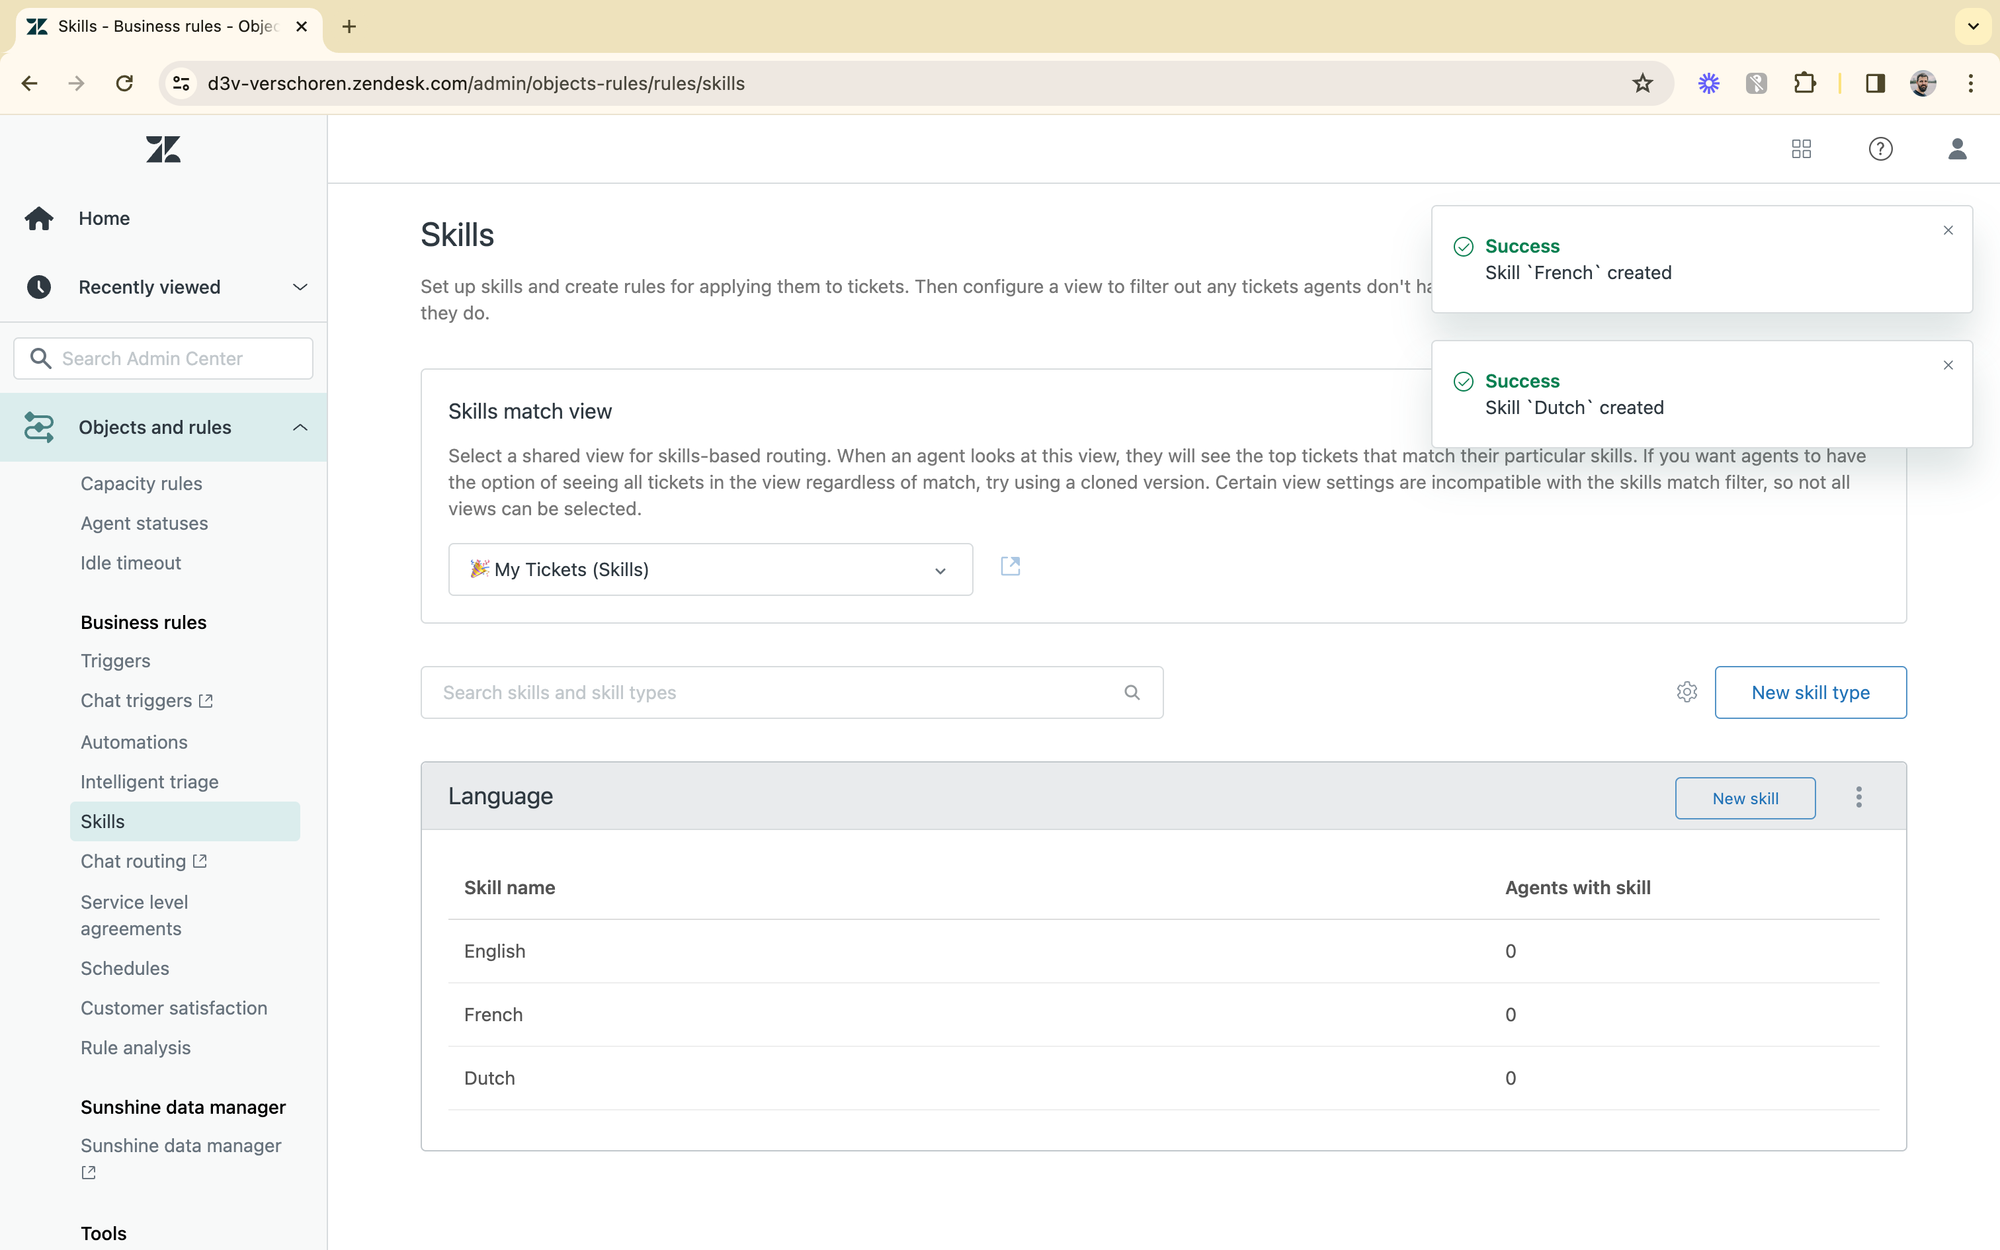
Setting up skills is done under Business Rules in the Admin Center.
- You start by creating a Skill a name: e.g. "Language"
- Add your skill options: French, English, Dutch, ...
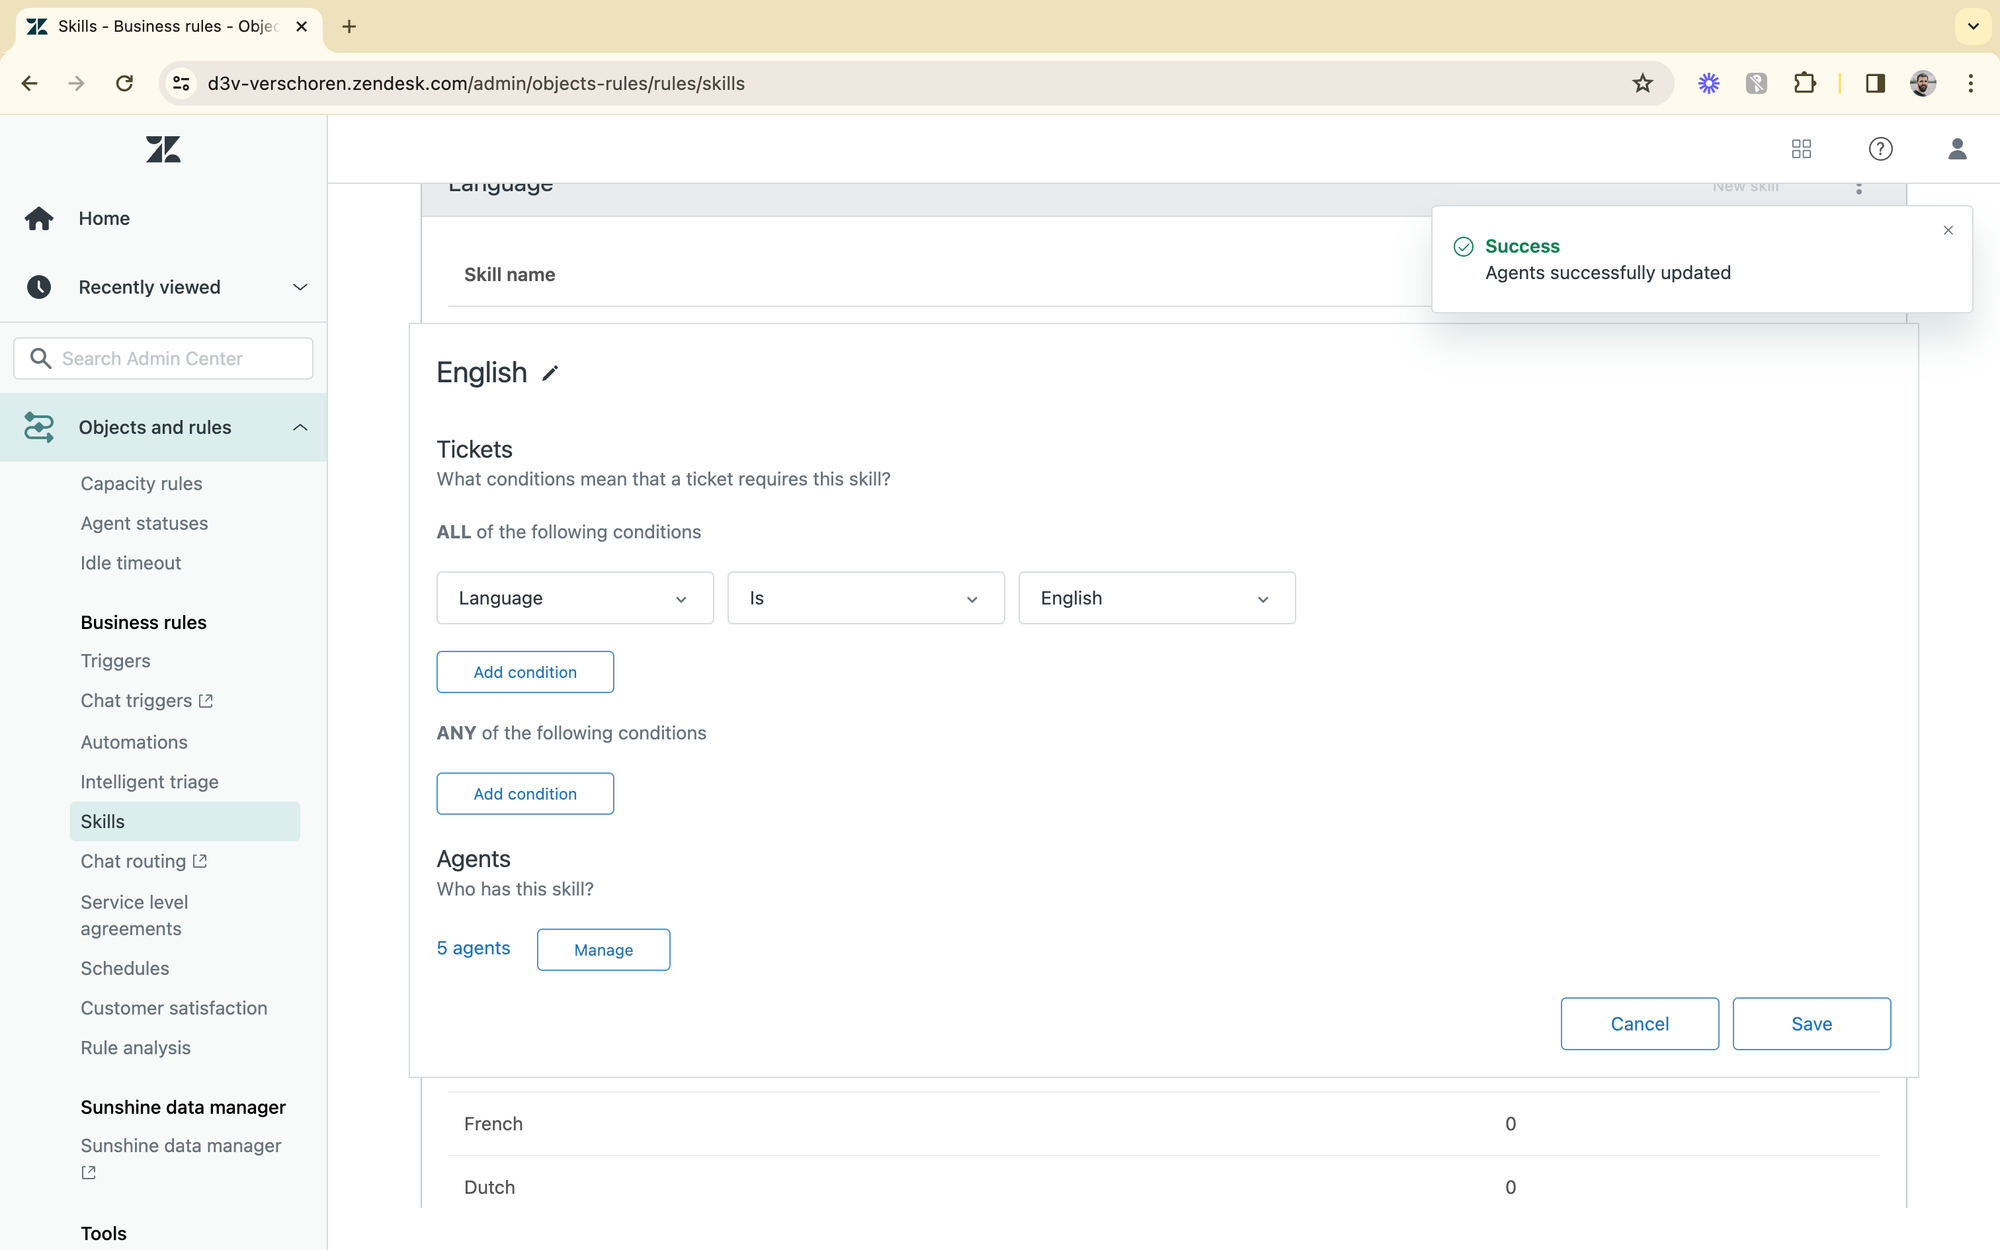
- For each skill, setup the conditions. These work similar to how you setup triggers or views: e.g. Language is Dutch. Or "Country is Belgium" or "Country is Netherlands"
- And finally assign the skills to one or more agents.
Similarly, one skill – English – can be assigned to multiple agents.
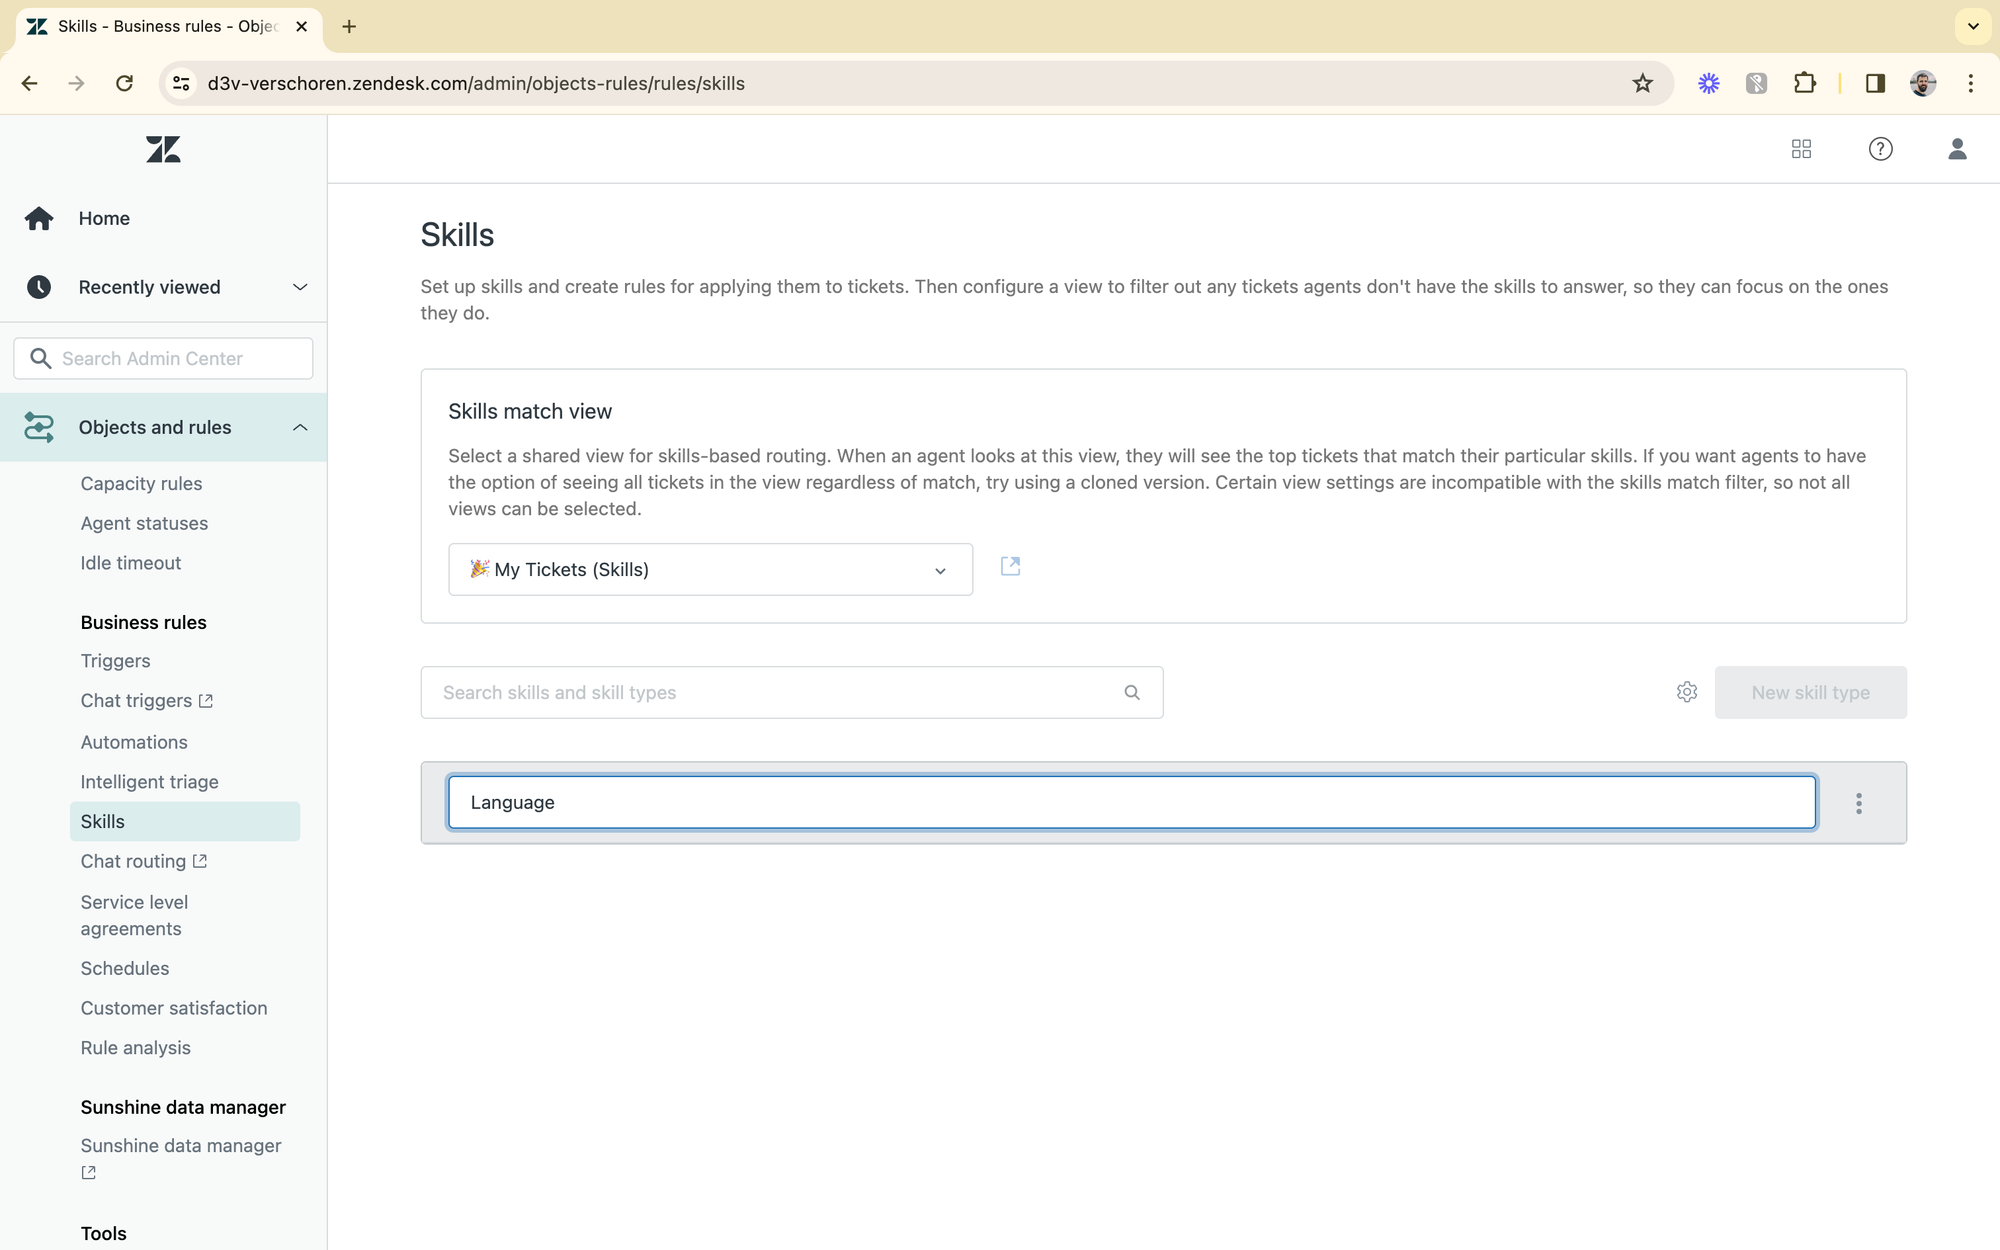
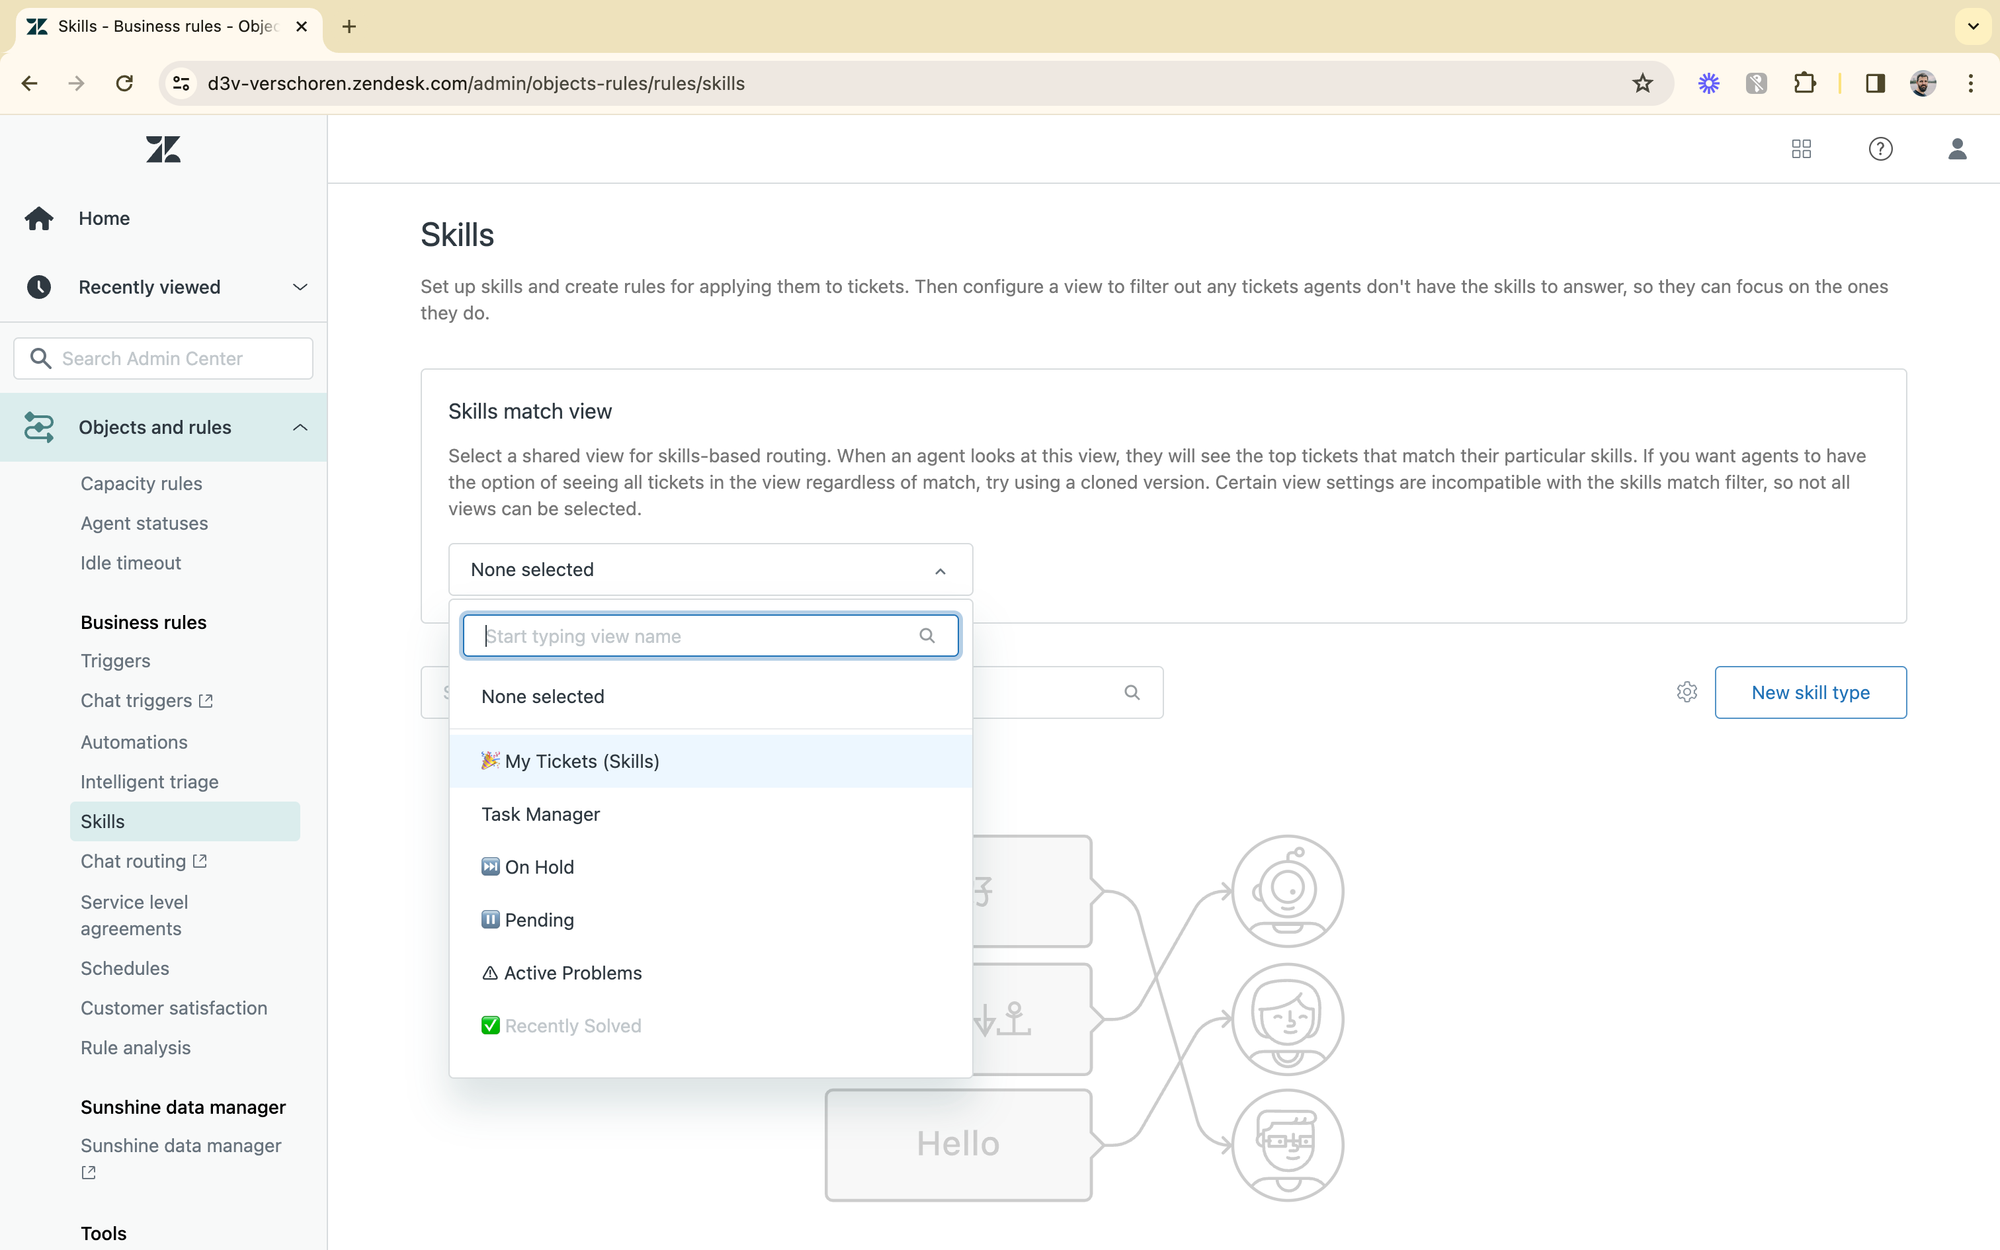
Skills match view
Once you've setup your skills, you need to select a View which will show the agent their Skill-matched tickets. Since tickets are routed and assigned to agents, this view is not really a requirement when using Omnichannel Routing, but it could give agents insight in how many active tickets pertaining to their skills there are across all agents. I recommend making a copy of your "My Tickets" view and using that one.
A word about triggers
You'll notice that the skills only contain a set of conditions and are assigned to agents. It's imperative that tickets contain the parameters you're using upon ticket creation. So if you're condition is e.g. "Category is refunds", you have to have a trigger that sets the custom field "Category" upon ticket creation.
Since skills are assigned when a ticket is created, as opposite to when a ticket is updated, only tickets with a category set will match your skill. So make sure that your conditions are usable for newly created tickets, and if not, use triggers to set those fields upon ticket creation.
Using the skills for routing
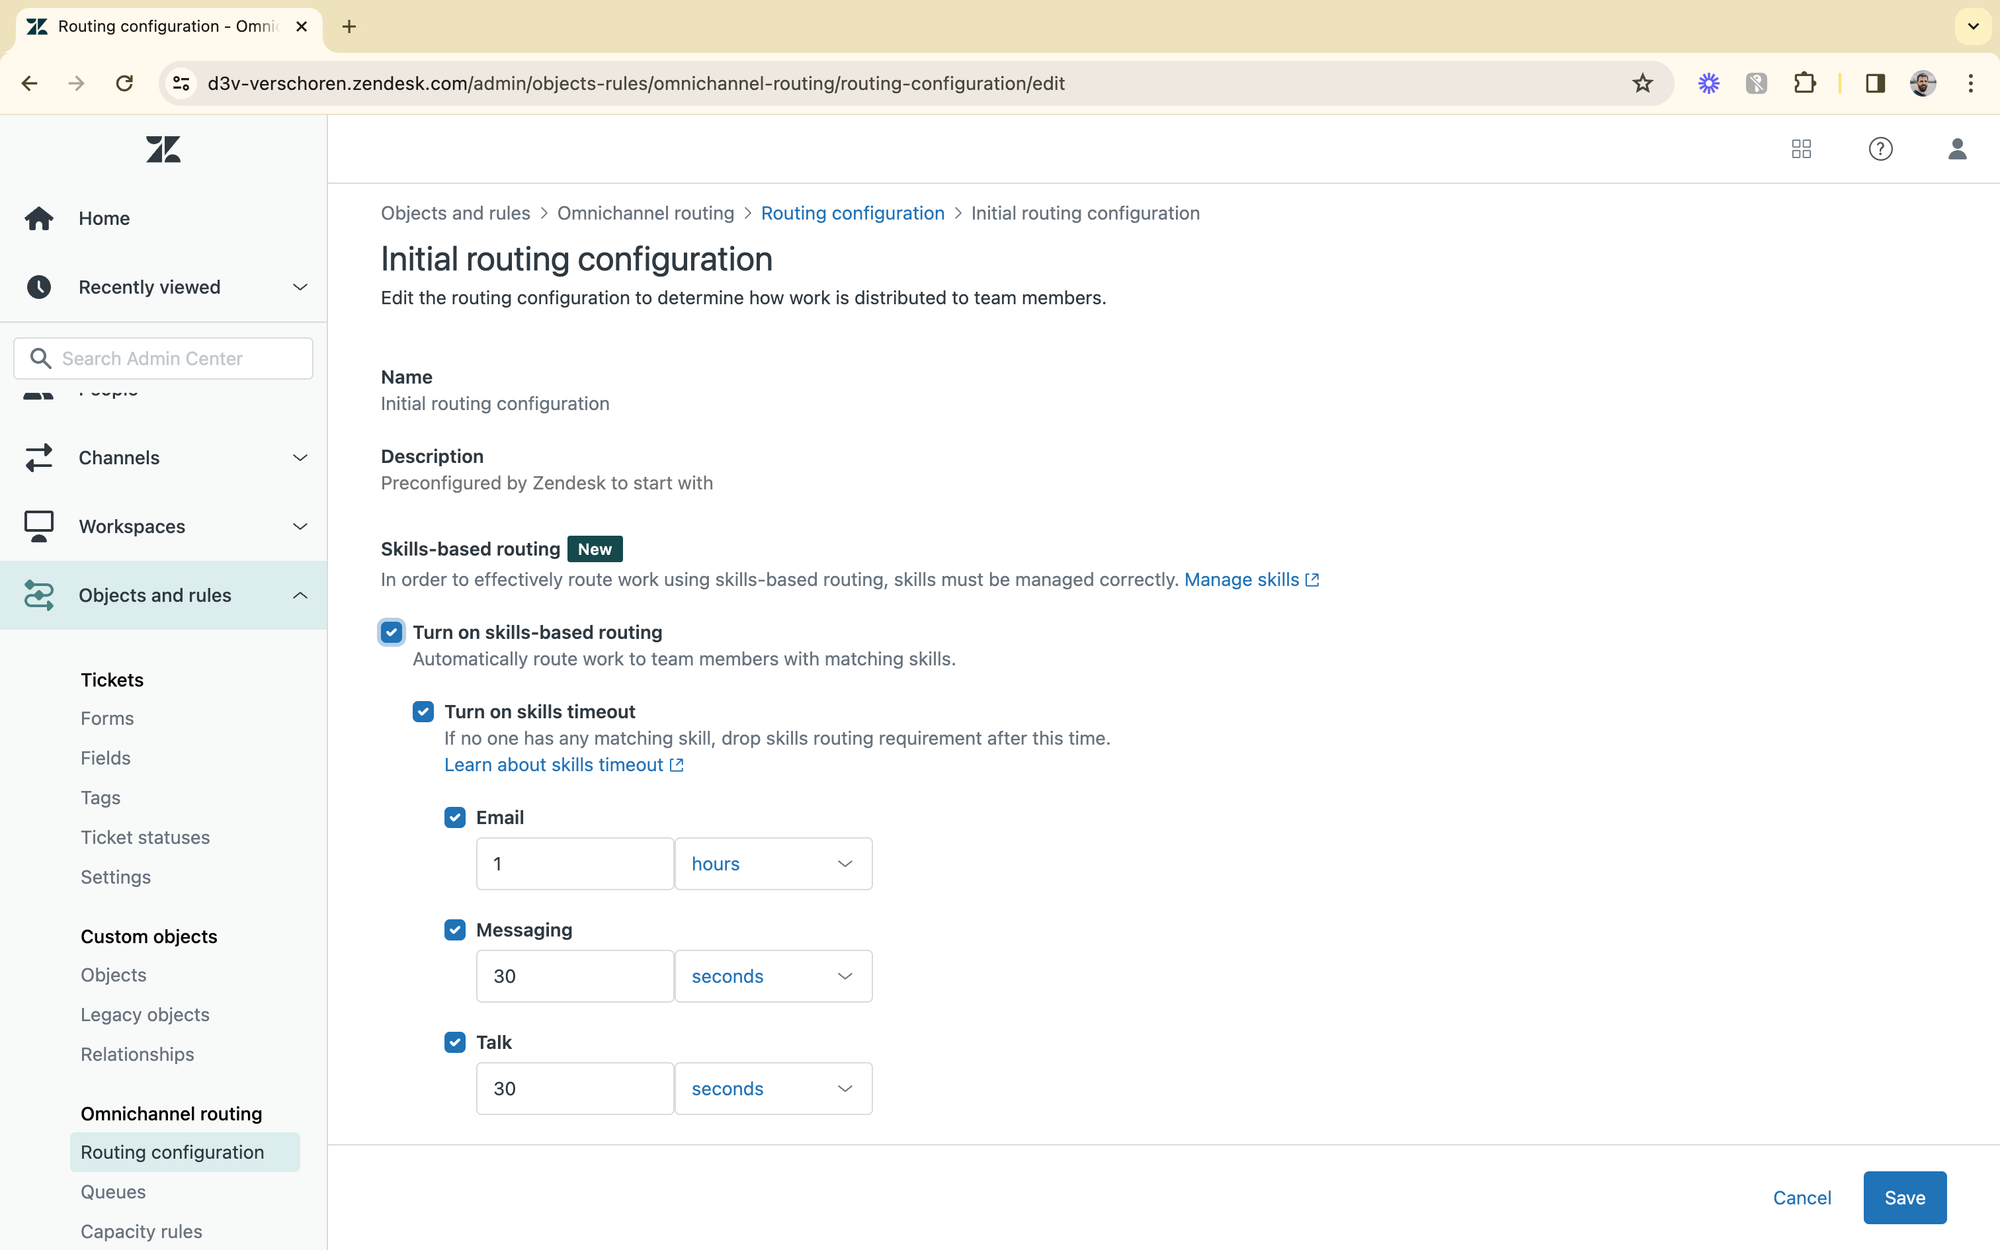
Now that Skills are enabled, we need to tell our Omnichannel Routing configuration to use them.
This is done by going to the Admin Center > Routing Configuration > Edit, and enabling skills-based routing. Once enabled the skills will be taken into account when assigning tickets to agents.
In order to prevent tickets being unassigned for a long time if no available agent with the skills is found, you can us the timeout settings to allow the routing to assign tickets to any available agent in the group, if no skill-matching agent is online.
Queues
So far we've only routed tickets with the context of a group and available agents.
Our initial triggers tagged tickets with auto_routing and assigned them to their respective groups: Support, Company, etc.
Within those groups we have agents with skills that get those tickets assigned if they have capacity and are available.
But what happens if all agents in our Support group are offline or are above capacity. In this case all tickets remain unassigned in the Support group until one of the agent becomes available.
But imagine there are a lot of Finance tickets in the queue of open tickets. Even though are support team is supposed to triage these first, it might be useful to automatically shift those tickets to an available finance agent who happens to have capacity. This clears the queue of unassigned tickets, and allows the finance team to work at full capacity.
Similar, we might have a Support team in EMEA, and once in USA. Even though tickets originating from Belgium are supposed to be handled by our EMEA team, it might be useful, especially at the end of a working day, if the unassigned tickets could overflow to our USA team.
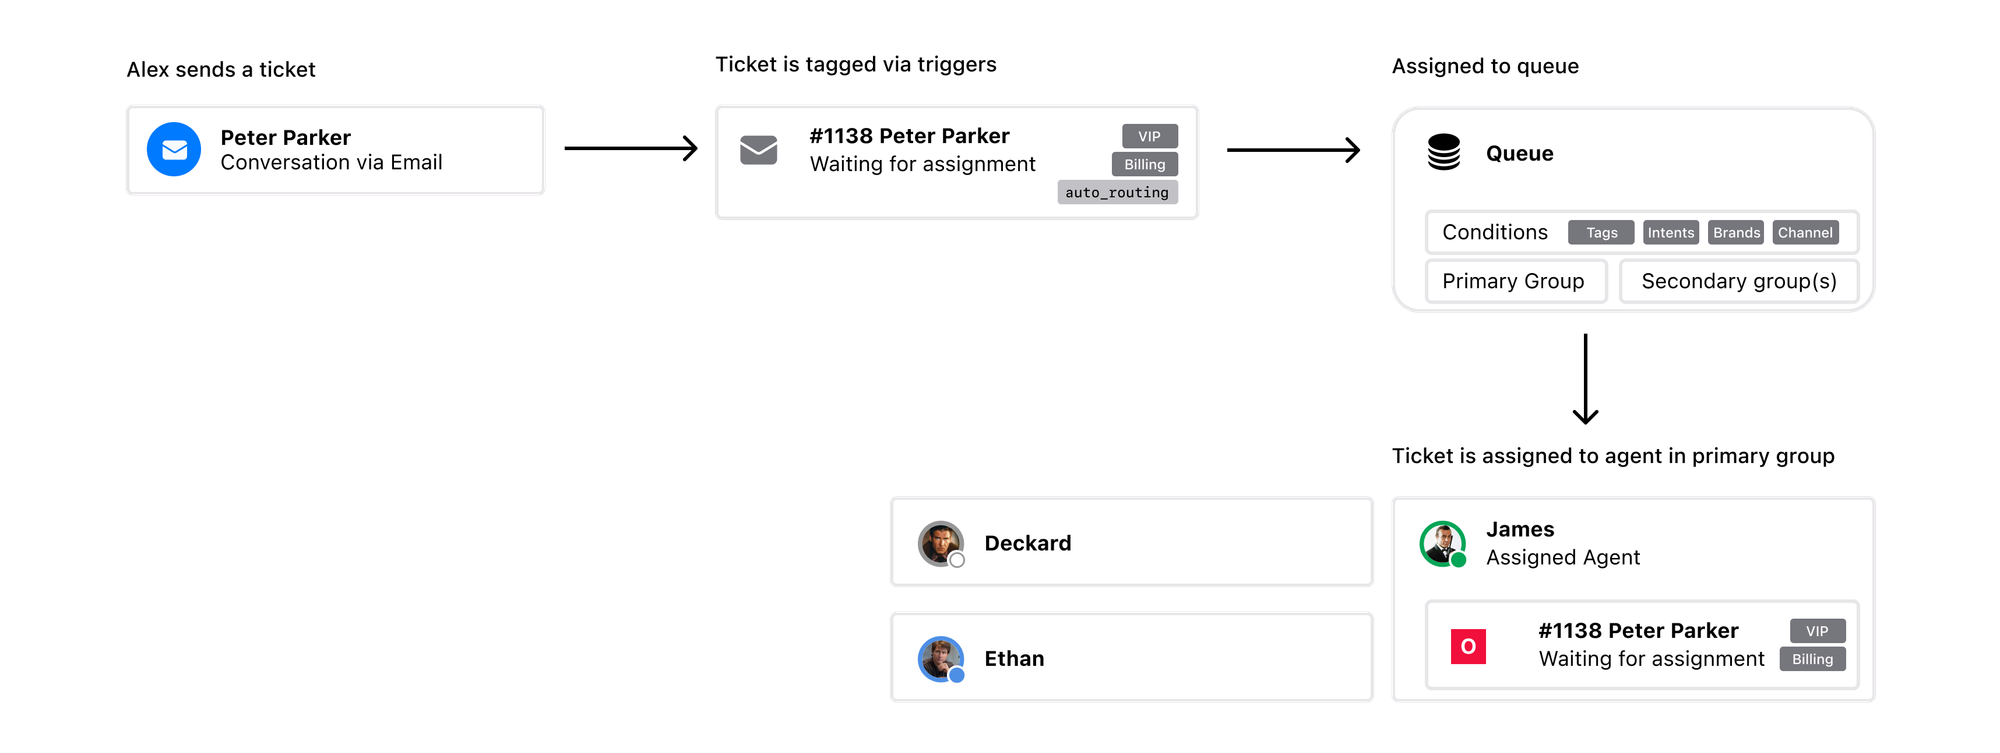
This is where Queues come in. This newly announced feature allows you to "intercept" the default routing behaviour and put matching tickets into a queue. The queue will first be handled by agent in the primary group, and of they are over capacity or offline, will optionally be assigned to a fallback group, or groups.
How do queues work?
The default omnichannel routing is actually managed by a hidden default queue. This queue looks at the group a ticket is assigned to, and its respective agents, to route a ticket to the best available agent.
If you add new custom queues, you can remove tickets from this default assignment behaviour, and assign them to different groups, or even allow for fallback groups.
To make it a bit more clear: if we go back to our Finance example above we can by default assign all incoming tickets to the Support group, just like we explained in the first part of this article. But if we create a "Finance queue", we can tell our Omnichannel Routing to always route tickets whose intent matches "Refunds" to the primary group Support. If that group is over capacity or offline, we can allow tickets to overflow to the Finance group and get tickets assigned to available agents in that group.
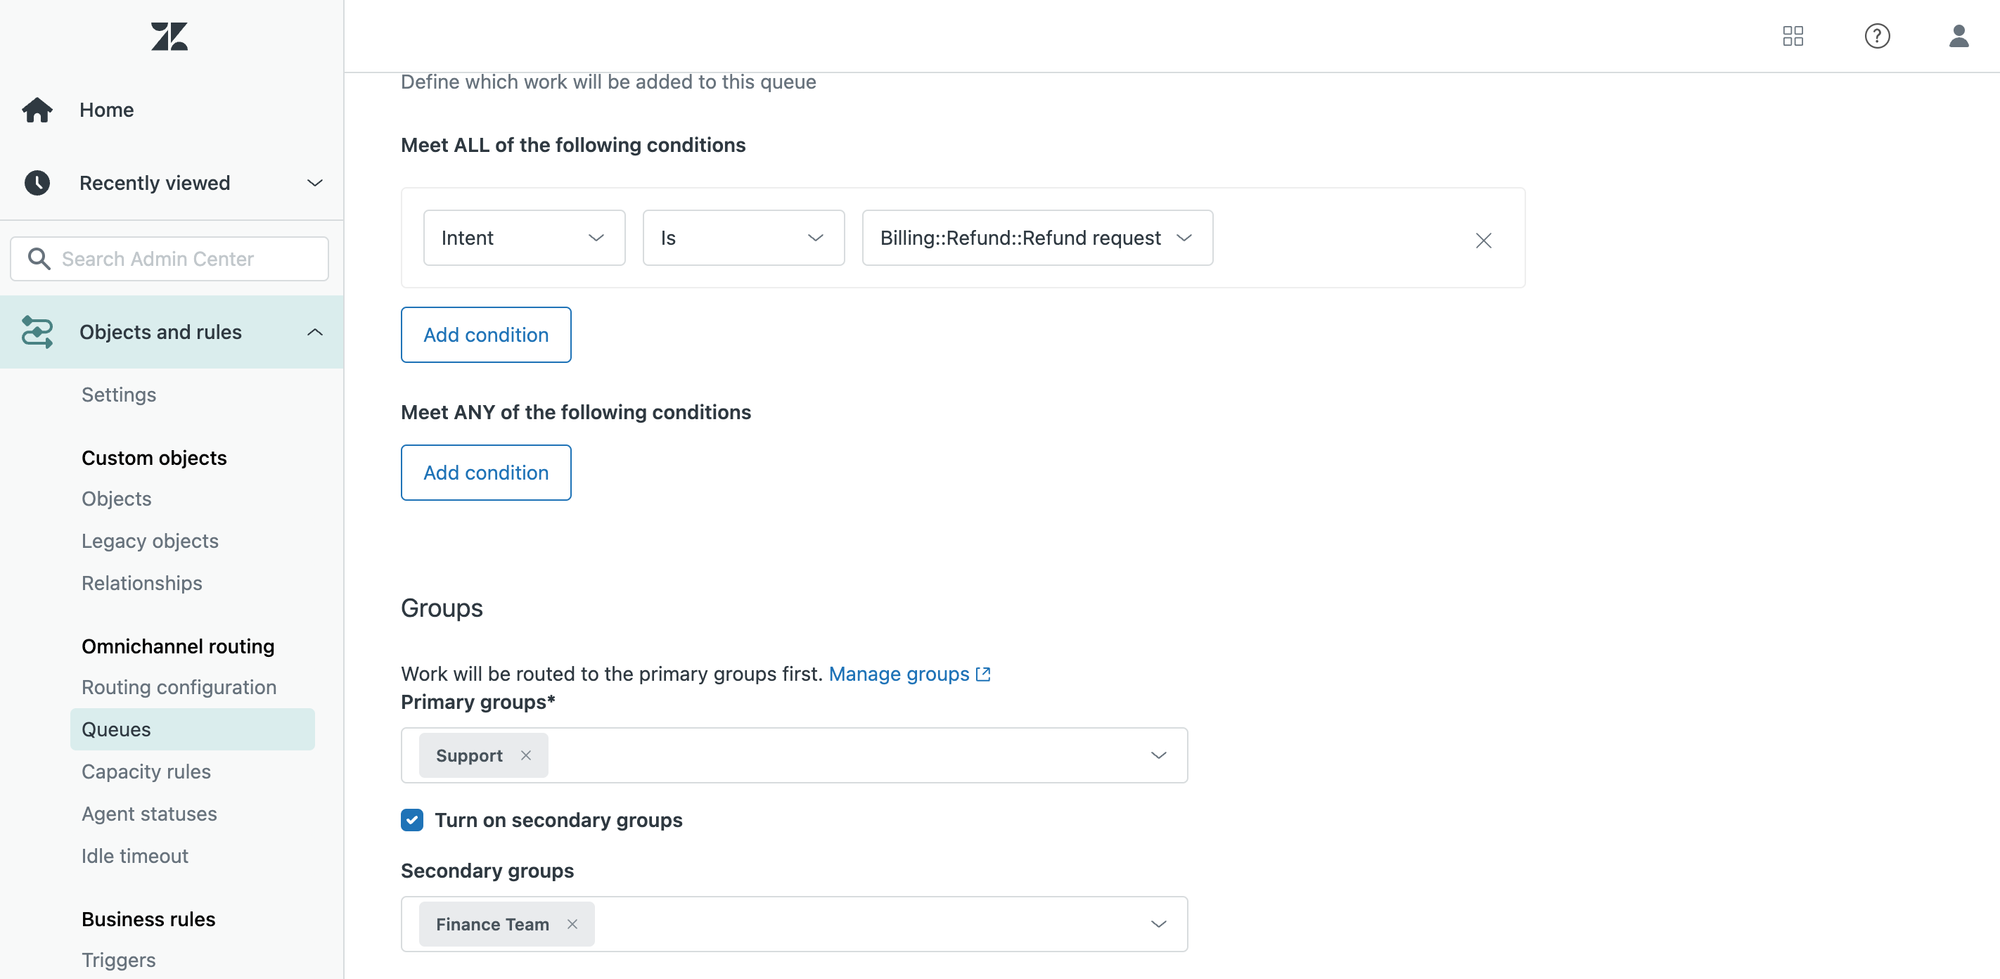
Similarly, we can assign all tickets originating from Europe to our Support EMEA team, and set Support USA as the secondary group. We could even set Support USA and Support Asia as our secondary groups.
Conclusion
We started this article with explaining how traditional assignment in Zendesk works. A ticket is assigned a group, and an agent in the group picks up the ticket.
With omnichannel routing we assign tickets to agents based on capacity and availability. And skill-based routing takes the skills of agents into account to route tickets to the best fitting agent for the job in that group.
Ticket queues take this approach one step further by moving ticket assignment from triggers and group towards queues that route tickets to one or more groups based on a set of criteria. Once routed, tickets then get assigned to an agent in that group.
They complicate the Zendesk setup since we can now use both triggers and queues to assign tickets to groups and, by extension, agents.
It's important to know that queues still require the existence of the auto_routing tag to work. But I am tempted to forgot assignment triggers completely and only rely on queues by leveraging the following setup:
- Have a trigger that adds the tag
auto_routingto all tickets - Have multiple queues for specific scenarios that assigns to the right group and fallback groups
- Have a final queue with low priority (100) that checks for tickets without a group, and assigns them to my default group without a fallback option enabled.
This setup means that all routing management is now in one place, and triggers are only used to tag or update ticket content.
So, what option will you pick for your ticket assignment?