Preview of the new Generative AI for the Zendesk Help Center
This article previews the new Generative AI for Help Center content that's been made available in EAP by Zendesk.
Preview of the new Generative AI for the Zendesk Help Center

On this page
Zendesk's AI Drop Event last month included tons of new Zendesk AI features. Their new Generative AI Bot got all the attention and headlines, but in parallel they also announced their new Generative AI for Help Center content.
This new feature allows Content Managers to write short summaries of articles, and use Generative AI to expand the summary or bullet points into long-form support articles. It's powered by OpenAI, and positioned as a way to create content faster and more efficient by having your writers focus on the essence of an article, and have AI worry about turning it into an actual article.

Although the presentation was packed with announcements, almost all of them were already known or released in the last few months: Layout Builder, Agent Home, Omnichannel Routing, Generative AI Bot, Custom Objects and most of the stuff covered at the AI Drop Event.
The few items that were actually new, like the 360 Employee View app, will be covered in the Zendesk Roundup later this month.
Let's put it to the test
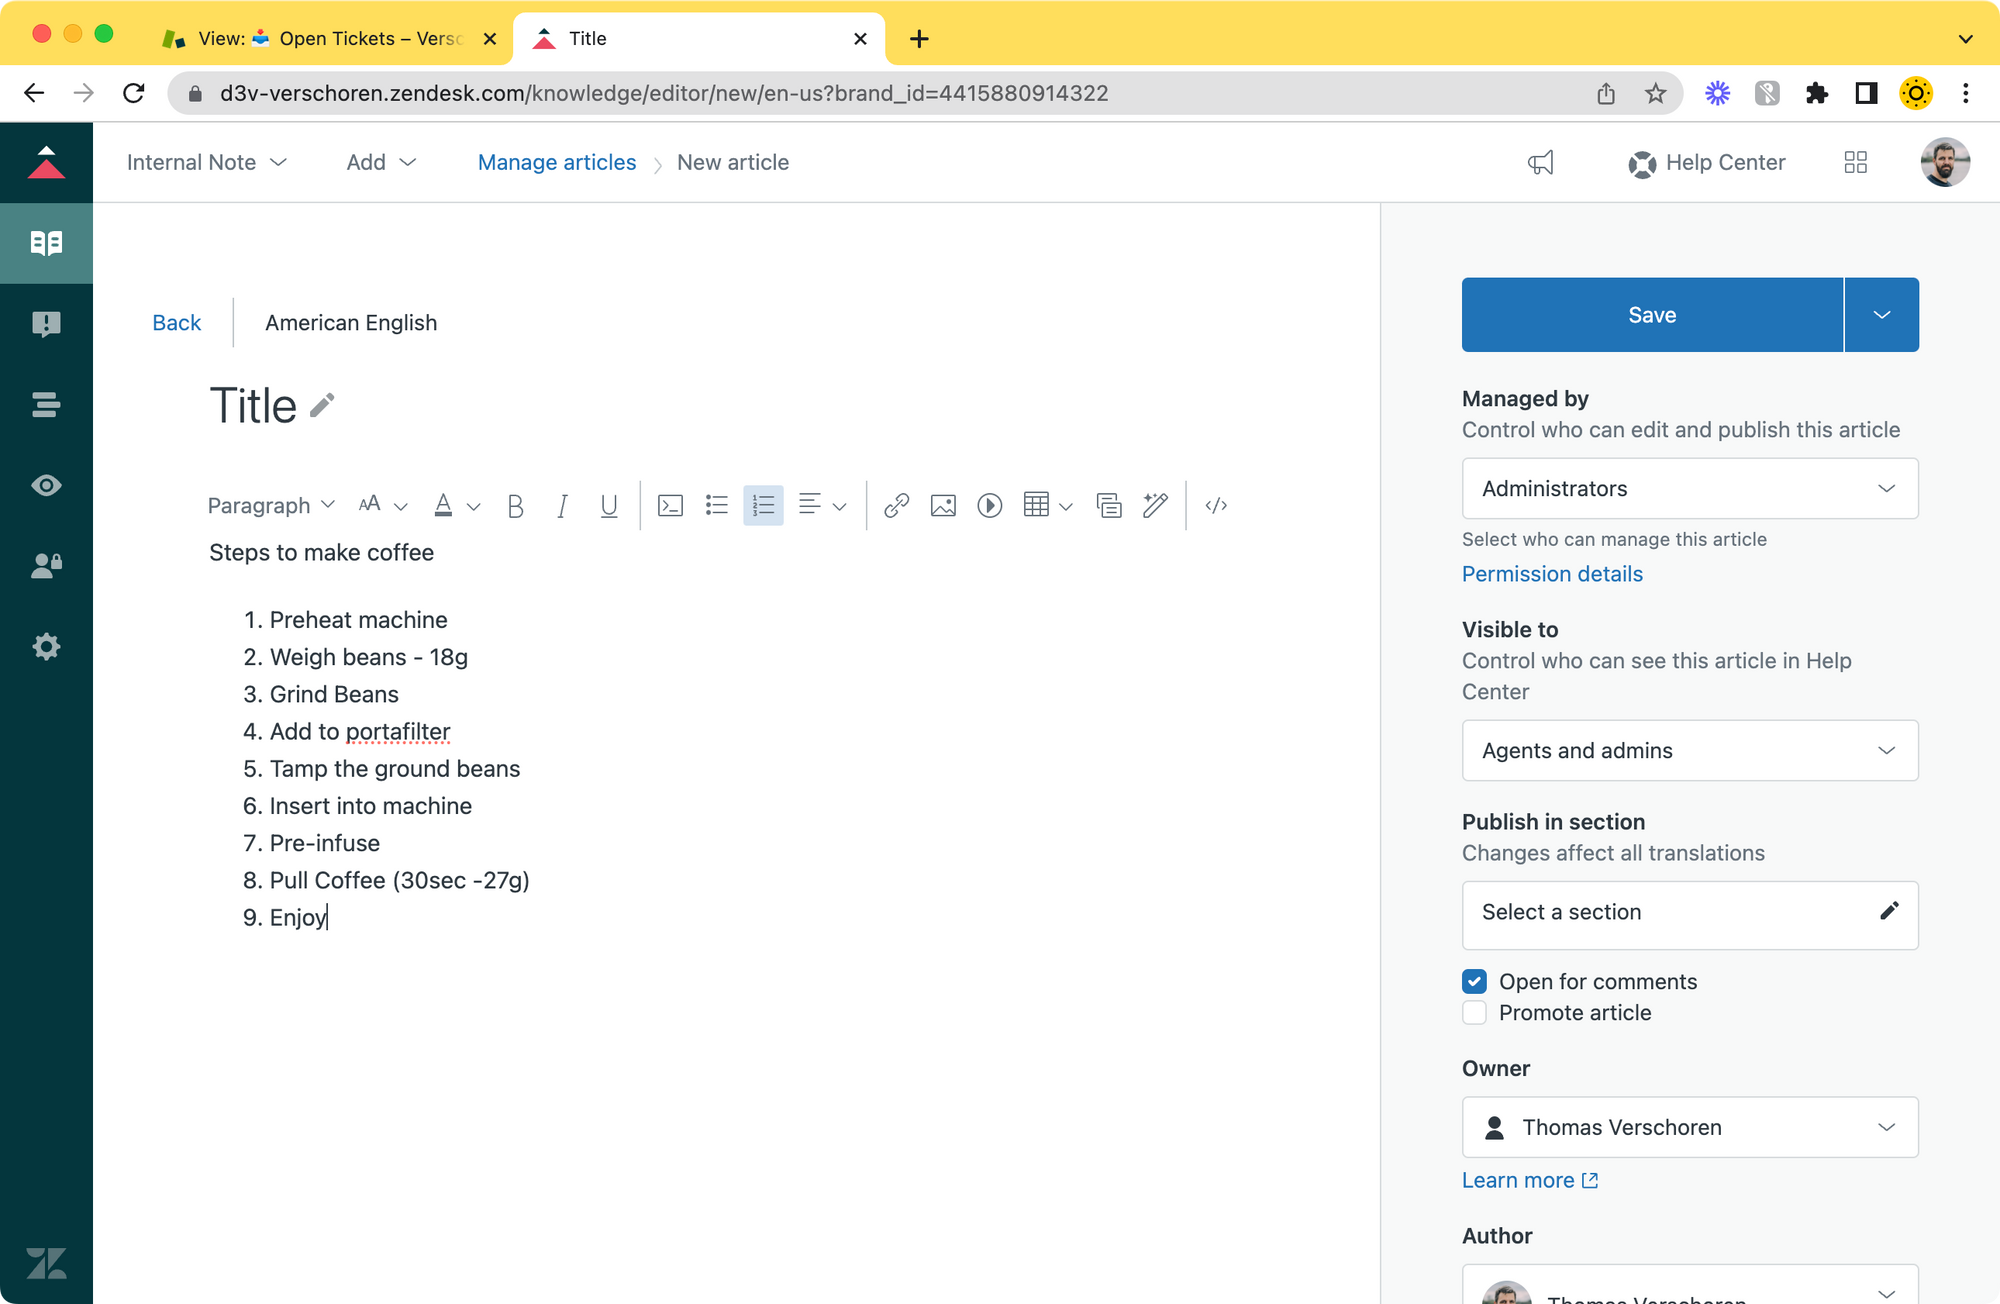
I gave my test article the following input:
Input
Steps to make coffee
1. Preheat machine
2. Weigh beans - 18g
3. Grind Beans
4. Add to portafilter
5. Tamp the ground beans
6. Insert into machine
7. Pre-infuse
8. Pull Coffee (30sec -27g)
9. Enjoy
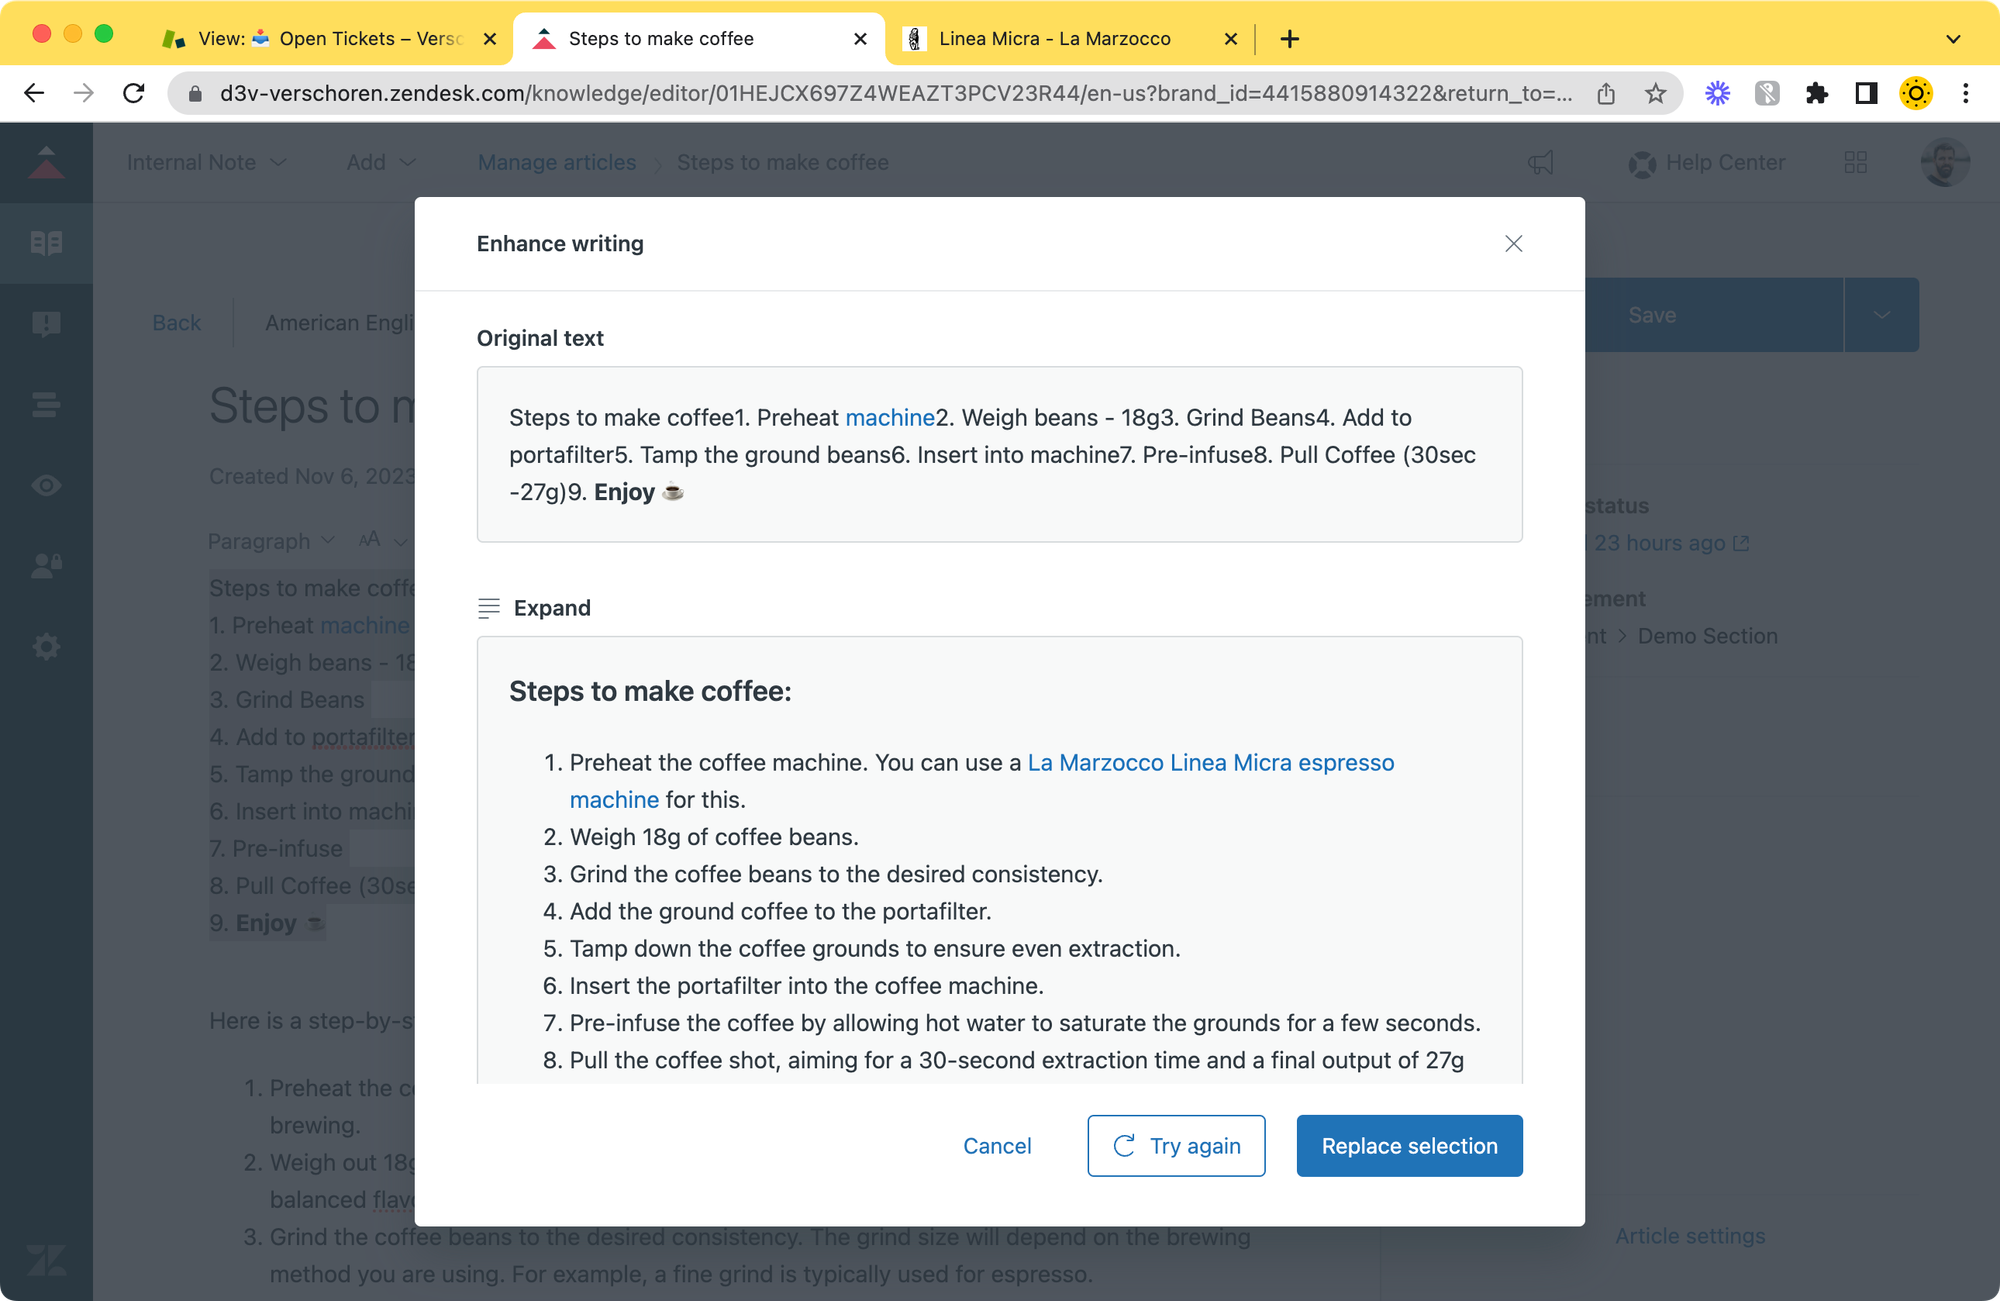
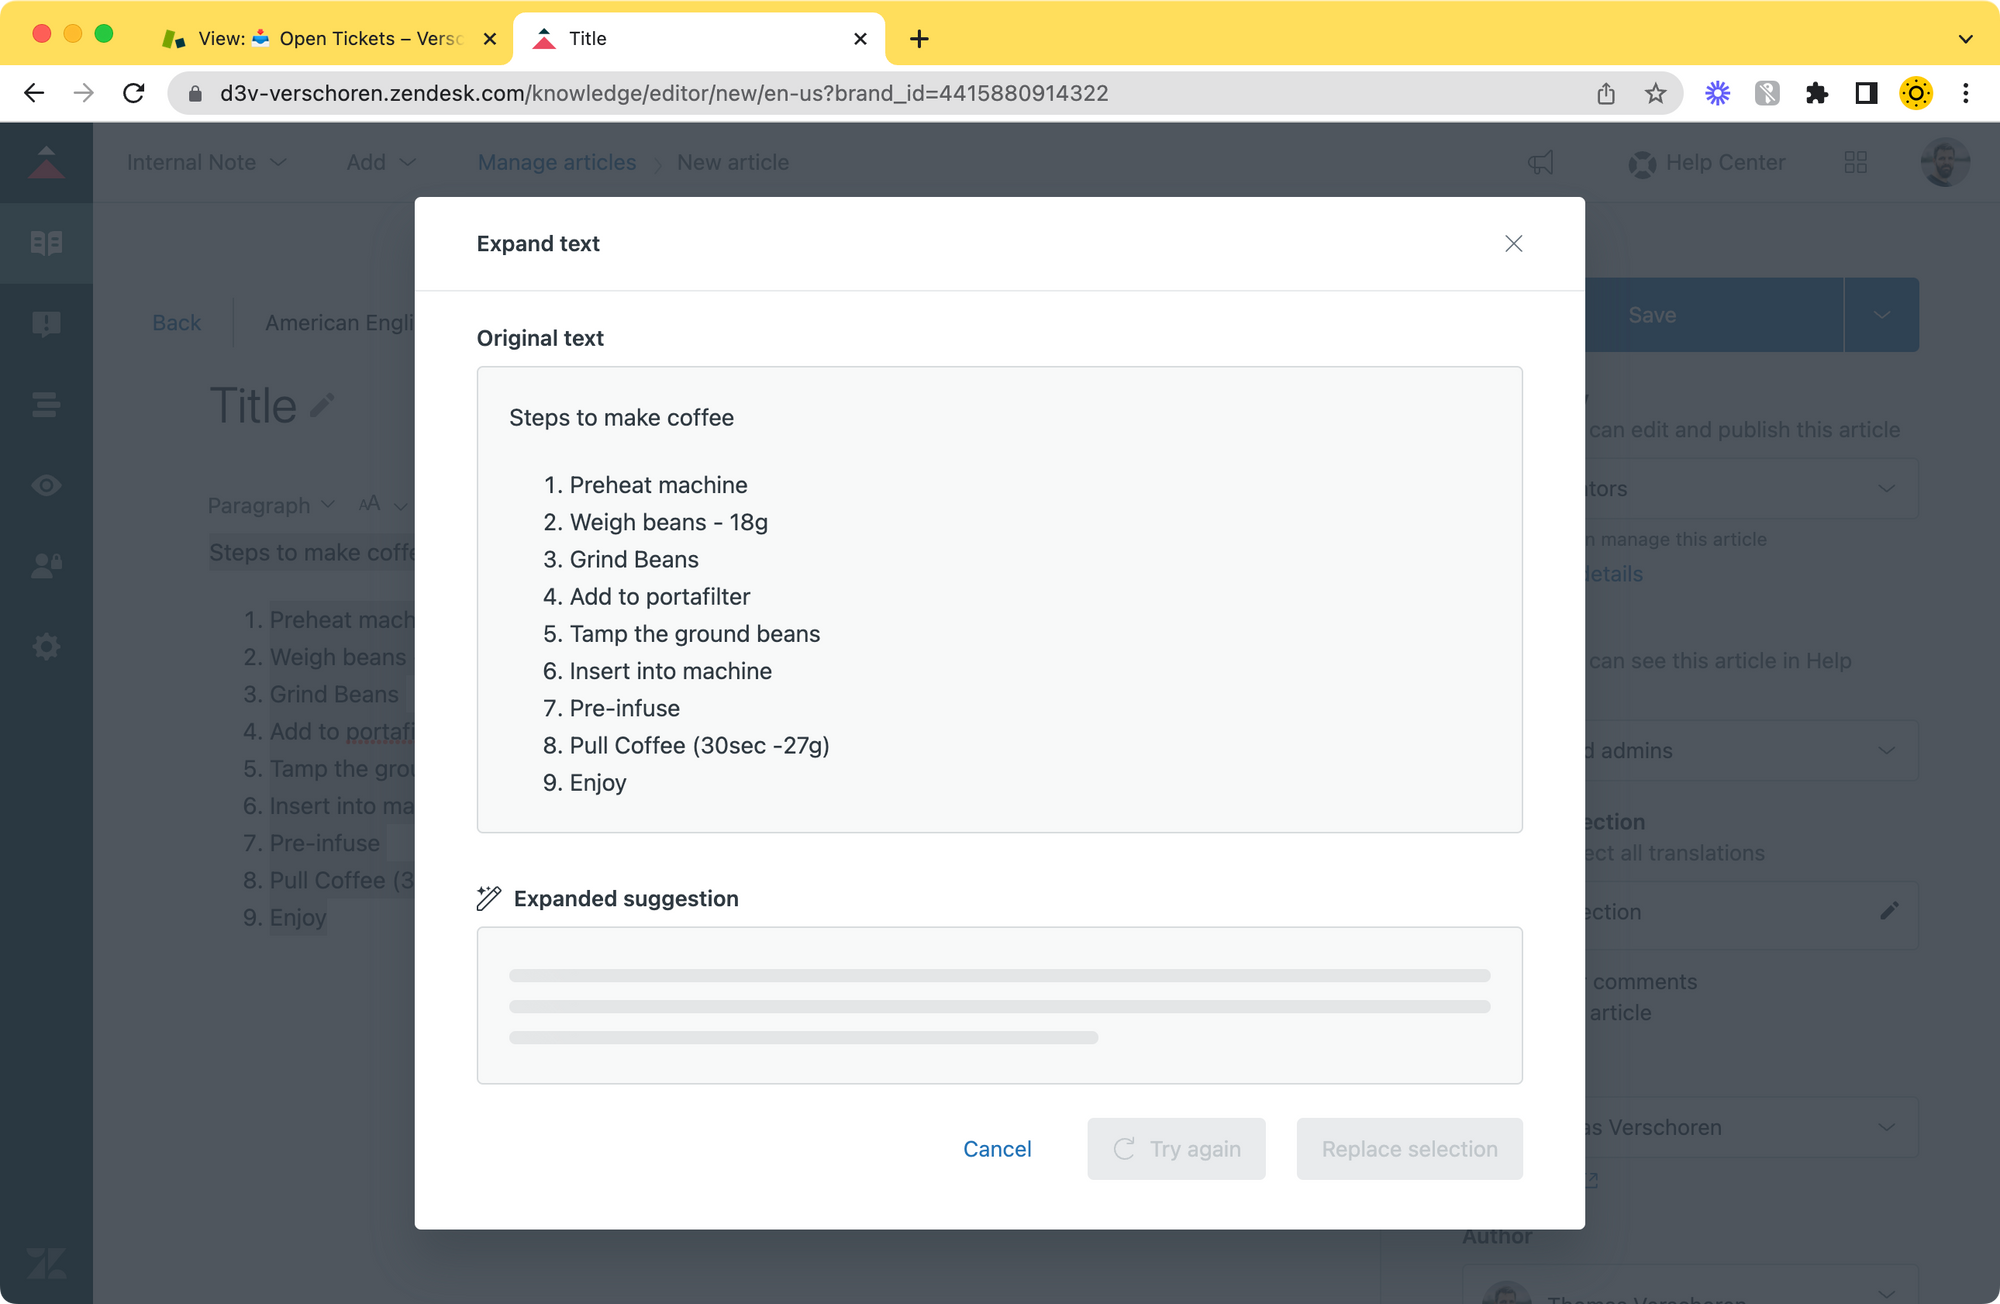
And clicking the magic wand tool in the article editor turned it into this longer article:
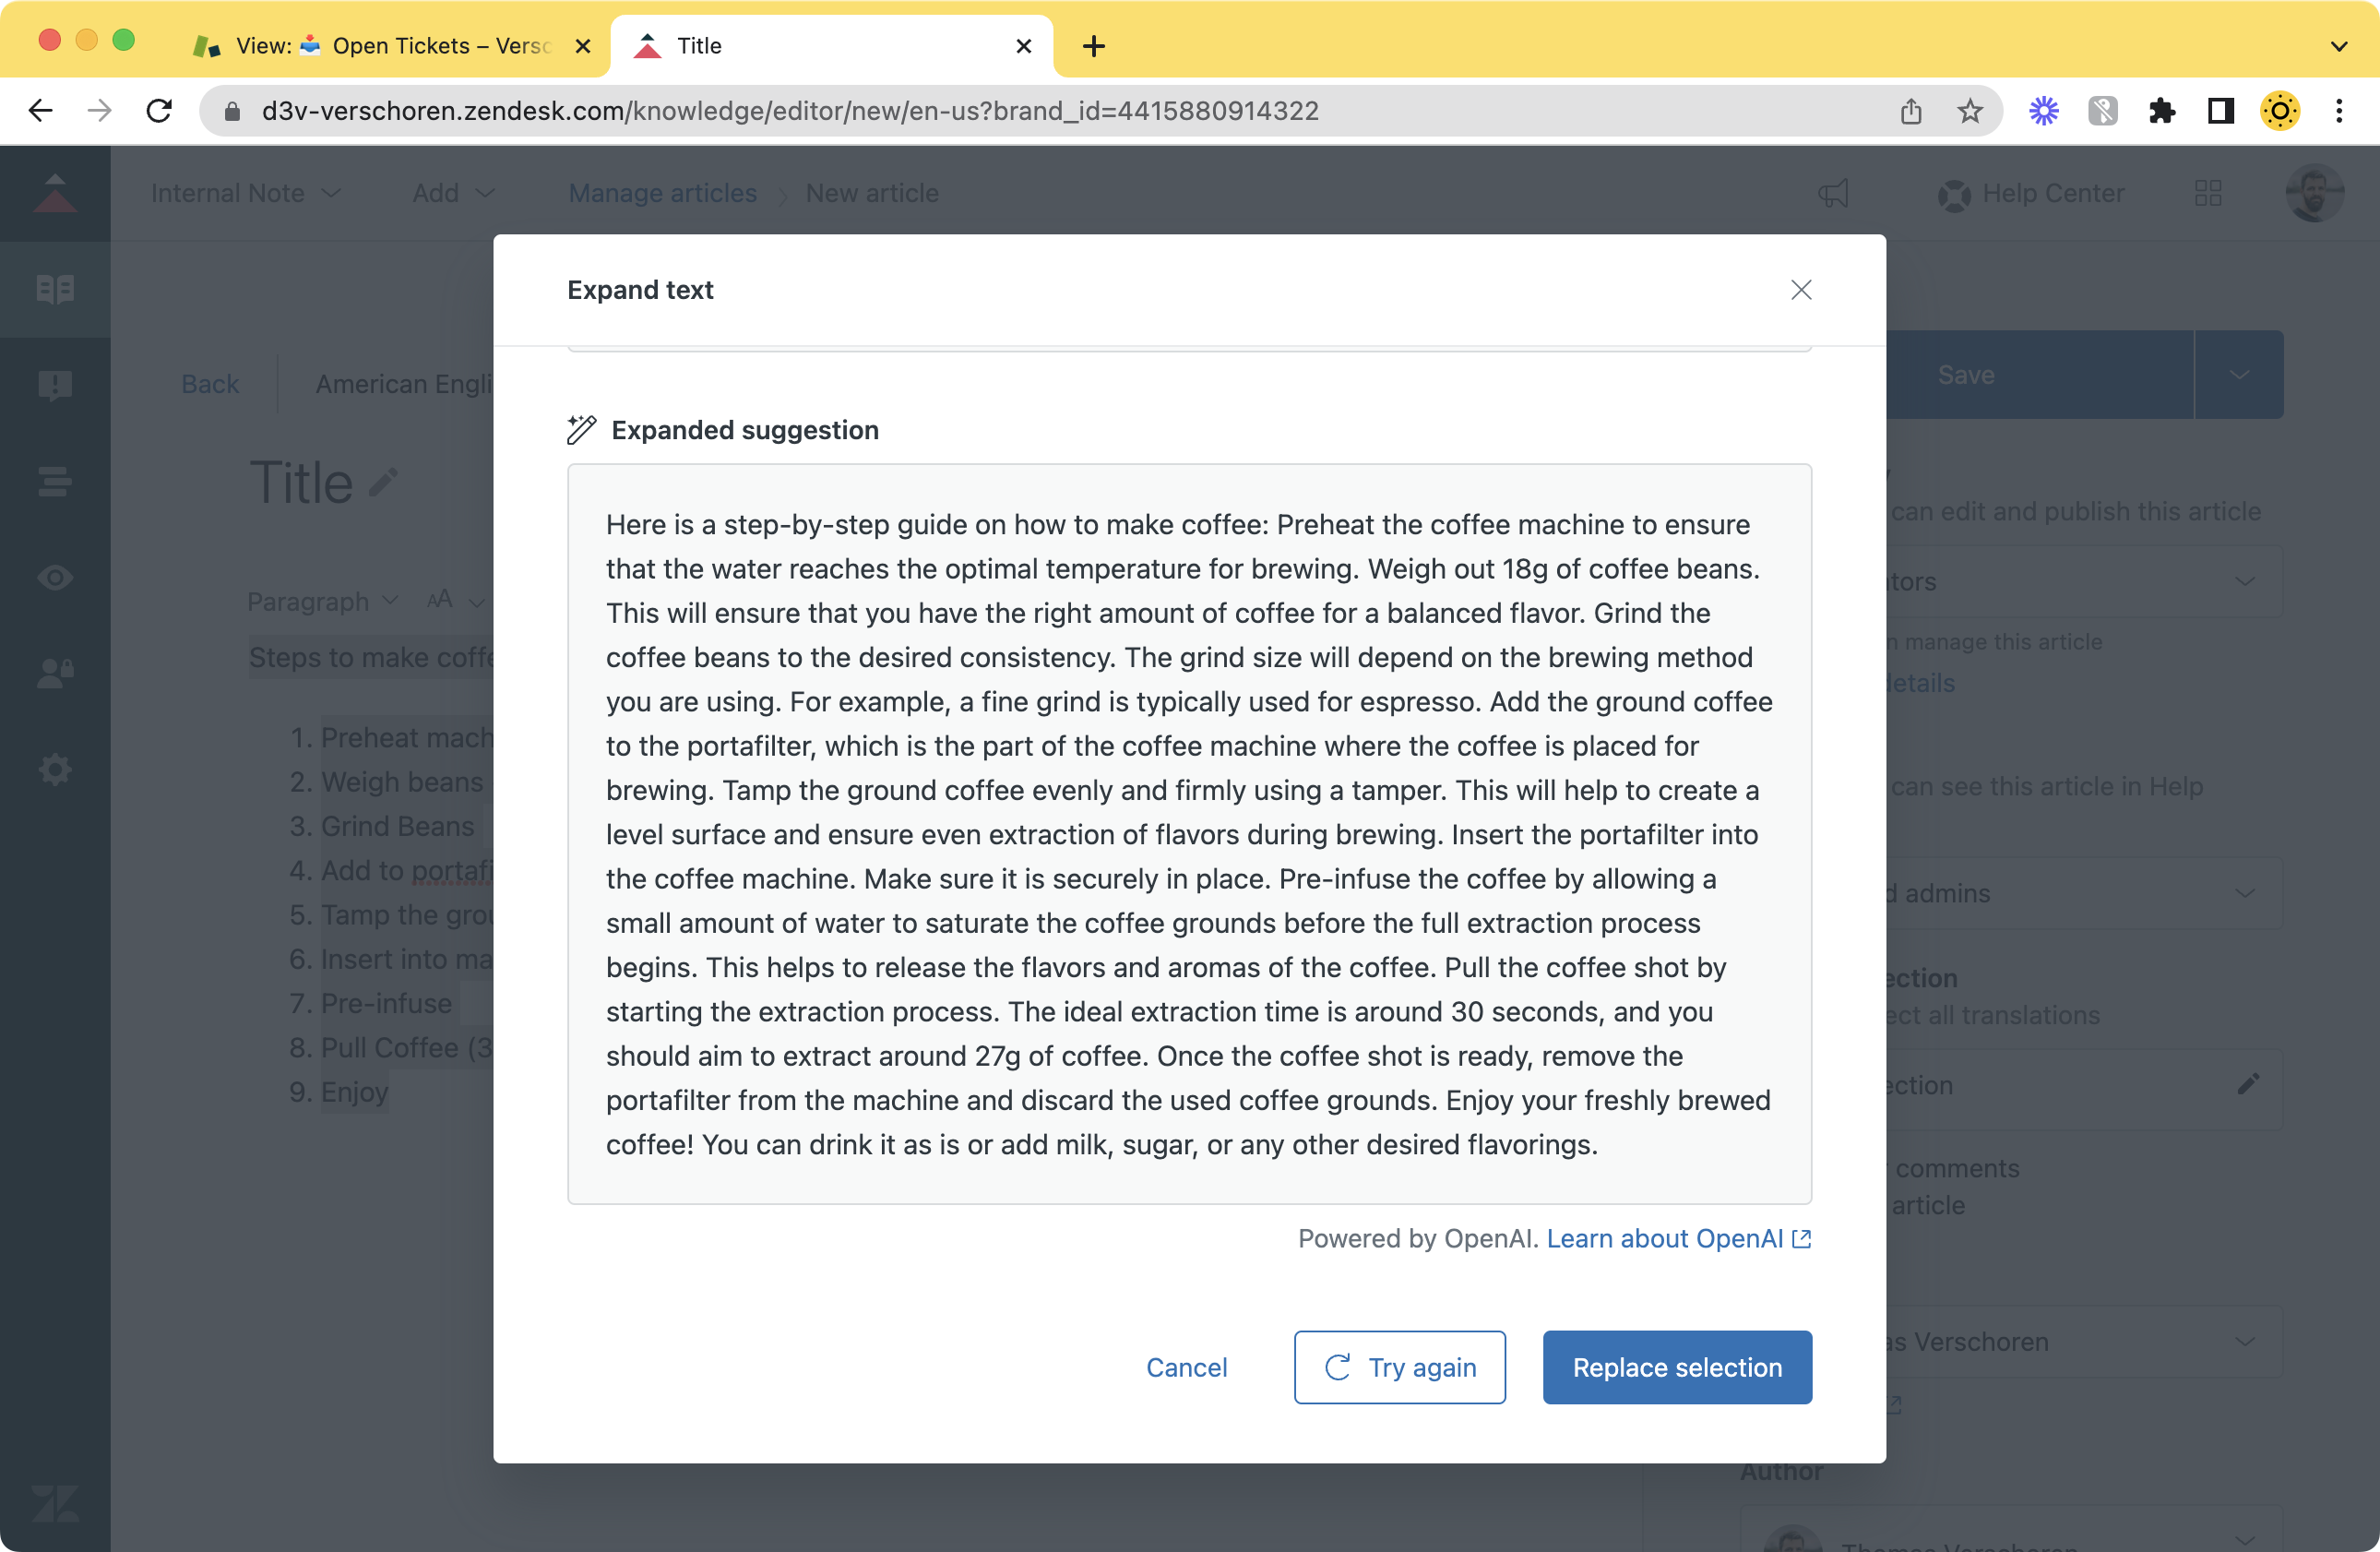
Expanded Result
Here is a step-by-step guide on how to make coffee: Preheat the coffee machine to ensure that the water reaches the optimal temperature for brewing. Weigh out 18g of coffee beans. This will ensure that you have the right amount of coffee for a balanced flavor. Grind the coffee beans to the desired consistency. The grind size will depend on the brewing method you are using. For example, a fine grind is typically used for espresso. Add the ground coffee to the portafilter, which is the part of the coffee machine where the coffee is placed for brewing. Tamp the ground coffee evenly and firmly using a tamper. This will help to create a level surface and ensure even extraction of flavors during brewing. Insert the portafilter into the coffee machine. Make sure it is securely in place. Pre-infuse the coffee by allowing a small amount of water to saturate the coffee grounds before the full extraction process begins. This helps to release the flavors and aromas of the coffee. Pull the coffee shot by starting the extraction process. The ideal extraction time is around 30 seconds, and you should aim to extract around 27g of coffee. Once the coffee shot is ready, remove the portafilter from the machine and discard the used coffee grounds. Enjoy your freshly brewed coffee! You can drink it as is or add milk, sugar, or any other desired flavorings.
What's evident is that this article is (A) longer and (B) contains a lot more nuance than my, admittedly, very short series of steps. It even included information on the effect of grind size, and explains why a proper tamping of the coffee puck is important. It offers extra nuance to my notes, things that make the article more informative, and trustworthy, but that's all detail that would have taken me time to look up and write.
The generated article also did not deviate from my summary. It contains my steps, and even took over my mistake, namely that a 18g doze of coffee should measure 36-40g coffee when going for a 1:2 or 1:3 ratio. So even though we count on AI to generate an expanded version of the article, I still stayed in control of the actual (wrong) content.
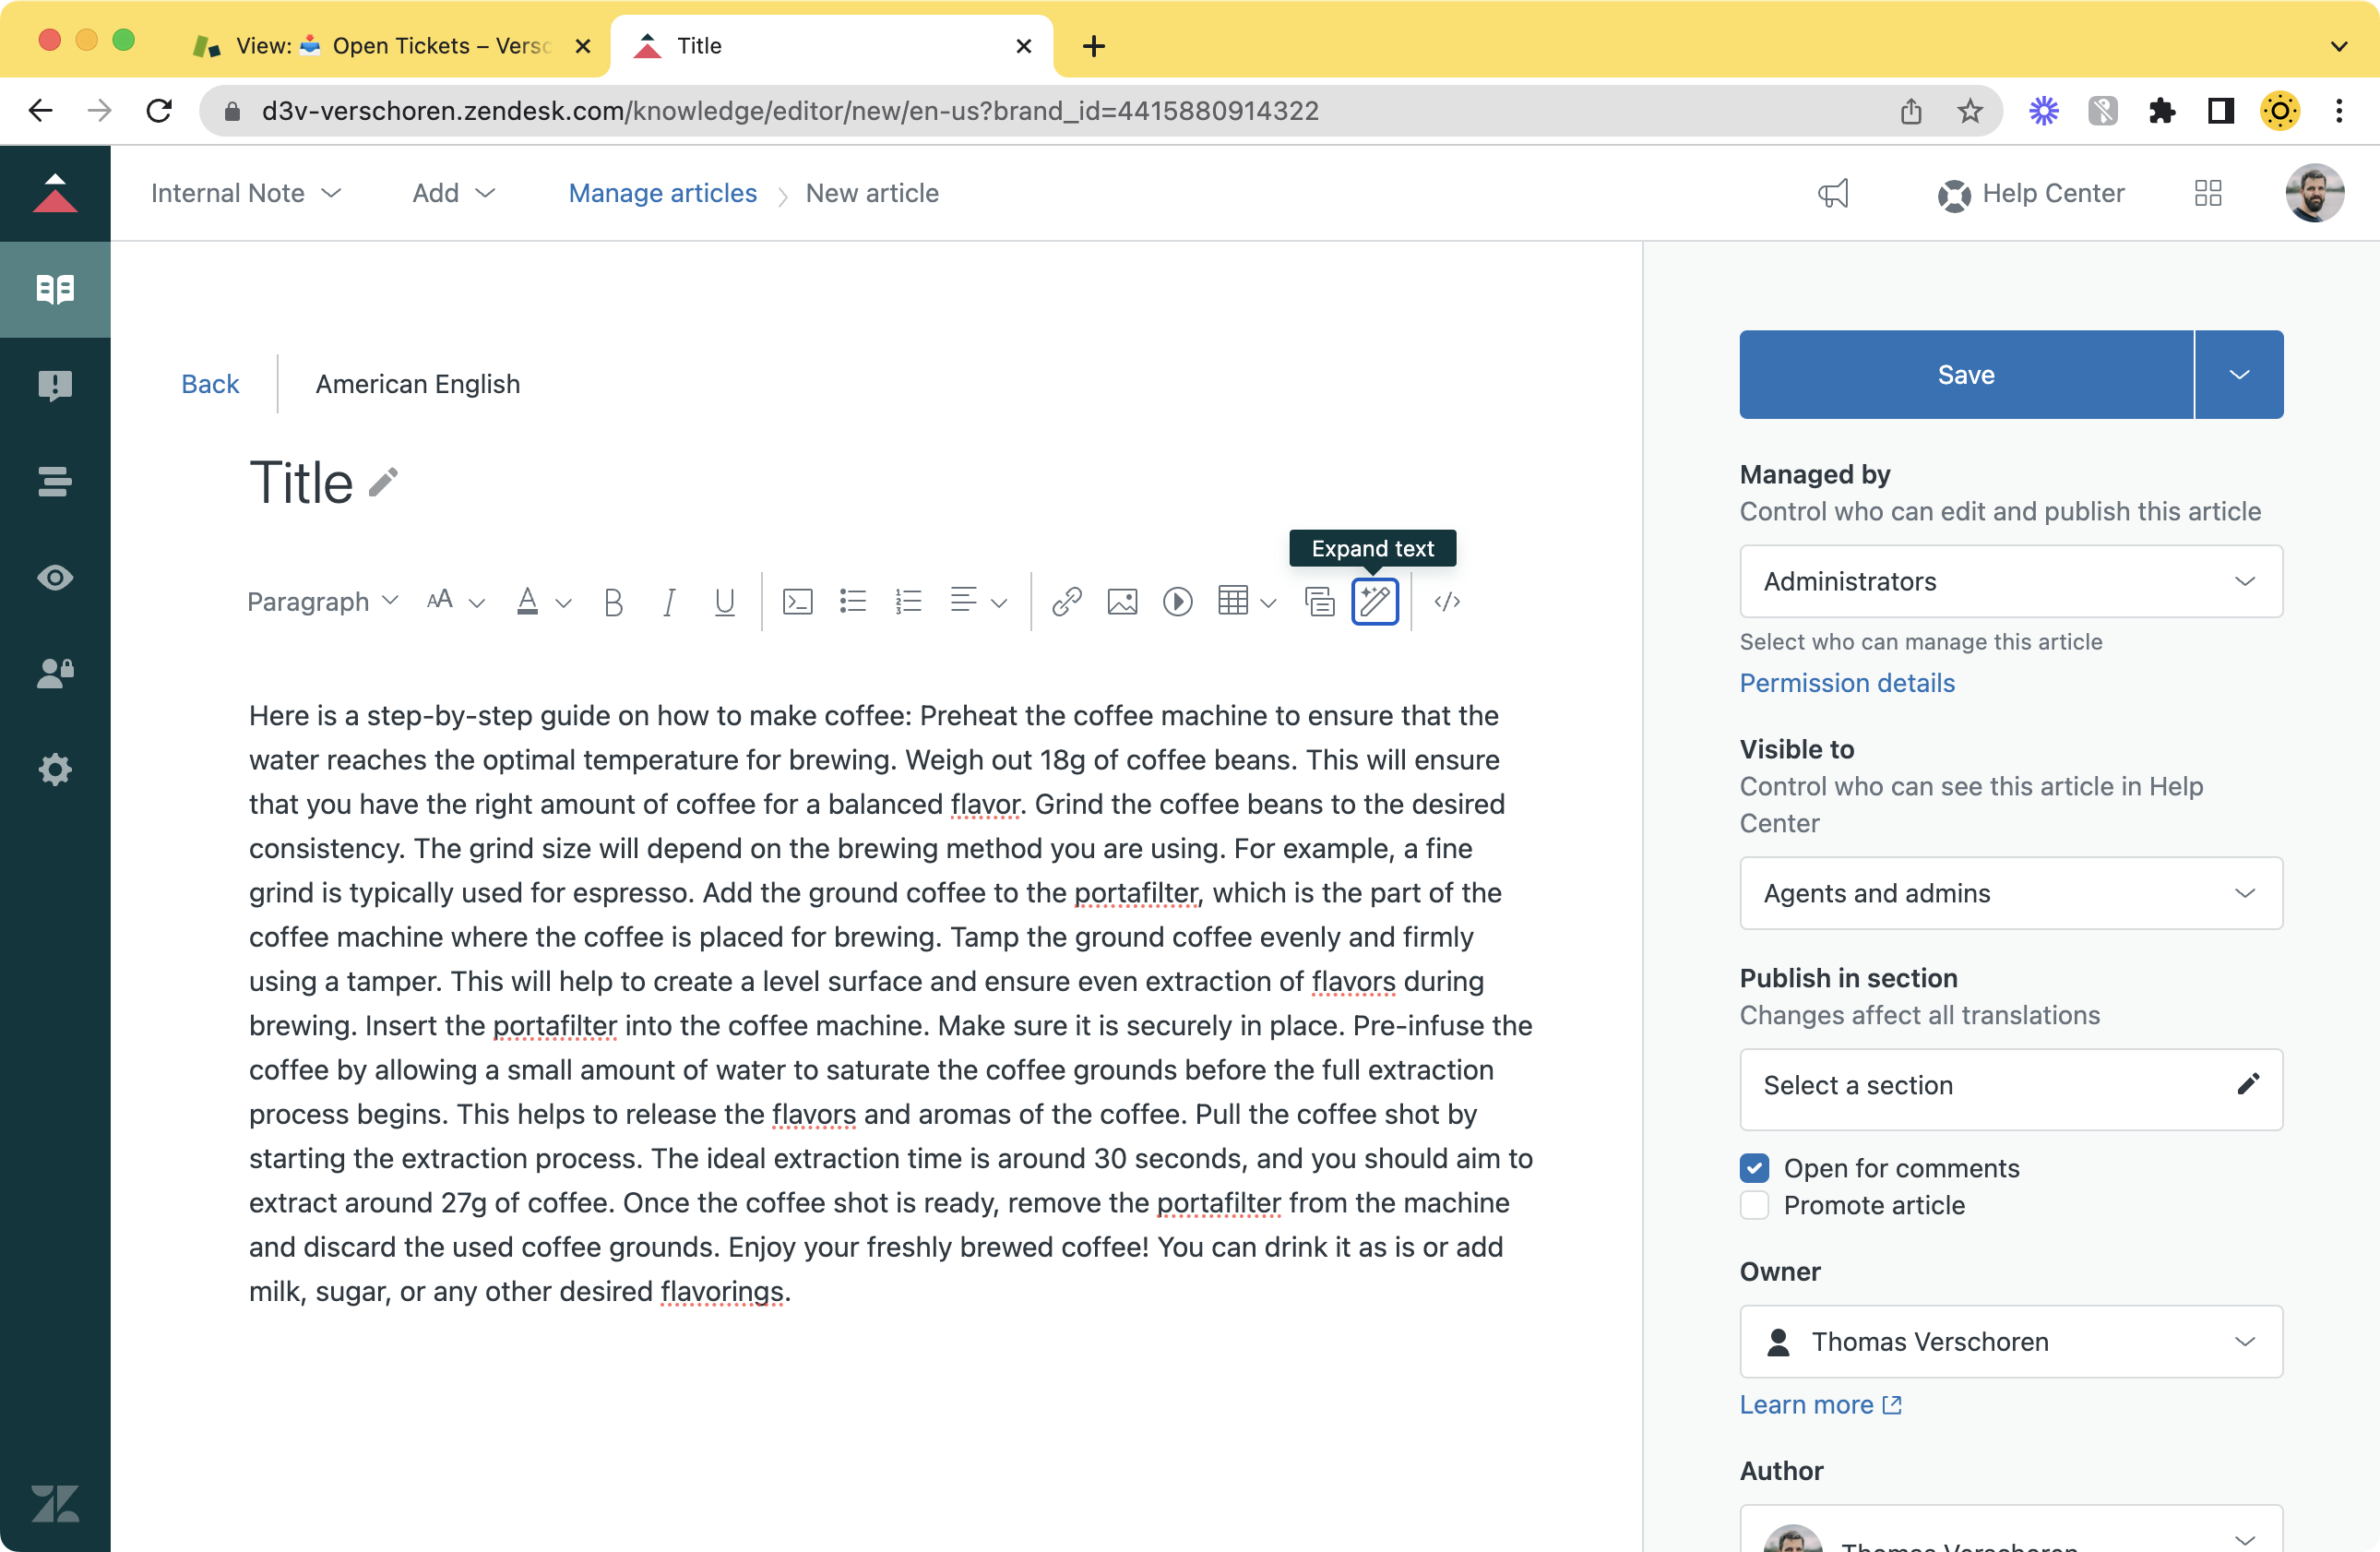
What's also clear is that this article is not at all usable as is. It's one giant block off text, has no line breaks and omits any sense of steps when reading the article. (Update: fixed, see below)
But a quick round of editing later turned my summary into this nice article:
Final Article
Here is a step-by-step guide on how to make coffee:
- Preheat the coffee machine to ensure that the water reaches the optimal temperature for brewing.
- Weigh out 18g of coffee beans. This will ensure that you have the right amount of coffee for a balanced flavor.
- Grind the coffee beans to the desired consistency. The grind size will depend on the brewing method you are using. For example, a fine grind is typically used for espresso.
- Add the ground coffee to the portafilter, which is the part of the coffee machine where the coffee is placed for brewing.
- Tamp the ground coffee evenly and firmly using a tamper. This will help to create a level surface and ensure even extraction of flavors during brewing.
- Insert the portafilter into the coffee machine. Make sure it is securely in place.
- Pre-infuse the coffee by allowing a small amount of water to saturate the coffee grounds before the full extraction process begins. This helps to release the flavors and aromas of the coffee.
- Pull the coffee shot by starting the extraction process. The ideal extraction time is around 30 seconds, and you should aim to extract around 27g of coffee.
- Once the coffee shot is ready, remove the portafilter from the machine and discard the used coffee grounds.
Enjoy your freshly brewed coffee! You can drink it as is or add milk, sugar, or any other desired flavorings.
Expand/Tone-Shift
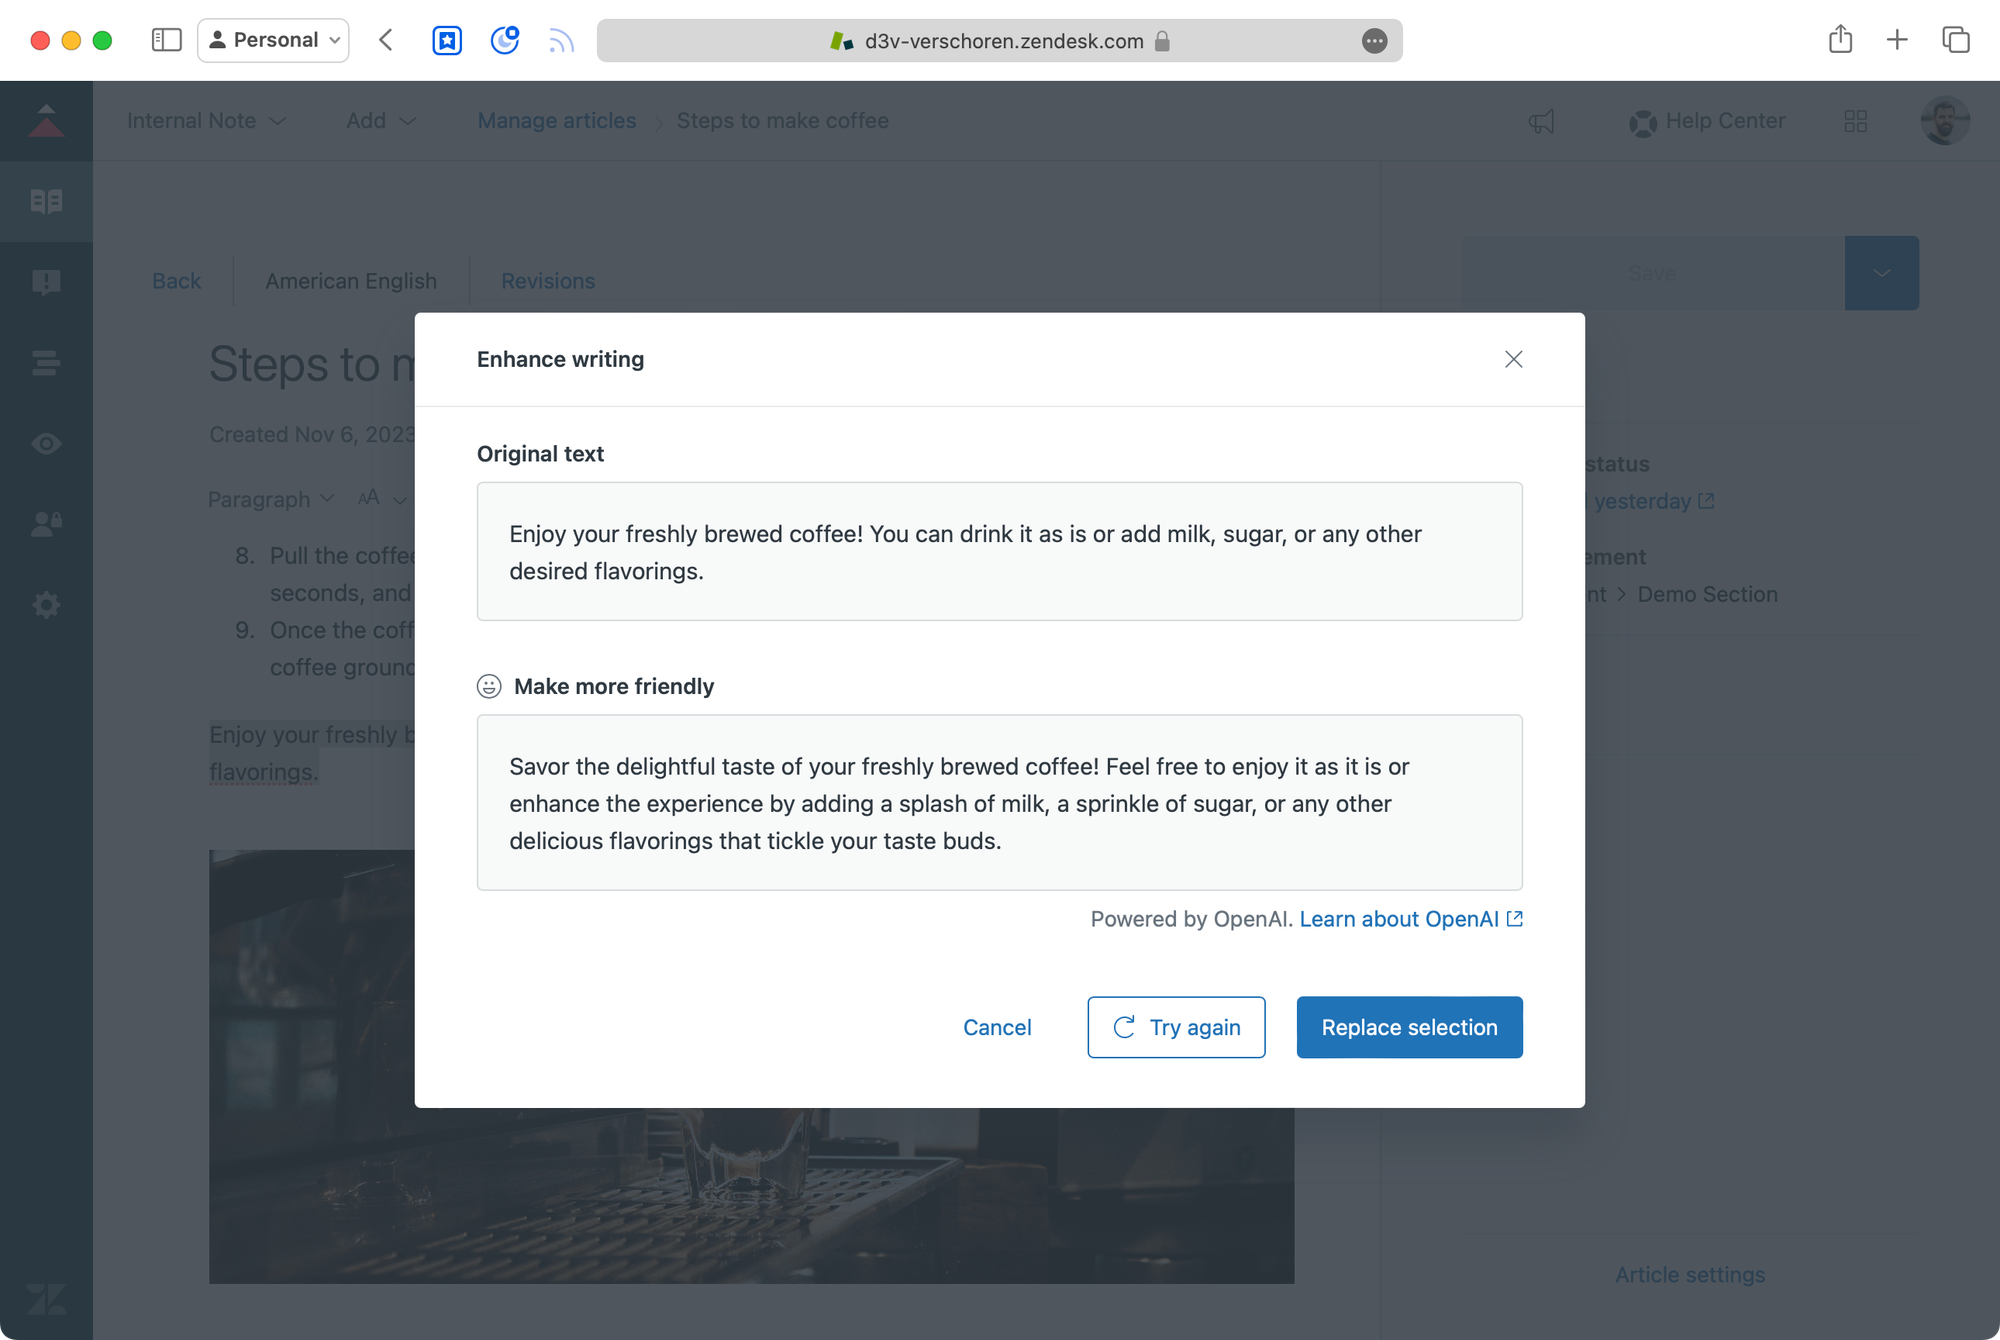
Aside from just expanding text, Zendesk also added a tone-shift feature into the editor, turning text into a more serious, or more playful tone.
By using this feature, similar to the one already available to agents, you can turn this dry closing sentence:
Enjoy your freshly brewed coffee! You can drink it as is or add milk, sugar, or any other desired flavorings.
Into this more friendly, slightly longer, paragraph.
Savor the delightful taste of your freshly brewed coffee! Feel free to enjoy it as it is or enhance the experience by adding a splash of milk, a sprinkle of sugar, or any other delicious flavorings that tickle your taste buds.
My take
I've written before on the absurdity of some of the AI flows. When combining all the AI features we basically now have someone writing a shot summary of an article, that AI expands to a full article on one side.
And on the flip side we have customers asking questions to the Zendesk Bot, where AI turns long articles into a summarised answer. The main nuance lies in the fact that the Customer Answer is generated with their intent en context in mind, but surely somewhere in this game of Chinese whispers, something will or can get lost in translation.
That being said, it is a useful feature to have, cause it turns technical summaries into readable articles with nuances and more colourful text, and in times of crisis (when things go offline, when orders are lost) not spending time on writing detailed article for the sake of it, makes time available to actually help customers or dive into the issue.
A few missing items
While playing around with the EAP I noticed that it handled all input as plaintext. URLS, lists, bold or italic text were all turned into plain text, and even titles and line breaks were gone once AI did its thing. (Update: fixed, see below)
I tested both lists of steps like the example above, as well as feeding the AI paragraphs of text (thanks Wikipedia!) but in both scenarios some of the existing structure or markup got lost.
Especially in the case of lists and URLs I hope these feature will get added by the time this EAP turns final release.
Update (Nov 9th)
The Product Manager of this EAP reached out to me and let me know that the HTML stripping issue is now resolved and articles should now respect lists, urls and other markup when being processed via OpenAI.
It's an EAP for a reason, so pretty cool to see how fast feedback gets implemented and the tool improves.