Zendesk Custom Objects - Part 1: Introduction
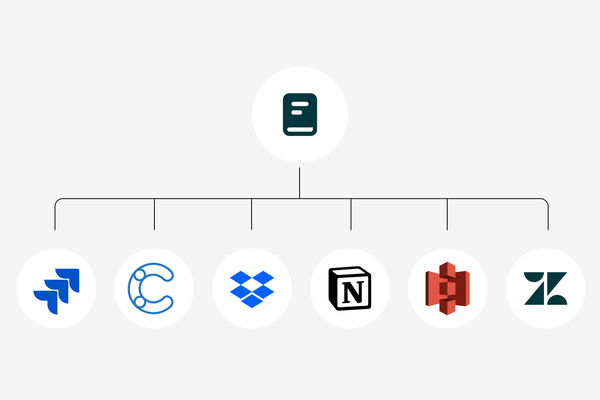
This is a four-part series on Zendesk's new Custom Objects feature. The articles cover setup, data import, using Custom Objects in forms and with agents, expanding user profiles, and displaying Custom Objects in Help Center forms.
Zendesk Custom Objects - Part 1: Introduction

On this page
A few years ago Zendesk introduced Custom Objects to break out of the classic pattern of ticket - user - organisation.
With custom objects companies could expand the Zendesk CRM with their own assets: printers, orders, contact information, SLA contract,... it promised a lot, but sadly, the APIs and stability didn't really deliver. The Legacy custom objects – as they're now called – always felt like they lived next to Zendesk, as opposed to integrated with the platform.
This all changes with the new Custom Objects. This new release is a completely reworked approach to Custom Objects, that deeply integrates with the Agent Workspace. It has a UI to create object types, a build-in record viewer, and records can be linked to users, organisations, tickets and other records via the Lookup Fields Zendesk introduced last year.
Custom Objects Series
Showing how the New Custom Objects work in a single article would not do them service since they offer so much capabilities right out of the box. So instead of writing one article, I'm doing a series!
In this four part series we'll explore the new Custom Objects from an admin, agent and end-user standpoint.
Custom Object Series
This first article will show you how to set up custom objects, how to structure and link the data, and how to import data into Zendesk.
The second article will show you how to use Custom Objects in forms, how to show the data to Agents, and will include a custom sidebar app that will show the records in a more visual way.
The third article will dive into expanding user profiles with Custom Objects and how you can use them to trigger different priorities based on linked records.
The last article will solve a missing feature in Zendesk by showing Custom Objects in Help Center forms and make the selected record available to agents.
Pokédex
Last spring shortly after the Relate event, I build a quick proof of concept of a Pokédex in Custom Objects. This series will use that concept to explain all the elements related to Custom Objects in Zendesk
 Thomas Verschoren
Why a Pokédex? When building on top of new technology I tend to use a data set or environment I know, so I can focus on exploring the tech, and not worry about thinking of complex data structures, or generate sample data on my own.
Being a father of a 3 and 6 year old, the world of Pokémon was readily available, and there are a lot of online tables, lists and assets ready to copy and use. But even if the world where this article series lives in is not at all related to your business, the concepts in this series can easily be applied to your own business needs.
Creating Custom Objects
Before starting with Custom Objects it's important to first write down the structure of your data so you can see how the data is organised.
In our case we're building a Pokédex, so we need at least:
- Index, or the number of the Pokémon in the list
- Name
- Image, to make the data a bit more visual
- Type, which element is linked to the Pokémon
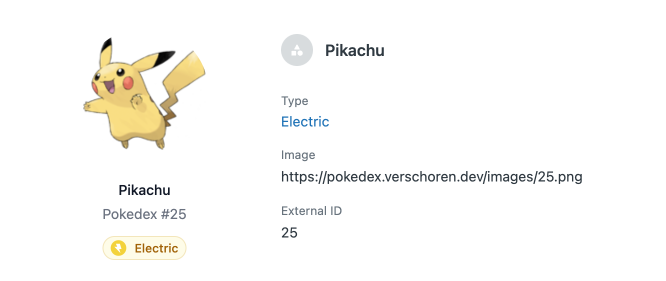
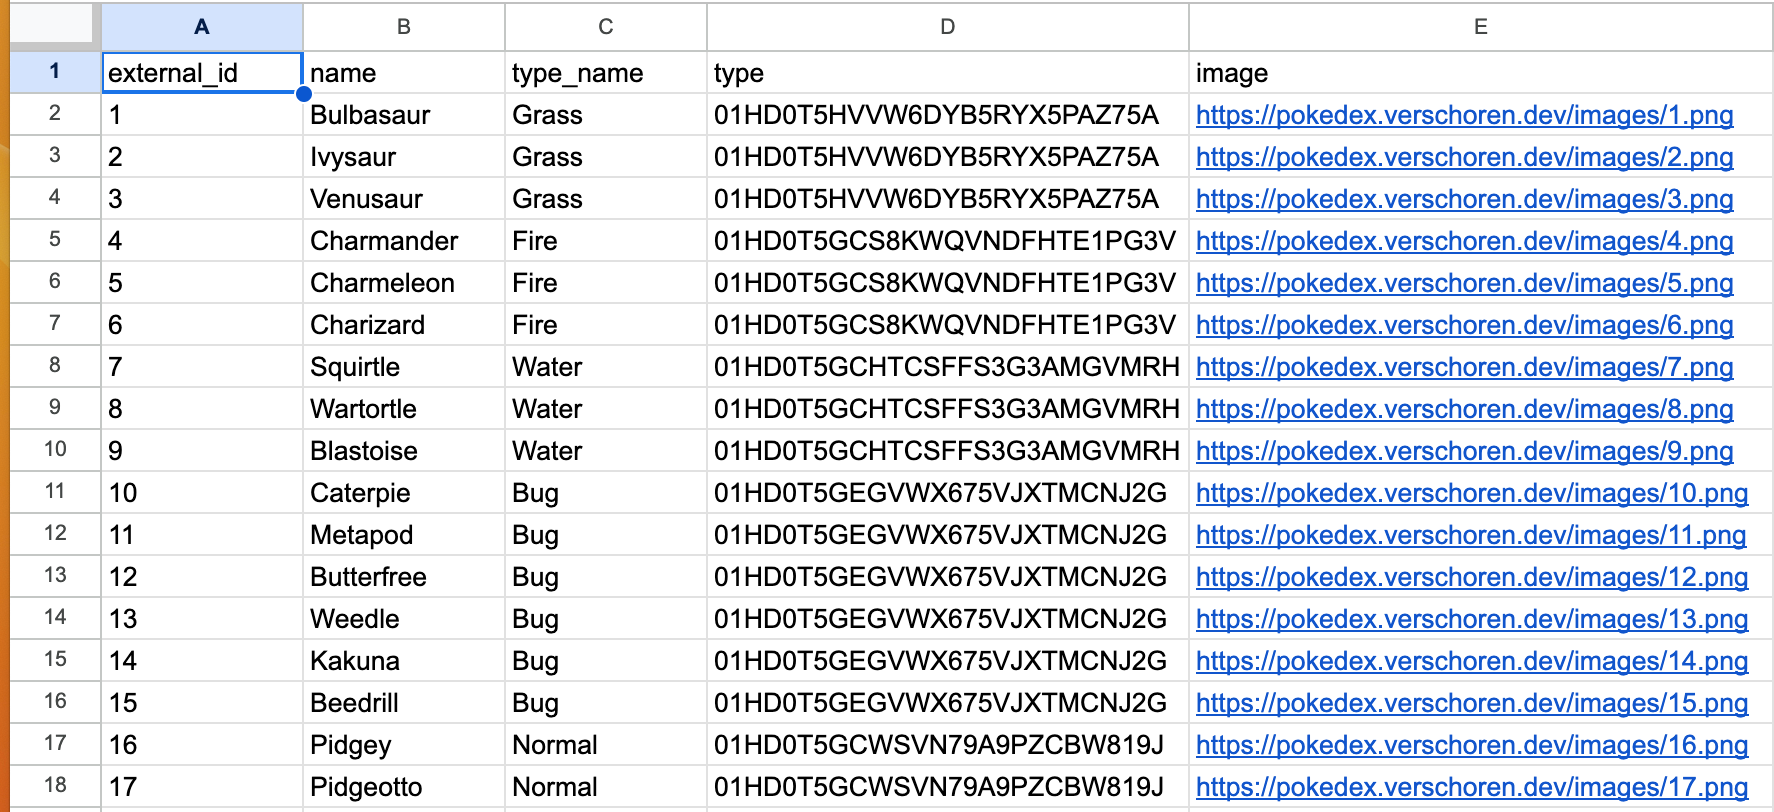
Custom Objects have an external_id and name as default fields. Those nicely map to our index and name fields.
Since Custom Objects does not support attachments or binary data, we can't just upload an image. So we'll use a text field for this value and store the URL of a hosted image.
And finally, we have Type. Type is a text value, e.g. Electric or Fire, but is a known list of values. There's around 12 different types our Pokémon can have. We might be tempted to use a Dropdown field for this element. This way we can choose one of the preset values, and can filter on those values.
But, Type is more complex than just a string of text. In the lore of the games Fire types are weak against water, and strong against grass. So it might be cool if we can somehow store that information too in our Objects.
So instead of creating a dropdown, we'll first create a separate Object for Types which contains that related data. We'll then link those two together.
Vendor field attach to them. That vender has an address, name, contact email,... so instead of storing just the name of the Vendor, you could create a Vendor object and link it to your Products object.So that's the basic structure we'll need. Two object types, each containing around three fields.
Creating the Type Object
Setting up the object
To create an object, go to the Admin Panel > Objects and Rules > Custom Objects > Objects and click on Create Object.
Give the object a name 'Pokémon Type' and a plural name 'Pokémon Types'. This last one is used whenever we show multiple records of this type. The object key is used whenever we interact via the API. Give it a short name like pokemon_type.
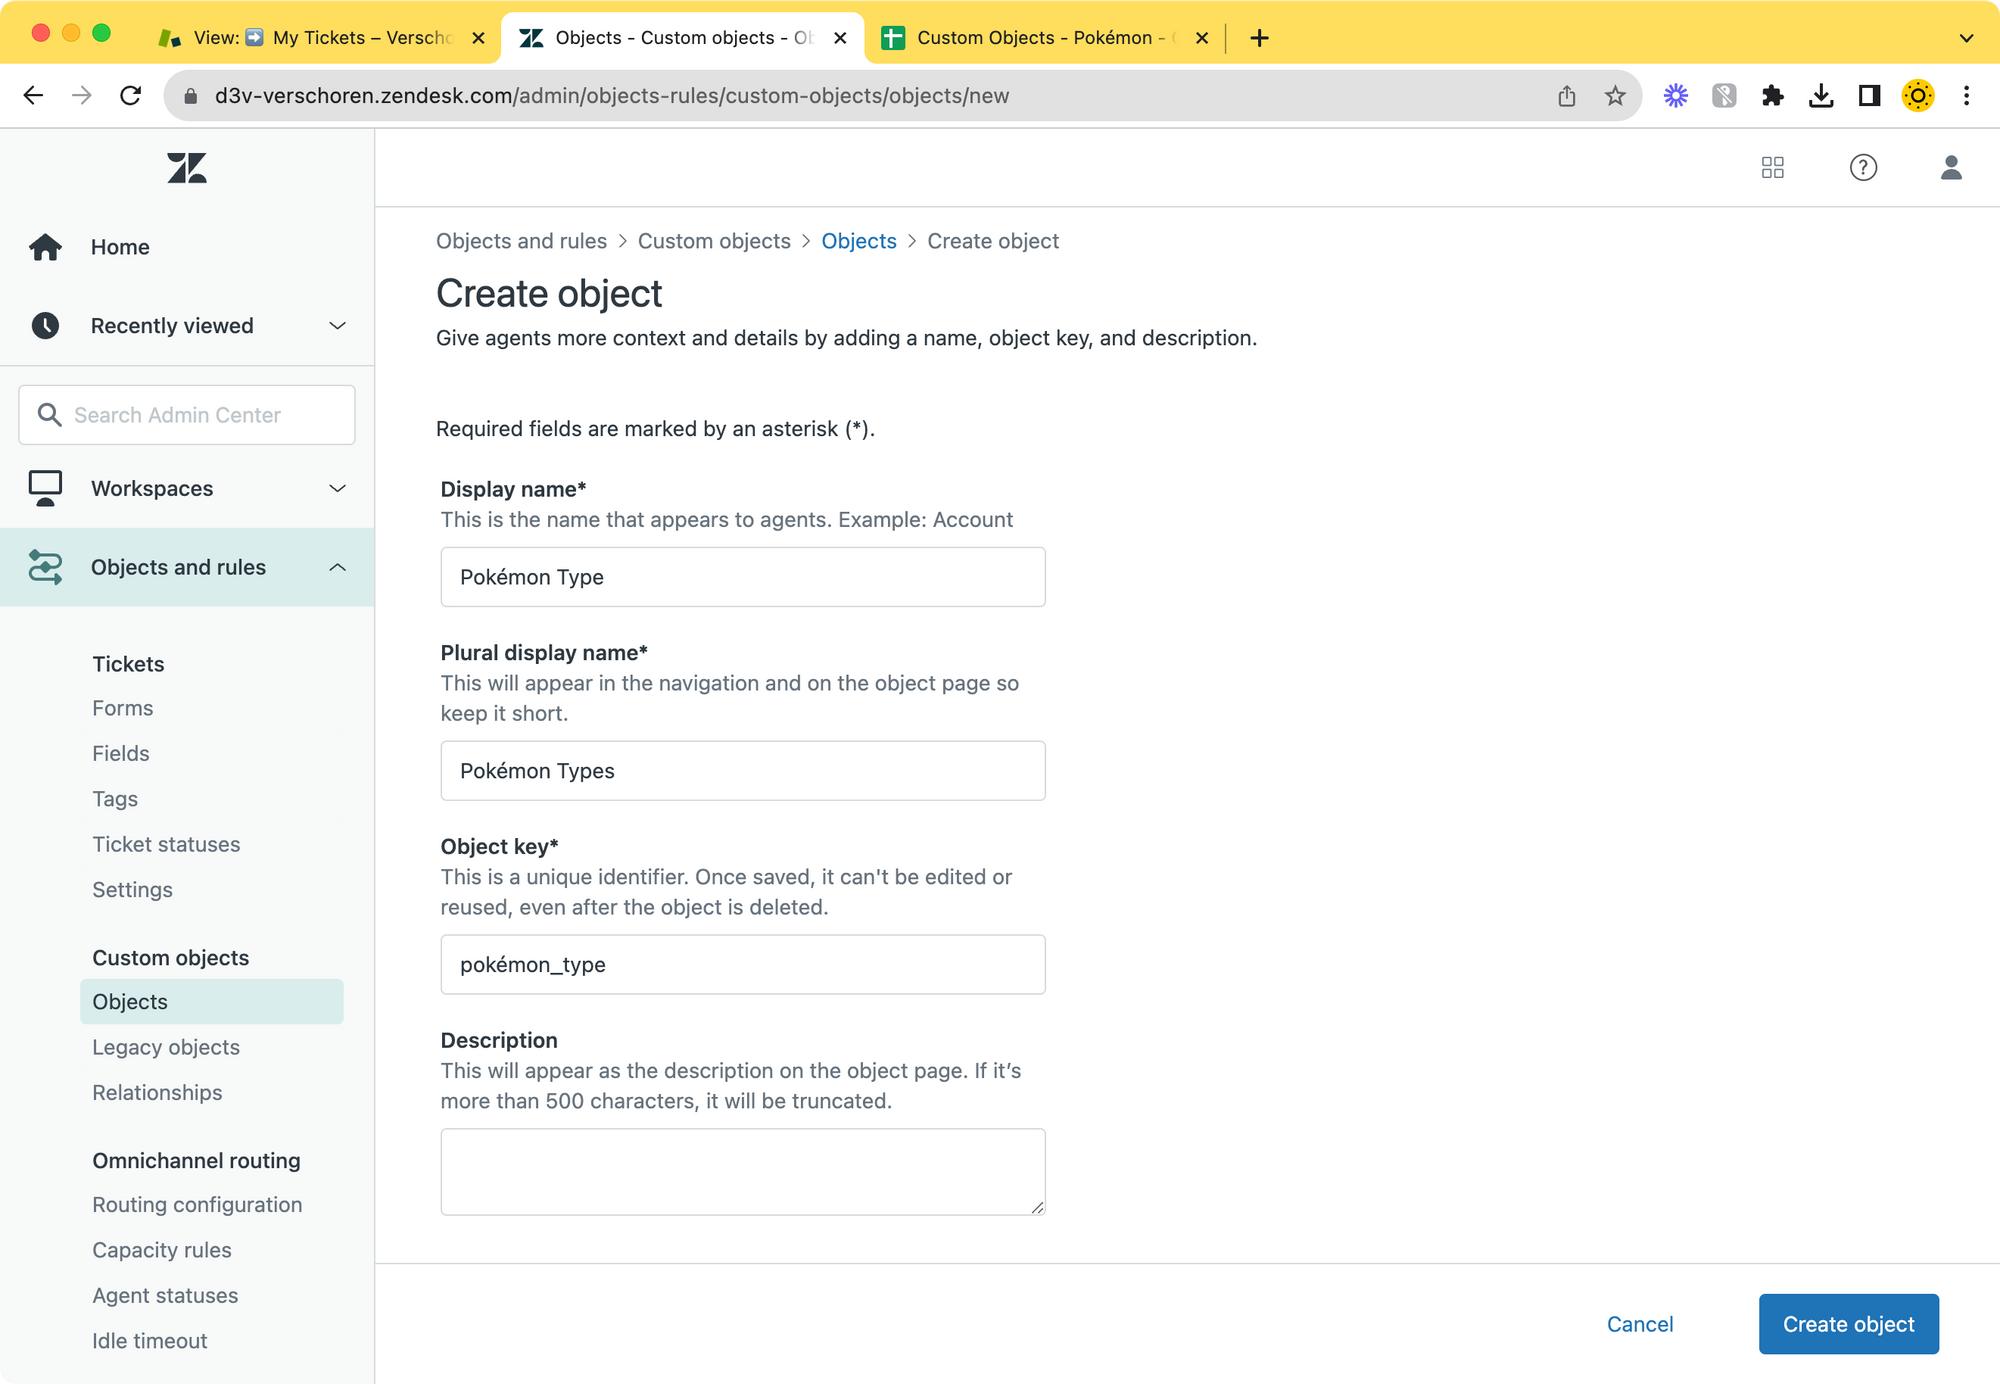
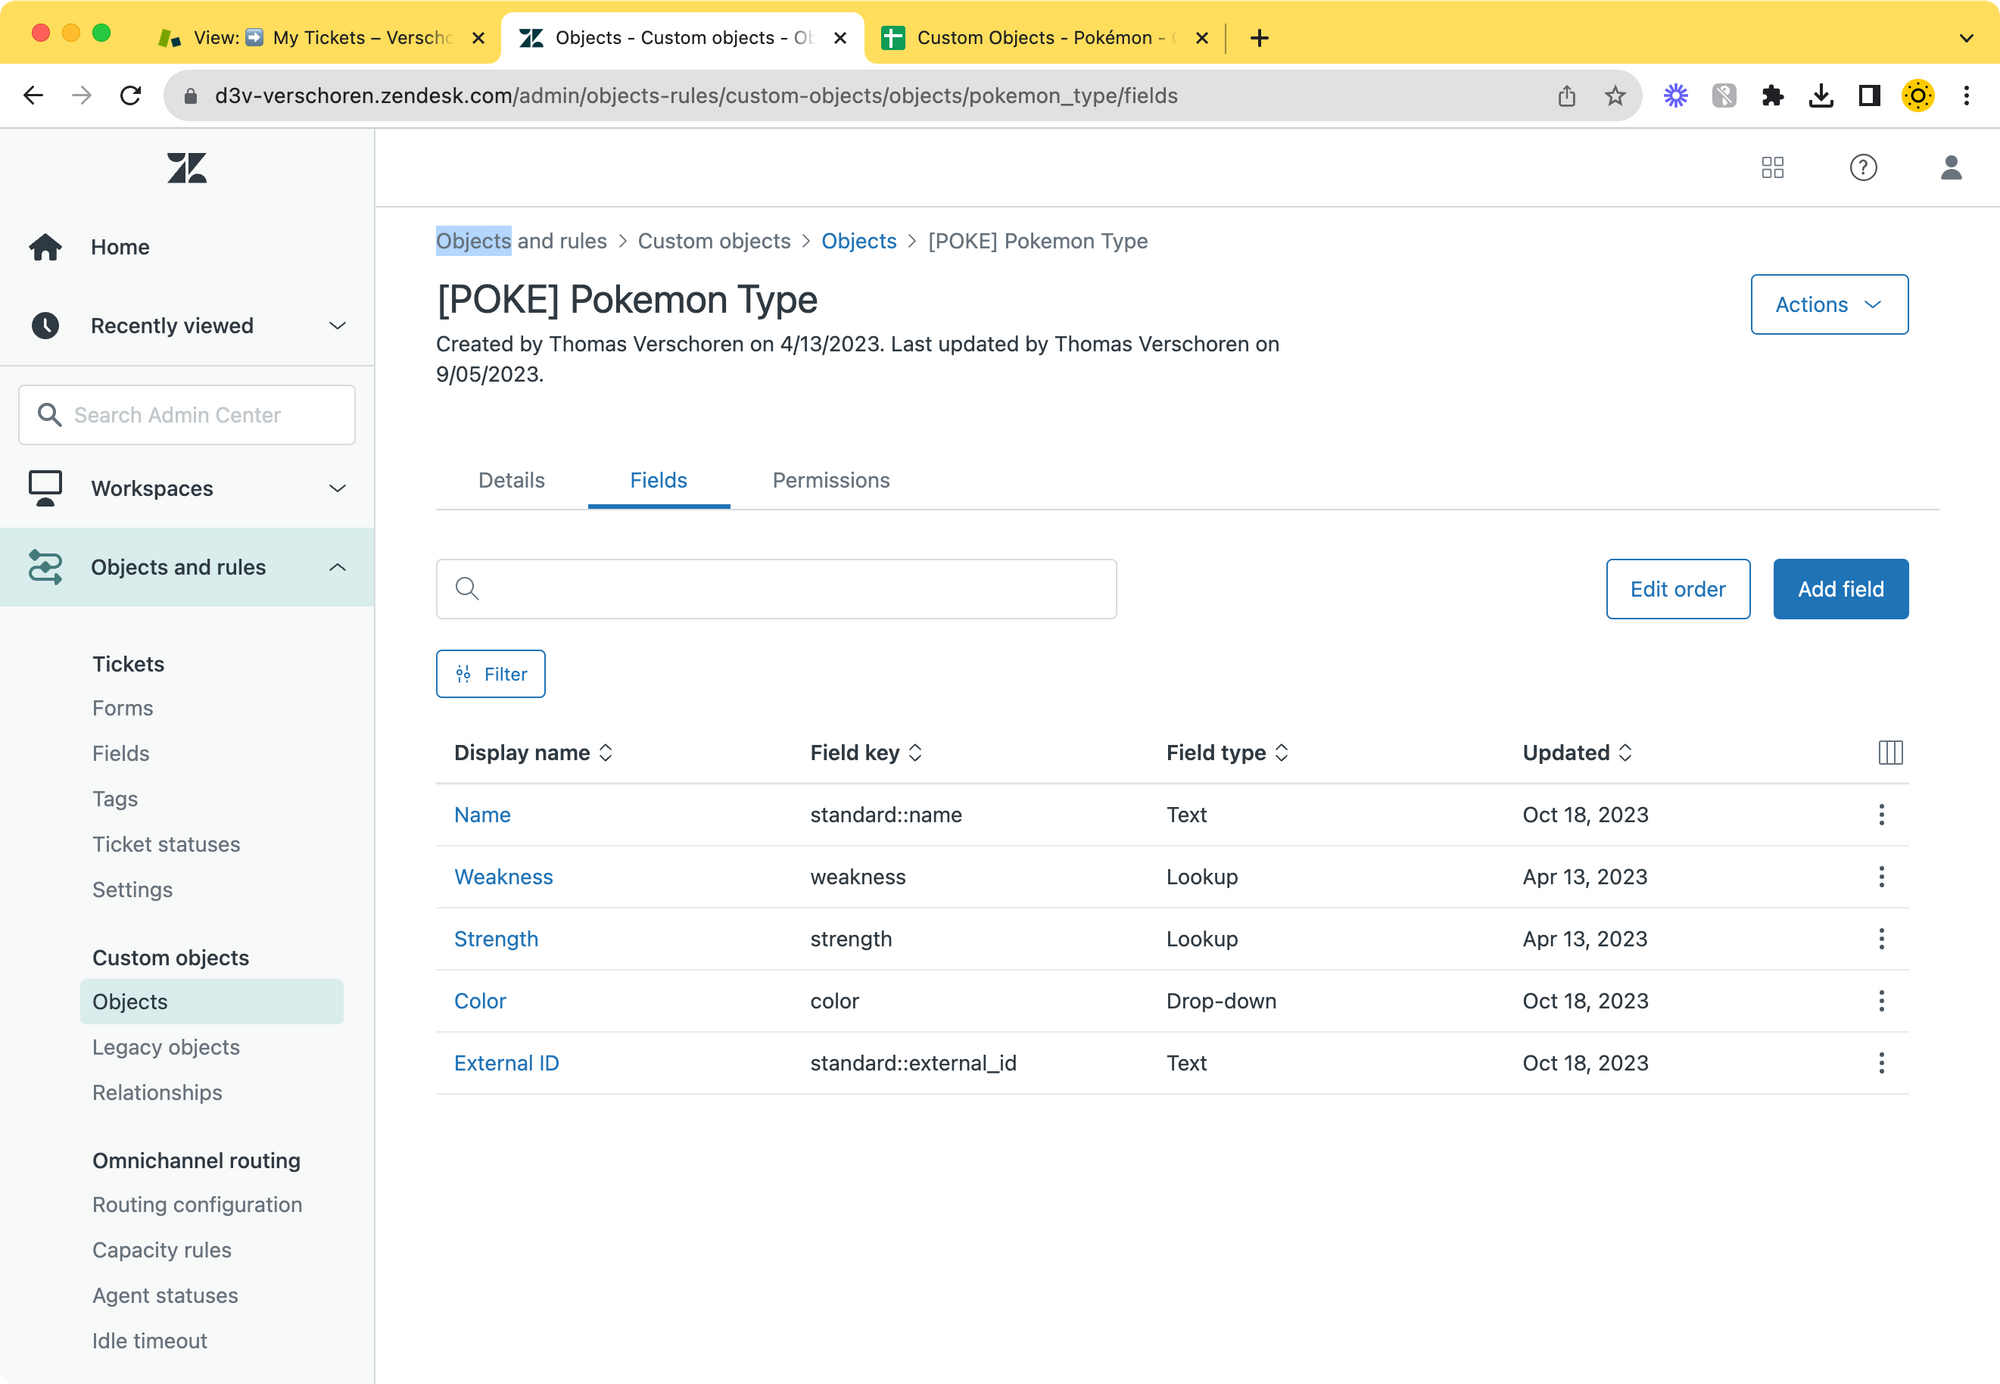
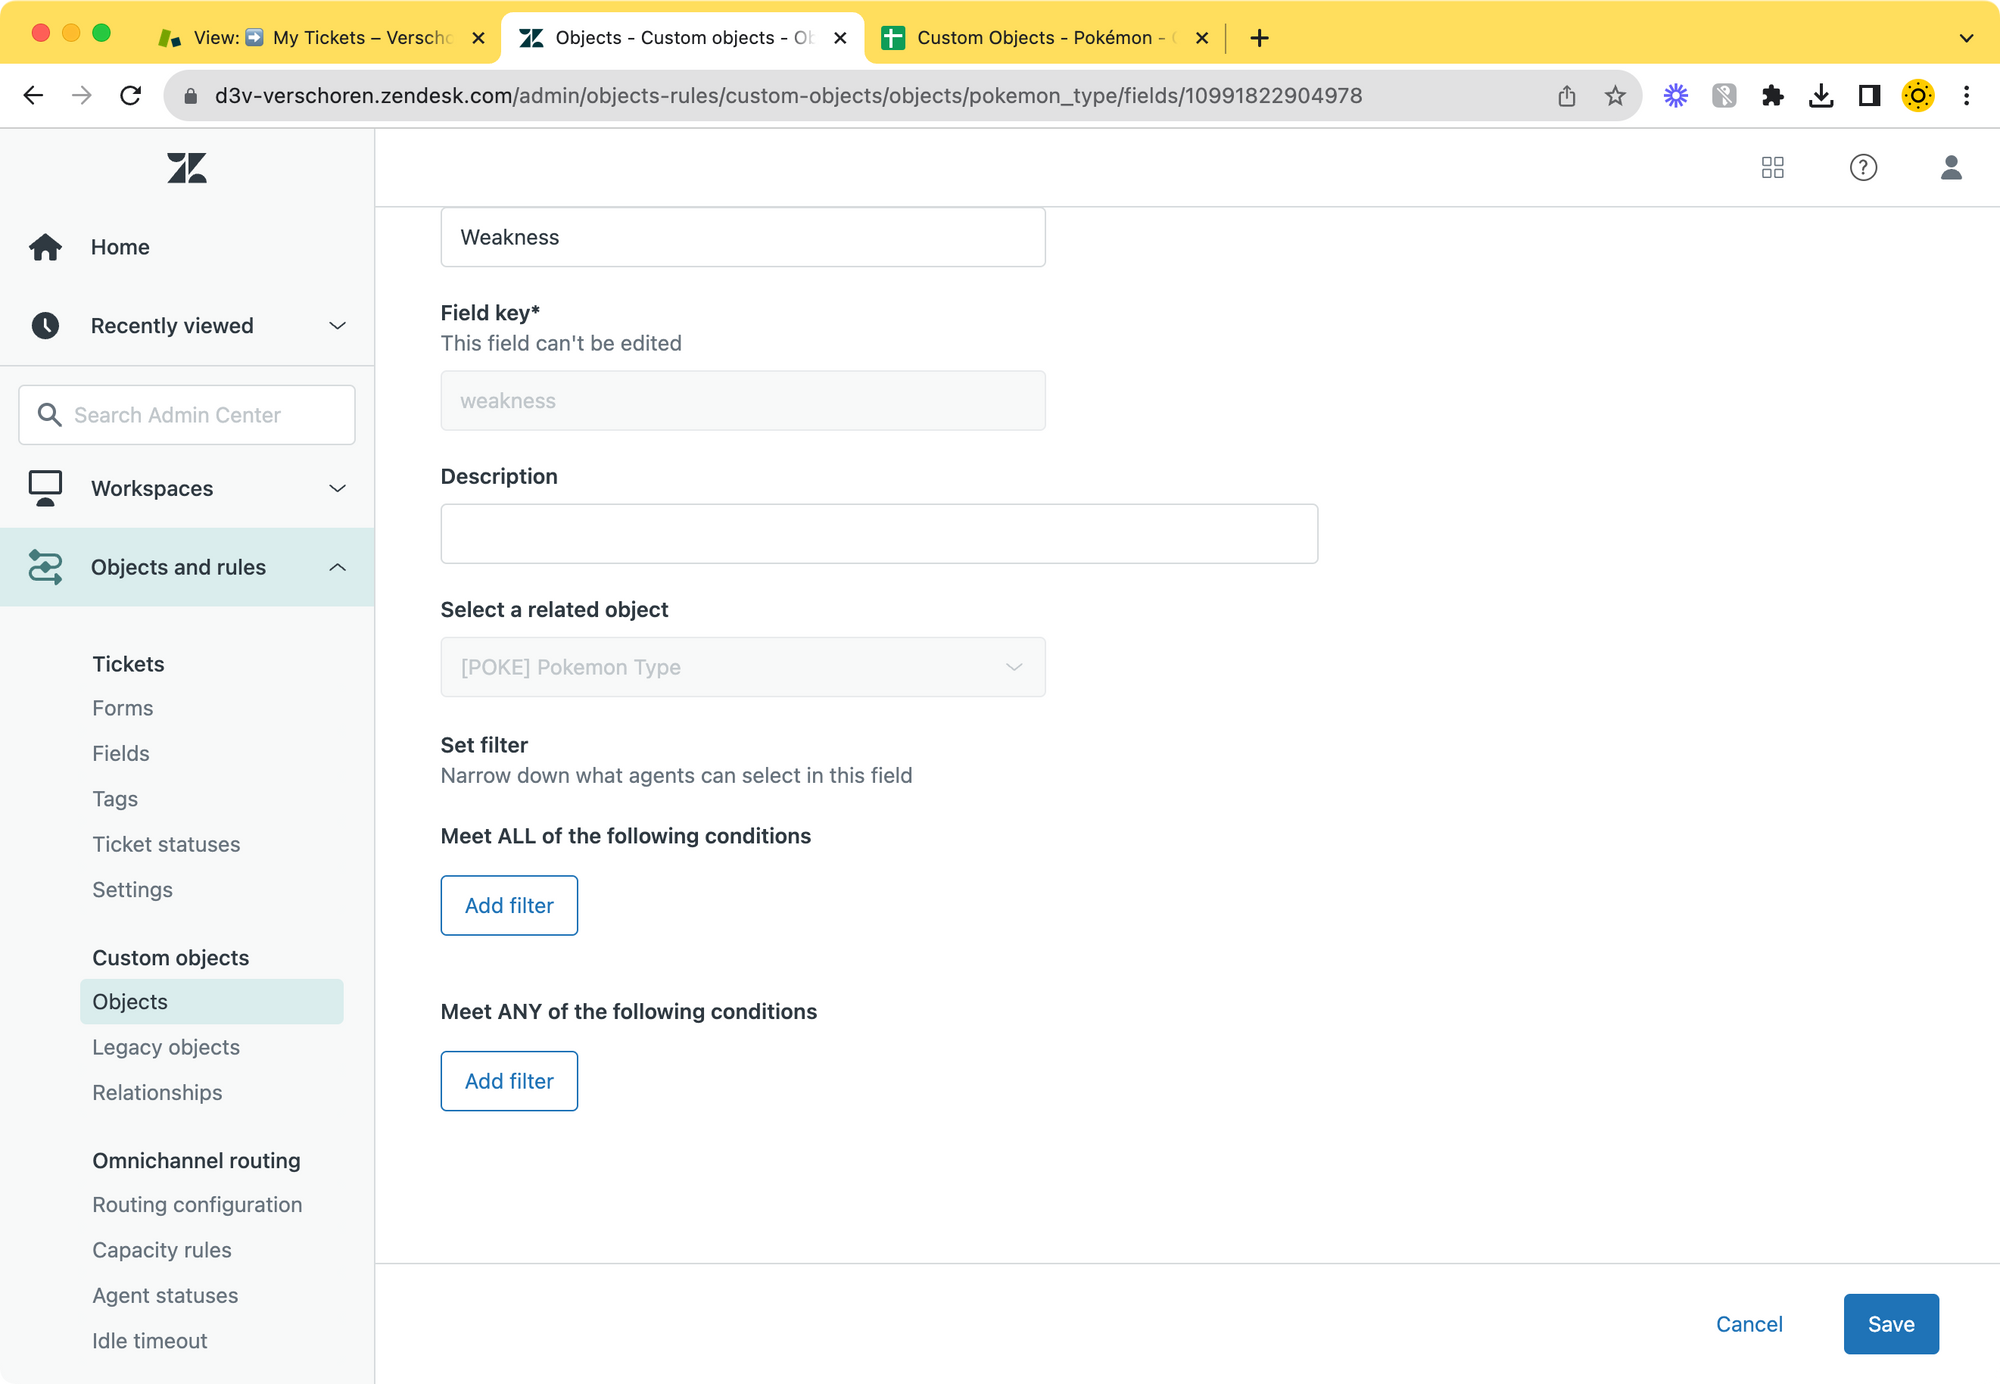
pokemon_ as a prefix so I can more easily find them when using the API.Next up, we need to add the fields. We already get name so we can use that to store e.g. Water. We then add three fields: two lookup fields, and a dropdown.
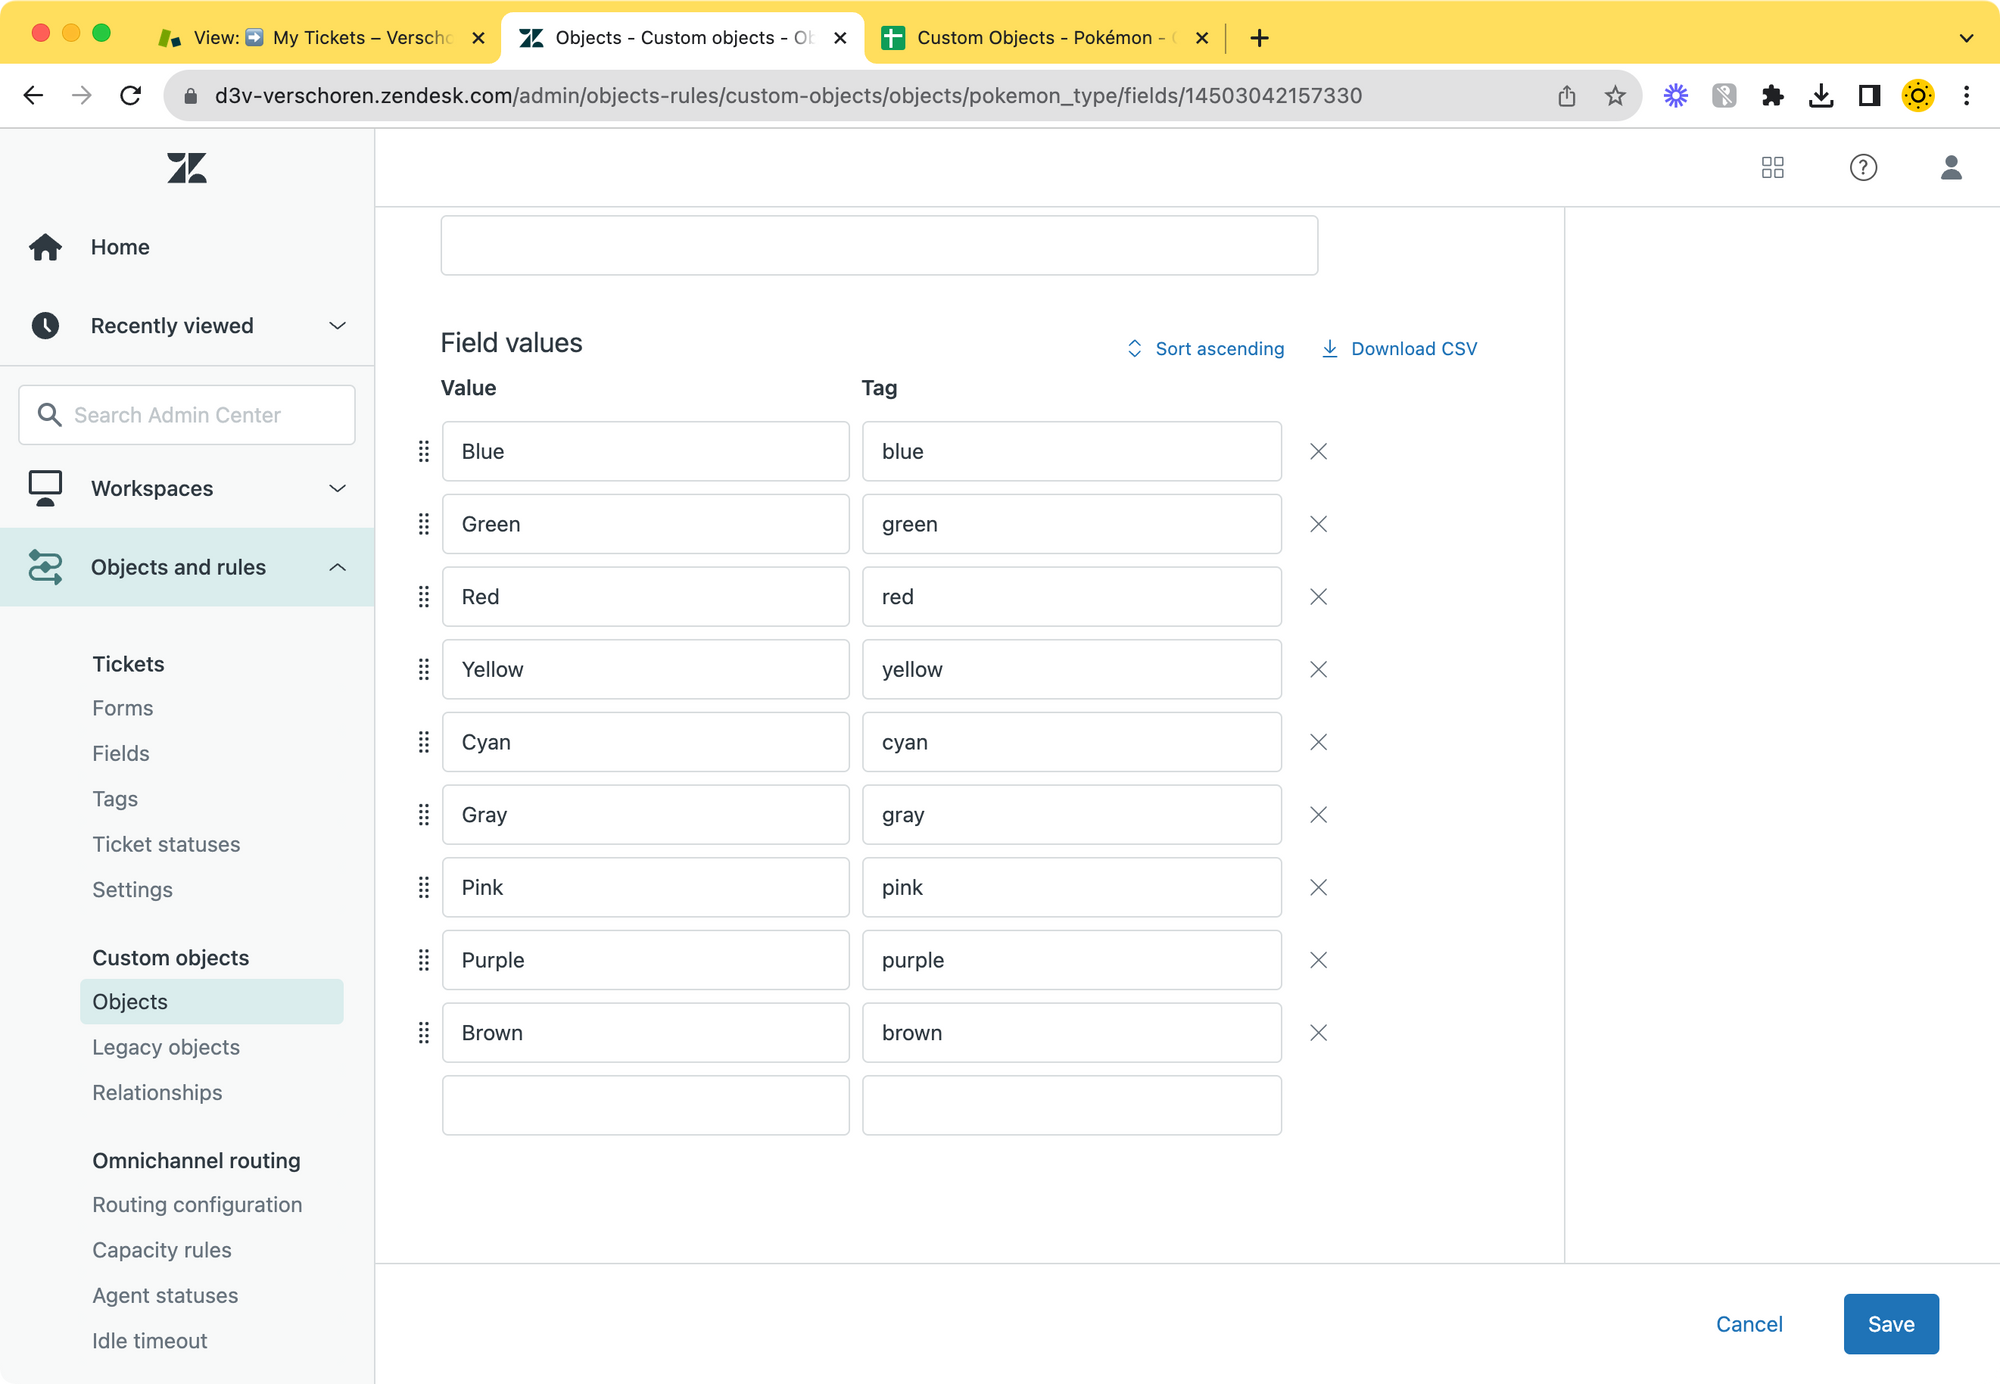
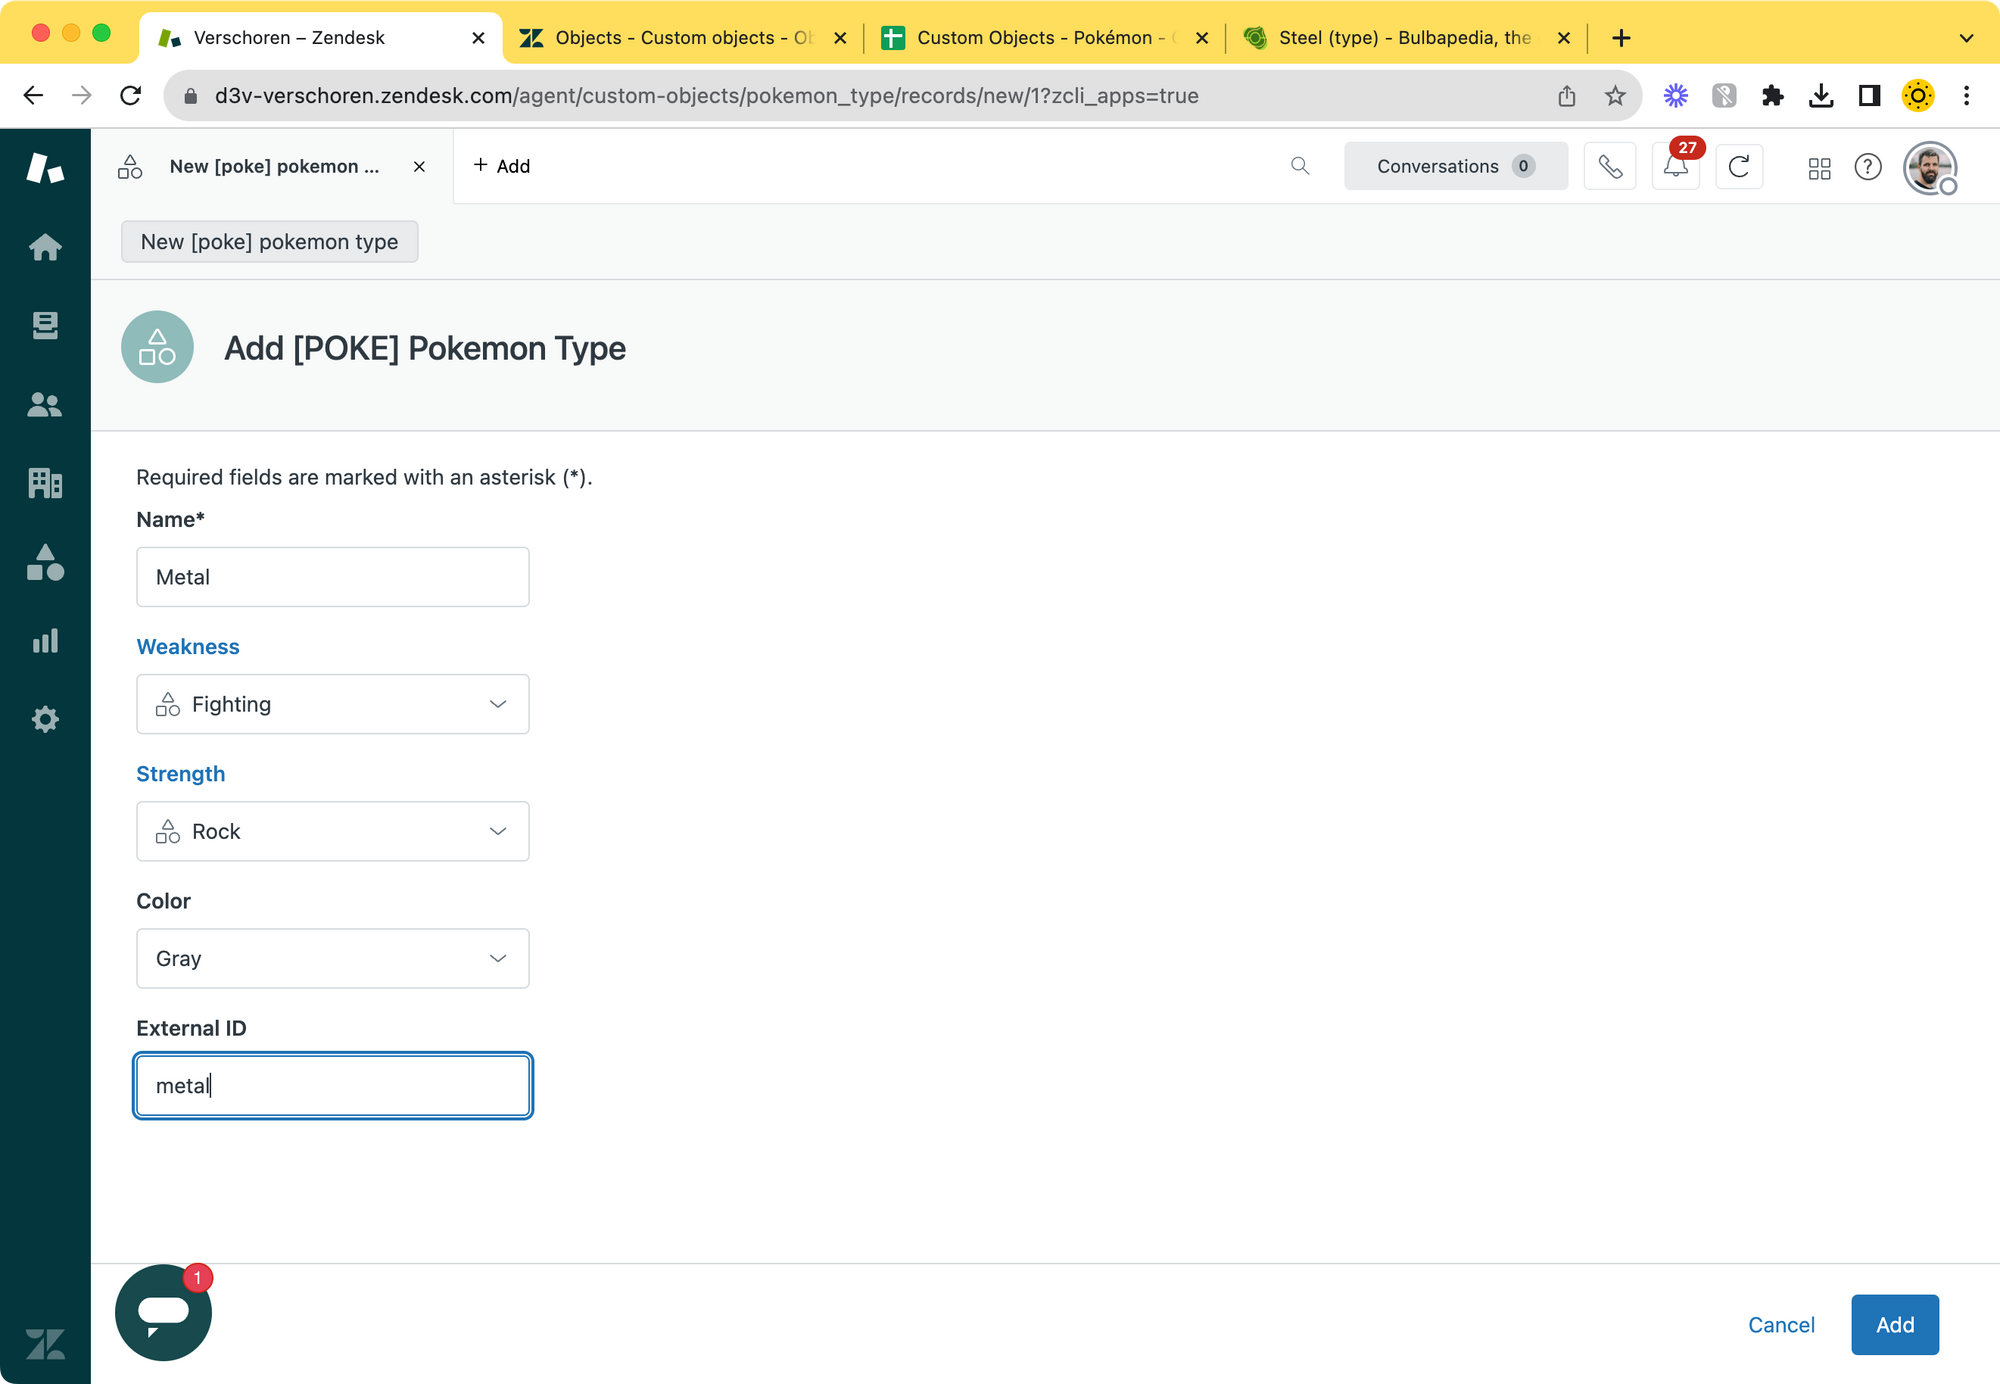
The dropdown contains a list of colours which we can use in custom apps to improve the way the object looks. Or, we can use the value to reference the colour the Pokémon type has in the game.

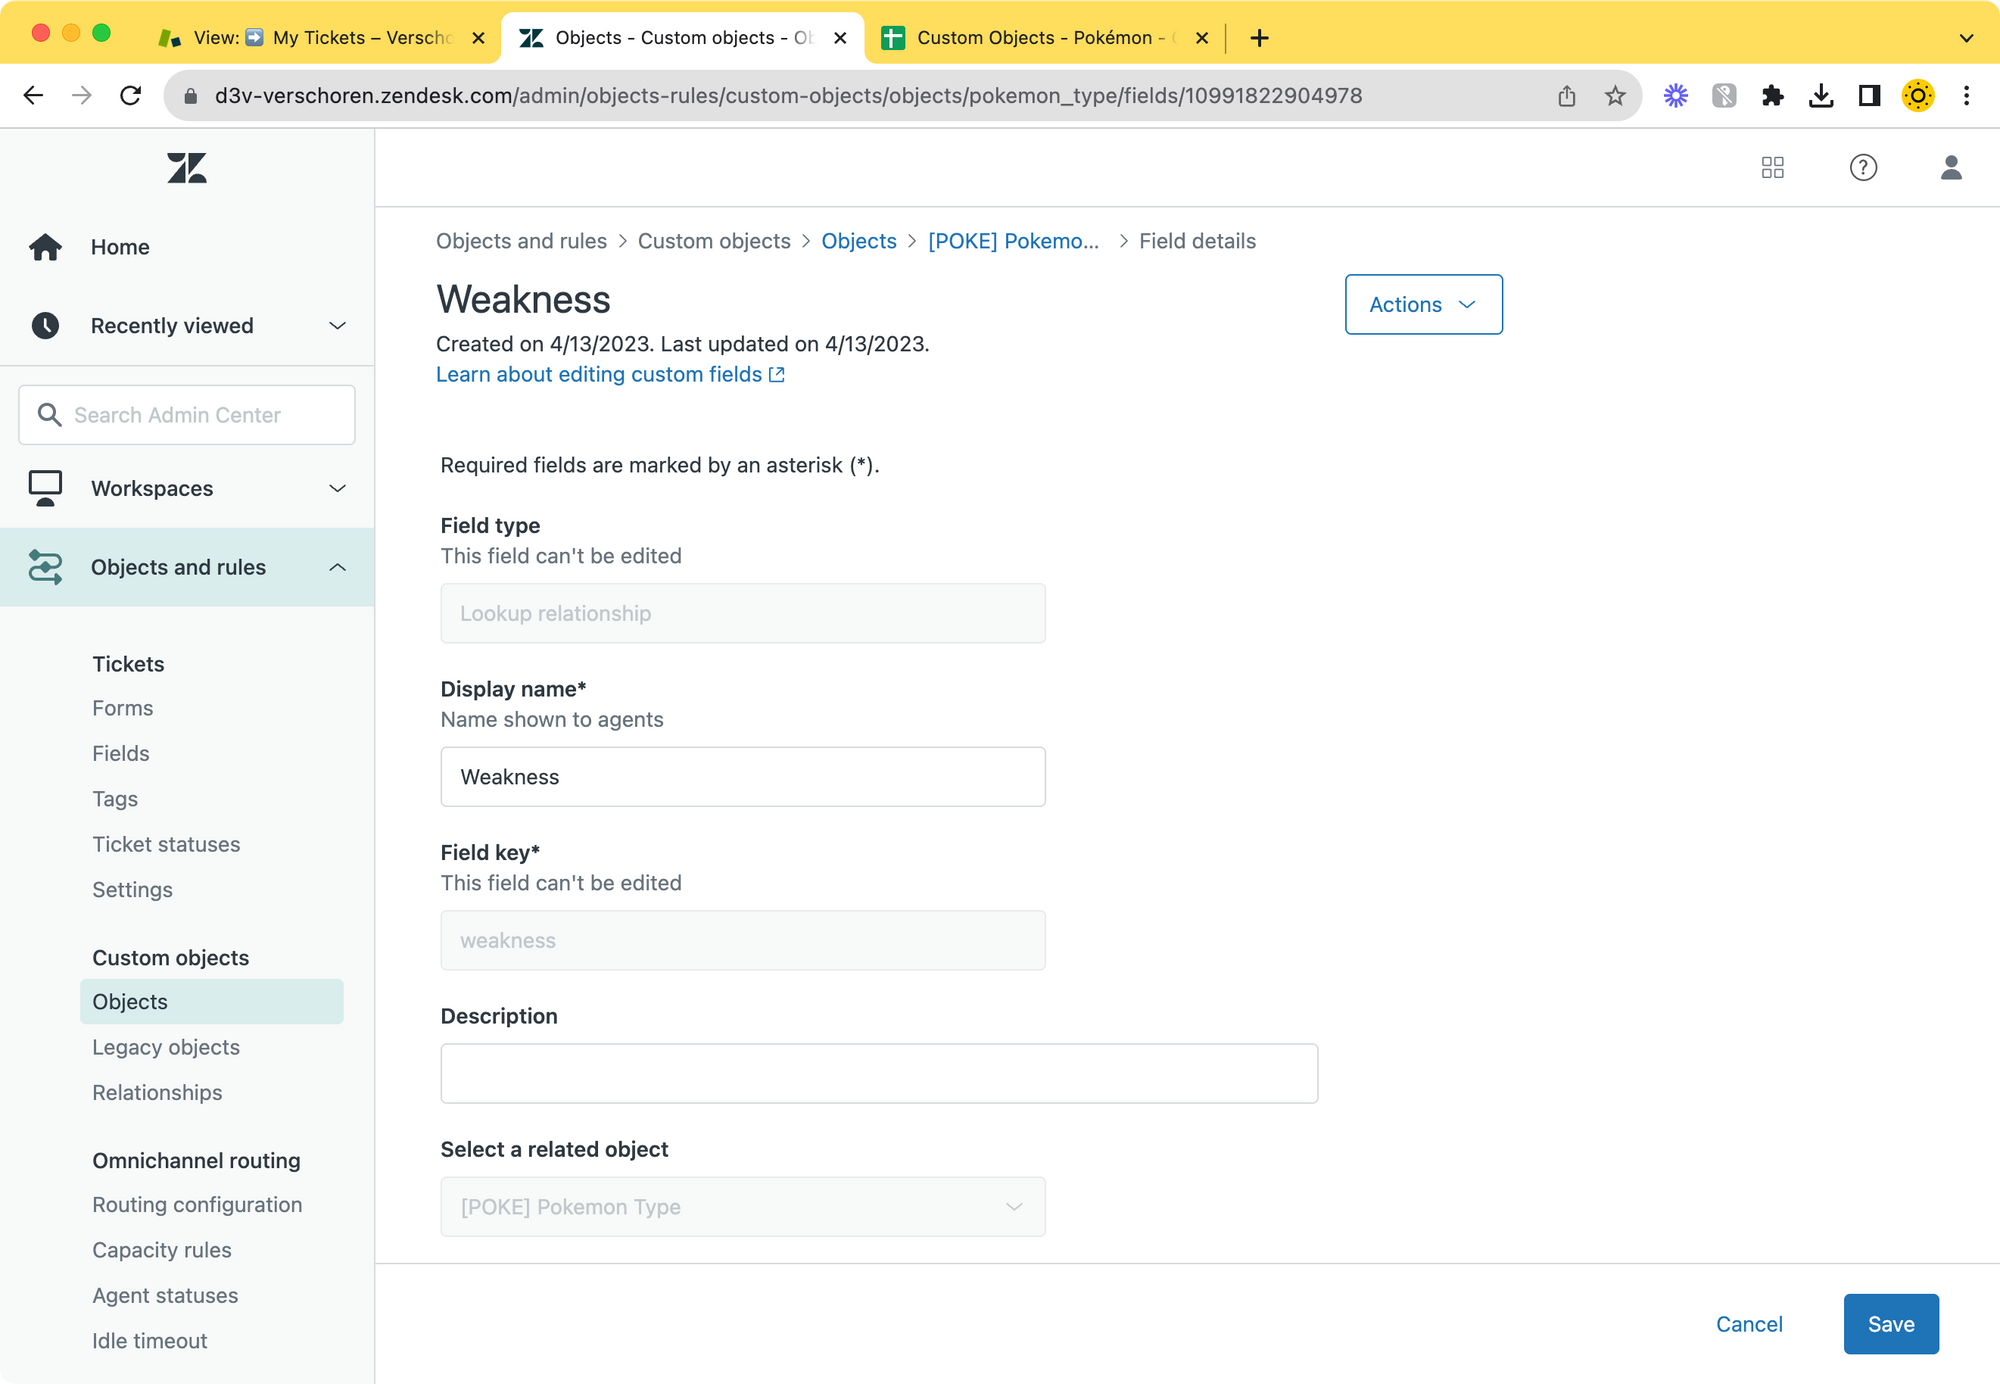
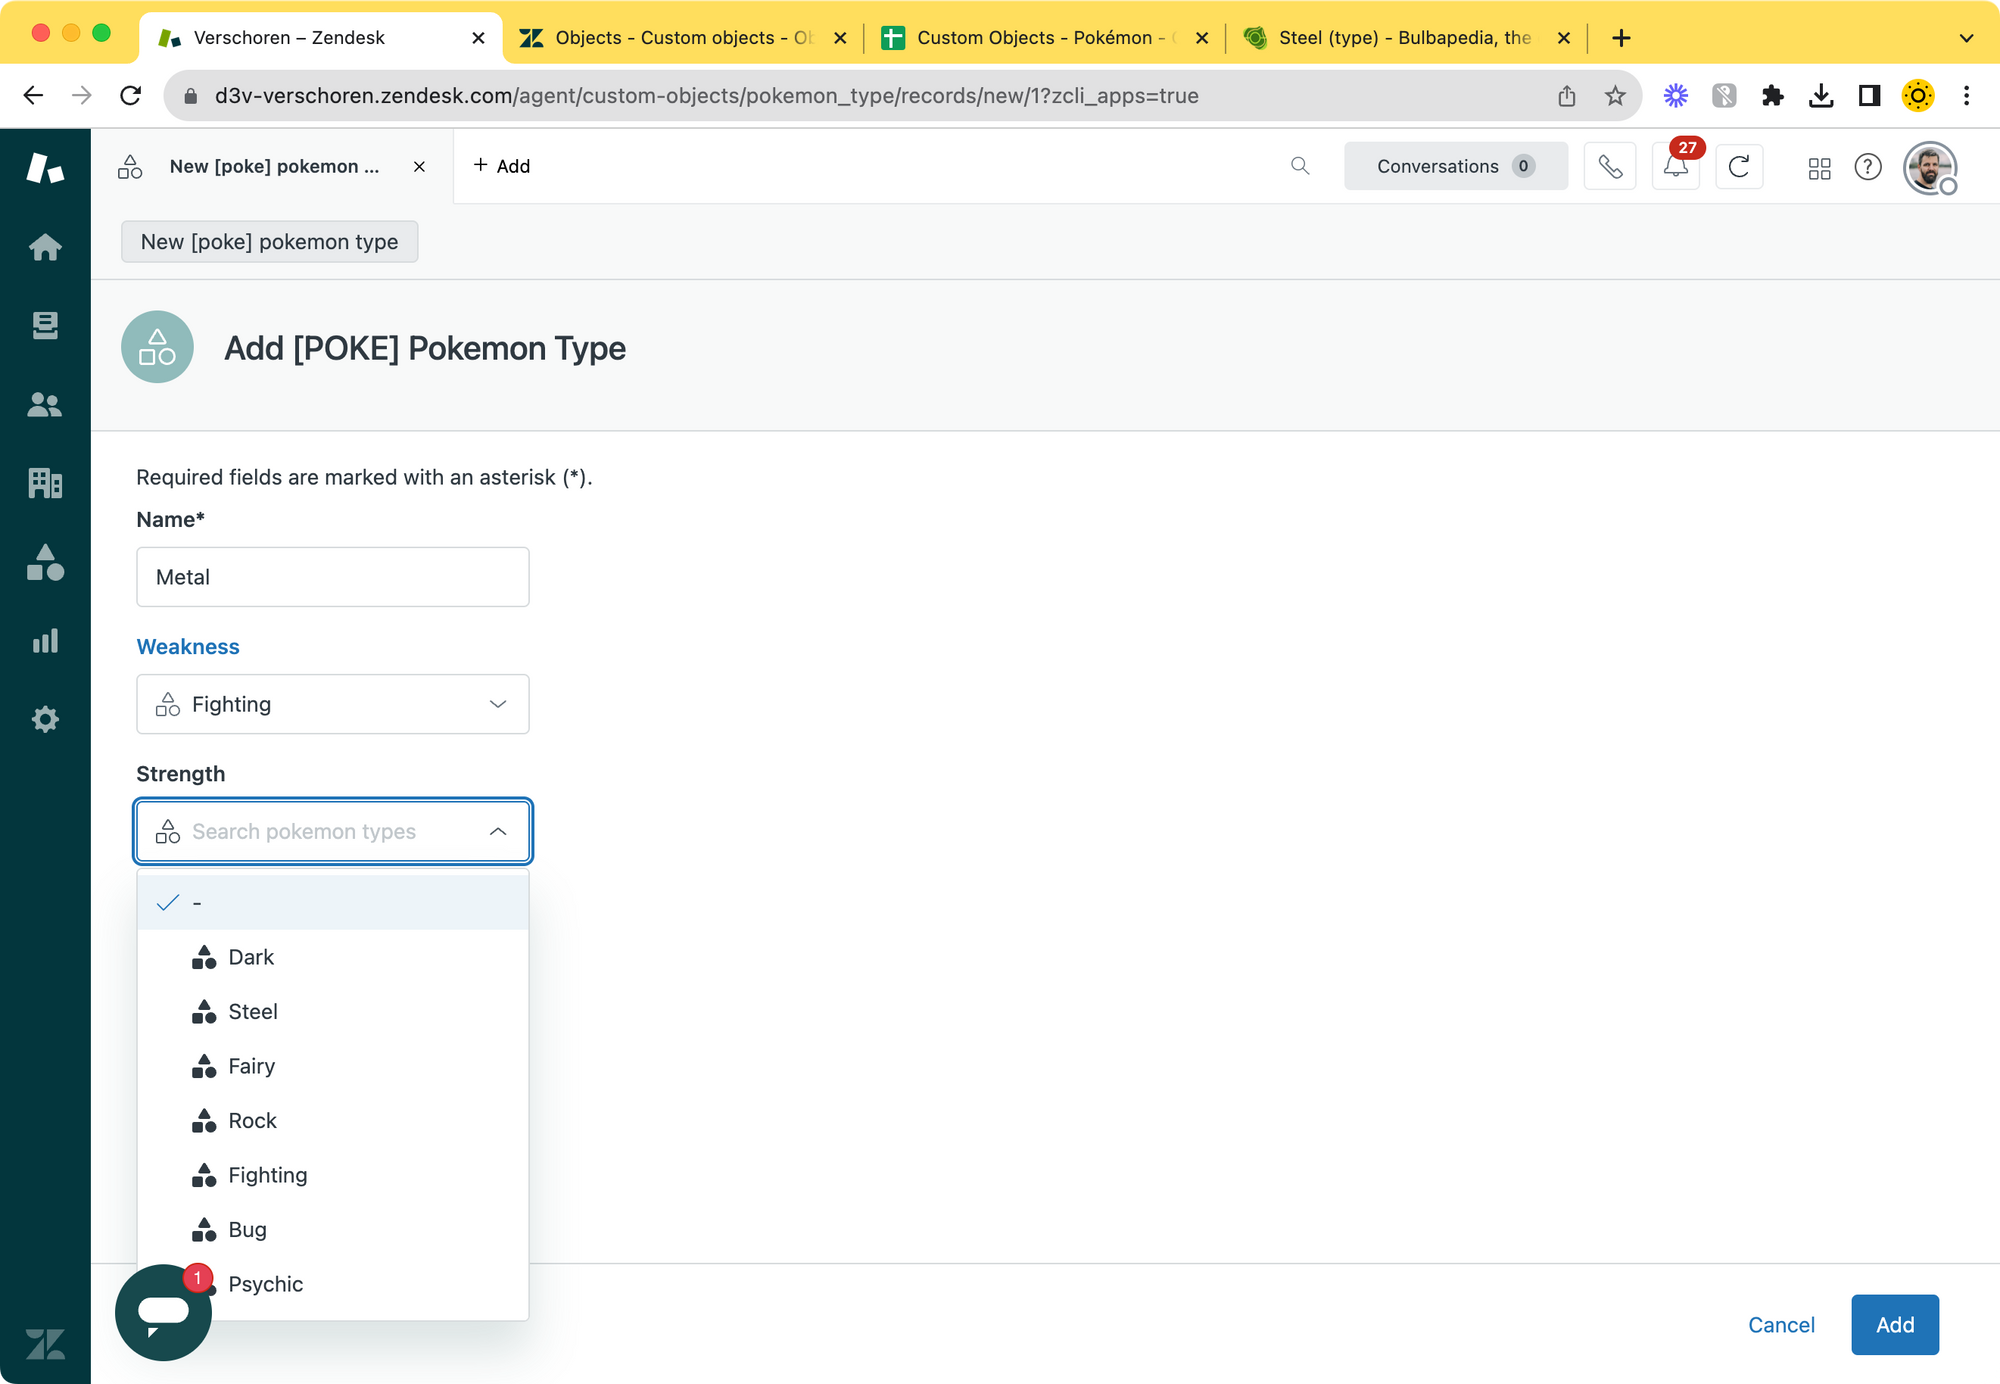
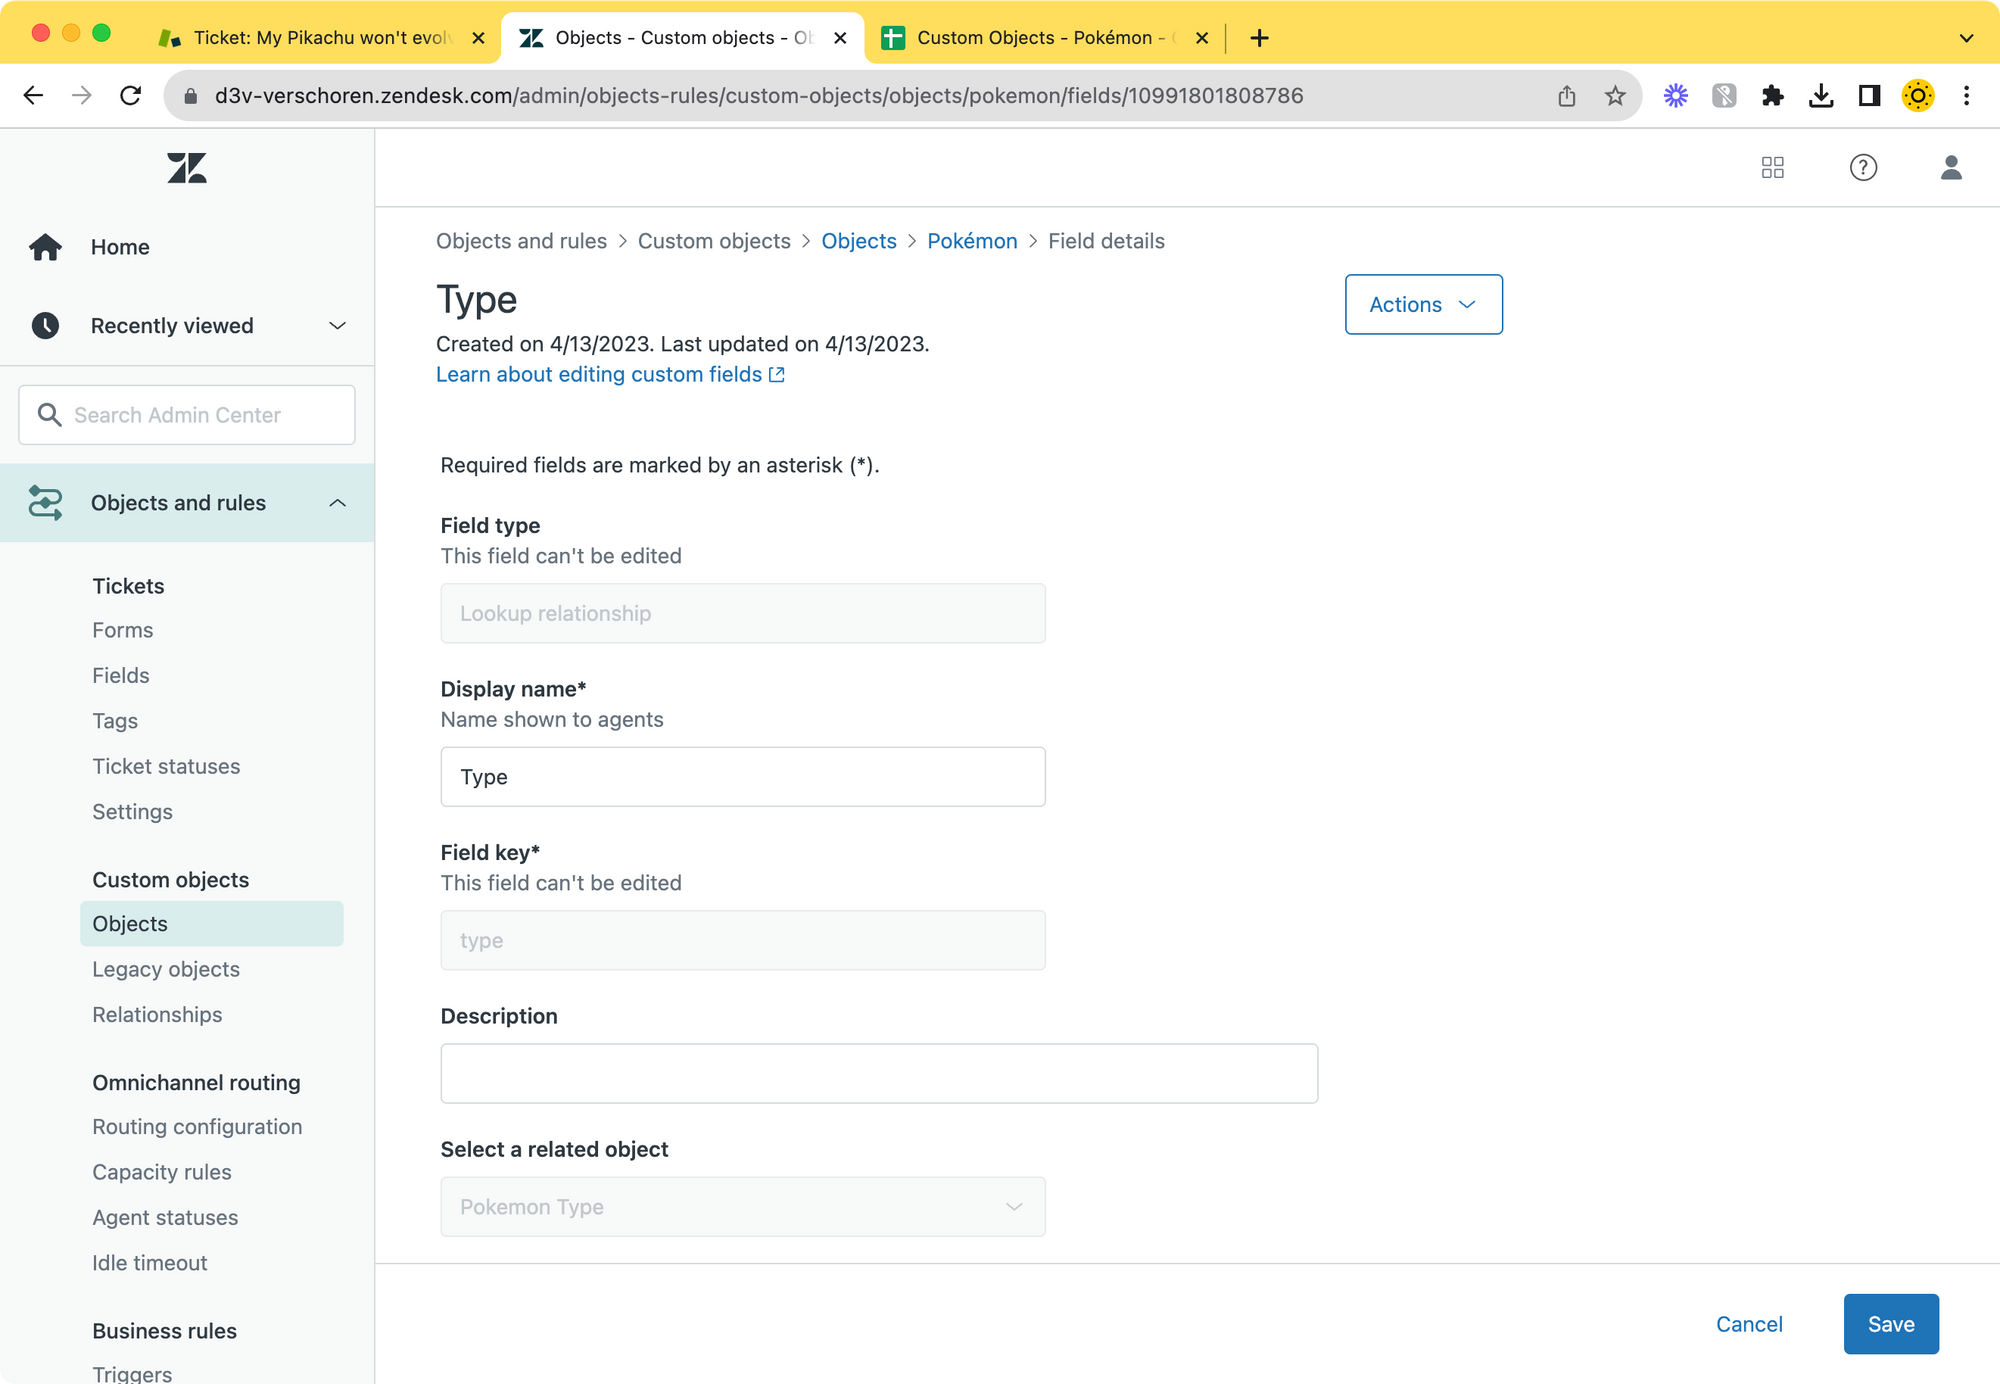
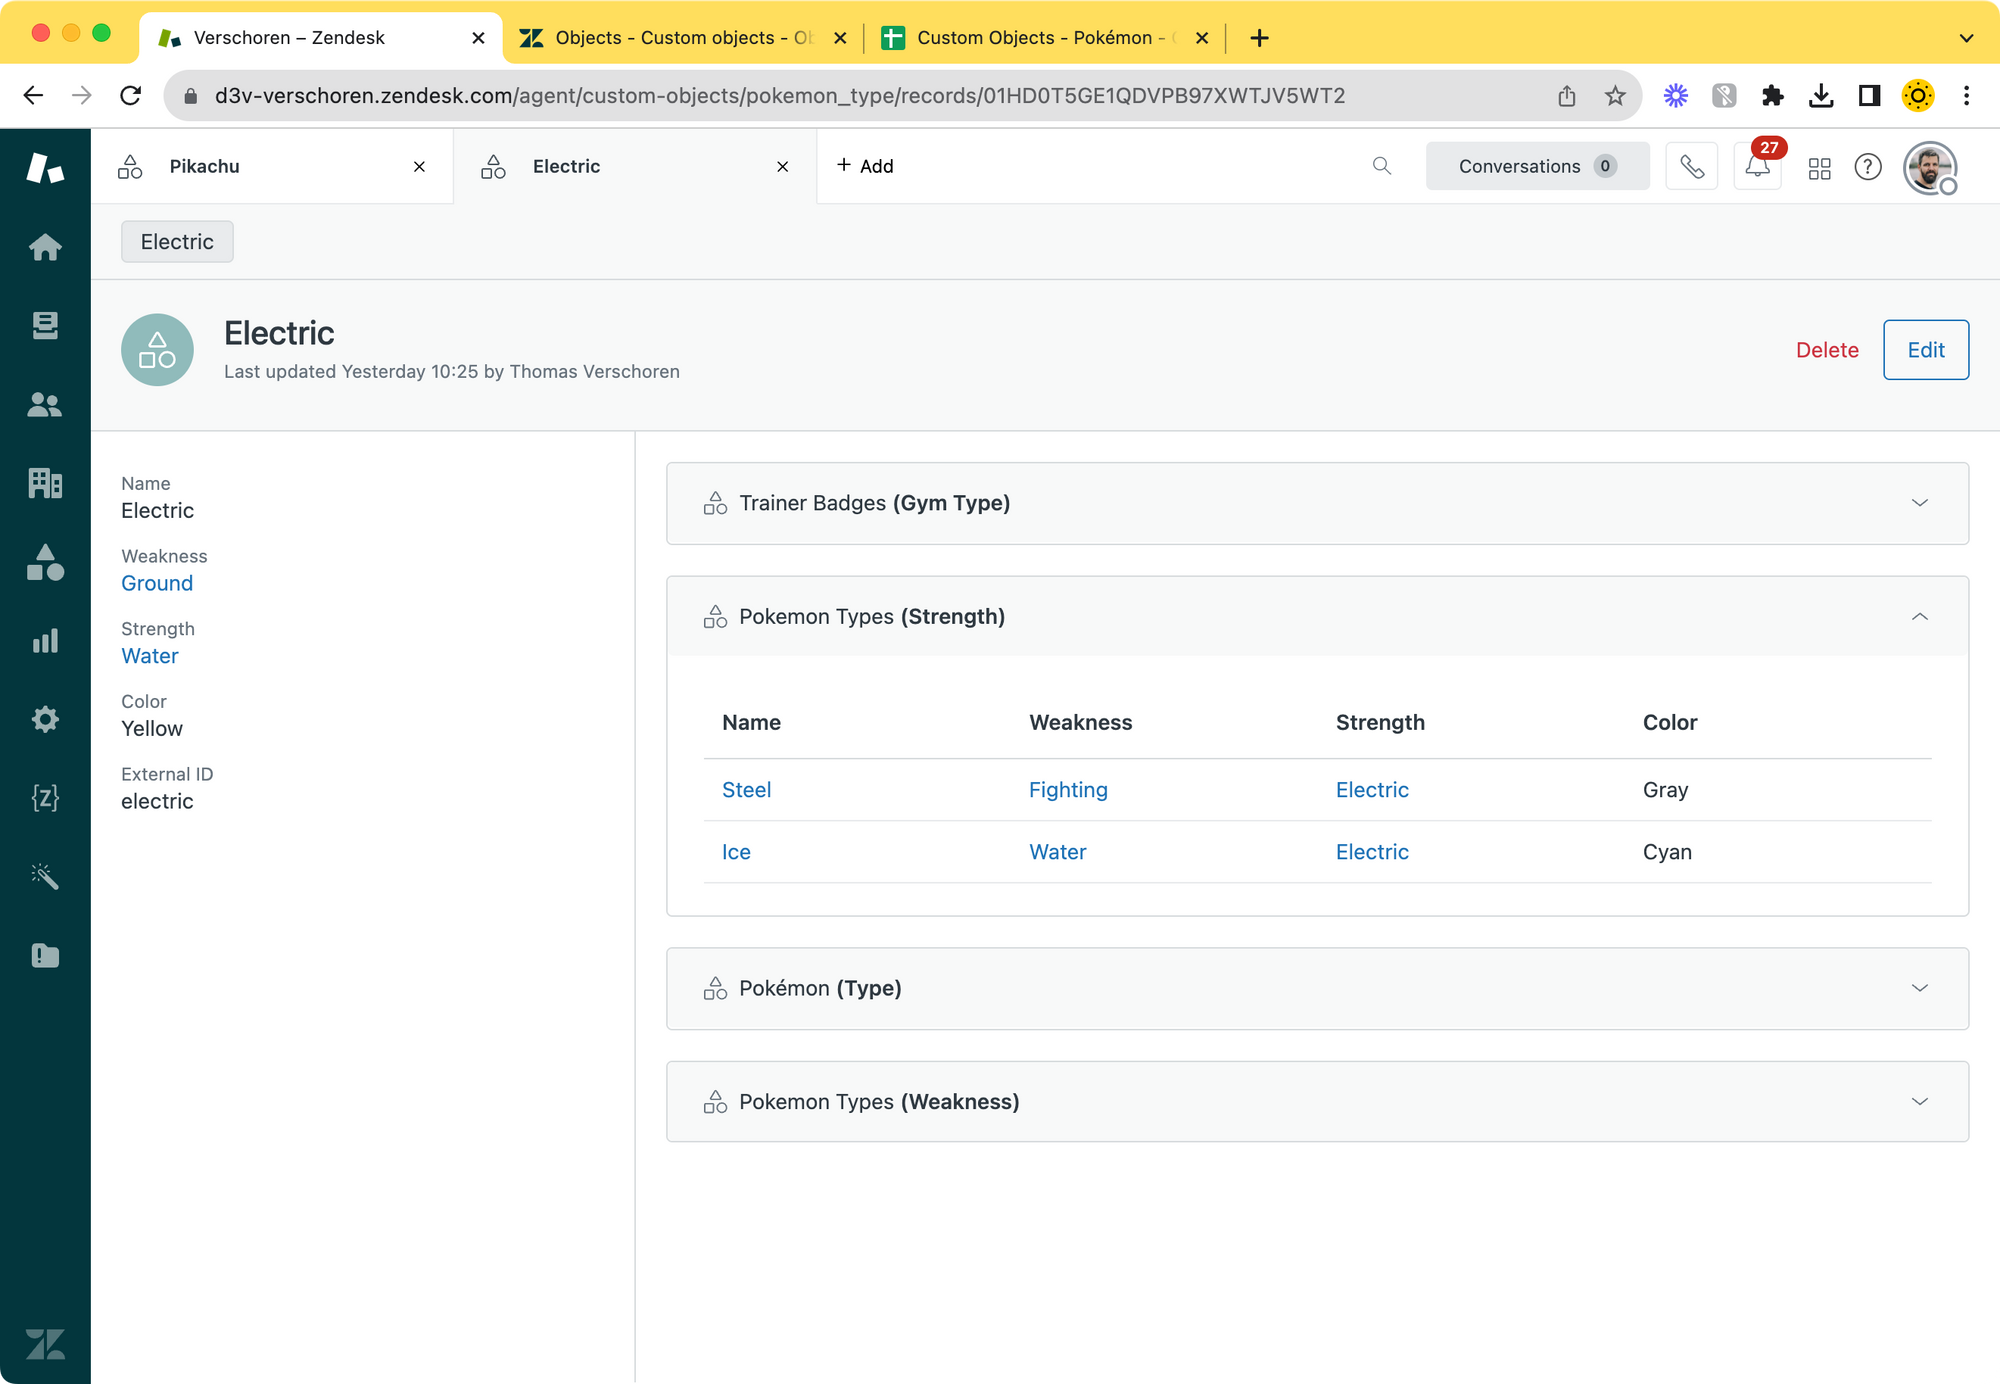
Lookup Fields are used to link multiple objects together. In our case we want to add a strength and weakness field that stores the types the customer is strong or weak. Since these values are pokemon_types too, we can add lookup fields that link to pokemon_types to reference them. This way we can jump between the elements when looking at them later in the Custom Object inspector.
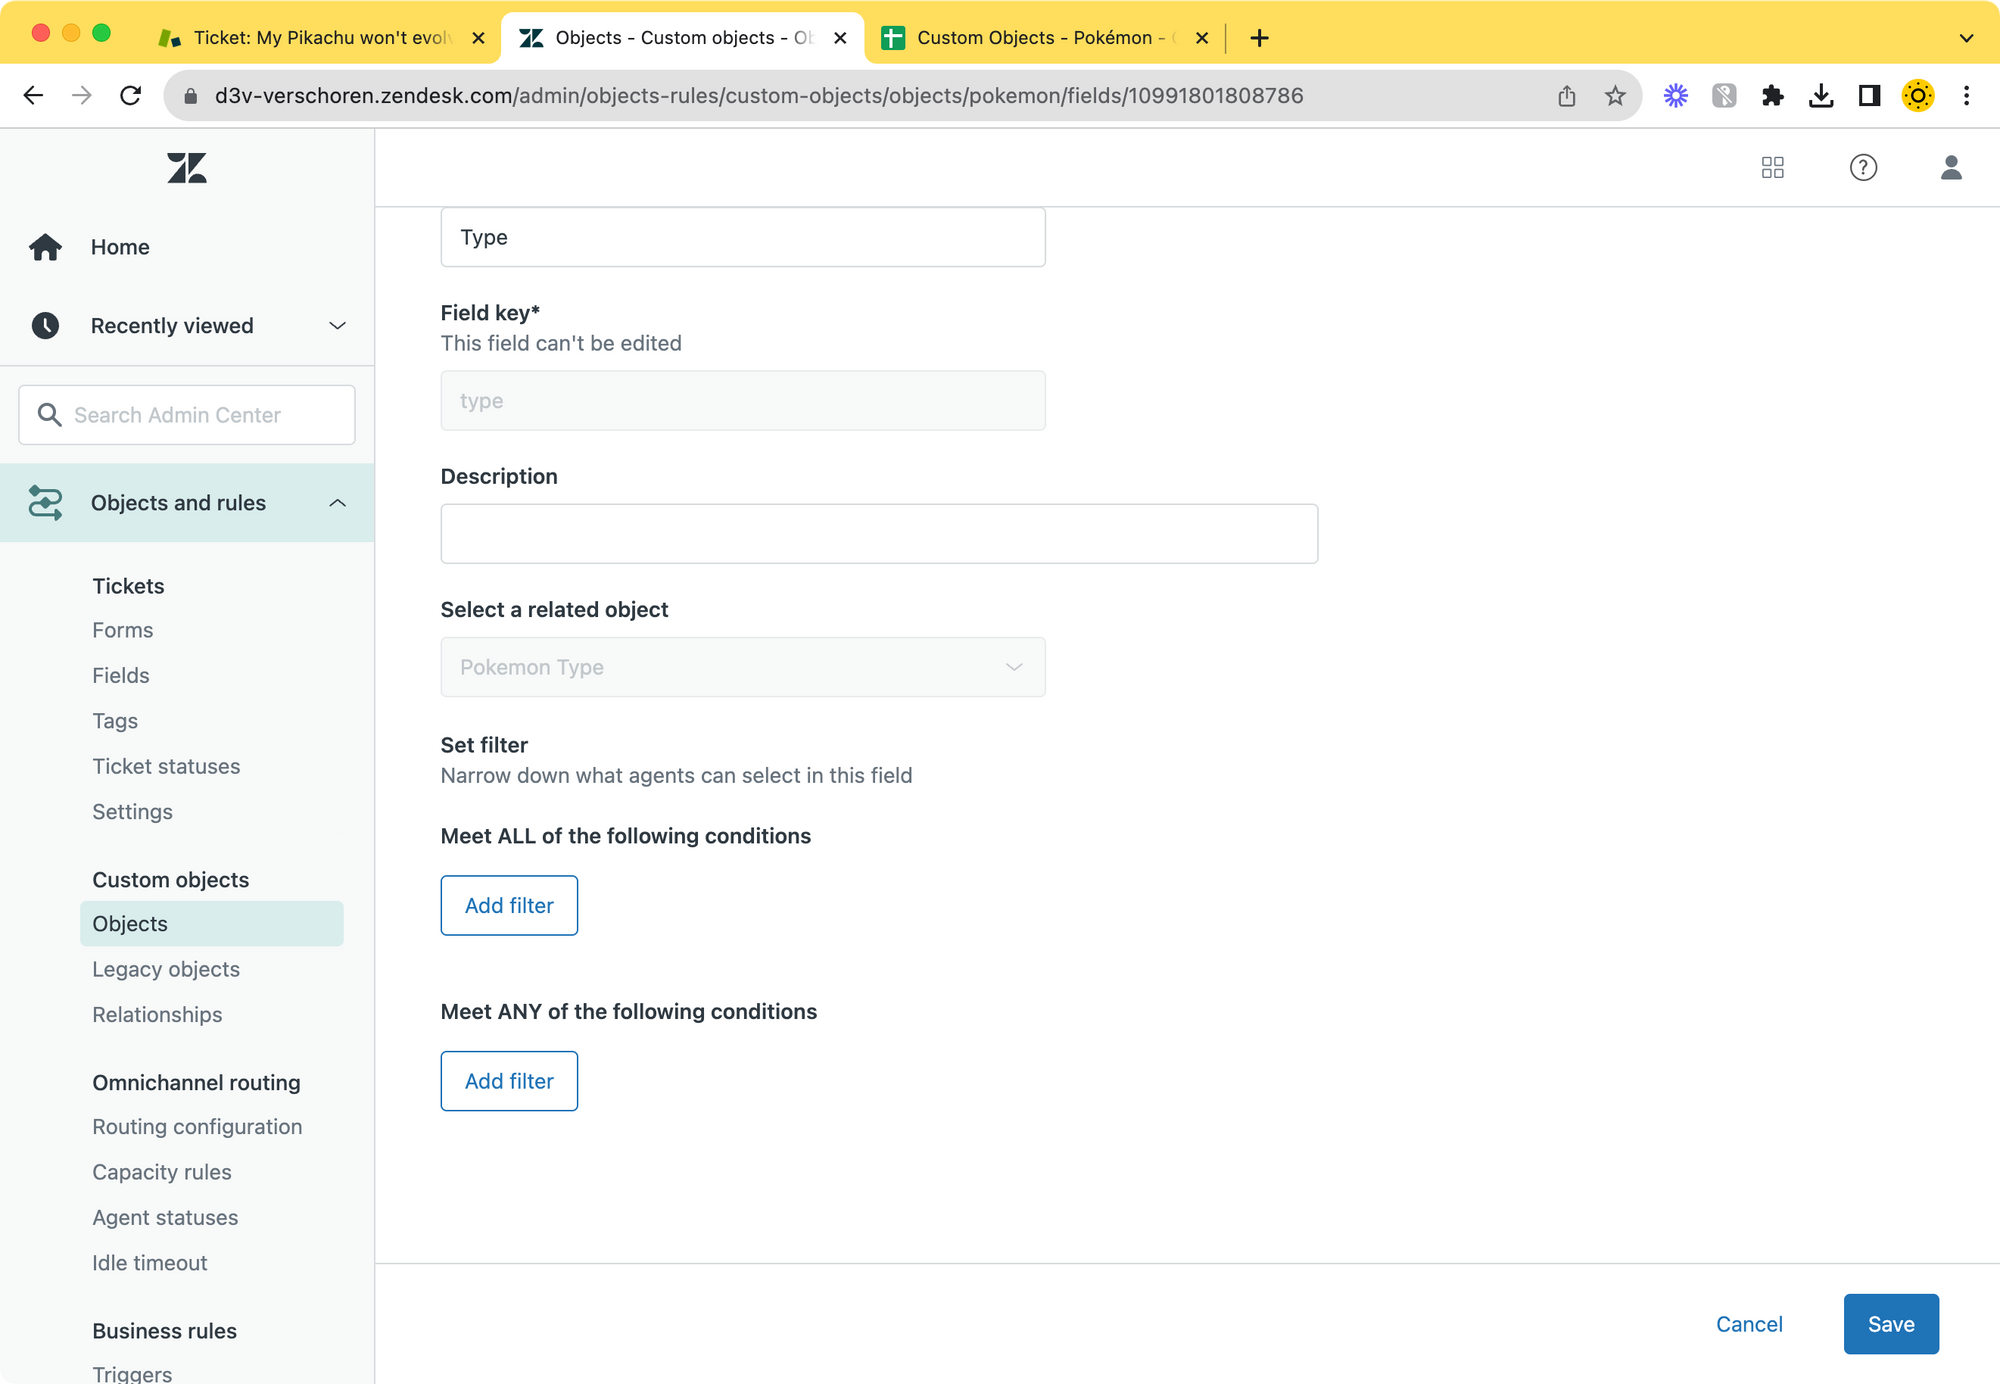
When adding a Lookup Field you have to select the Related Object, in our case the Pokémon Type . You can filter the returned records, but that's something we'll use in a future article. You can ignore it for now.
Adding records
Now that we have our object type created, we can start adding data. This is done via the Custom Objects Inspector in the Agent Workspace. You can find it via the nabber by clicking on the Stacked Blocks icon.
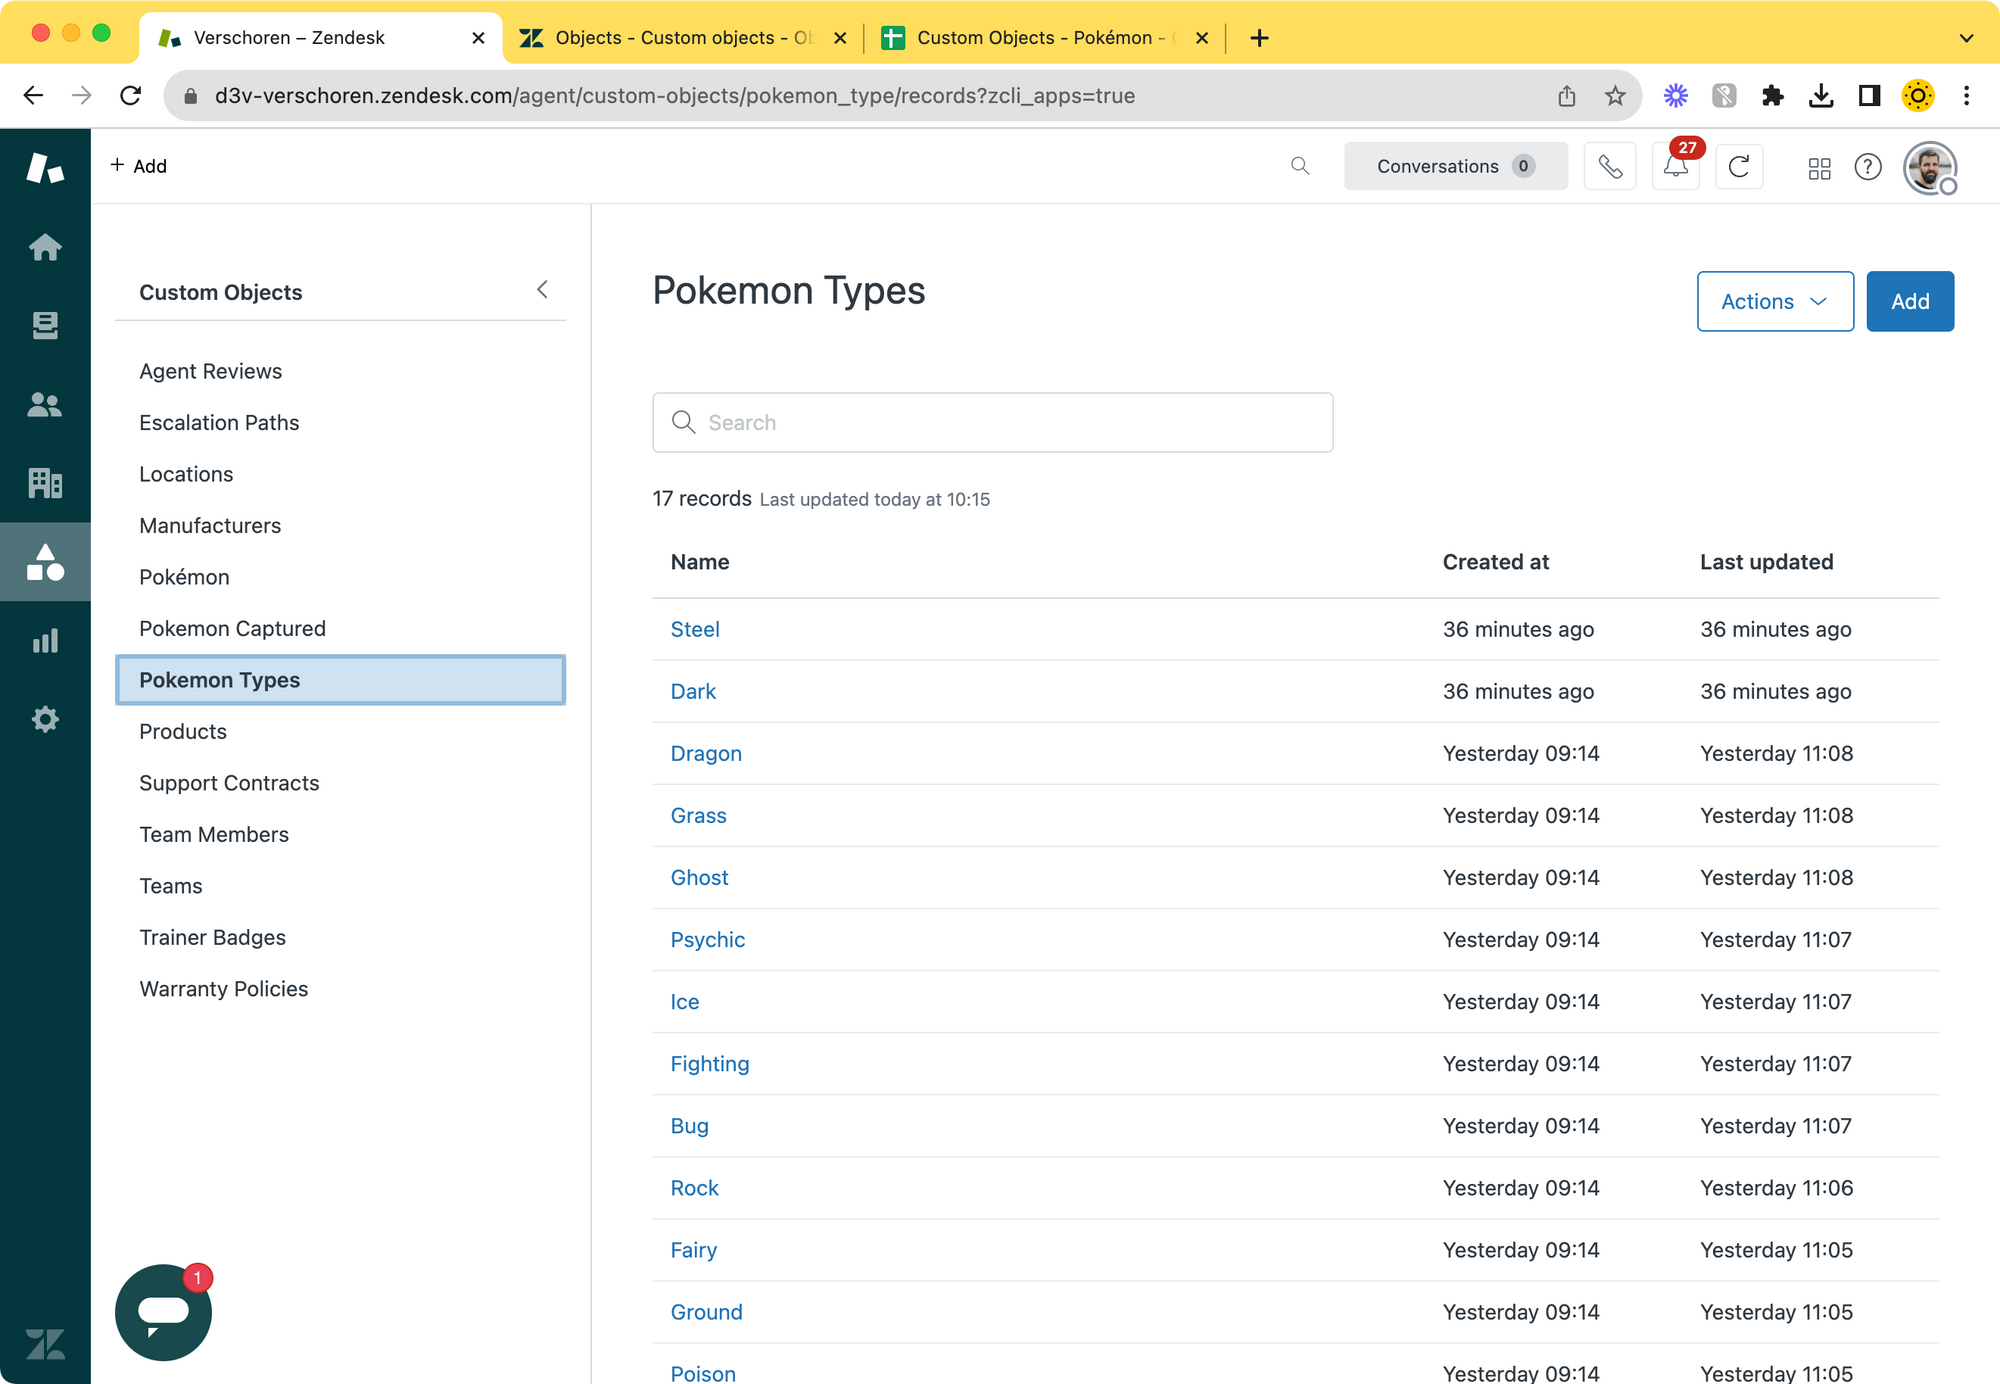
Select the Pokémon Type object and click Add to add a new type. You'll notice that you probably need to first create all elements, and then go back to add their Strength and Weakness since most of those referenced types will not yet exist.
Creating the Pokémon Object
Now that we have our Types setup, we can create our main object, the Pokémon object record type.
Similar to how we created our pokemon_type object, we'll start by creating a new object type and give it a logical name, plural name and key. (I chose pokemon for all)

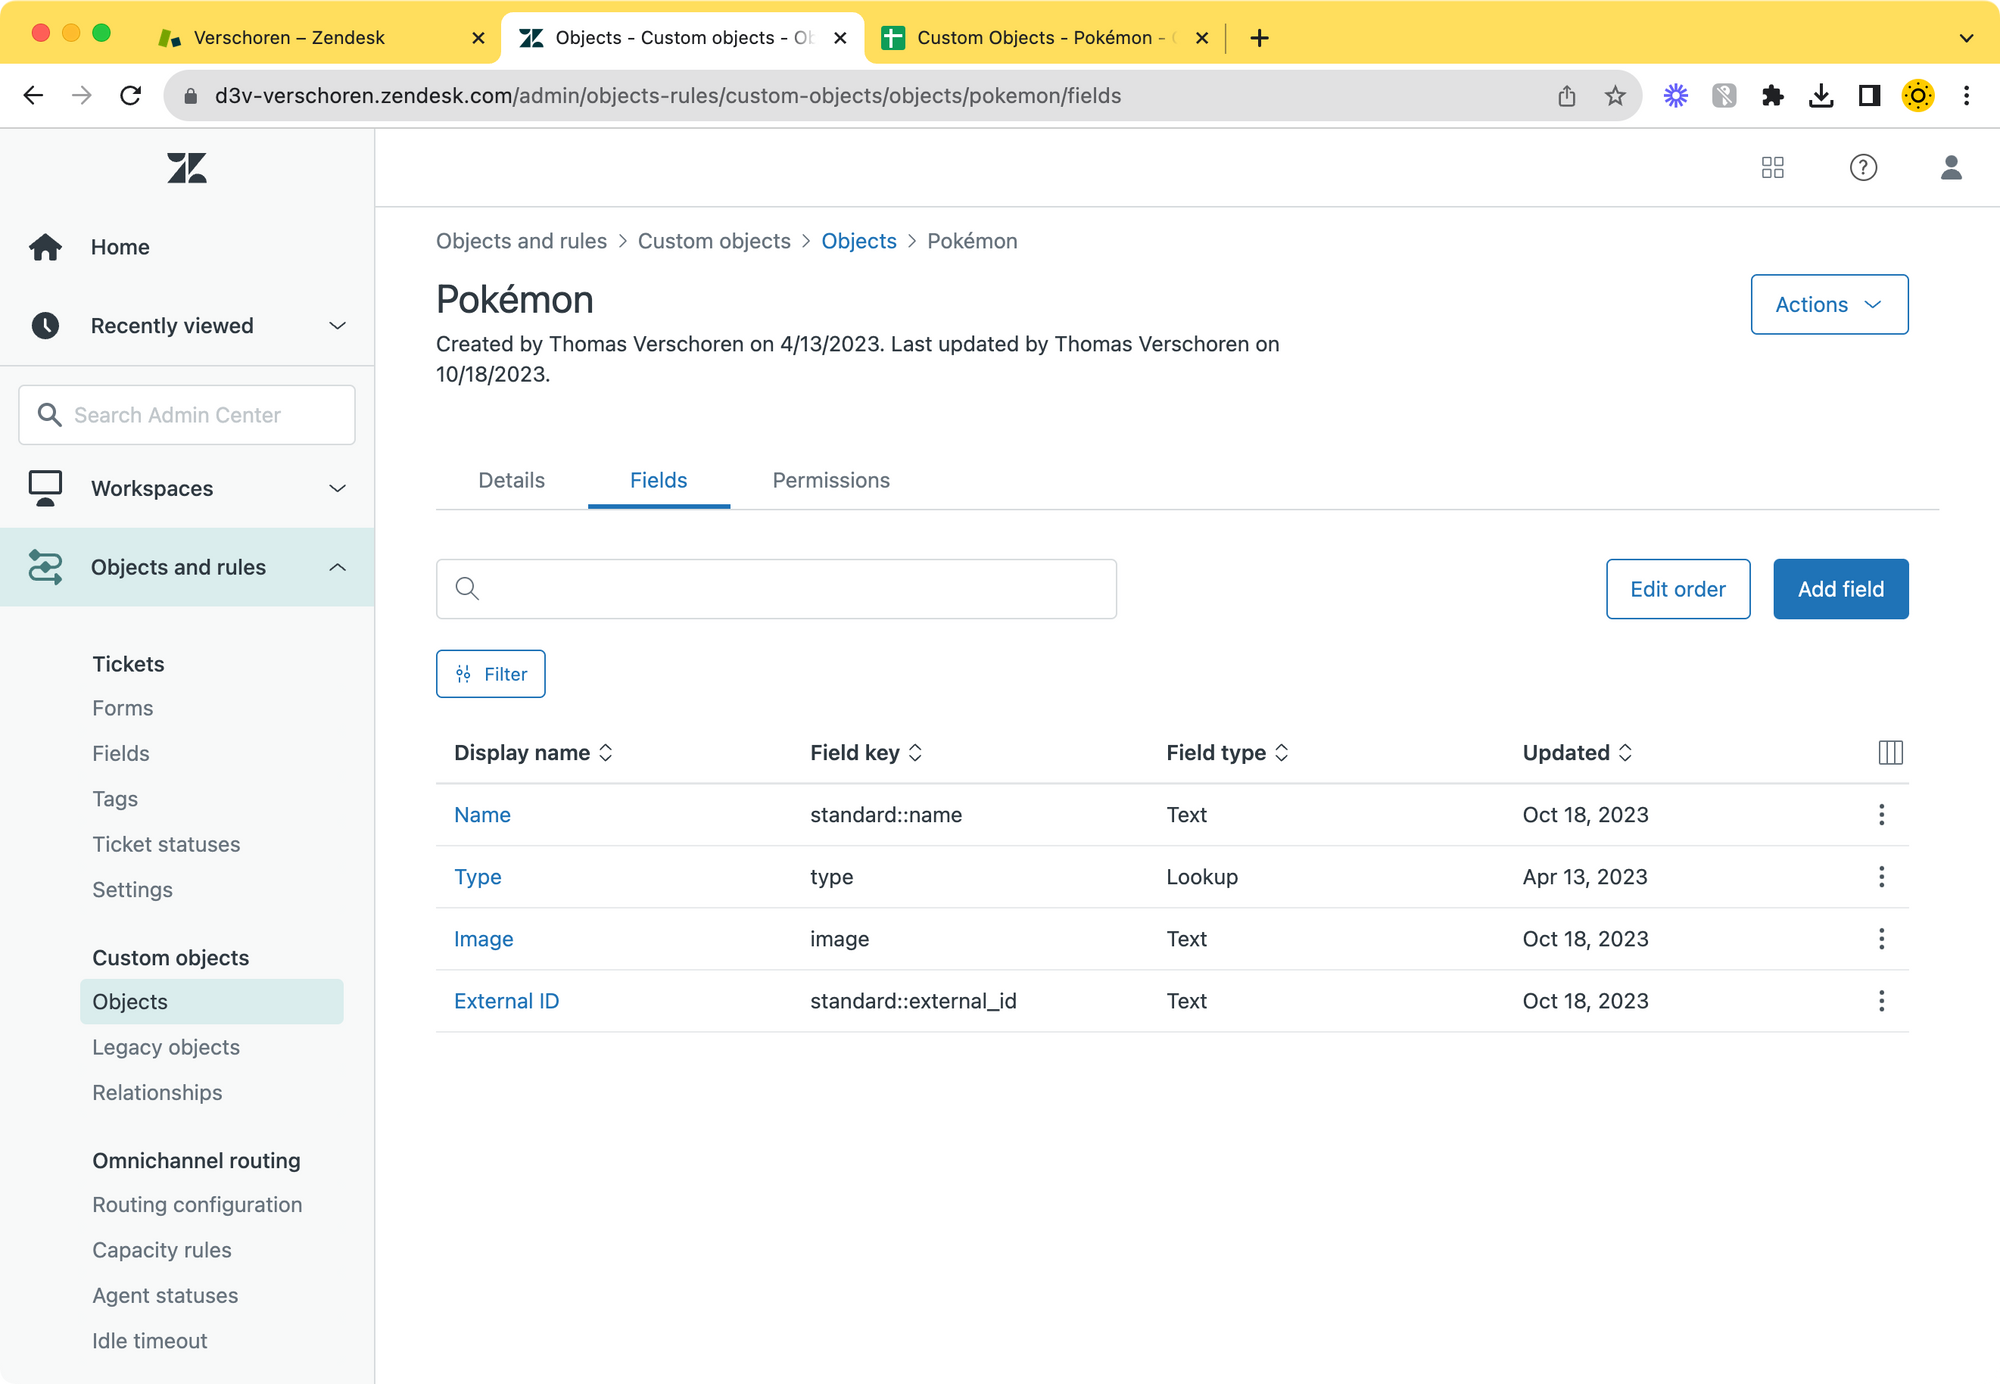
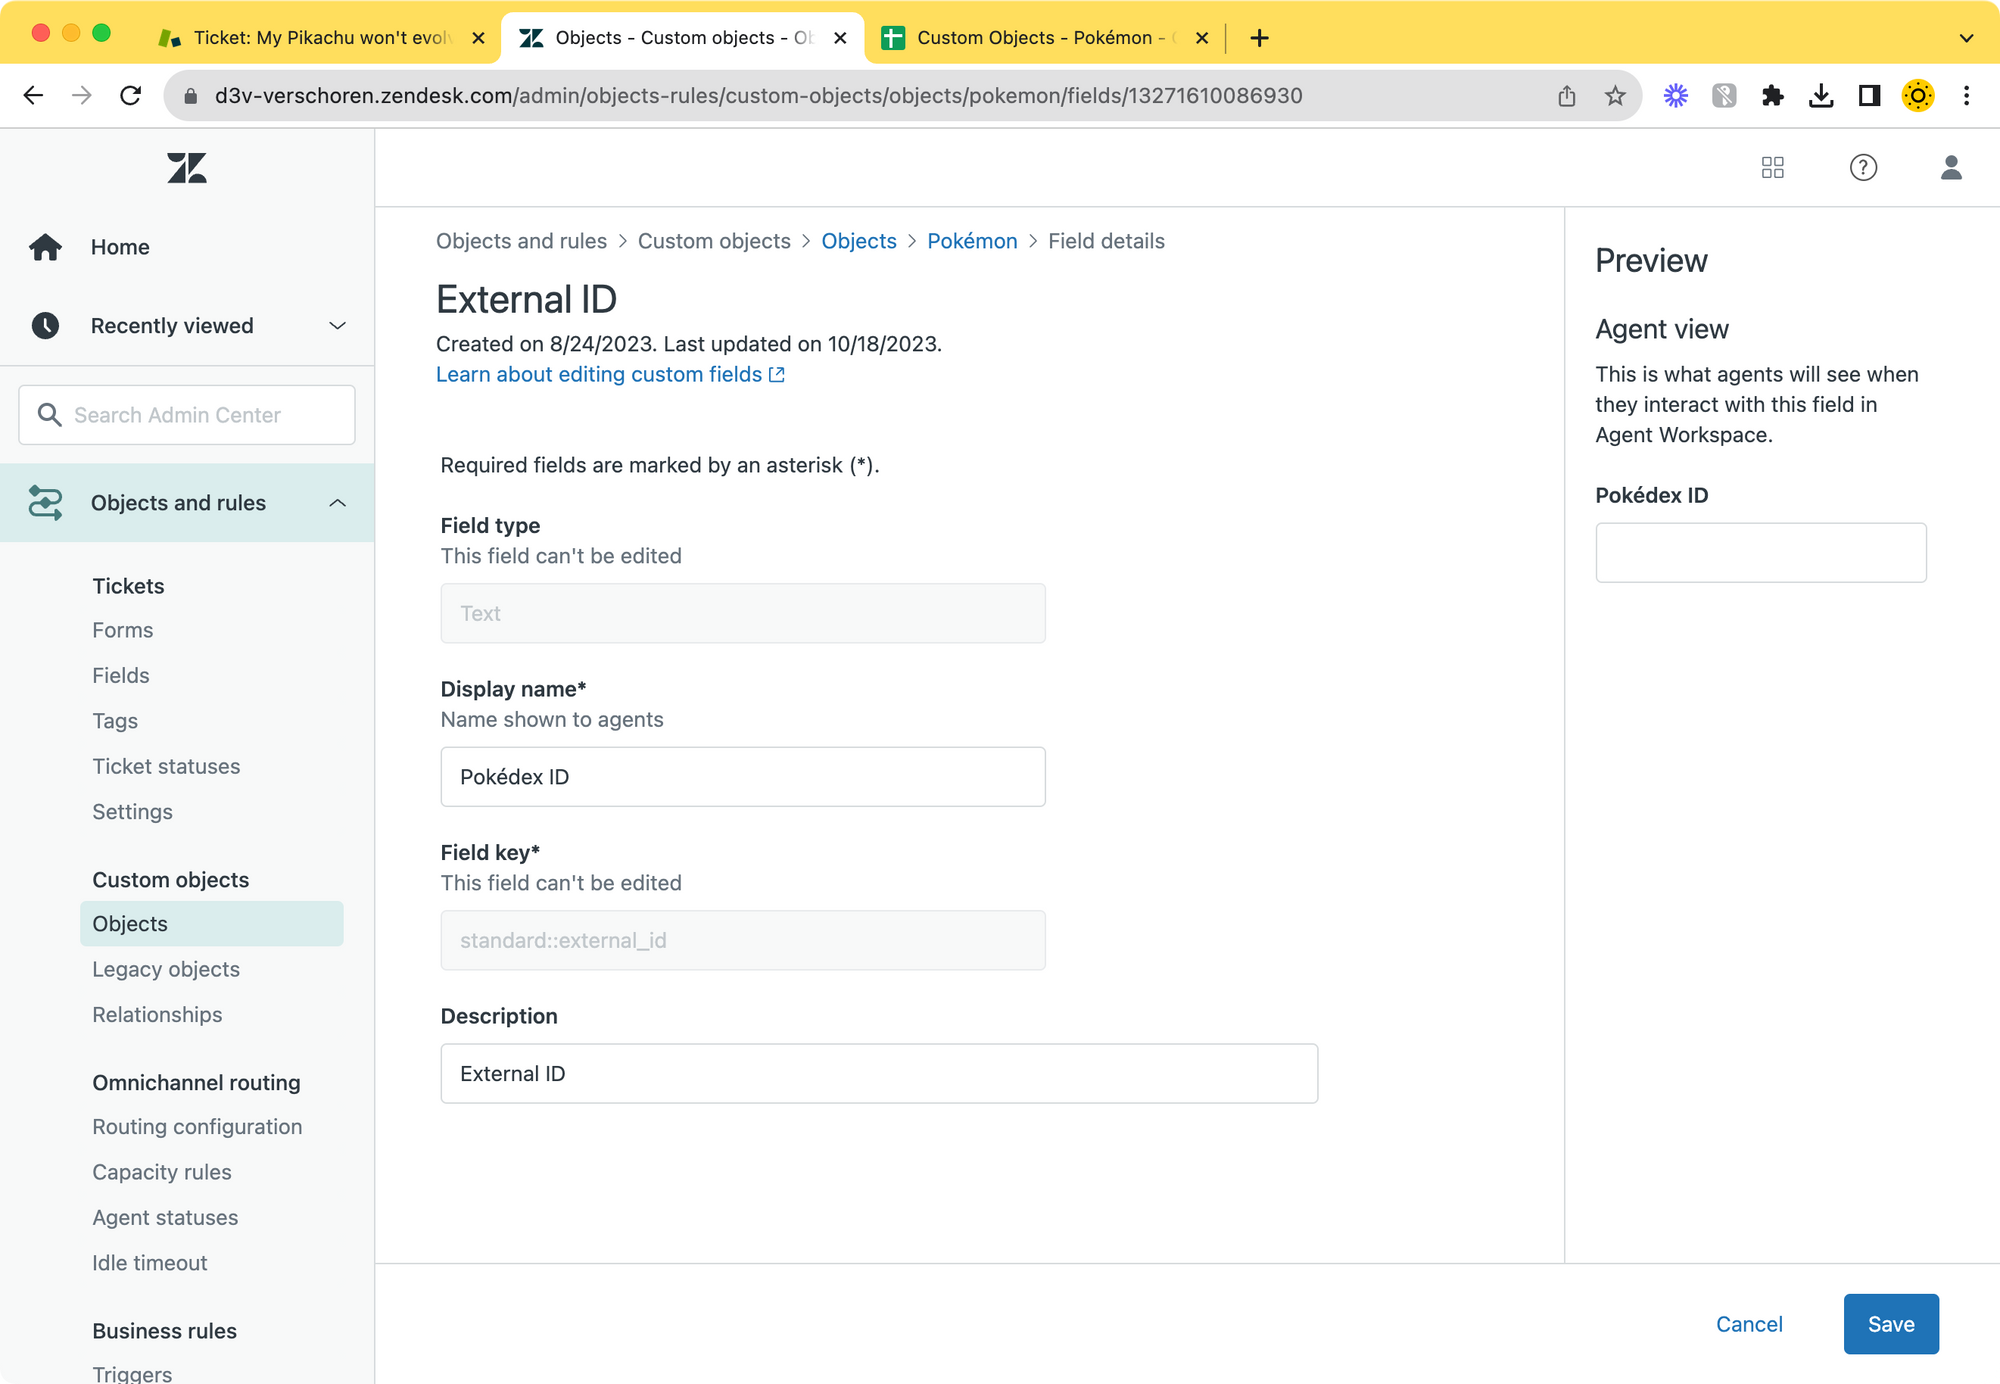
Next, add the fields. Like we discovered in our mapping exercise we can use the existing name and external_id fields.
We'll rename the External ID though. Pokédex ID has a nicer ring to it. We'll also add one Text Field for our Image URL by clicking the Add Field button and choosing a text field type. And finally we'll add a Lookup field that references the Pokémon Type we created earlier.

Adding the Pokémon Records.
Last time I looked, the starter Pokédex for Pokémon contained 151 creatures. In total there are over a 1000 of those. Similarly, if you want to use Custom Objects for your own data you probably don't want to enter all records manually like we did with our dozen Pokémon Types earlier.
To solve this Zendesk has added a Data Importer feature that allows you to import CSV files with Object Records into Zendesk.
I've prepared a file for the first 151 Pokémon here:
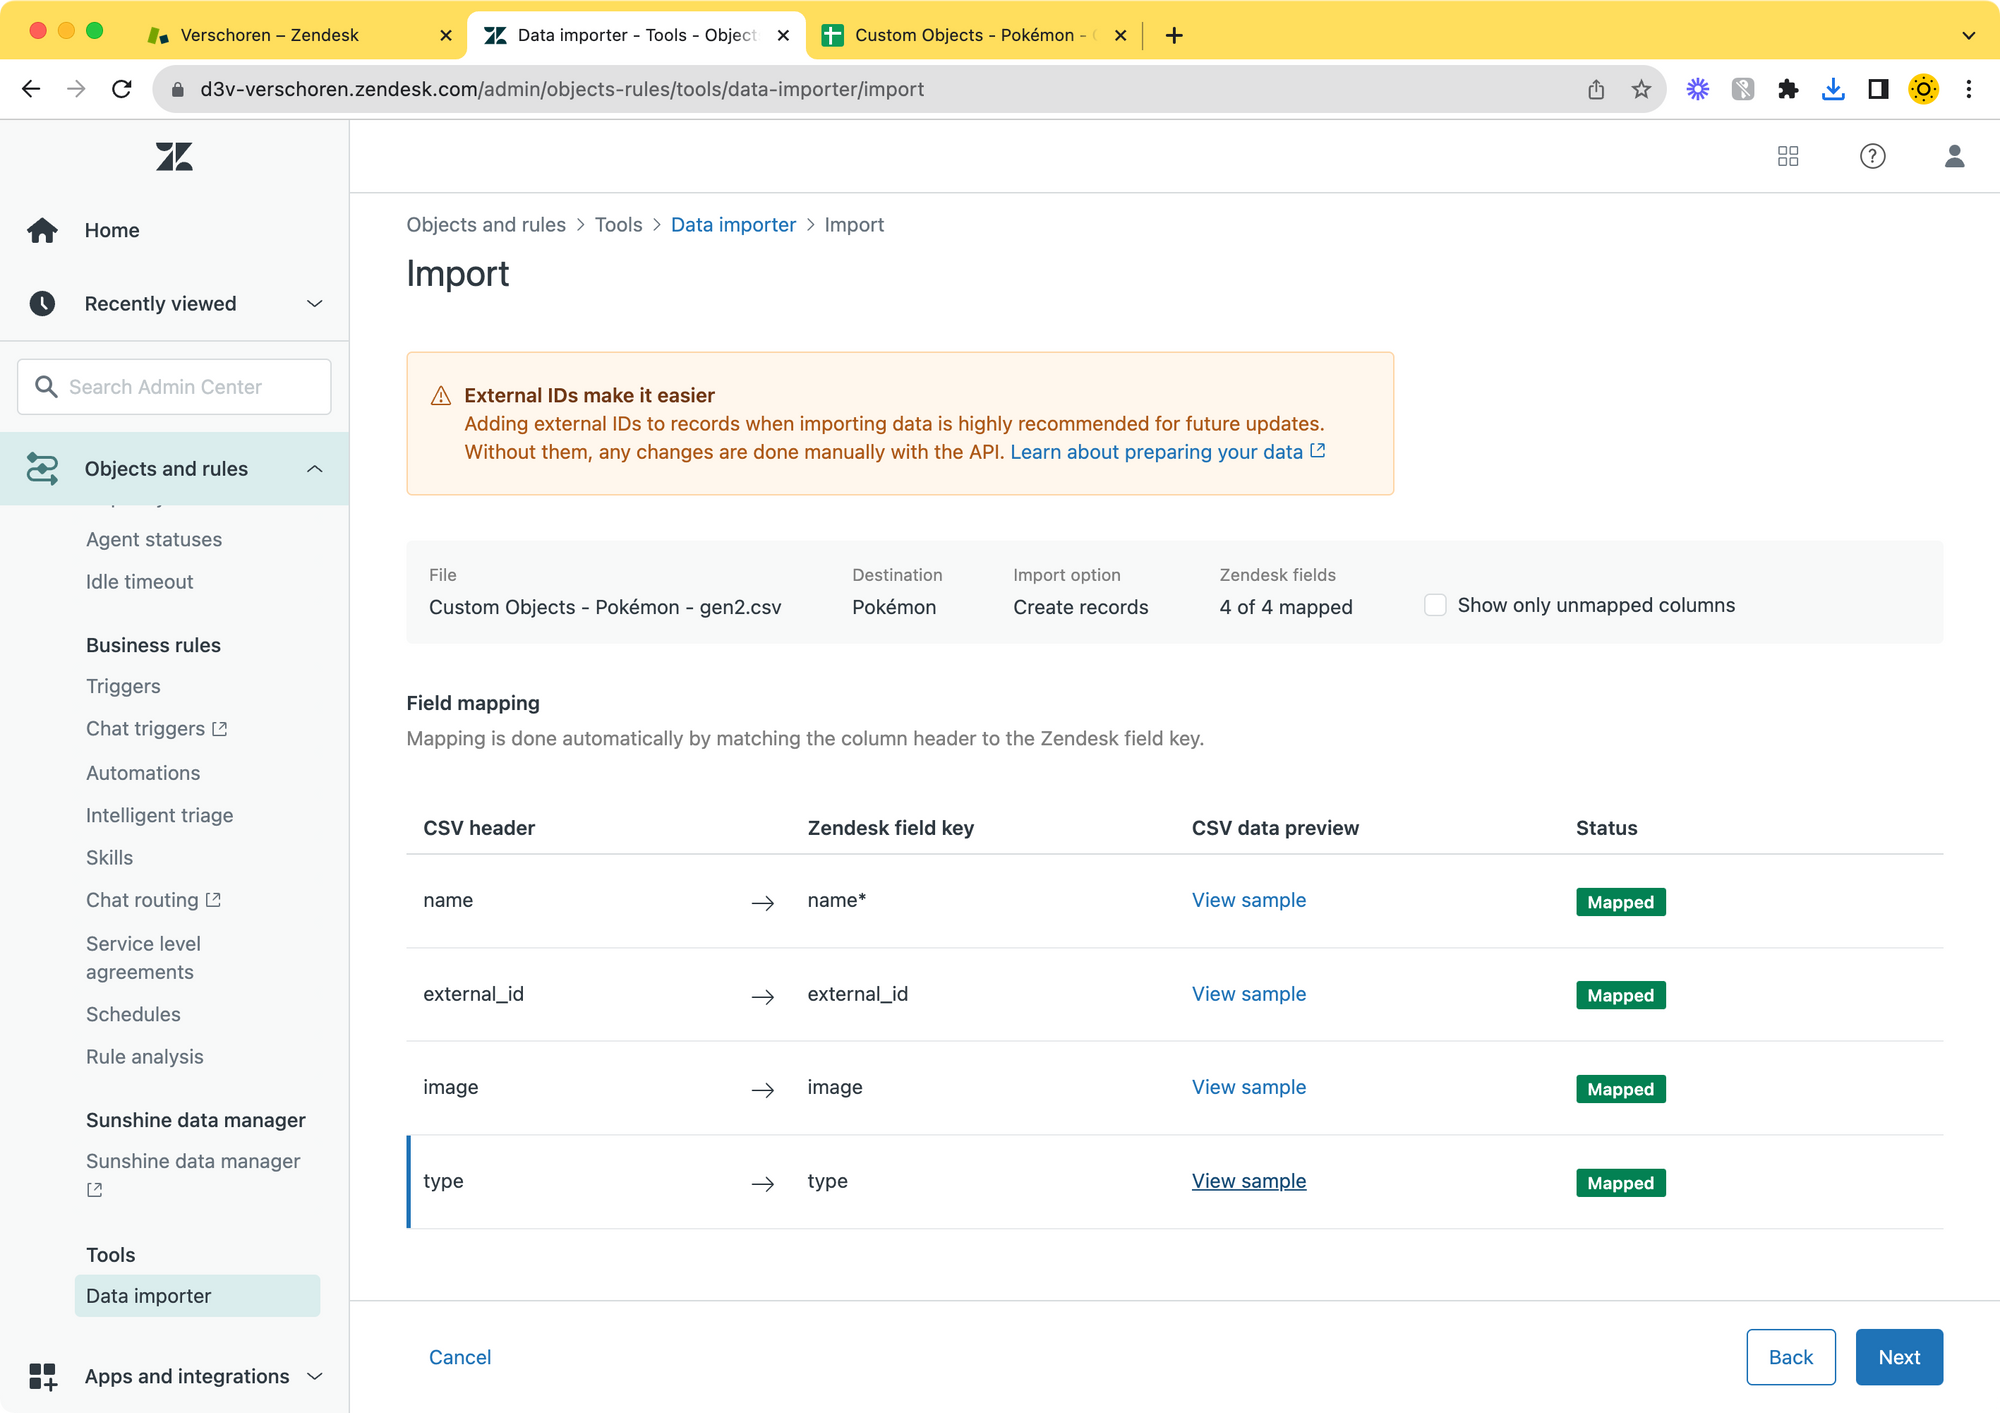
The basic import structure is simple. The column names should match the Field Keys off the Fields you created earlier, and obviously the contents should match its type. (So adding a date to a date field, a number to an integer field and so on)
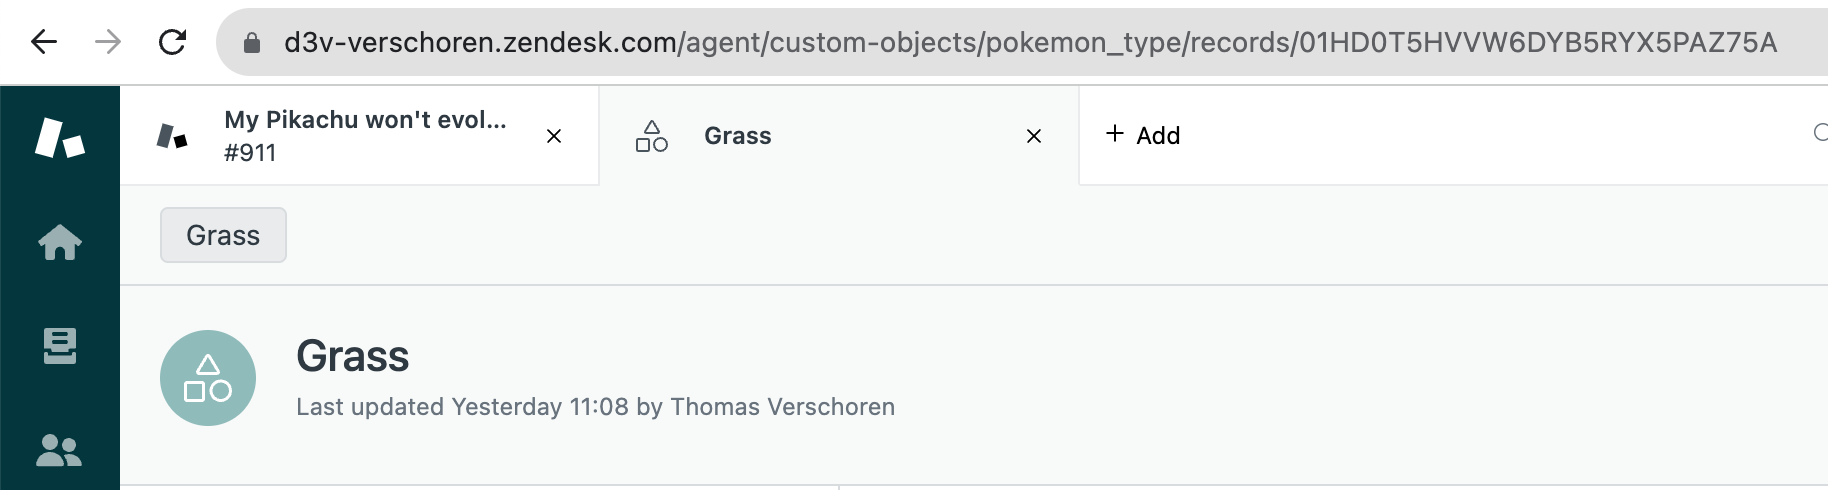
One special case is the Lookup Field column. Here Zendesk expects the ID of the element as stored in Zendesk. This ID is generated by Zendesk whenever an object is created and can be found in the URL of the object when looking at it in Agent Workspace.
For my import file I created a separate Sheet in my spreadsheet with list of Types and their corresponding ID and used a VLOOKUP to match the type Name with its ID. The resulting CSV file has two columns, Type_Name and Type where the latter matches the Field Identifier used in my Pokémon type.
https://yourdomain.zendesk.com/api/v2/custom_objects/pokemon_type/records.json will also show you a list of all records and their IDs.Once you prepared the import file, you can go to the Admin Center > Objects and Rules > Tools > Data Importer to start the Import process. Select a Target Destination (the Pokémon type) and upload your CSV.
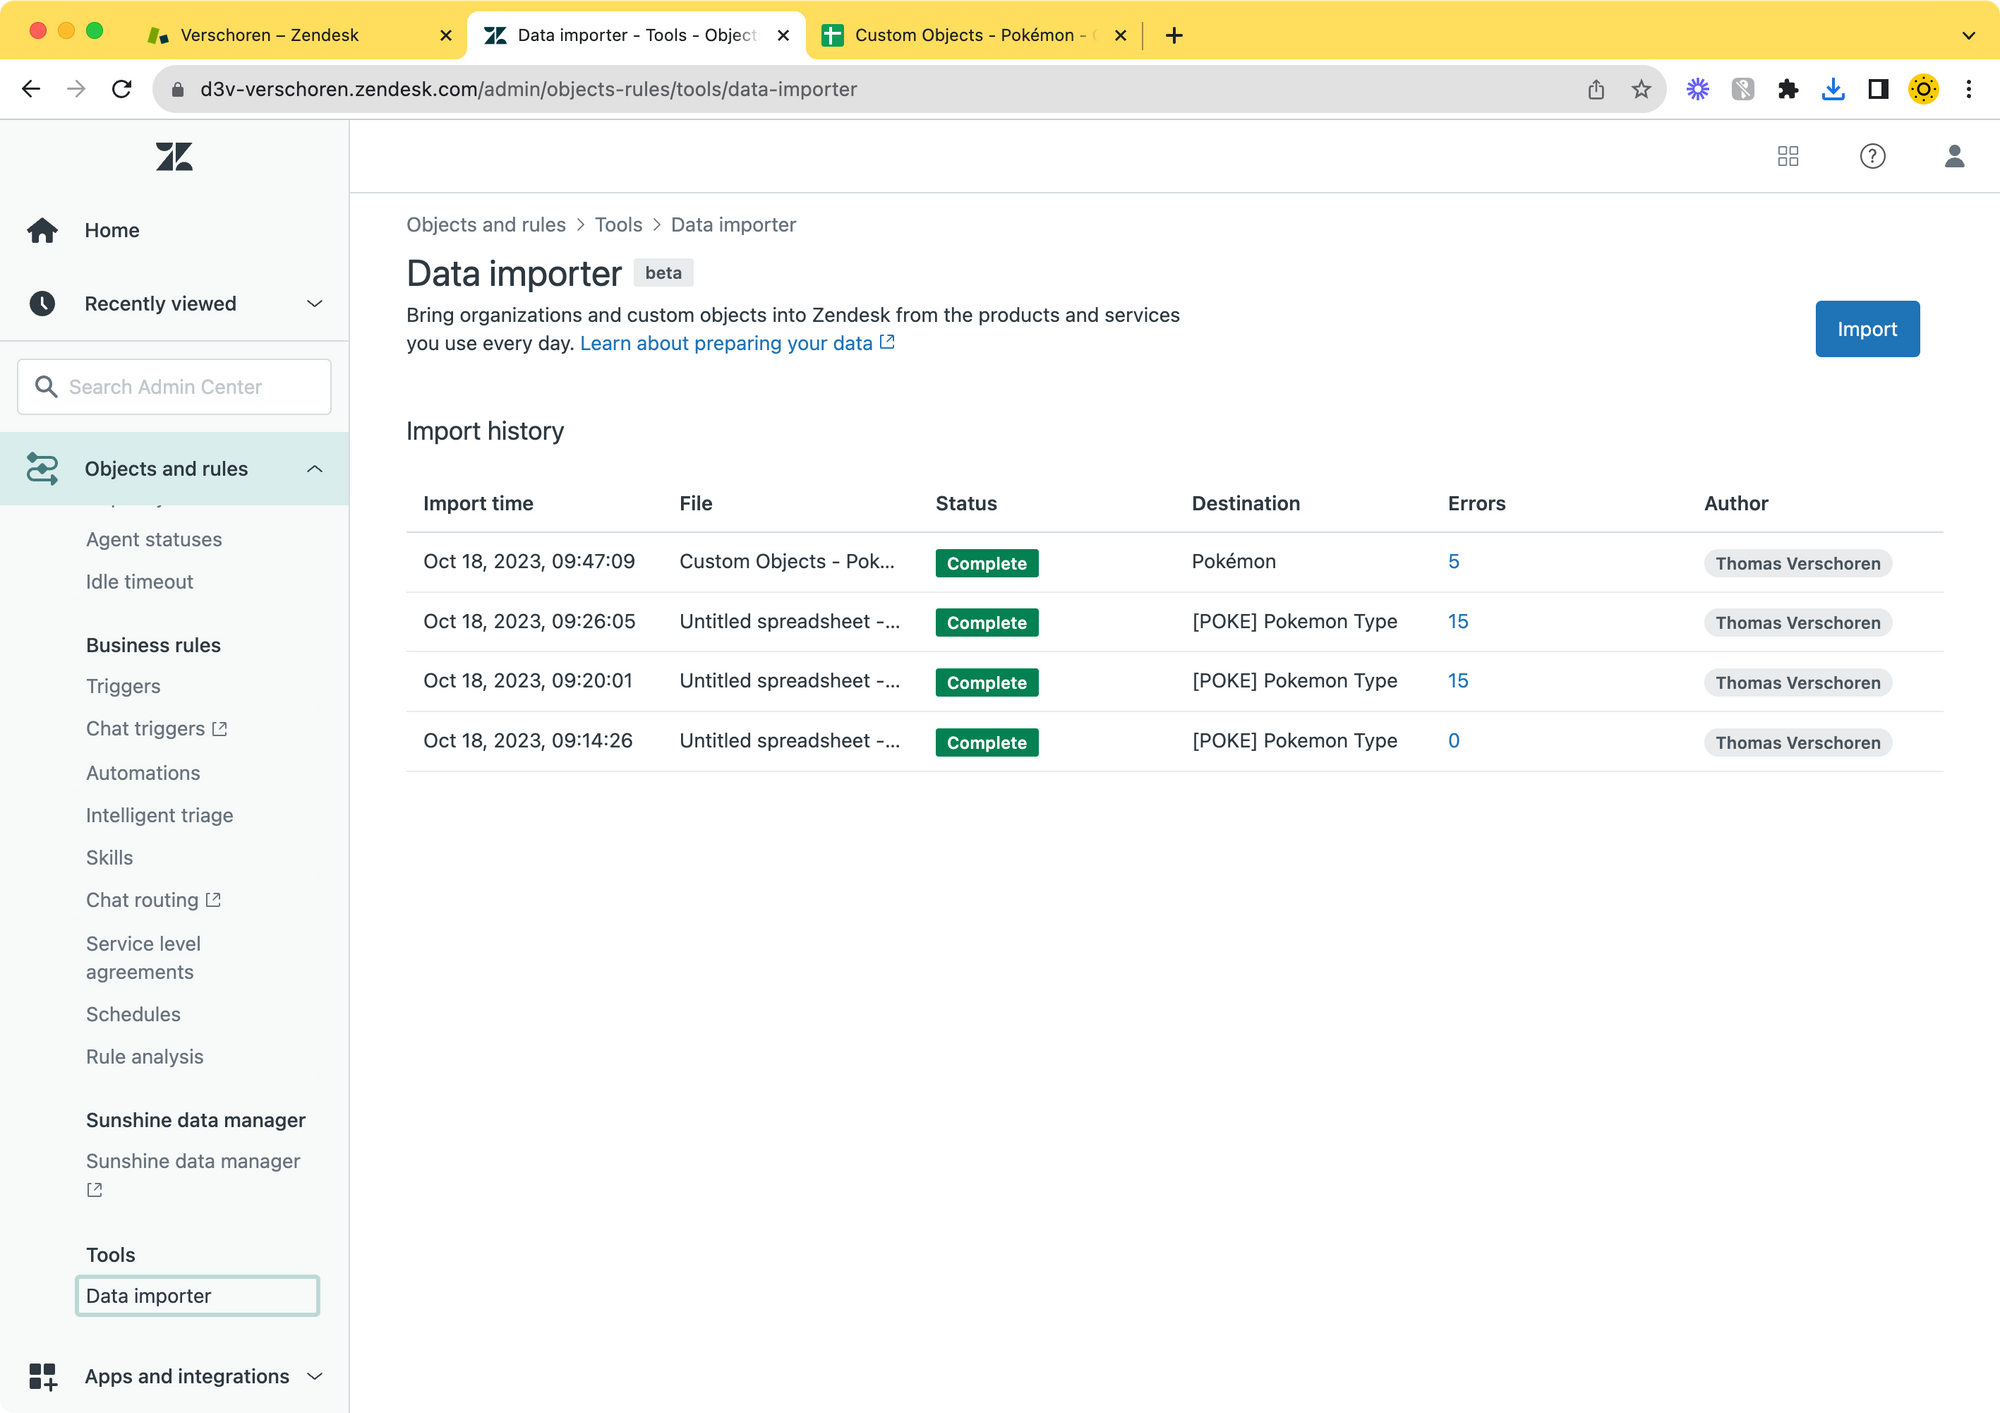
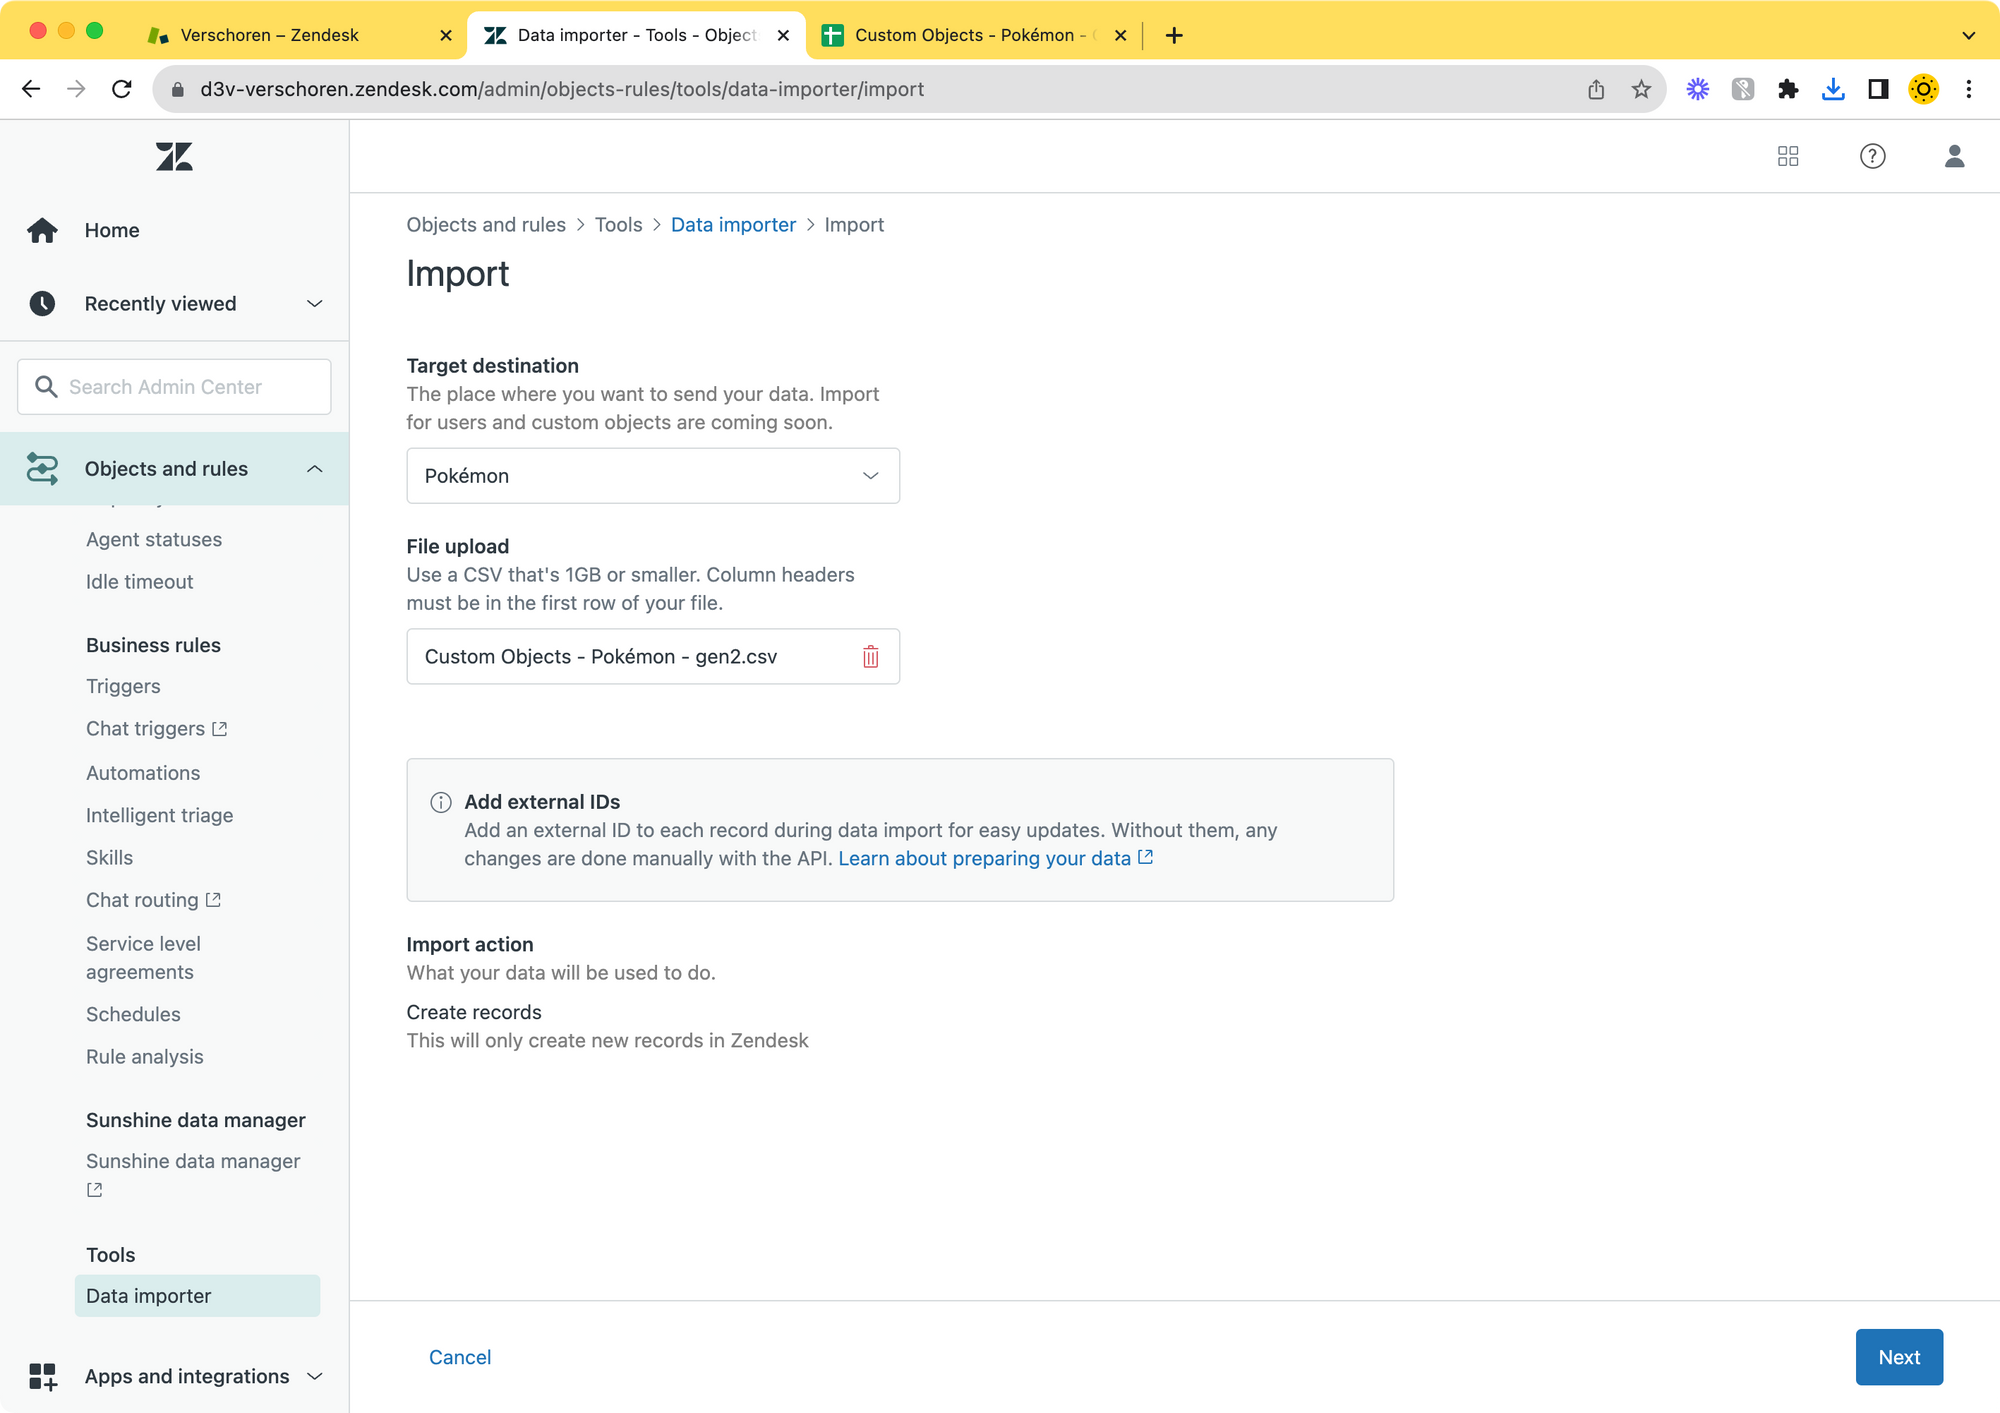
The system will validate the file and show the matches column. You can inspect some sample data to see if it all matches. You'll notice that the importer ignored the type_name column but nicely mapped my types to their correct linked record in the Pokémon Types object.
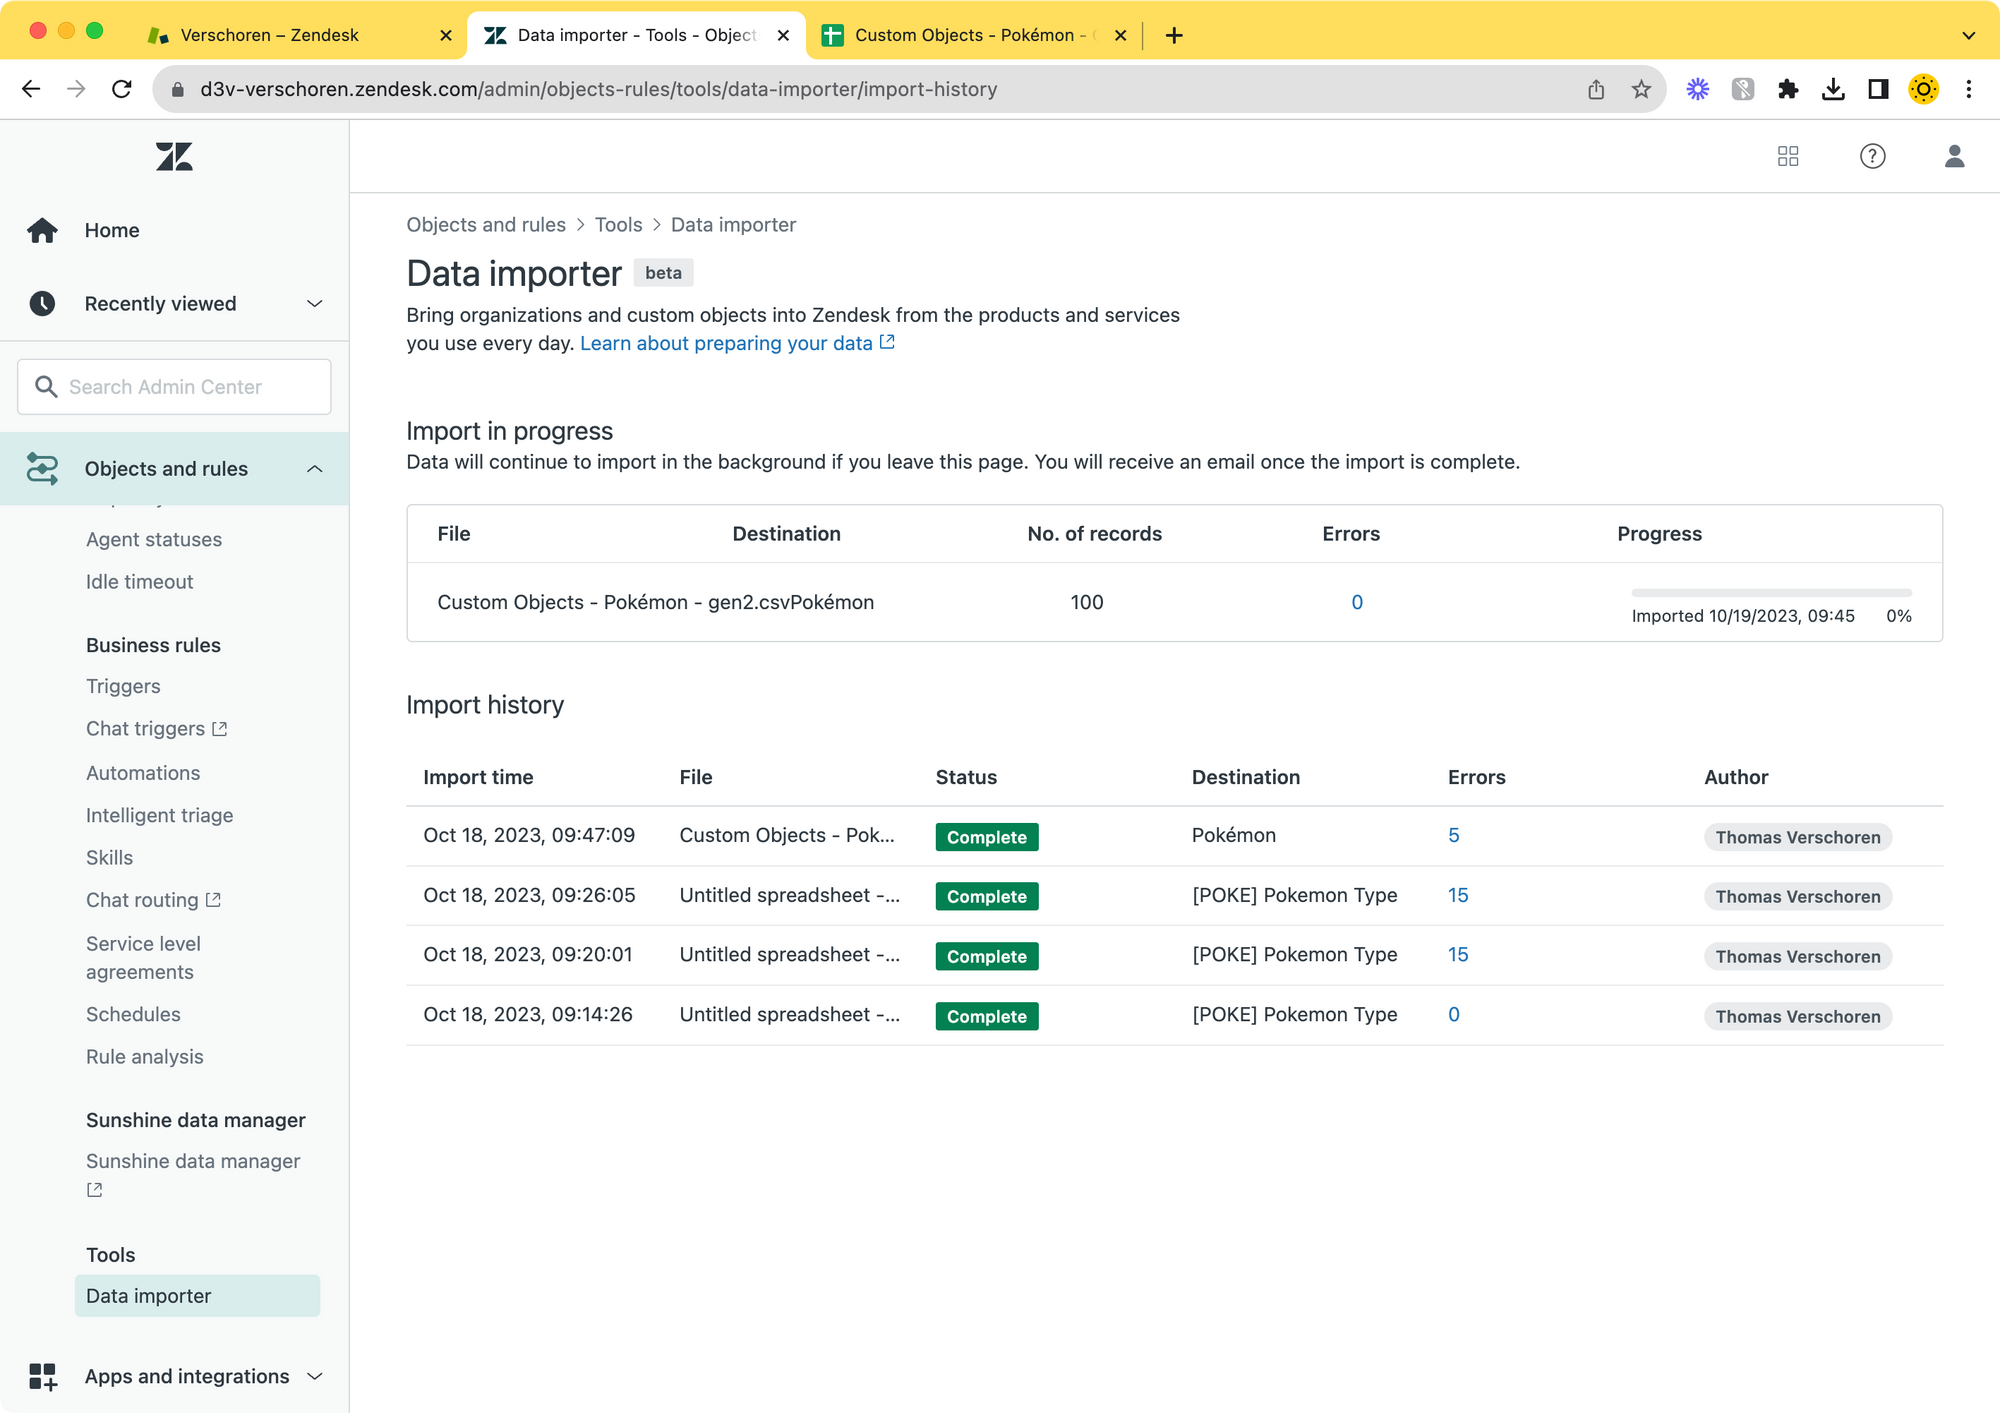
Press next to import. You'll see a status bar that shows the progress, and once completed you'll see your Pokémon appear in the Object Inspector!
Viewing Records
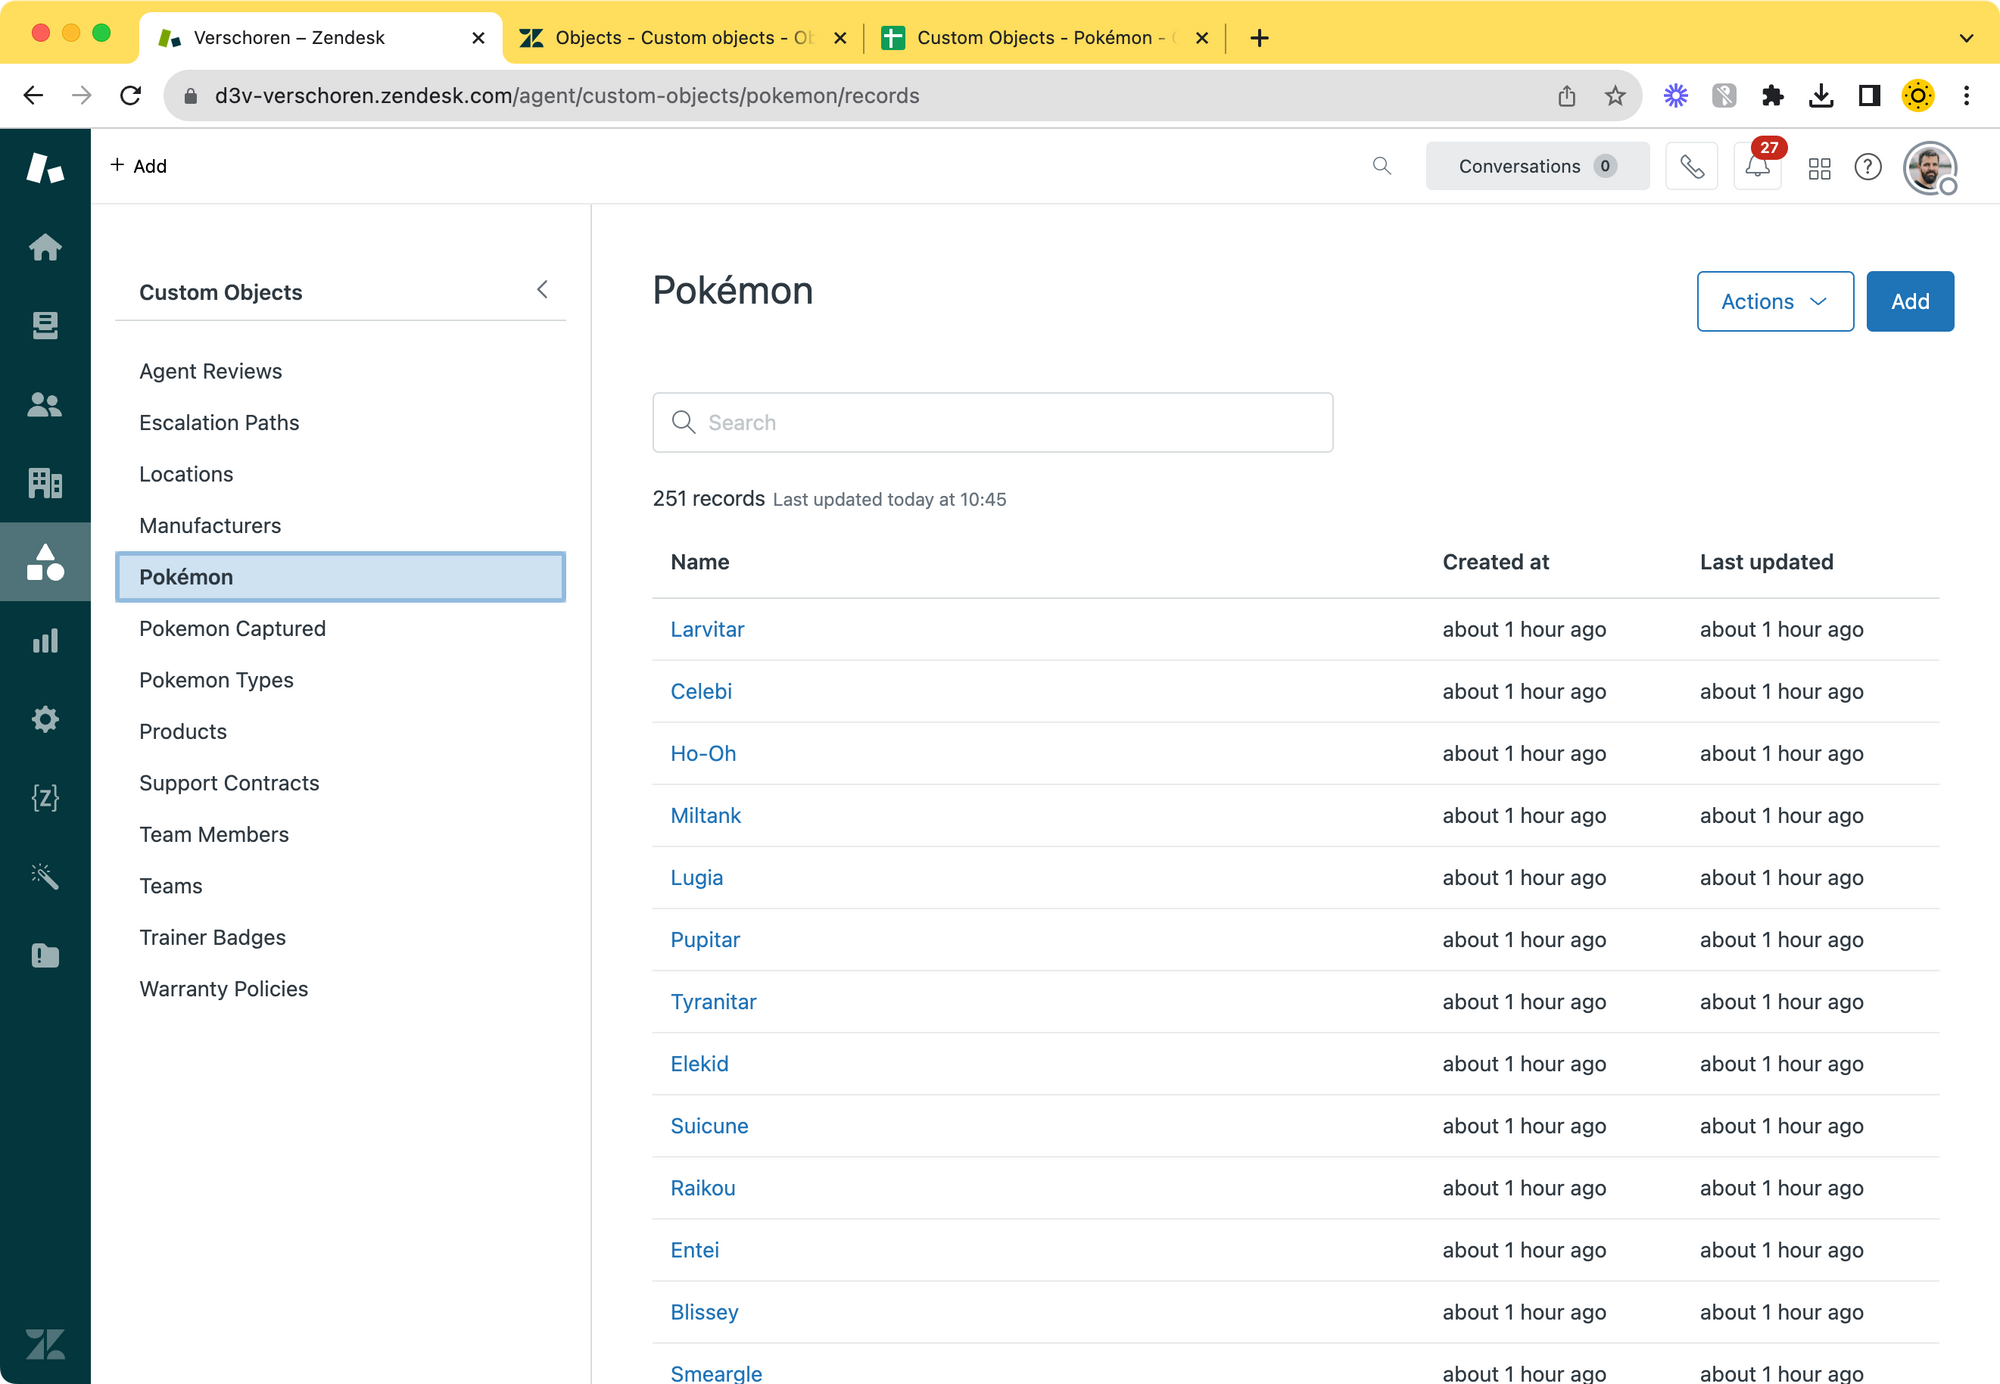
Not that we have created our Pokémon object and imported the data, we can use the Inspector to explore our records.
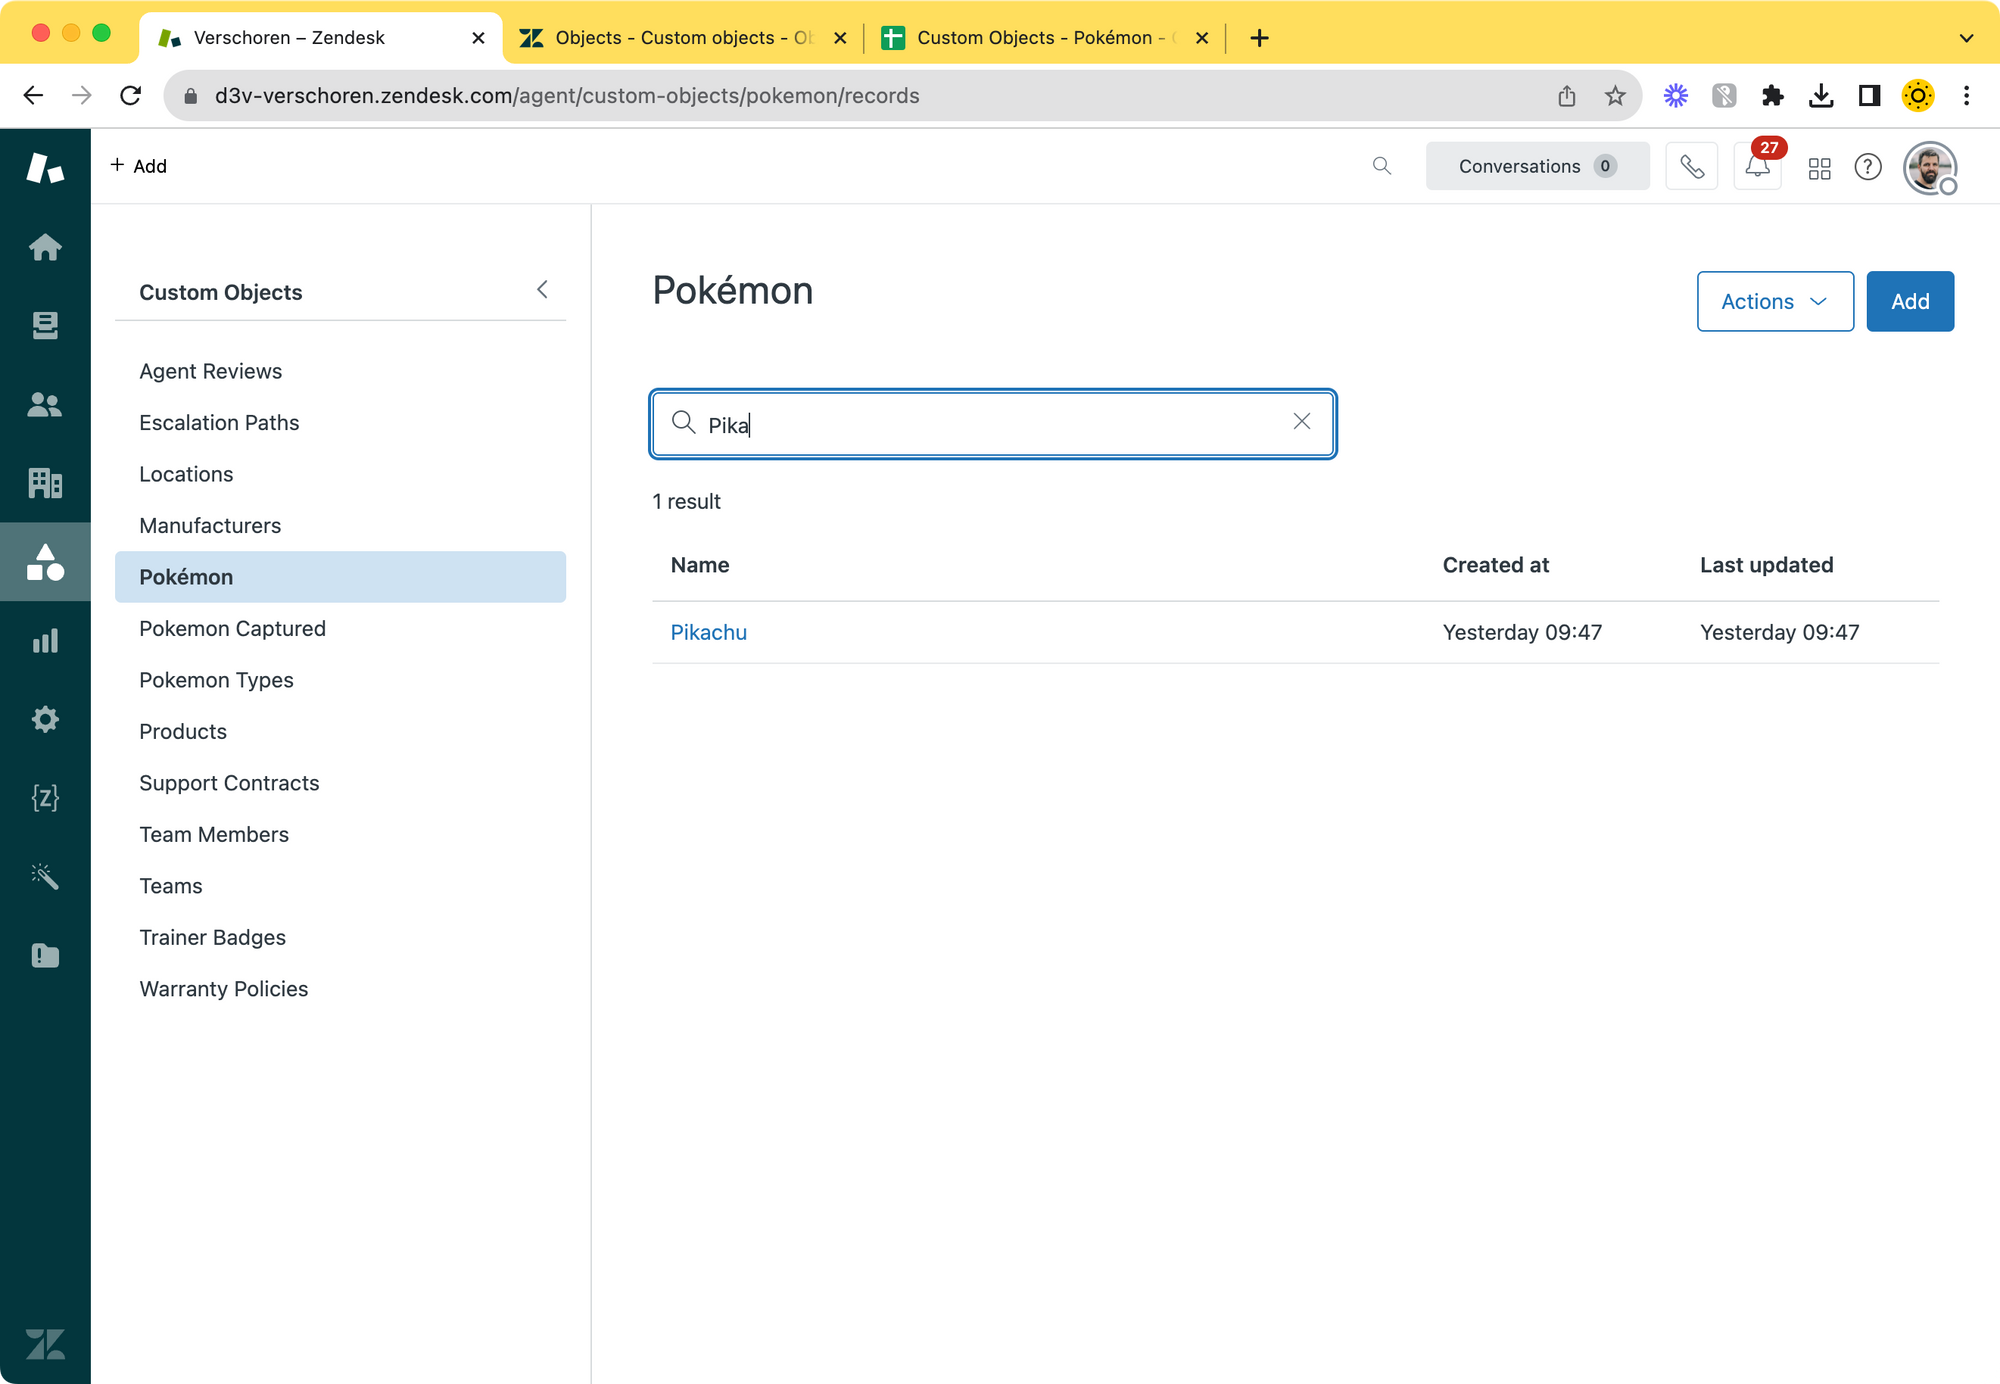
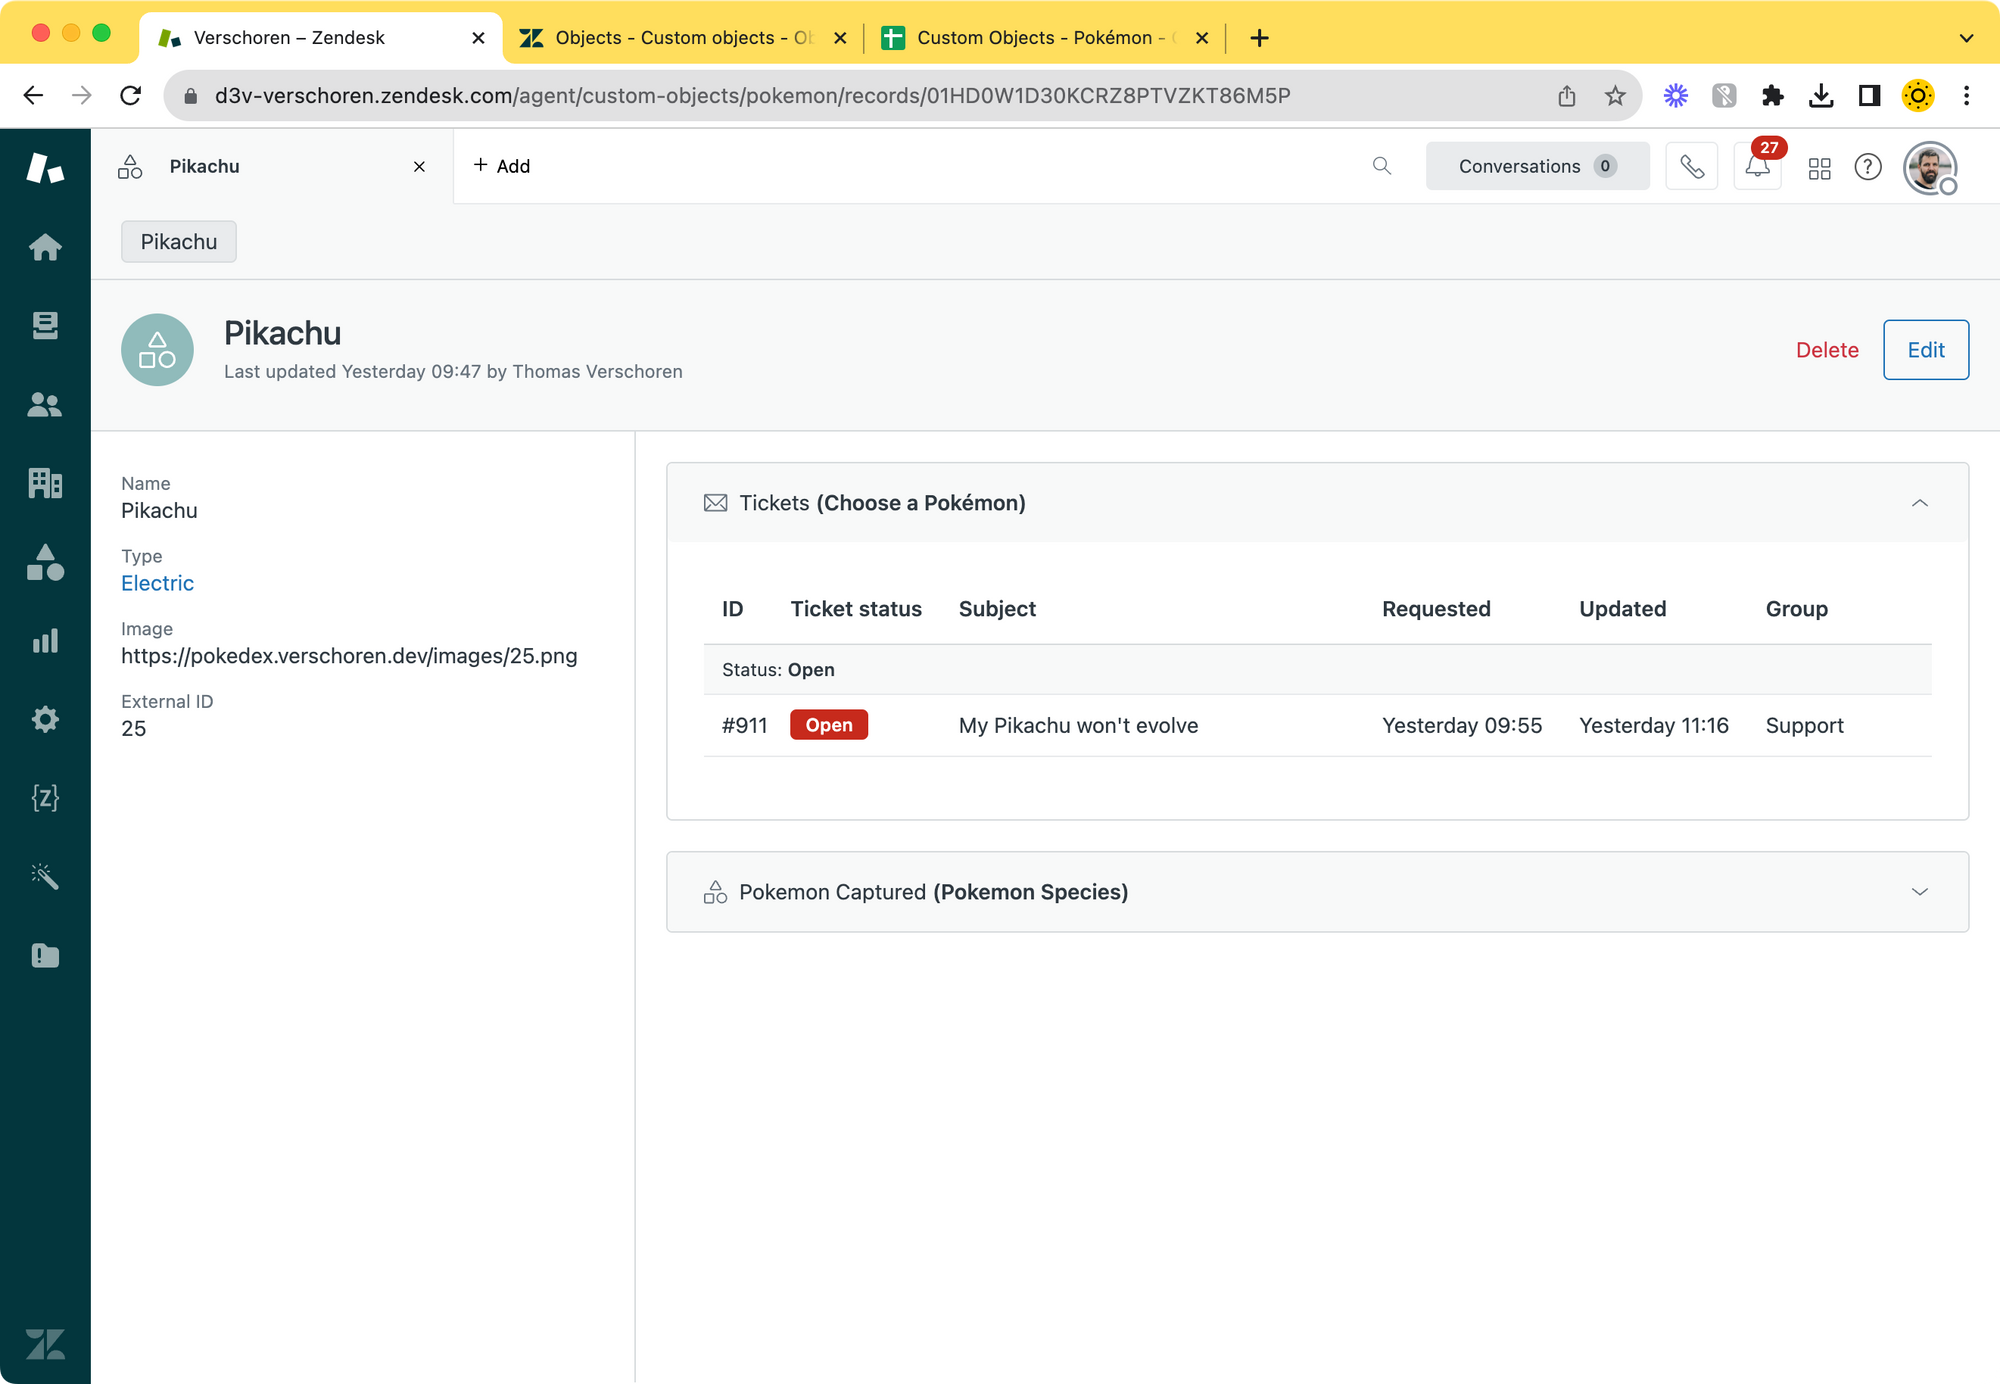
Click the stacked blocks icon in the navbar and select the Pokémon object. You'll see a list of records sorted by Creation Date. You can paginate through them, or search via the search bar on top to filter. You can search for both the name field (e.g. Mew) or the External ID (e.g 151).
When you click on a record you'll see an inspector that shows the field data of the record on the left. The right side of the screen shows all objects that reference this record. We'll explore this in depth in the next article, but when looking at e.g. a Pokémon Type, you'll see all Types that have it as a Strength or Weakness.
What's Next?
Now that we have our record types and records setup, it's time to integrate them with the Agent Workspace and make them available to agents.
The next article in this series will show you how to use Custom Objects in Forms, how agents can interact with them, and we'll build a custom sidebar app that makes use of the API to show the data in a nicer way!