Show restricted articles in Zendesk Bots
Show restricted or internal Help Center articles right within your Messaging Widget thanks to this newest addition to Zendesk Bot Builder
Show restricted articles in Zendesk Bots

On this page
One of the core tenants of a good customer care setup is a way to allow customers to self service. This not only deflects tickets and lowers the workload of your agents, but also allows customers to resolve issues faster, leading to a higher CSAT.
For this reason the more Help Center articles are made publicly available to all of your customers (and Google..), the better your self service approach will work. Customers will search your Help Center, interact with your Bot, or get auto replies with these articles as your first line of defence.
But sometimes you want articles to be available to only a subset of users. Maybe you use Zendesk for an Internal Help Desk, and you want your IT guidelines only visible to your employees. Or you are a hotel and have special amenities only available to your VIP guests. Or you have support articles that should only be visible to customers who buy a specific product or support SLA.
This is where user segments and restricted articles in Zendesk Guide come in. You can create segments of users based on tags or organisations, and then make articles only available to those segments. These articles are then invisible to guest users, or logged in users outside of the segment, but will be searchable and readable to logged in users that do belong to the segment.
Up till now this would not work for conversations started via Zendesk Messaging on the Web. The Zendesk Bot did not care about segments, and even if you authenticated your user, it would only show publicly available articles. But this has now changed!

Any user that interacts with your Bot within the Zendesk Web Widget can now search for and see restricted articles, provided they are authenticated. Flow Builder even allows you to add restricted articles as part of the Show Articles step in your flows.
When an anonymous user uses the widget restricted articles will not be part of the suggested articles via search. For authenticated users they will appear if they match their segment.
Similarly, if you add a restricted article to a "Show Articles step", they'll show up as a generic card without exposing any titles or content. For authenticated users the system will show the restricted articles' title and a snippet of the content.
If you want to you can jump into the Bots' settings and make the metadata of suggested restricted articles visible to everyone regardless of logged in status. But watch out, the snippet might expose article content you don't want to be visible to the world!

What do you need to get this to work?
Since you are interested in using this feature in Messaging we can assume you already have segments on your Help Center, allow users to login and restrict some articles to those segments.
So, to get started with restricted articles in Zendesk Bot, you basically only need to enable Authentication for Messaging and you're done. Luckily, I've got an entire article on this topic:
 Thomas Verschoren
Example Flow
As explained in the overview above, by default Zendesk will show restricted articles as placeholders to unauthenticated users.
In this article we will build a bot flow that will only show restricted articles to logged in users if applicable, and will fall back to only show public articles to everyone else. A bit more complex of a setup.
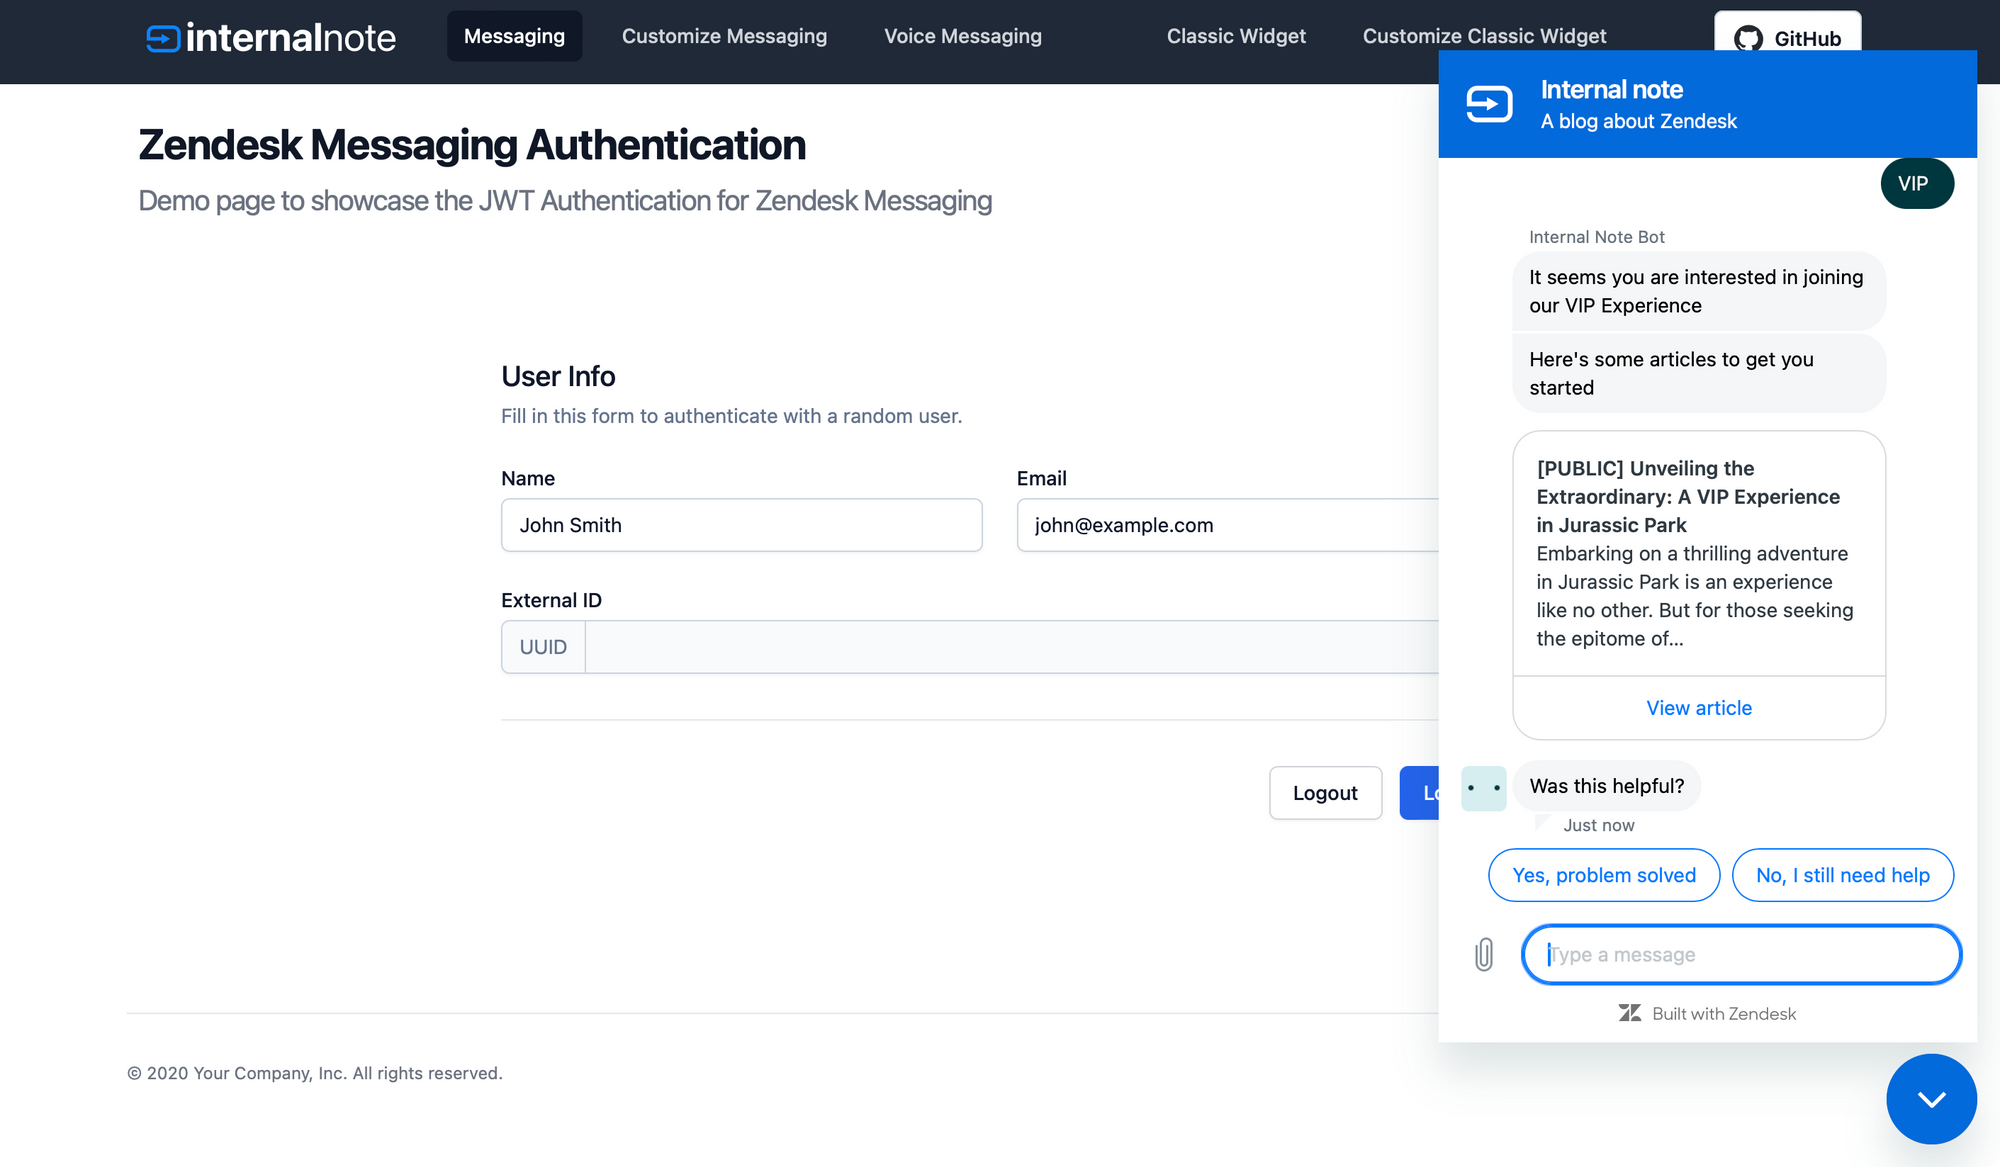
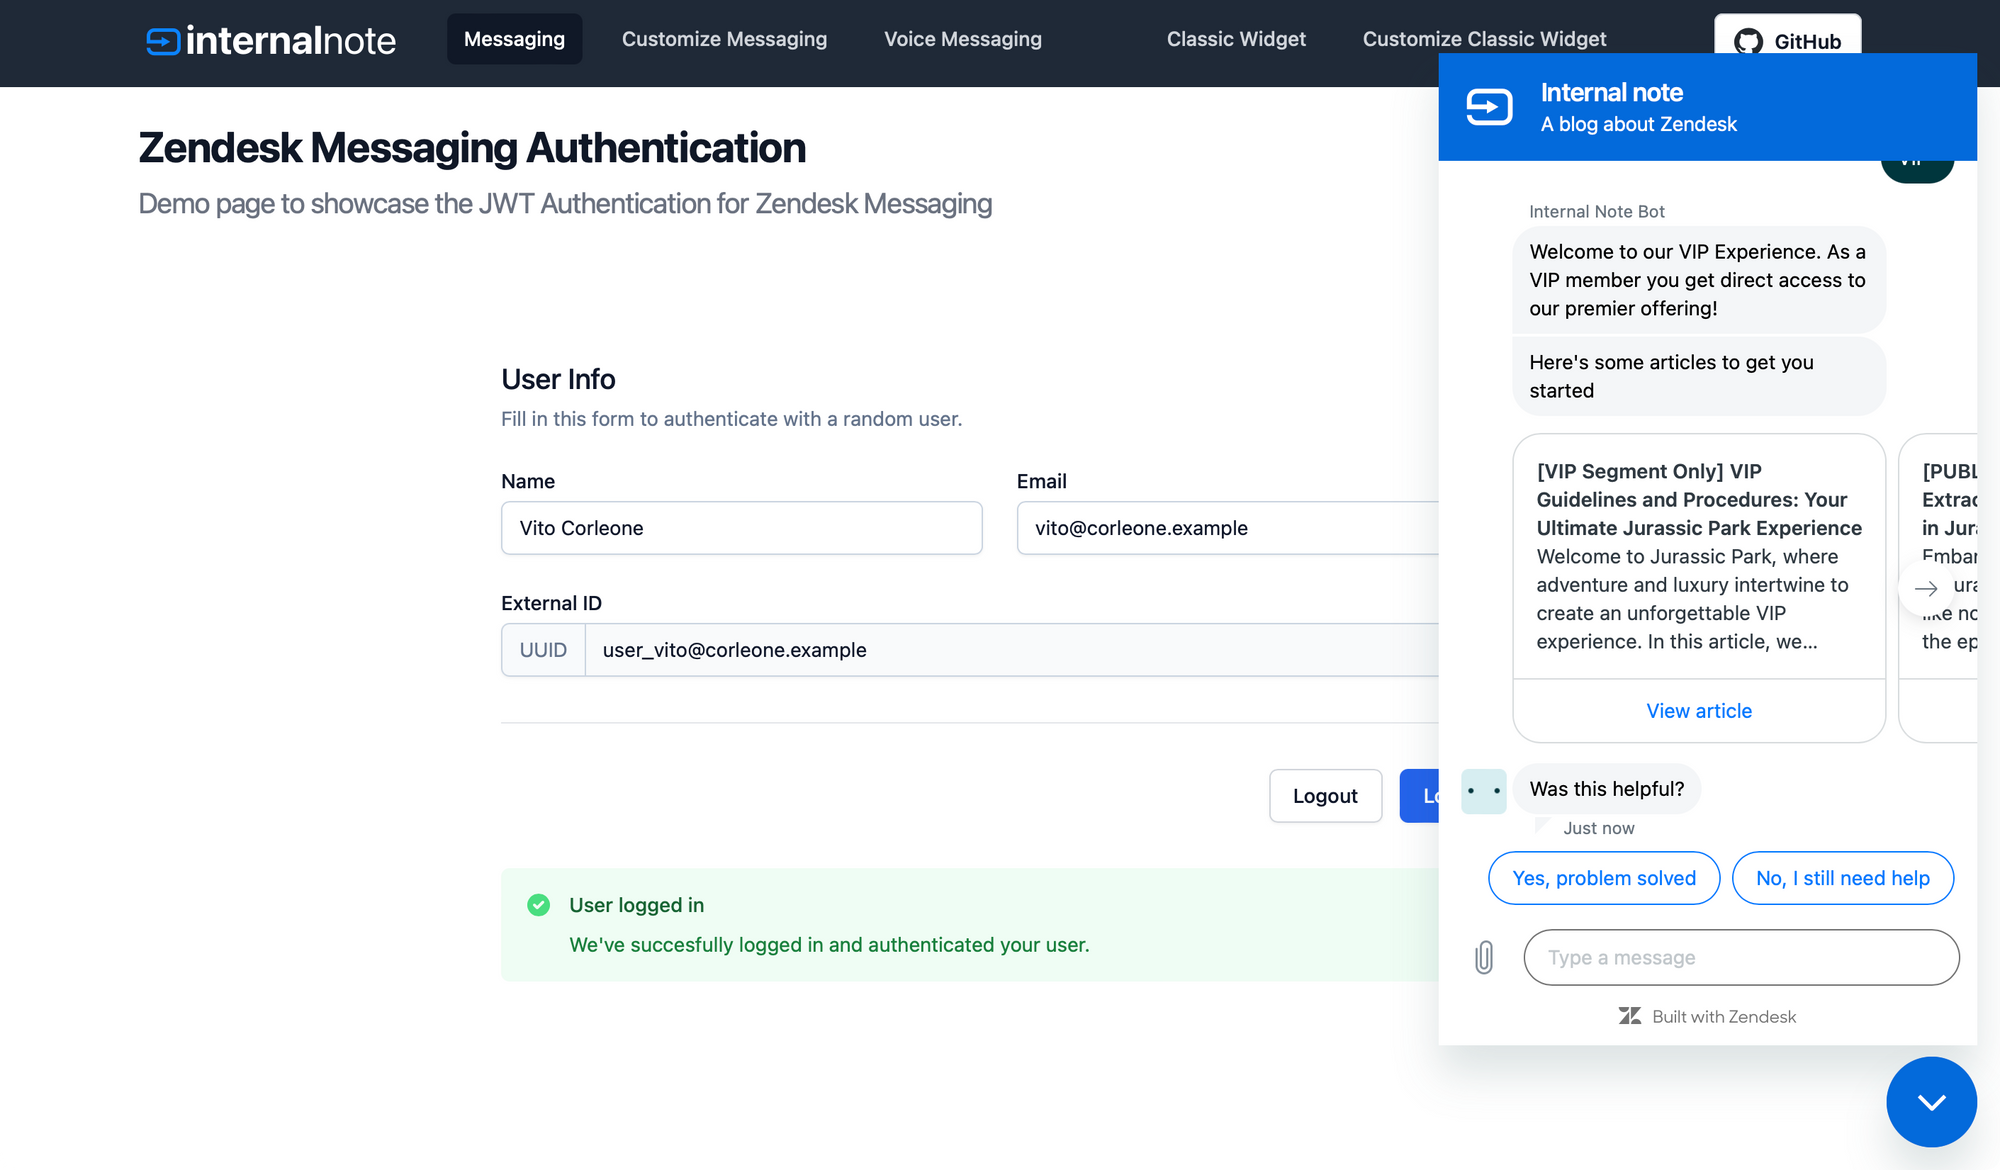
You can test it out by going to our demo page.
 Internal Note
If you log in as [email protected] you'll get the VIP experience. If you log in as [email protected] you'll get the regular flow.
Bot Setup
We'll build a dedicated bot flow to show this new functionality. It flows as follows:
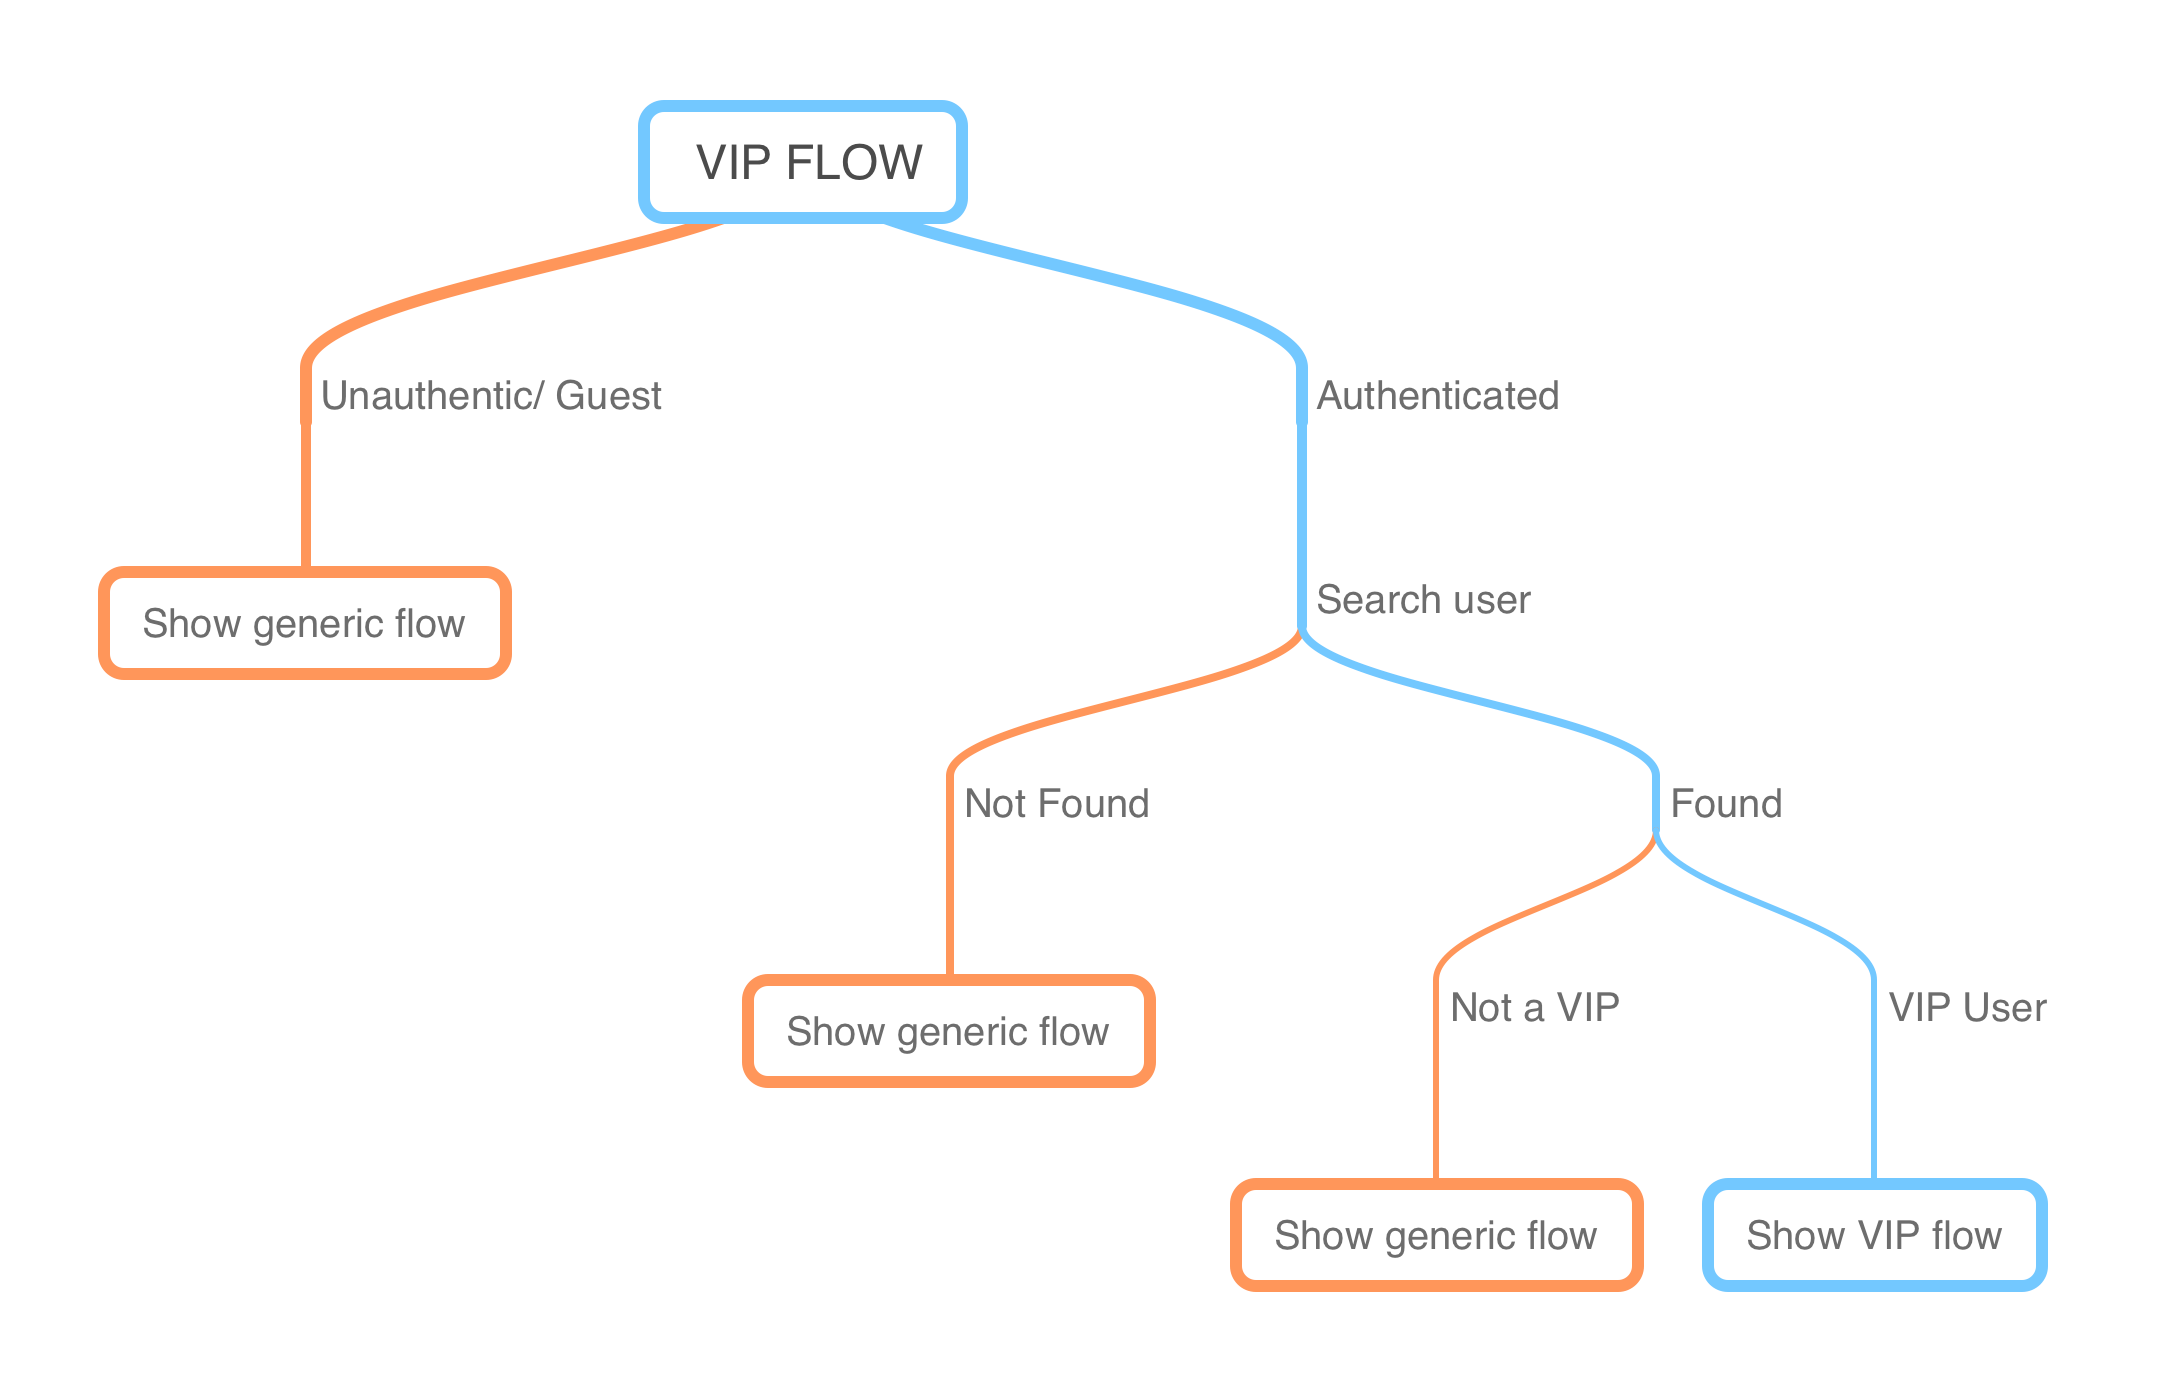
- We check via
conditionsif the user is authenticated or not. - If they are authenticated we use an
API Stepto retrieve their data from the Zendesk instance. - We check the returned user data for a
VIP tagand if they are a VIP we show the segmented article to them. - In all other cases we show a more generic reply with public articles.
Assumptions
- You have a working Messaging Authentication flow.
- You have created a User Field of type
checkboxthat sets aviptag to a user - You have created a User Segment in Guide that contains all users with a
viptag - You have an article that is restricted to that segment.
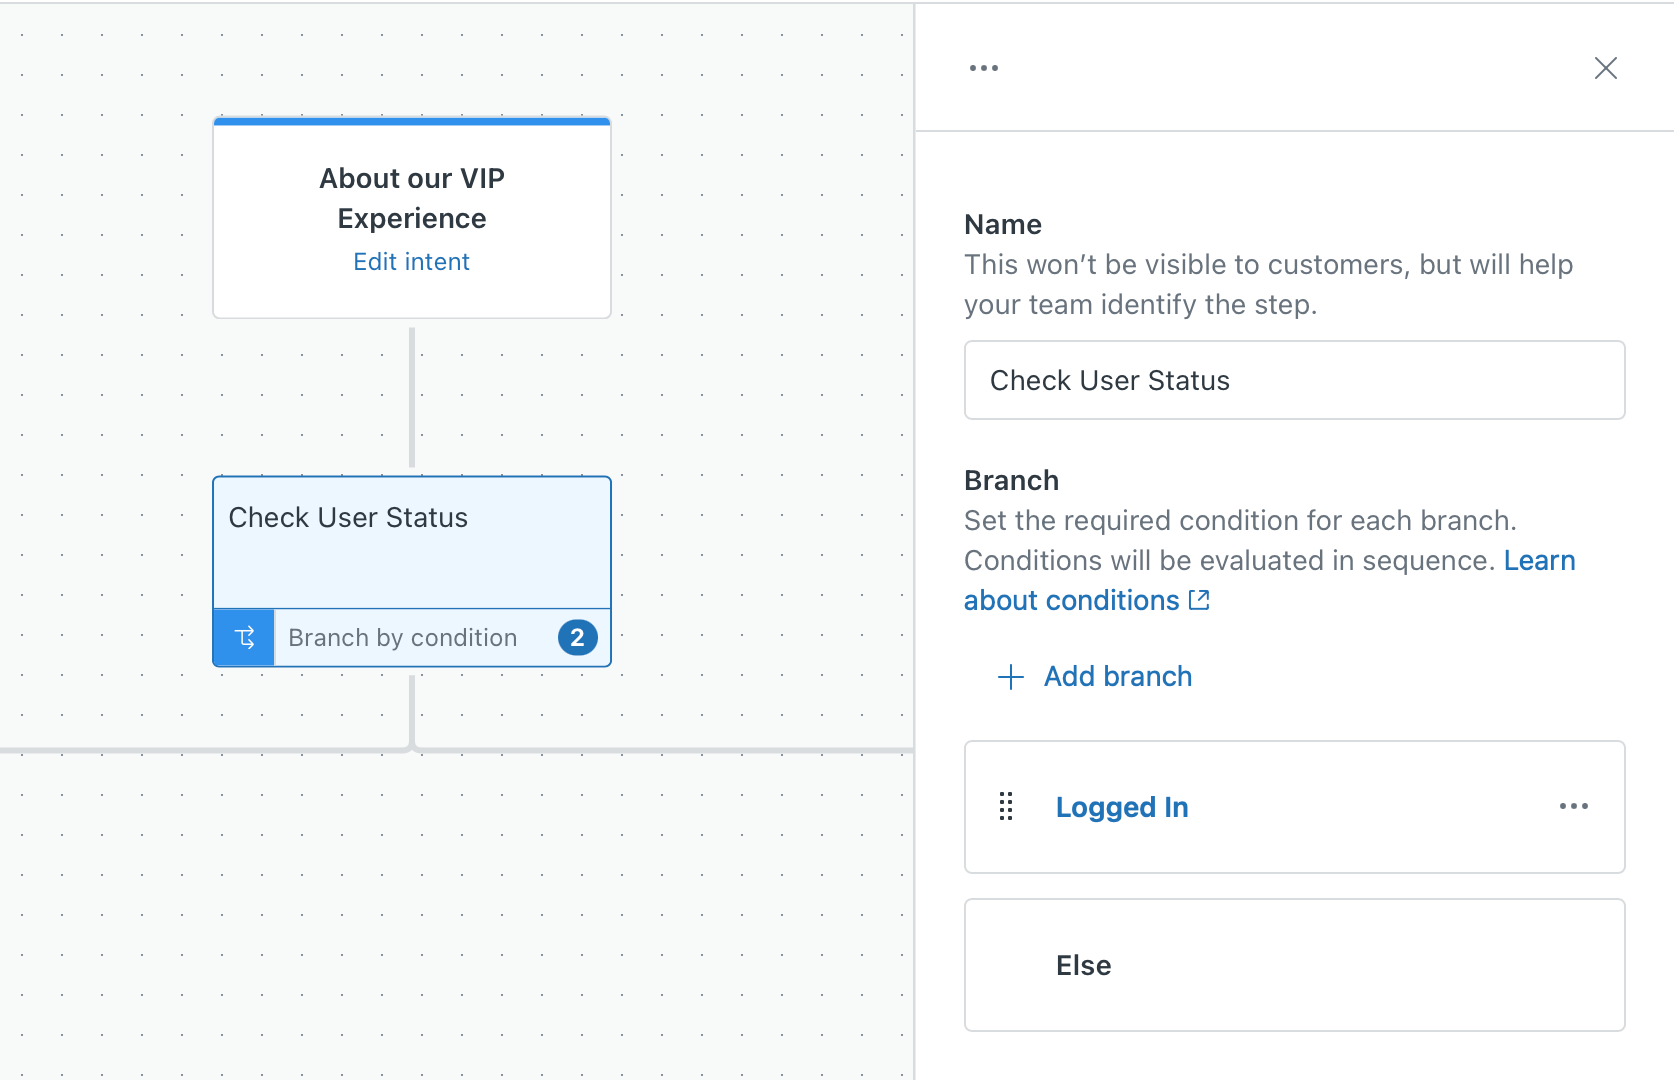
Check if the user is authenticated
Since restricted articles only show up for logged in users if they match the segment applied to the ticket, being logged in is a first requirement for showing these articles and displaying a title and snippet.
All you need to do is use a Branch Condition step and check for Authentication status is true in the conditions.

Retrieve customer data via API
Now that we know if the user is logged in, we need to check if they are a VIP user or not. In our scenario we created Guide segment for users that are tagged with vip. This tag is set by a User Field of type checkbox called VIP.
Since Zendesk does not allow to add any tags to the authentication payload, and since we can only use email and name as native variables inside Bot Builder, we need to retrieve this data from Zendesk itself via the API.
We use a Make API call step to call the Zendesk search API to search for users that match our authenticated users' email address. It's not the most elegant way, but it's what's available for now.
Connections
Before you can make an API call you need to go to Admin Center > API and Integrations > Connections and add a two secure connection.
- zendesklocal
UseBasic Authenticationas the type and add an admin email address followed by/tokenand a Zendesk API token.
Addhttps://*.zendesk.comas the allowed domain - zendeskwidget
UseBasic Authenticationas the type and add an admin email address followed by/tokenand a Zendesk API token.
Addhttps://*.yourhelpcenterdomain.comas the allowed domain

API Call
Once we have the connections setup we can add the API call step to our bot flow. Set it as a step in the Is Authenticated branch
- Endpoint URL
Set it tohttps://d3v-verschoren.zendesk.com/api/v2/search?query=type%3Auser%20email%3Afollowed by pressing the {+} button and add the Messaging Metadata > provided email as a variable - Authentication
Choose thezendesklocalauthentication method
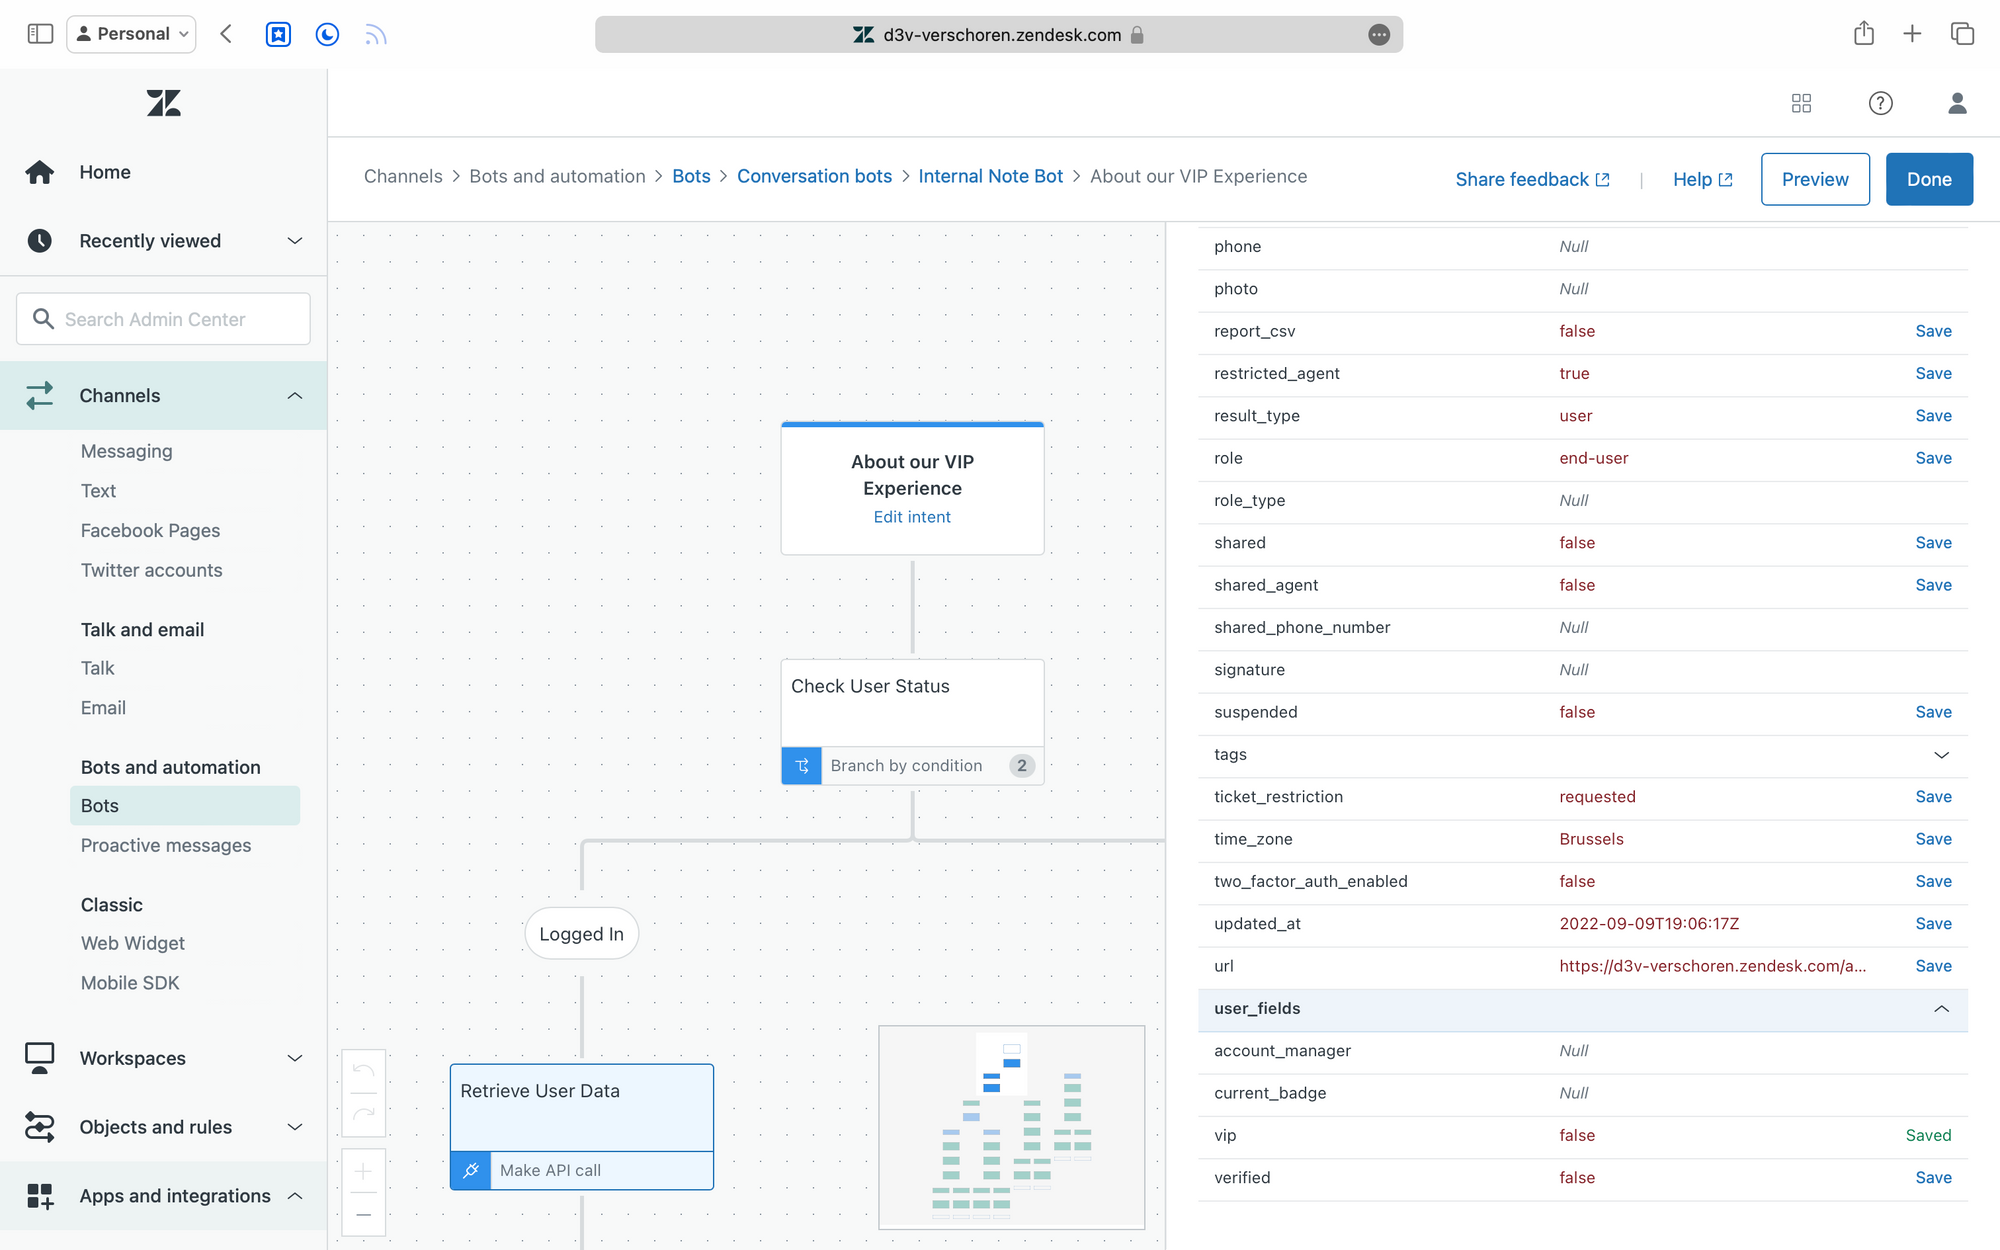
Next press Make API Call to do a testrun. The system will fetch a random user. Scroll down the Variables list and expand until you see the user_fields and click on the Save button next to the VIP field to store it as a variable called vip. In our example, since it's a checkbox it has either a true or false value.


3. One final step before wrapping up and saving this step is to swap the API Authentication method from zendesklocal to zendeskwidget.
Even though we can assume the user exists (they can log in) they might not yet have any interaction with Zendesk yet, so there might not be a user profile. So this API call can fail.
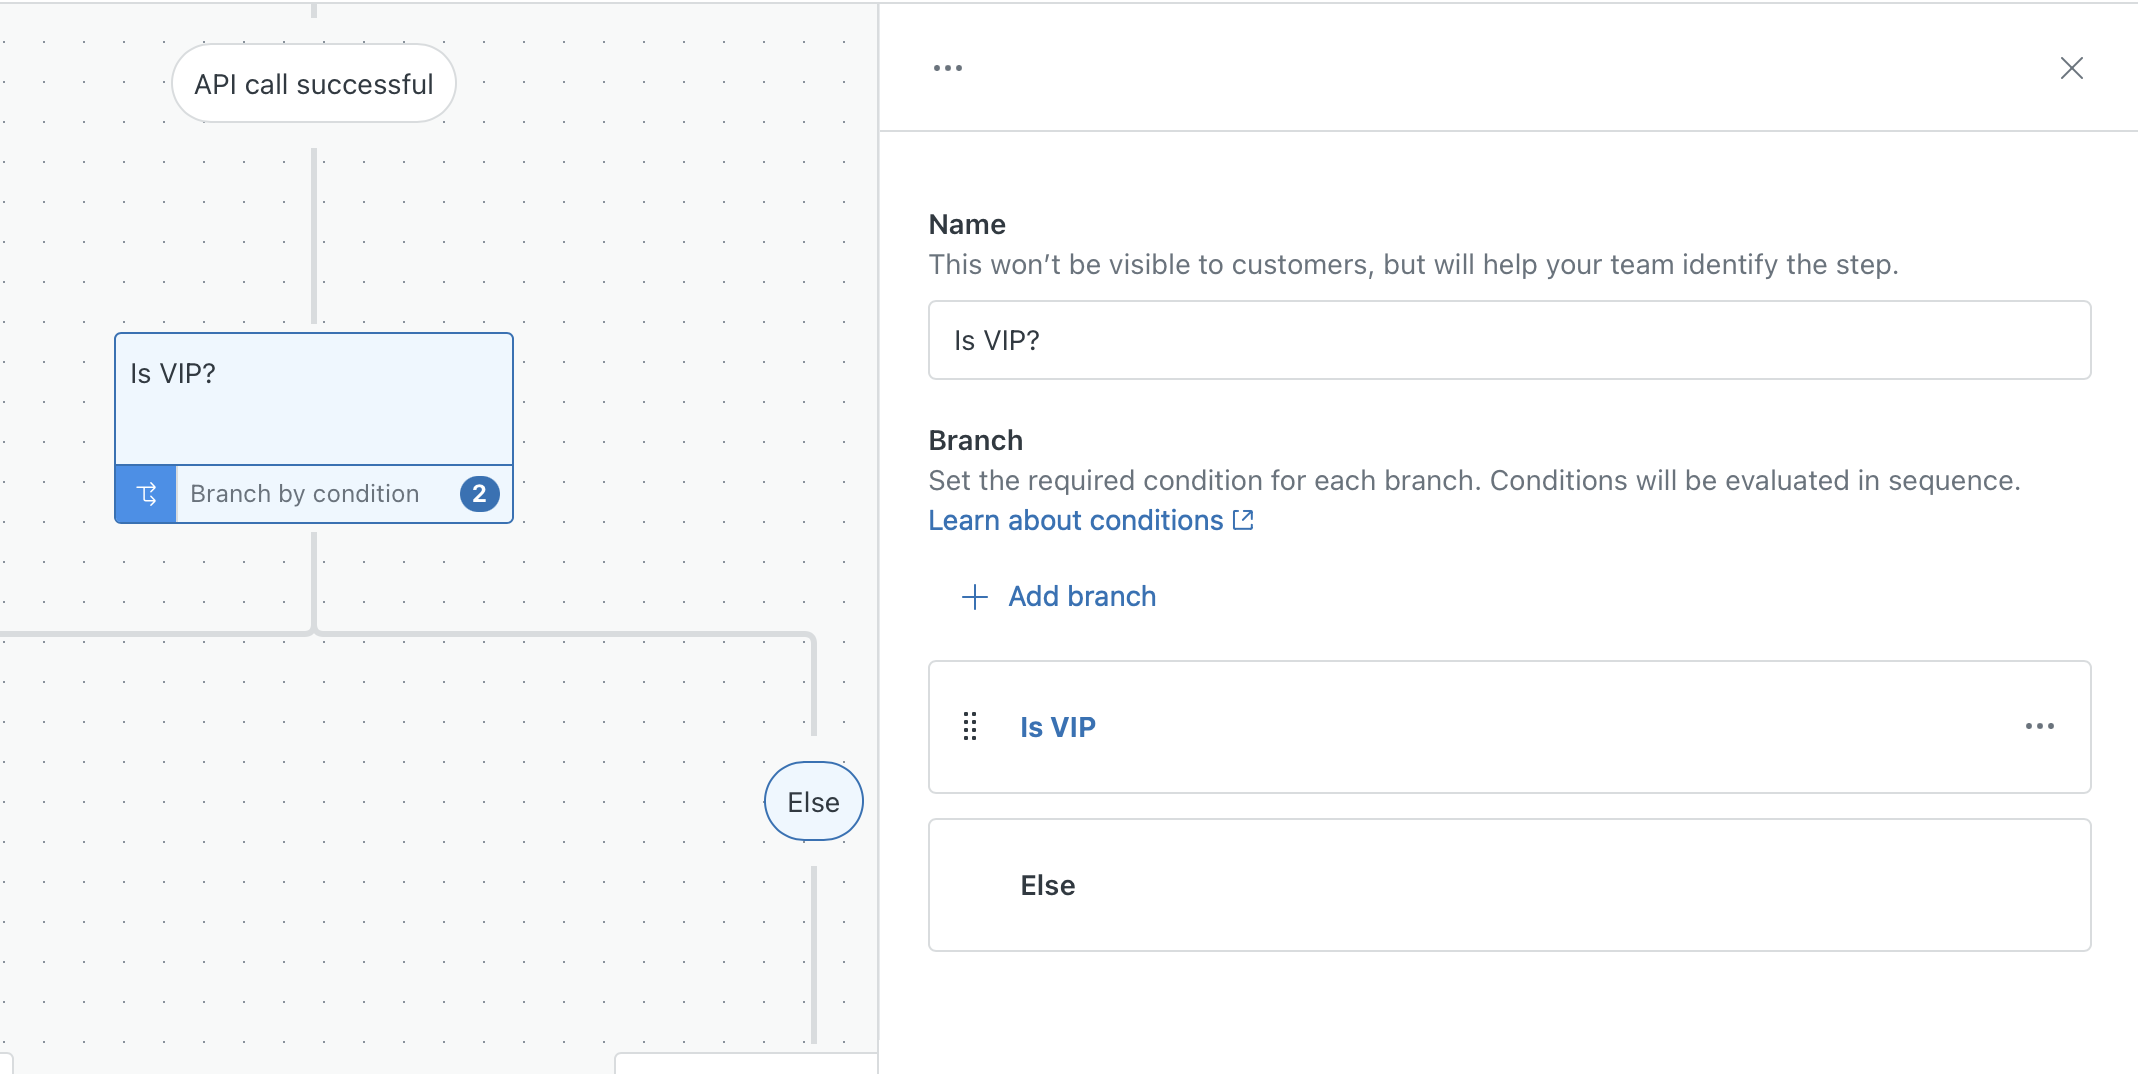
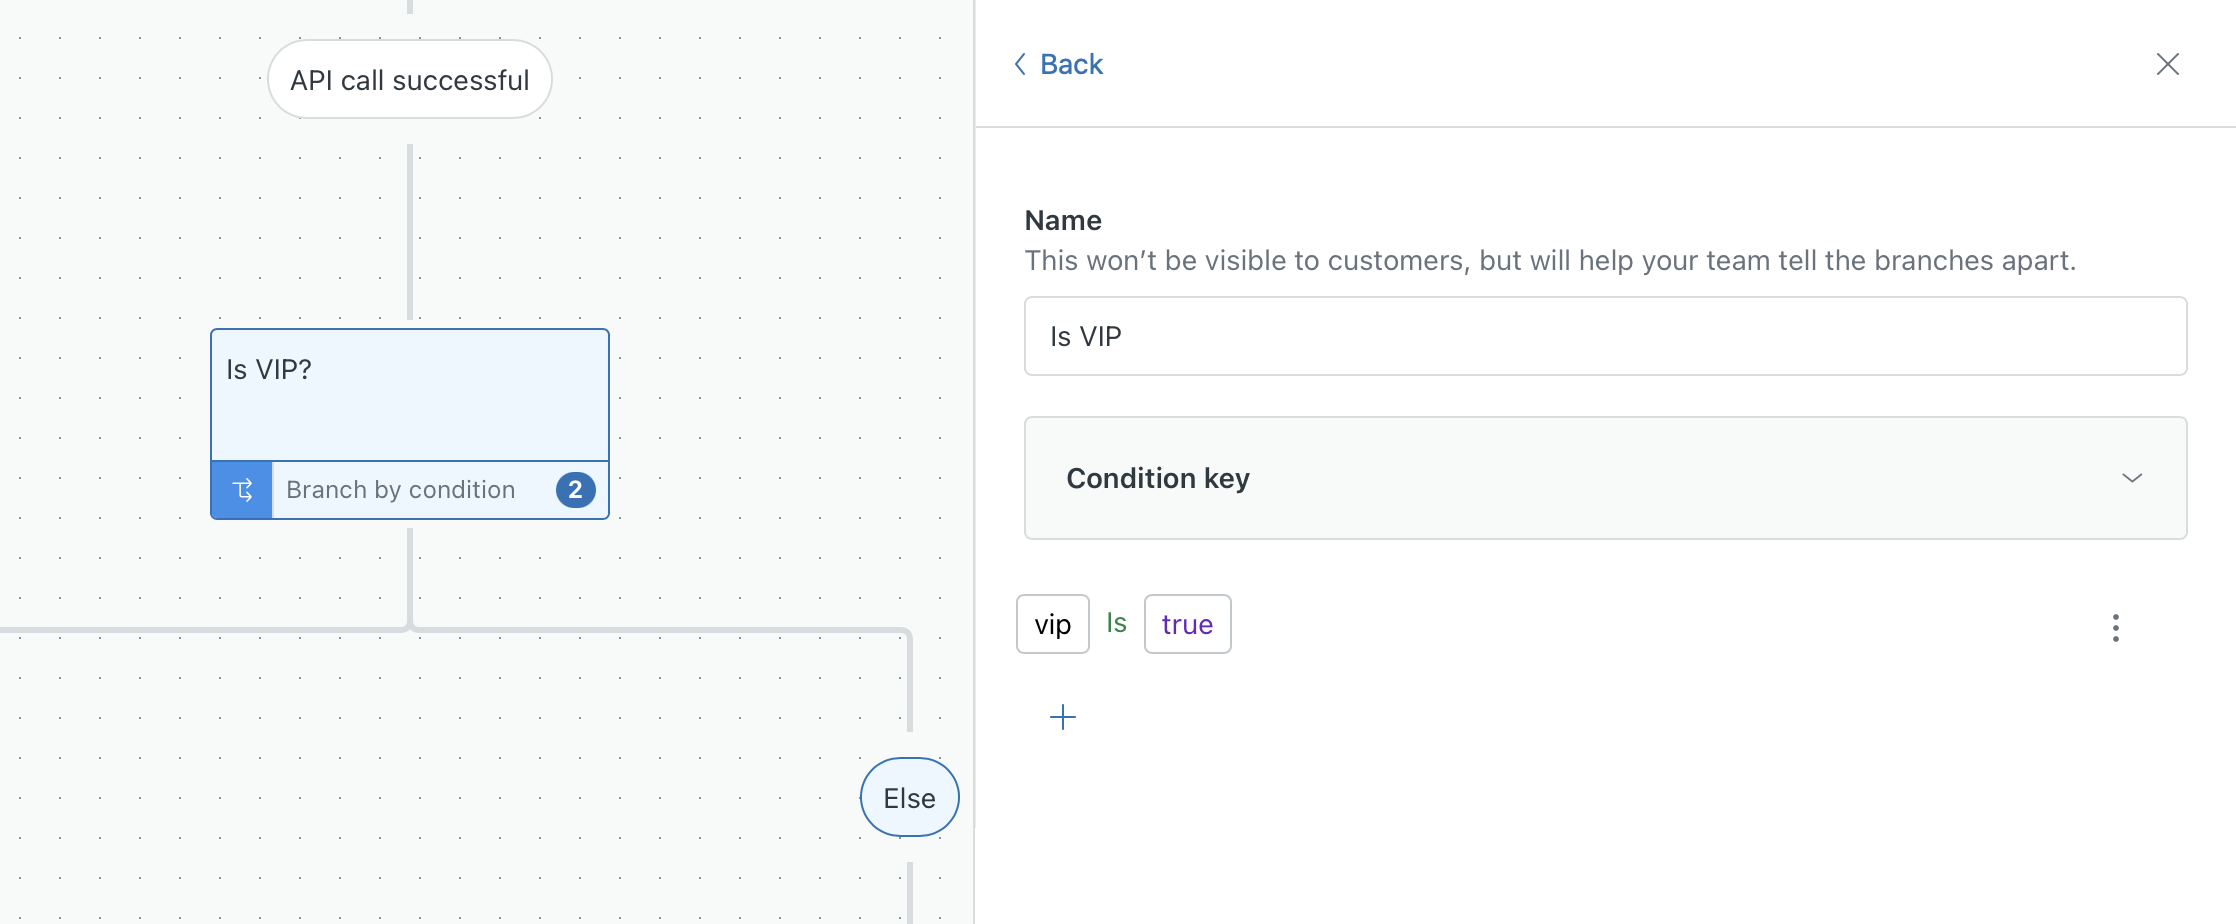
Check for VIP Tag
Now that we have an authenticated user and we have stored their VIP status in a variable we can finally check if our user is a VIP user.
We'll use another Branch by Condition step for this one. Add the step in the API Call Successful and set the IF condition to vip = true
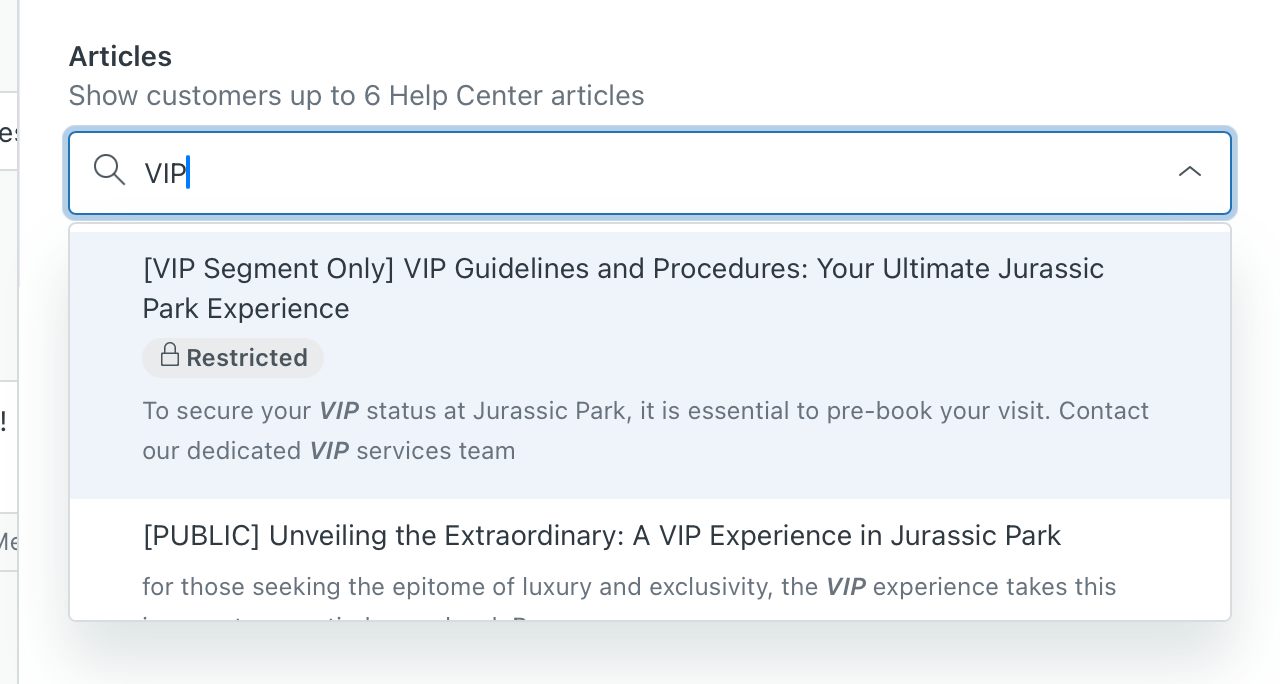
Show Segmented articles
Now that we know we have an authenticated user that is a VIP we can safely show them restricted articles for their section and we can be sure that the user will see the title, snippet and will be able to see the entire ticket if they click the link.
- Add a
Show Help Center Articlesstep in the is VIP branch - Search through your list of article and select the (restricted) article you want to show
This can be done by right clicking the top step of a branch, and choose "Copy this step and all below". Right click on an empty branch and choose "Paste steps"
Wrap up
I think it's fair to say that finally is a word to use in this context. Showing restricted articles has been an existing feature in the Classic Widget, and the lack of support in Messaging made it impossible for most Business-to-Employee or Internal use cases to move to Messaging and the new Zendesk Bot.
This new flow elegantly builds on the work done for Zendesk Messaging authentication and works without any complex custom work for most environments. The flow above is a bit more complex by design because I wanted to only show restricted articles to users that can access them, but in most other scenario's it will just work.