
Zendesk Messaging authentication in the Help Center
Zendesk Messaging authentication just got simpler. A new Help Center setting lets the widget inherit user login status—no custom code needed. This article breaks down the setup, advanced use cases, how AI Agents can personalize replies, and the complex identity mapping that powers it all.

On this page
Internal Note now has hundreds of articles on Zendesk ranging from obscure technical details to general overviews of new releases From all these articles, the ones about authenticating Zendesk Messaging consistently rank among the most-read on this blog— some even years after publication.
That’s no surprise: to deliver personalized support, you need to know who your customer is. Where regular Help Center authentication arrives out of the box, Zendesk Messaging has always been a more involved and custom process. Setting up authentication using custom JWT tokens you need to build yourself isn’t easy. It’s a tricky technical process that many teams find daunting.
Luckily, Zendesk also saw this and has now released an easier method to login users when using the Web Widget in combination with the Help Center.
Let's dive in!
Setting up Messaging authentication
Authenticating the Zendesk Messaging web widget or mobile SDK takes three steps.
- First, embed the web widget on your website.
- Second, ensure you have a backend service in place to generate an JWT token securely.
- Third, if the user is already logged into your site, pass that valid authentication token to the widget before it opens:
zE('messenger', 'loginUser', function (callback) {
  callback(jwttoken);
});
What happens after login
Once authenticated, the web widget gains access to the user’s name, email, and external ID . It's context you can pass to AI Agent flows or surface in Agent Workspace.
AI Agents can use this information to unlock gated Help Center content for logged-in users or tailor replies based on user segments. You can also trigger personalized actions: start a return, show delivery updates, or let customers (re)book their flights.
For human agents, authentication provides certainty. They know they’re speaking to the right person, can skip redundant identity checks, and use the verified details to look up orders or power Agent Copilot procedures.
And from the customer’s perspective? They get a seamless experience—complete with full conversation history in the widget and mobile app.
As noted, I've written a couple of technical guides highlighting how to implement authentication for the Messaging channel. If you're interested, take a look at the articles below!
Help Center authentication
One of Zendesk’s core product principles is the gradual shift from custom development to built-in configuration—ideally reduced to a simple checkbox.
We’ve seen this evolution play out before. Messaging reminders, once implemented via the SunCo API, moved to trigger-based automation and now exist as a native feature. The same goes for omnichannel routing: where we once used automations to close or unassign pending tickets, there’s now a built-in “Capacity Release” option under Messaging settings.
That same philosophy now extends to Help Center authentication.
Many Zendesk customers already secure their Help Center—whether through Zendesk’s built-in login, social login providers like Google or Microsoft, or enterprise-level protocols such as SAML, JWT, or OAuth. This unlocks a range of benefits: you can restrict Help Center content from public view, segment articles by user type (e.g. subscribers vs free users, internal teams vs customers), and build a more personalized support experience.
Naturally, many assumed that the embedded messaging widget on a logged-in Help Center would inherit the same authentication. But until recently, enabling auth for the widget meant editing your theme and wiring up your own JWT endpoint—extra steps that felt inconsistent with Zendesk’s click-to-configure approach.
For websites or blogs, asking developers to handle widget auth made sense. But for the native Help Center, built and hosted on Zendesk’s platform? Most customers expected it to “just work.”
With the new Help Center authentication setting for the Messaging widget, it finally does. One checkbox is all it takes for the widget to automatically inherit the logged-in session—no custom code required.
Enabling Help Center authentication
Enabling native Help Center authentication is straightforward. In your Web Widget settings, simply toggle on “Turn on Help Center authentication.” As long as users can log in to your Help Center, the widget will now automatically authenticate them—no additional code or setup required.
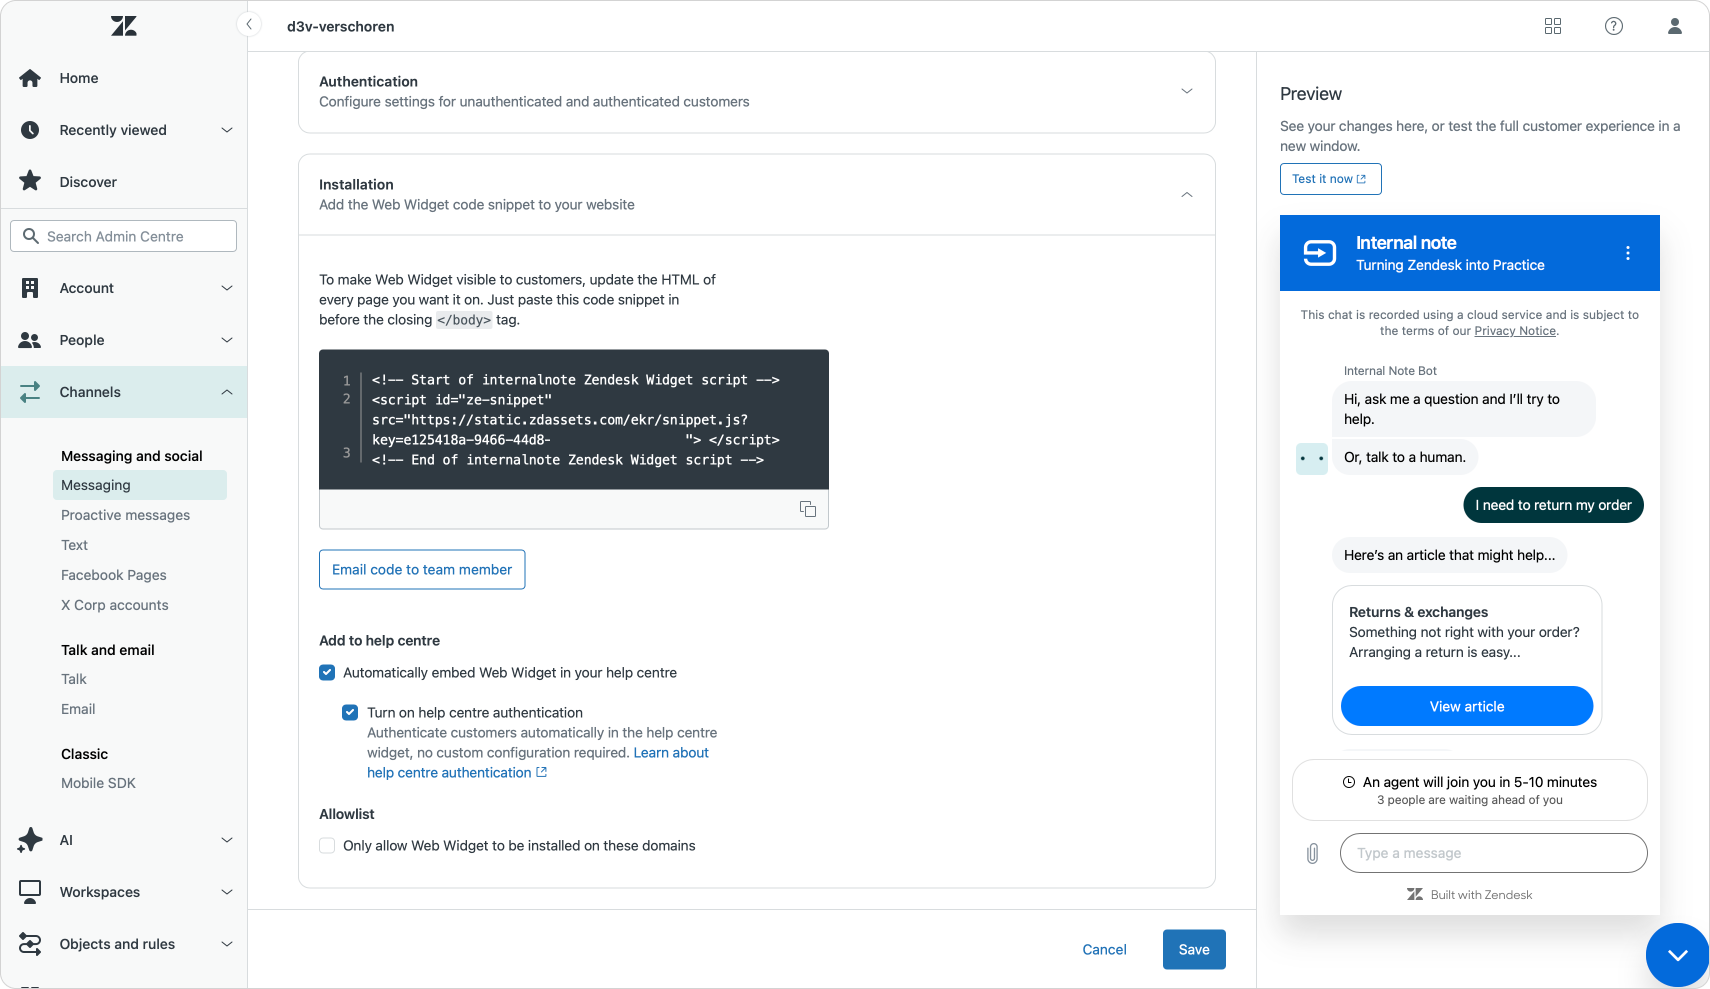
When an end user is logged into your Help Center, they’re now automatically authenticated in the web widget as well. They’ll see their full conversation history, and—if your AI Agent is properly configured—they’ll be welcomed with a more personalized greeting.
Personalizing AI Agents with user data
If you’re new to user authentication and want to take full advantage of this new feature, it’s worth adding a touch of personalization to your AI Agent.
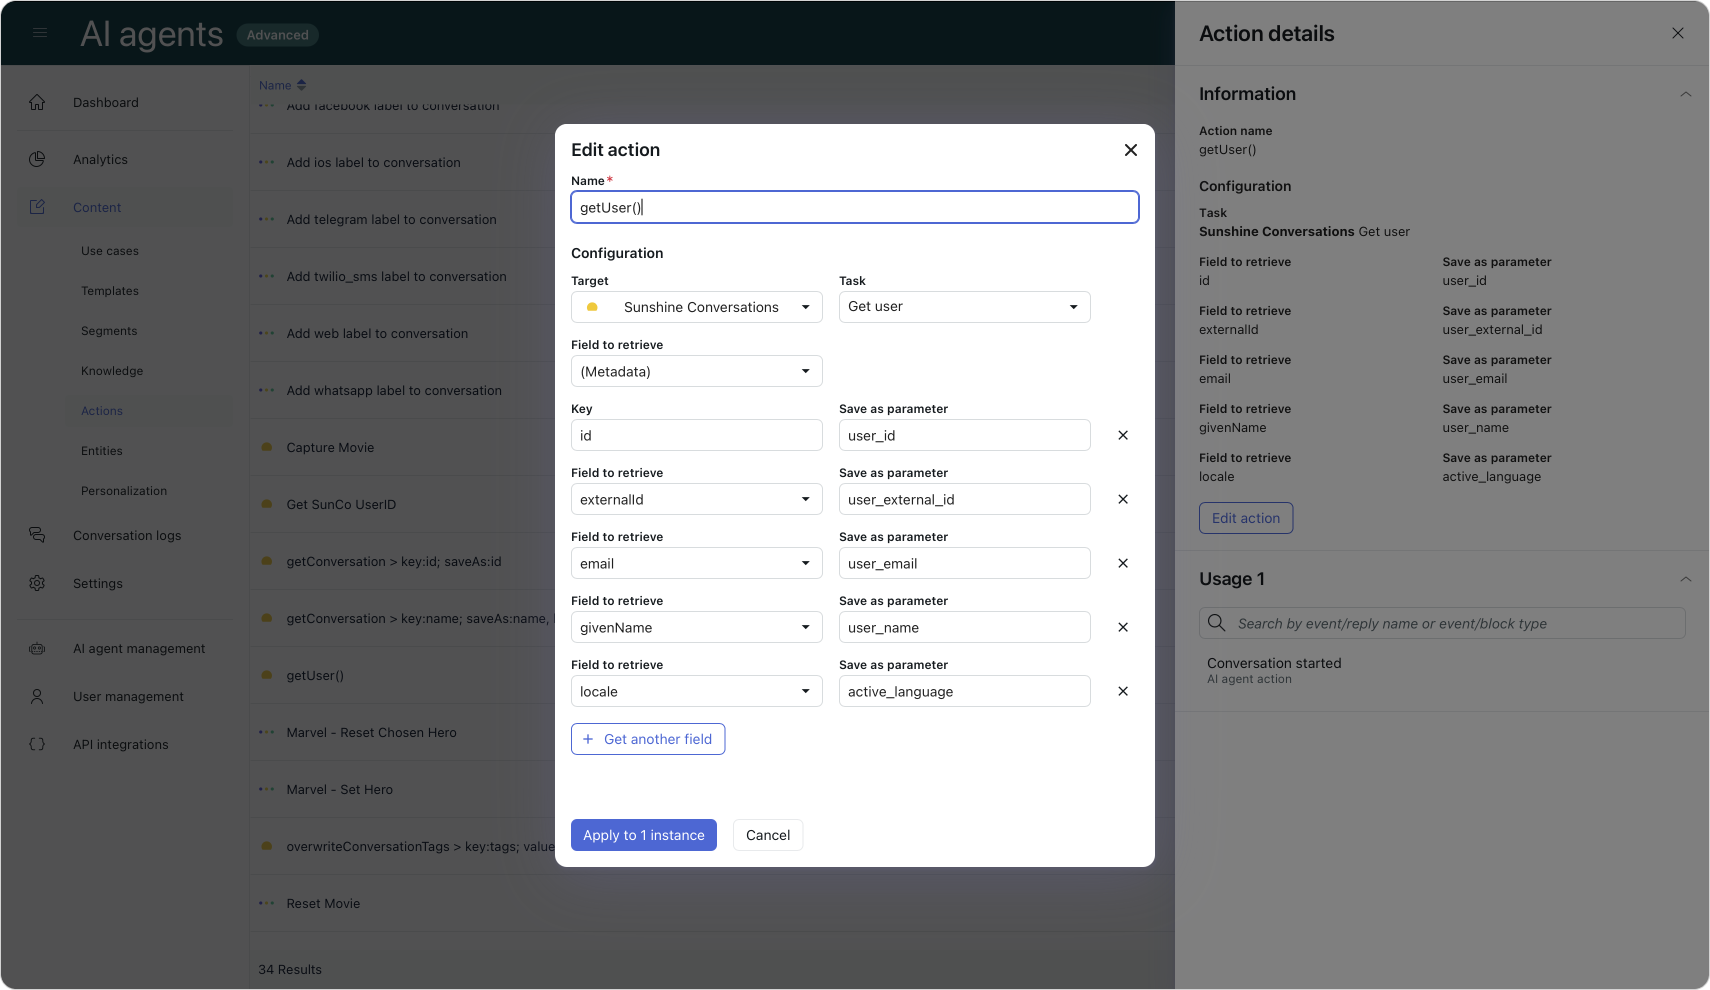
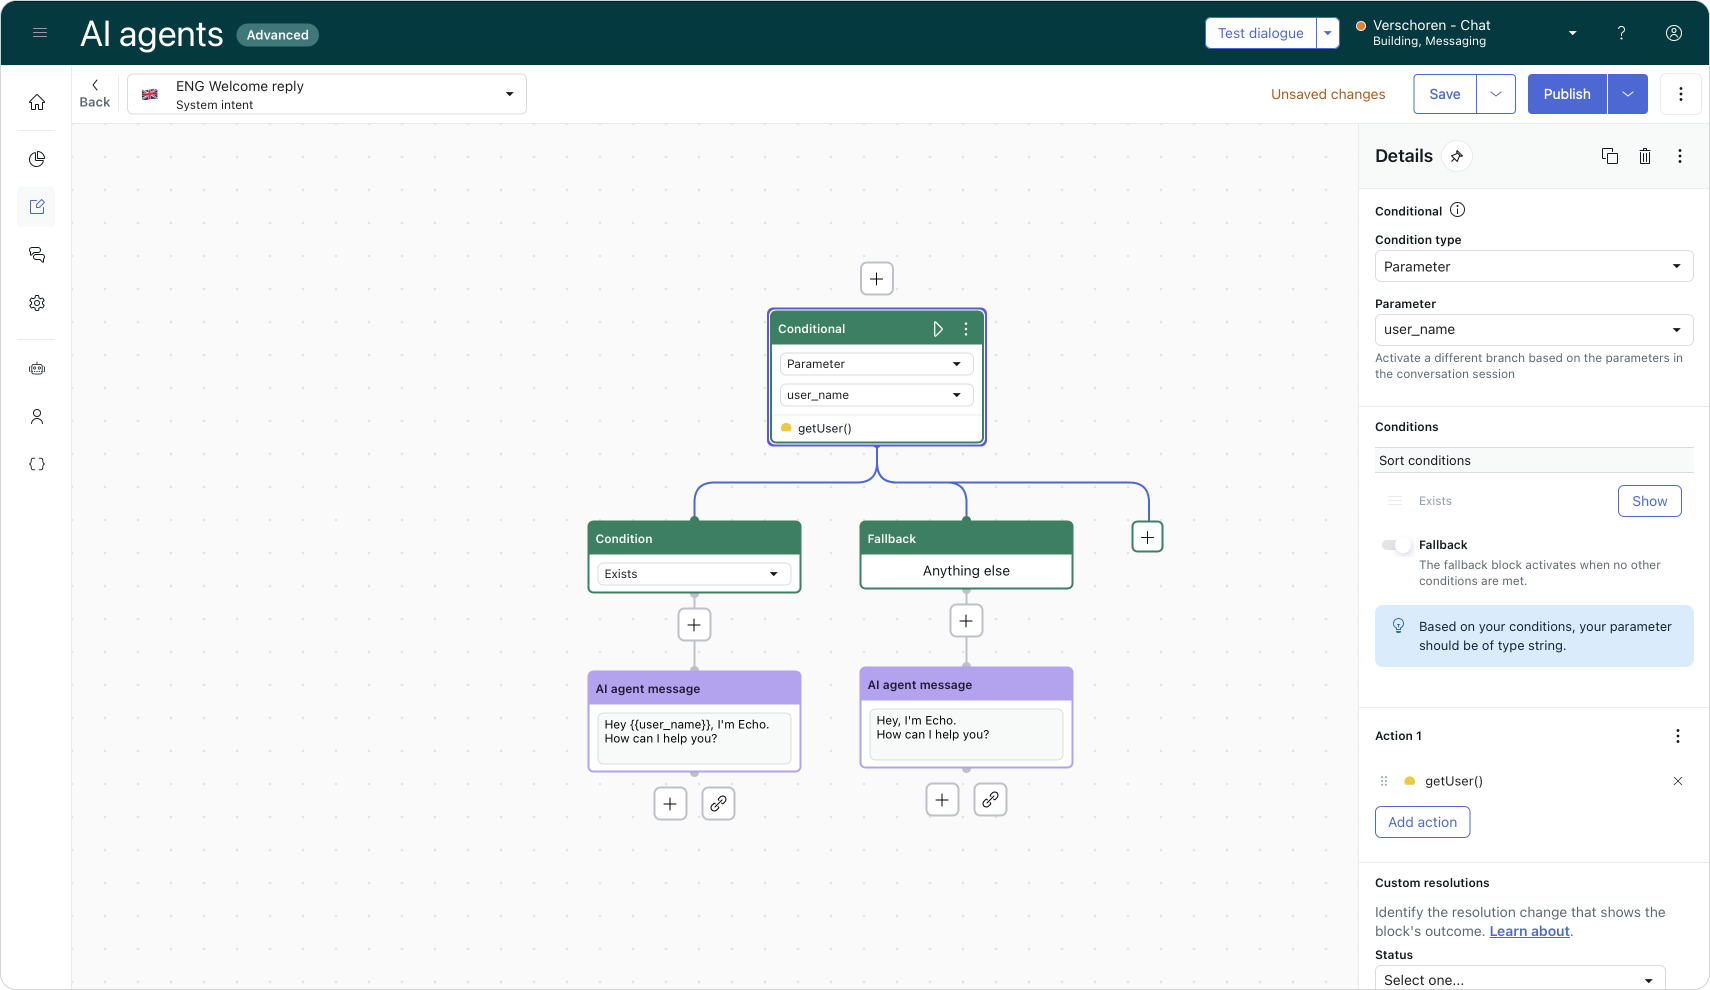
At its simplest, you can create an Action that retrieves the current Sunshine Conversations user. Then, in your Welcome Reply, check for values like user_name and greet the customer by name.
“Hey John!”
For a more advanced setup, you can build an API integration that fetches the full user profile from SunCo. Zendesk has published a detailed guide on how to do this:
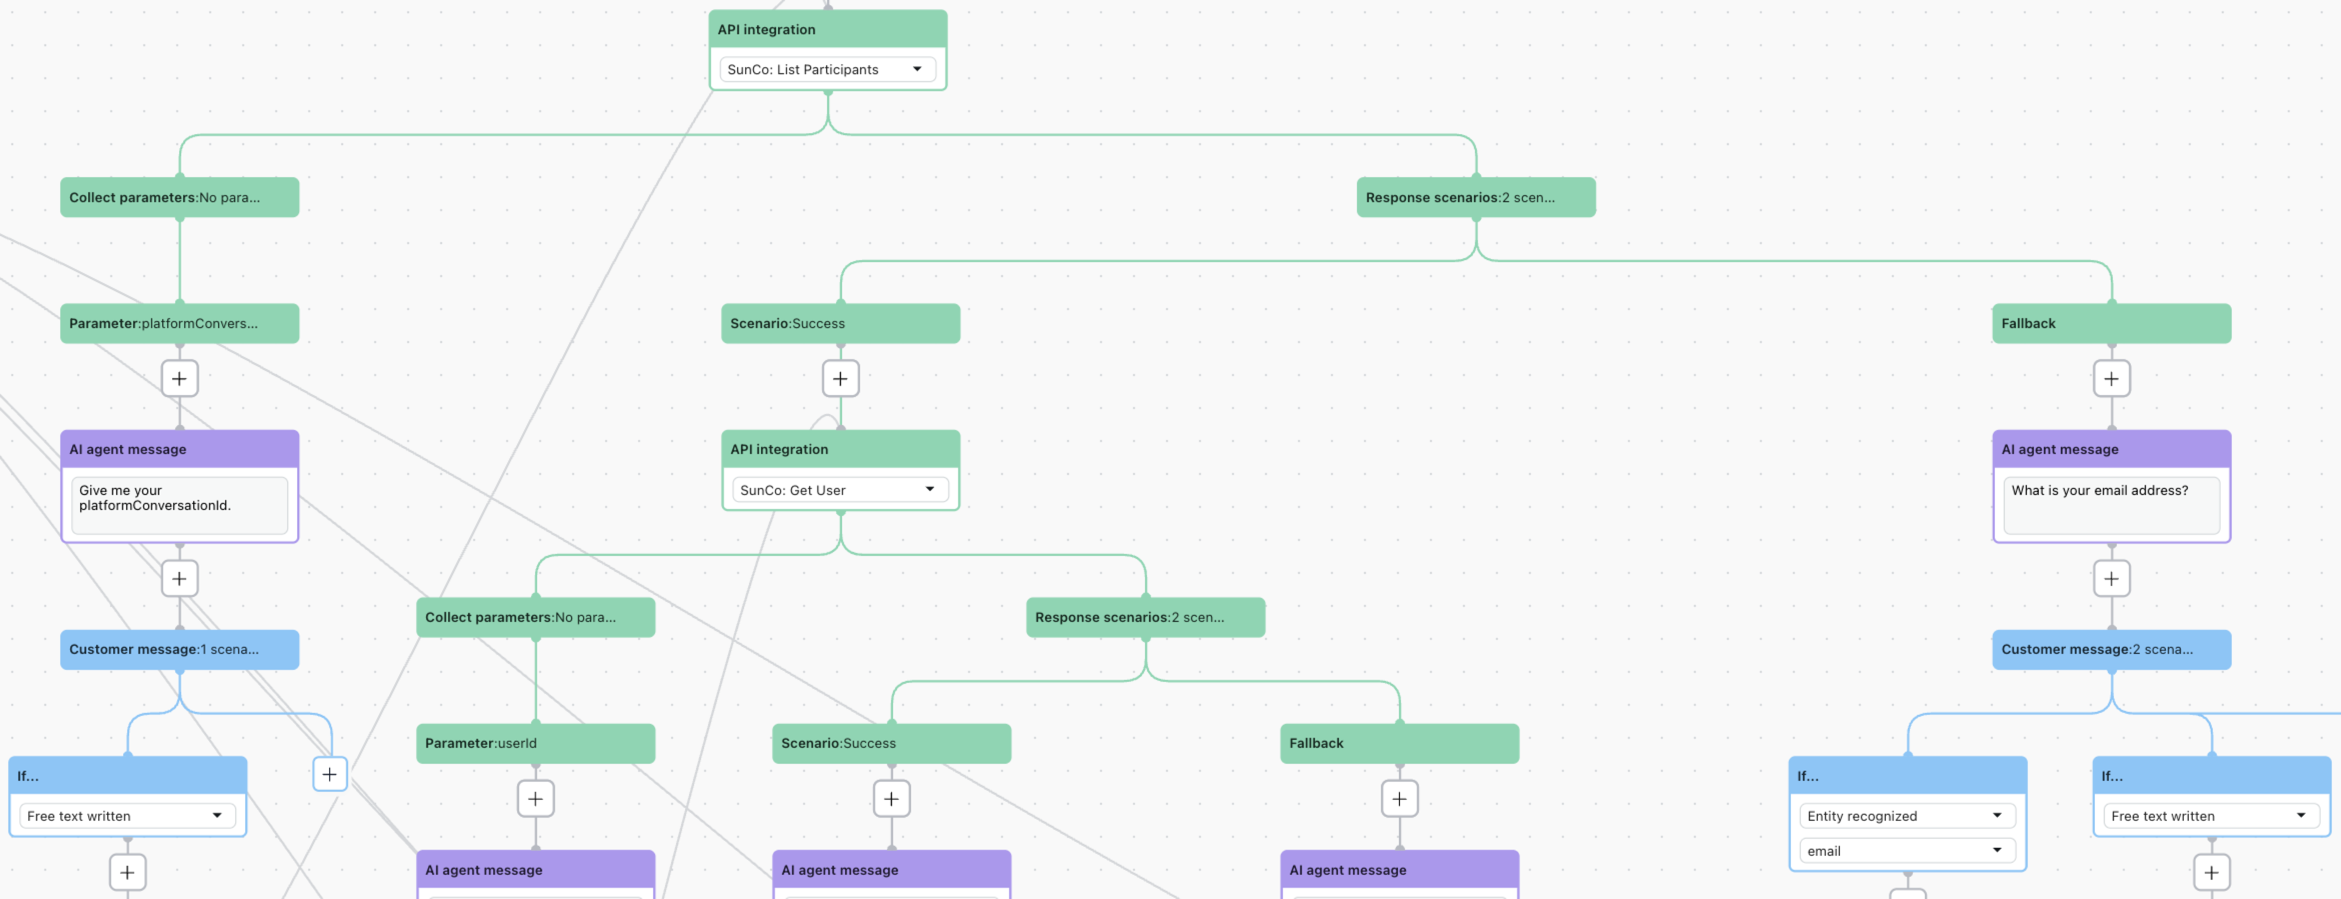
Using Authentication with custom widgets
By default, Help Center authentication only works when the Web Widget is embedded directly into the Help Center. But there are scenarios where that setup doesn’t fit.
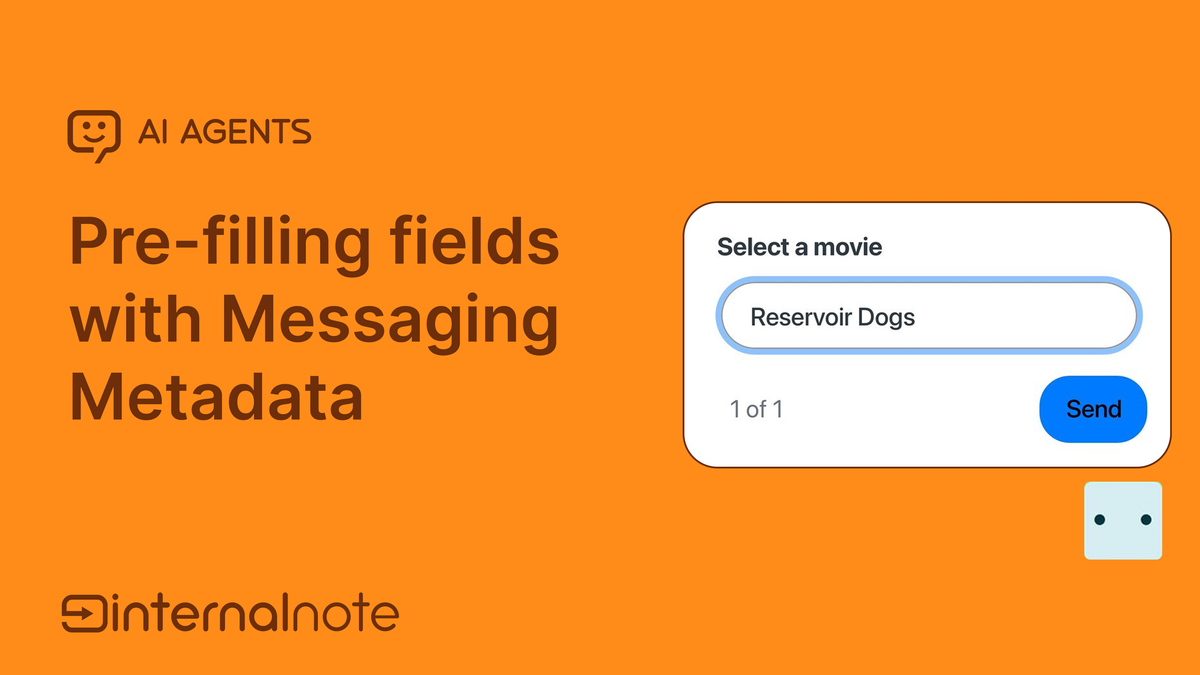
For example, if you’re using a custom launcher for the widget, or if you want to pass metadata to prefill custom fields in a conversation, you’ll need to use a custom script instead of the default embed.
To enable Help Center authentication in these custom setups, you’ll need a bit of extra code—similar to how you’d prefill ticket fields:
<script>
  zE("messenger:set", "conversationFields", [
    { id: "987654321", value: 42}
  ])
</script>
For authentication, add this snippet after your Web Widget embed:
<script id="ze-snippet" ... ></script>
{{#if signed_in}}
  <script>
      zE("messenger", "useSessionAuth");
  </script>
{{/if}}
This approach is only needed in cases where the widget is heavily customized. For most standard Help Center setups, the built-in checkbox will handle authentication automatically.
Under the hood: How Zendesk maps user identities
Earlier in this article, I referred to Help Center authentication for Messaging as “a simple checkbox.” But behind that checkbox lies a web of complexity.
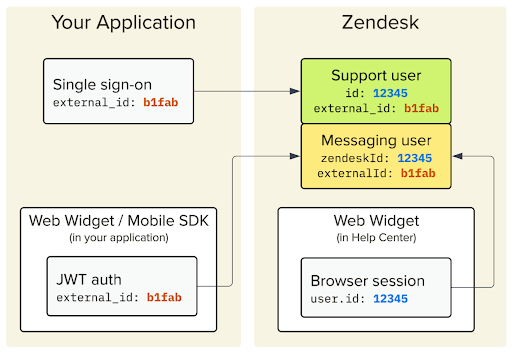
When a user is authenticated through the Messaging widget, Zendesk creates a user record in Sunshine Conversations. This user includes fields like givenName, email, and externalId.
If the conversation escalates to Zendesk Support, a Zendesk user is created. This record has its own name, external_id, and a set of identities—which can include email, messaging handles, phone numbers, or social logins.
At this point, Zendesk attempts to match the SunCo user with an existing Zendesk user based on external_id and email. If the combination is valid and conflict-free, the email is marked as verified and mapped to a Zendesk identity. That if carries a lot of weight here. I drew up a full flowchart to map all possibilities here.
A Zendesk User can also have multiple identities associated with them in the form of email, messaging, social or phone numbers.
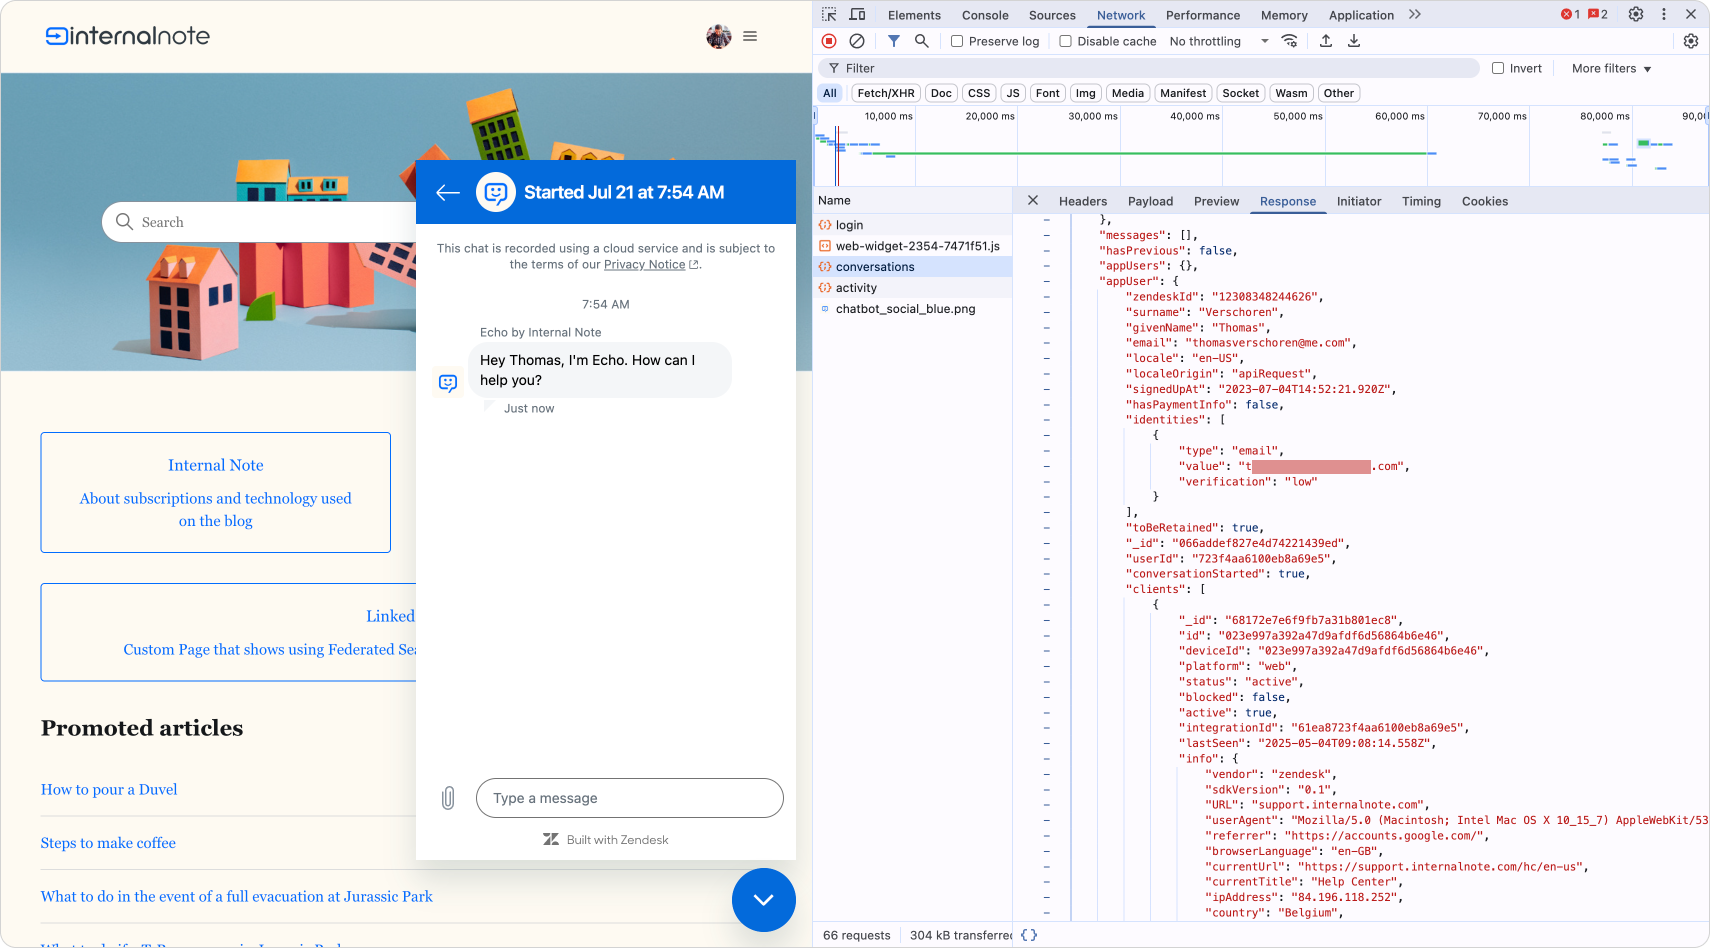
Things start to get tricky when you look at what’s actually passed during login. The login() action in the Help Center provides a payload that may include several identifiers for the same user:
    "zendeskId": "12308348244626", //Zendesk User ID
    "surname": "Verschoren (End User)",
    "givenName": "Thomas",
    "email": "[email protected]", //User email
    "locale": "en-US",
    "localeOrigin": "apiRequest",
    "identities": [
        {
            "type": "email",
            "value": "[email protected]",
            "verification": "full"
        }
    ],
    "_id": "066addef827e4d74221439ed", //SunCo User ID
    "userId": "qwerty1234", //External ID
    "authenticated": true
}
So within a single login event, you might see:
- a Zendesk user ID
- a SunCo user ID
- an external ID
- one or more emails
Each of these lives in a different system, and yet they need to be linked, merged, and deduplicated to ensure the customer is treated as a single identity.
Zendesk’s documentation provides a full breakdown of how this identity mapping works. But one thing is clear: SunCo users and Zendesk users are separate systems, and making them work seamlessly together takes some serious engineering under the hood.
Conclusion
Much of this complexity stems from a few legacy assumptions baked into Zendesk’s early design:
- Each end user has a single
external_id - Every email address maps to just one user
- If someone sends an email, we can safely assume they are who they claim to be
These assumptions worked in a simpler time. But over the years, layers of functionality have been added—often bending or stretching those original rules. And with that, edge cases and identity mismatches began to surface.
For example, a guest user who provides an email address via Messaging can’t always be trusted to own that email. Or consider multi-brand setups: the same email might be used across two different brands, each tied to a different external_id. That’s when identity mapping gets messy.
To Zendesk’s credit, much of this complexity is hidden from admins. That simplicity is hard-earned, and likely the result of deep technical plumbing behind the scenes.
Still, I hope that at some point Zendesk gives users the same structural overhaul it gave to custom objects—a rethink where identities become the foundation. Where email isn’t the primary identifier anymore, but instead a composite of channel + brand + external_id becomes the canonical key.
But if this is starting to sound like too much detail, don’t worry. For most teams, it’s as easy as ticking one box in your widget settings. Enable Help Center authentication, and it just works.