Pre-filling custom fields in the Zendesk Bot with Messaging Metadata
This article contains three tutorials that explain how to use the new Messaging Metadata feature in Zendesk to pre-fill fields in your conversation bot flows.
Pre-filling custom fields in the Zendesk Bot with Messaging Metadata

On this page
Last week's article showed how Zendesk now allows you to show restricted Help Center articles in Guide, removing one of the final missing items for feature parity between the Classic Widget and Messaging from the list.
Less than a week later they released another update to Messaging that resolves maybe the biggest open item on that list:

In short, it is now possible to fill in custom fields in the Messaging flows via a bit of code and preselecting dropdown, pre-filling text fields or checking checkboxes without user interaction.
This not only enables now flows in your Conversational Bot, but also removes manual actions that used to be done by your users: you can enter order numbers, select a venue, tag conversations with VIP, or set values you can use in API calls (retrieve an order) or branched conditions in your flows.
This is all done with one fairly simple line of code:
zE('messenger:set', 'conversationFields', [{ id: 'id', value: 'string'}]);Let's dive in!
Pre-filling Ticket Fields
To demo this new feature I've build three demo environments:
- Movie Picker - a demo on how to pre-fill a text field and use the input to make an API call.
- Star Tours - a demo on how to choose a dropdown option and handle the choice via conditional branching.
- VIP Flow - set a VIP tag whenever a VIP customer is logged in and contacts you via the bot.
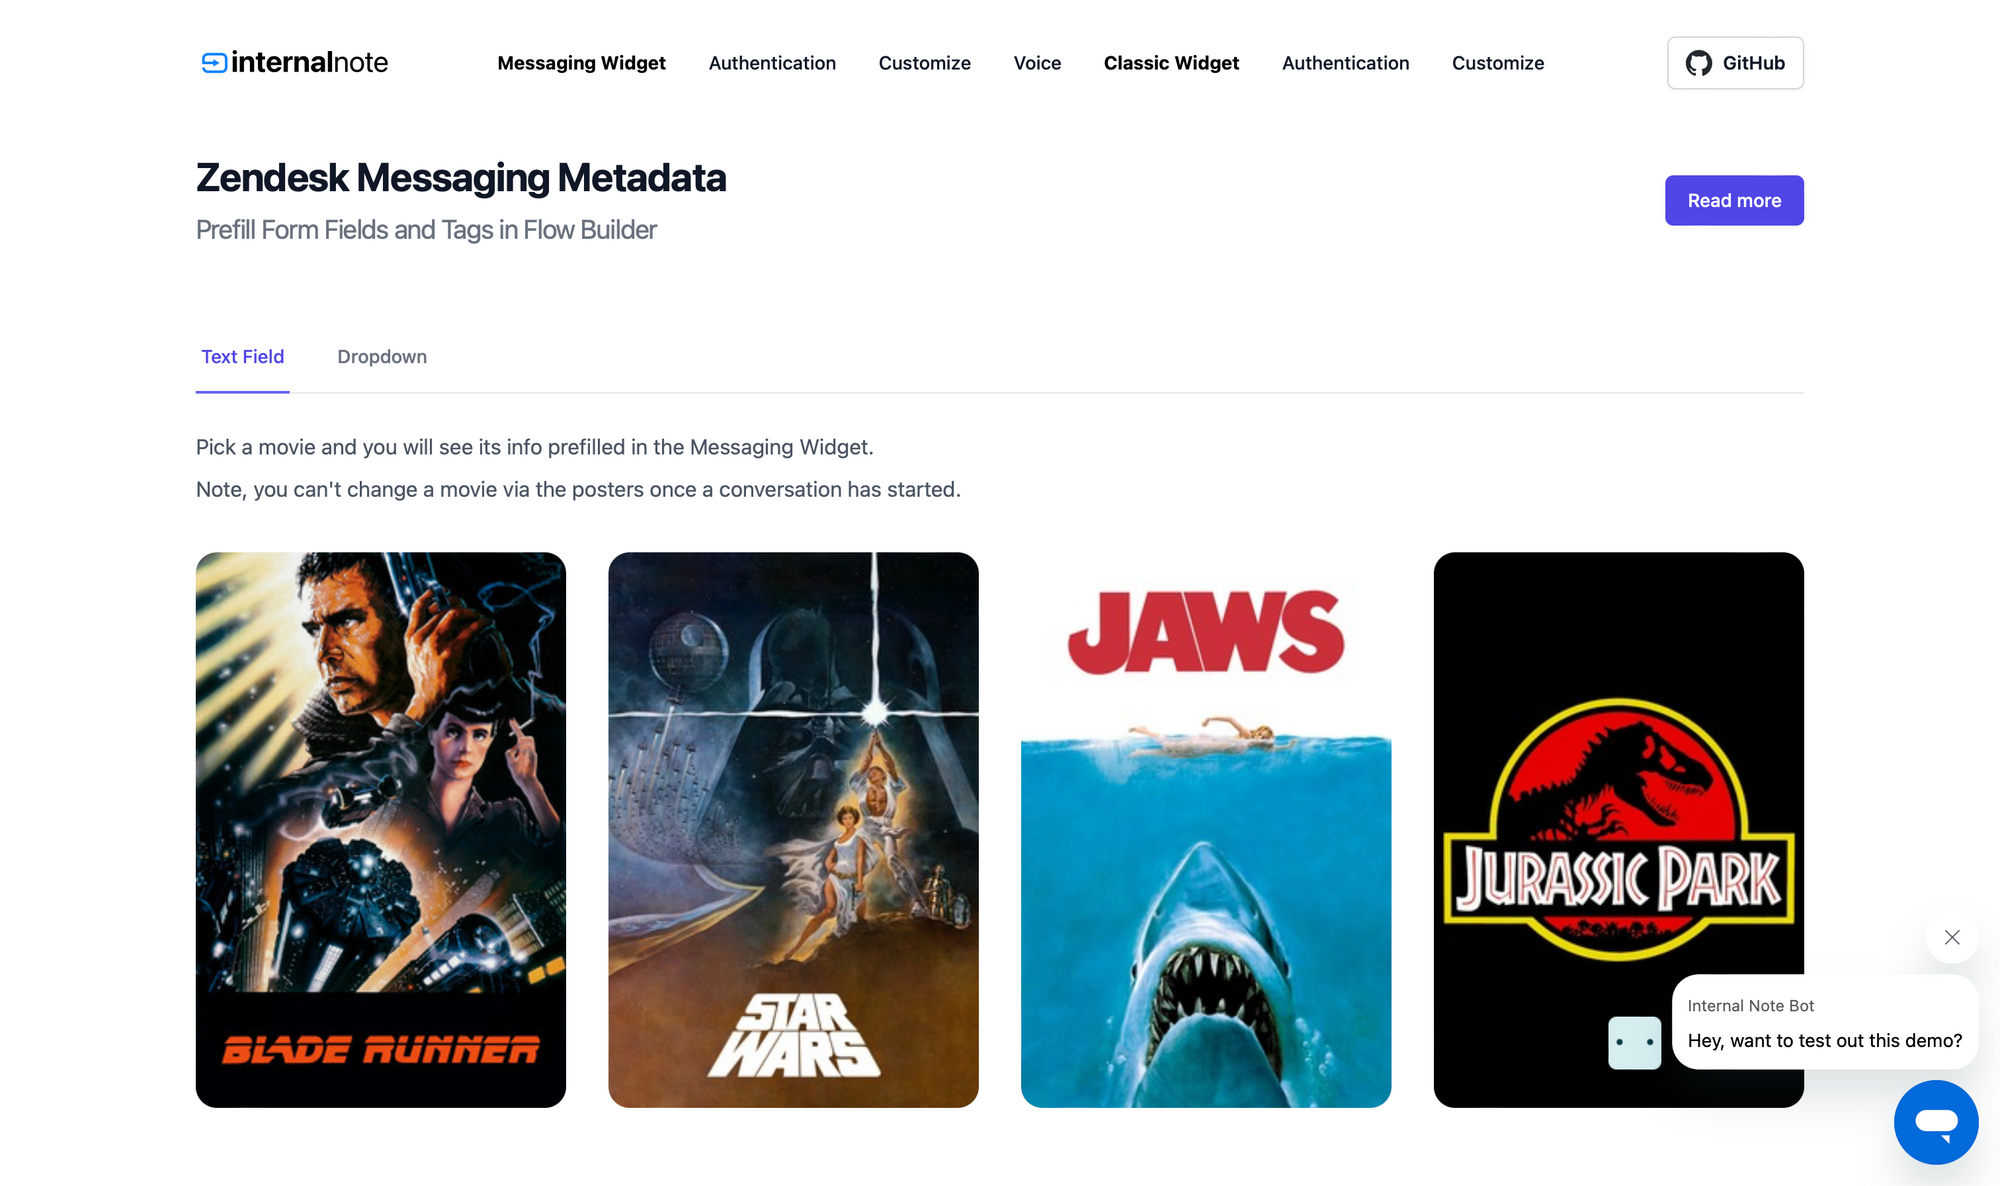
Demo Flow 1 - Pre-fill a text field
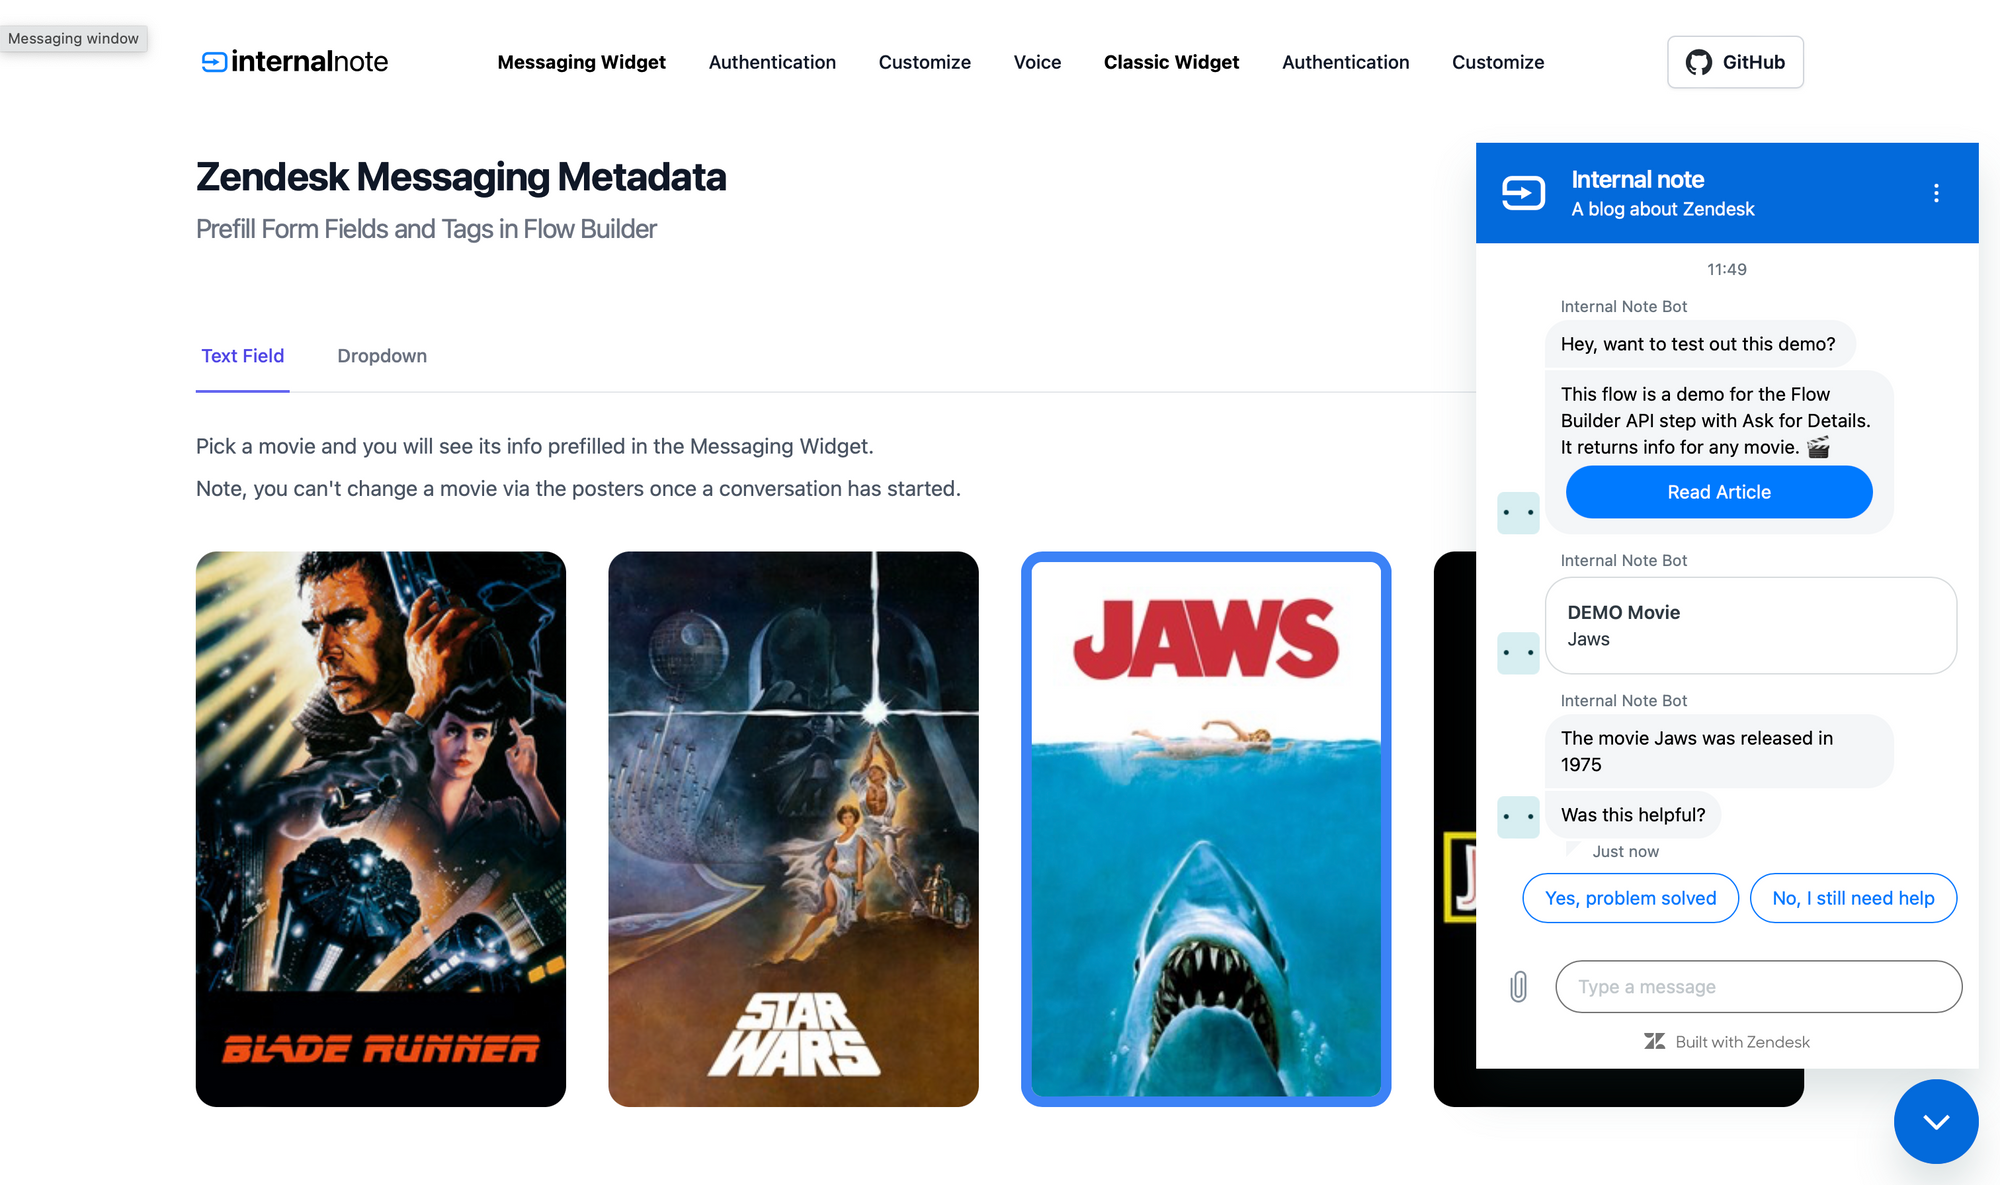
This demo builds on top of the Ask for Details article that I published earlier this year. It runs as follows:
- A user enters a movie in the bot flow
- We make an API call to retrieve info about the movie
- We show the returned info (title, director, release year) as a result.
Now that we can pre-fill data in the Messaging Flow we can make this flow a bit nicer. We can e.g. show a list of movies on our website, and whenever the customer selects a movie we fill in the movie field with its title, and open the widget.
Setup
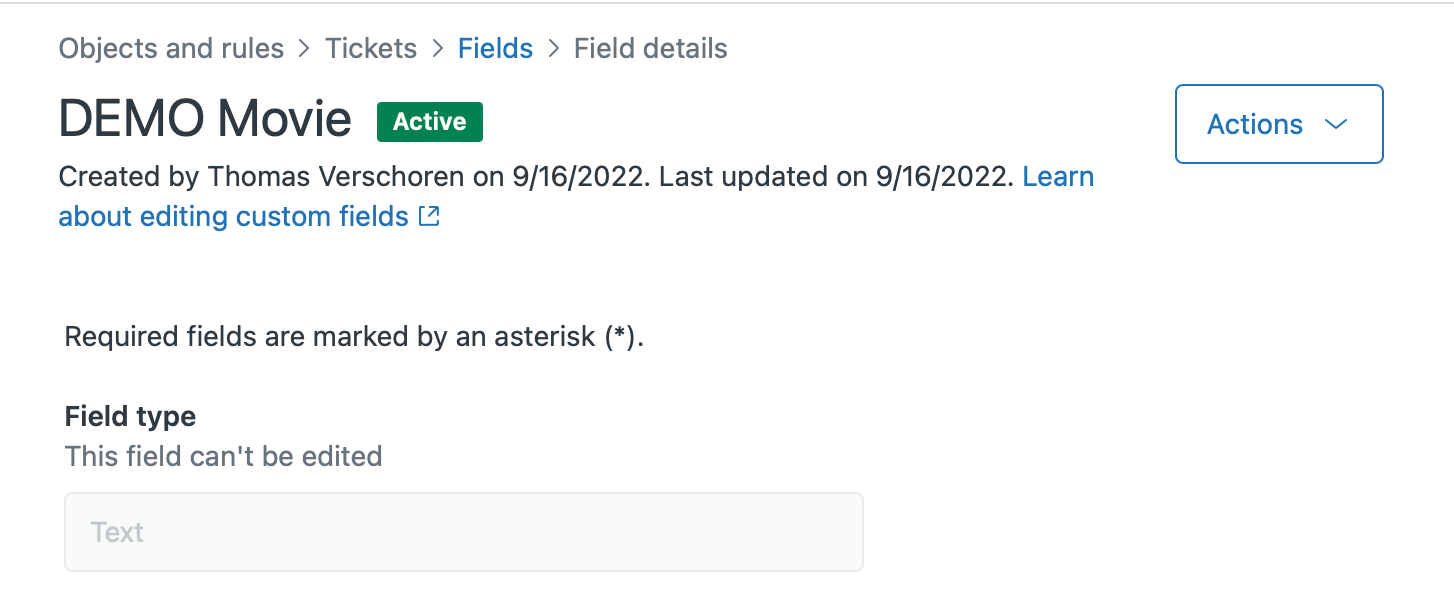
The first item you need for this flow is a ticket field to capture the Movie Title. Note down the Field ID which is part of the URL while editing the ticket field in the Admin Center: https://domain.zendesk.com/admin/objects-rules/tickets/ticket-fields/7662882404114
Bot
To see how to build this bot, please refer to this earlier article.
 Thomas Verschoren
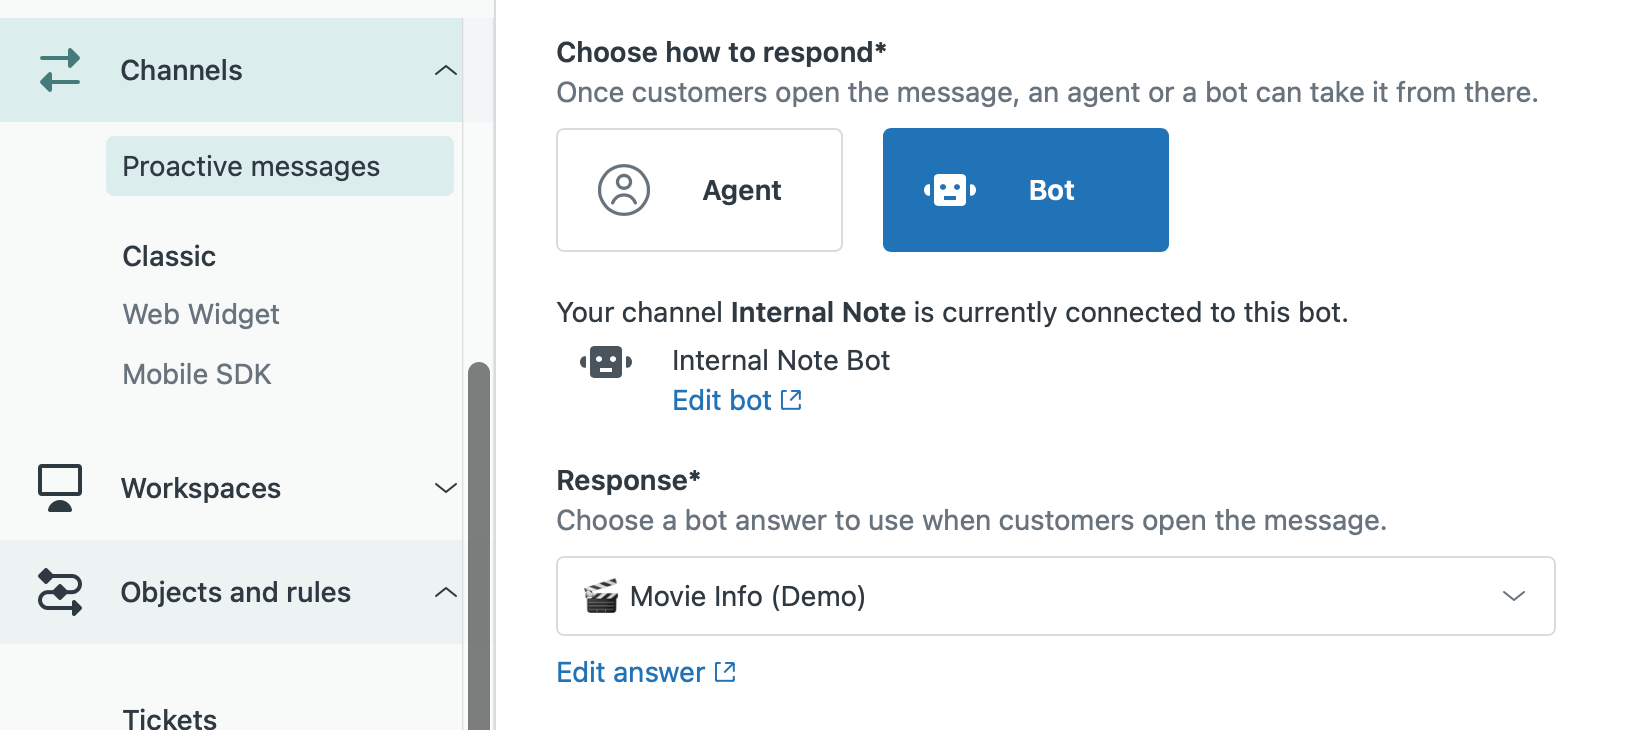
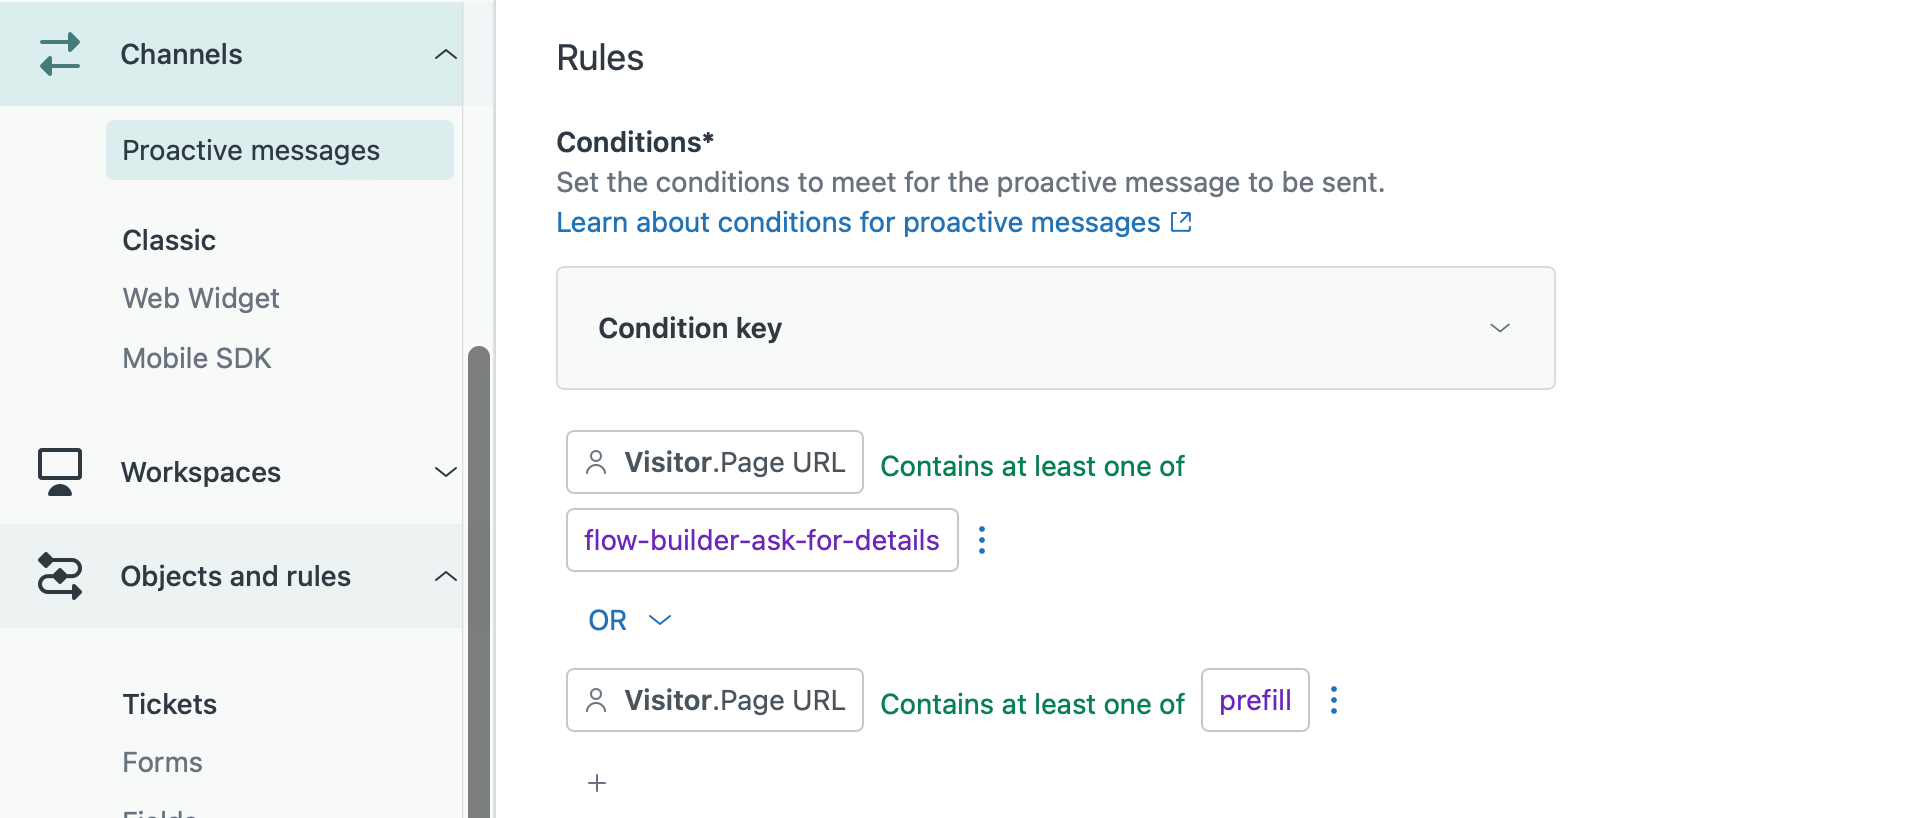
One extra I added to make the flow easier to discover is create a proactive message that preselects the 🎬 Movie Info intent in the Admin Center. This is an optional step but makes it easier for customers to discover the demo.
However, if we pre-fill the fields they will also show up as filled in without selecting an intent in advance.
Website
The final part is the actual new part of this release.
We're going to pre-fill our custom field with the value of a selected movie.
https://demo.internalnote.com/prefill
The first step is creating an array of movie posters to click on. Note that we add a data-target value to each poster so we know which poster was clicked on.
<ul role="list">
  <li>
    <img class="movie" src="img/movies/bladerunner.jpeg" data-target="Blade Runner">
  </li>
  <li>
    <img class="movie" src="img/movies/starwars.jpeg" data-target="Star Wars">
  </li>
  <li>
    <img class="movie" src="img/movies/jaws" data-target="Jaws">
  </li>
  <li>
    <img class="movie" src="img/movies/bladerunner.jpeg" data-target="Jurassic Park">
  </li>
</ul>
Next we react to a click on a .movie and set the custom field with the Field ID we copied earlier to the data-target of the selected item.
And finally we open the widget to start the conversation.
$(document).ready(function() {
  $('.movie').click(function(){
    var movie = $(this).data('target');
    zE('messenger:set', 'conversationFields', [
      { id: '7662882404114', value: movie}
    ]);
    zE('messenger', 'open');
  })
});
Note that even if we preselect a movie, the customer will still be able to see and change the value.
Use Cases
You can adapt this flow in a myriad of ways:
- Whenever a customer is looking at an order in their order history you can fill in the Order Number field in your bot flows so that any conversation starts references that order
- If a customer is looking at a product page you can fill-in the SKU number so you know what item they're interested in
- Since we can not yet pass user metadata other than email or name, you can fill in a customer id or membership number field with the value of their profile
- If a customer needs help with changing a booking you can launch the widget, pass the conversation to an agent and already pre-fill in their booking number.
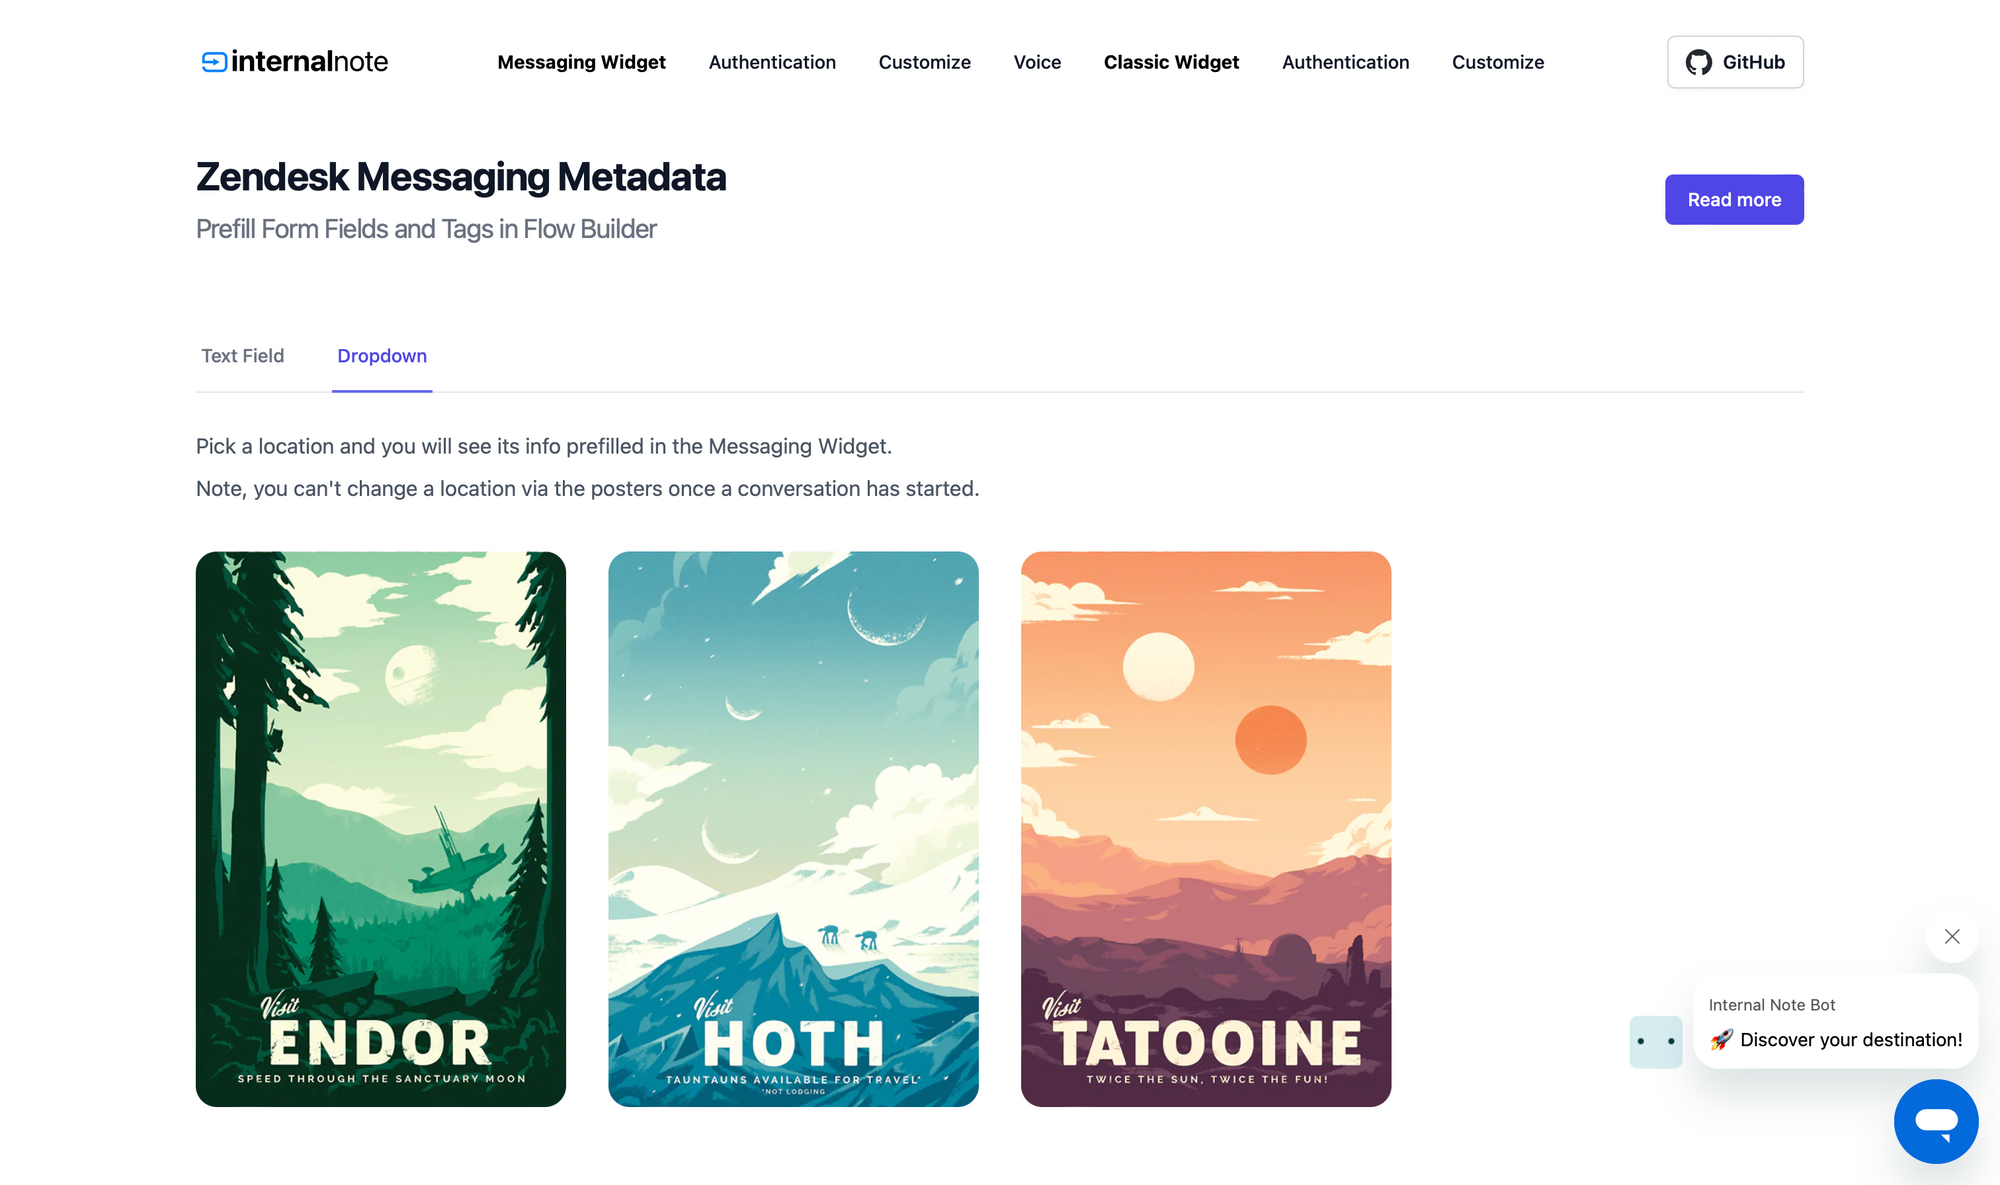
Demo Flow 2 - Pre-fill a dropdown
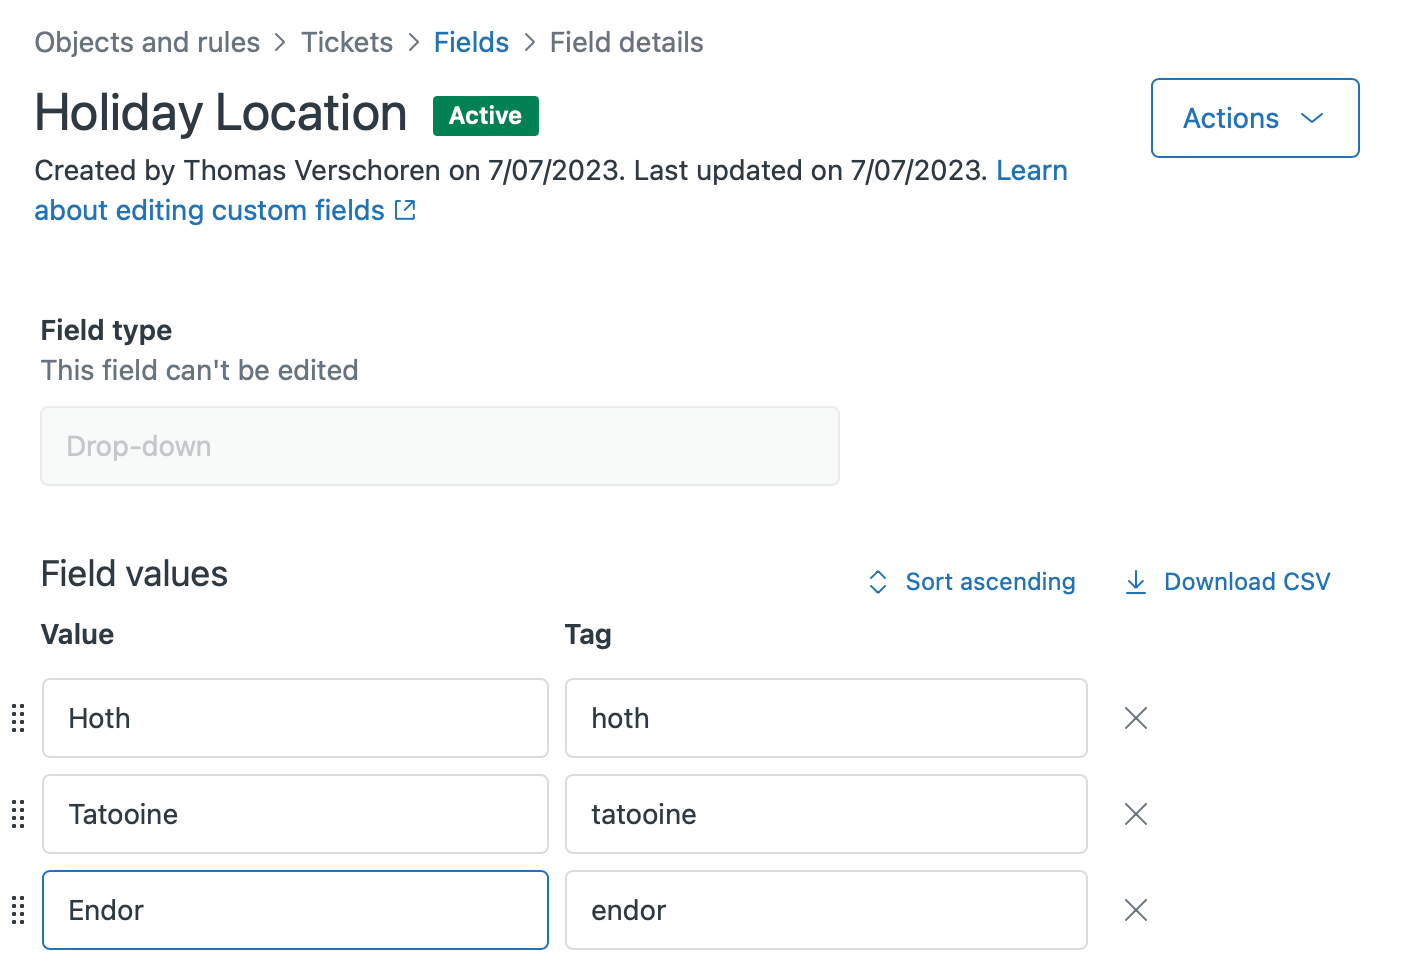
This next demo doesn't use a text field but makes use of drop-down with a preset list of options.
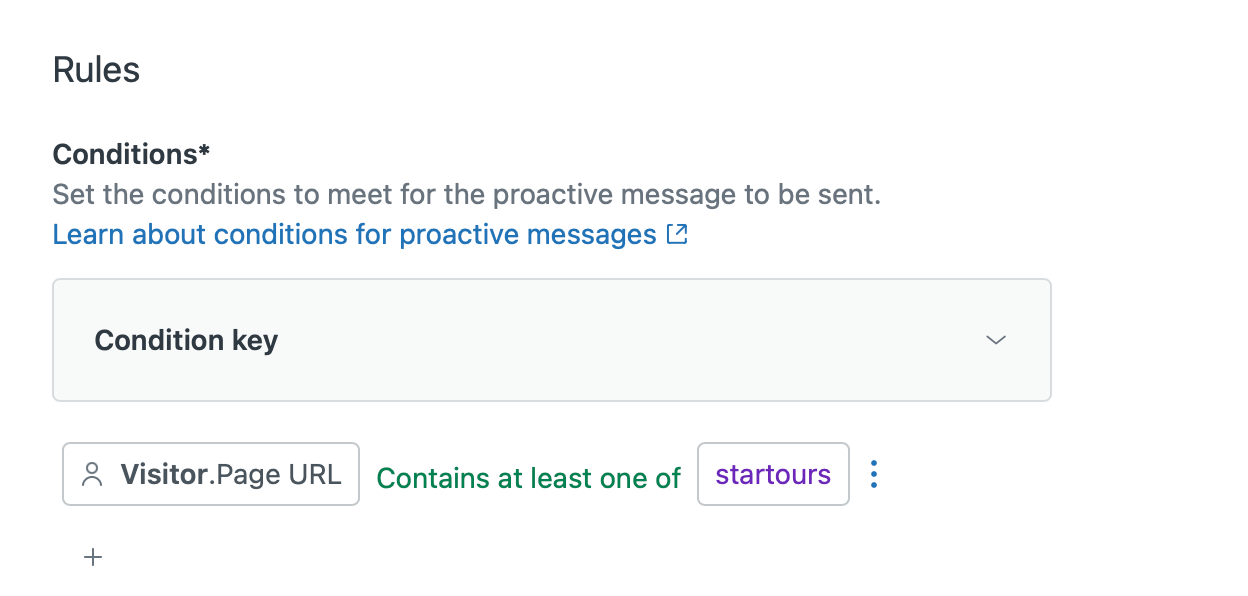
In this demo we show 3 holiday locations in a galaxy far, far away. When the user selects a destination we pre-fill the location in the messaging flow and when the customers interacts with the bot we'll use this value to branch to the right flow.
Setup
Step one is creating a dropdown with a list of locations in the Admin Center. Note down the Field ID.
Bot
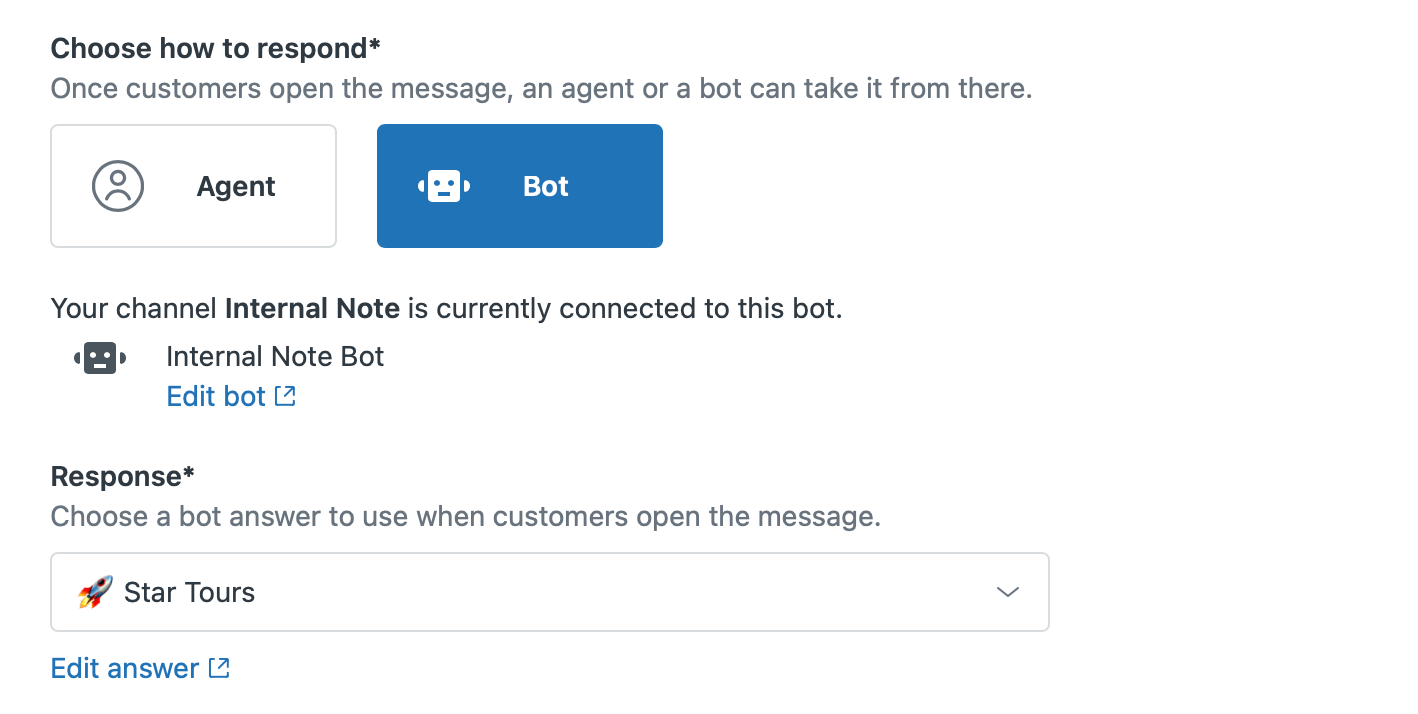
Next up we create a new intent for our bot. For a full breakdown on how to build complex Conversational Bot flows, take a look at this article:
Thomas Verschoren
Our intent functions as follows:
- We add an Ask for Details step where we ask to select a location by adding the
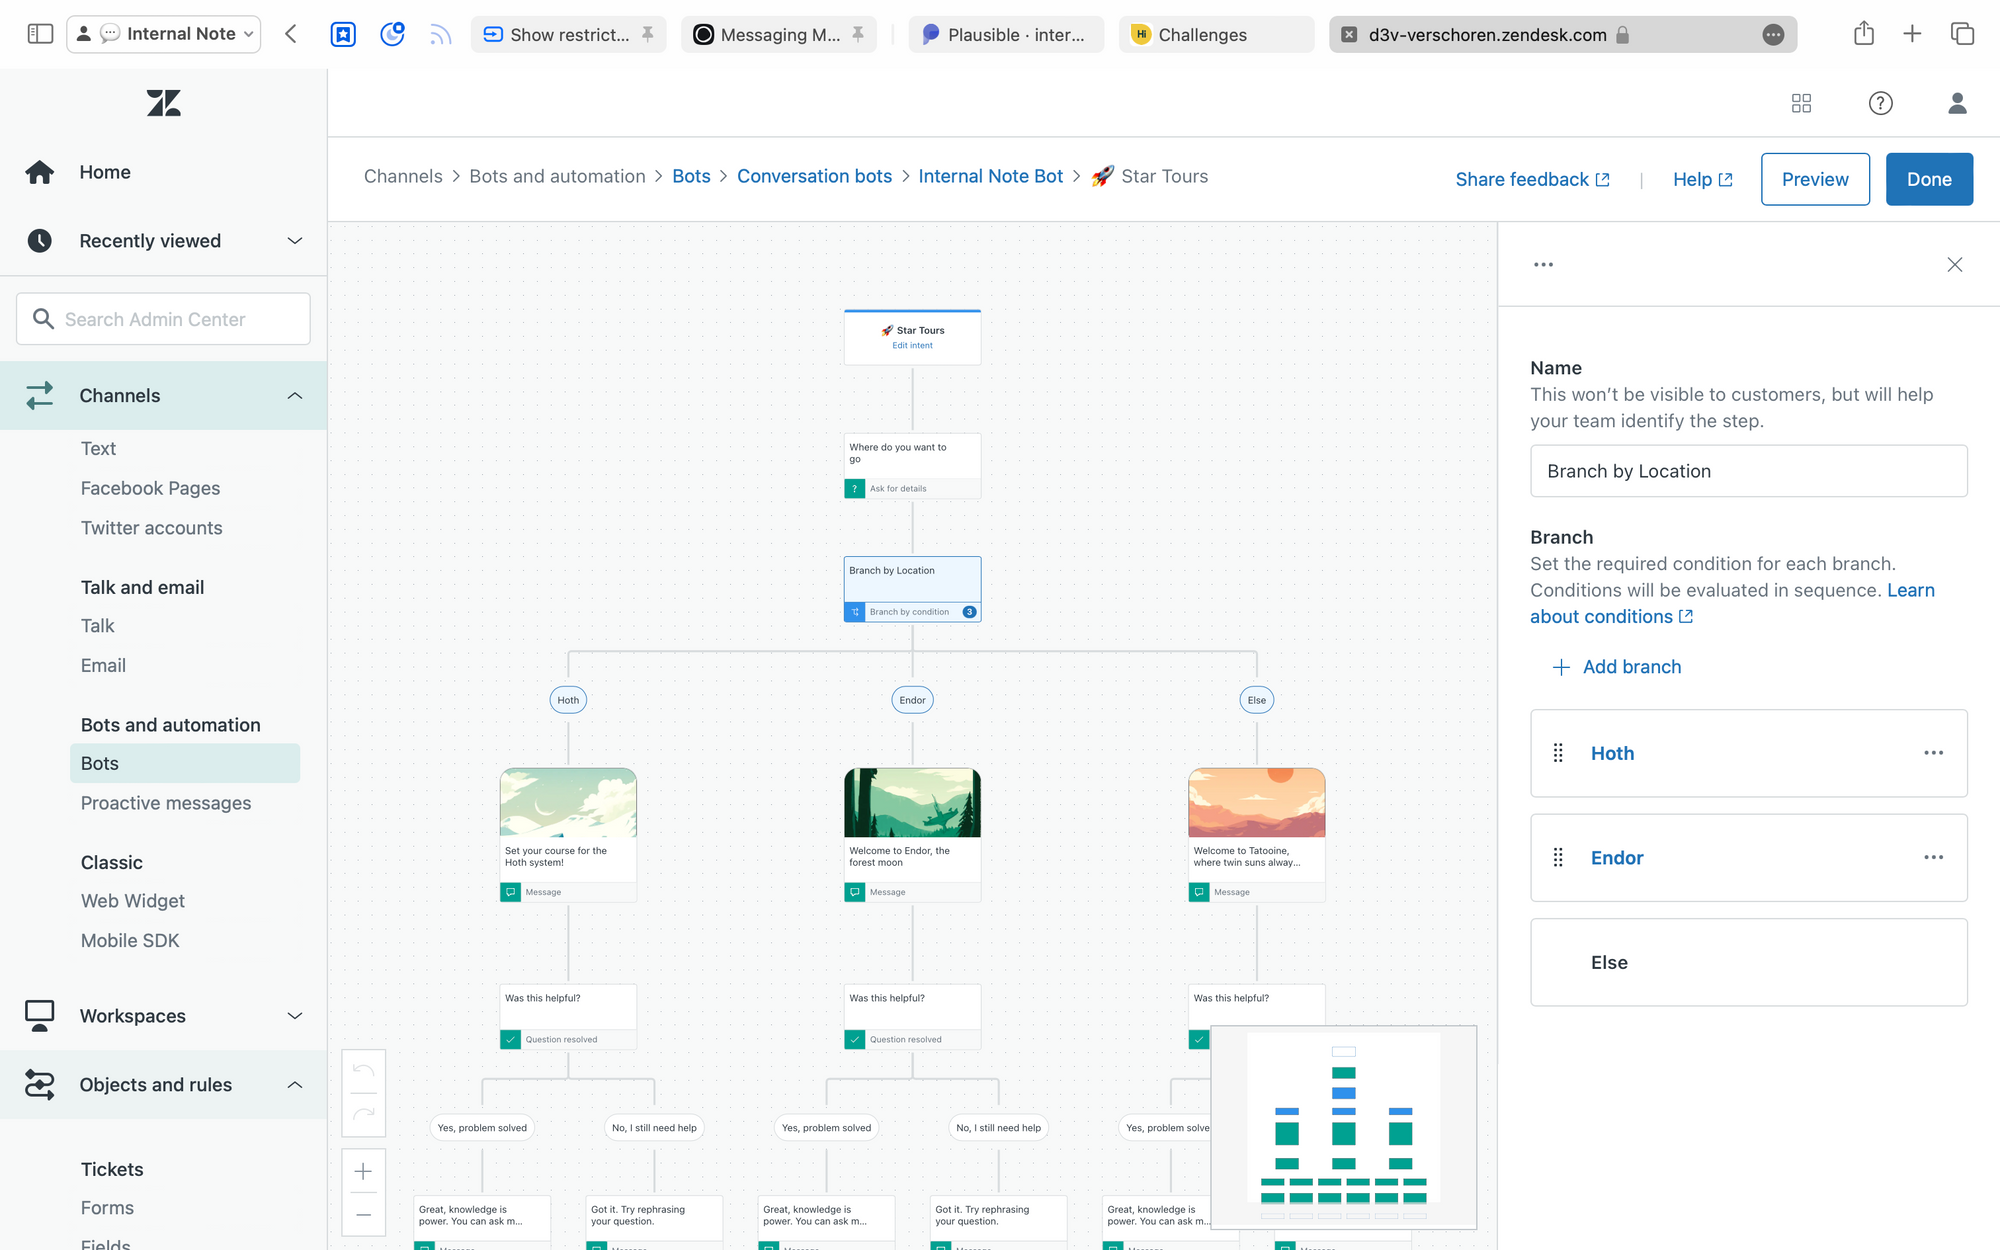
Holiday Locationfield to the Ask for Details step. We'll call this: Pick a Location. - We add a Branch by Condition step with 3 branches.
Pick a location is HothPick a location is Tatooine- Else (the last option)
- For each branch we add some text, an image and a Was this helpful? step
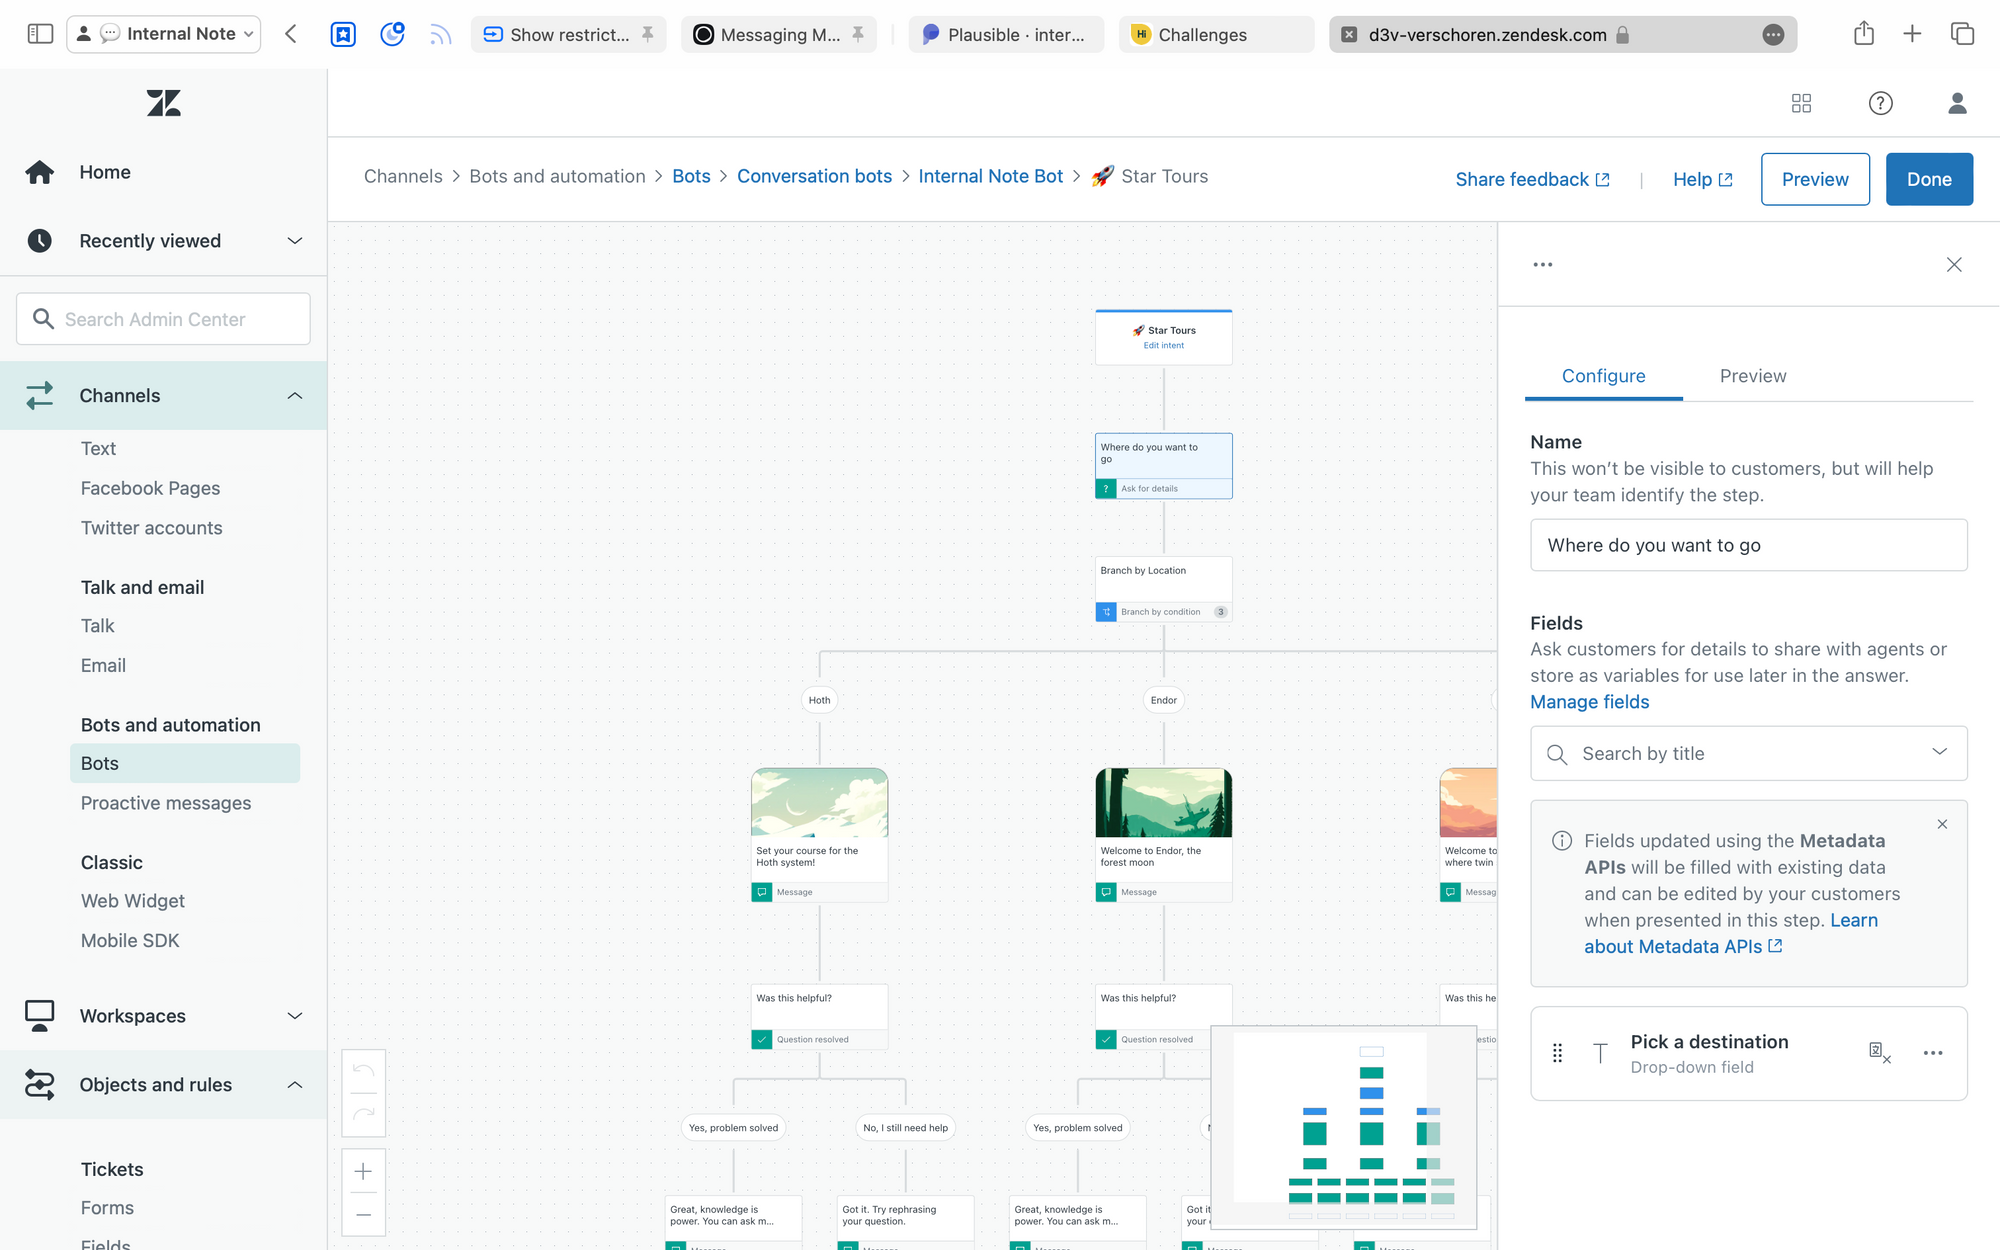

And finally we add a new proactive flow. This is optional, but by using this flow we can select the Intent and immediately jump to it when the page loads.
Website
The logic for this step is similar to the first demo.
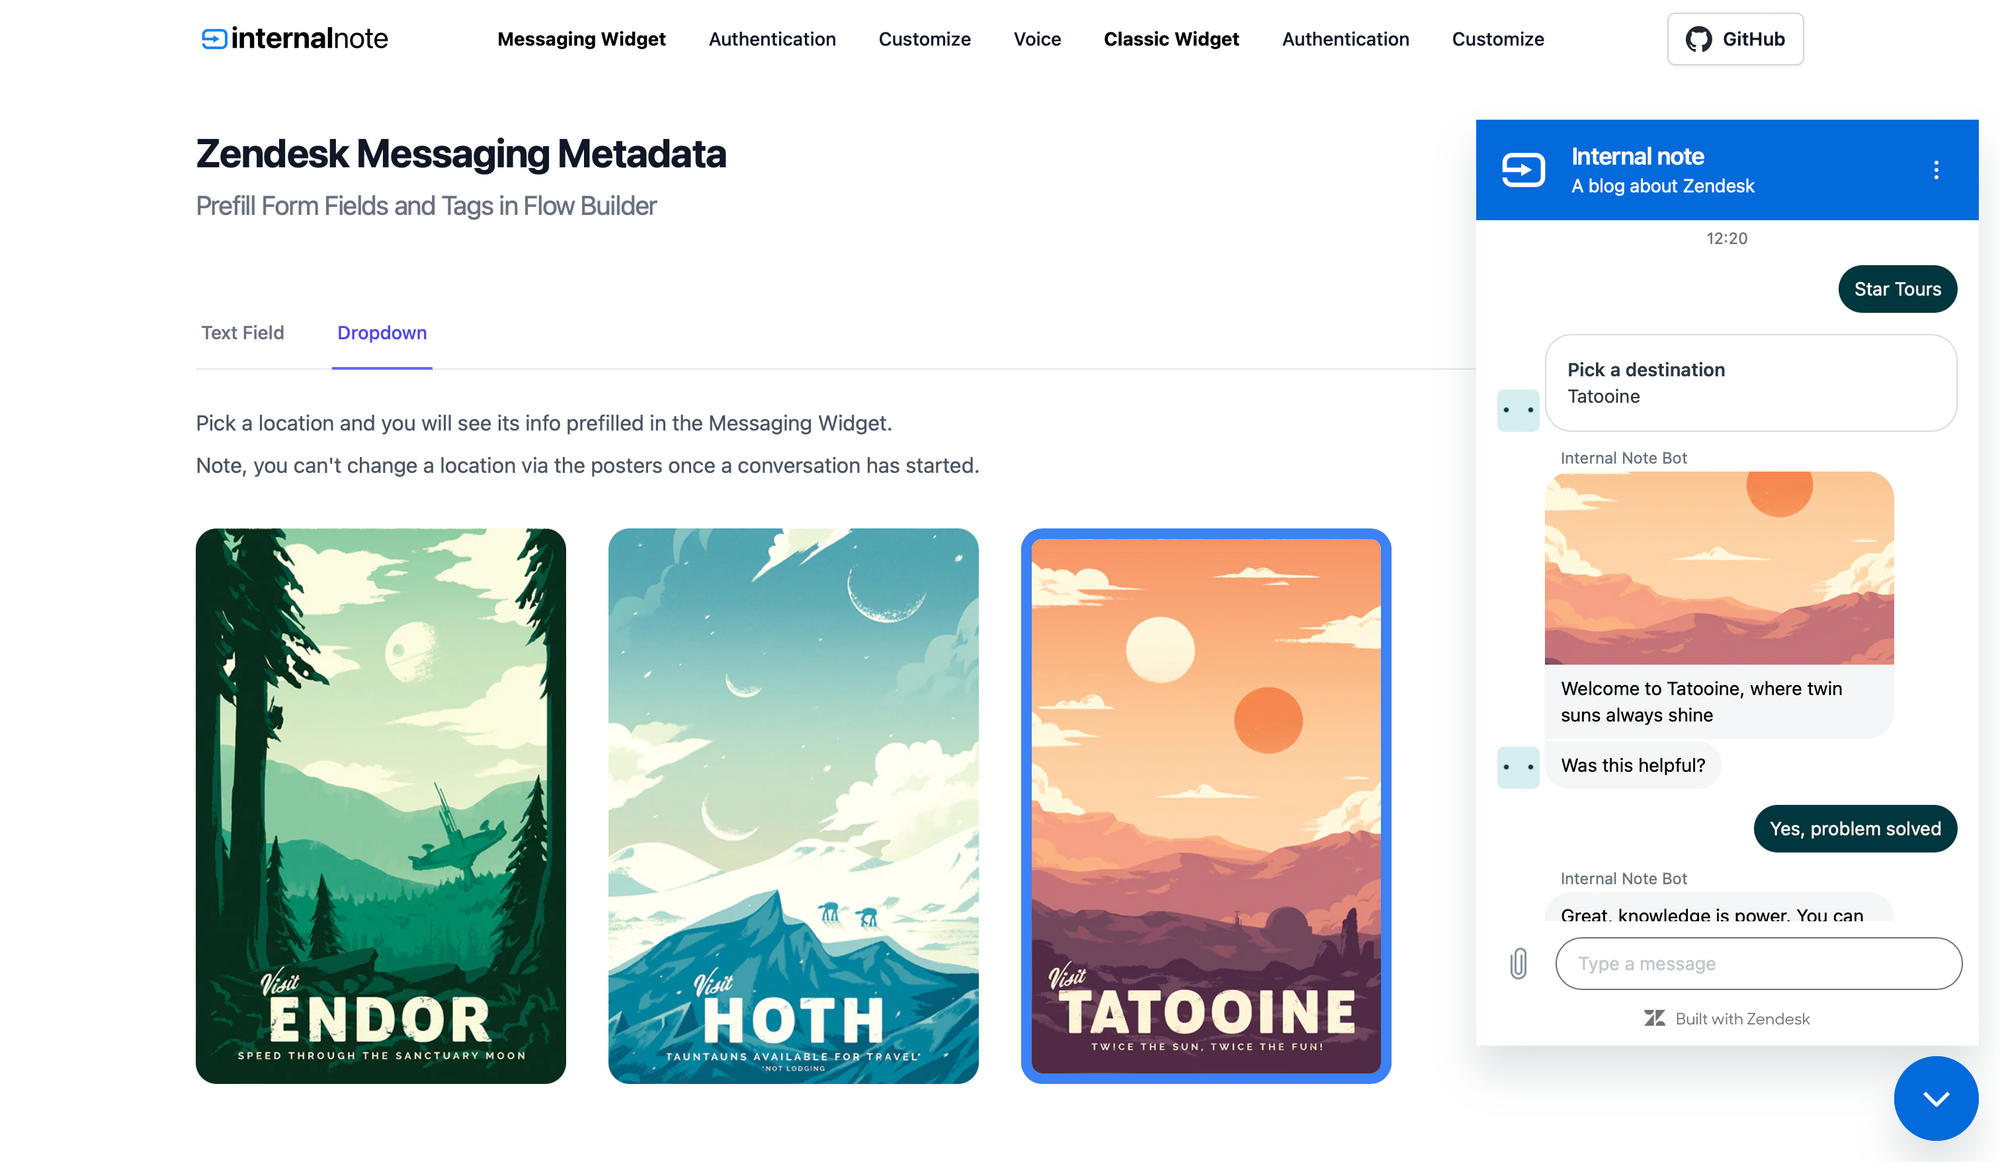
https://demo.internalnote.com/startours
First we create a list of locations. Each location has a data-target with a location name that matches the tag of the dropdown we created earlier.
<ul>
  <li>
    <img class="location" src="img/locations/endor.png" data-target="endor">
  </li>
  <li>
    <img class="location" src="img/locations/planethoth.png" data-target="hoth">
  </li>
  <li>
    <img class="location" src="img/locations/tatooine.png" data-target="tatooine">
  </li>
</ul>
Next we react to a click event and pre-fill our field by setting the id to the Field ID and the value to the chosen location.
$(document).ready(function() {
  $('.location').click(function(){
    var location = $(this).data('target');
    zE('messenger:set', 'conversationFields', [
      { id: '12367640319506', value: location}
    ]);
    zE('messenger', 'open');
  });
});
Use Cases
Based on the above there's a few scenario's where this could be useful:
- You're a hotel chain with multiple locations. If a user looks at a specific hotel you can preset the Hotel dropdown so you can route the requests to the right team
- You've got a request type field that's used to route between Support issues and Sales inquiries. Based on the page the customer is looking at (Support page or Product page) you can preselect the request type.
- For logged in customers you can set the "Are you already customer" field to yes, and no for others.
Demo 3: Setting tags
You can set Tags. These tags will only be applied to the created ticket once a conversation has started, and cannot (yet) be used on conditions within the bot flow.
zE("messenger:set", "conversationTags", ["vip", "gold"])
For example, on this demo page whenever our VIP logs in, we set a tag VIP to the conversation, and we wipe the tag for all other users:
if (vip) {
  Login({
    name: 'Vito Corleone',
    email:'vito+'+random+'@corleone.example',
    external_id: random
  });
  zE("messenger:set", "conversationTags", ["vip"])
} else {
  Login({
    name: 'Maximus Decimus Meridius',
    email:'maximus+'+random+'@example.com',
    external_id: random
  });
  zE("messenger:set", "conversationTags", [])
}
Final notes on Messaging Metadata
There's a few caveats when using the new feature.
Fields are always visible to the end-user and are you can't make them read only like you could with the Classic Widget.
One final "issue" is the fact that once the customer has started a conversation you can't update the values anymore.
Also, you can set multiple fields at once by adding more items to the array
zE('messenger:set', 'conversationFields', [
  { id: 1234, value: 'text_string'},
  { id: 5678, value: true},
  { id: 1977, value: 'dropdown_option'},
  { id: 1138, value: 42}
]);
To wrap this up, this release is one that's been on my Wishlist for a long time and makes more complex flows possible. Are there things I still want? Sure, hiding pre-filled fields, making them read only, selecting an intent via the same API, ... are just a few of them.
What do you think of this new feature? Which flows does it unlock for you?