
Zendesk Custom Objects - Part 3: Users
This is a four-part series on Zendesk's new Custom Objects feature. The articles cover setup, data import, using Custom Objects in forms and with agents, expanding user profiles, and displaying Custom Objects in Help Center forms.

Zendesk Custom Objects - Part 3: Users
This is a four-part series on Zendesk's new Custom Objects feature. The articles cover setup, data import, using Custom Objects in forms and with agents, expanding user profiles, and displaying Custom Objects in Help Center forms.

On this page
In this four part series we'll explore the new Custom Objects from an admin, agent and end-user standpoint.
Custom Object Series
The first two articles showed you how to set up custom objects and how agent can interact with them.
This third article will dive into expanding user profiles with Custom Objects and how you can use them to trigger different priorities based on linked records and how to create custom record tied to a specific user.
Map records to user profile
So far we've covered creating records and linking them to tickets. But we can also use Custom Objects to expand User Profiles in Zendesk.
Traditionally whenever we wanted to expand a customer profile we'd resort to user fields or tags. We tag a customer with VIP or set the Customer Type field to prospect. With Custom objects we can link rich objects to customers and provide more information than a regular field can.

Going back to our Pokémon example, in that world trainers can earn badges which gives them certain privileges. In our demo we'll use them to do the following:
- Make it clear what badge a trainer has earned
- Increase the priority of a trainers' ticket based on their badge
- Add the Gym Owner in cc to the ticket.
Creating the Custom Record
As always, whenever you create a record it's best to first map out the required data.
In our case we need the following fields:
- Name: name of the badge
- Gym Owner: Lookup Field linked to a specific
userin our Zendesk environment - Gym Type: Lookup Field linked to the Custom Object
Pokémon Type - Information: text field with info about the badge.
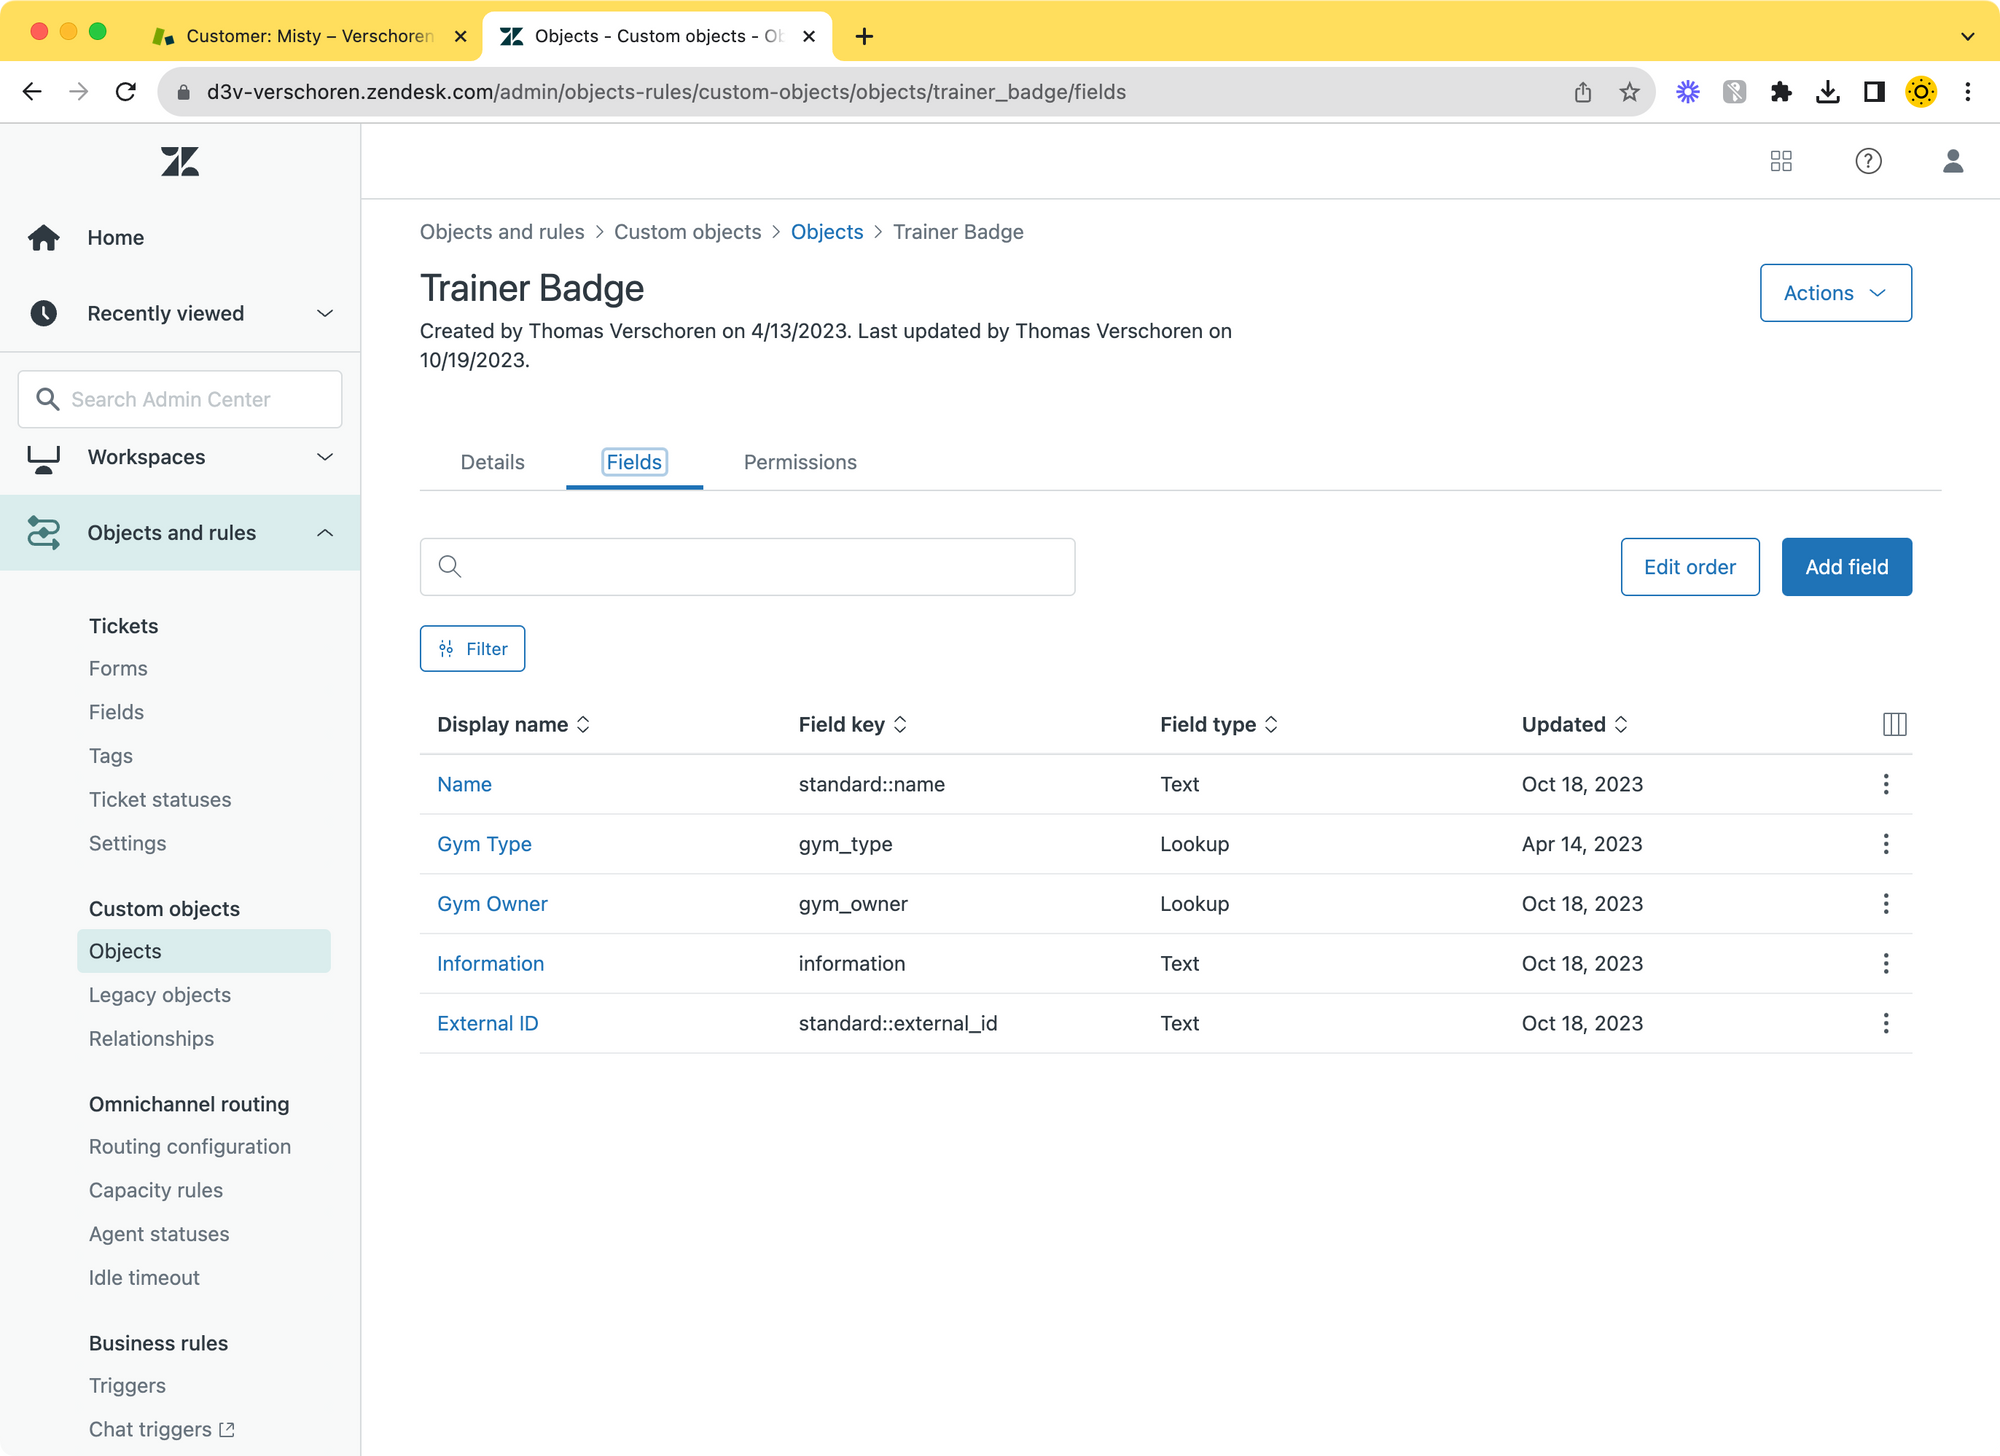
Looking at the previous articles you should already know how to setup most of these fields, but let's dive into one new type: a lookup field that links to a user.
We've setup a few Light Agents in Zendesk tagged with gym_owner . These people are responsible for giving second line support on their customers.
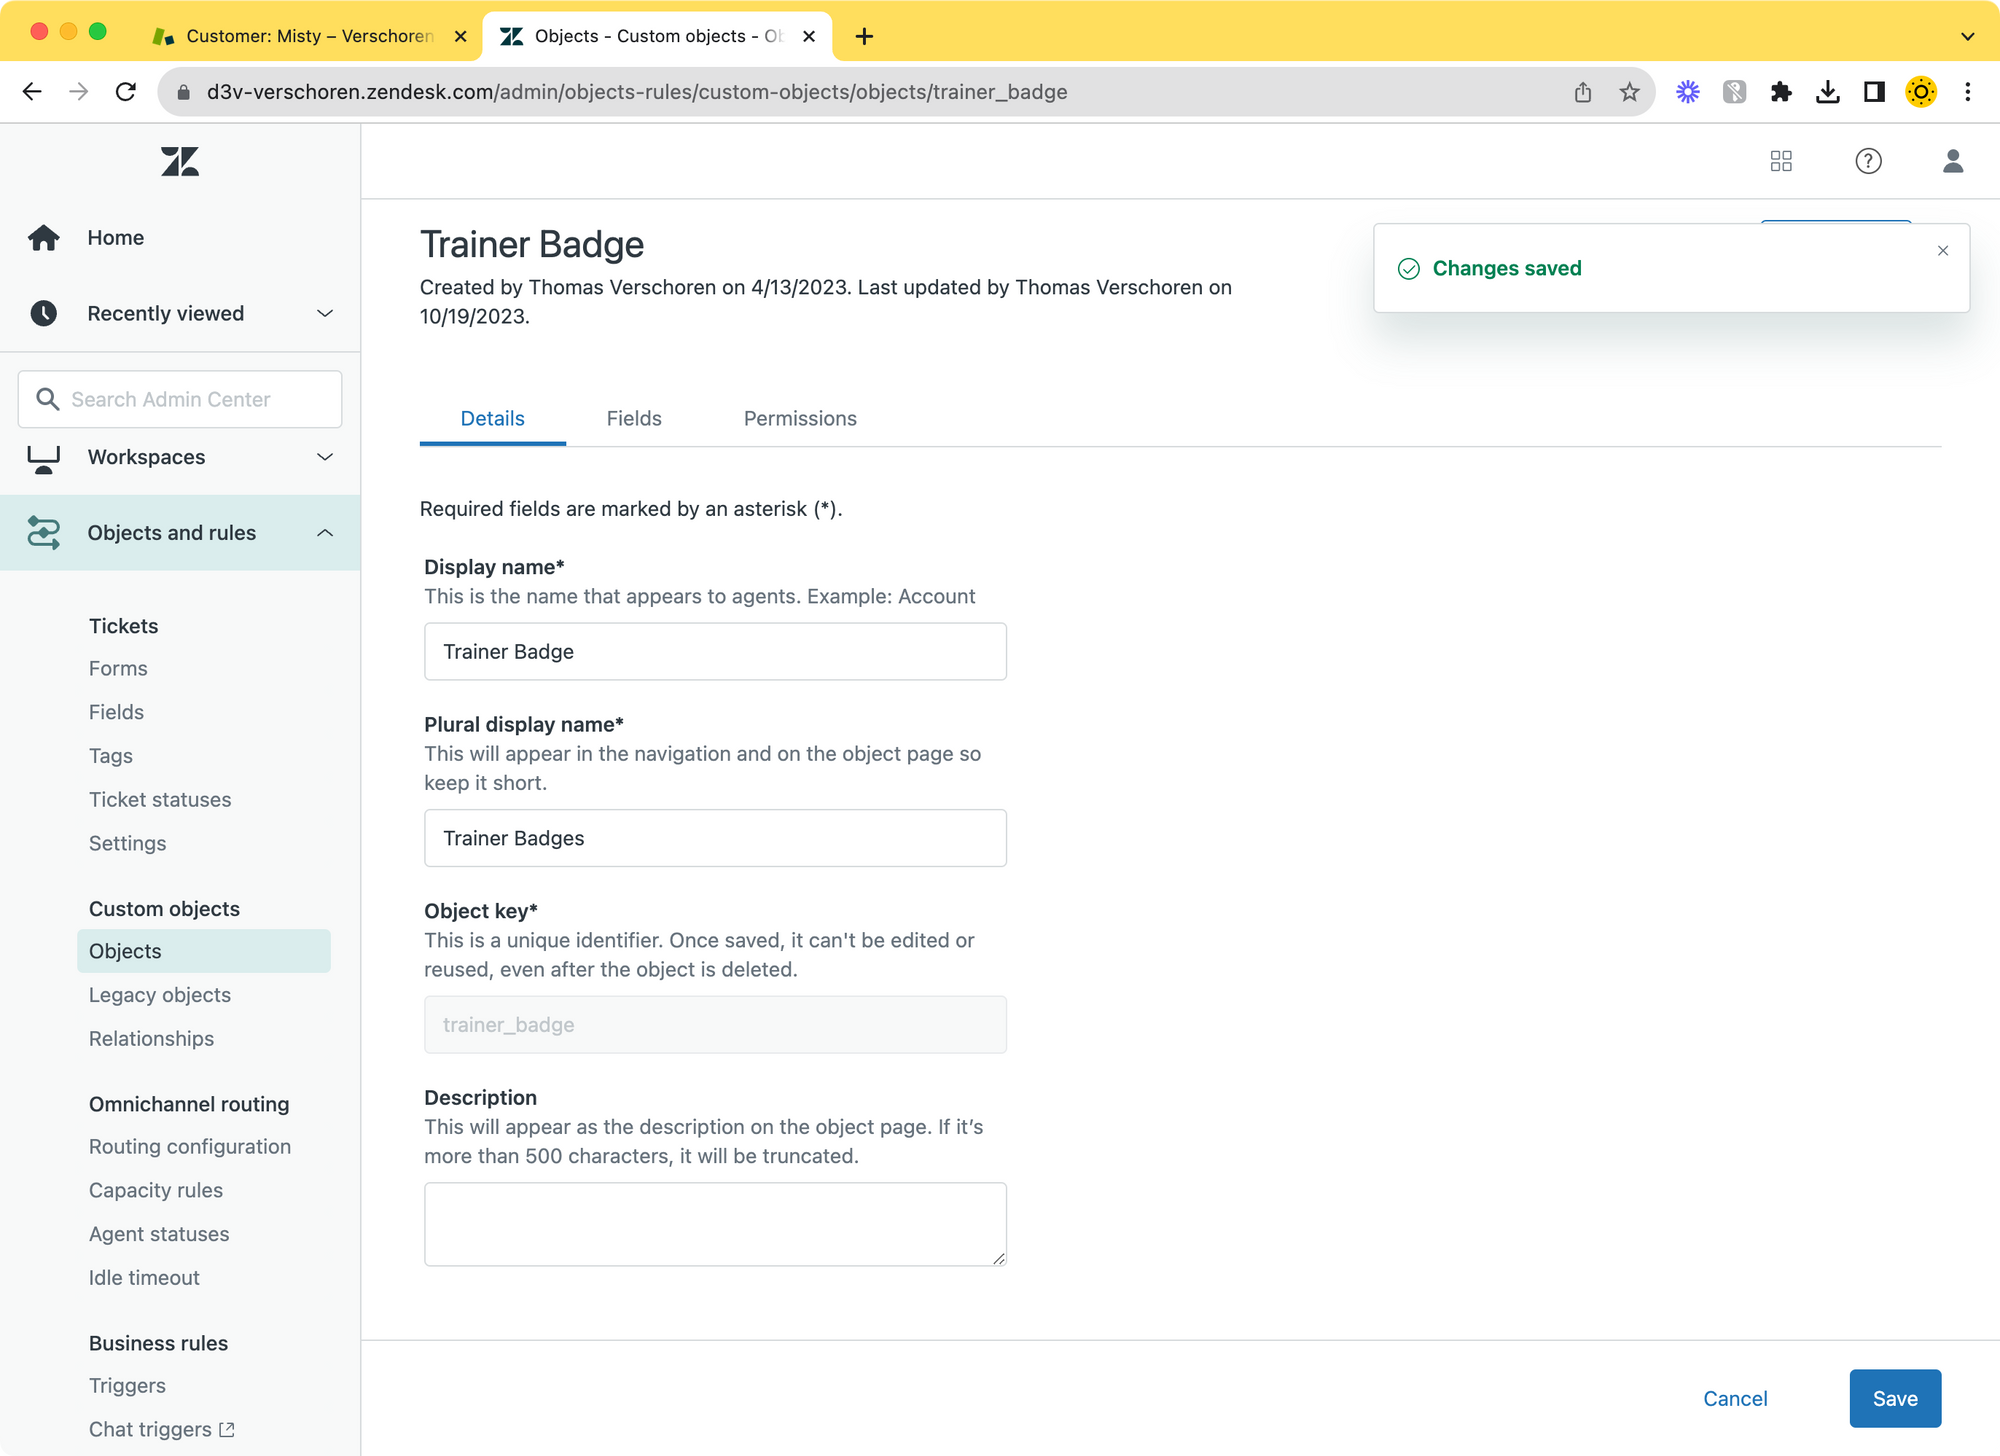
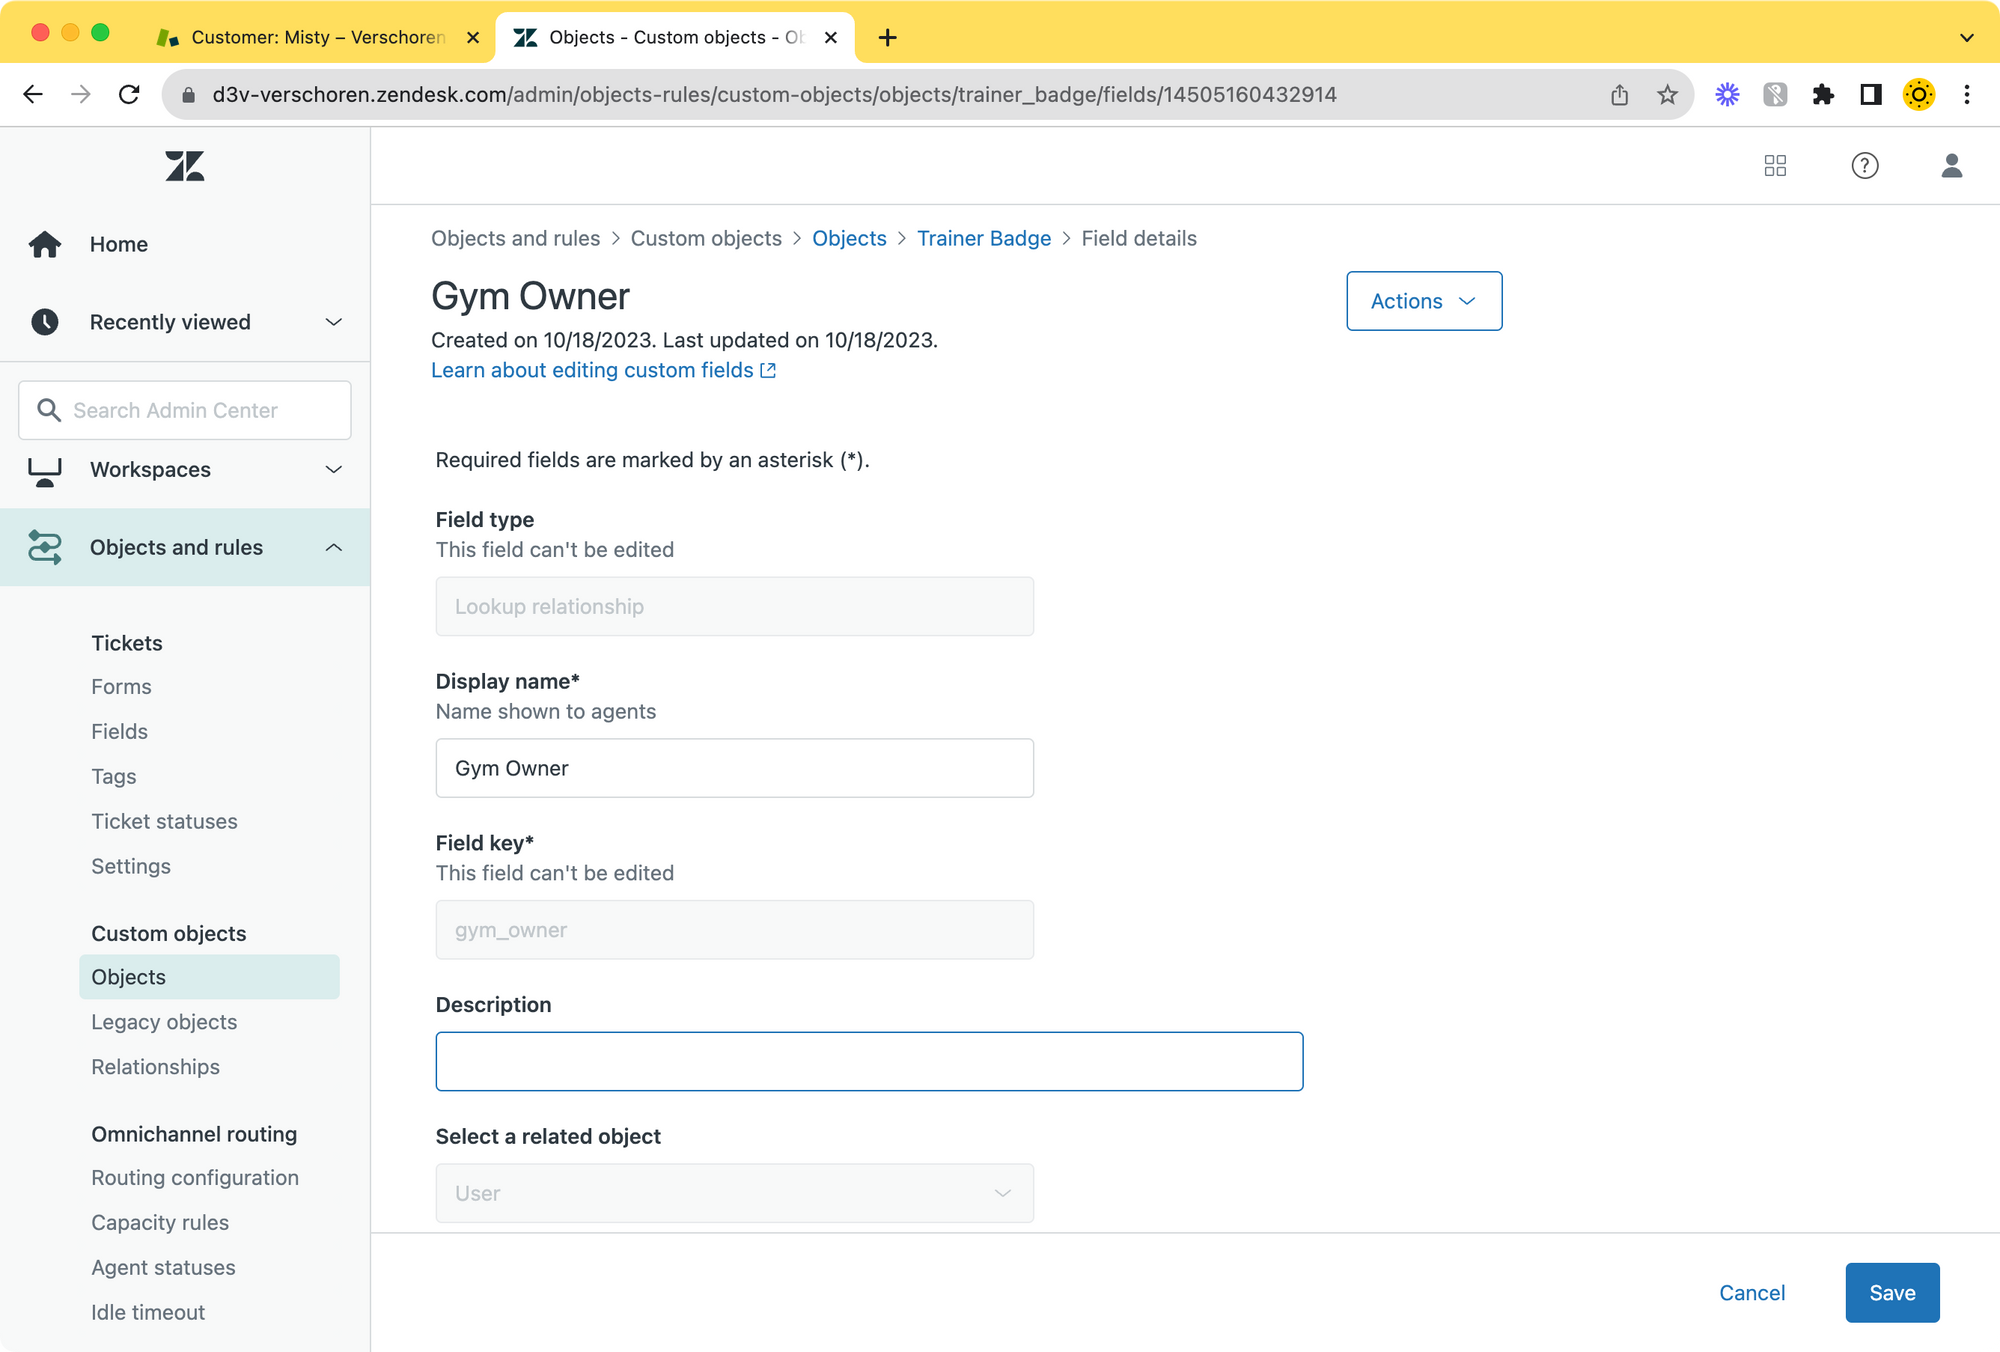
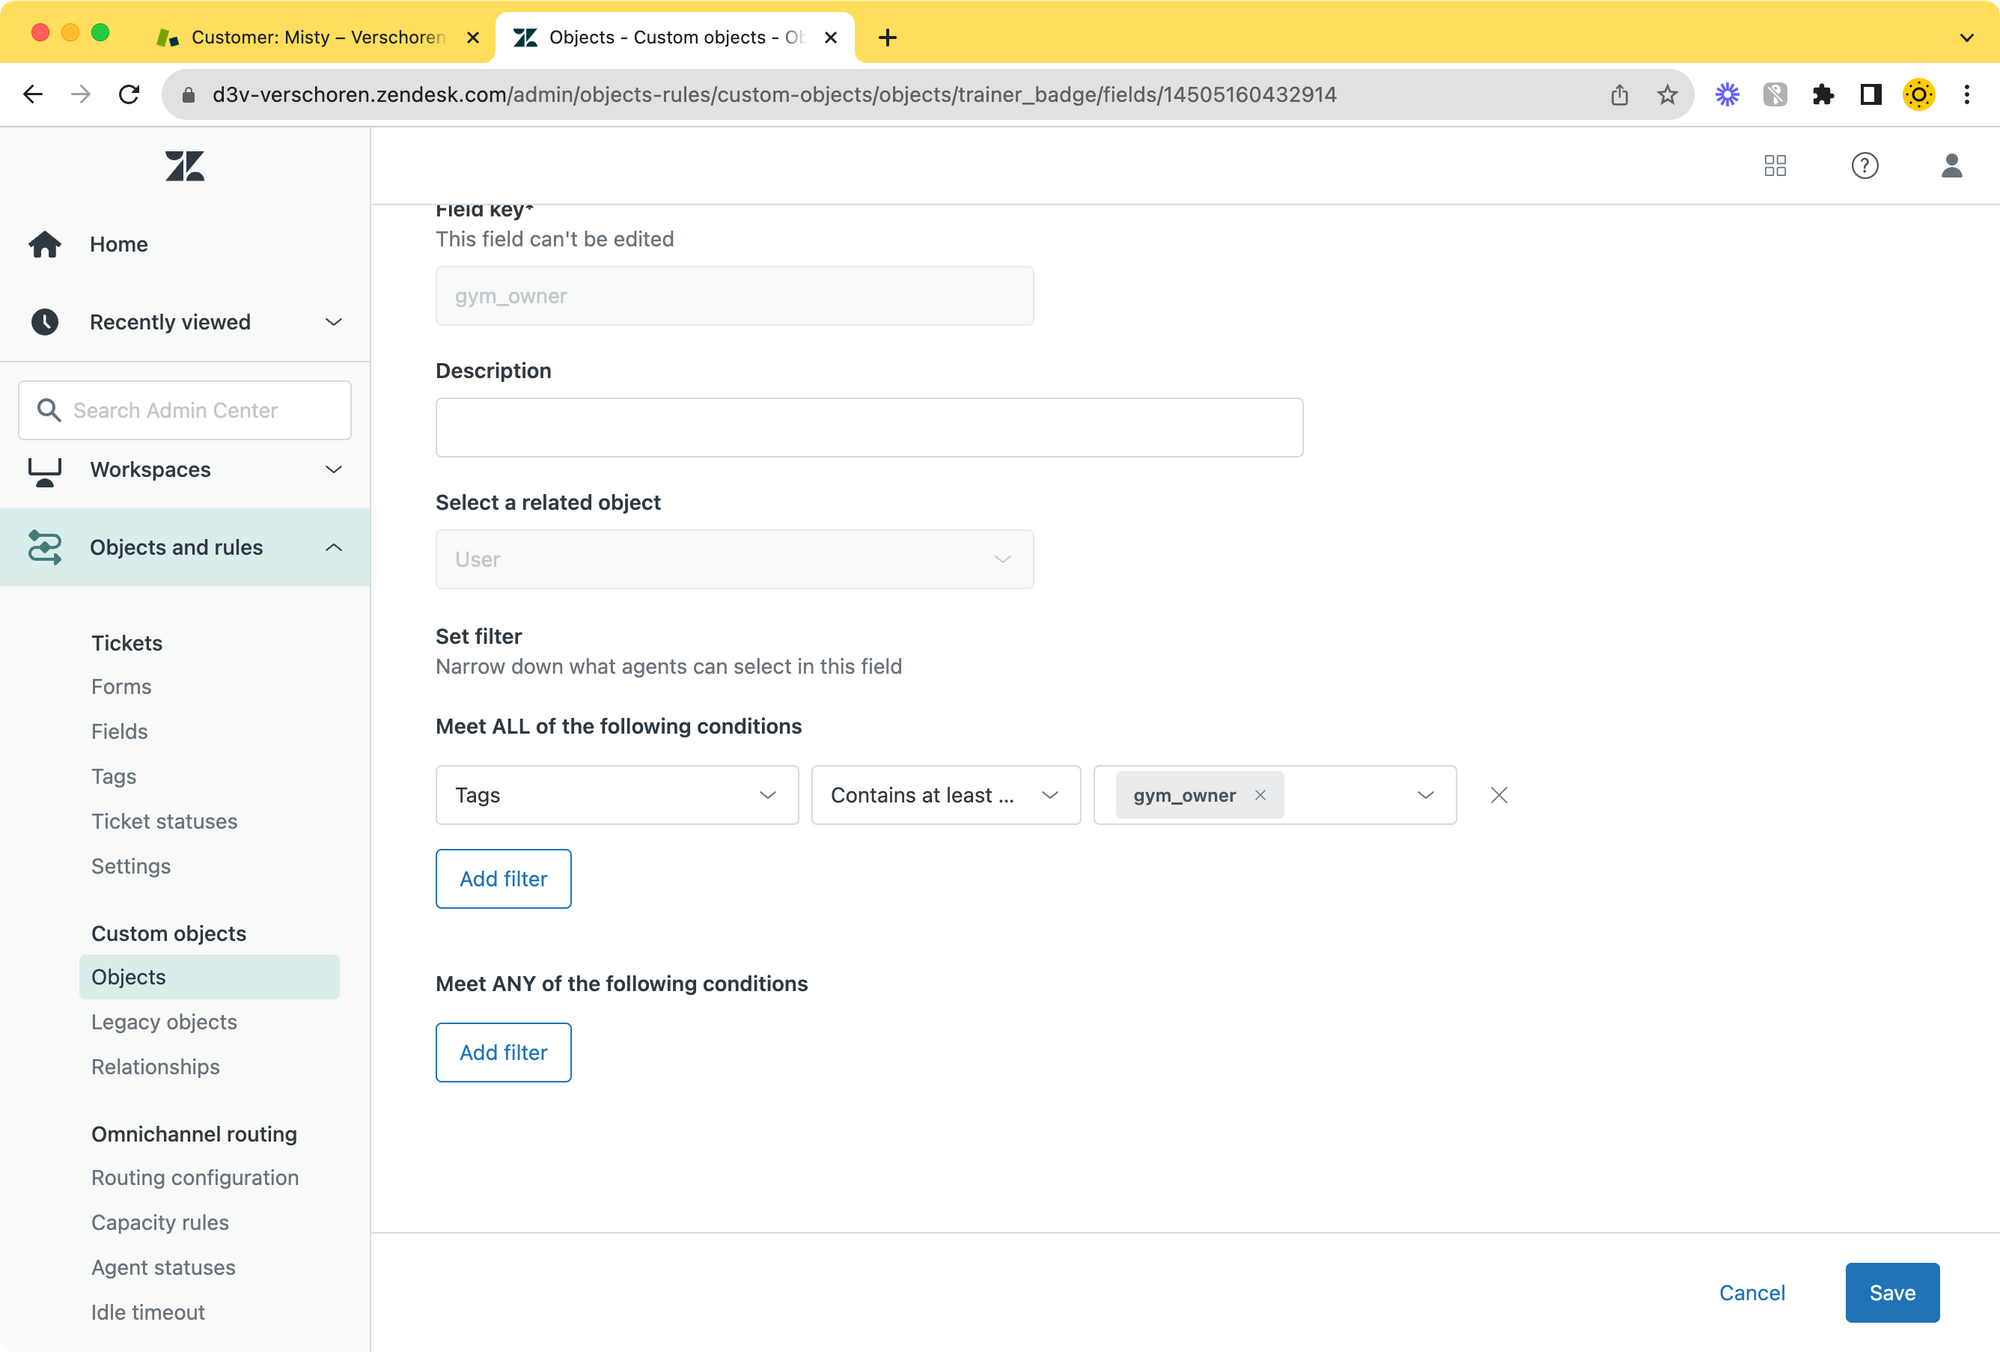
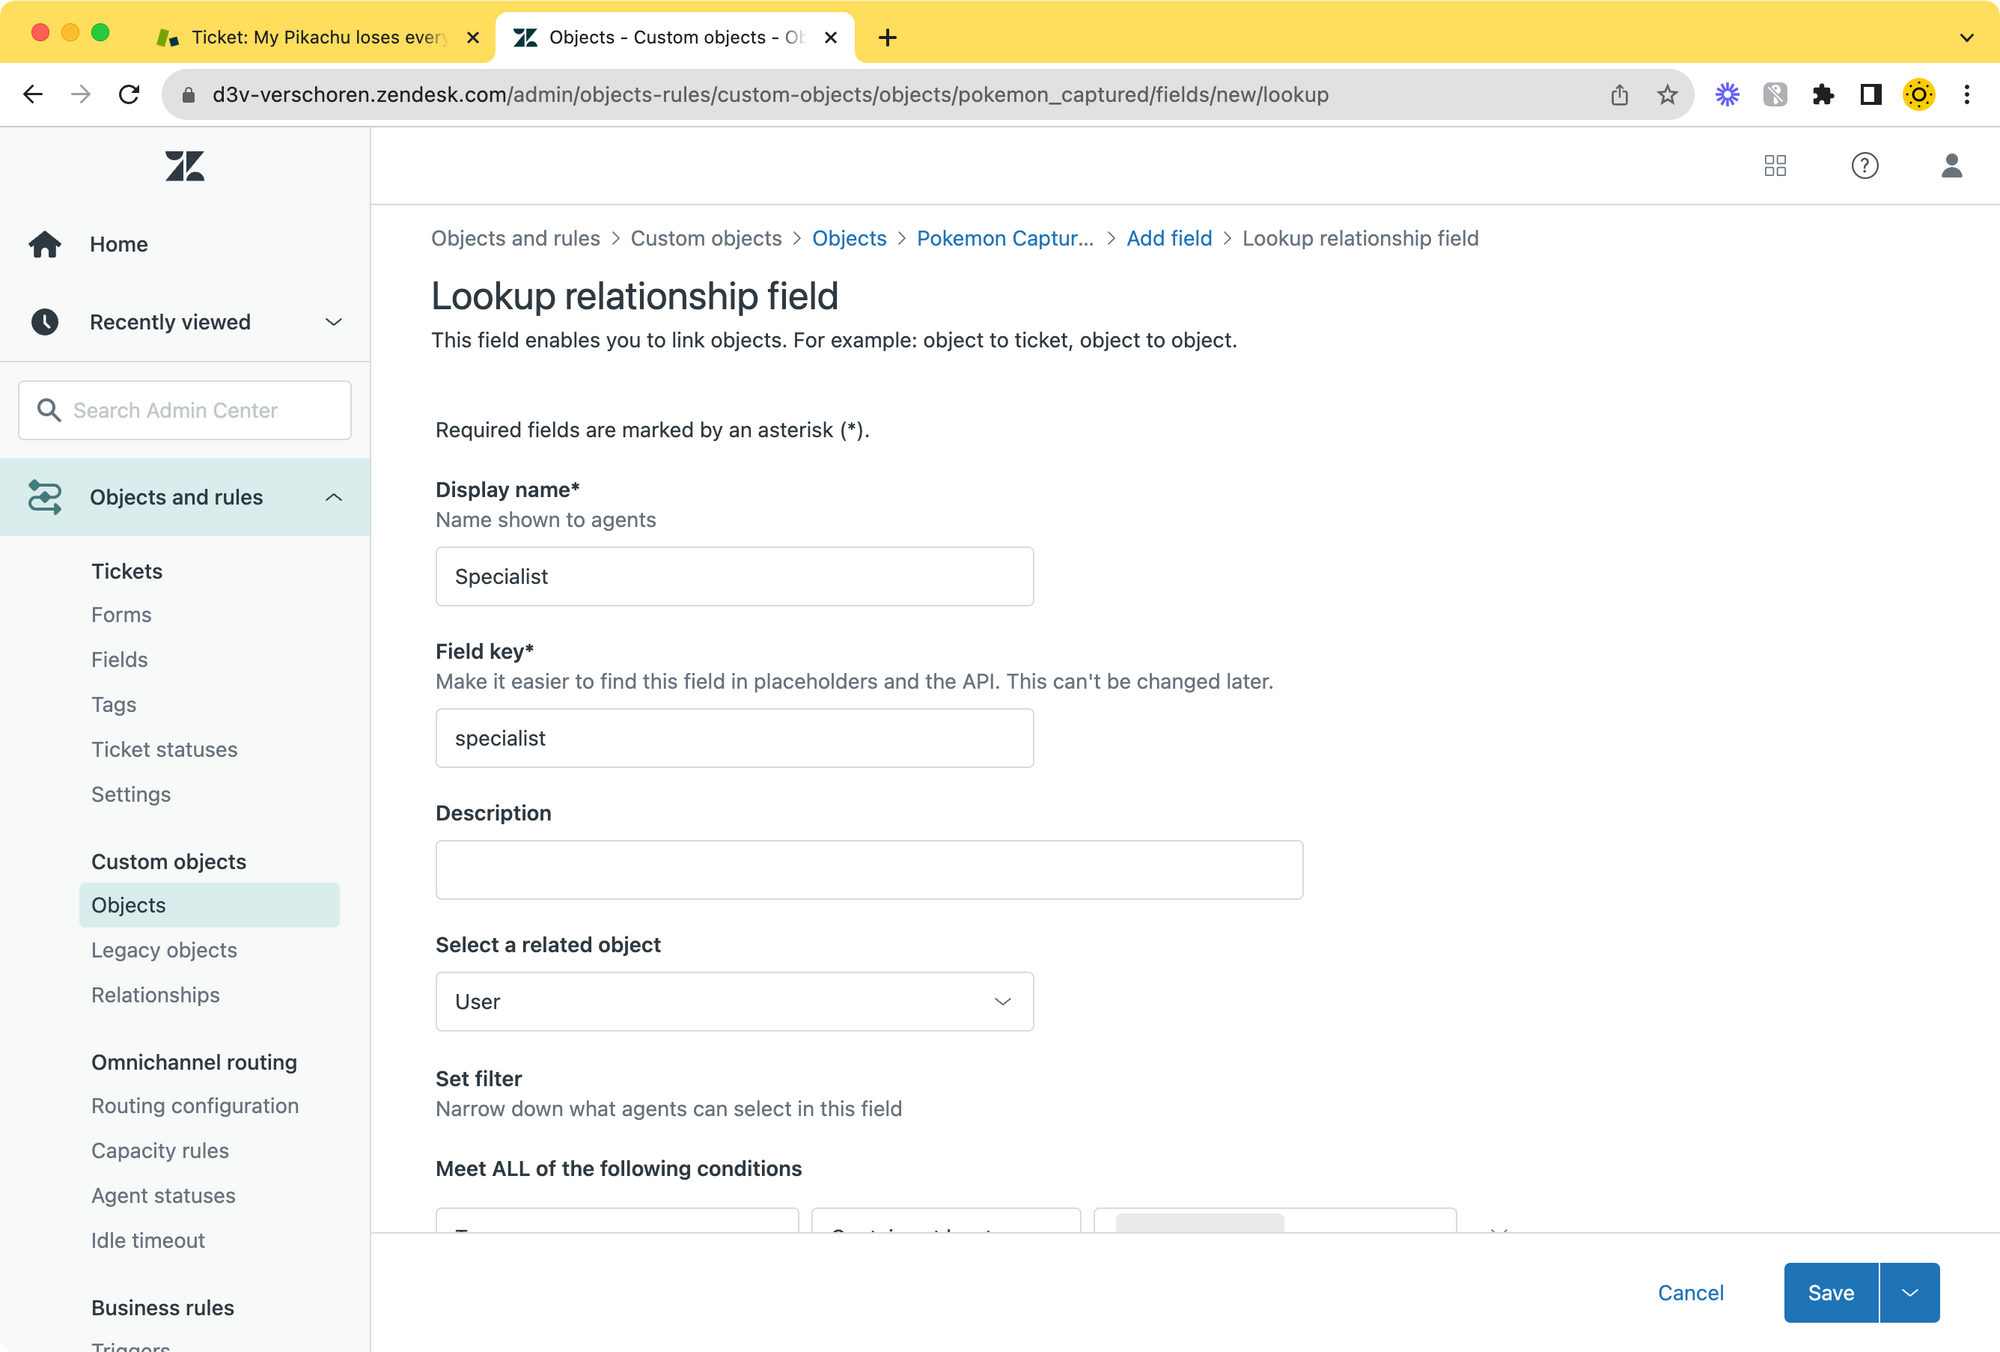
Now, in the Custom Object we're creating, add a new field of type Lookup Relationship and named Gym Owner.
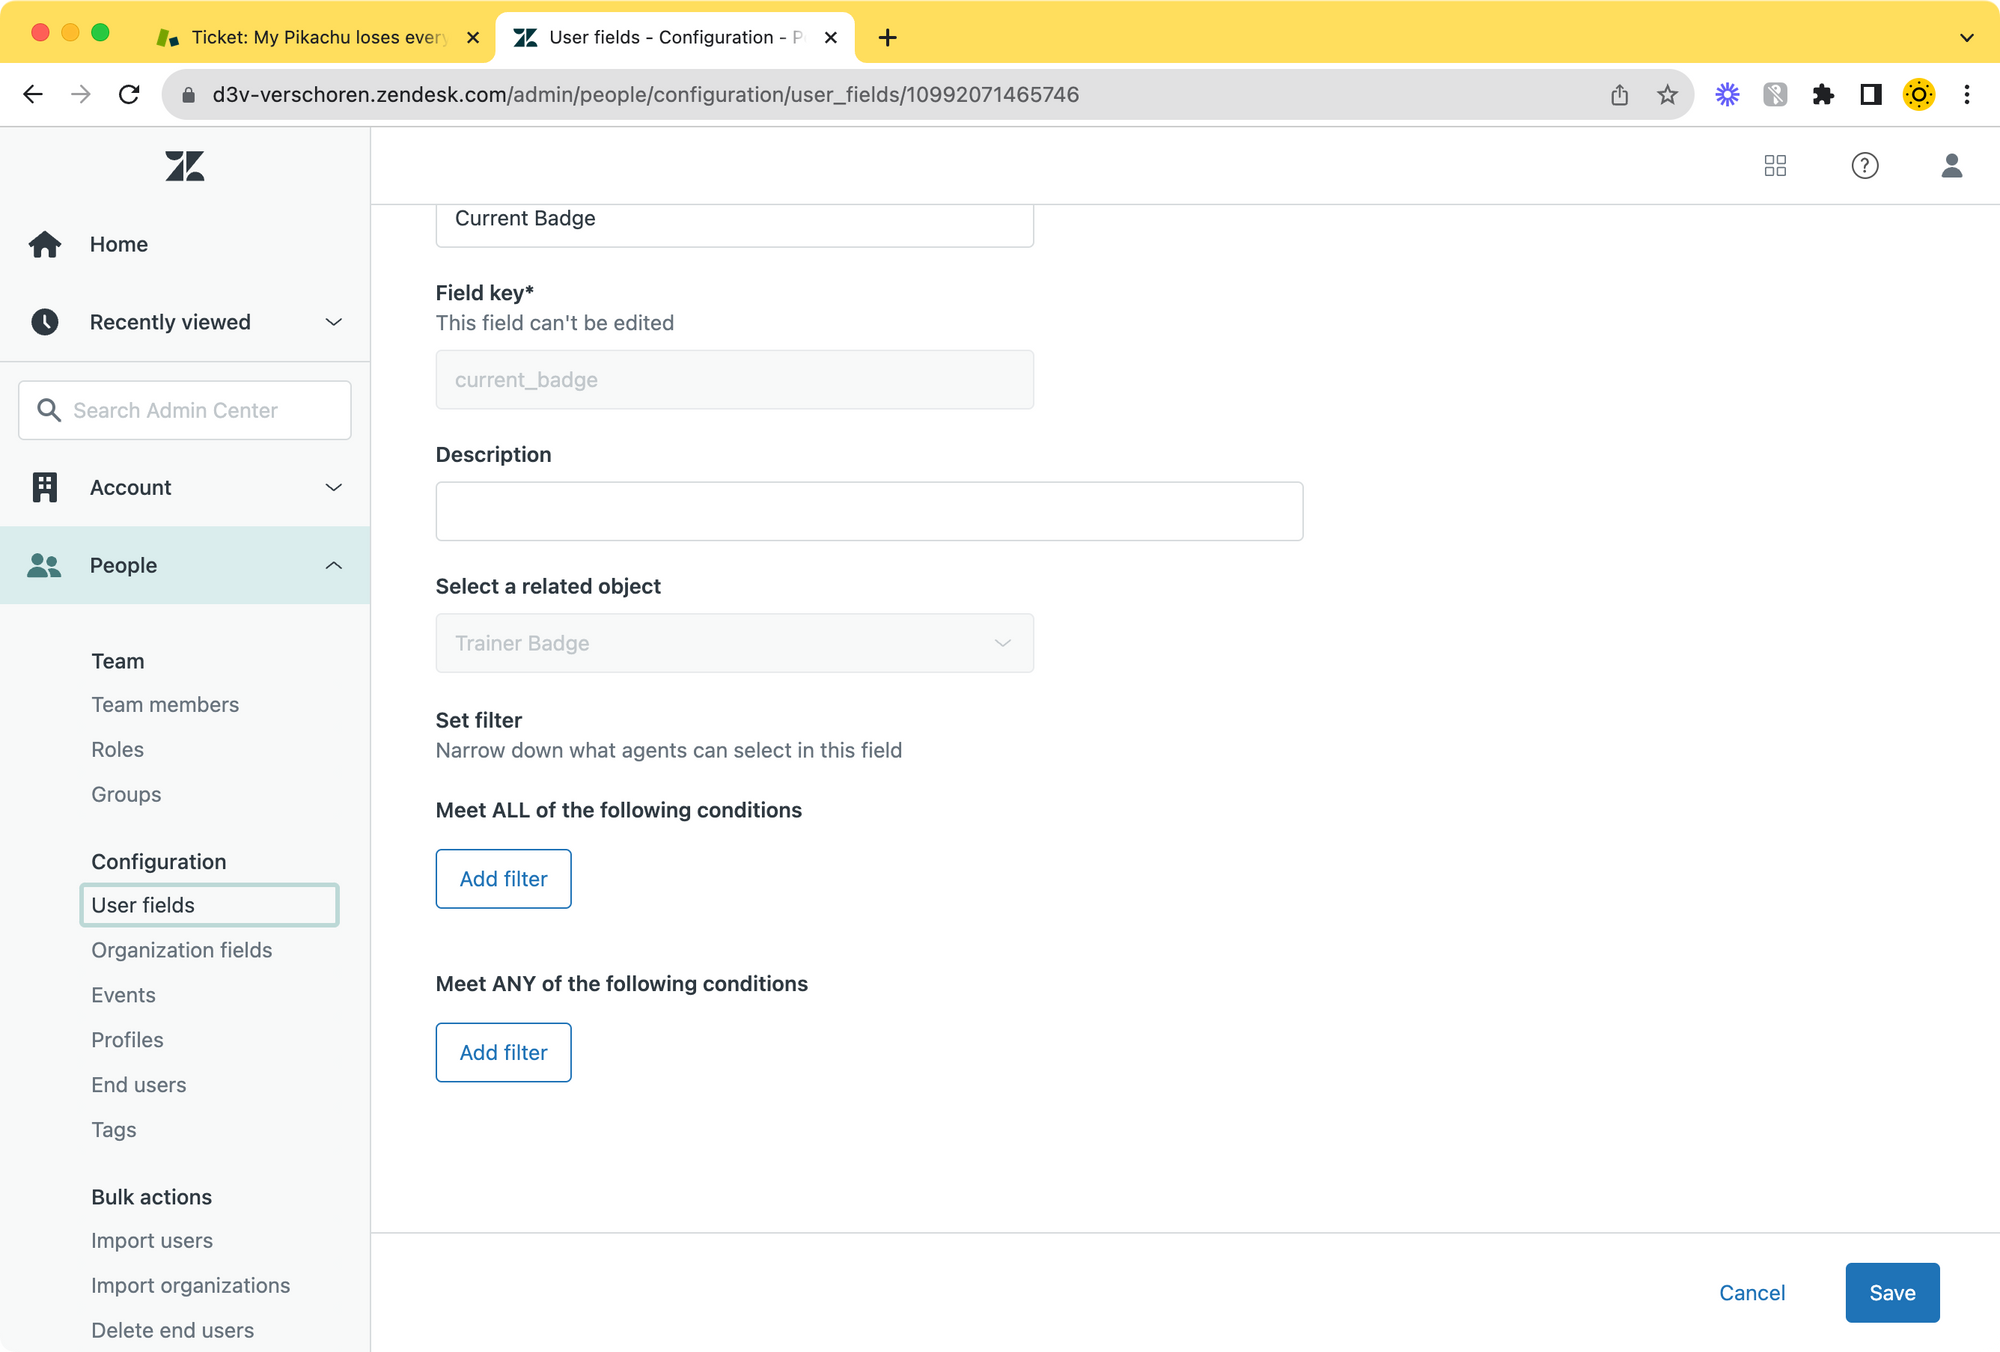
Select User as the related object. Opposed to all prior steps, this time we do want to setup a filter. We only want to show or link users that are tagged with gym_owner since these are the only people we want to be linked to badges.
Creating the badges
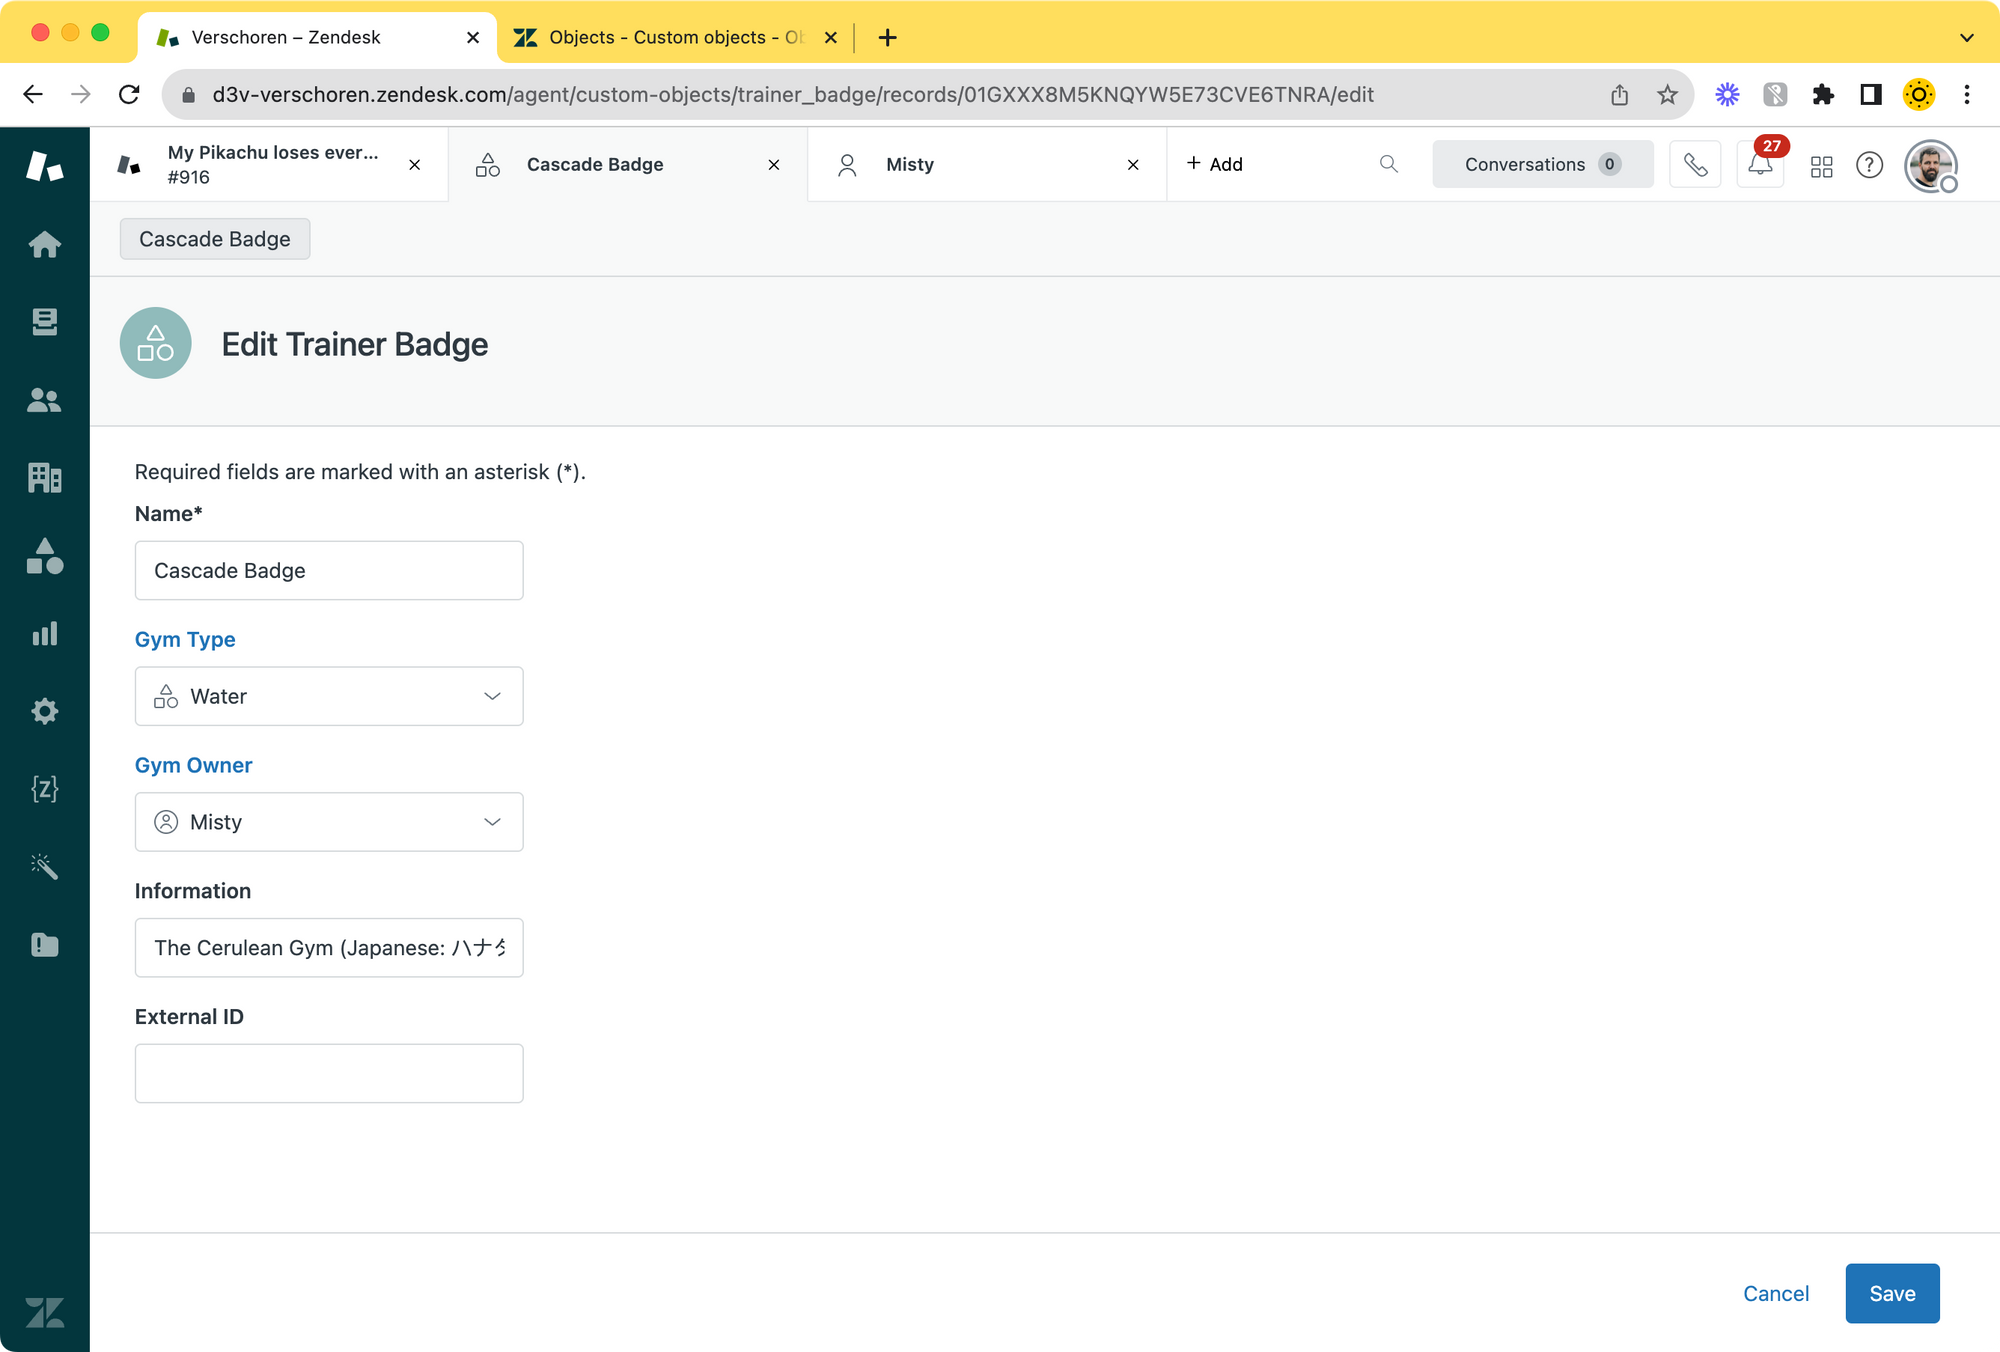
Now that we've created the record type, we can start adding records to our object. We'll create a Cascade Badge, of type Water linked to the Gym Owner Misty.
Linking a custom record to a user
Lookup fields work in two directions. In our case we have a badge with a Lookup field that links a gym owner. This is one record that reference the badge and includes metadata like type, owner,...
Each badge can only have one gym owner linked.
We can also add a lookup field to a user profile in Zendesk that links a badge to a user. Each user in Zendesk can have one badge linked. But the same badge can be linked to multiple users.
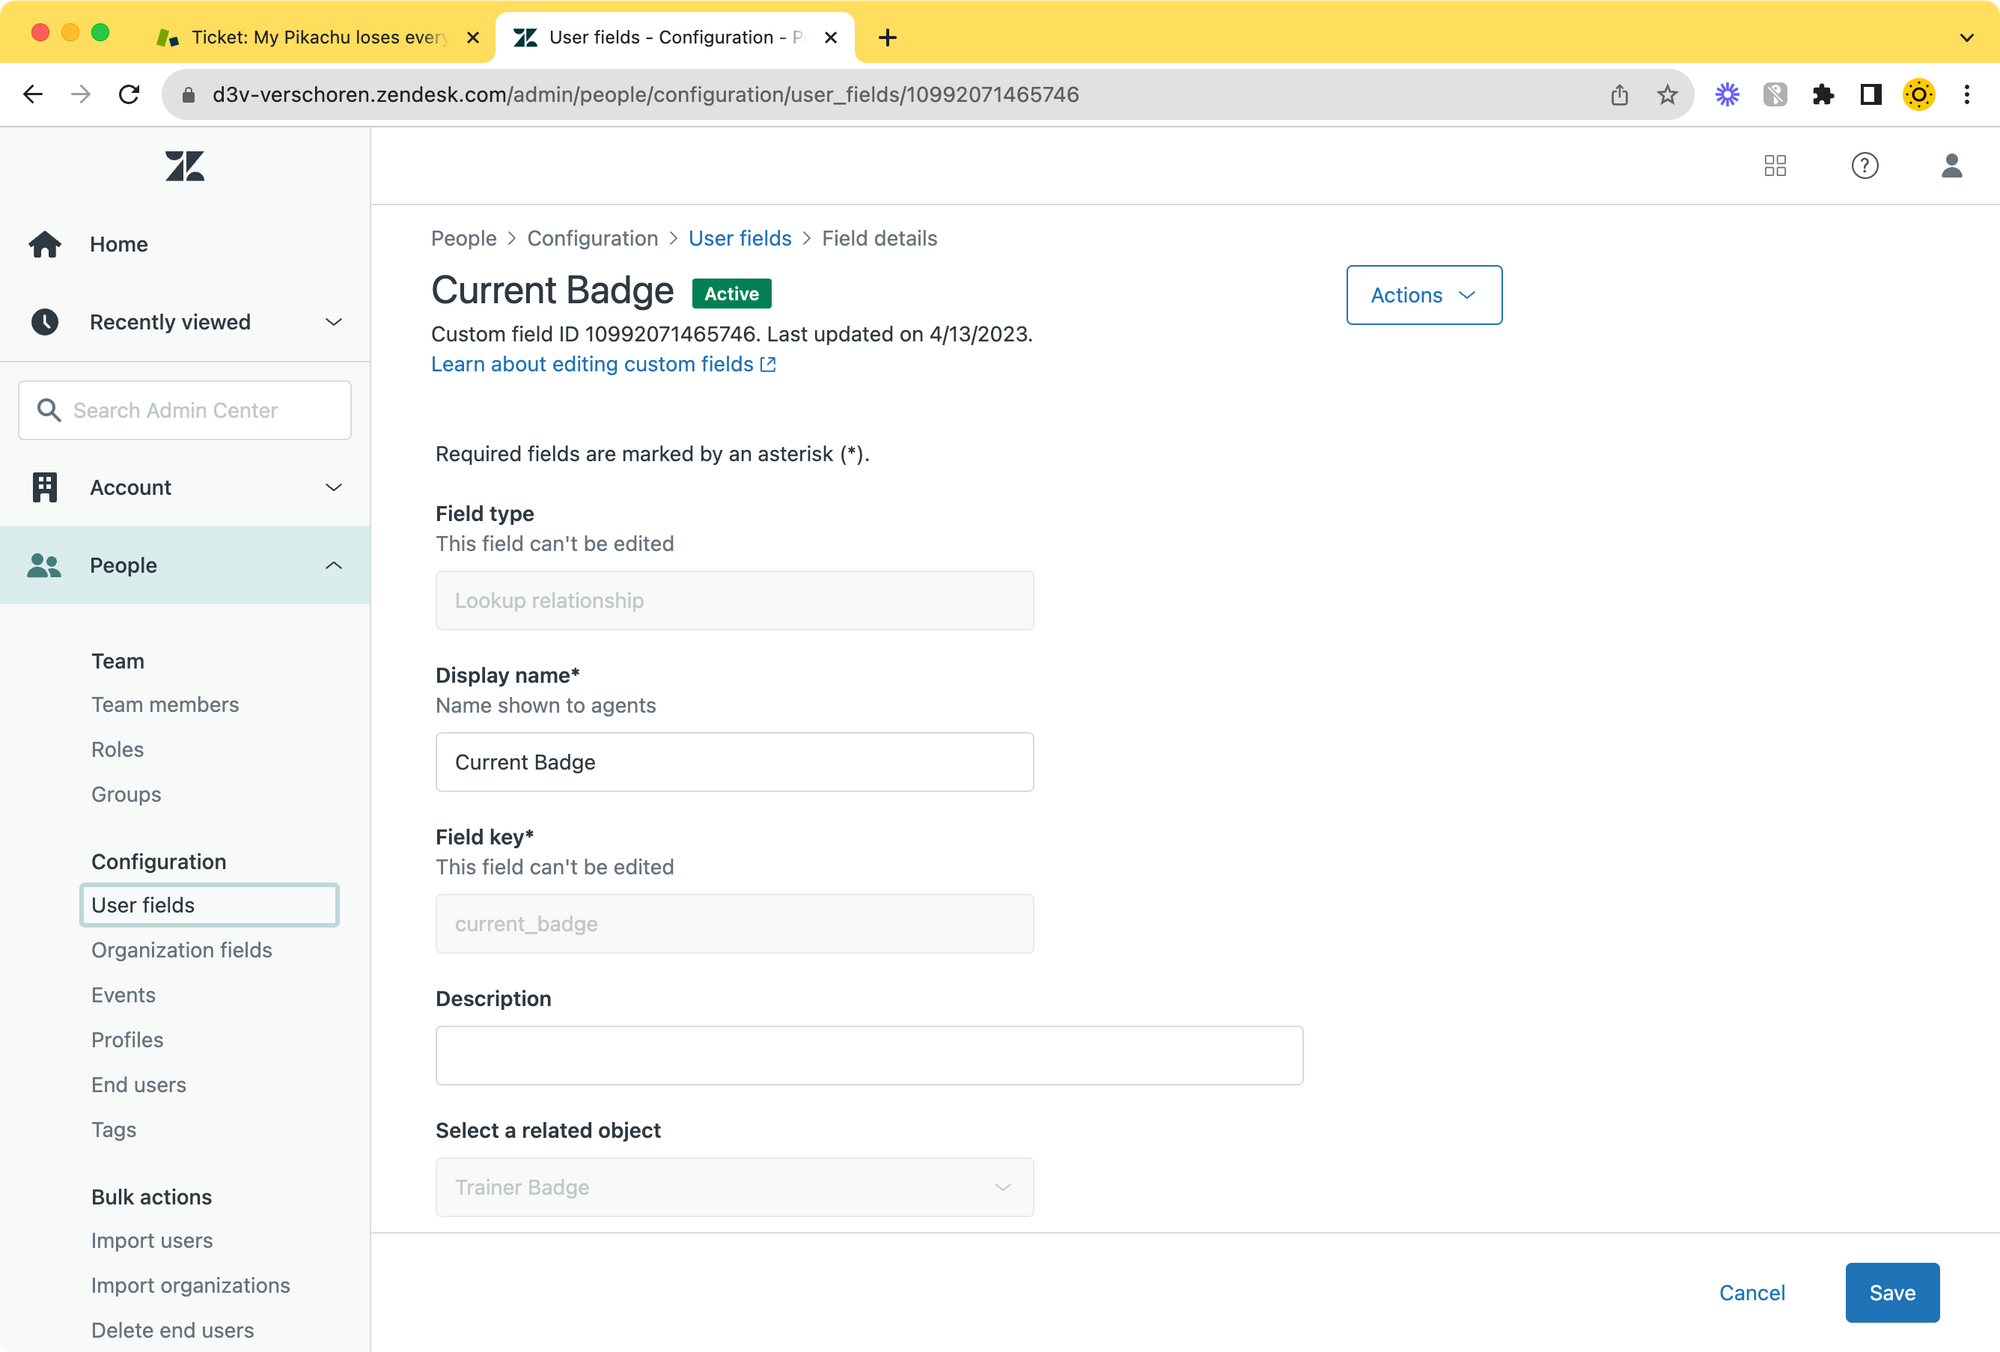
To link badges to users we need to add a User Field via the Admin Panel > People > Configuration > User Fields. Create a new field of type Lookup Relationship. Give it a name like "Current Badge" and set the related object to the Badge object we just created.
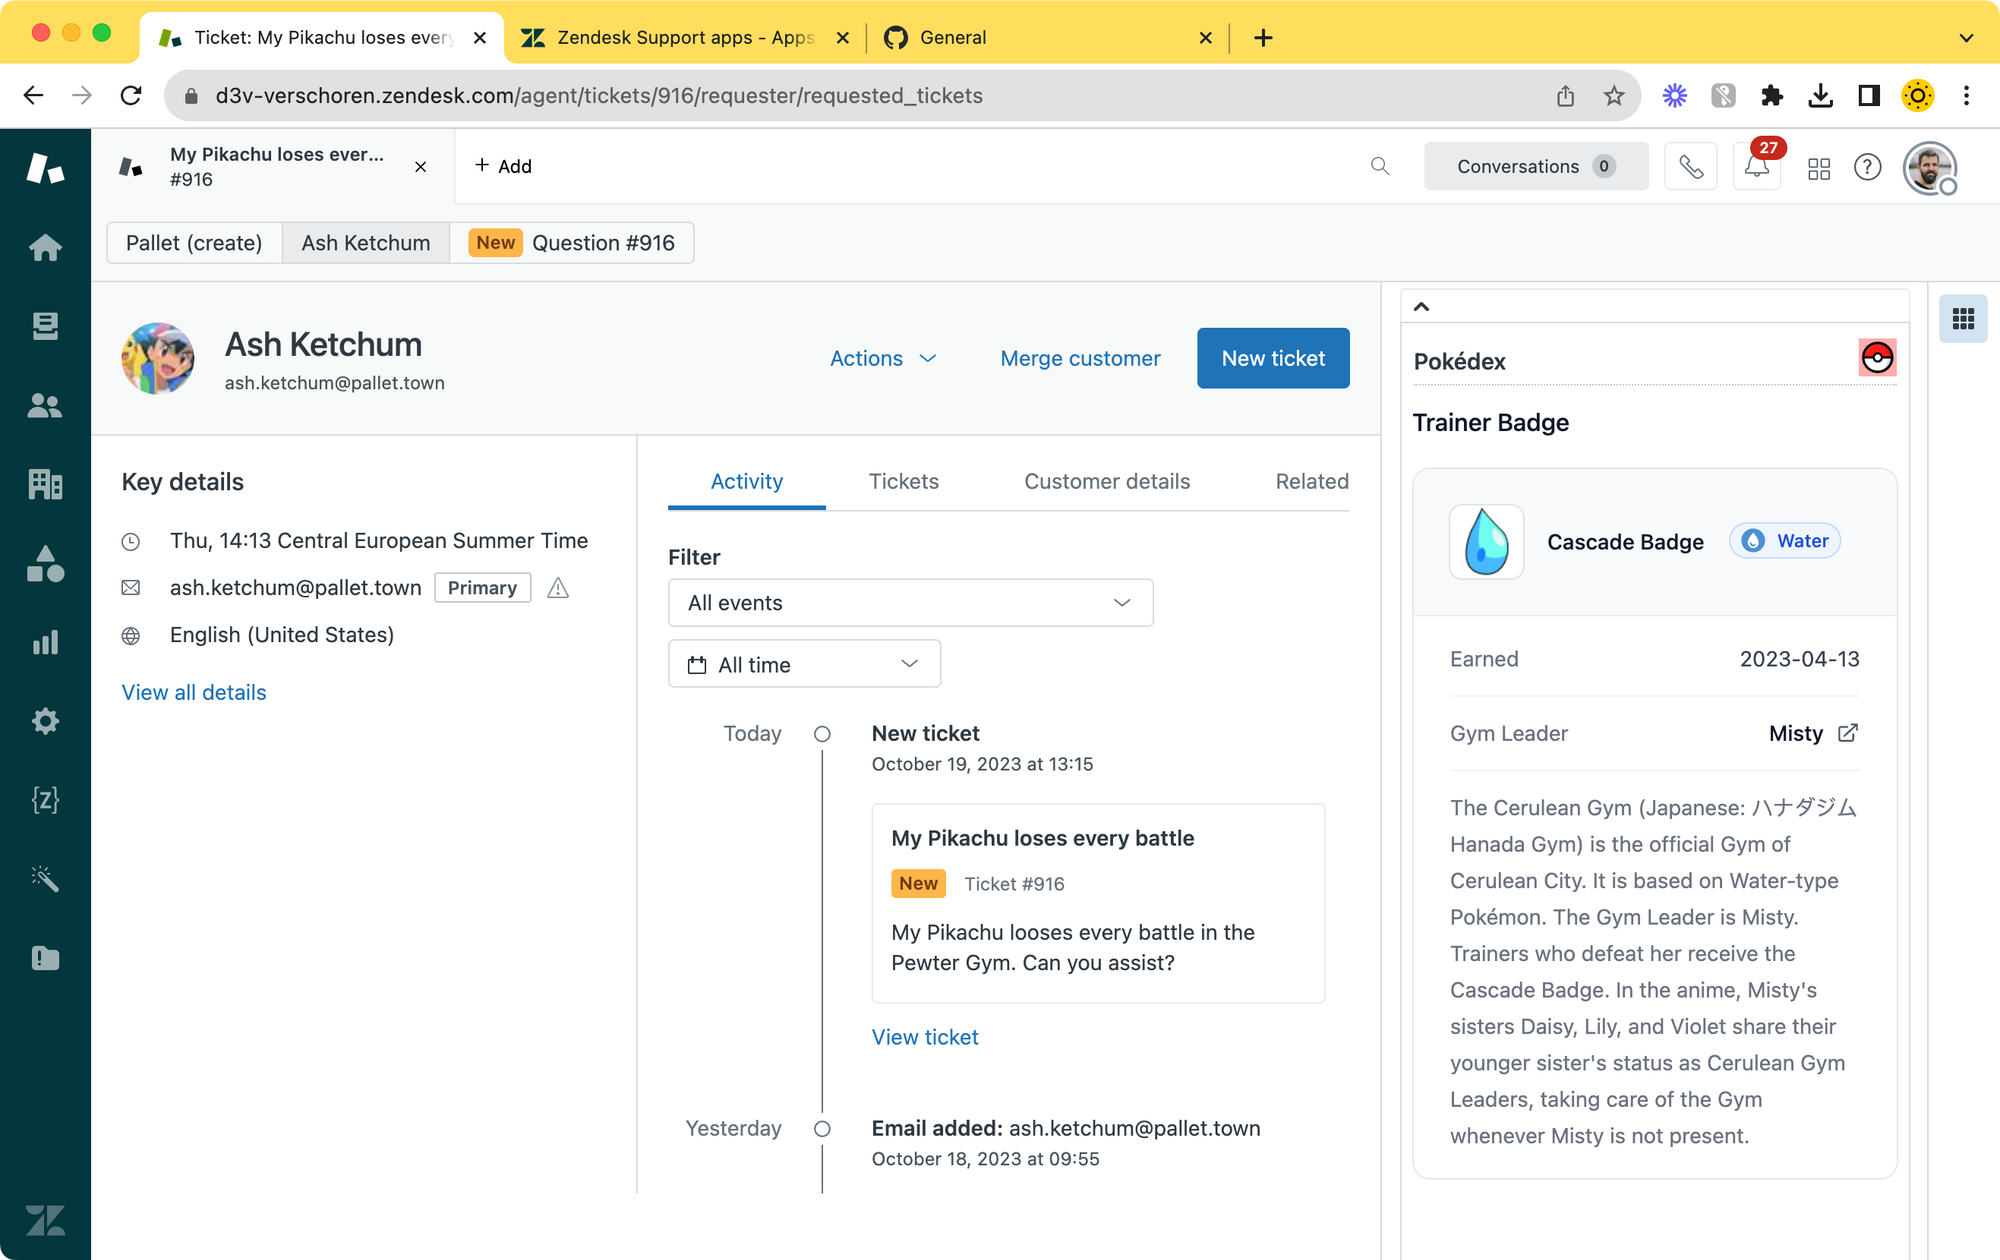
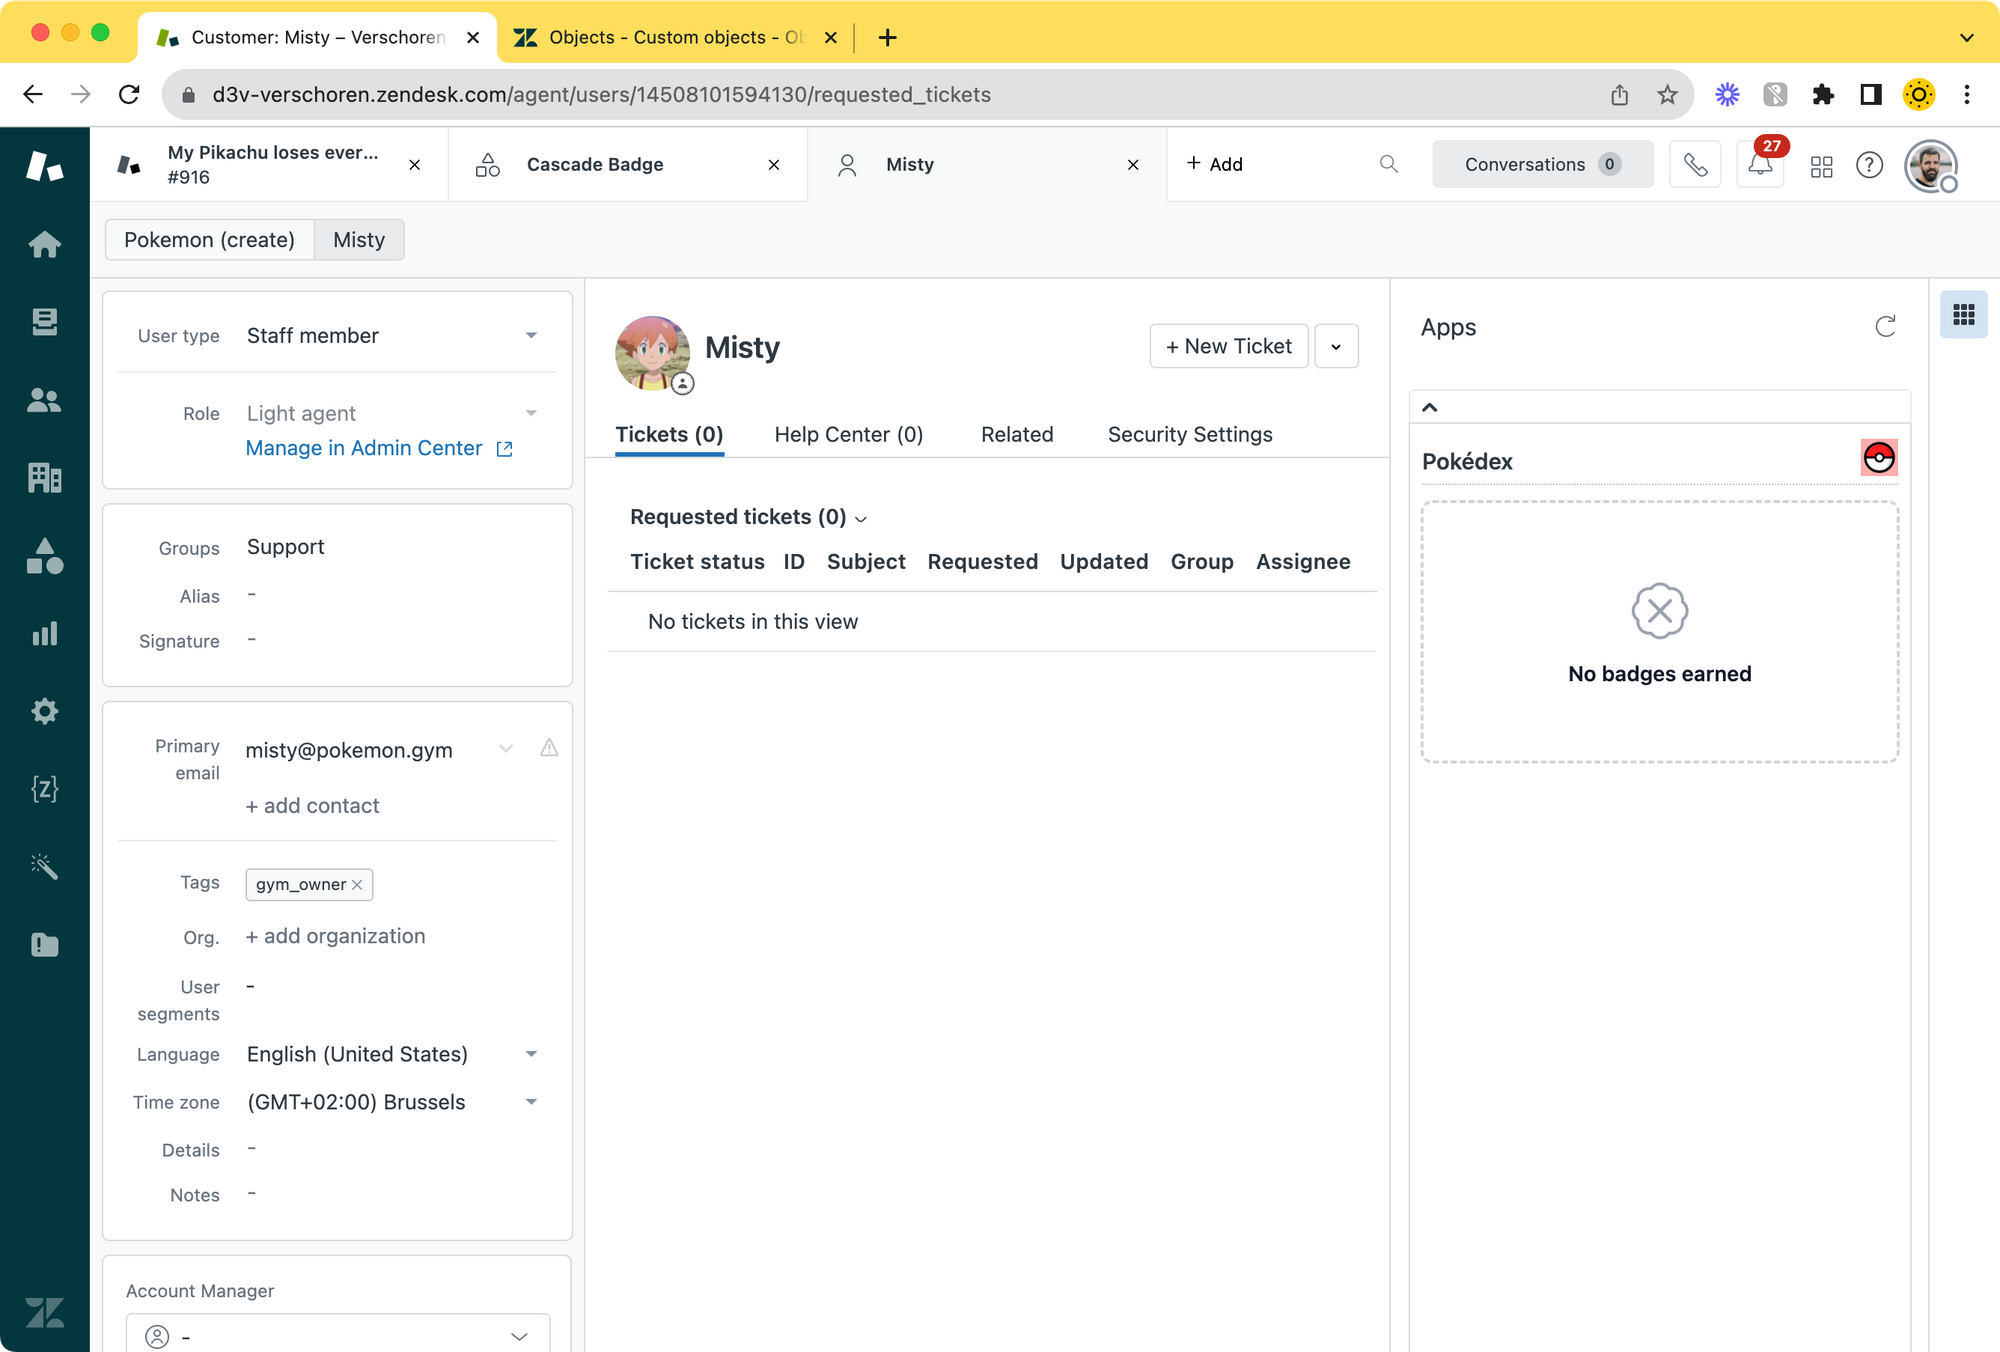
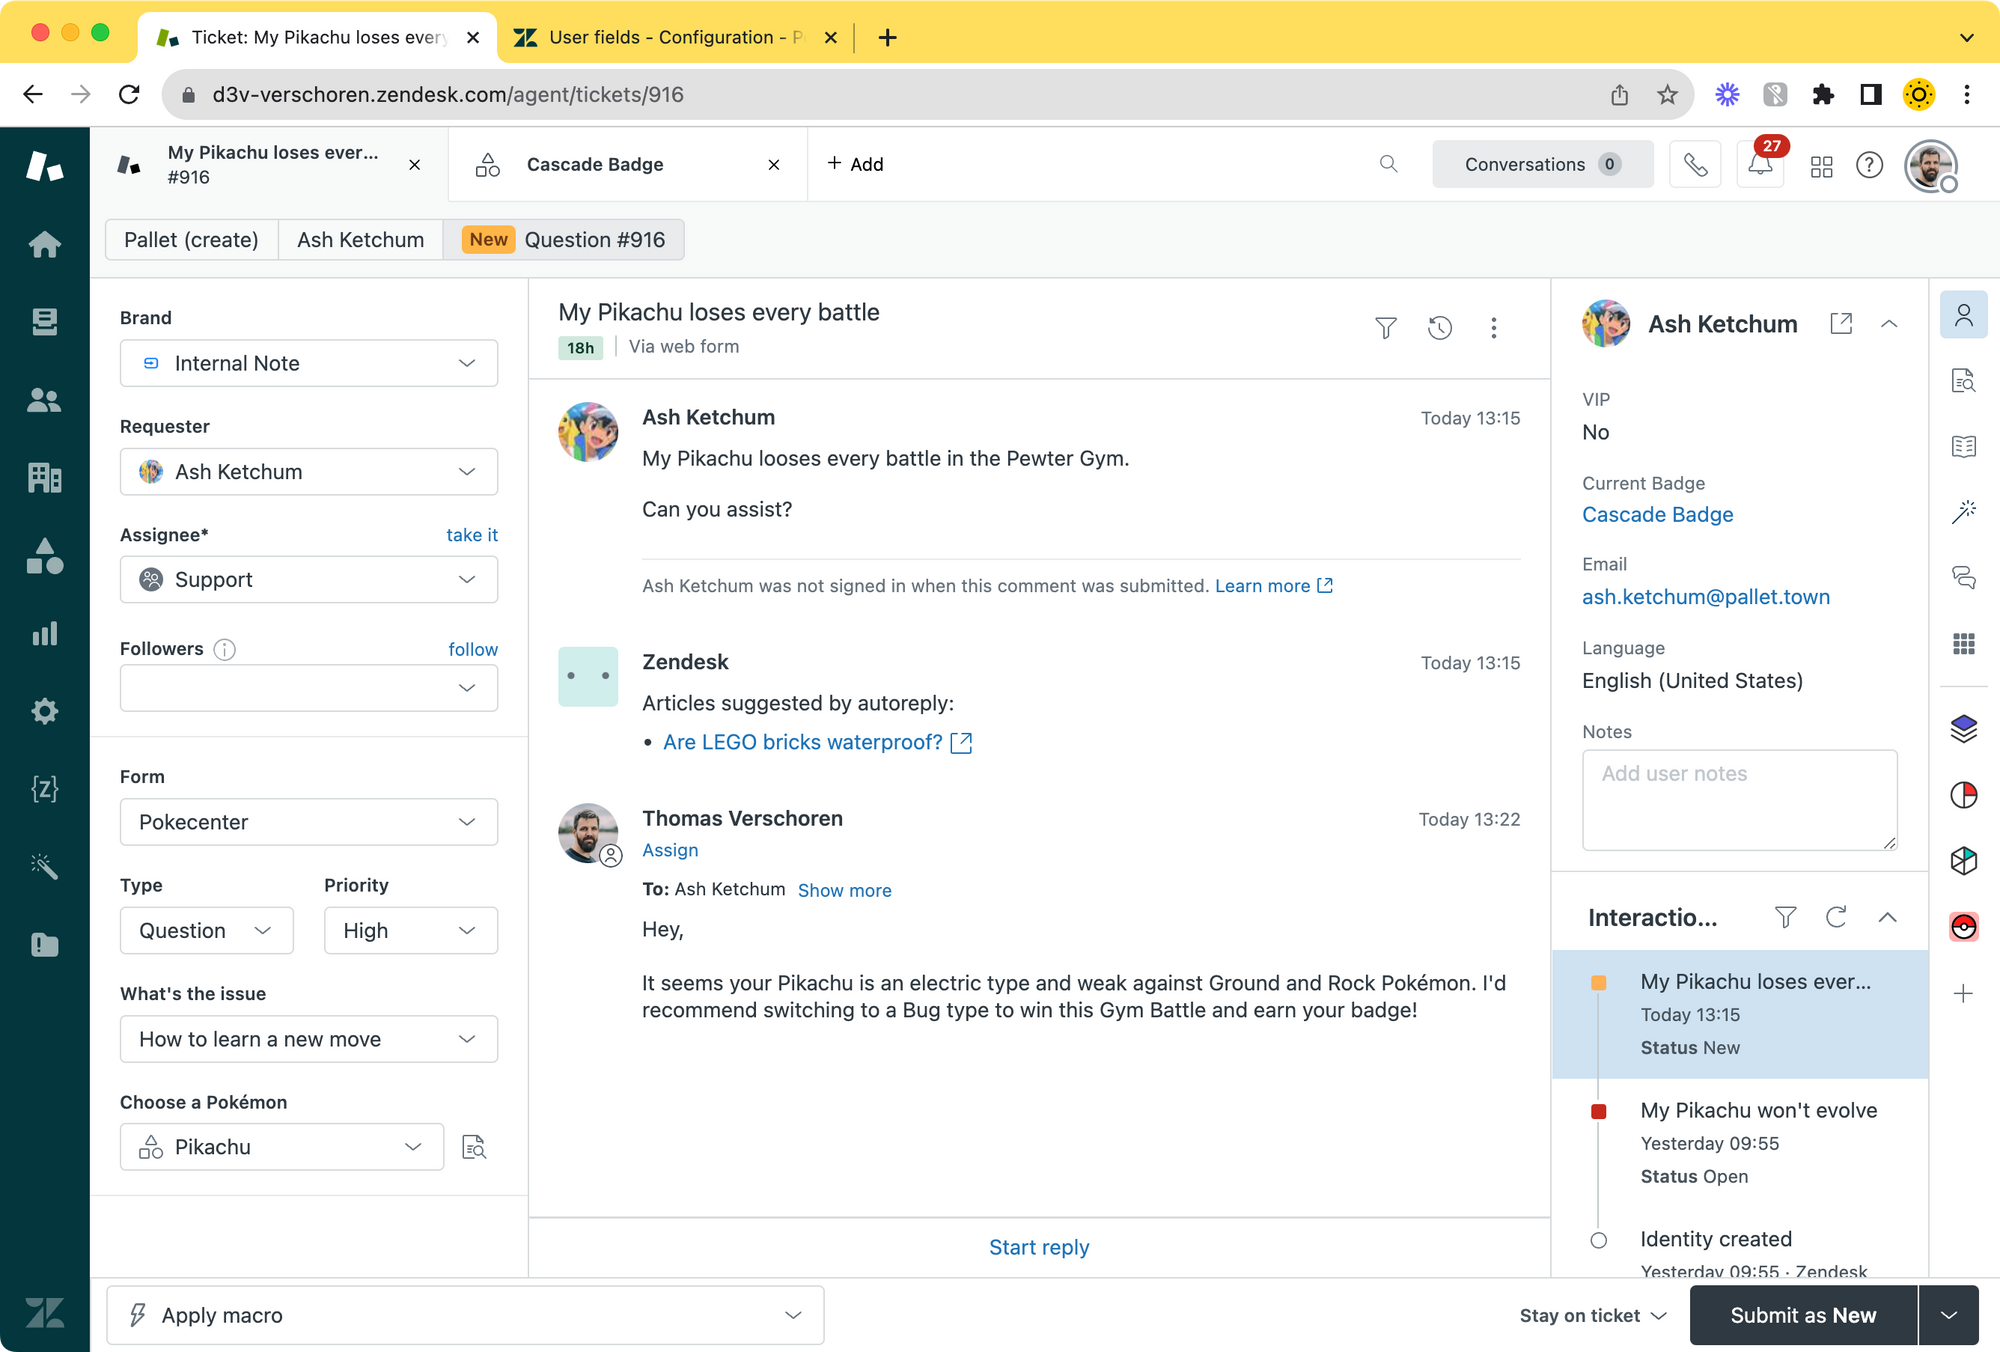
Now, when we open a user profile in Zendesk, a new user field will appear on the left side. Click on the Badge dropdown and select the Cascade Badge we just created.
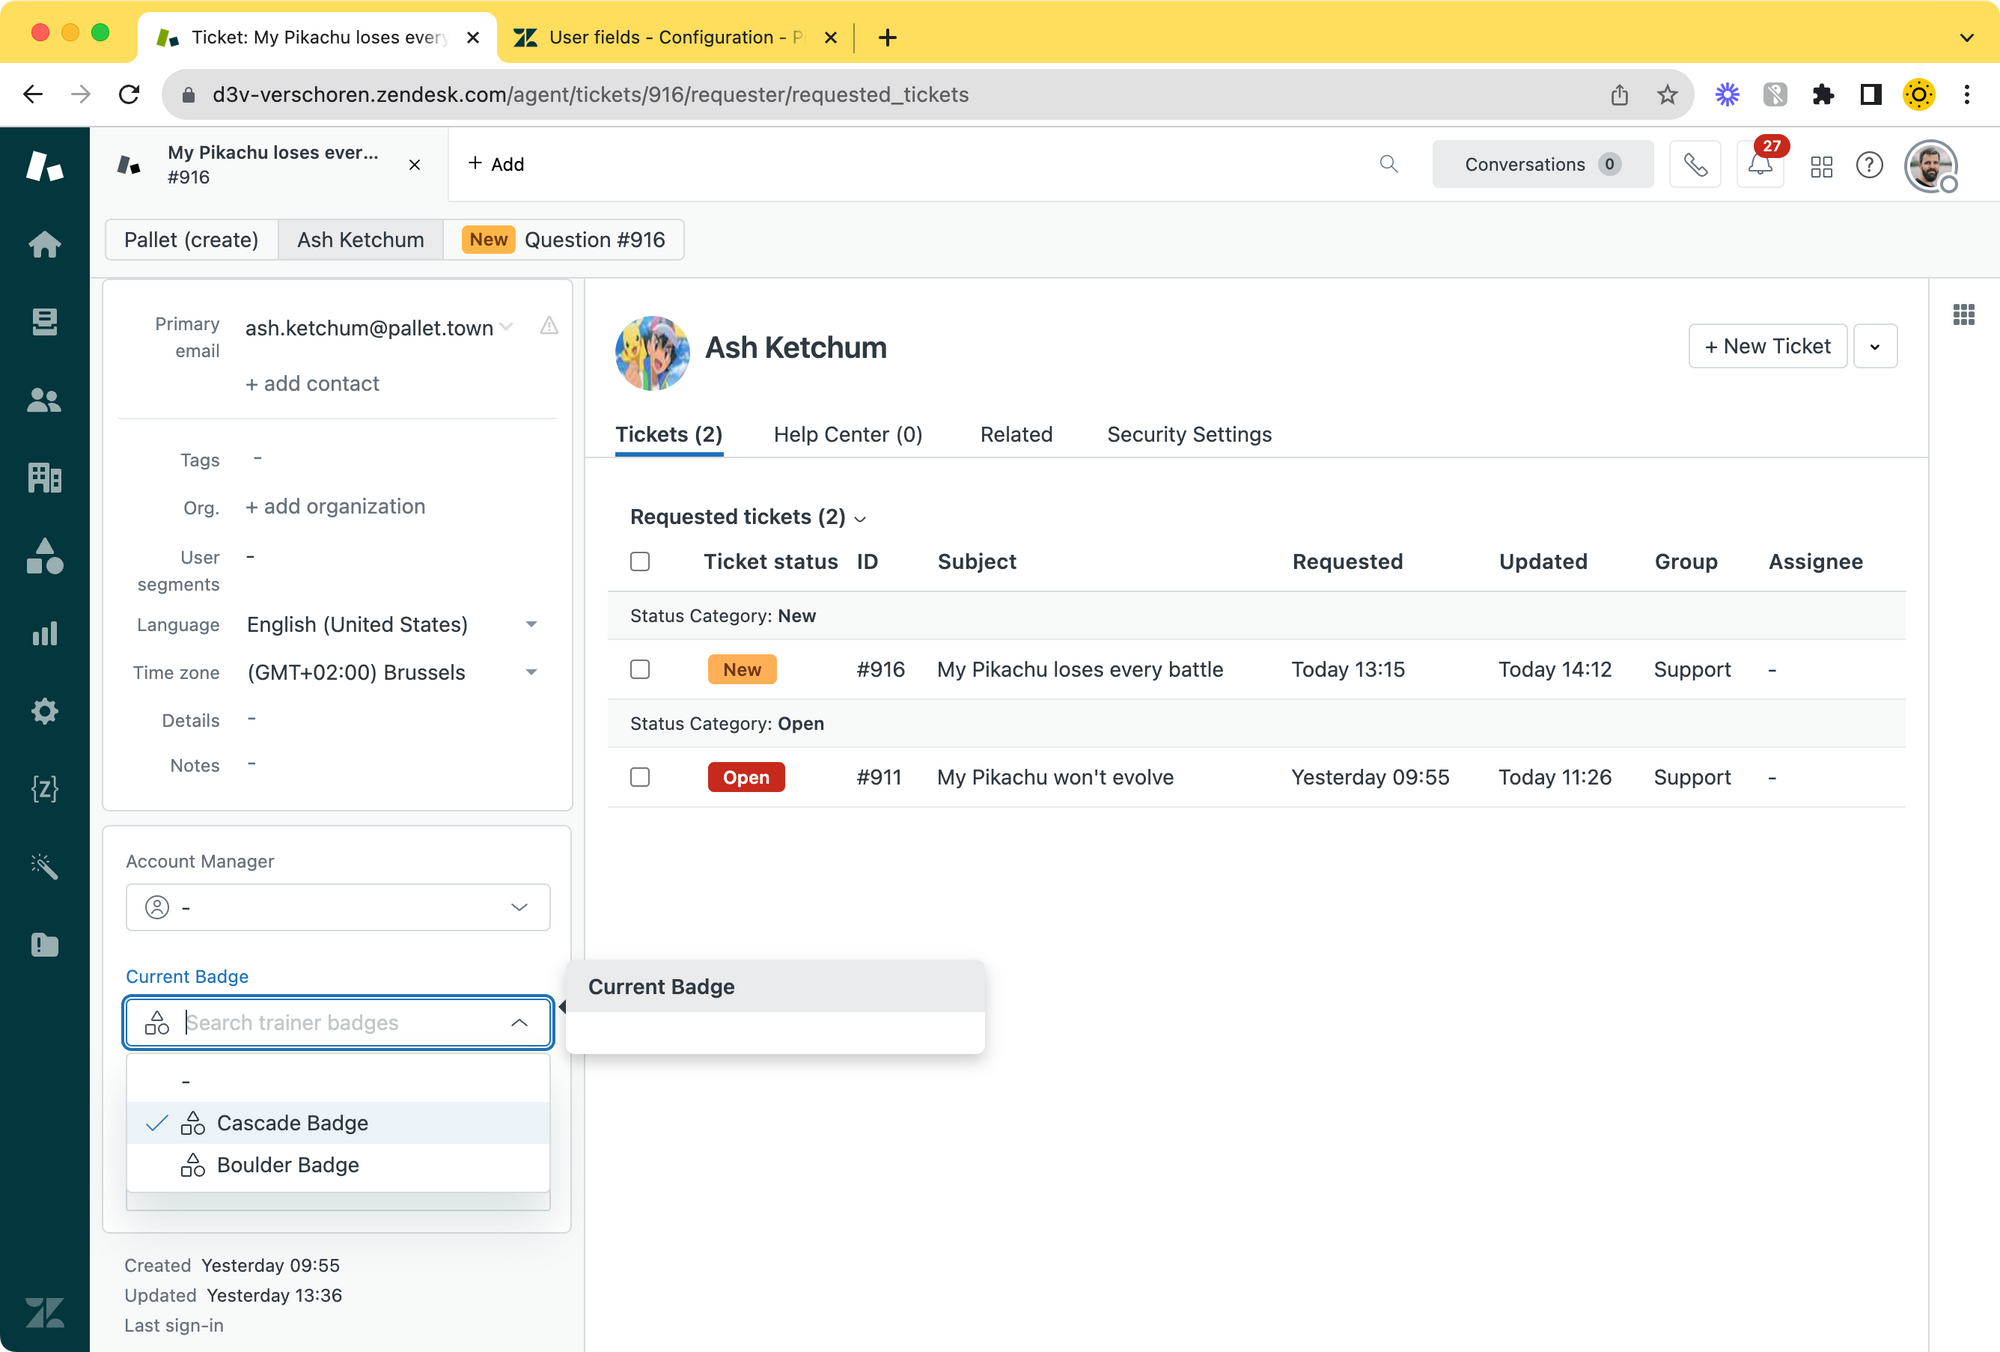
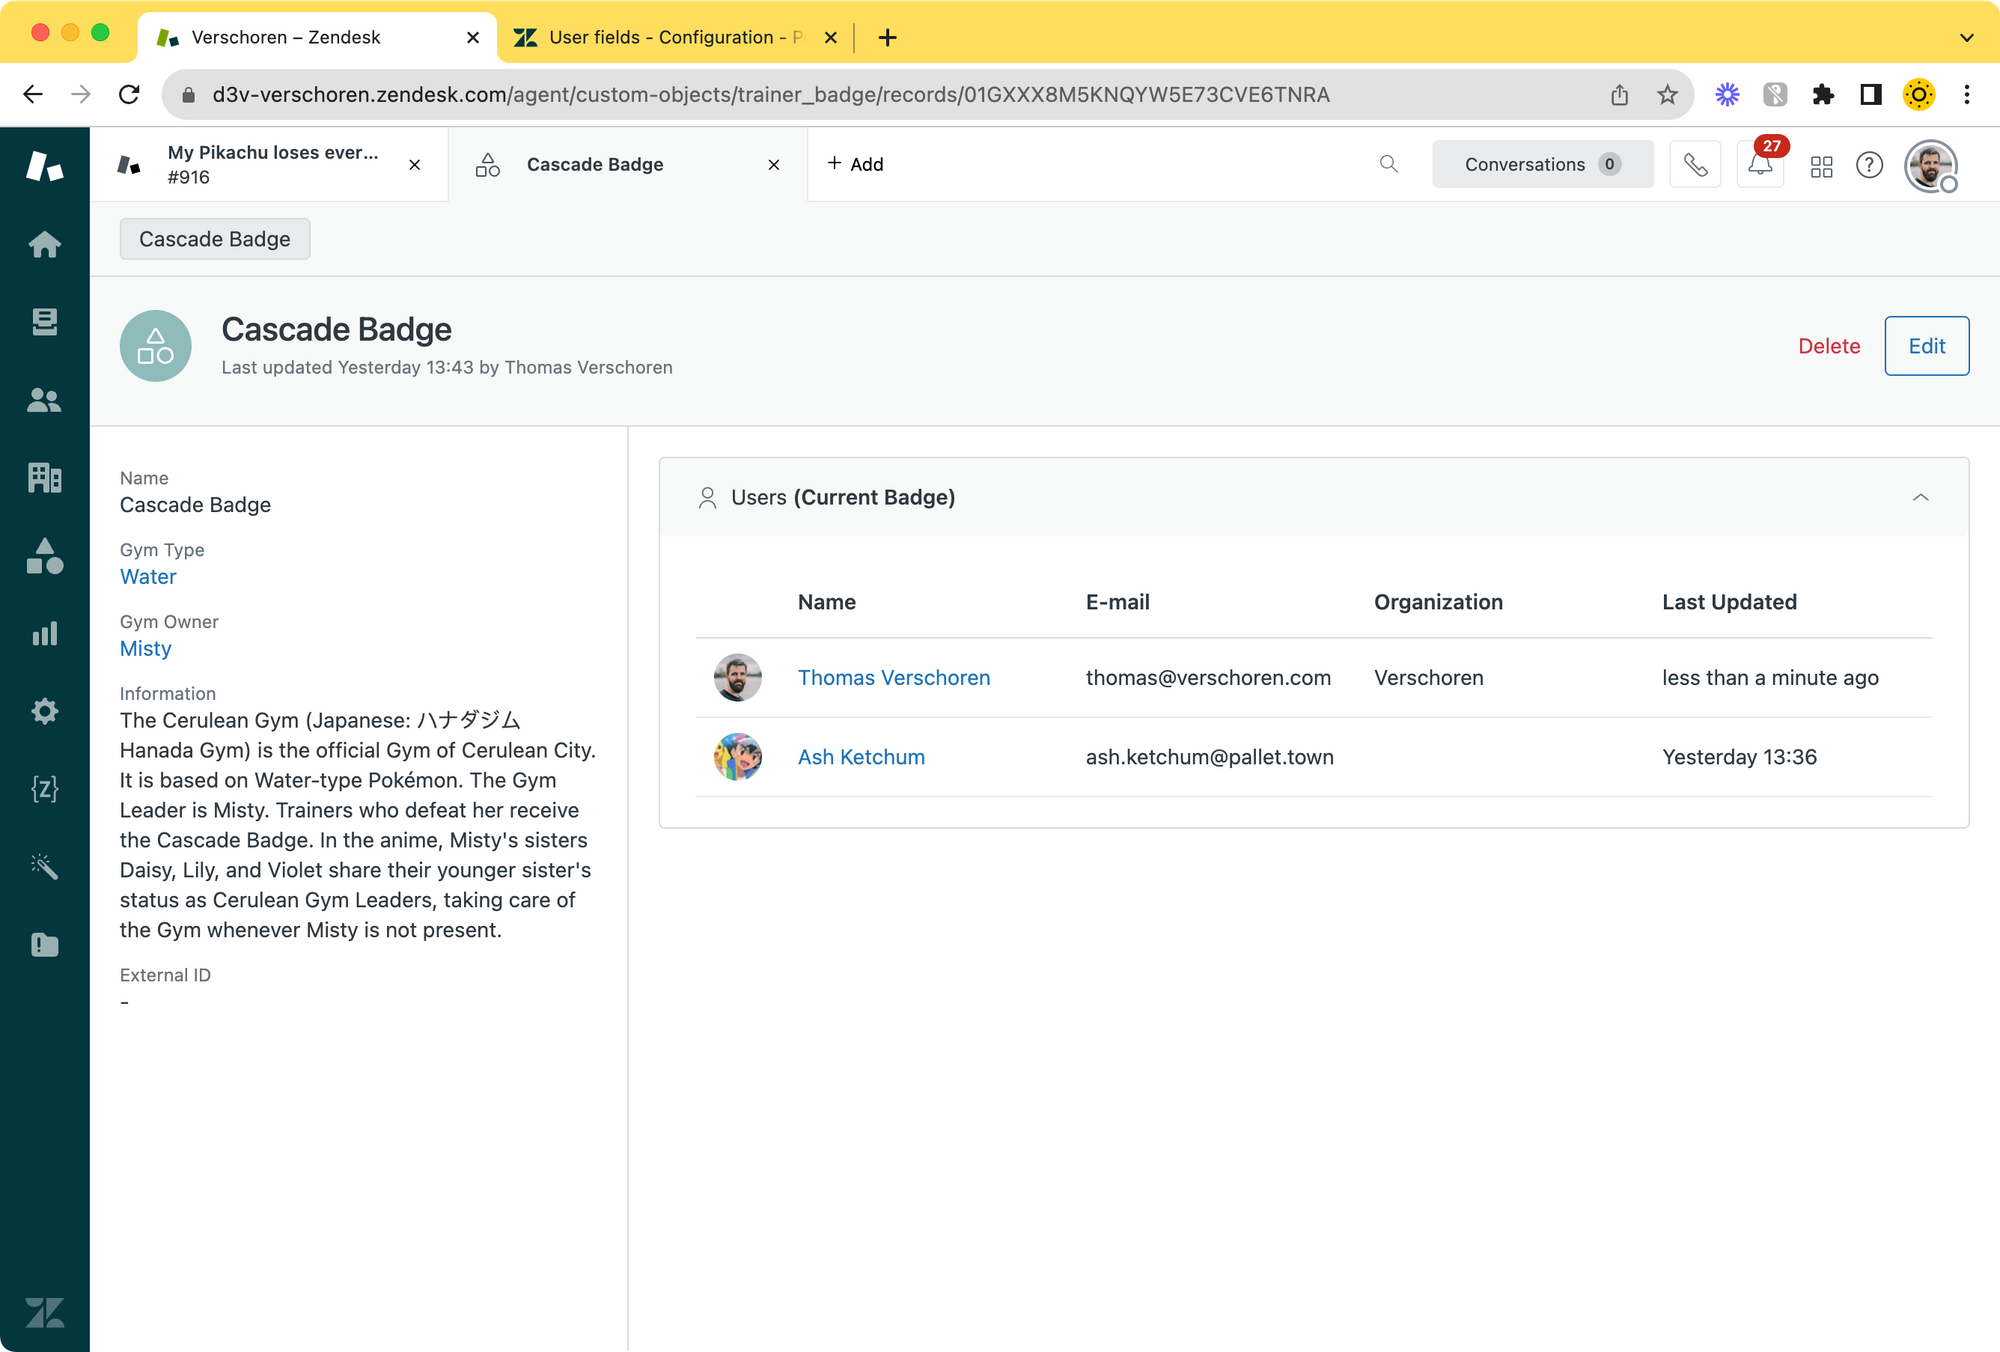
Two things will happen. When we look at a customers' essentials card it will show their current badge. And when we look at the badge in the Object Viewer we'll see Badge listed as one of the current owners.
When we click on the badge name in their profile or in the Essentials Card it'll open the detail view of the Badge and we can view its owner, type and other information stored in the record.
Interacting with custom objects via triggers
Just being able to view data next to tickets is nice, but it we can also interact with that data to automate processes.
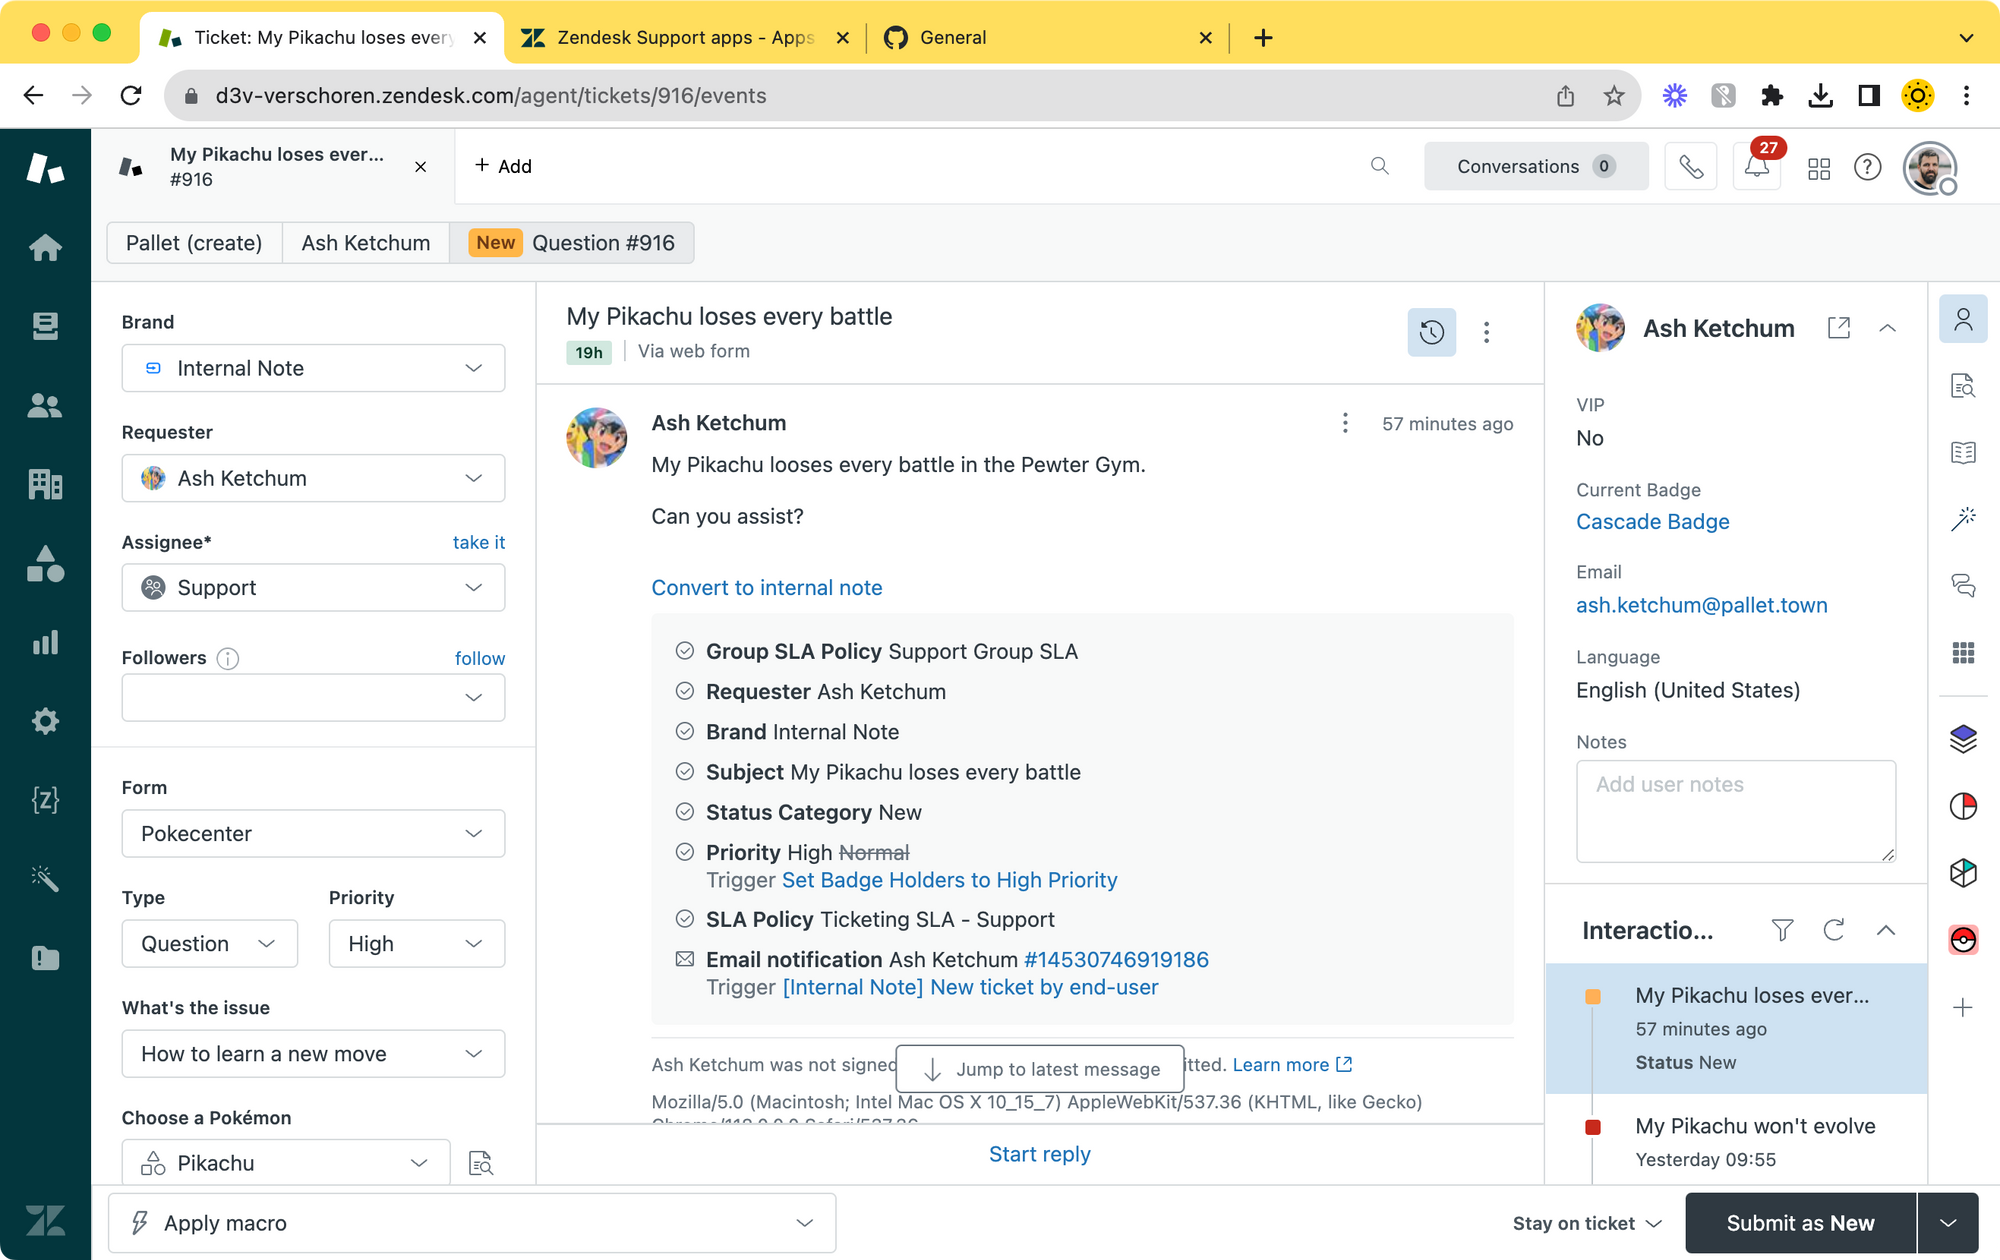
Set ticket priority based on the current badge
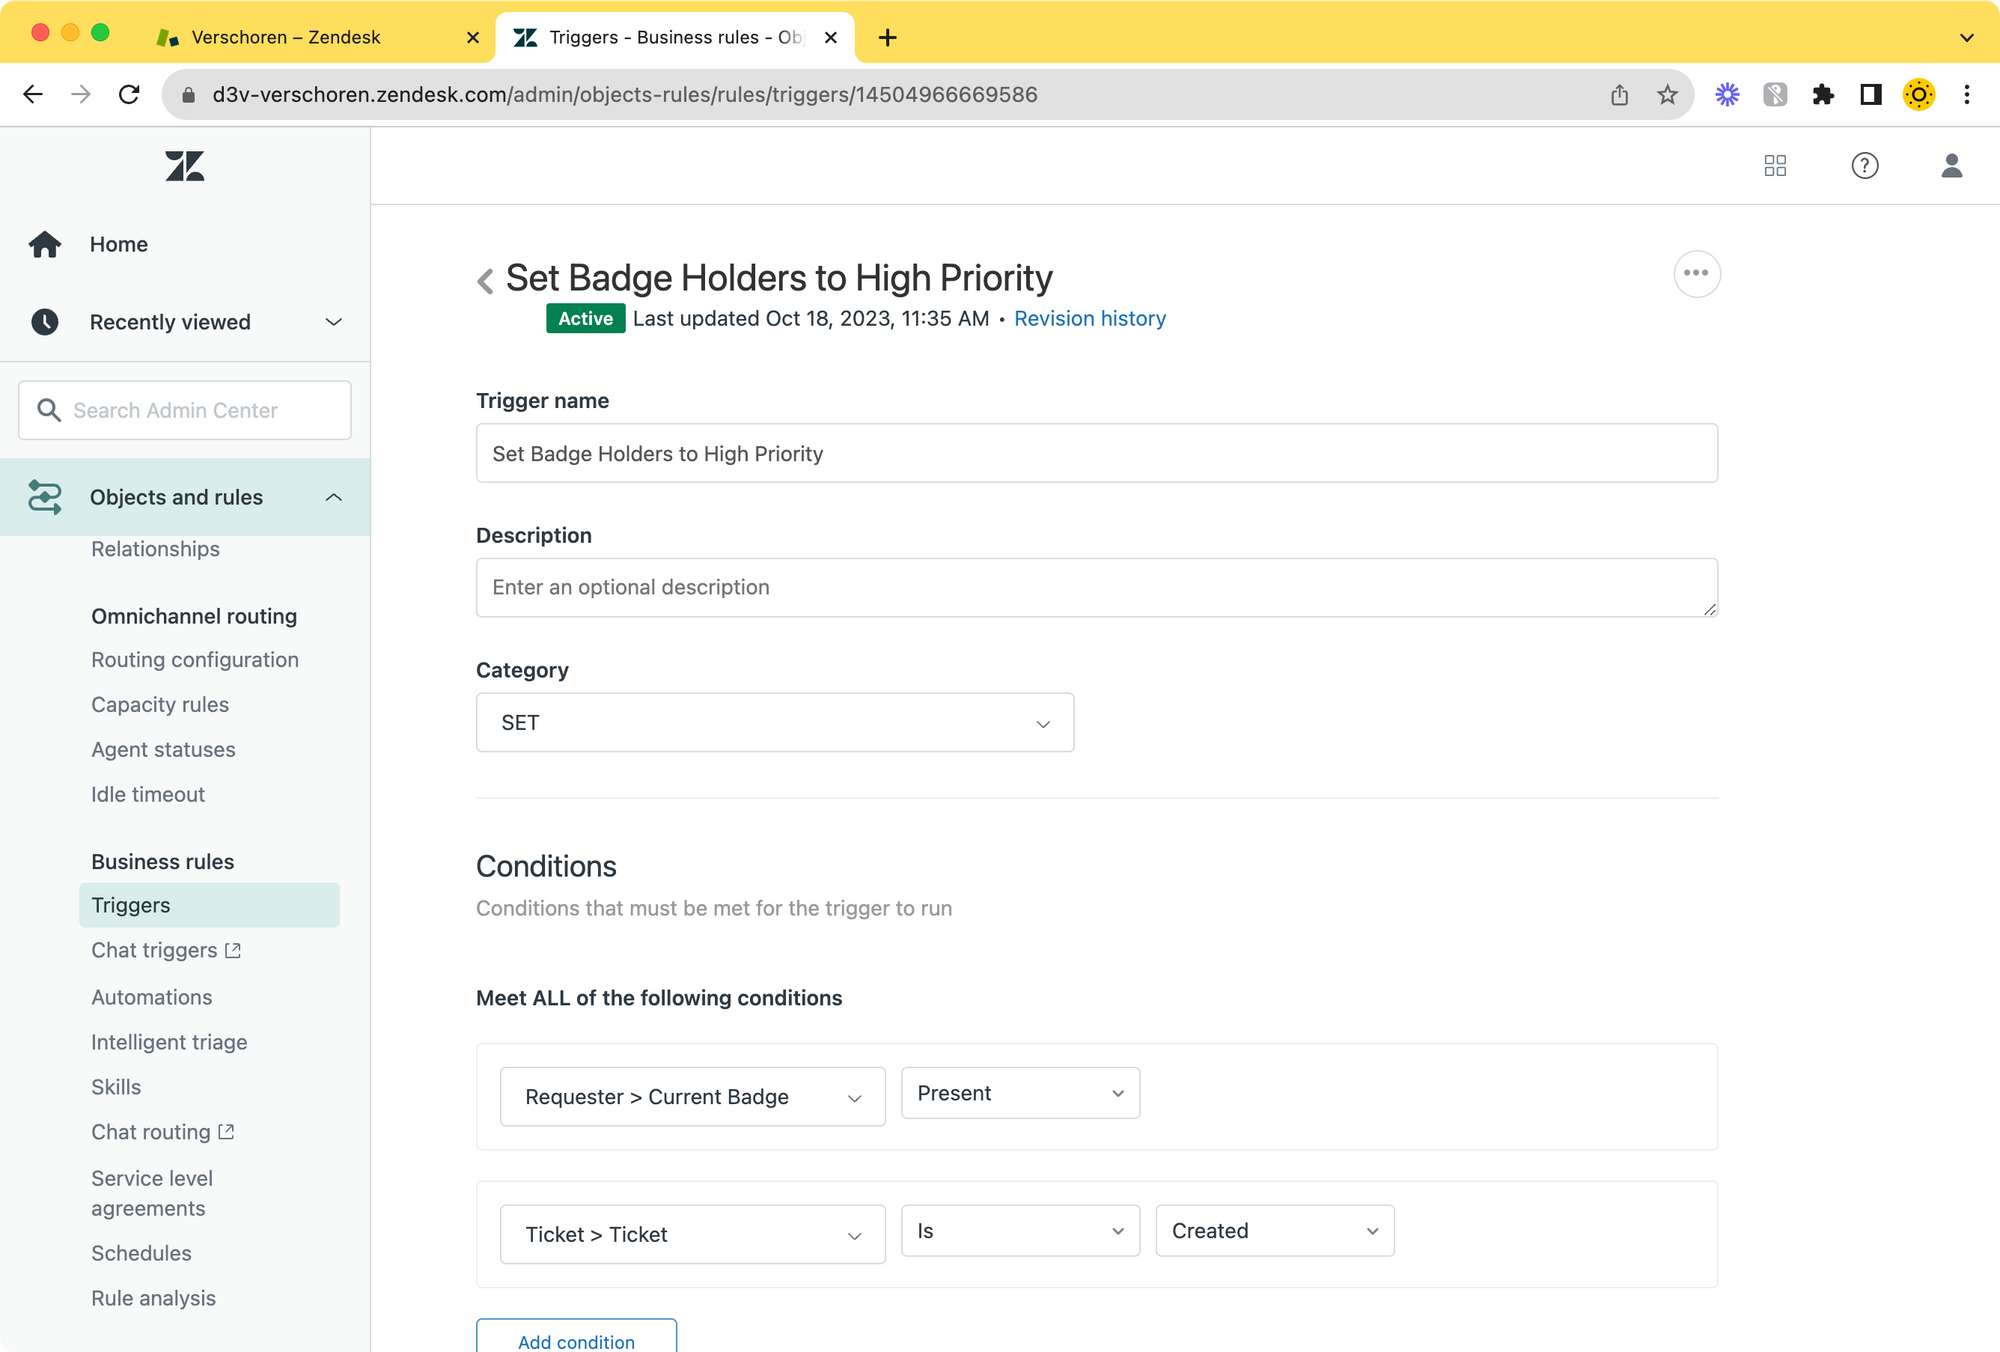
We can use a trigger to give all tickets created by badge holders a higher priority in our instance. This will benefit badge owners because a higher priority often means a faster SLA, thus a quicker assist to their issues.
You can see this trigger in action in the screenshot all the way at the start of this article 😇
Setting this up is done by a trigger with the following conditions:
- Ticket > Ticket is
Created - AND Requester > Current Badge is
Present
Choose the following action:
- Ticket > Priority to
High
Make assets unique per user
So far in this tutorial we've linked predefined objects to users and tickets. But there are use cases we're objects have a specific type, and exist multiple times. Think multiple copies of a specific laptop, or versions of a software license, or in our cases: the different between a Pokémon species and a specific captured specimen.
So let's expand our Pokémon object to make a difference between Pikachu as a species, and the specific Pikachu captured by Ash, our requester used in the demo's.
Setting up object
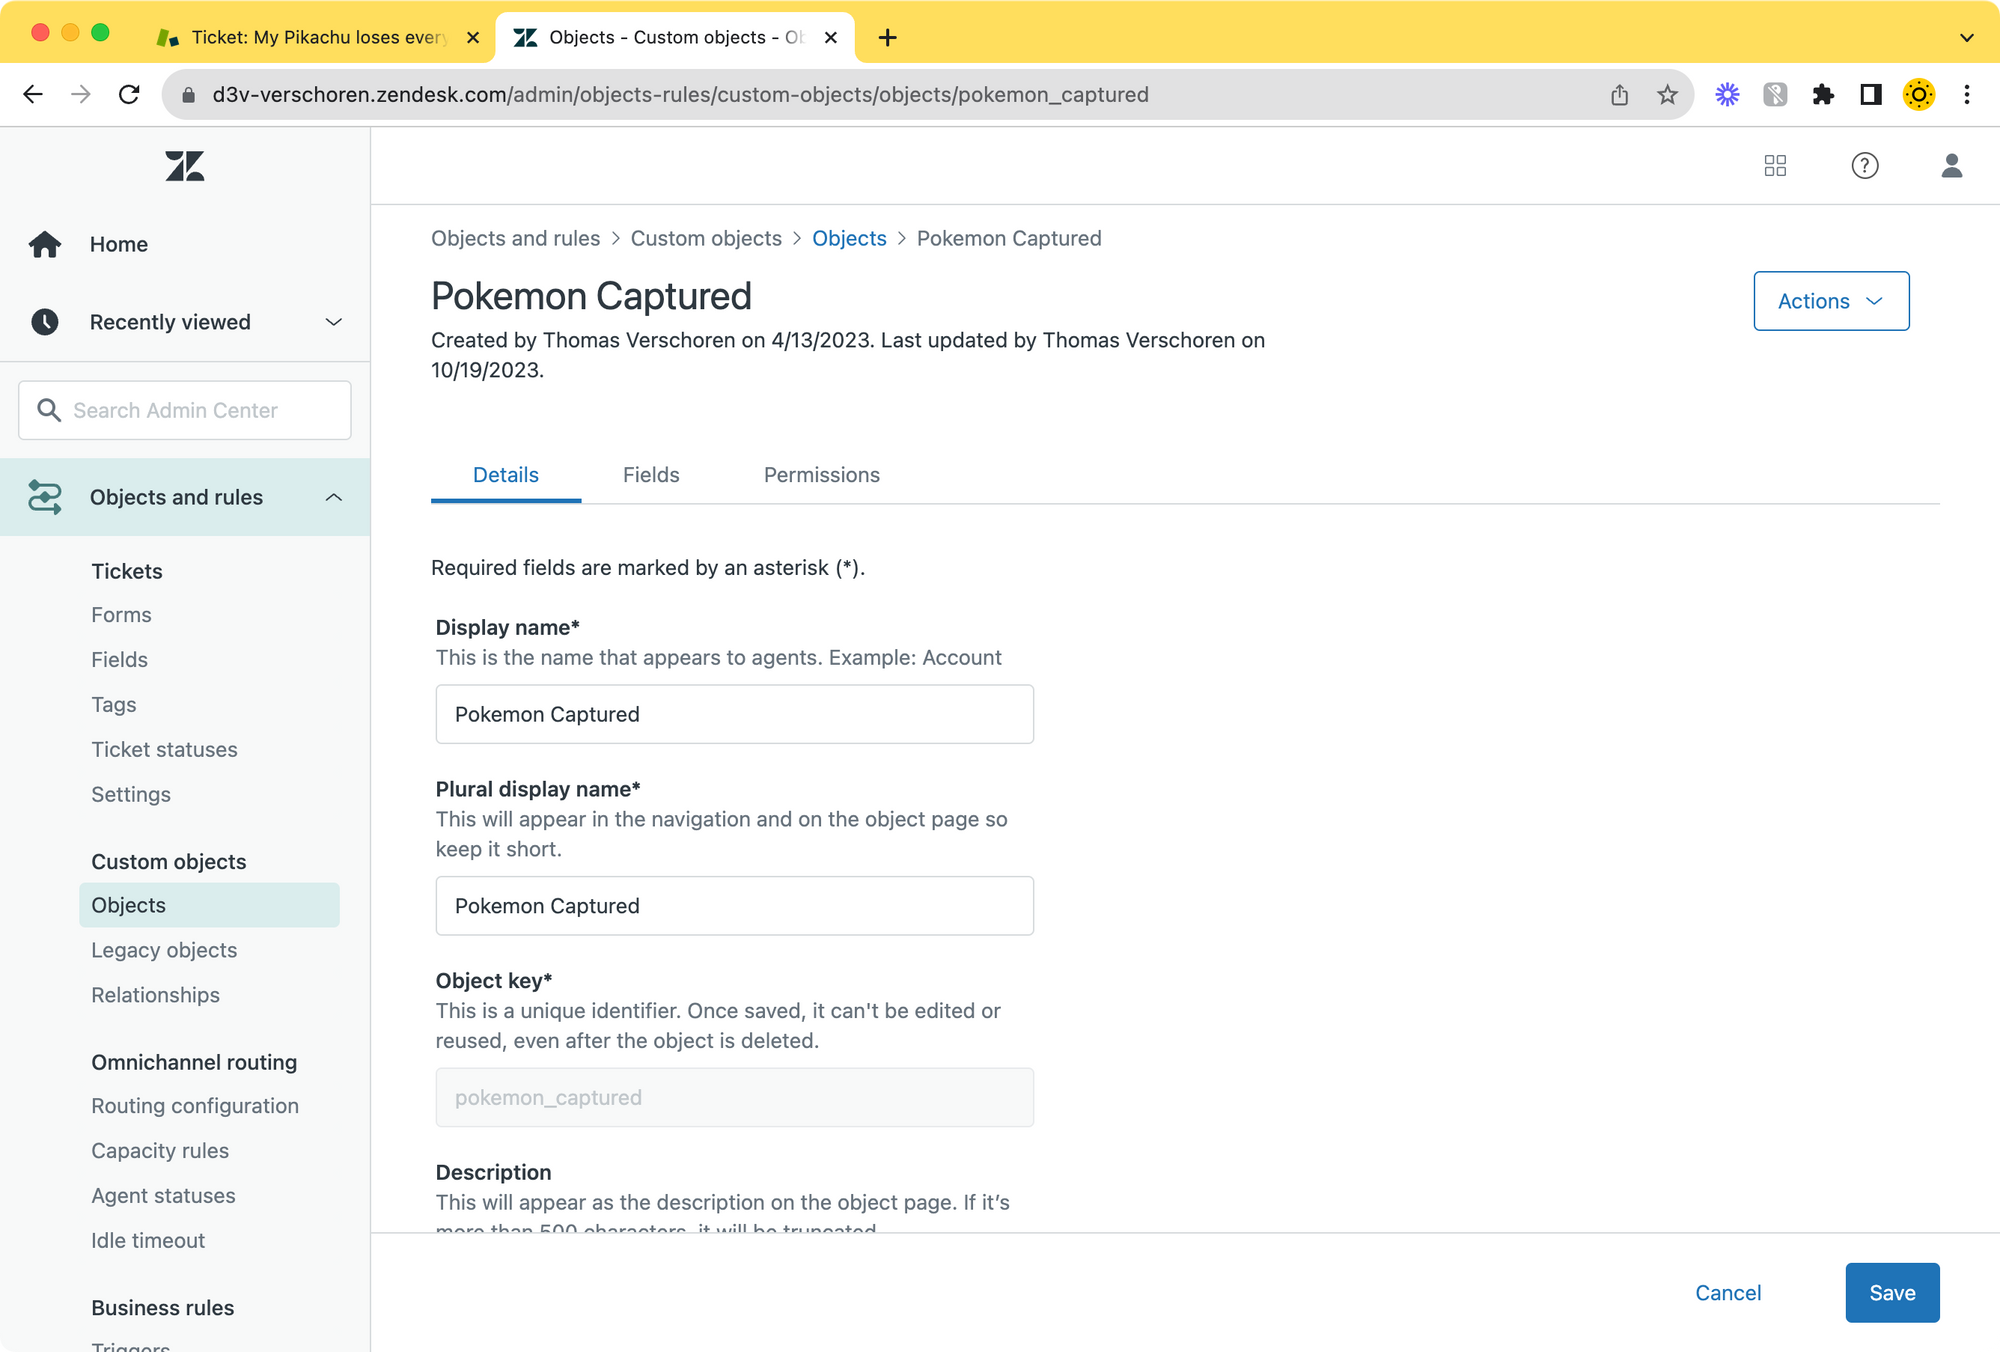
Just as before, let's first define our object. We have a Captured Pokémon owned by a trainer. That Pokémon is of a specific pokemon species.
Let's set this up. We first create a new Object Type named captured_pokemon. We add the following fields:
- Name: Captured Pokémon
- Lookup Field: Pokémon Species, that links to the
pokemonobject we created in the first article of this series - Lookup Field: Trainer, that links to Users. We do not need a filter since anyone can be a trainer.
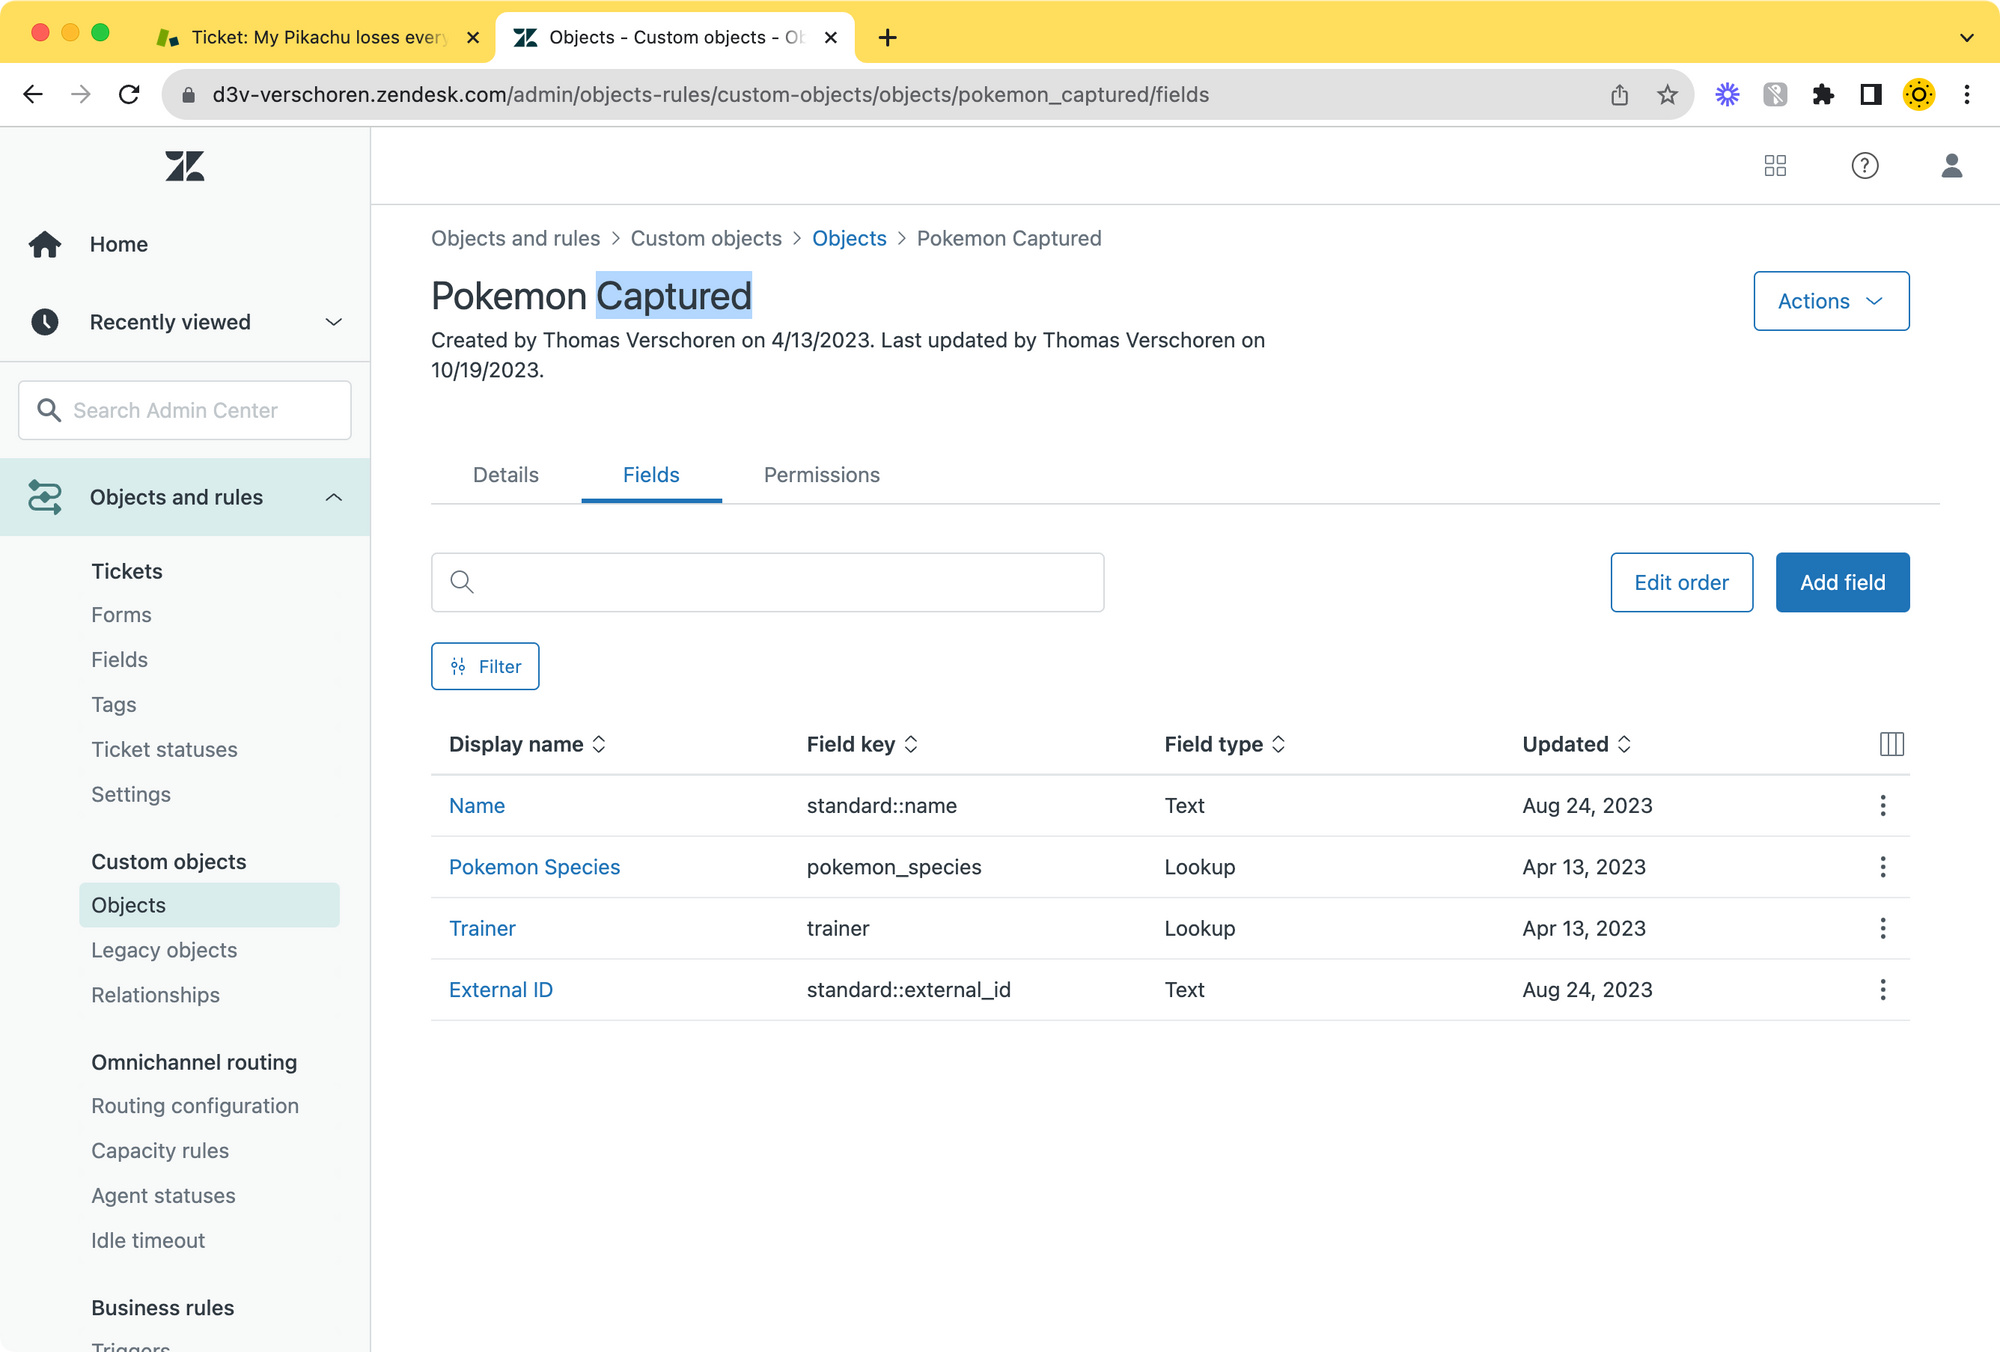
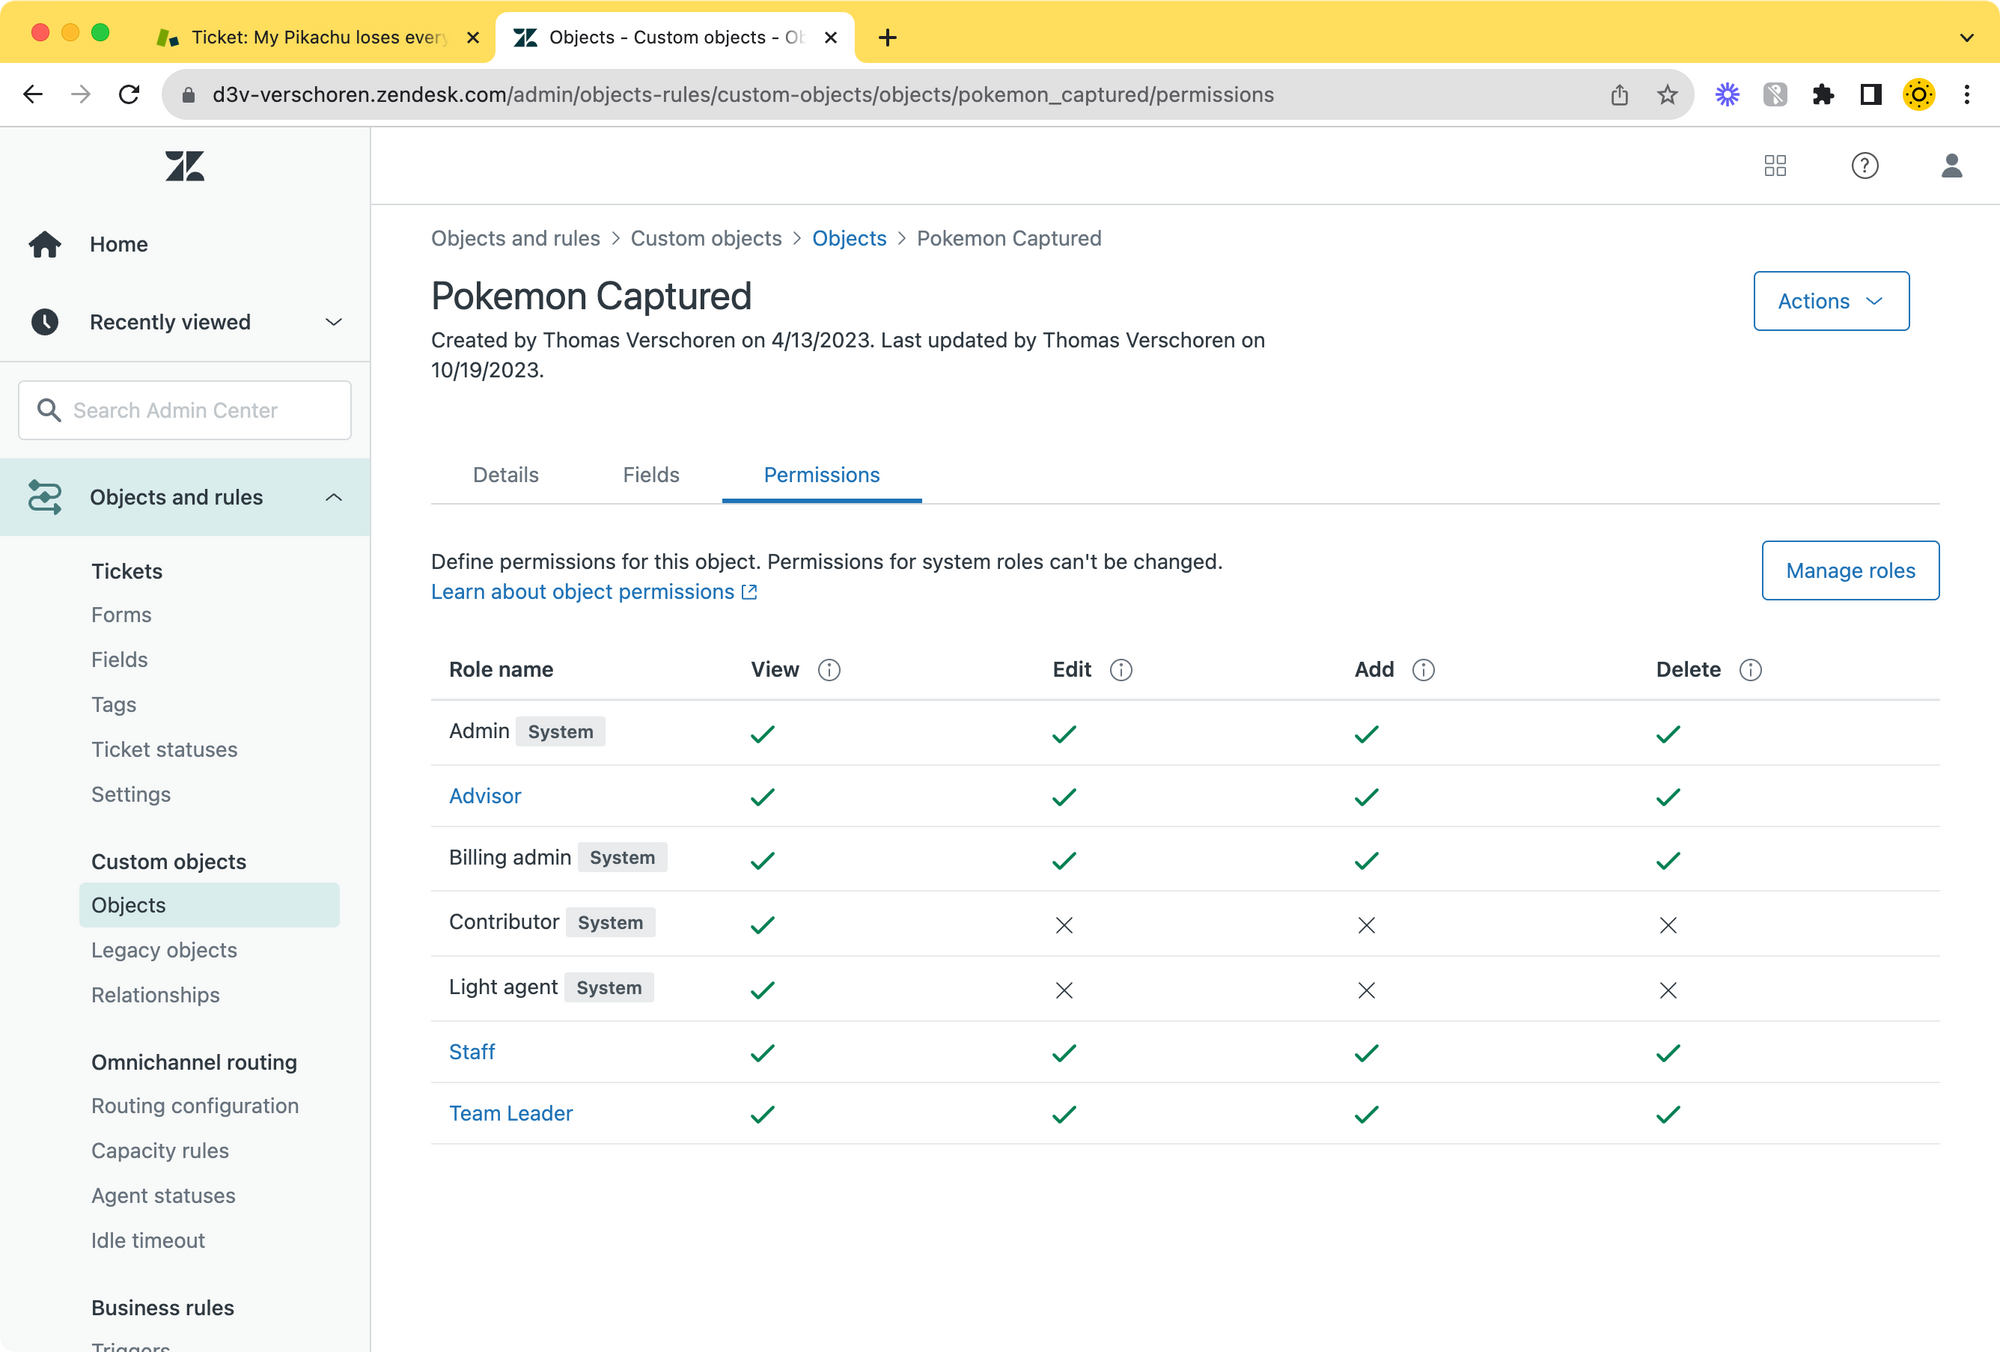
Since we want our agents to be able to modify these Pokémon, or even create new ones we didn't know of, we'll change the permissions to give all our agents add, edit and delete rights. (Some Pokémon might escape after all).
Creating a new Captured Pokémon
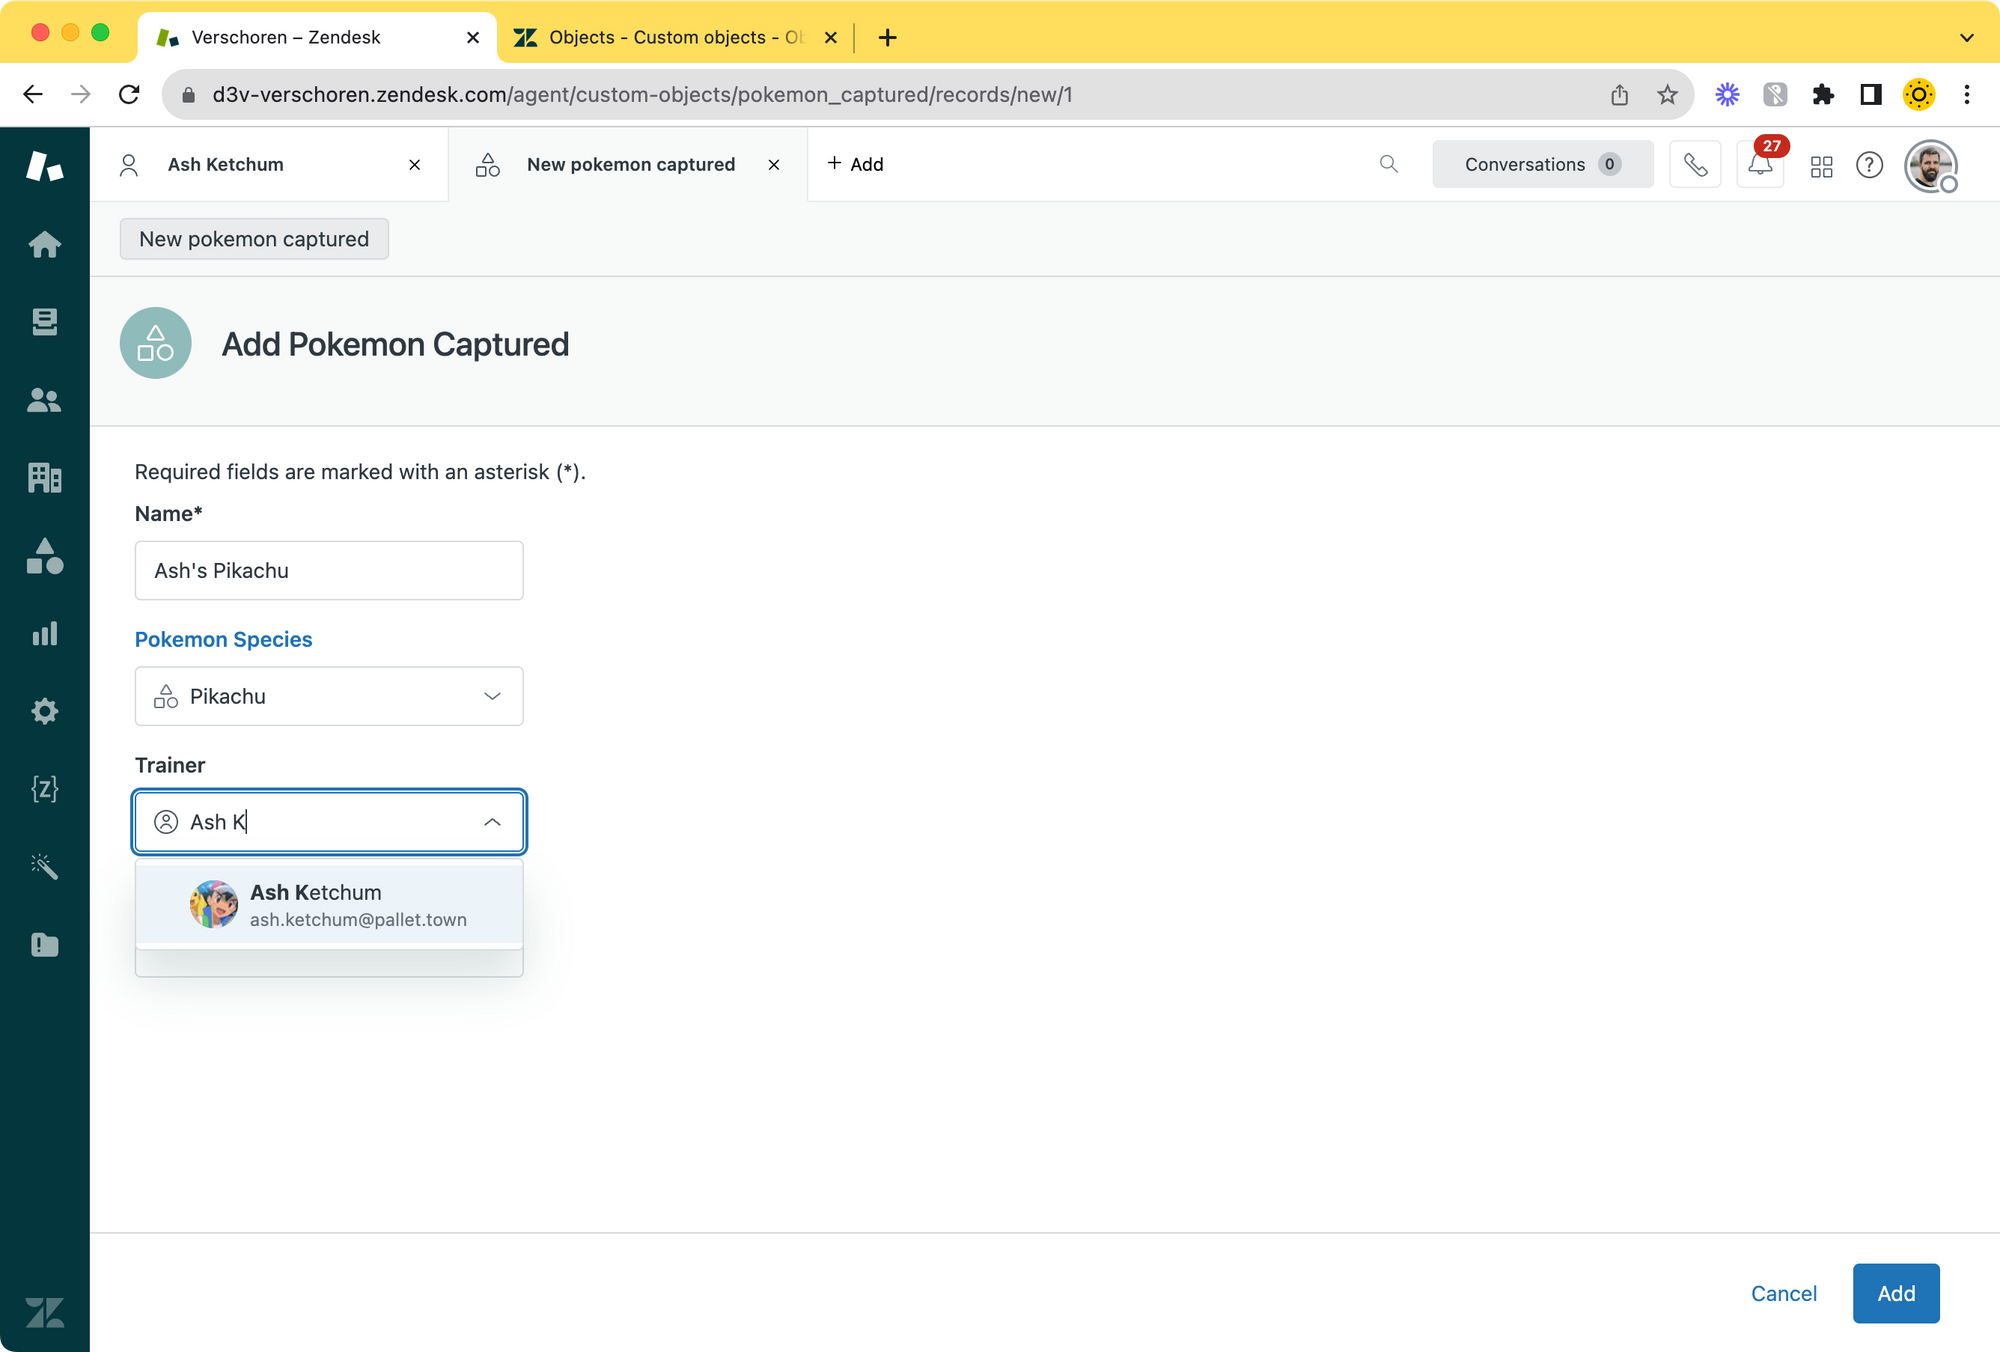
Go the the Object Viewer via the navbar and choose the Captured Pokémon object. Click add and create a new Pokémon. Give them a name, choose a species and select their trainer.
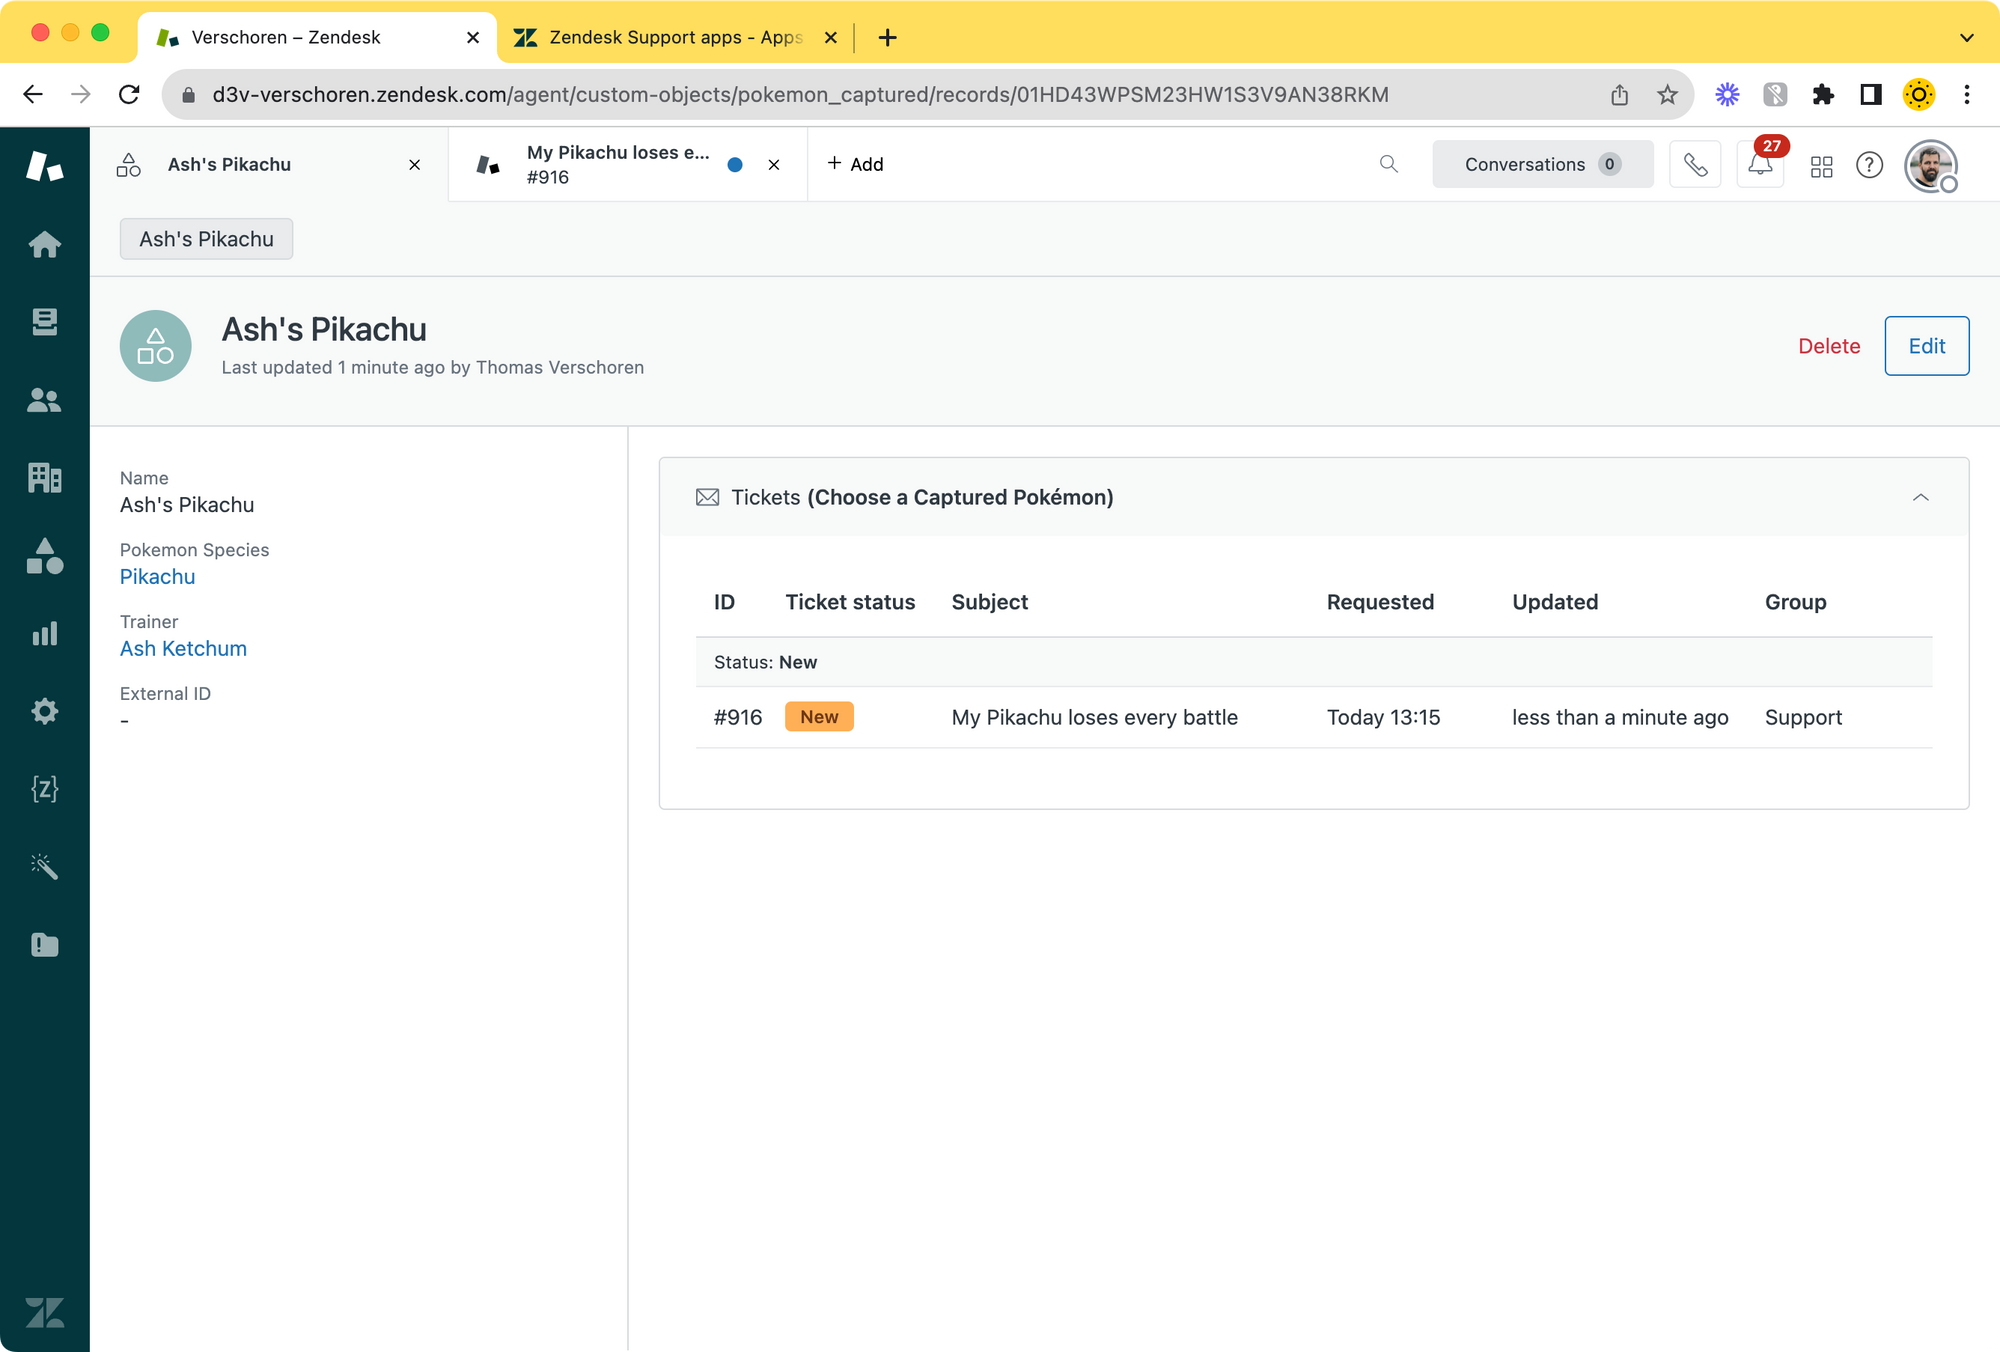
Once added, the Pokémon will show up when looking at the Captured Pokémon object, and will also show up on the Trainers profile in Zendesk in the Related tab.
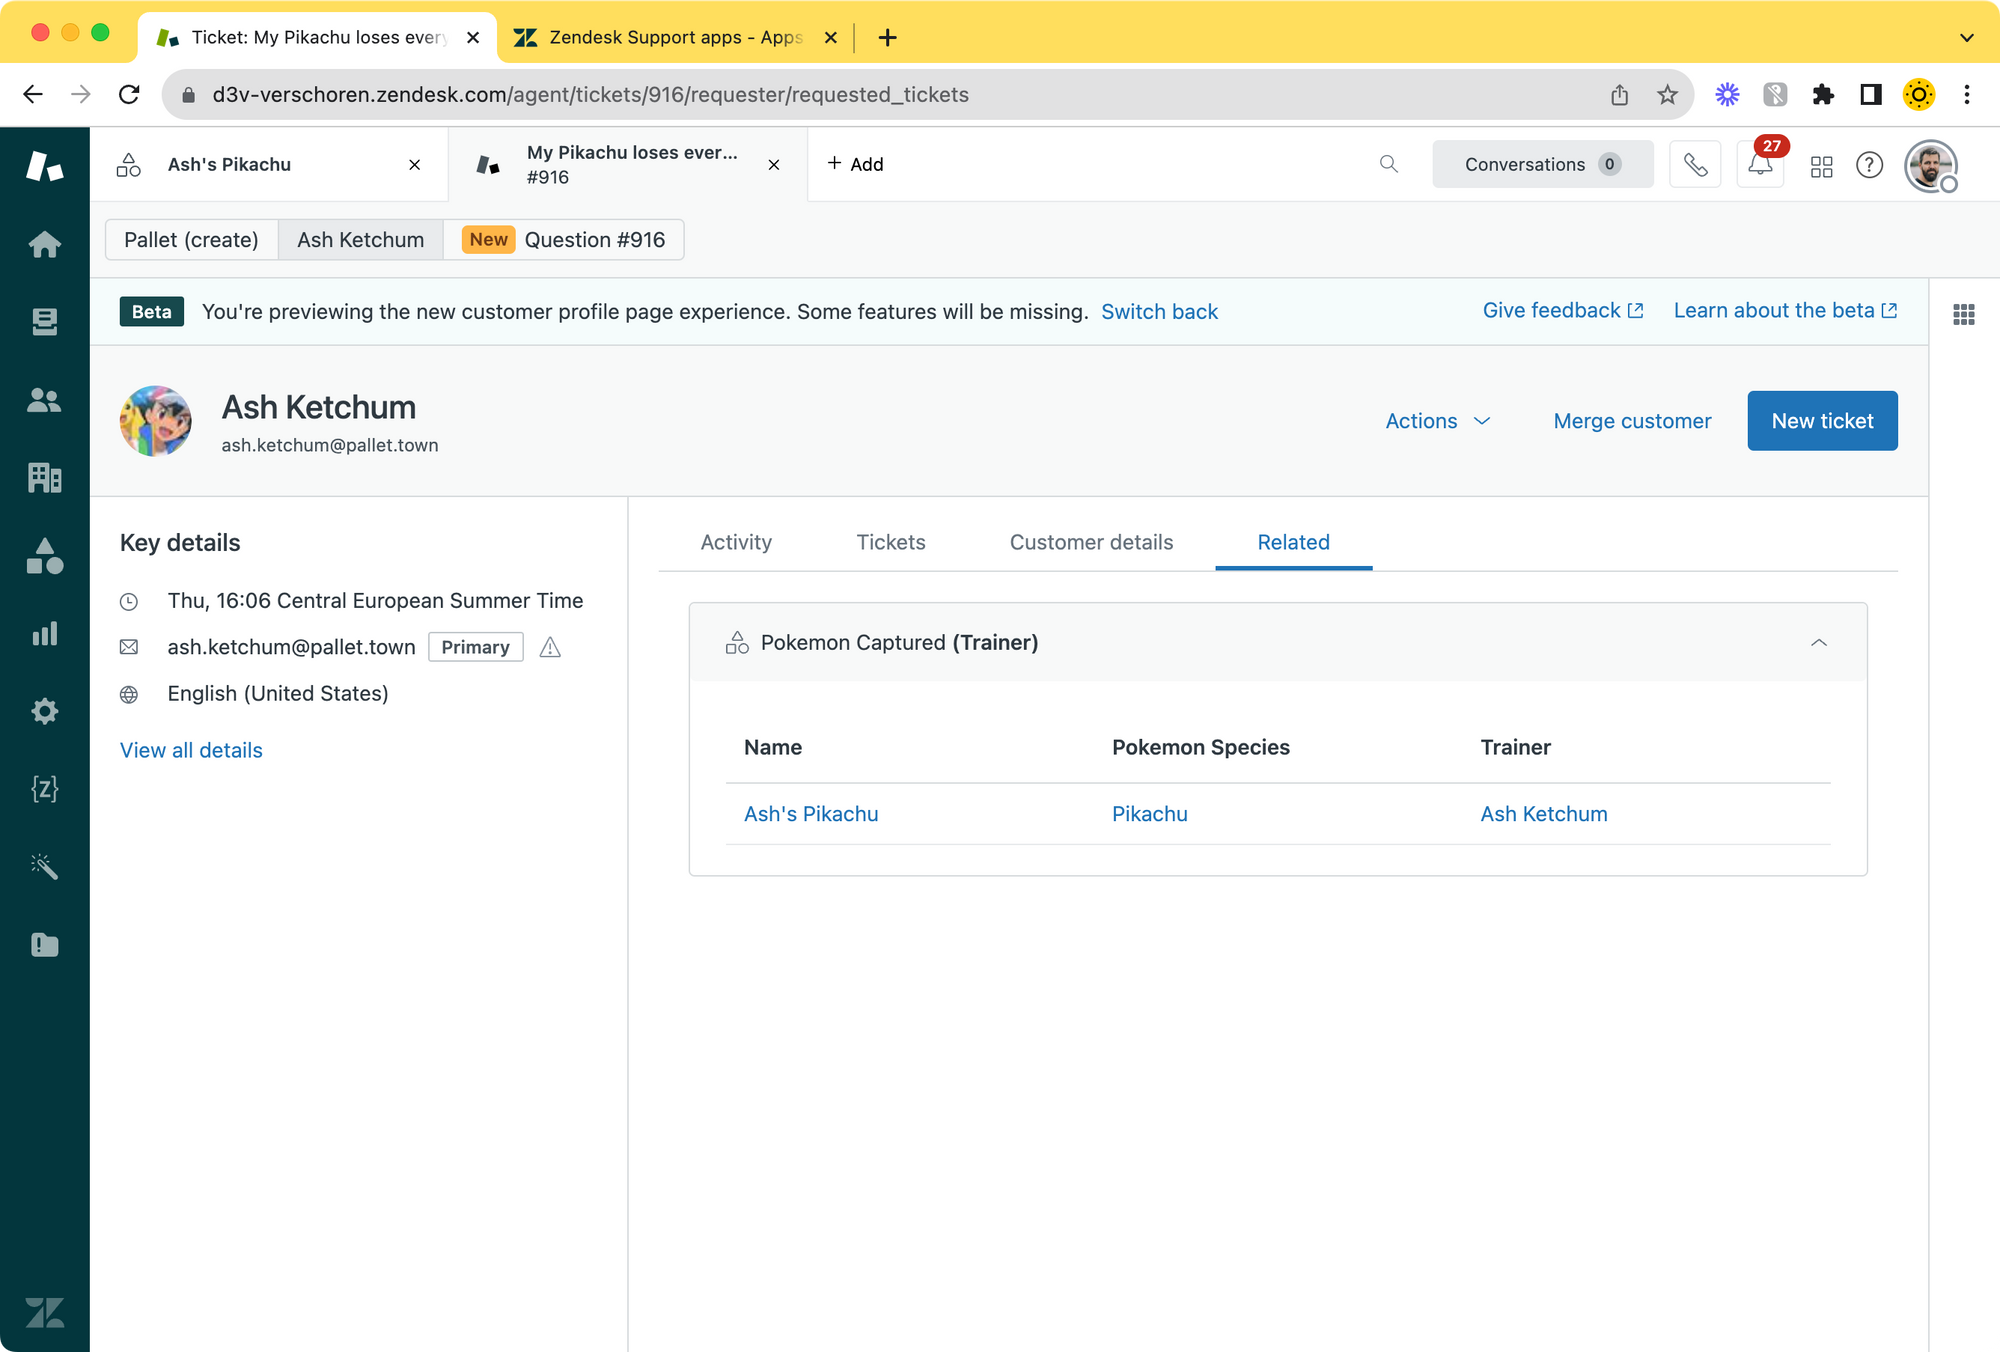
Naturally, this is only part of the story. Now that we have a specific Pokémon to refer to, we might want update our Ticket Forms to refer to that Pokémon instead of the generic Pokémon type.
This is done similar to how we did it earlier for the regular object. Create a new Custom Ticket Field of type Lookup Relationship, and select the Captured Pokemon as a related object.
Now your agents can link tickets to a specific Pokémon, instead of the generic species.
Update to the sidebar app
In the previous article we build a sidebar app that showed a nicer overview of the Pokémon data. If we want to use these Captured Pokémon we need to make an extra API call to show the data.
First we need to get the value of the Captured Pokémon ticket field:
var captured_pokemon_id = await client.get('ticket.customField:custom_field_14504649143442'); We then use that value to retrieve the data of the Captured Pokémon record, and more specifically its linked species. This way we capture the Record ID of the Pokémon we need.
var linked_pokemon = await client.request({
  url: '/api/v2/custom_objects/pokemon_captured/records/'+captured_pokemon_id+'.json',
  type: 'GET',
  dataType: 'json'
}).then(async function(pokemon){
  return pokemon.custom_object_record.custom_object_fields.pokemon_species;
});
And now we can use that Record ID to get the data of the actual species:
return await client.request({
  url: '/api/v2/custom_objects/pokemon/records/'+linked_pokemon+'.json',
  type: 'GET',
  dataType: 'json'
});
The application in the repository we used in the last article is updated to include this functionality. Just make sure to set the "Use Captured Pokémon" setting in the apps' configuration to true when installing.
 verschoren
Notify trainer
Similar to how we used triggers to set the priority of tickets based to linked records, we can also use other data in a record to update our tickets.
Imagine a scenario where our Captured Pokémon have a linked Gym Owner which is the specialist for this Pokémon.
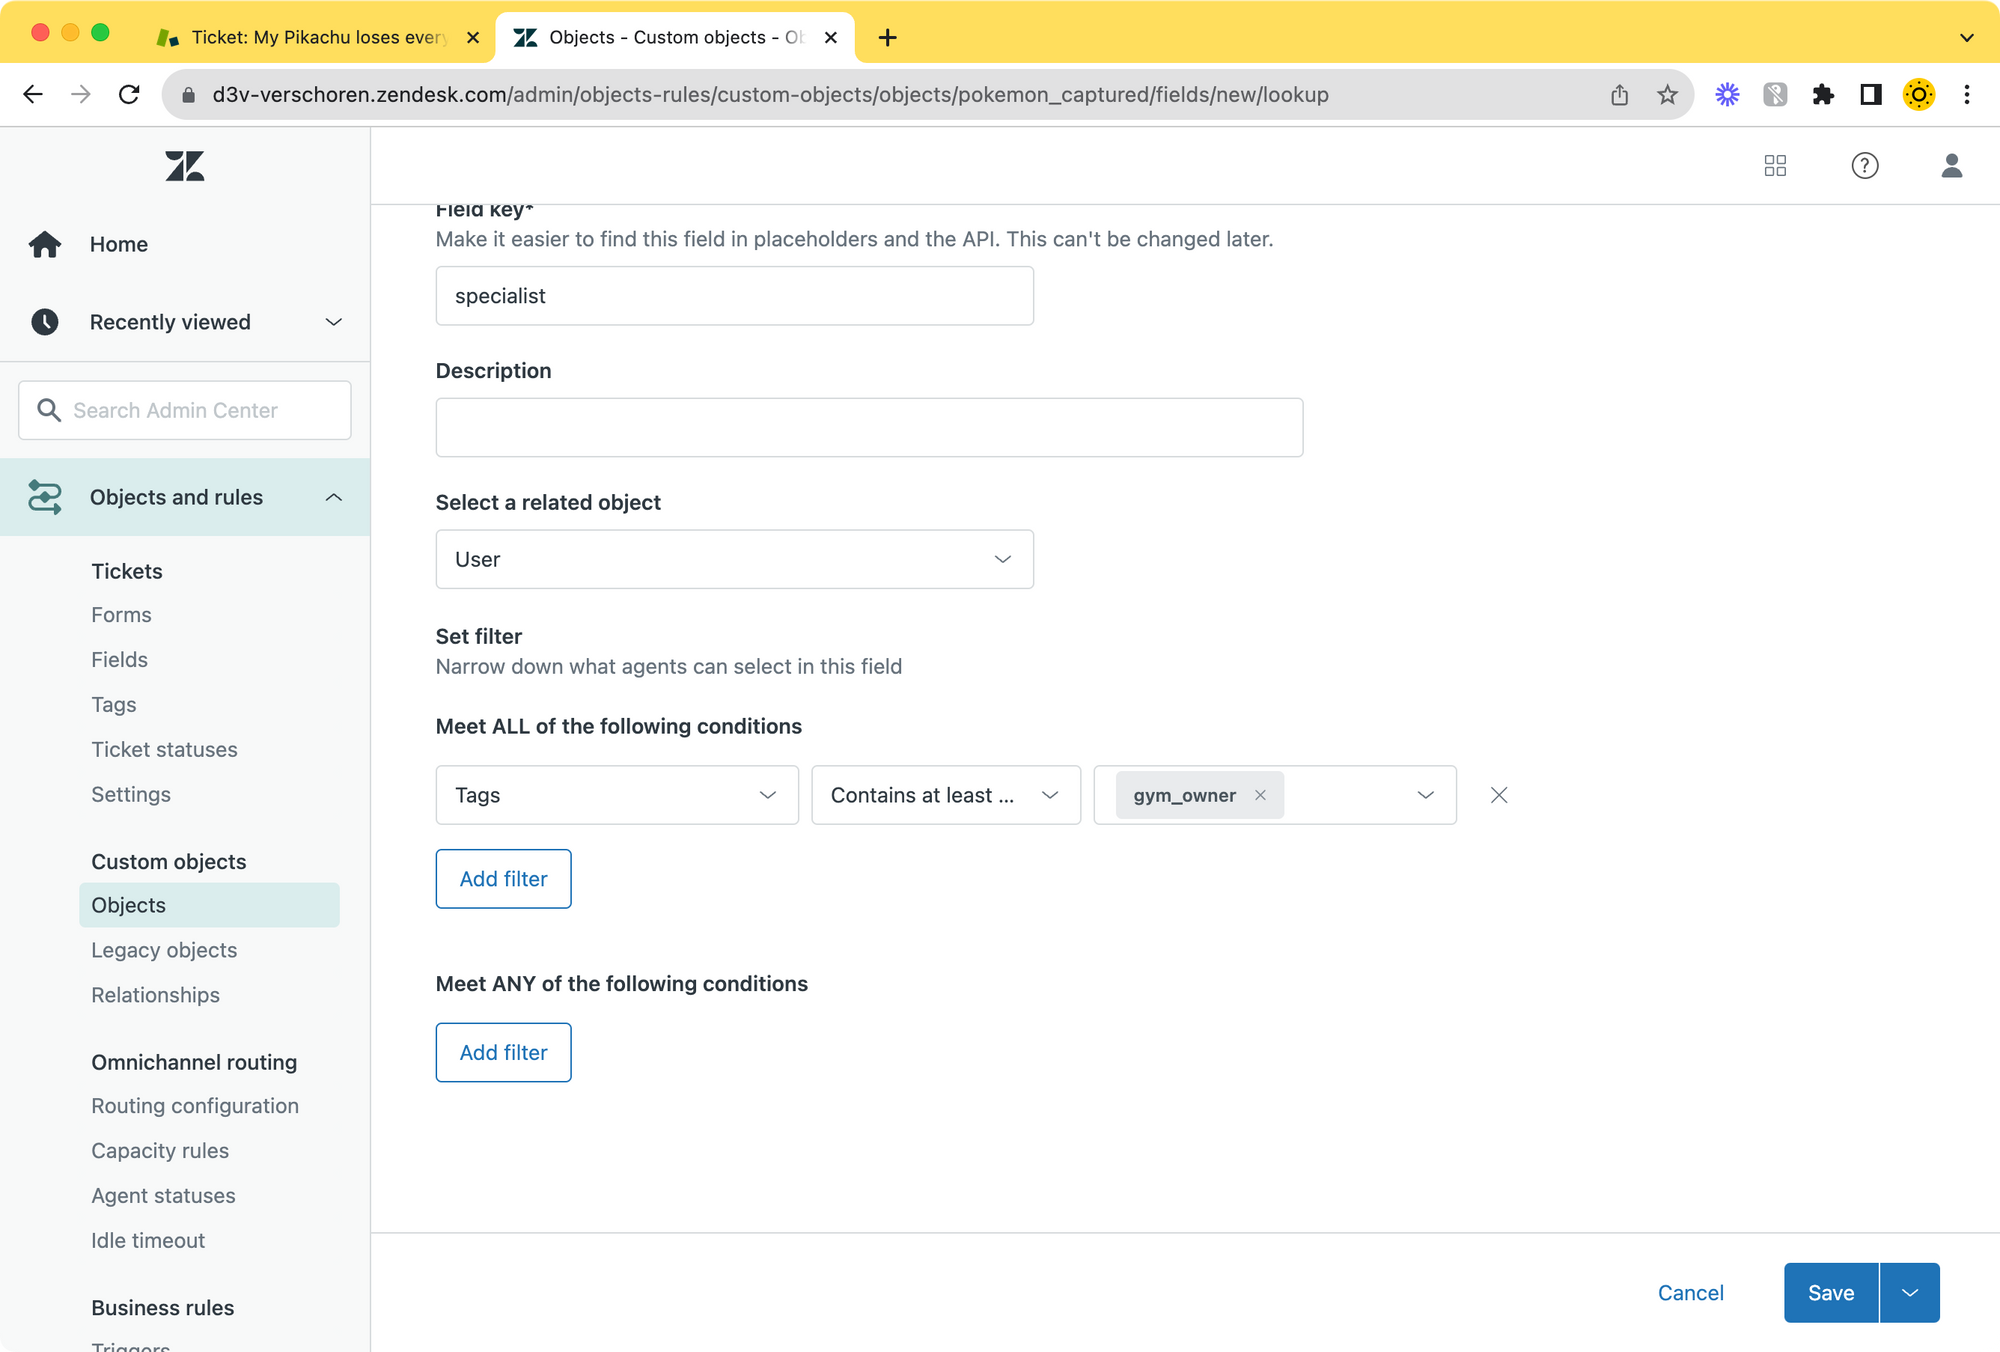
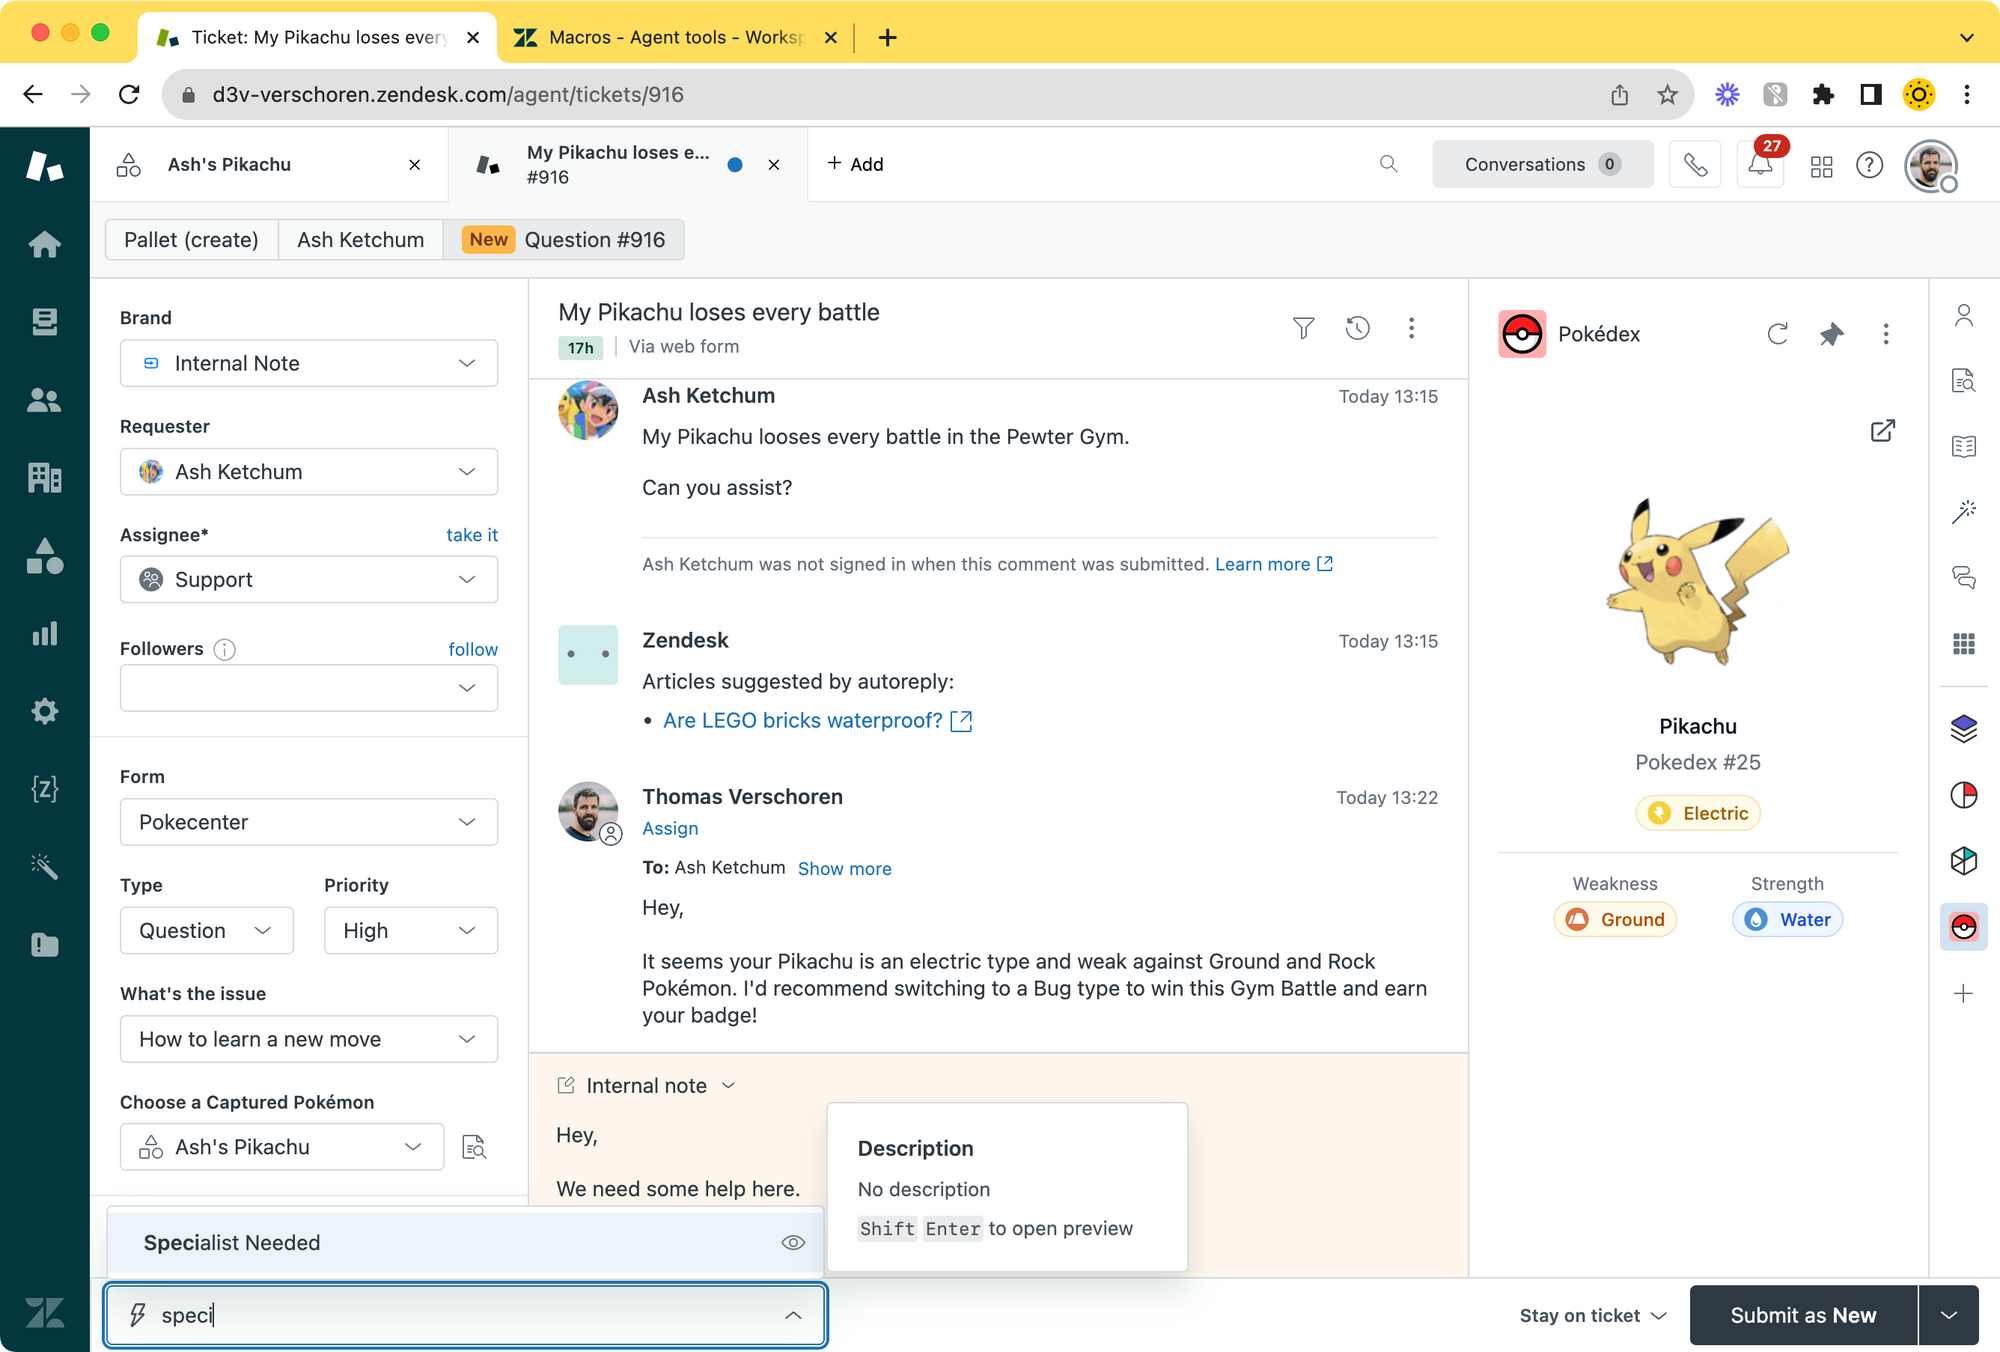
We can now create a trigger that adds the Gym Owner as a follower whenever the tag specialist_needed is added to a ticket. This is done by leveraging the nested data in a Custom Object.
In the action step choose Add Follower as a step and select your Captured Pokémon ticket field > Specialist as the value.
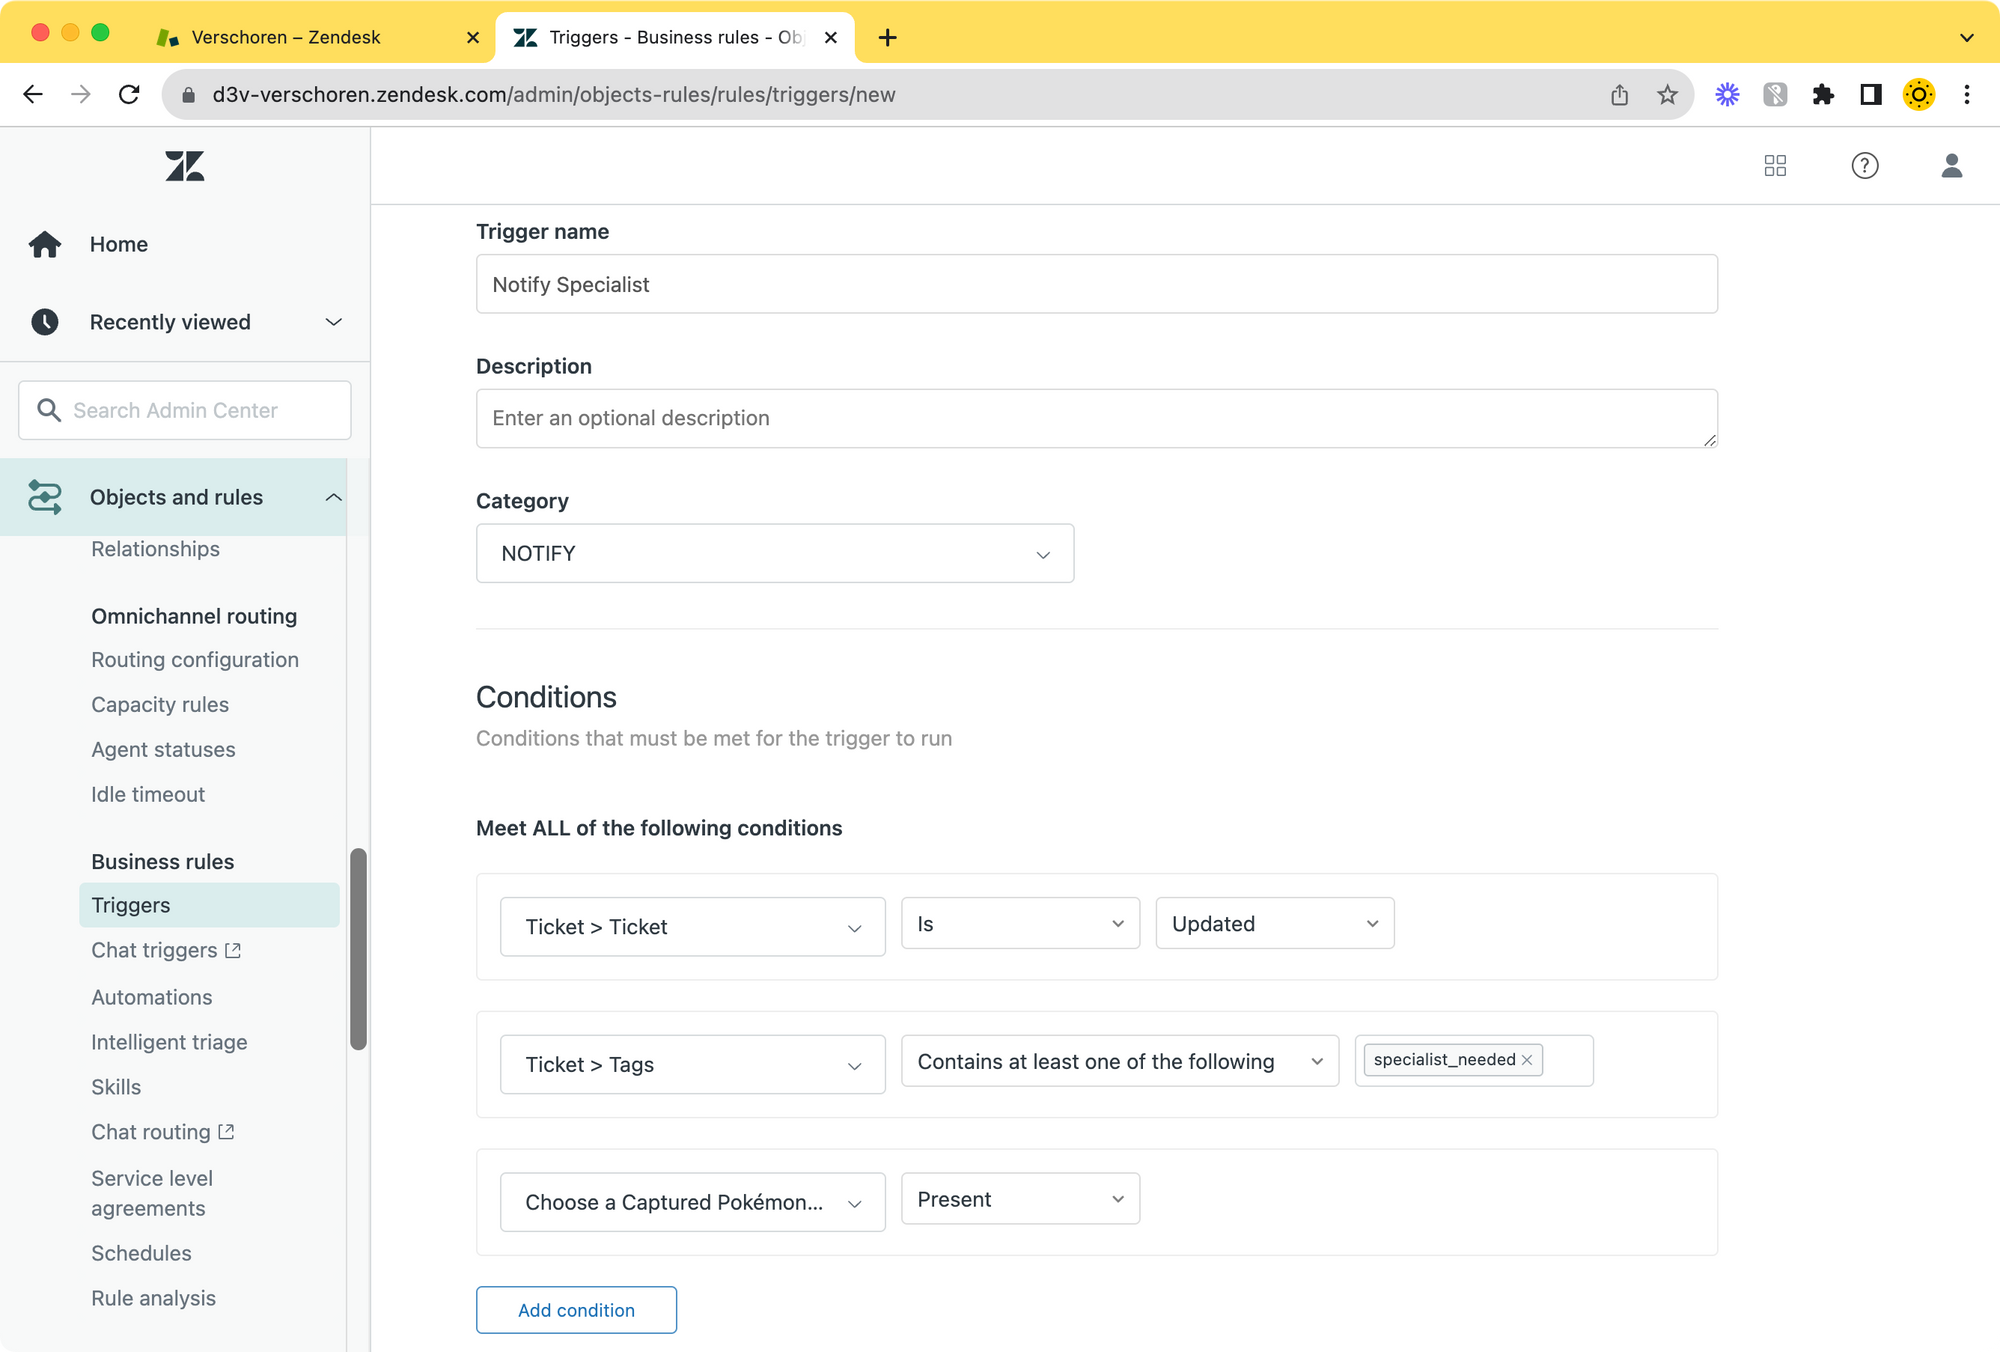
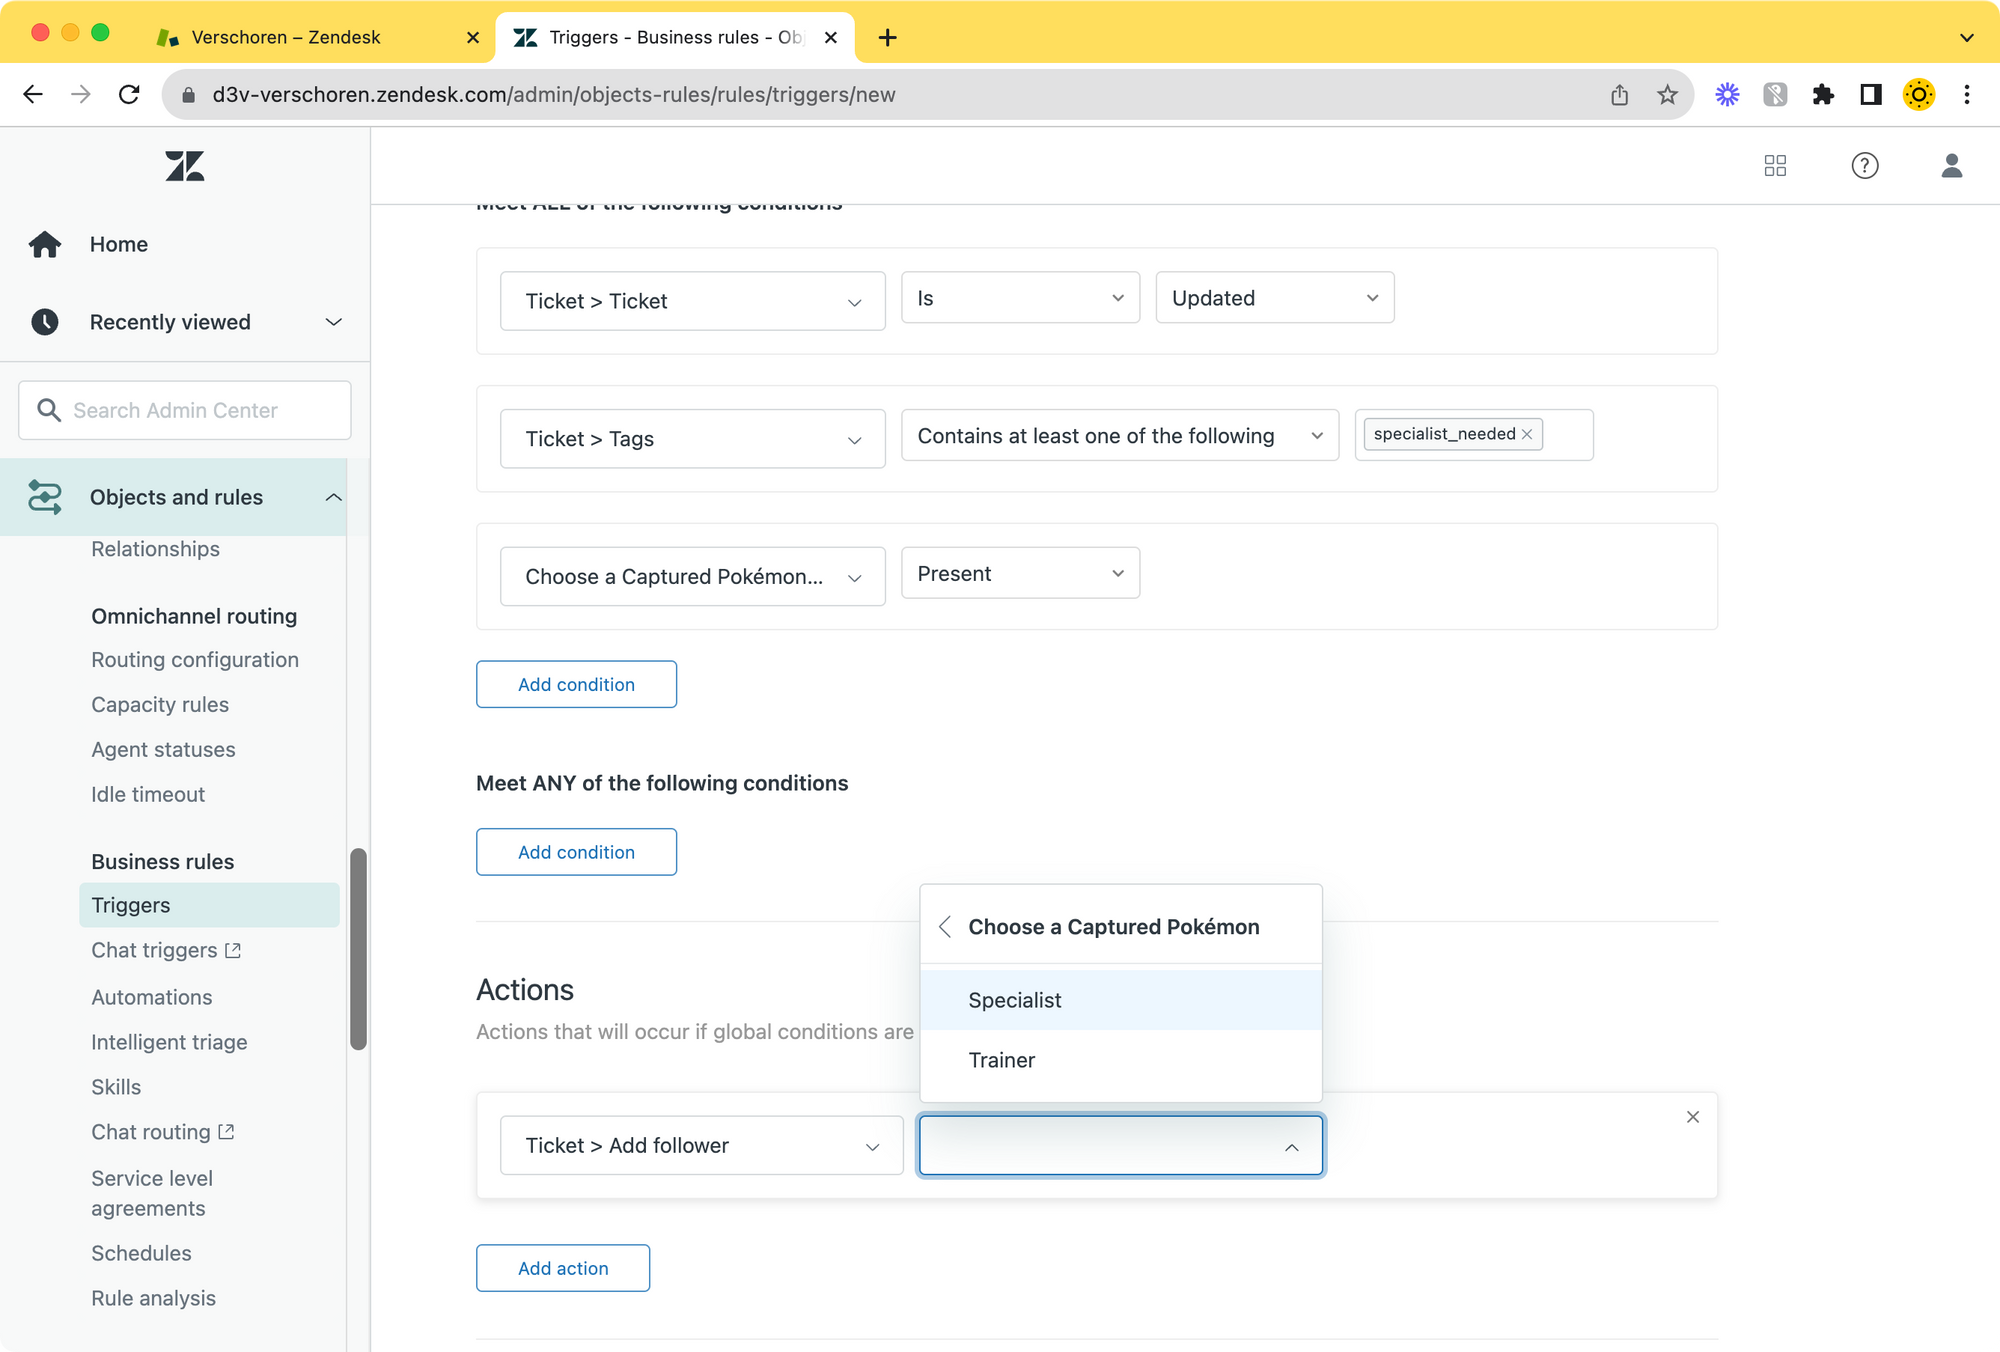
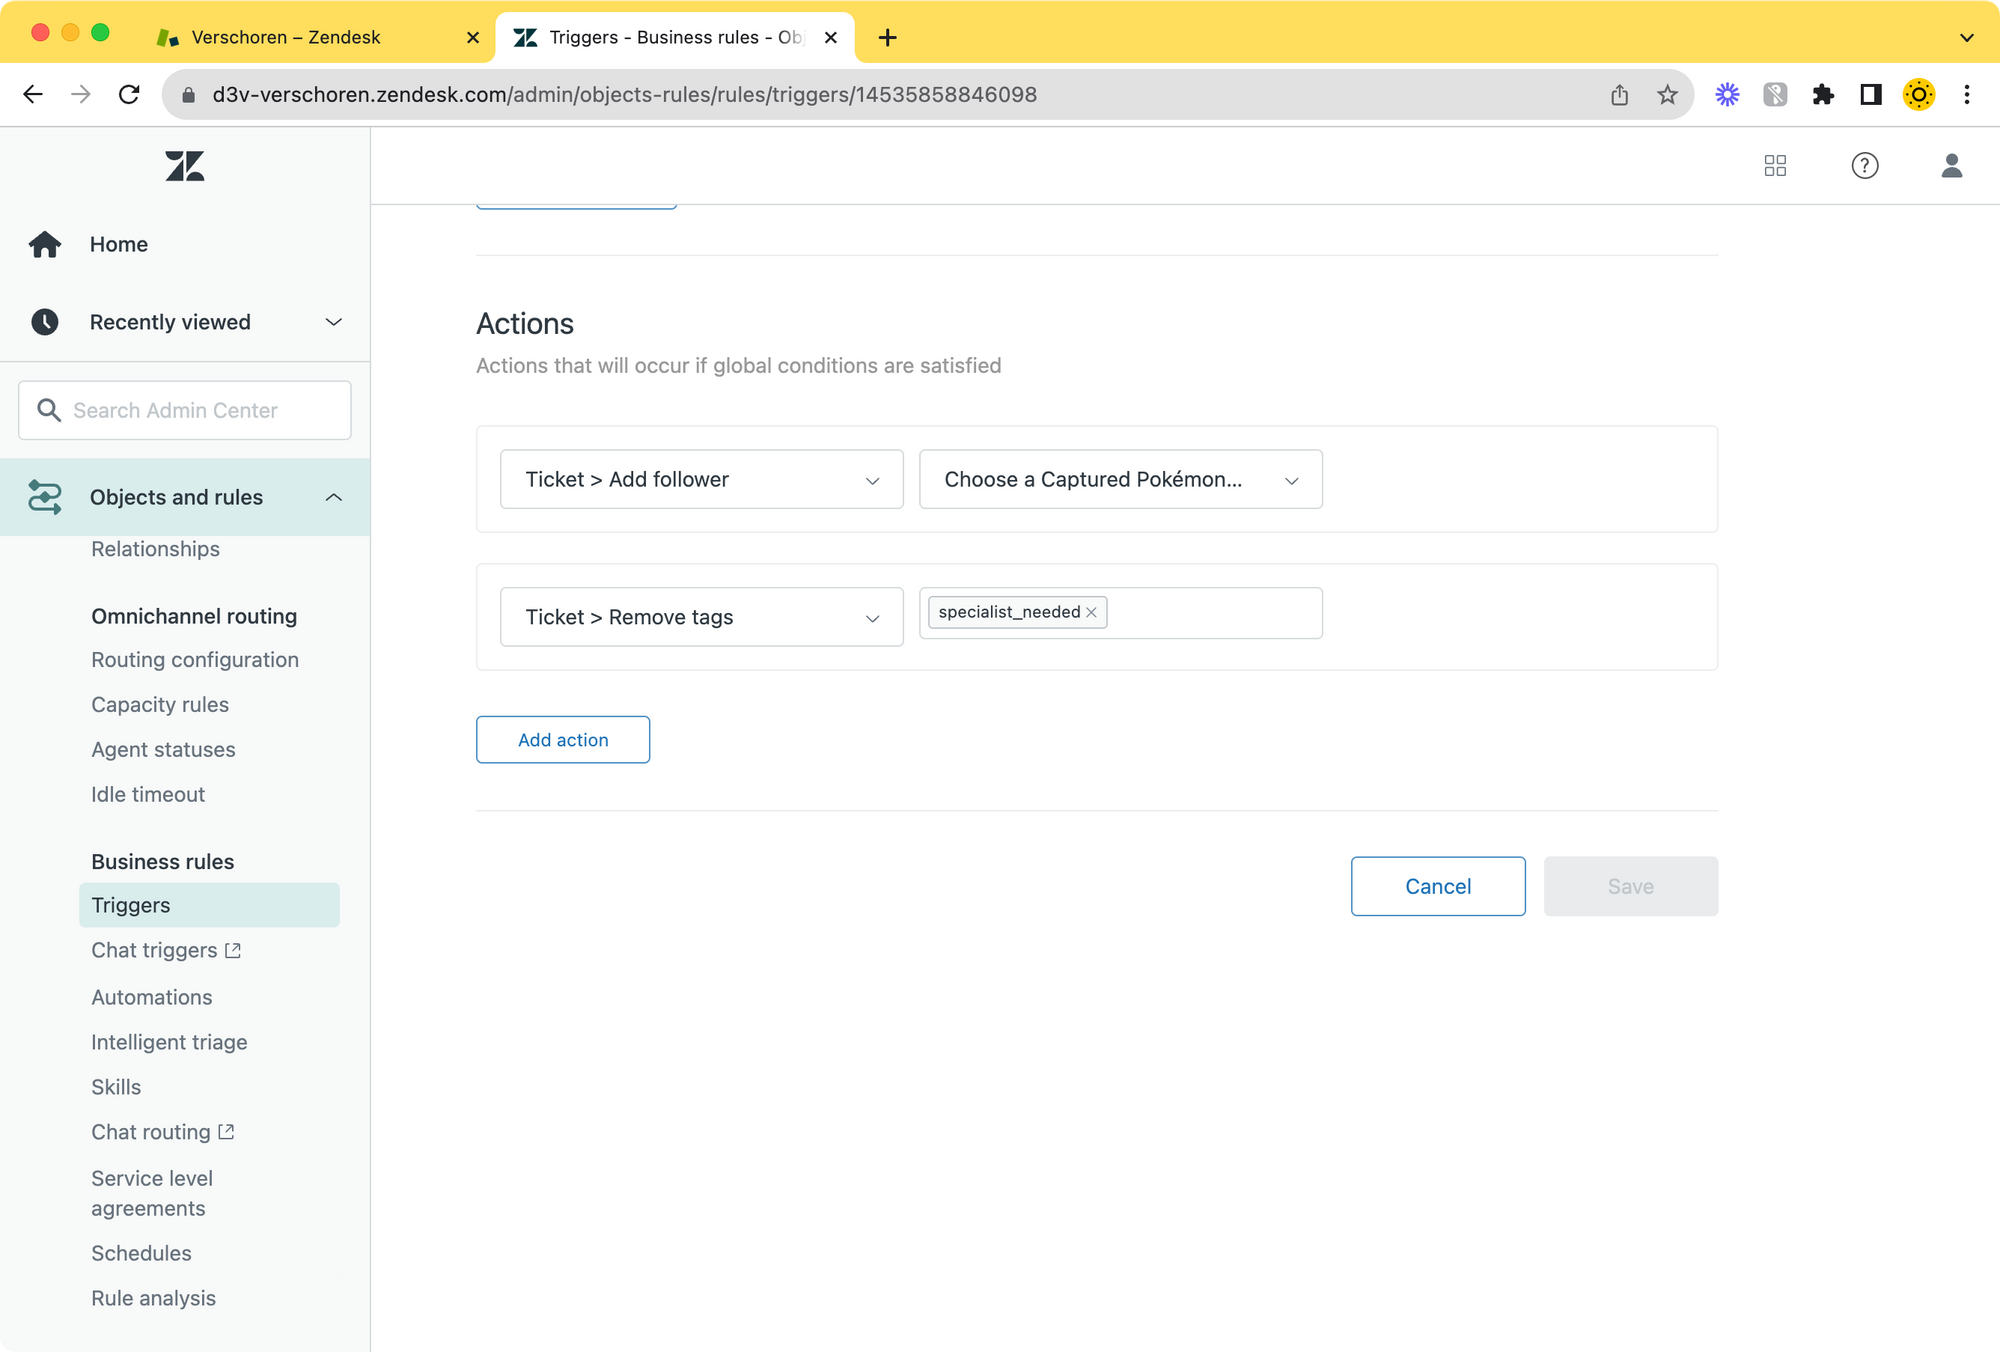
Whenever we now add the tag specialist_needed to the ticket (e.g via a macro) we'll add the Specialist linked to that specific Pokémon as a Follower to the ticket.

Sadly, it does not yet work for objects linked against the ticket requester.
What's next?
So, we've now learned how to create custom objects at the start of this series. We then used the objects to give agents additional context in tickets to help them solve tickets faster. And this article showed how to add additional information to end-user profiles and use that information to change priority or escalate conversations to agents.
To wrap up the series we'll solve a missing feature in Zendesk in the next article. We'll show Custom Object data in Help Center forms and make it possible for customers to choose object instead of requiring agents to do so.