My approach to Zendesk Triggers
This article offers a deep-dive on how to structure and sort your Zendesk triggers starting from the concept of "one trigger does one job"
My approach to Zendesk Triggers

On this page
In a previous issue of Internal Note, I wrote about the way I structured Views in Zendesk. For me, Views should reflect the way the tickets flow through Zendesk and should focus on work to be done instead of being used to categorise and report on tickets.
My approach is often in stark contrast to how others use Zendesk. Most customers have dozens of views and use views as filters to look into the work, with multiple views that show a subset of tickets sorted by category, group, or assignee.
This not only makes it easy to see what's outstanding and what the next actionable item is, but it also allows for a too granular set of conditions that might hide or omit some tickets from views.
I use a similar approach to the way I build and organize triggers in Zendesk. Instead of building my triggers ad hoc for the use case I need at that moment, throughout my years of experience as a Zendesk consultant, I developed a way to organize triggers that makes it very clear what each trigger does, and allows you to follow a ticket throughout the triggers so you can know exactly where a ticket will end up once all triggers have passed.
Triggers
Triggers in Zendesk are rule sets that are activated by an action on a ticket and can update the ticket or perform other actions as a result of this initial action.
They consist of a set of conditions (when they should run) and a set of actions (what should happen next). Since triggers update tickets, they can also activate other triggers through the actions they execute, making them ideal for chaining actions one after another.
A ticket is created and its category is set to "Refunds." Based on the category, the ticket should be assigned to the "Finance Team." We should notify the requester about when they can expect a reply from this team via a notification email.
When considering the above scenario, there are two approaches we can take in Zendesk.
- We create a Refunds trigger that sets the category based on the content in the ticket or intent, then assigns it to the Finance Team and notifies the requester. All nicely combined in one flow.
- We create three triggers:
- One that sets the "Refunds" category
- Another trigger that looks at tickets with a category updated to "Refunds, Invoices, or Payments" and assigns them to the Finance Team
- A trigger that sends out a notification to the requester for all assigned tickets
Most people will go for option one: a single trigger that bundles all Refund actions in one nice trigger. But personally, I prefer the latter of the two options and create three distinct triggers.
Why? Because if you need a trigger to handle "Refunds, Invoices, or Payments" and use the combined trigger option, you end up with three triggers that have very similar actions. If you ever want to update, for example, the assignment (e.g., start using queues) or the notification email (e.g., add auto-replies), you need to update three triggers with the same actions.
And since triggers perform a lot of actions, it becomes complex to update them, as they execute many actions at once, making it difficult to understand why they did or didn't run.
So, let me introduce you to my ideology when it comes to building triggers:
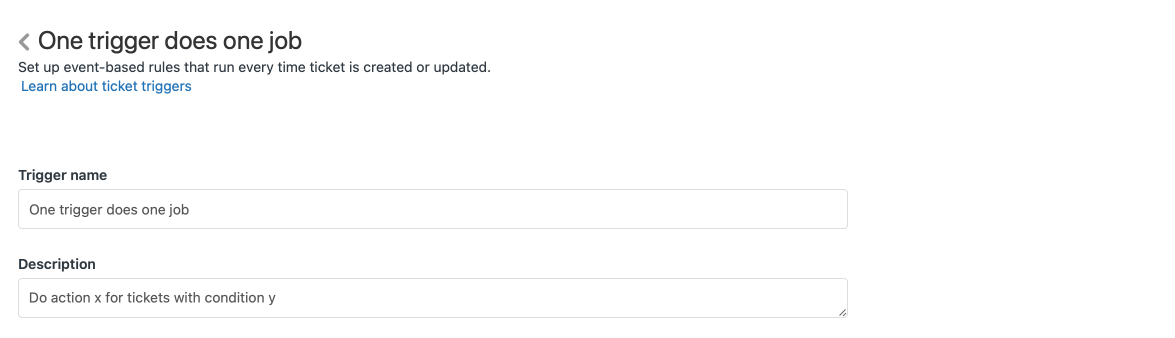
One trigger does one job
This means you have one trigger with a few or a lot of conditions and a single outcome. That outcome can be "raise the priority," "escalate to a webhook," "assign," or "send an email."
Sounds confusing? Let's dive in!
Order
Triggers in Zendesk run from top to bottom. So whenever a ticket is updated or created, it will pass all the triggers in order. Whenever a condition applies, the ticket is updated with the actions defined in the ticket.
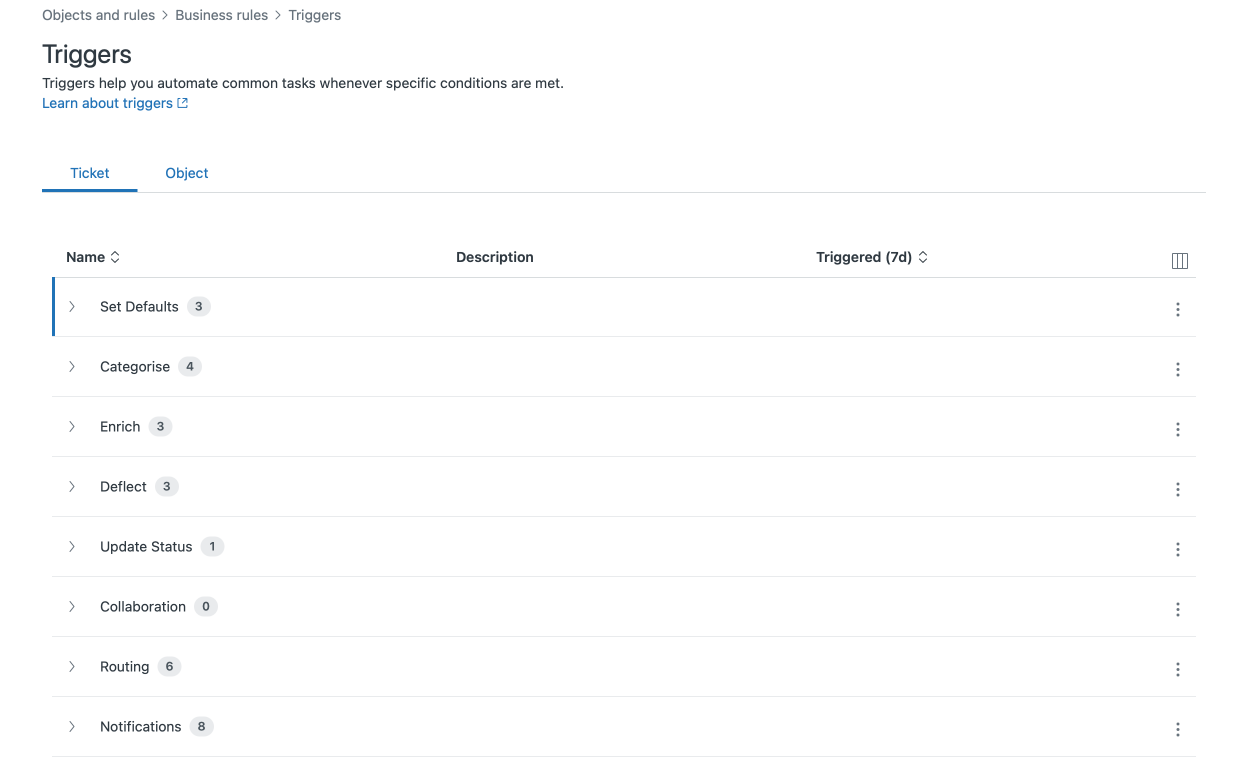
When I define triggers, I order them in a specific way. I work my way from categorisation, towards assignment, and then notifications. Or to put it differently, if the end goal of a ticket is that it's being resolved by the right person, we need to make sure we first define what the ticket is about, then route the ticket to the right team or person, and then in the end make sure that any comments get sent to the requester or other interested parties or tools.
Categorisation
The first categories of triggers are all about knowing what the ticket is about and setting all fields required to update and assign tickets later on. It's important to do this as soon as possible to prevent tickets from getting assigned to the wrong team and rerouted again. Or imagine sending out alerts to teams or customers, with later triggers adding a "do not notify" tag. Setting defaults and defining categories first is key.
Set Defaults
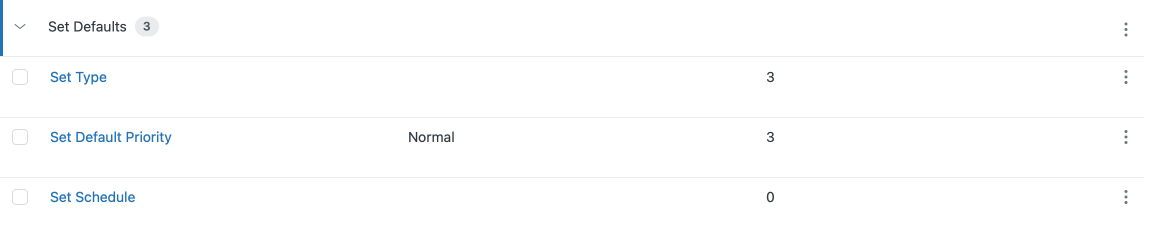
Service Level Agreements in Zendesk only work when tickets have a priority. Similarly, tickets need a schedule if you want the SLAs to work. And you might want to differentiate between incidents and questions when it comes to routing or assignment.
So this first set of triggers basically fills in the blanks:
Set Brand (in case of multibrand)
A ticket's brand gets set automatically based on the email address, social channel, or web form used to submit the request. There might, however, be cases where a brand is not set, so this trigger will set the default brand if no brand is available.
Set default priority
A trigger that sets the priority to normal for all tickets without a priority.
Set default type
A trigger that sets the type to question for all tickets without a type.
Set default schedule (enterprise only)
A trigger that sets the schedule to your default schedule for all tickets without a schedule. If you have a multi-brand environment, you might want to create a trigger per brand for these schedules.
Categorize
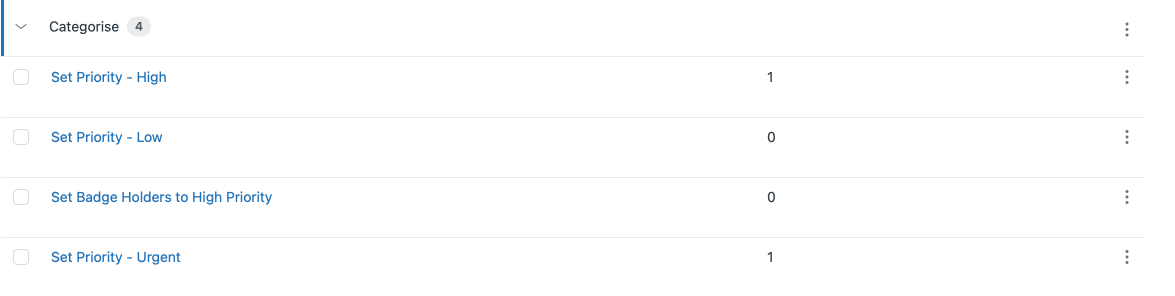
If we want to route tickets to the right person, or make sure the most urgent tickets are handled first, we need to update tickets and categorise them based on their content.
This is where this next set of triggers comes in.
Set priority to urgent/high/low
I add three prioritisation triggers, one for each priority, which contain a (long) list of any conditions:
- If "subject contains Backup failed", if "Organisation is VIP", "If system impact is critical", ... then set priority to Urgent.
- If "category is spam", if "Sla Type is bronze", ... then set priority to Low
The goal is to have a single trigger per priority change. We can add as many conditions as we need, but the outcome is a change from the default Normal priority to a higher or lower condition.
These triggers will continuously evolve. Each time we discover a new type of ticket that needs a different priority, we can append or remove the conditions from the specific trigger. The outcome is that each ticket either remains on normal, or gets an update to a different priority.
Set category to xx
When customers use the Zendesk Bot or Help Center forms to create tickets, you can capture the category (or intent) automatically. But for all tickets without a category, you can create a set of triggers that look at the subject, description, email address used, etc., to set the category of the ticket. Here too, we create a single trigger per action (Set category to refund), and have a (long) list of conditions (subject contains refund, description contains refund, recipient is [email protected]...)
Update other fields
This categorisation category is the best place to update any ticket fields you need to automatically update. But always make sure to have a specific outcome for your action. It's better to have one trigger that sets the "country" field, and a separate one that updates the "eligible" field, than combining both in a trigger.
!! By leveraging the one trigger per action approach, you will end up with a lot of triggers. But each trigger will have a clear purpose and can be named as such, so the list is easily parseable and a trigger's name can reflect its goal in a short sentence.
Set form to xx
Based on the category received at email or other fields, we can update a ticket's form to a specific form. I create a single trigger per form to, once again, keep things clear.
Enrich
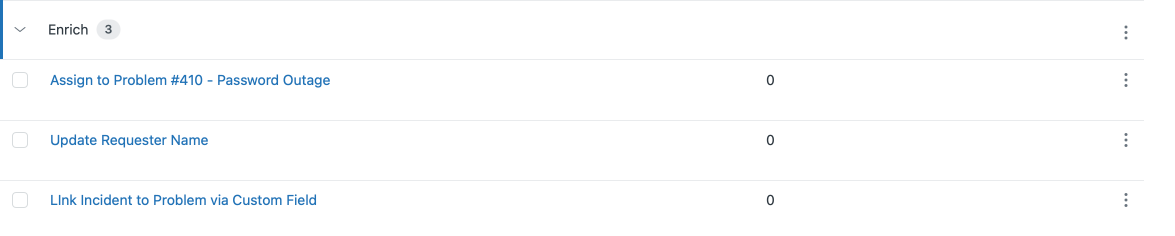
Before tickets reach agents, we want to make sure the tickets have all the context they need. Categorisation is one aspect, but we also need to clean up the data.
If a ticket needs a manager in cc, this is the moment to add them. If a customer profile needs to be updated with data from the form like name or phone, now is the time.
This set of triggers is all about updating users and tickets via webhooks, changing brands, updating subjects, or updating lookup fields.
Routing & Assignment
Now that we have given tickets the right priority and category, and made sure all fields and context have been set, we can route the tickets to agents to handle the ticket. This is what this next set of triggers will handle.
Deflect
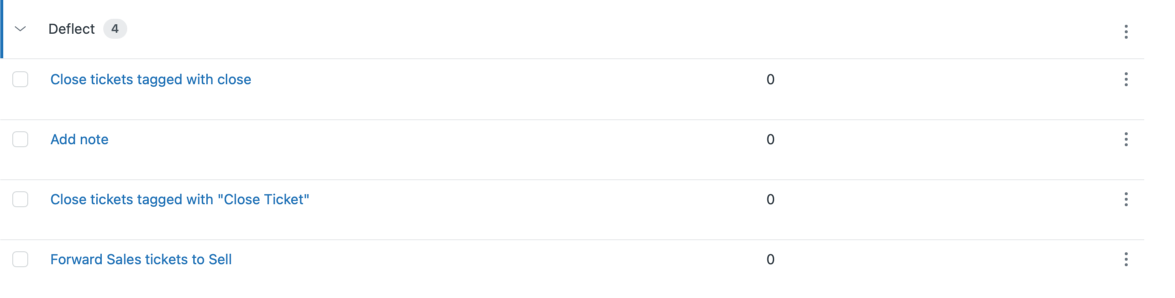
Not every ticket warrants an agent's attention. Some tickets are just notifications, others might be topics that need to be handled outside of Zendesk, and sometimes tickets are (re)opened when they should have stayed closed.
The triggers in this category are all about minimising the workload. Thanks to our categorisation, we can automatically solve/close all tickets categorised as spam, from automations,...
This is also a good spot to escalate your tickets to ticket automation tools like Ultimate. Tickets now have a full context, so if you want to automate responses to customers, this is the best time. Any ticket an automation tool like Ultimate can fully handle, will be resolved before it reaches your agents. And if it gets reopened, it will pass all triggers again, and might be routed to your agents.
The Spam deflection flow I described in a previous article also lives here.
 Thomas Verschoren
Update Status

This category is used for updating the ticket status based on ticket updates.
- Reopen tickets with an updated side conversation
- Reopen tickets with bad feedback
- Reopen tickets with comments from agents that are not the requester
- ...
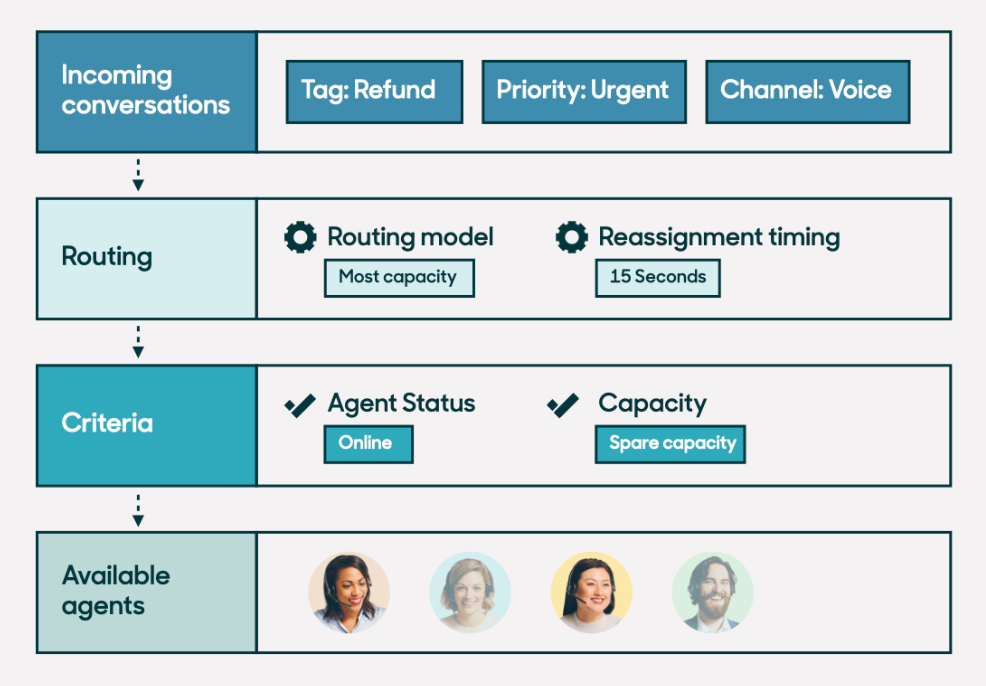
Routing
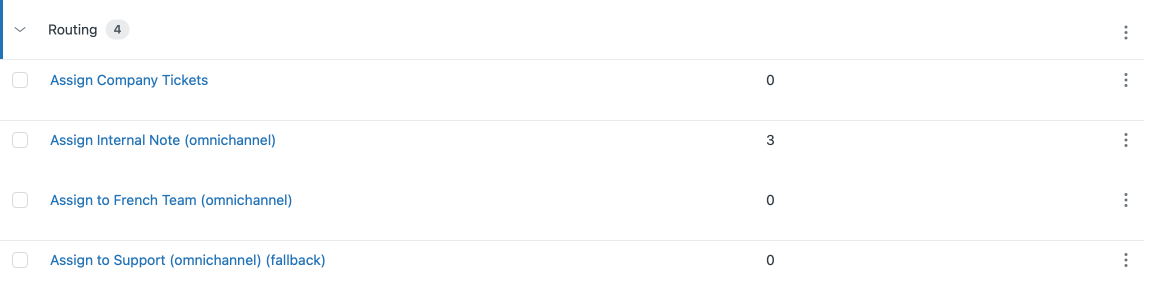
!! Depending on how you set up your Omnichannel Routing, this section might contain a lot, or a single trigger.
So far we've categorised tickets, enriched them with data, and deflected tickets where possible. So now is the best time to assign them to groups and agents.
Here too I follow the concept of "One trigger does one job". Each trigger assigns tickets to a single group based on conditions.
Example: Assign to Group Finance
For each assignment to a group, I create a trigger with the same initial conditions: "group is not set". This makes sure we only assign tickets that are not assigned yet and don't accidentally overwrite groups.
I then set a unique set of conditions that apply to this group's work: category is refunds, received at is [email protected], form is Finance Form). And the trigger ends with an action of assigning it to the right group, e.g. _Finance. _
In case of Omnichannel Routing, this would also set the auto_routing tag.
I repeat this trigger for each group.
Fallback
Every ticket should get assigned. But even when we rigorously check all conditions, there are some tickets that fall through the gaps. This is where the final trigger in the Routing category is needed. This trigger checks for "group is not set" and then assigns to a default group, e.g. 'Support" and tags them with "Fallback".
This way no ticket gets left unassigned, but we can easily filter all tickets to see which tickets fell through and update our triggers accordingly.
Notify
So far, we've not yet sent any outgoing communication to the customer. But now that we know what tickets are about, and know who will handle the ticket, we can start sending out notifications
_Only then do we notify end users because this way we’re sure we send out the right alerts (if any) upon ticket creation. This is also the moment where you would automatically add followers, since you can exclude assignees from being followers of their own tickets. _
Collaboration

Add followers
Aside from assigning tickets to groups and agents, we also might want to keep other people in the loop. For this reason, I create triggers that add people as followers. Here too I follow the rule of a single trigger for a specific purpose.
I try to be very selective when automatically adding people as ticket followers. It generates a lot of email noise, and it's often better to have the agent manually add a follower when necessary.
Remove Assignee as Follower
One added benefit of doing this after assignment is that we can exclude ticket assignees from being followers on their own tickets. I use an internal webhook to remove the {{ticket.assignee}} from the list of followers.
{
 "ticket": {
   "followers": [
     { "user_id": "{{ticket.assignee}}", "action": "delete" }
   ]
  }
}
Notifications
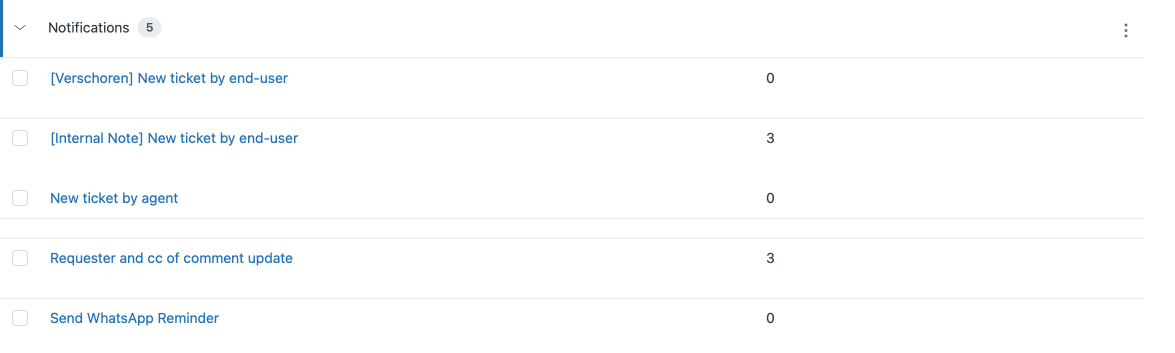
Auto Reply
Self-service is still the best way to initially handle tickets, so set up a trigger that sends out Auto Replies (previously called Answer Bot) to your customers.
Not every type of ticket warrants an auto-reply. Some topics are not documented in your Help Center, some sensitive emails (HR, GDPR, etc.) might be handled directly by agents, and some tickets (e.g. automated alerts) don't need a response.
Since we know what tickets are about, and we also know who they're assigned to, we can set up the trigger to always be sent out, except for tickets "assigned to group Finance", "Category is GDPR" or "Organisation is GitHub".
Tag the tickets that got an auto-reply with auto_reply, so you know which ones got an alert.
Ticket Created by End User
There's also a set of tickets you want to confirm to customers, but didn't need the auto-reply.
This trigger will send out a "Ticket created" notification, but excludes all tickets tagged with auto_reply so customers don't get notified twice.
You can also exclude any other ticket or user you don't want to notify. The important part is to make it exclusive, so the email gets sent by default.
Tickets sent as a reply to end-users often contain some text like "Thanks for contacting us, we try to reply within 24h"
!! I prefer to make all my notification triggers run by default except in some cases.
Ticket Created by Agent
For tickets that are proactively created by agents, we do not need the "Thanks for contacting us" preamble and we can jump right into the conversation by just sending a {{tickets.latest_comment}} placeholder.
Next Reply
The final trigger in this notification alert to end-users is one where we send updates to customers whenever an agent adds a public reply to an existing ticket.
Integrations
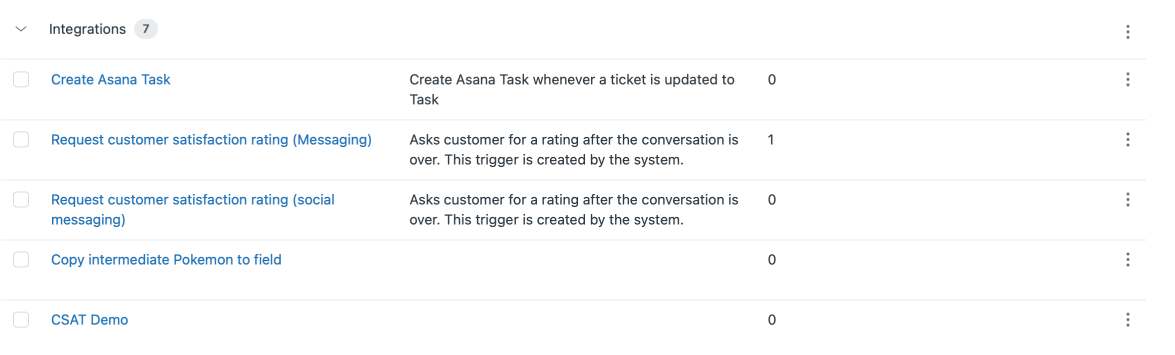
There's one type of triggers that don't really belong in the flow of categorise > assign > notify, and that's all triggers that belong to integrations. You might have installed a Marketplace app that requires a trigger to function, like Sweethawk's Tasks App. Similarly, Zendesk's Slack integration, or Ultimate.ai requires triggers to alert them of ticket changes.
You might want to log an Event in the customer timeline, or push the ticket's resolution to an external reporting tool.
All these triggers live in the final category Integration. That way they're nicely combined in one category for easy reference, and since they run at the end you can be sure that all other triggers have run first.
For some complex integrations, I often even create a dedicated category to collect all its triggers in one place.
Moving your setup to this concept
When building a new setup in Zendesk from scratch, it's easiest to add the categories and then run through the triggers top to bottom to match your requirements.
However, if you're interested in implementing this approach in an existing Zendesk environment, restructuring your triggers to match the different categories while maintaining business continuity is like repairing a plane mid-flight. You can't just delete all your triggers and start over; that would break existing flows and disrupt your customer or employee support.
My recommendation here is to add all the new categories above the existing default trigger category. You can then take each trigger and validate it.
The first thing to check is to see if the trigger has run in the last 30 days. If it hasn't, you can safely deactivate or delete it. It's not in use, so no harm done!
Next, check if the contents match the "One trigger does one job" rule. If it doesn't, it's best to clone the trigger and remove conditions from each trigger so you end up with two triggers that do one job. For example, if you have a trigger that sets the category to "Refunds" and assigns to "Finance Team", you can clone the trigger and end up with one trigger that contains all the conditions for setting the Refunds category, and a second trigger that contains all the assignment conditions. Once split, you can move the triggers to the right categories.
The final step in this flow is looking into each category and optimising the triggers. By splitting triggers into single-use triggers, you'll probably end up with a lot of triggers with similar actions. A few triggers that all assign to the "Finance Team". Or multiple triggers that change priority. You can move over conditions from similar triggers to combine them into one trigger that executes that action.
Once you've done this process, you'll end up with a nicely structured set of triggers that are easy to maintain and scales as your usage of Zendesk grows.
Conclusion
The approach of categorising triggers in a chronological order starting with setting defaults, moving towards categorisation, deflection assignment right up to notifications is an approach I've used for dozen (if not hundreds) of customers while setting up Zendesk instances.
As mentioned above, migrating to this setup is not a small job, but once completed, it's the way to work with Triggers in Zendesk if you ask me!